|
|
Gunsumer Reports TM Providing Detailed Objective Reviews for Firearms and Firearm Accessories |
Taurus 709 Slim Pistol Review
Part 4 - Disassembly & Internal Features
December 24, 2015
In this part of my Taurus 709 Slim Pistol Review, I try to cover disassembly and some of the internal features on this compact single stack 9mm pistol. Keep in mind that although I show the steps for disassembly, you should always consider the manufacturer's Instruction Manual as the official source when handling or disassembling any firearm. Their instruction manual will contain safety instructions that are not shown on this page.
For those who are more into the video reviews, I also cover the disassembly, reassembly and the internal features in the YouTube video below.
Disassembly
Step 1 - Safety
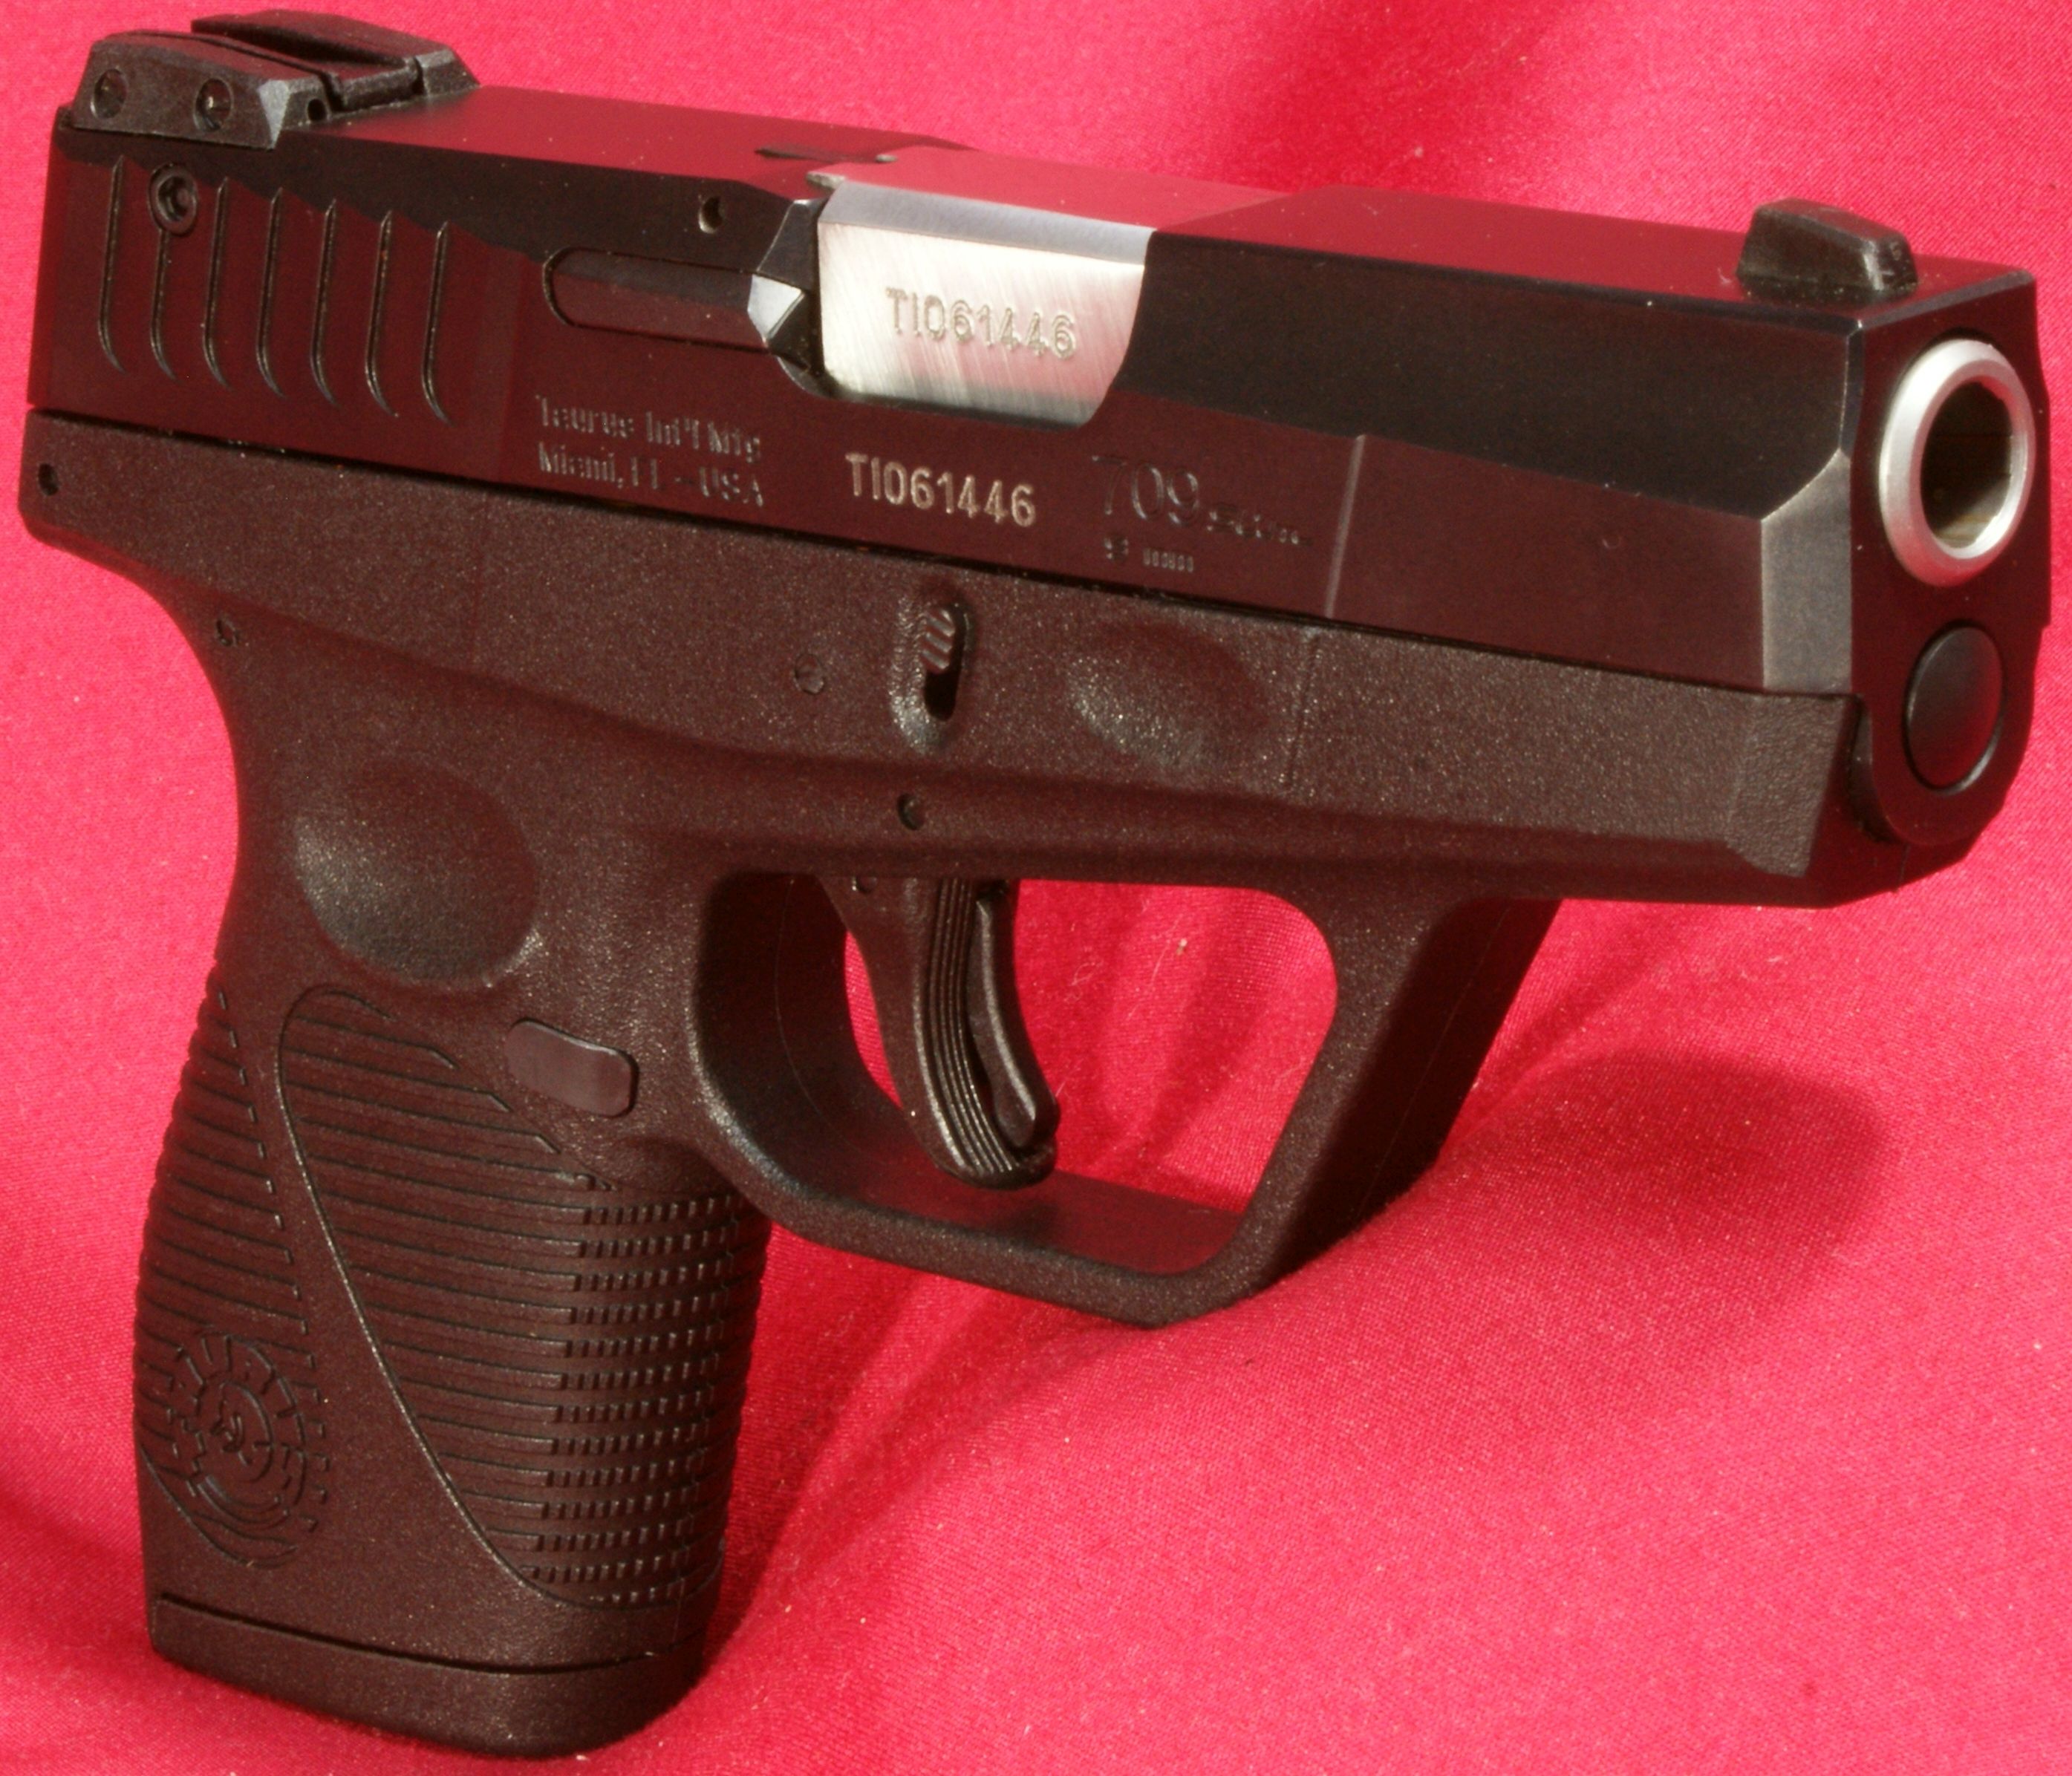
Point the pistol in a safe direction, remove the magazine and ensure that the firearm is unloaded with no cartridge inside the chamber.
Figure 1
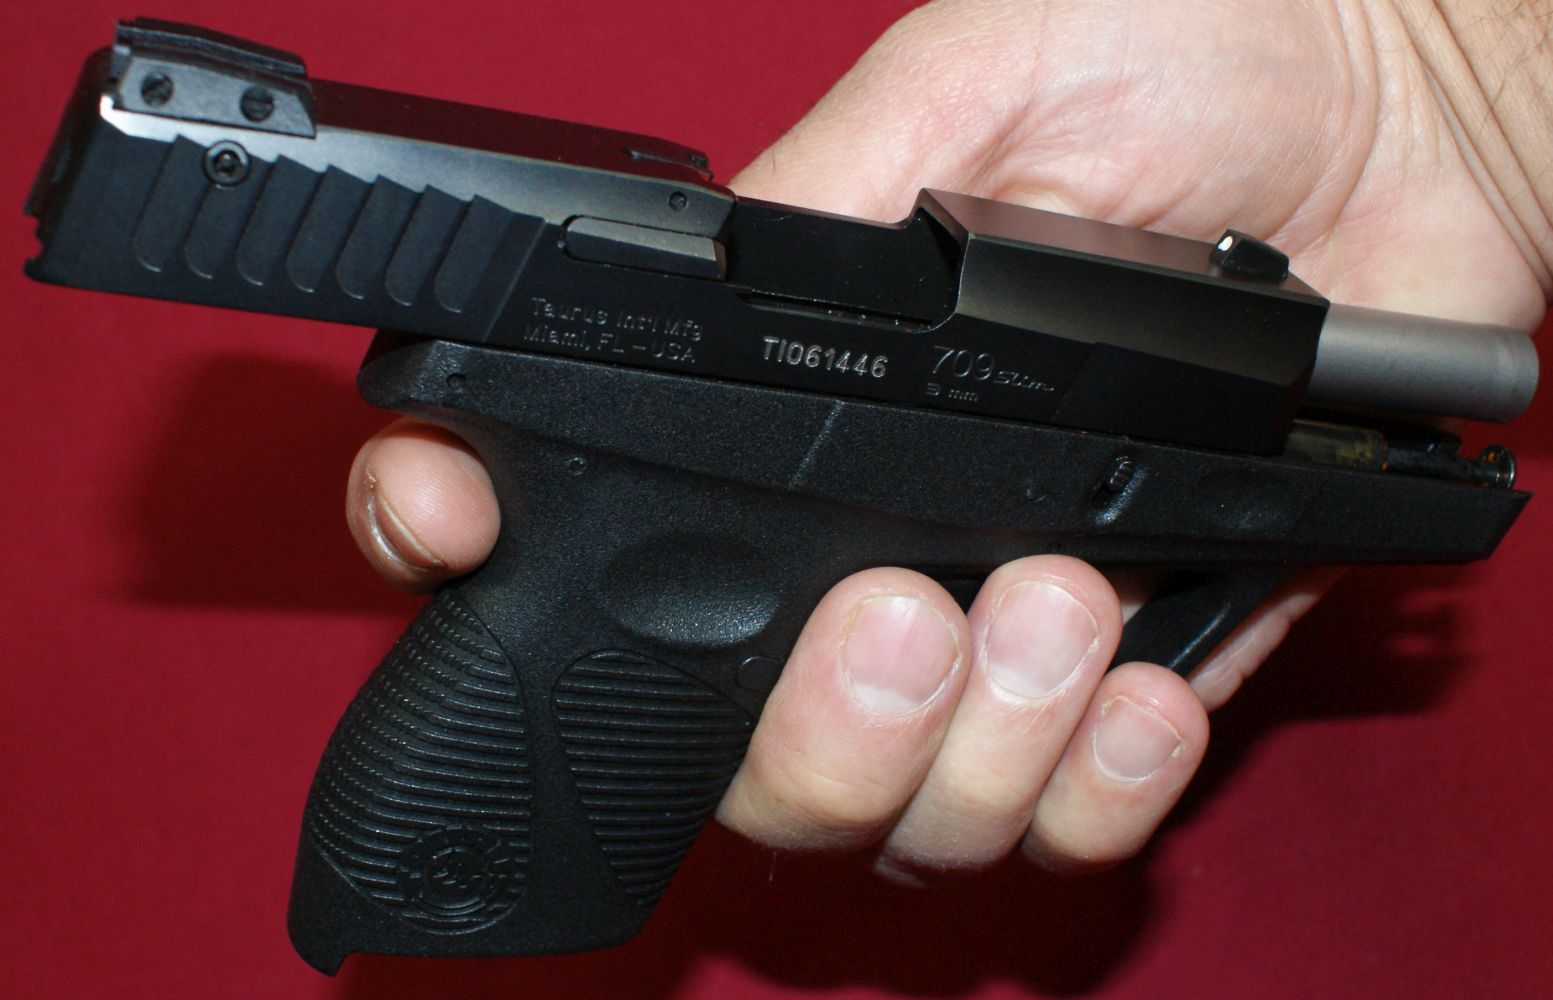
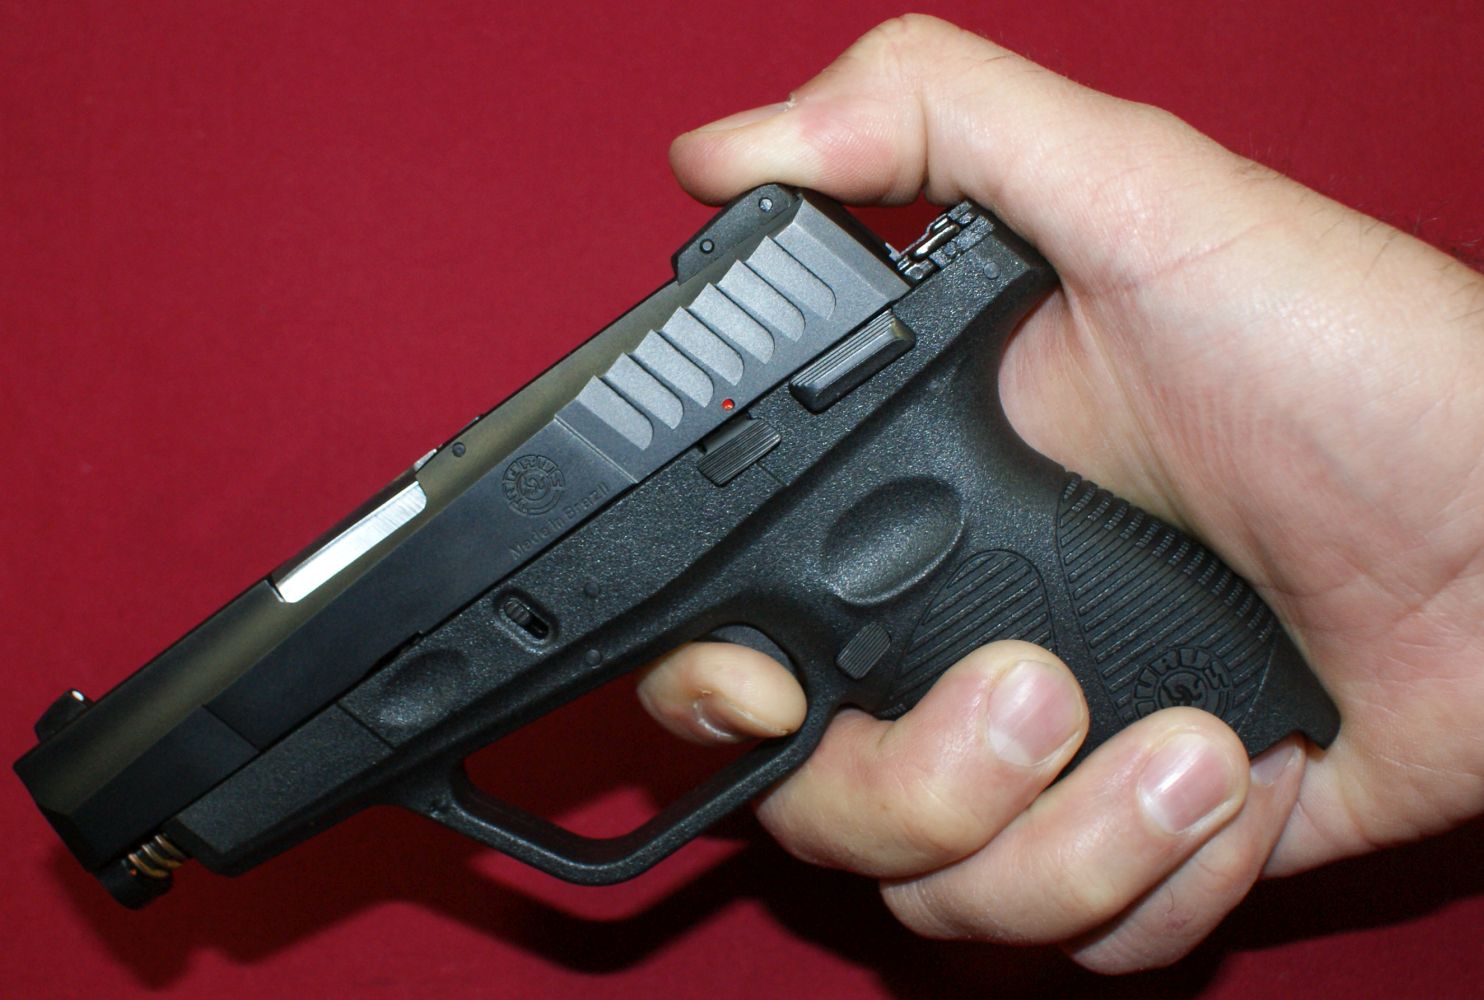
Step 2 - Shift Slide to Rear
If not already done, release the slide to the forward position and disengage the manual safety. Hold the pistol as shown below and shift the slide to the rear about 1/8" by pushing the grip down with your thumb while holding the slide with your other fingers.
Figure 2
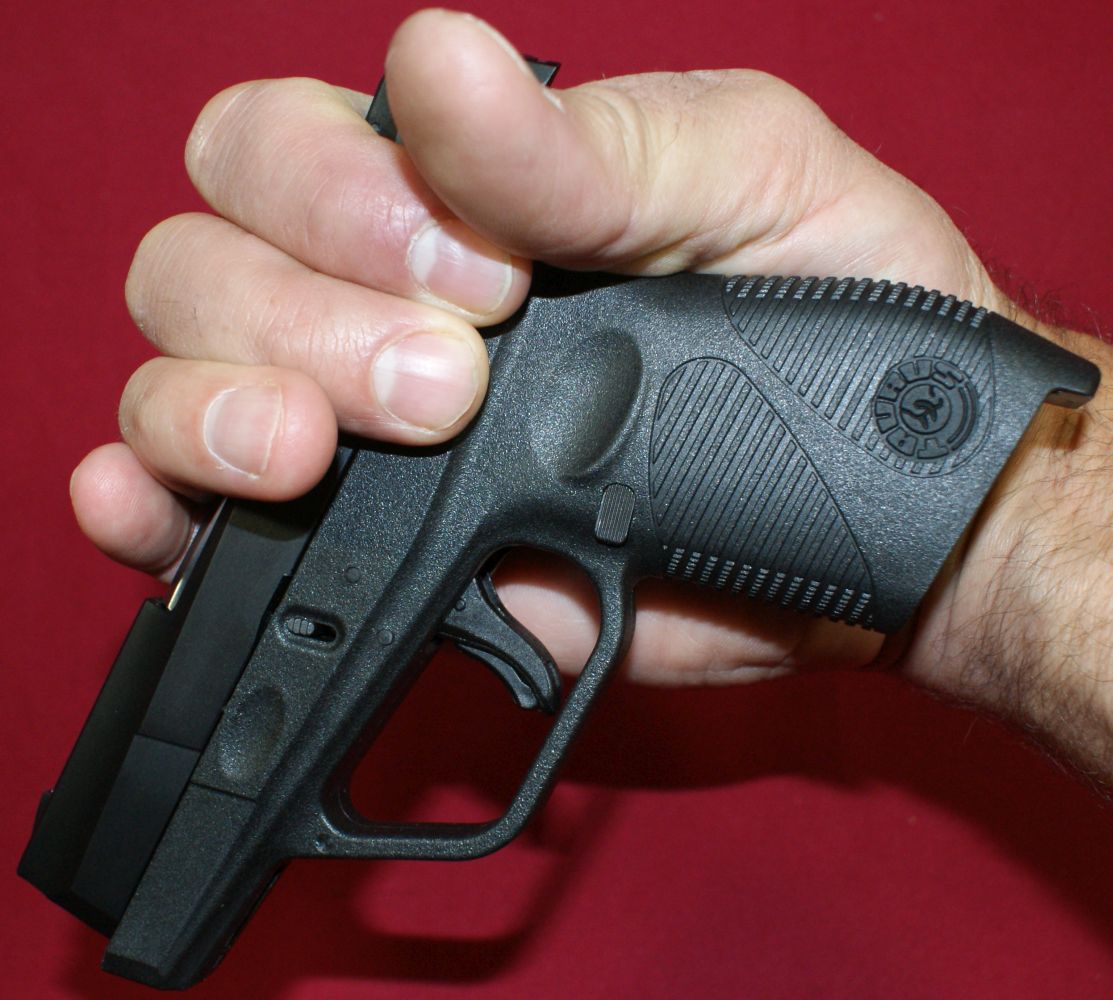
Step 3 - Lower Disassembly Latch
With your other hand, lower the disassembly latch by pulling it or pushing it down depending on how your other hands are oriented. In the photo below I'm pulling down with my thumb and index finger. Once the latch has been lowered, you can relieve the pressure holding the slide rearward.
Figure 3
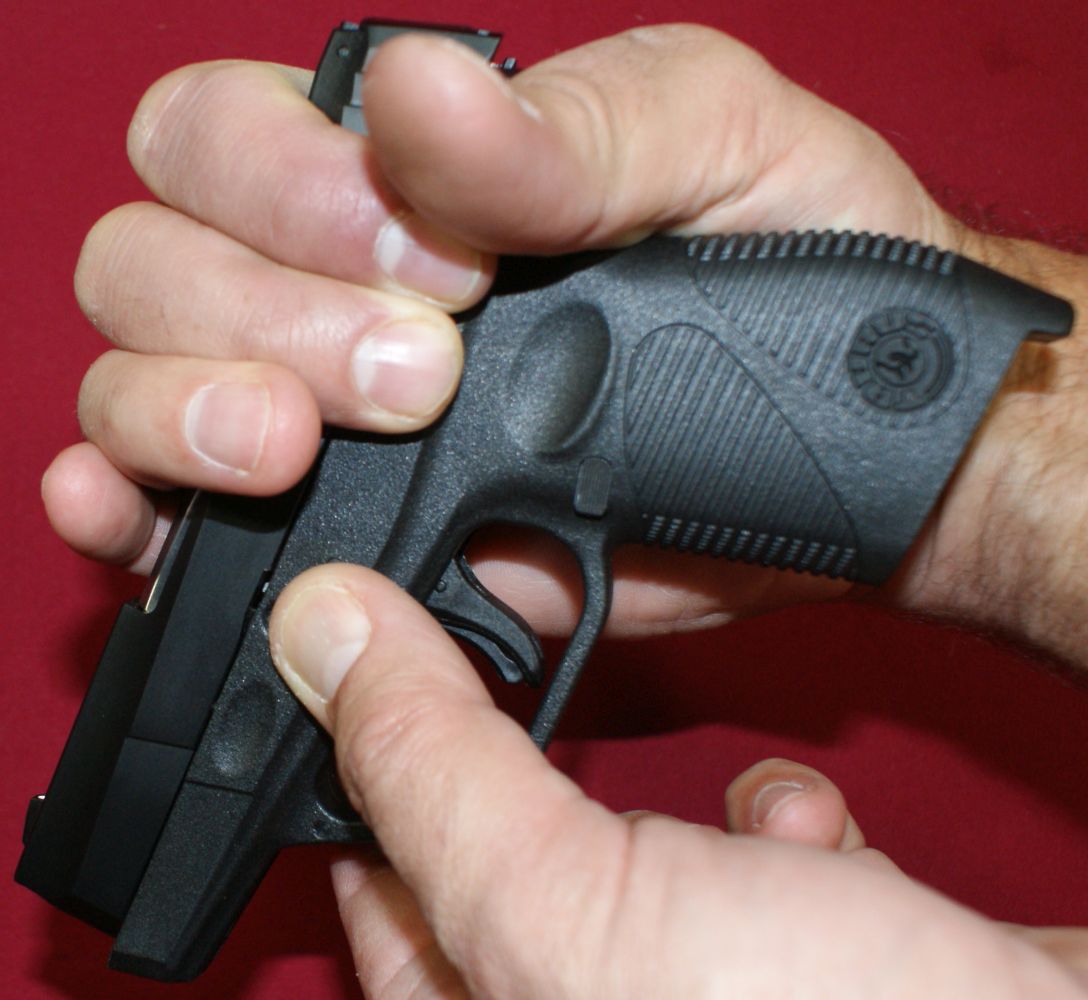
Step 4 - Pulling Trigger and Pushing Forward
This step seemed to be omitted from the Taurus instruction manual, but I had to pull the trigger and the push forward slightly to get the slide to shift forward.
Figure 4
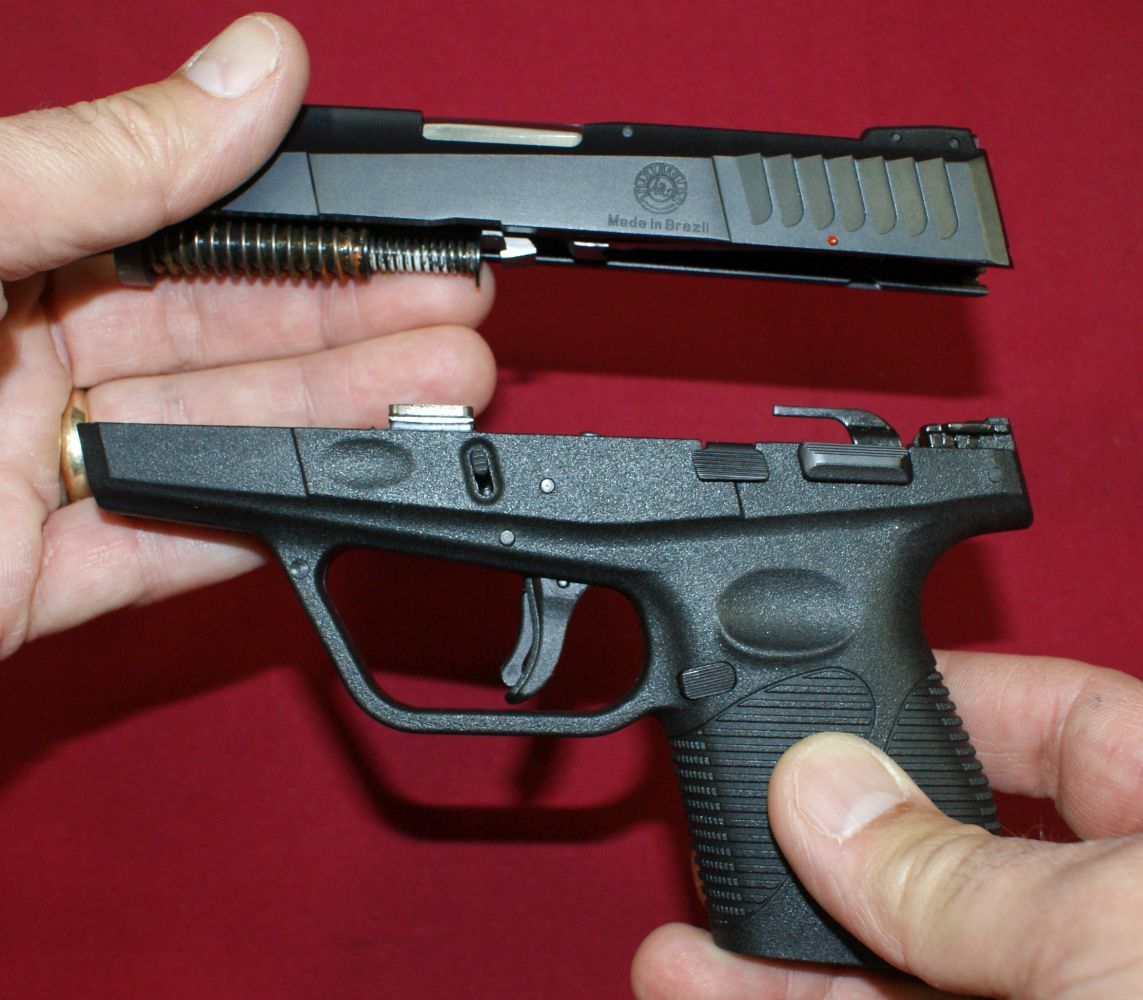
Step 5 - Remove Slide
At this step, all you have to do is shift the slide forward until it comes off the front of the grip. Although this seems like several steps, it is easy to do and it is possible to do it all in about 6 seconds.
Figure 5
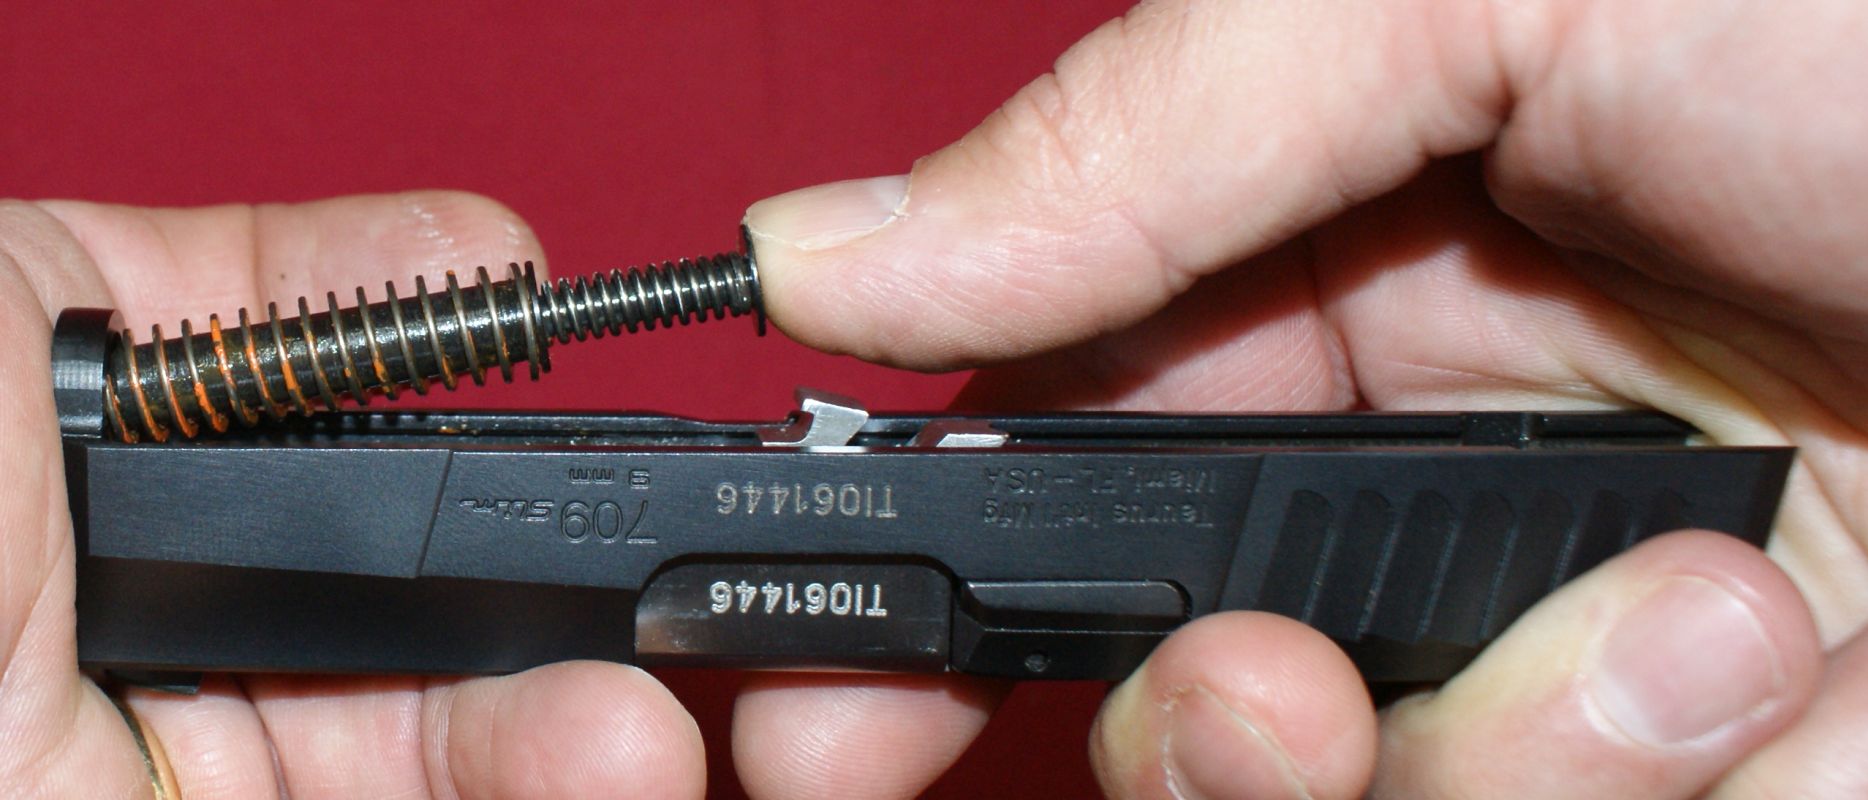
Step 6 - Remove Recoil Spring
Using your thumb or another finger, put some forward pressure on the recoil spring and then tilt the rear of the spring away from the barrel. The spring can then be pulled rearward out of the seat in the slide.
Figure 6
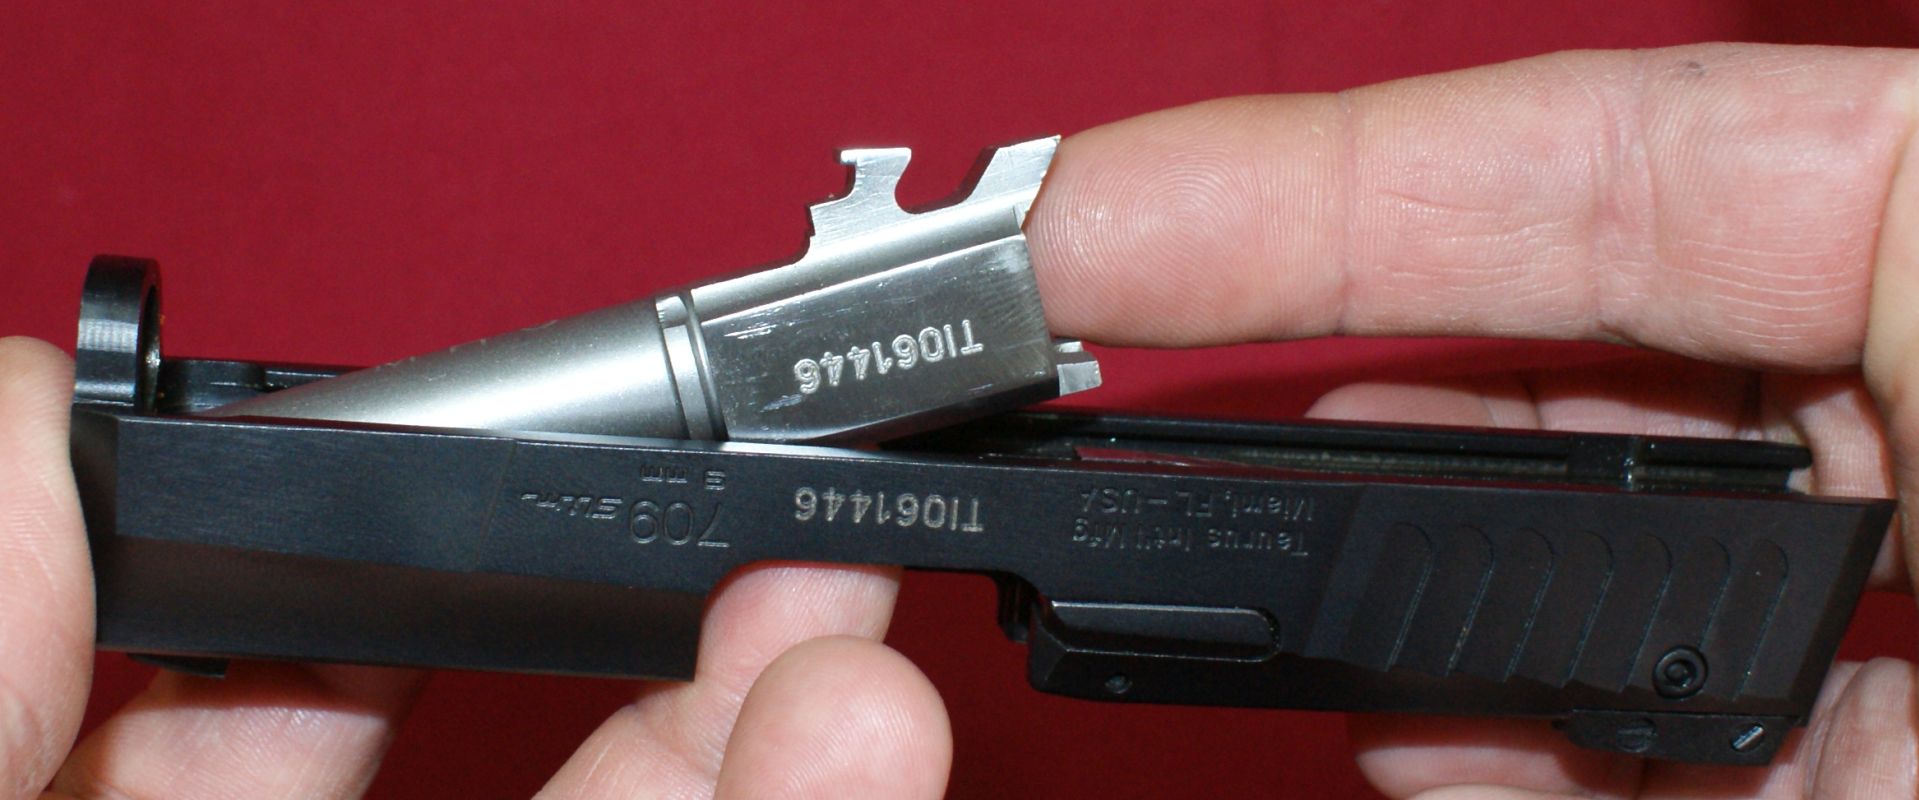
Step 7 - Remove Barrel
To remove the barrel, push up from the ejection port slightly while shifting the barrel slightly forward until the top portion of the barrel clears the extractor. At that point, you can continue to rotate the rear of the barrel away from the slide and start pulling the barrel rearward out of the hole at the front of the slide. Sounds complicated in words, but simple to do.
Figure 7
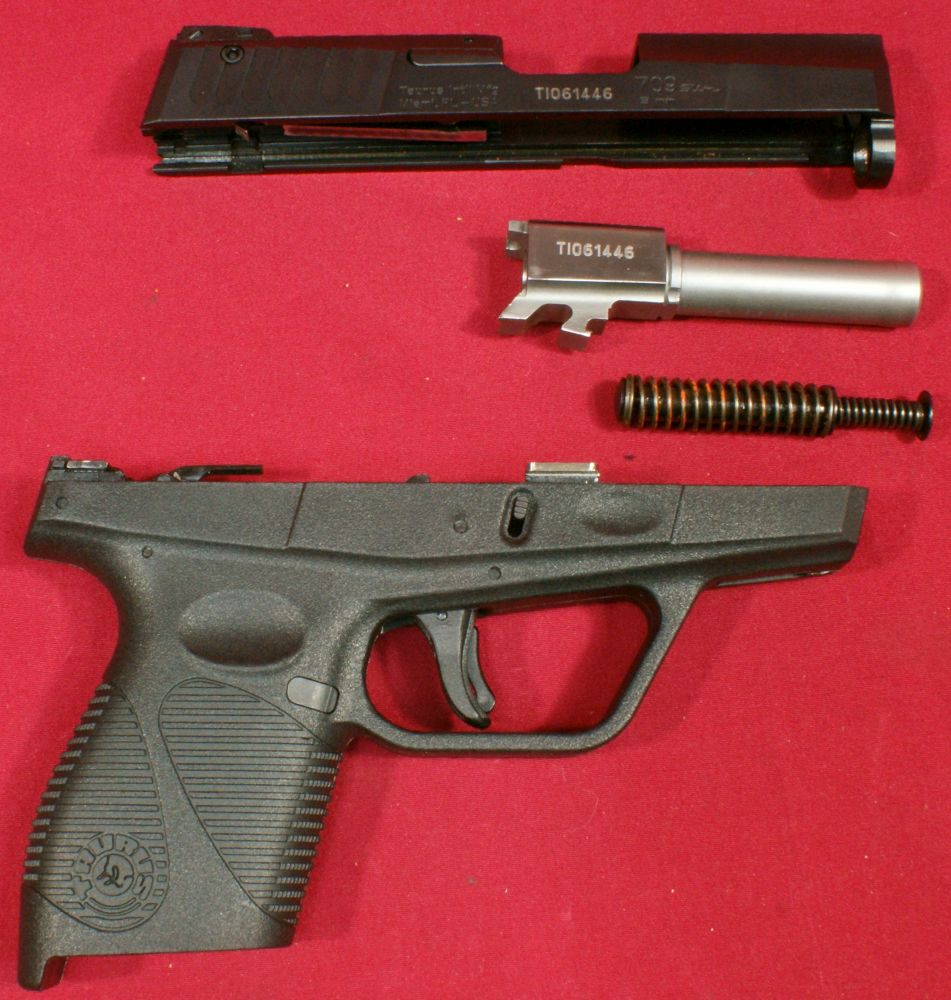
Fully Disassembled for Cleaning
The photo below shows the final disassembly state for normal cleaning. To reassemble, basically reverse the steps above. If you are not sure, watch the video or make sure you take a look at the Instruction Manual.
Figure 8
Internal Features
Although I show many photos below, I only comment about the things I find significant. Clicking on a photo will bring up a high definition image allowing you to study the internal features yourself.
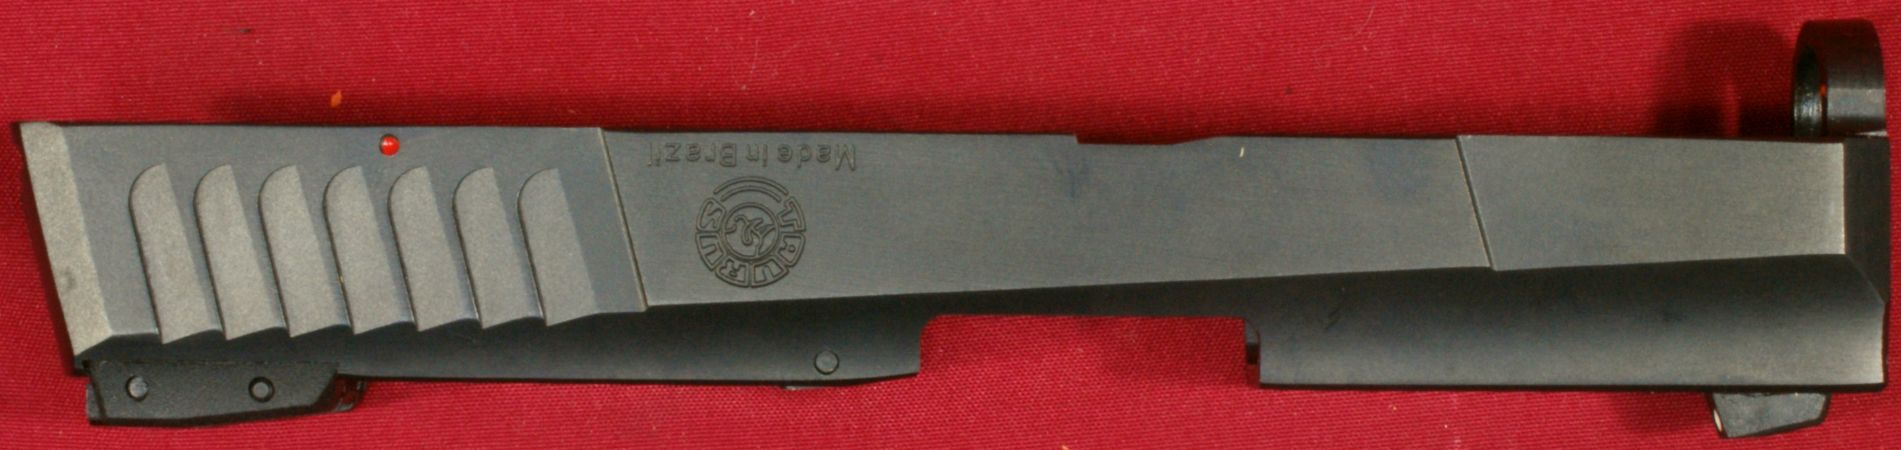
Slide Assembly
Figure 9

Figure 10
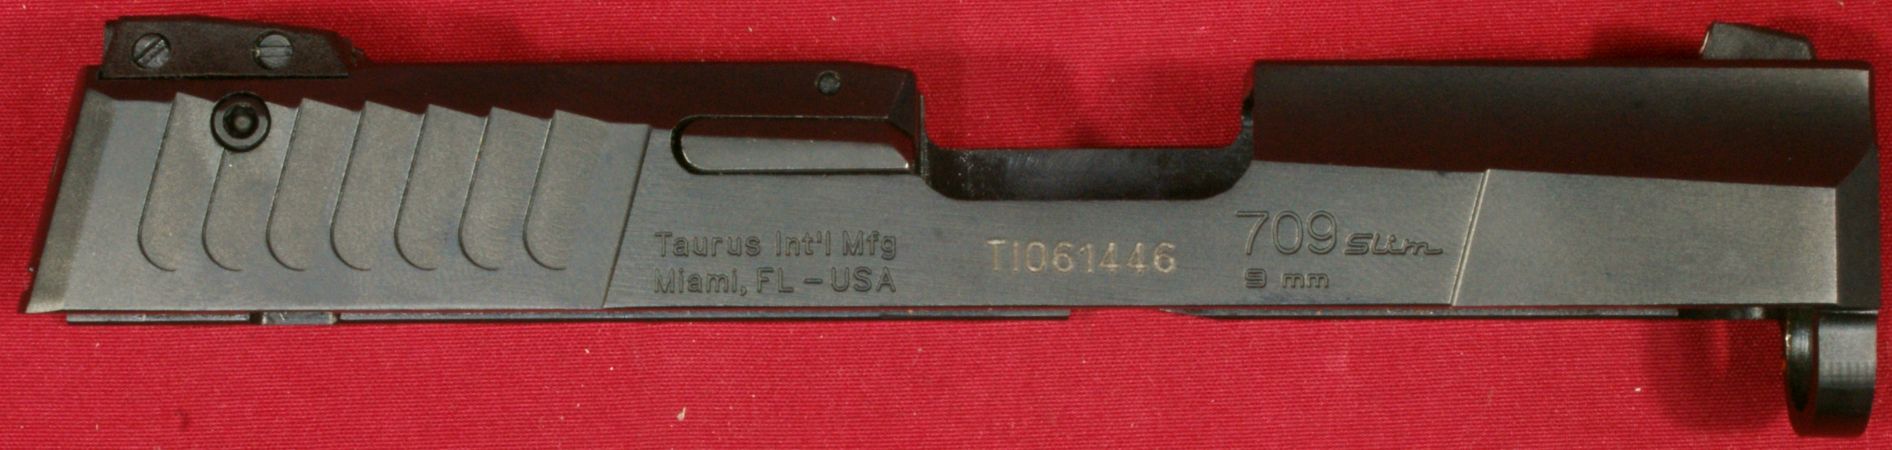
I already covered the externally visible features fairly well in Part 3 of this review, so I'm going to focus on the inside portion. At the front you see the head of the front sight screw.
Figure 11

The illustrated parts diagram taken from the Instruction Manual shows the 28 parts which makeup the slide assembly. Parts 1.03 and 1.05 are sight and sight screw, respectively.
Figure 12
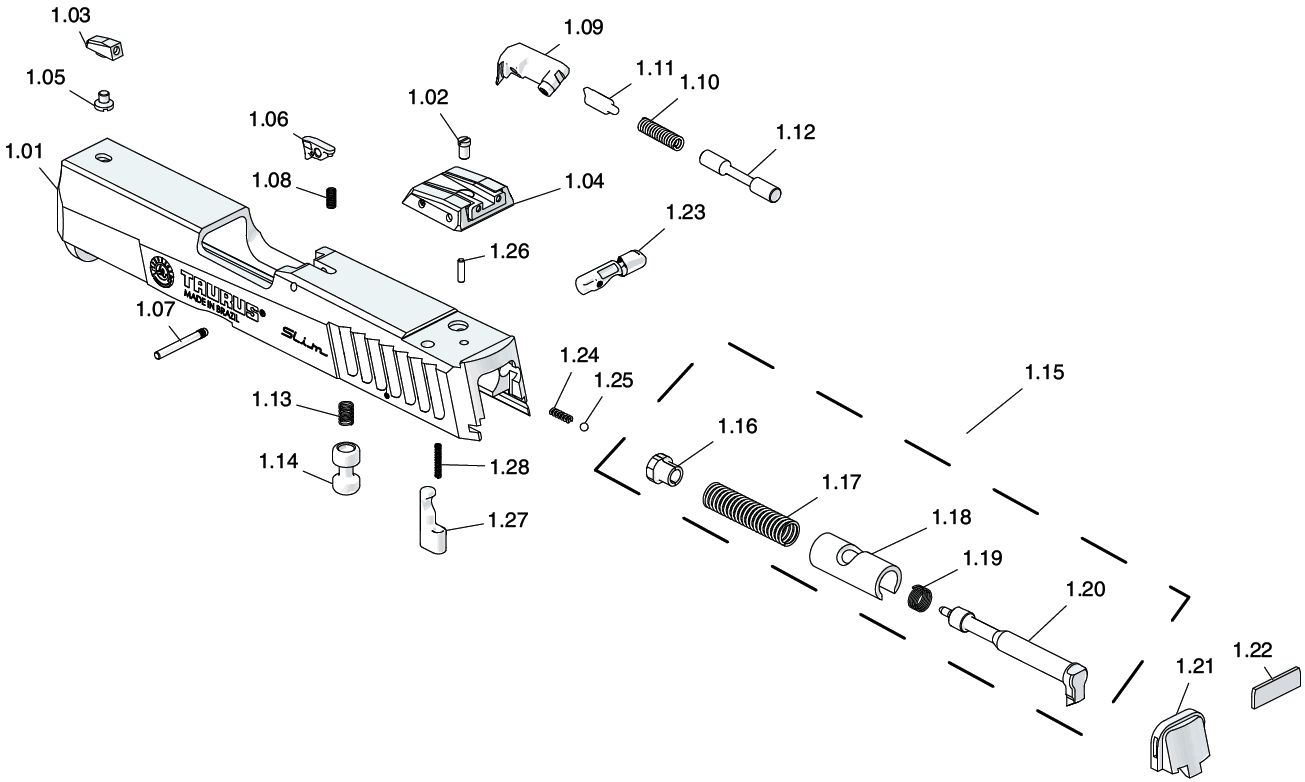
Figure 13
At the rear, you can see the:
- Bottom of the Firing Pin Block (1.14)
- Bottom of the Slide Block Pin (1.27)
- Rear of the Firing Pin (1.20)
- Rear of the Firing Pin Spring (1.17)
- Part of the Firing Pin Sleeve (1.18)
- Bottom of the Slide Cap (1.21)
Figure 14
The Firing Pin Block will prevent the firing pin from being able to pass forward of the breech face unless the trigger is pulled which pushes the block up into the slide. You can test this out for yourself by pressing forward on the rear of the firing pin while pushing the firing pin block into the slide. This feature is common on many other pistols.
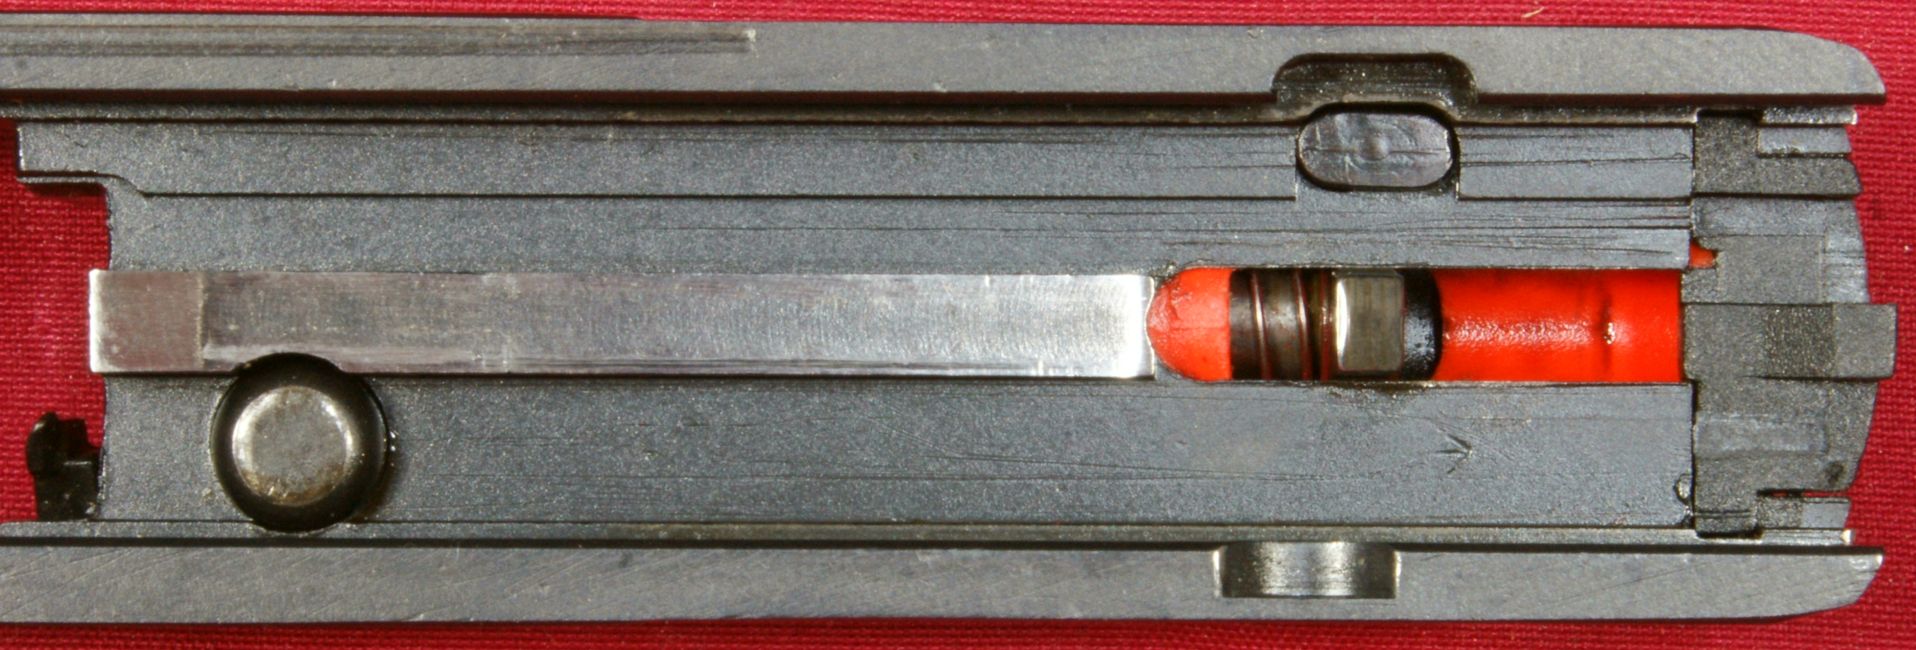
Figure 15
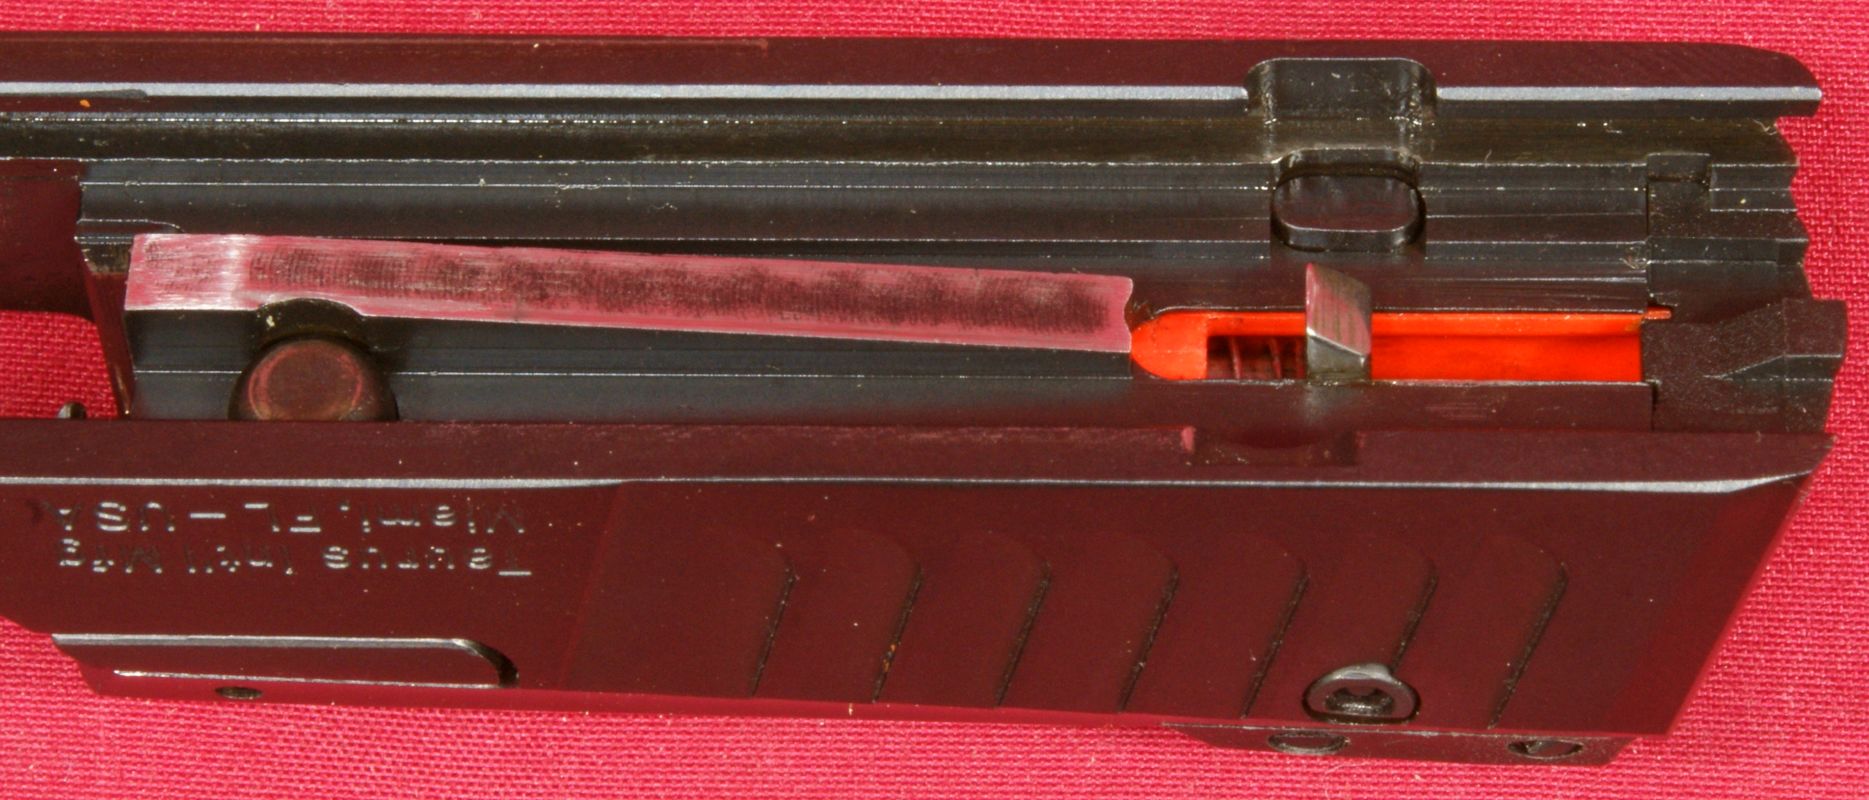
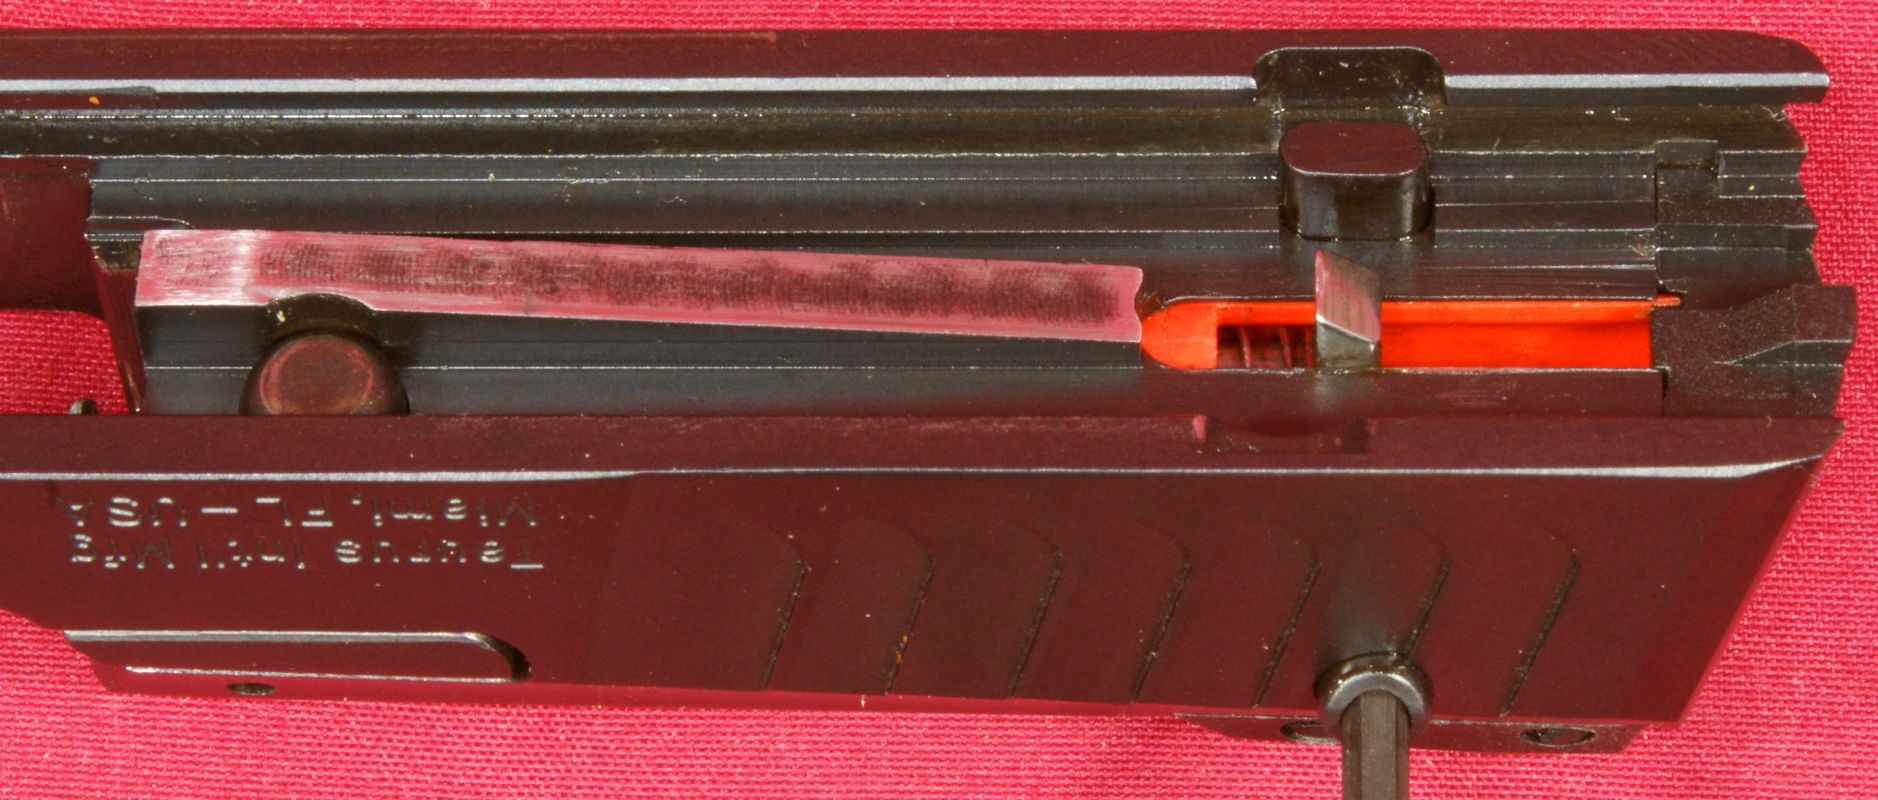
In the photo above, you can see the Slide Block Pin in the un-blocked position inside the slide. The photo below shows the lock feature engaged and you can see how the Slide Block Pin is extended to allow it to engage in a location on the grip frame assembly to prevent the slide from being shifted rearward when locked.
Figure 16
It is possible to remove the firing pin assembly, but I didn't do it on this pistol because it was extremely difficult to get the Slide Cap to move out of position and I didn't want to use tools and potentially scratch the surface of the slide or cap. There are videos showing this already on Youtube so make sure you check one out if you are interested in removing the firing pin. Maybe at some point I will go ahead and do this, but until then, please see those other videos.
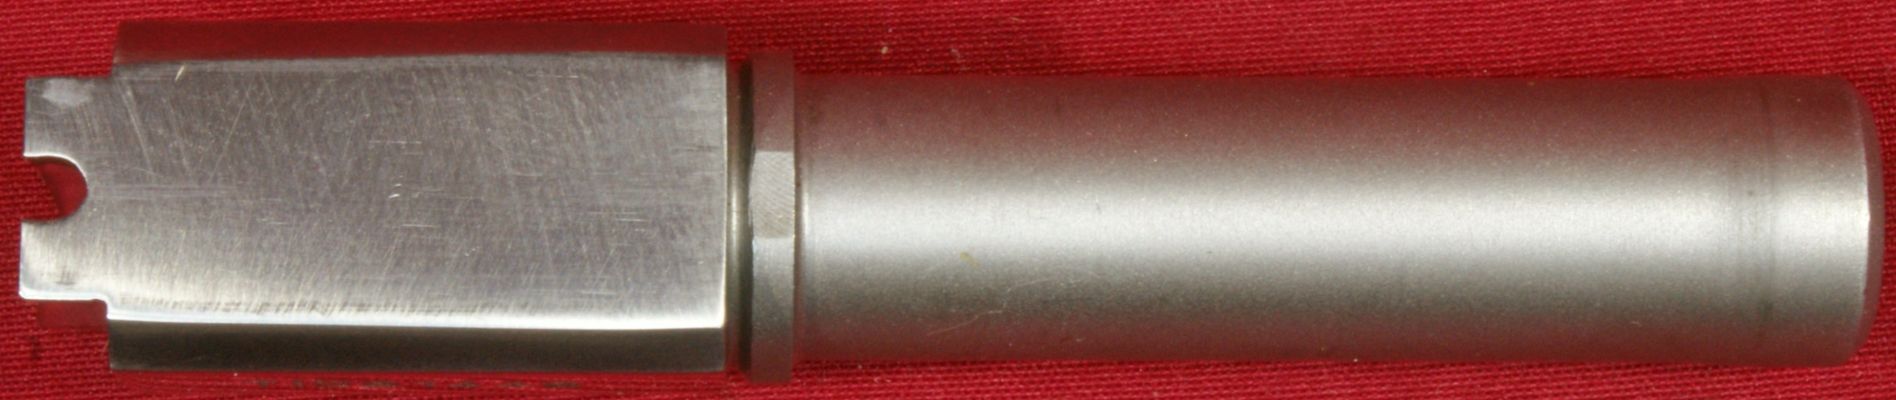
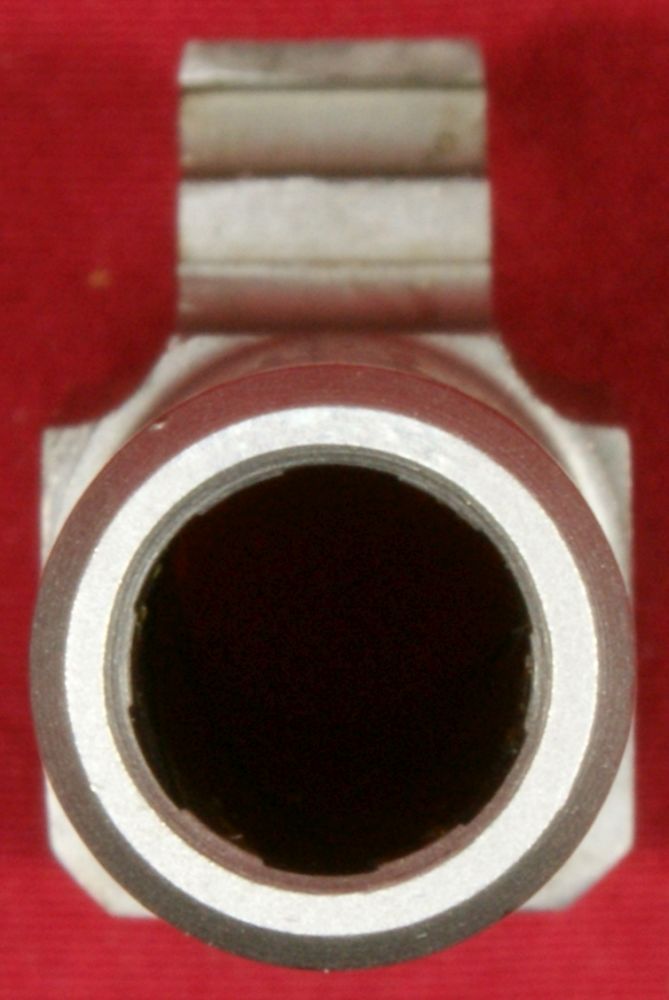
Barrel
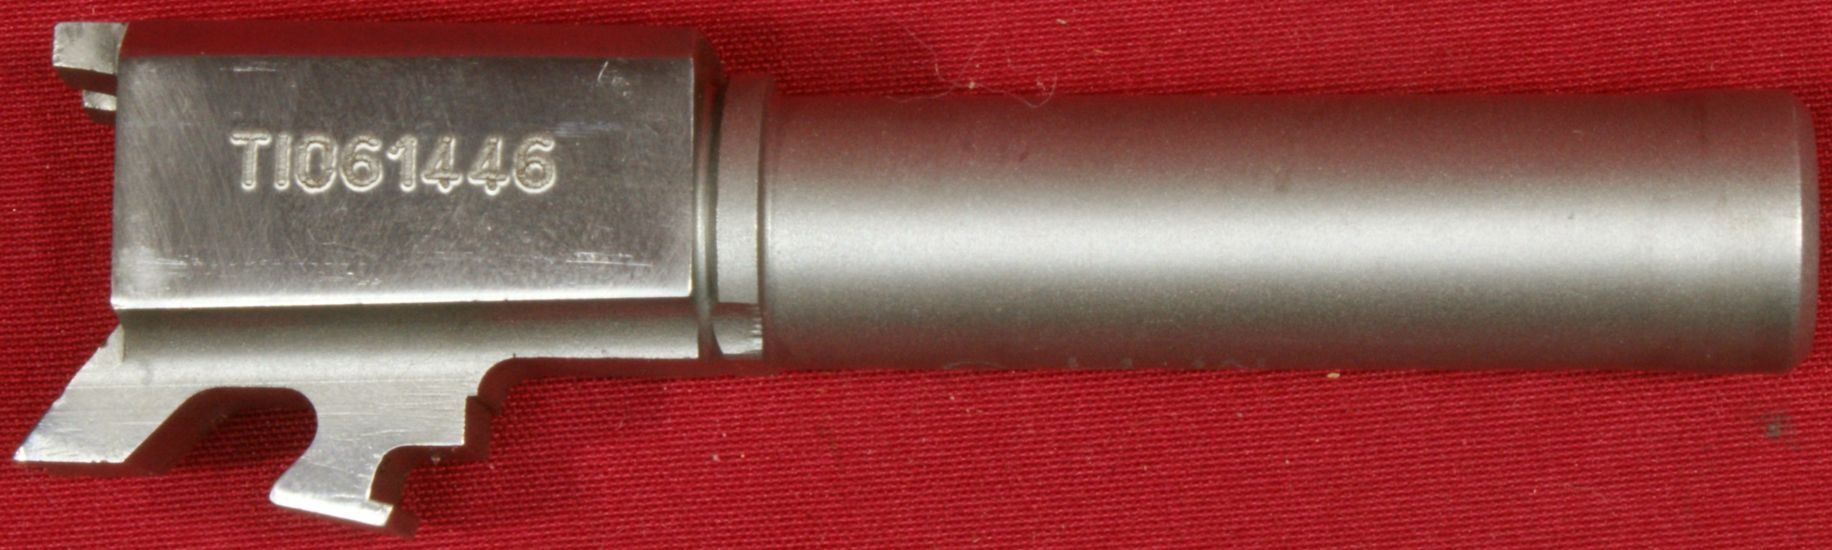
The stainless steel barrel has an overall matte finish, but is polished on the top and sides of the chamber area.
Figure 17
The right side is marked with the serial number of the pistol.
Figure 18
I'm not sure what the "MH3" stands for which is marked on the lower surface of the barrel. If you know, please leave a comment below to educate us all.
Figure 19
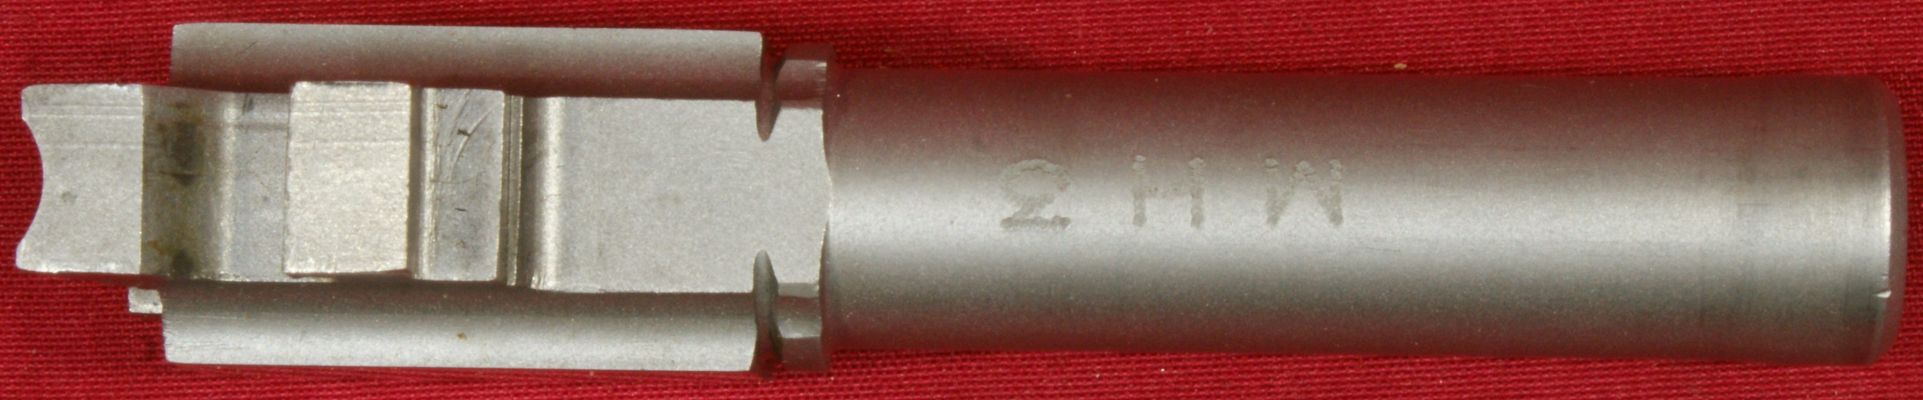
Figure 20
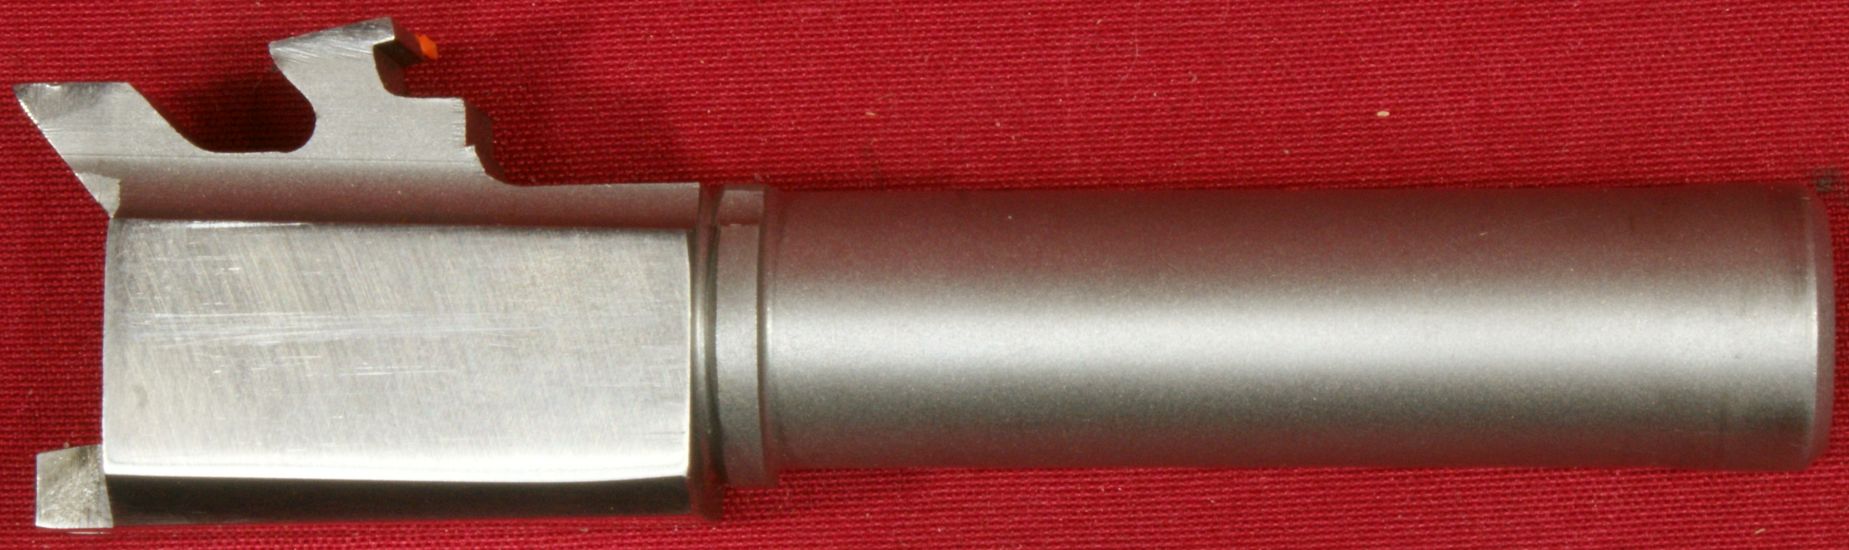
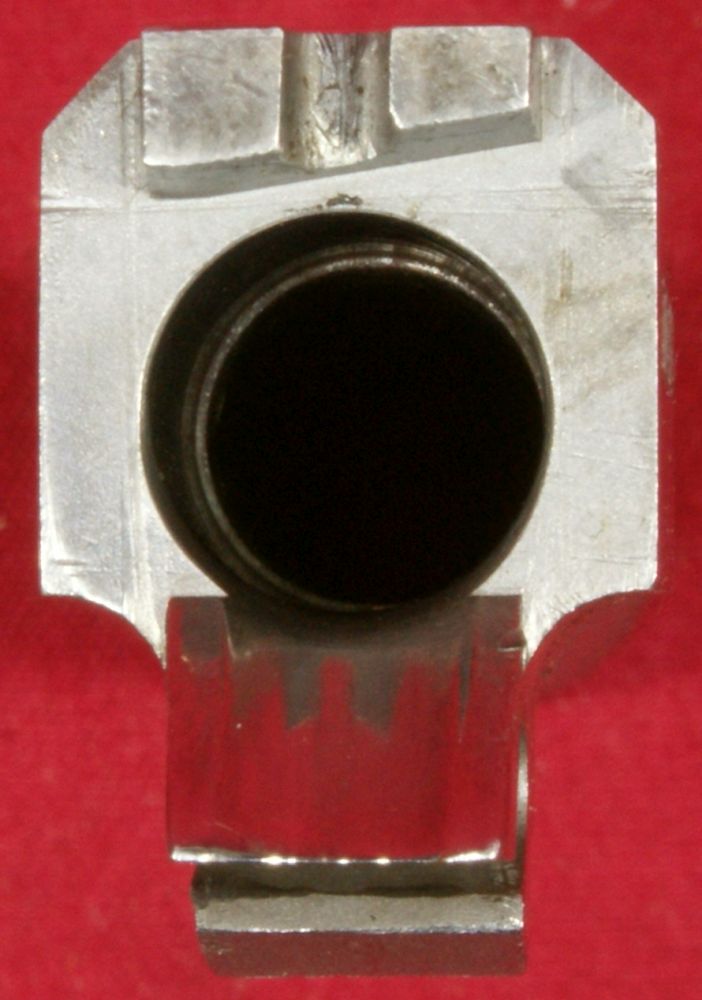
The barrel contains a 6-groove rifling. Based on my crude measurements, I calculated the barrel twist rate to be about 1:10" which is common for compact 9mm pistols. It is hard to see in the photo below, but the feed ramp is very polished.
Figure 21
Figure 22
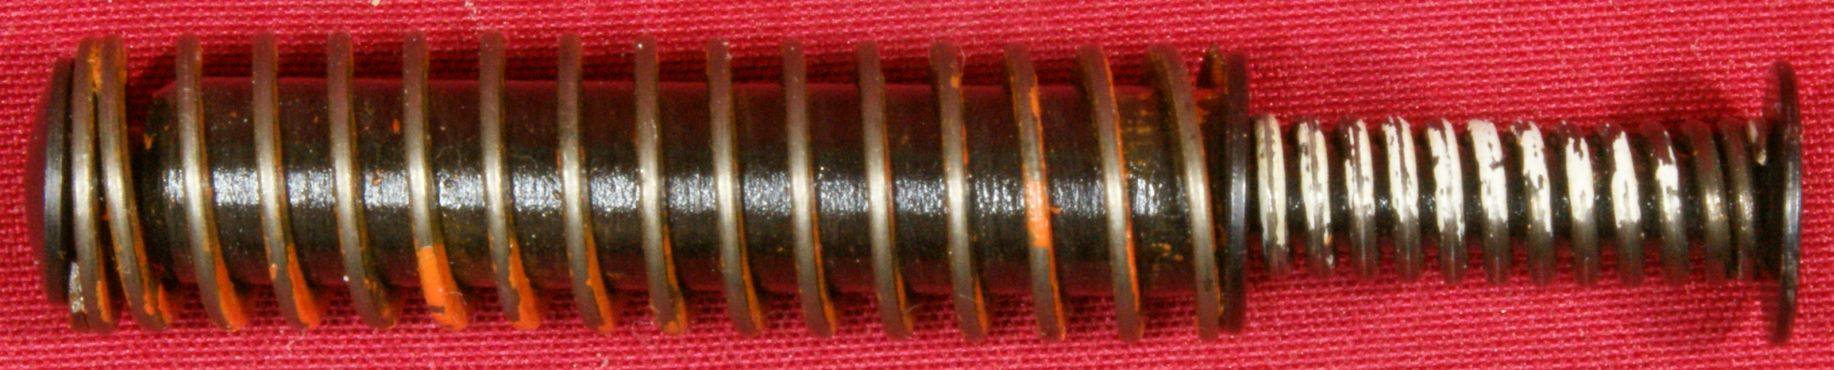
Recoil Spring Assembly
The recoil spring is made up of two springs. The springs came partially painted orange and white and the paint was flaking off and getting on the rod. I took a nylon bristle brush and brushed the spring as good as possible to remove as many flakes as possible and then relubricated.
Figure 23
Grip Frame Assembly
The grip frame assembly diagram from the instruction manual is shown below for reference. Unless you have some skills with disassembly and reassembly of these types of components, I recommend you not disassembling your grip frame assembly.
Figure 24
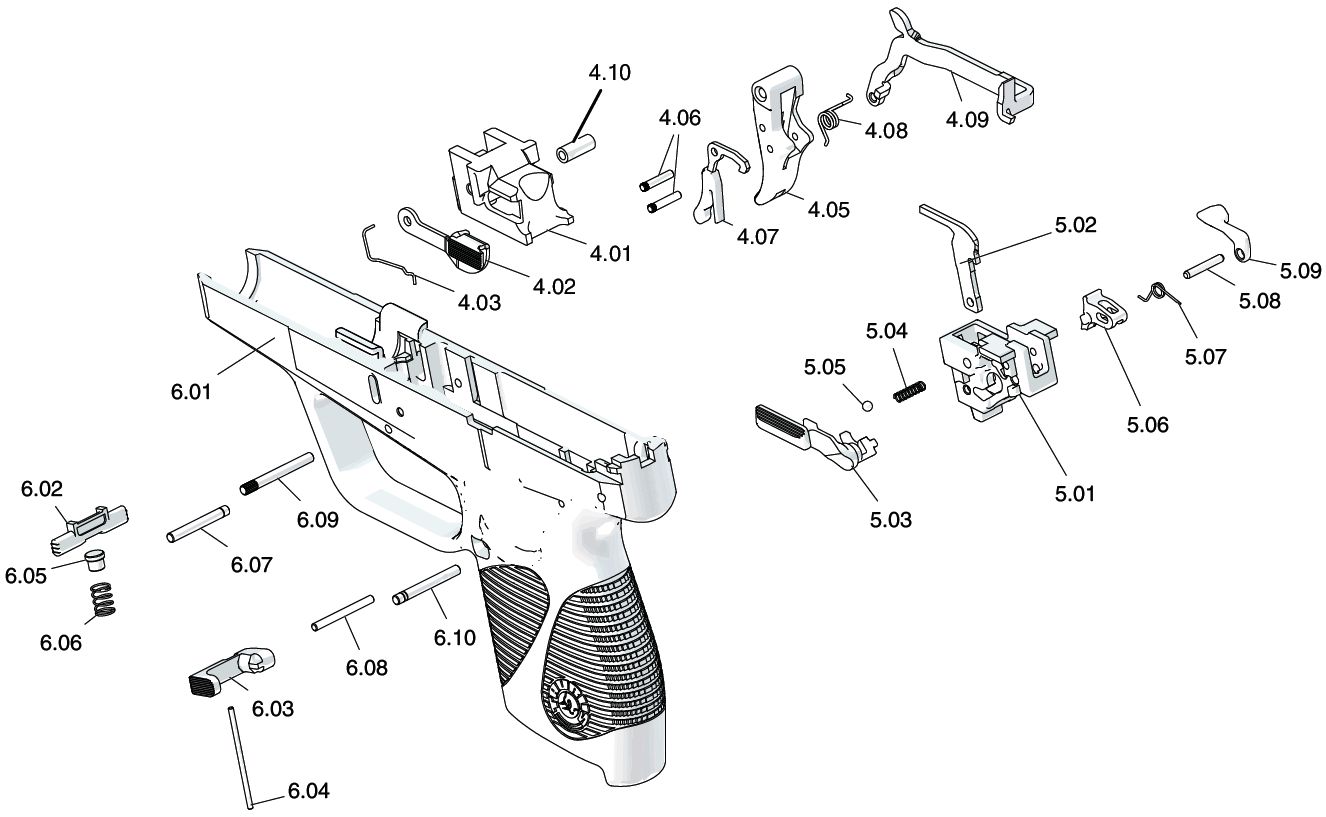
This assembly consists of the polymer grip frame and two metallic support assemblies called the Central Support Assembly (4) and Mechanism Support Assembly (5). The polymer grip frame appears to have the metallic slide support and serial number plate molded into the frame.
Figure 25

I always like to study the trigger and safety mechanisms when I get to this level. For example, if you own this pistol, take the time to see what is blocking what when you engage the manual safety. I could spend hours writing up this stuff and few people (if anyone) would really benefit from the detail, so I'm going to leave it up to you to watch the video and fill in the gaps. The main comment is that the mechanisms look relatively simple and safe and should give years of life under normal conditions.
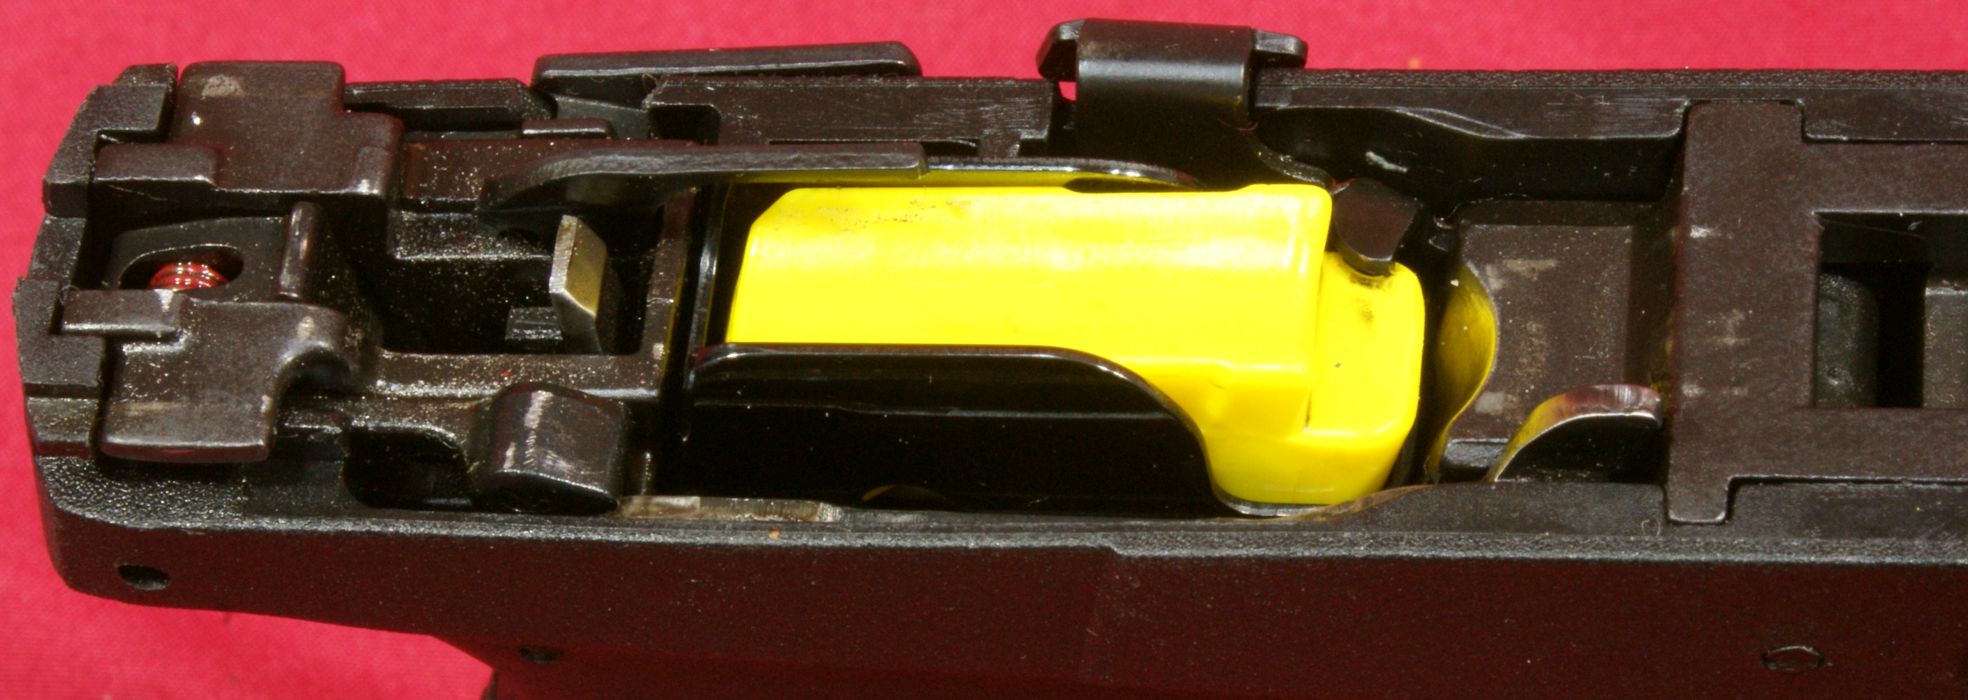
Figure 26

This next photo shows how the slide catch is pushed up by the yellow magazine follower to lock the slide open after the last shot.
Figure 27
Thoughts
Disassembly is very simple and only takes about 15 seconds, so there shouldn't be any excuse for not keeping your pistol clean. It is possible to remove the firing pin assembly, but I didn't do it on this pistol because the slide cap was so tight in the slot and I didn't want to risk scratching the firearm (at this time). Maybe in the future I will update this part of the review to show the firing pin removal. The trigger and safety mechanisms inside the grip frame seemed relatively simple and they should give you years of service under normal conditions.
For more detailed photos and commentary, make sure you check out the other parts of this review and feel free to leave comments below. The following links are provided to help you see other parts of this review.
- Taurus 709 Review: Part 1 - Introduction, Specifications and Summary
- Taurus 709 Review: Part 2 - What's in the Box
- Taurus 709 Review: Part 3 - External & Operational Features
- Taurus 709 Review: Part 4 - Disassembly & Internal Features
- Taurus 709 Review: Part 5 - Range Test
Or
If you would like to be notified about future Gunsumer Reports reviews via Facebook, make sure "You Like This" by clicking the Facebook "Like" button at the bottom or top of this page. If it already says "You Like This" beside the button, clicking it again will uncheck the "Like" status and you will not be notified.
| Share on Facebook | |
© 2010, 2011, 2012, 2013, 2014, 2015, 2016, 2017, 2018, 2019, 2020, 2021, 2022, 2023 & 2024 Gunsumer Reports™, All rights reserved.
FTC Disclosure