|
|
Gunsumer Reports TM Providing Detailed Objective Reviews for Firearms and Firearm Accessories |
Ruger 10/22 Carbine with LaserMax Laser Review
Part 4 - Disassembly
July 19, 2013
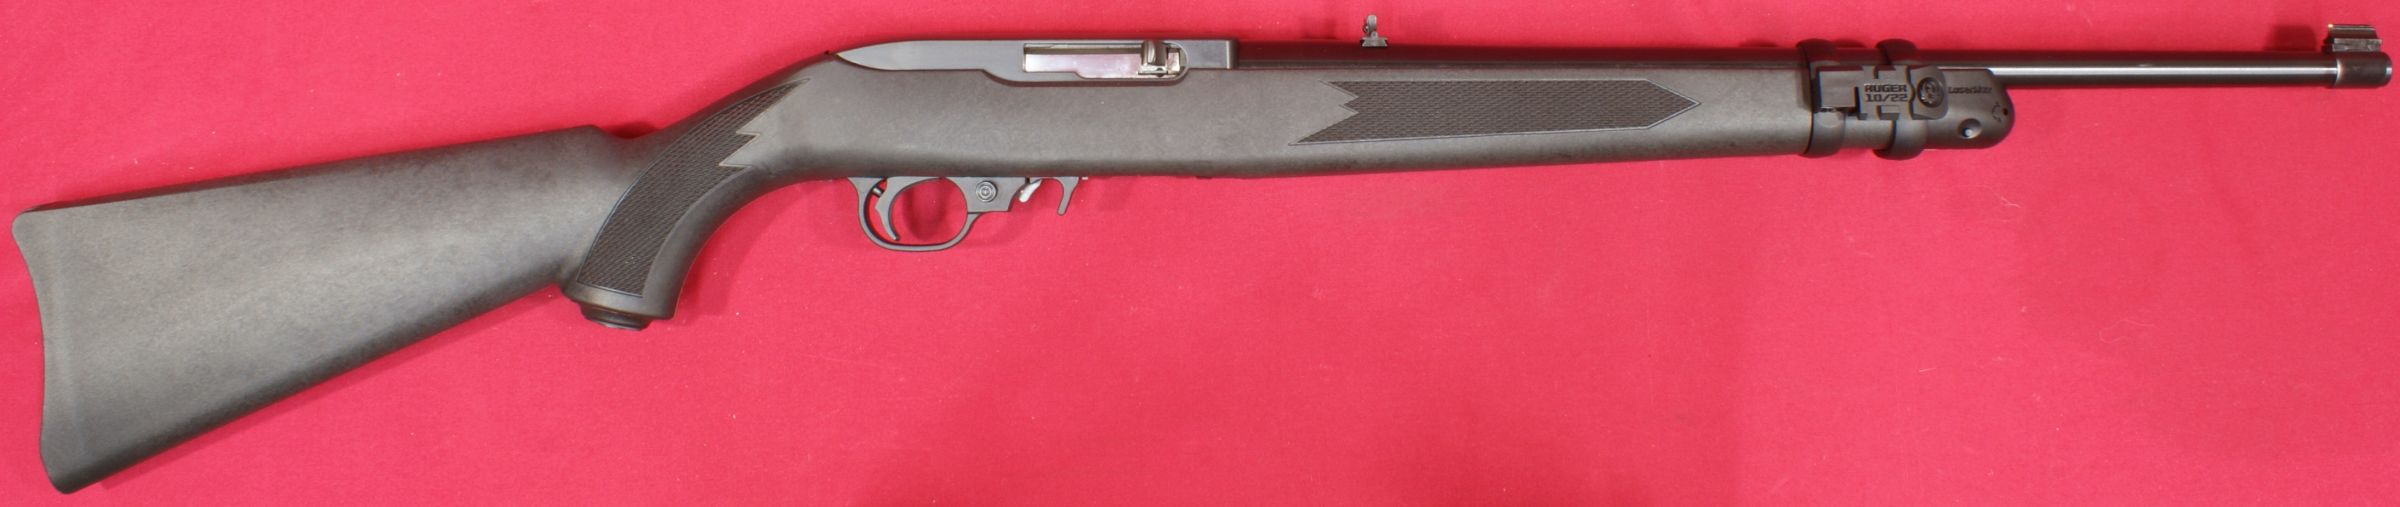
In this part of the review, I cover disassembly of the Ruger 10/22 Carbine Rifle which includes removal of the LaserMax Laser. Even though I follow the steps outlined in the Instruction Manual, you should always consider the manufacturer's Instruction Manual as the official source when working with any firearm.
Step 1 - Safety
Before disassembling any firearm, you should make sure the firearm is completely unloaded. On the Ruger 10/22, you should remove the magazine and then pull the bolt all the way to the rear and visually inspect the chamber to ensure no cartridge is present. After checking, then allow the bolt to fully close. The hammer should be in the cocked state and Ruger suggests flipping the rear sight down.
Step 2 - Remove LaserMax Laser
This is the only step that deviates from the standard carbine rifle disassembly. Functionally, the LaserMax Laser acts as the barrel band and the intent of this step is to remove the barrel band. Since I already figured out that it took removing the battery cover on the LaserMax to allow it to be removed from the barrel, the next step is removing the two screws and battery cover. You can see a schematic of the installation of a LaserMax Laser by looking at the Ruger 10/22 LaserMax Laser Installation Instructions.
Figure 1
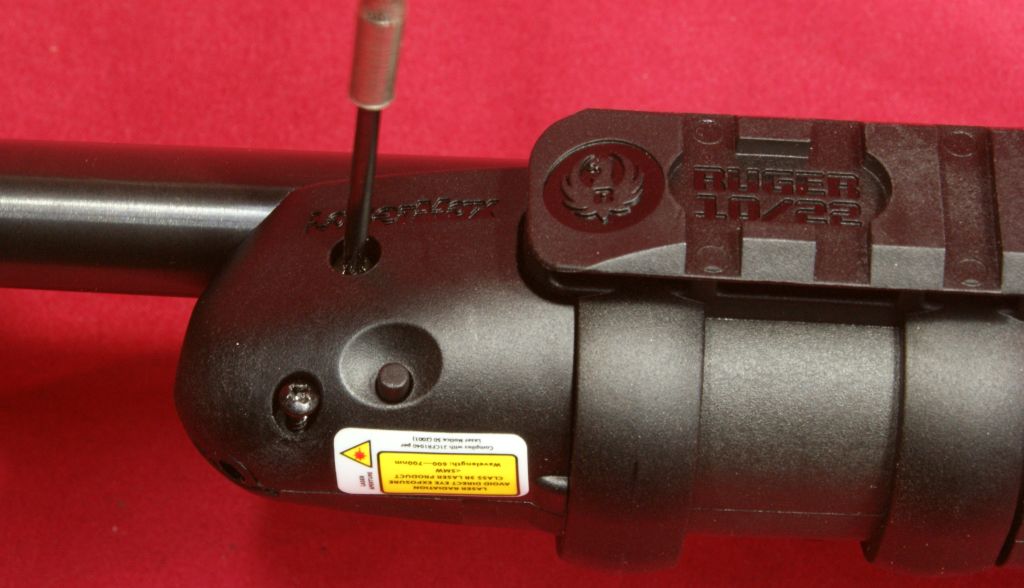
Figure 2
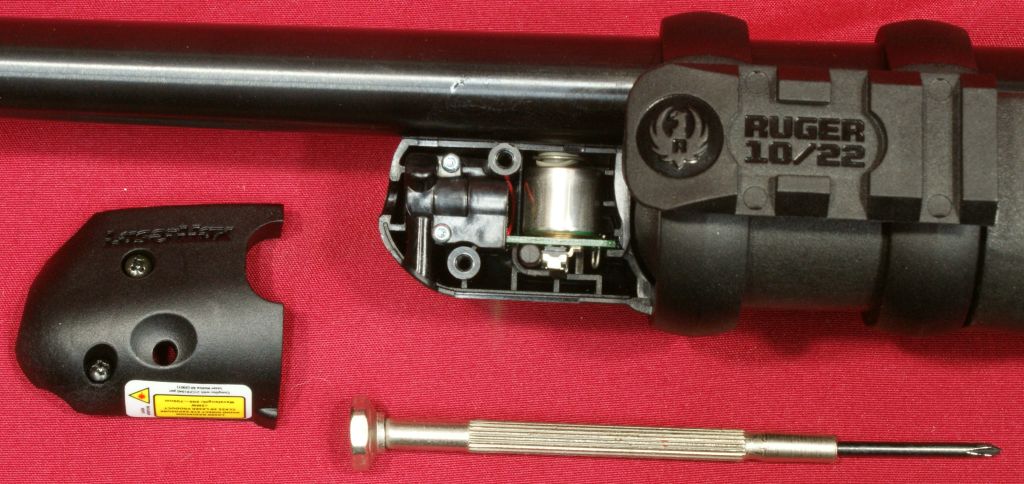
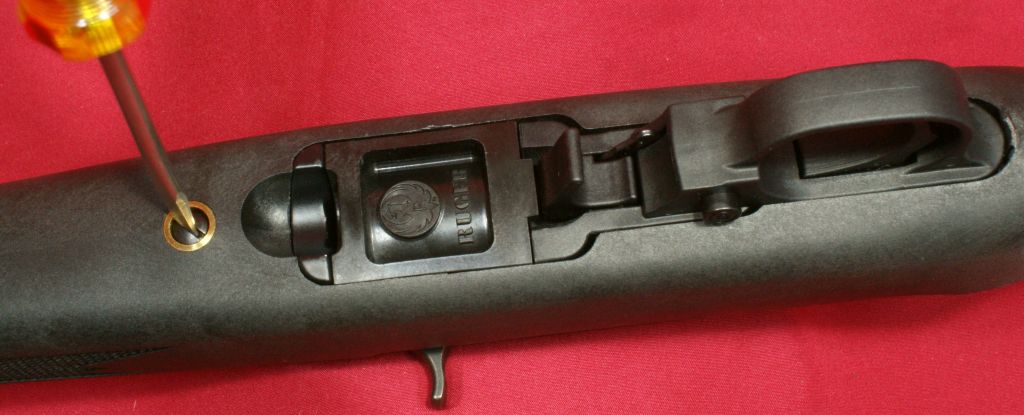
With the battery cover removed, you can now loosen the barrel band screws as shown below. You don't have to fully remove the screw to remove the LaserMax Laser. If you do remove the screw, be careful that you don't loose the nut which is nested inside the lower part of the LaserMax housing. With the screw removed, the nut will fall out of the housing, so make sure you are over something that allows you to easily locate the screw or that you have the nut pointing up so gravity will keep it in place.
Figure 3
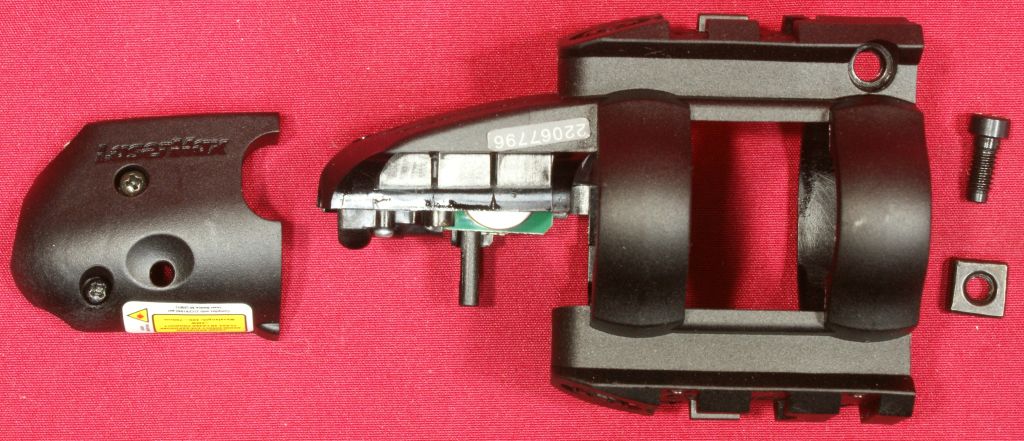
This next photo shows all the parts that make up a Ruger 10/22 LaserMax Laser.
Figure 4
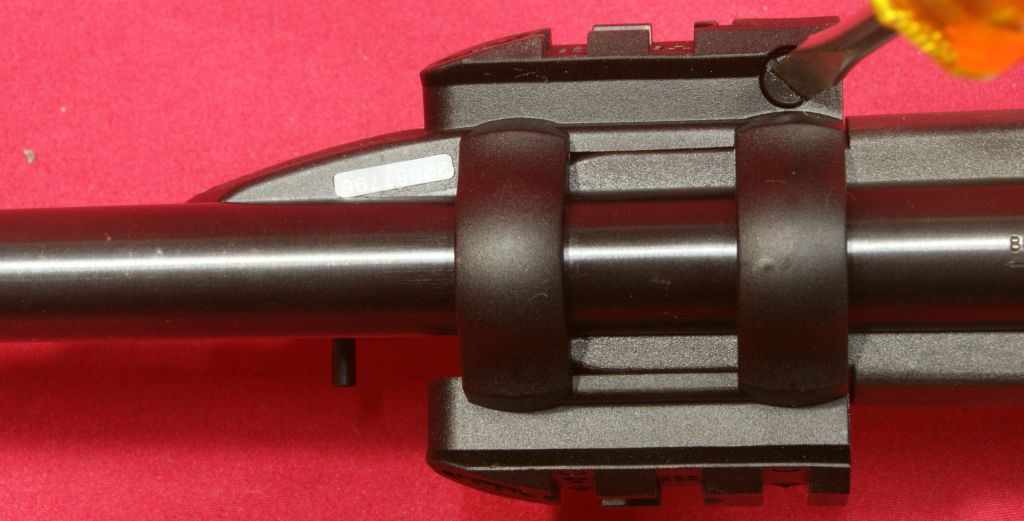
Step 3 - Loosen Takedown Bolt
Using a flat head screwdriver, loosen the takedown bolt. It is possible to full remove the bolt, but this is not required to remove the barrel and receiver assembly.
Figure 5
Step 4 - Safety Button Position
Position the safety button so that equal amounts are exposed on each side. You have to do this so the safety doesn't interfere with the stock as you lift the barrel and receiver assembly from the stock.
Figure 6

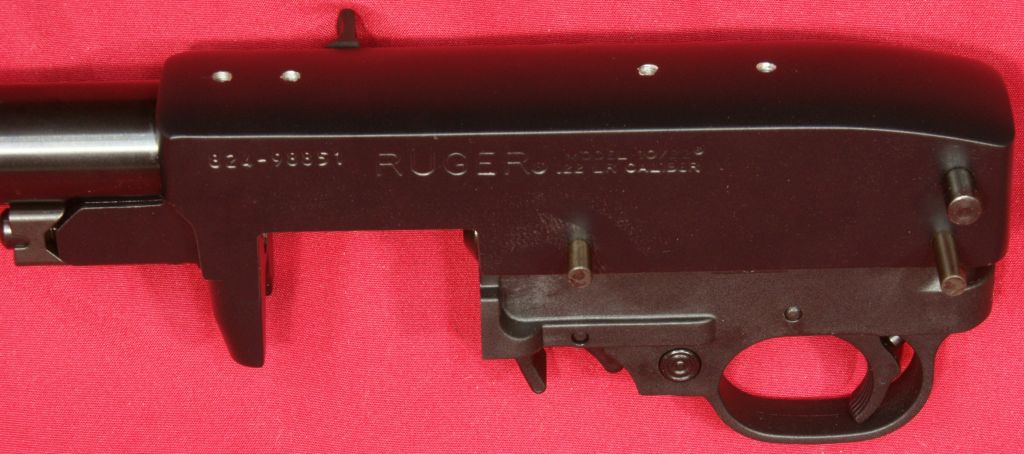
Step 5 - Remove Barrel and Receiver Assembly
You remove the barrel and receiver assembly by rotating the barrel upward from the forearm of the stock. As you rotate the assembly upward, the trigger housing will disengage from a notch in the stock and you can remove the barrel and receiver assembly from the stock. Be careful because the receiver cross pins and bolt stop may be loose enough to fall out on some rifles. Once you have the assembly out of the stock, place the safety button in the "safe" position. At this step you have the rifle disassembled to the level shown below.
Figure 7
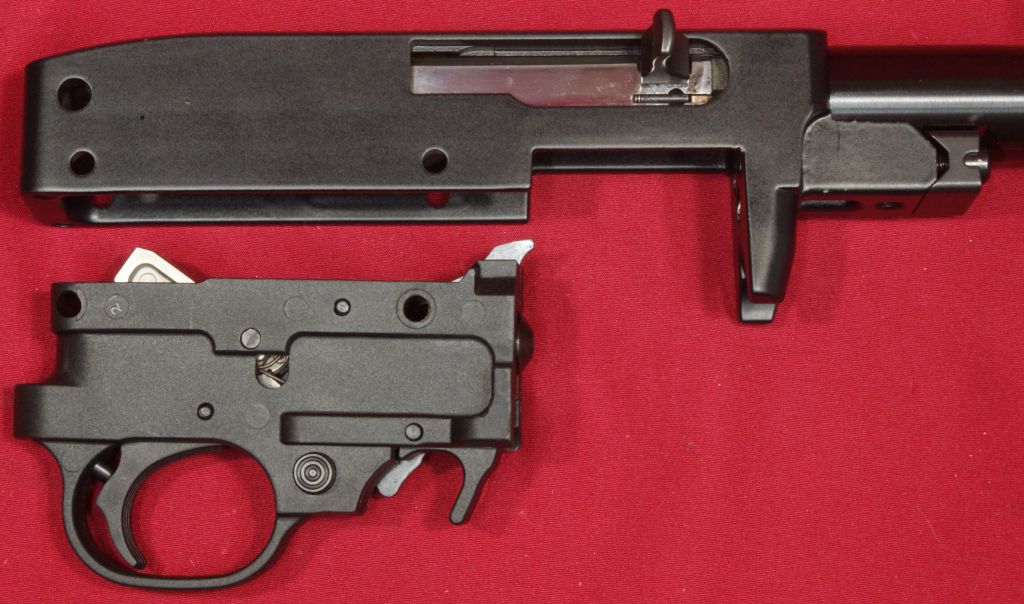
Step 6 - Remove Trigger Guard
Ruger states the next step is to remove the trigger guard by first drifting out the two receiver pins. Most people will also remove the bolt for cleaning so I suggest going ahead and drifting out the bolt stop pin as shown below. On this rifle, I had to use a punch to remove these pins, but on some of my other rifles, the pins will fall out if I turn the assembly on its side.
Figure 8
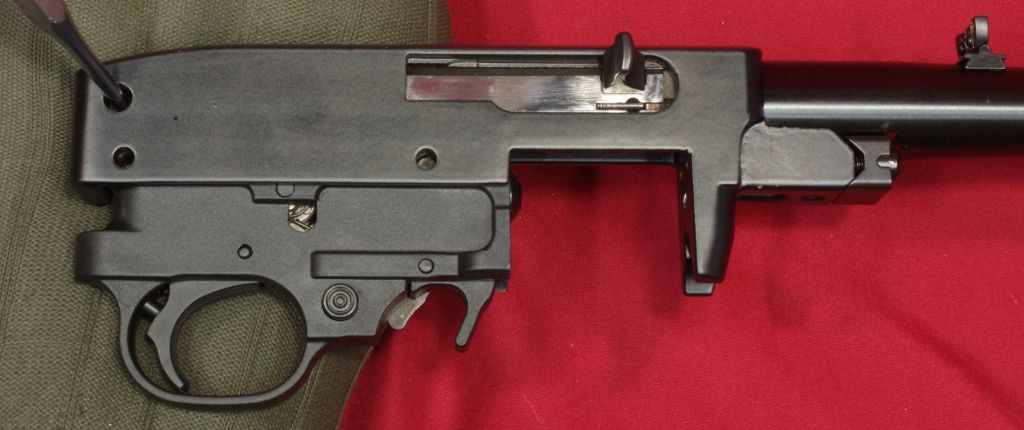
Figure 9
With the pins removed, the trigger guard can be pulled down out of the receiver. Ruger recommends that the components in the trigger guard should not be disassembled any further and I agree. You need to be careful that the cross pins in the trigger guard assembly don't fall out. When I disassembled this rifle, the magazine latch cross pin did actually fall out, but I was able to put it back in without any issues.
Figure 10
Step 7 - Remove the Bolt
Although removing the bolt is a relatively simple step, bolt removal on this rifle was more difficult than any of my other 10/22 platform rifles. It seems there was less freeplay around the bolt to pull it from the receiver. To remove the bolt, first make sure the bolt stop pin has been removed as shown in the step above, then pull the bolt all the way to the rear as shown below. The instruction say to lift up on the front of the bolt to disengage it from from the bolt handle. I agree these are the normal steps, but on this rifle, I had to turn the assembly so that gravity would help the bolt drop and and I tapped the bottom of the receiver with the palm of my hand until the bolt dropped out. Once the bolt is out of the receiver, you can remove the the bolt handle assembly through the ejection port.
Figure 11
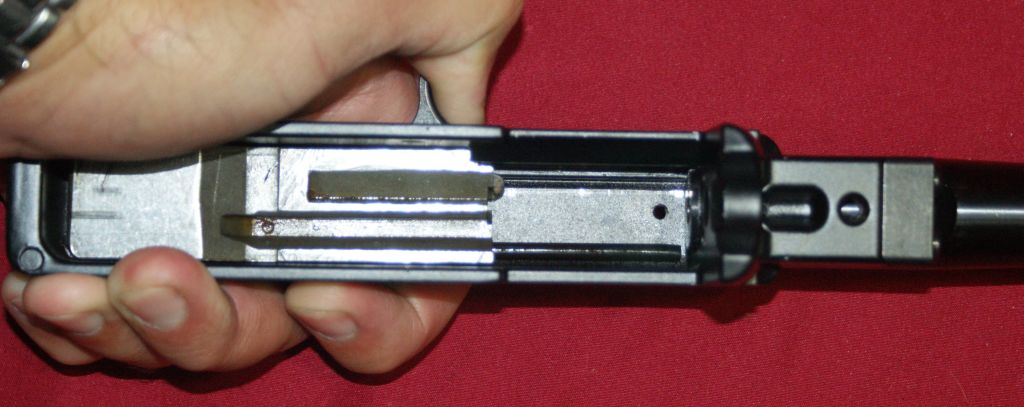
Figure 12
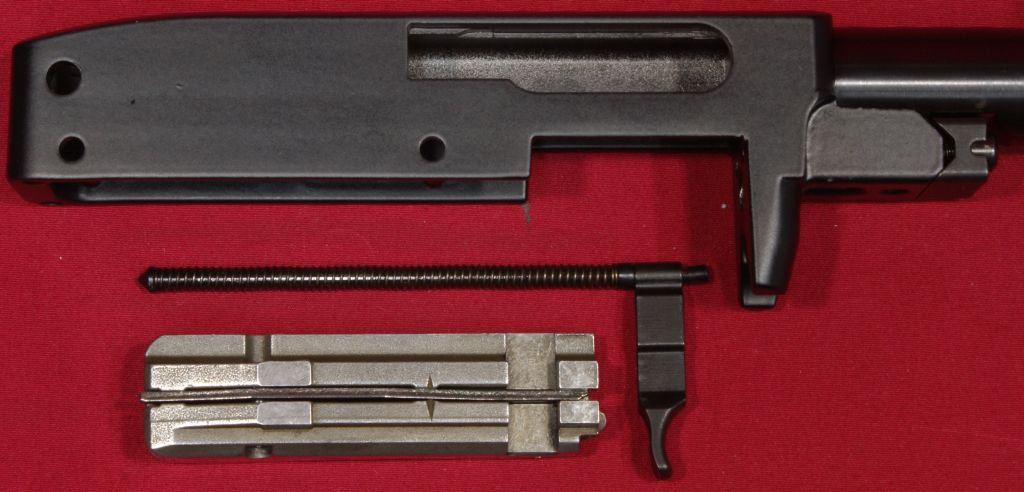
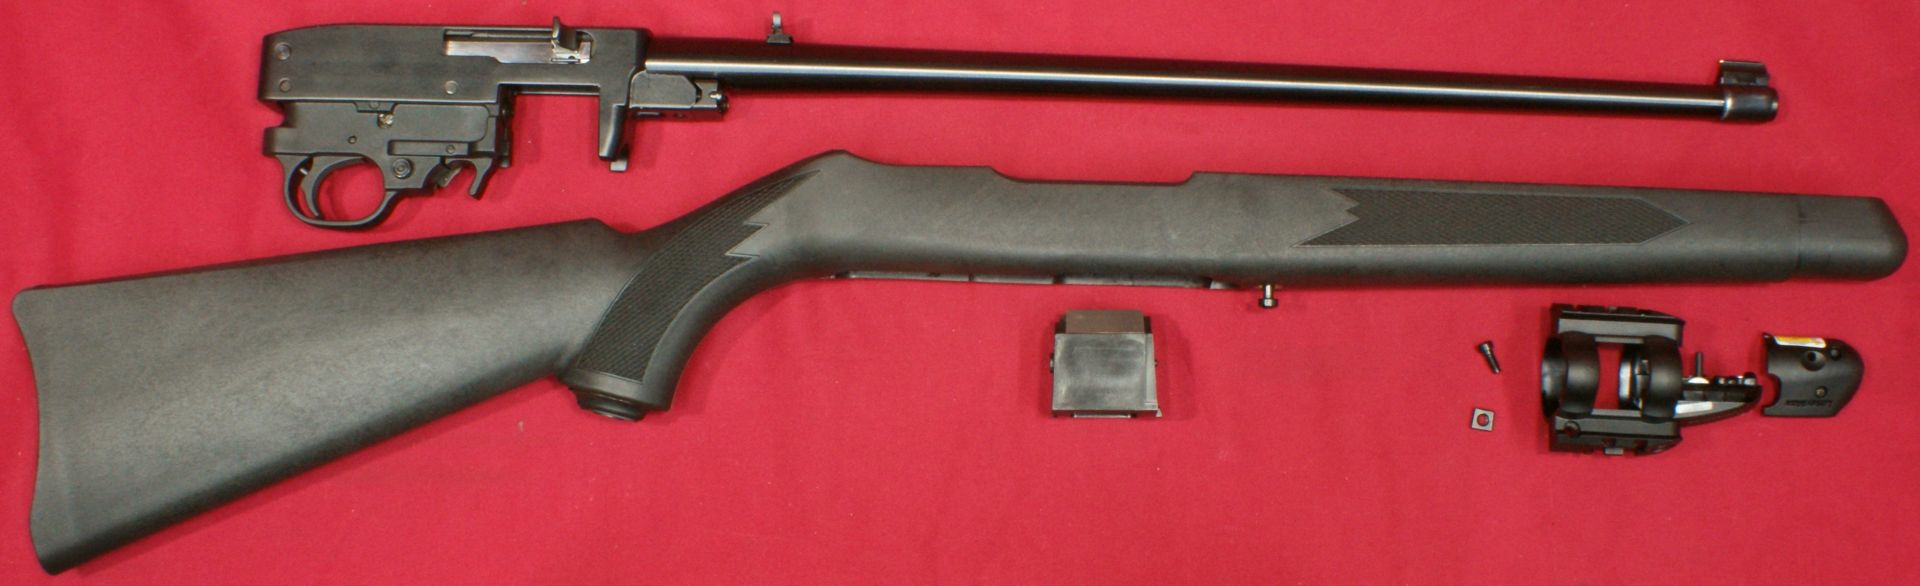
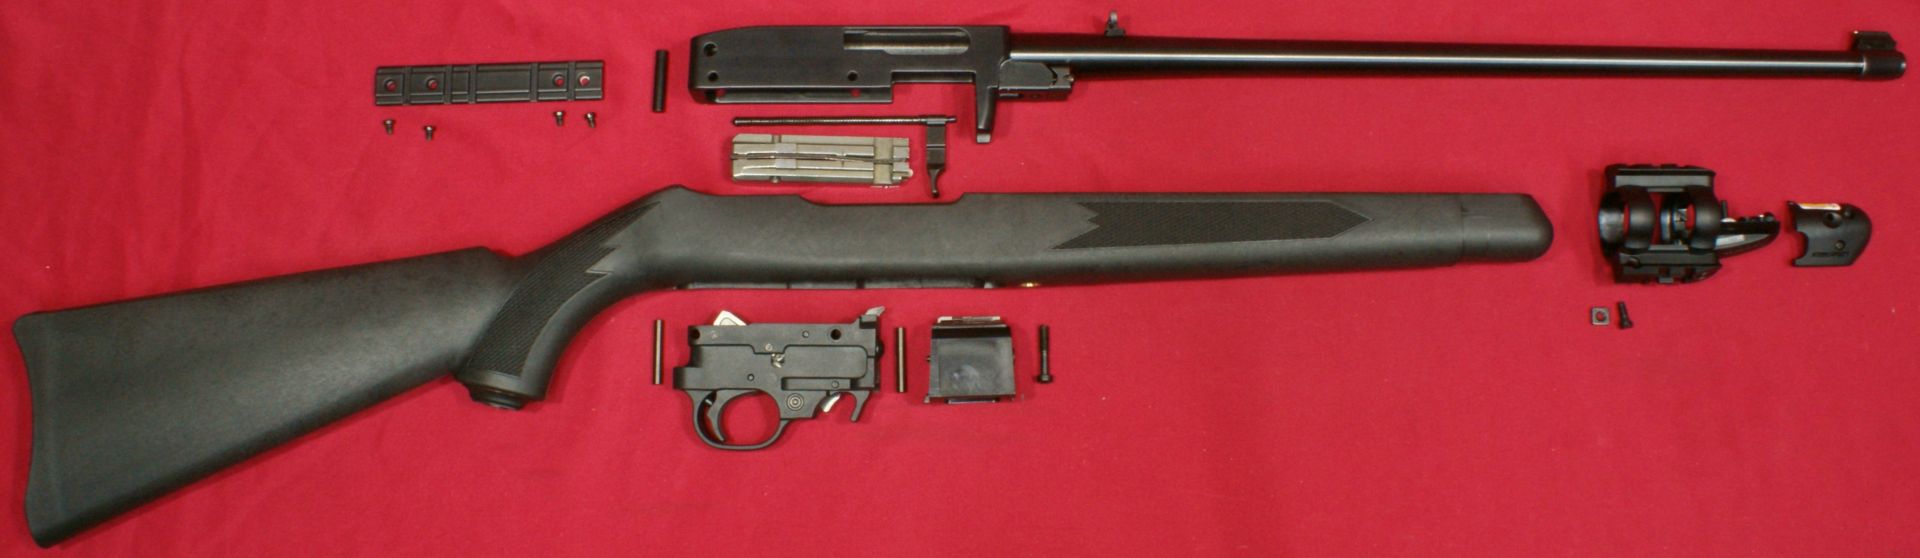
Fully Disassembled
This photo shows the Ruger 10/22 Carbine and LaserMax Laser fully disassembled.
Figure 13
Thoughts
Overall, disassembly of the Ruger 10/22 Carbine with LaserMax Laser is quick and simple. The addition of the LaserMax Laser adds another step and tool required for disassembly of the Ruger 10/22 Carbine Rifle. Since removing the LaserMax laser is required because it replace the barrel band, you will need to re-zero the laser when you reassemble the rifle. Since your rifle has iron sights or if you have installed an optical sight, re-zeroing is not a major issue because you can re-zero using these other sighting methods as your reference.
For more detailed photos and commentary, make sure you check out the other parts of this review and feel free to leave comments on my Reader's Comments page. The following links are provided to help you see other parts of this review.
- Ruger 10/22 LaserMax Review: Part 1 - Introduction, Specifications and Summary
- Ruger 10/22 LaserMax Review: Part 2 - What's in the Box
- Ruger 10/22 LaserMax Review: Part 3 - External and Operational Features
- Ruger 10/22 LaserMax Review: Part 4 - Disassembly (this page)
- Ruger 10/22 LaserMax Review: Part 5 - Internal Features
- Ruger 10/22 LaserMax Review: Part 6 - Range Test
Or
If you would like to be notified about future Gunsumer Reports reviews via Facebook, make sure "You Like This" by clicking the Facebook "Like" button at the bottom or top of this page. If it already says "You Like This" beside the button, clicking it again will uncheck the "Like" status and you will not be notified.
| Share on Facebook | |
© 2010, 2011, 2012, 2013, 2014, 2015, 2016, 2017, 2018, 2019, 2020, 2021, 2022, 2023 & 2024 Gunsumer Reports™, All rights reserved.
FTC Disclosure