|
|
Gunsumer Reports TM Providing Detailed Objective Reviews for Firearms and Firearm Accessories |
Remington 870 Express Tactical Review
Part 4 - Disassembly and Internal Features
January 12, 2011
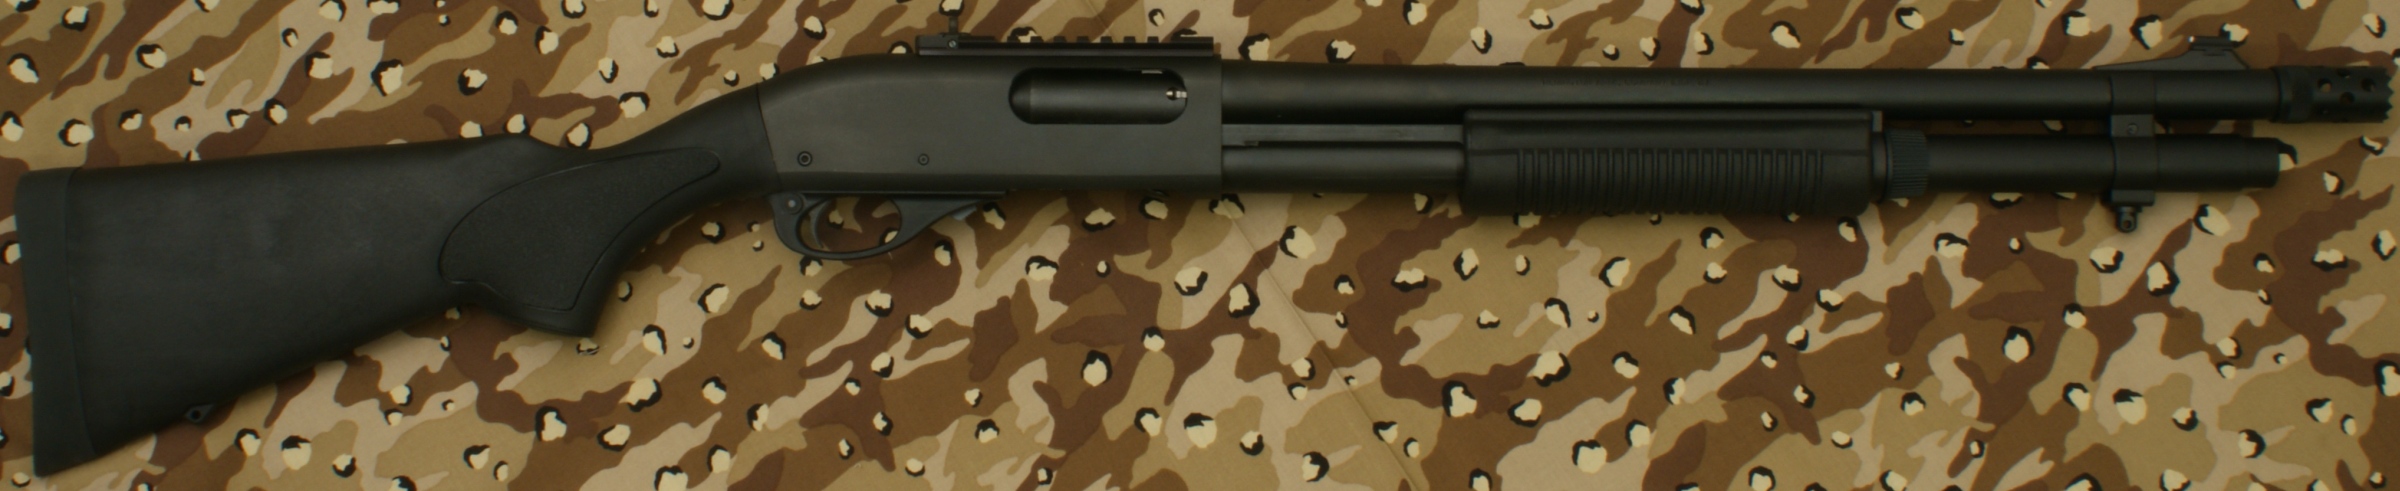
In this part of the review, I'm going to cover basic disassembly of the shotgun for normal cleaning and show some of the internal features of the shotgun. Although I show many photos and give comments on the steps for disassembly, you should always refer to the manufacturer's Owner's Manual as the official source for these instructions. Also you should always make sure your firearm is unloaded and on safety prior to any disassembly.
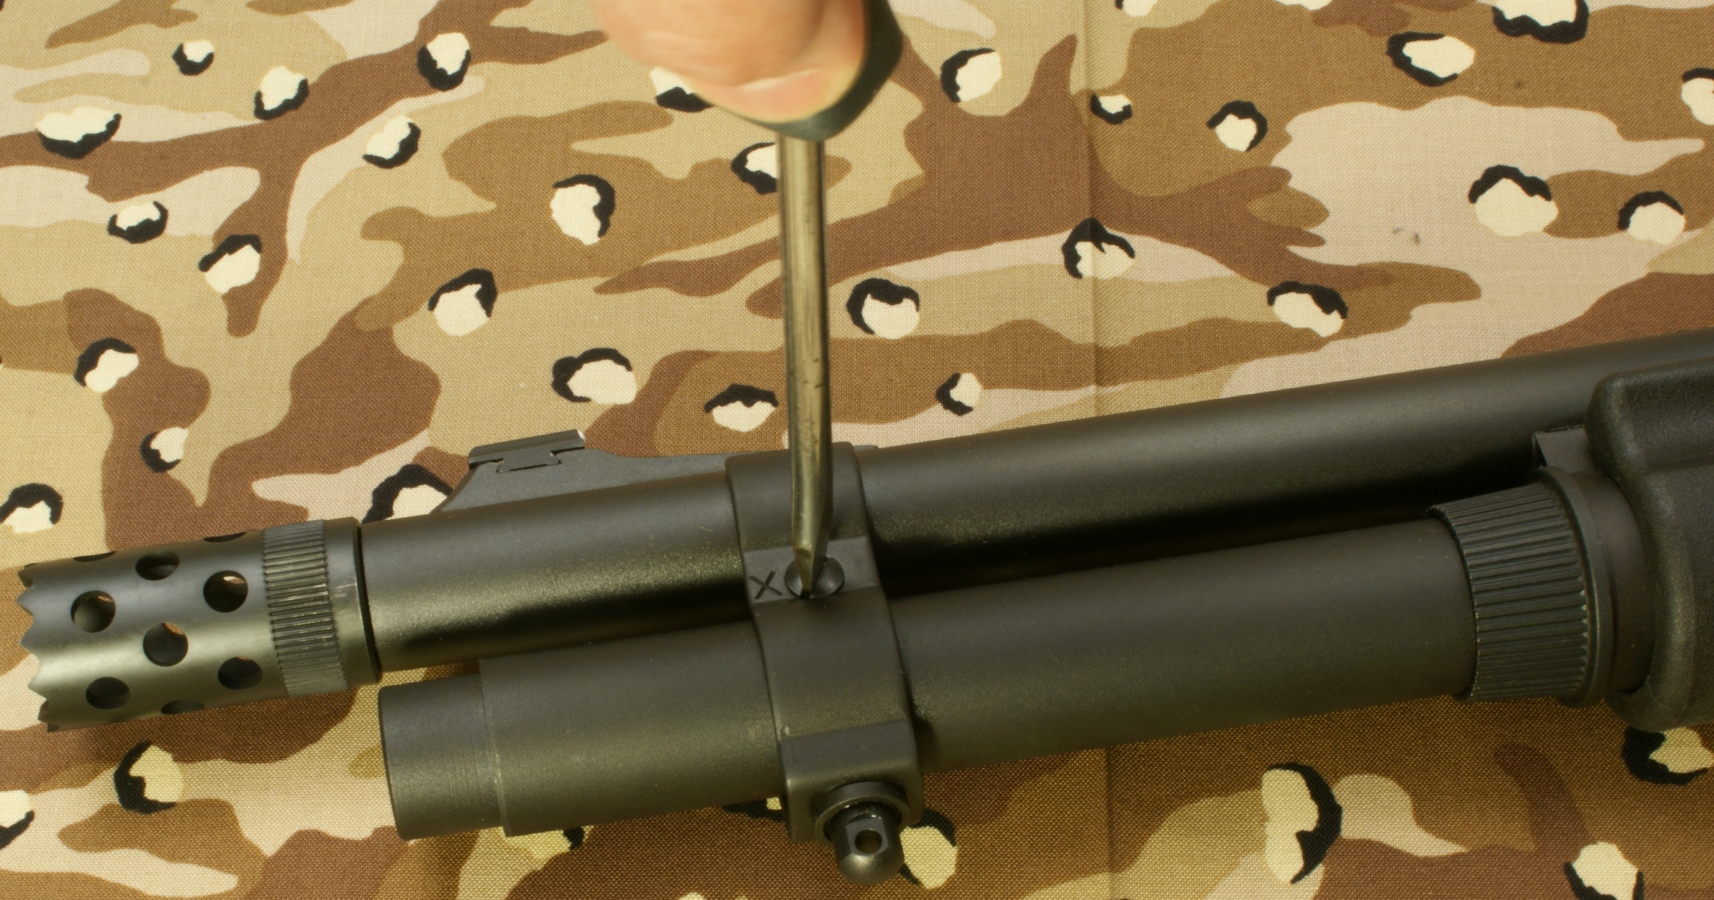
Step 1: Removal of the 2-Shot Extension Tube
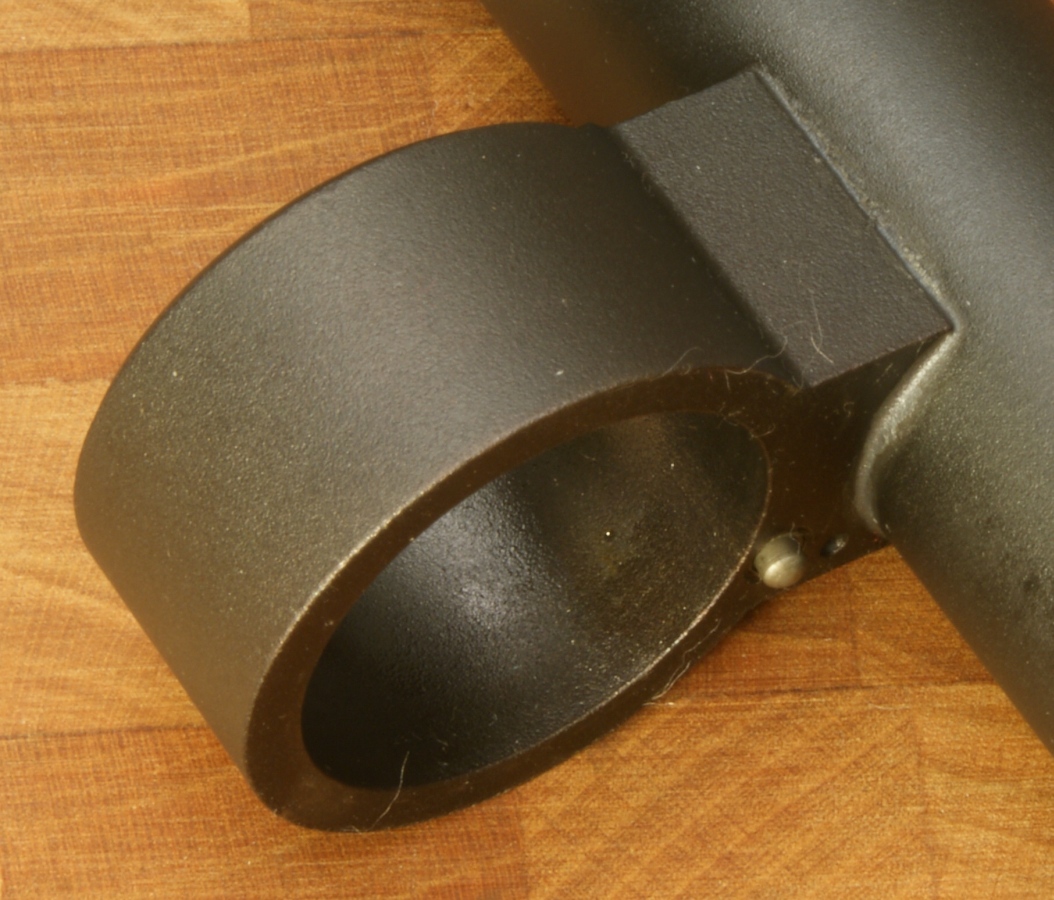
To remove the 2-shot extension tube, you must remove the extension swivel assembly by removing the screw using a flat head screwdriver. With the screw removed, the swivel assembly will slide over choke tube.

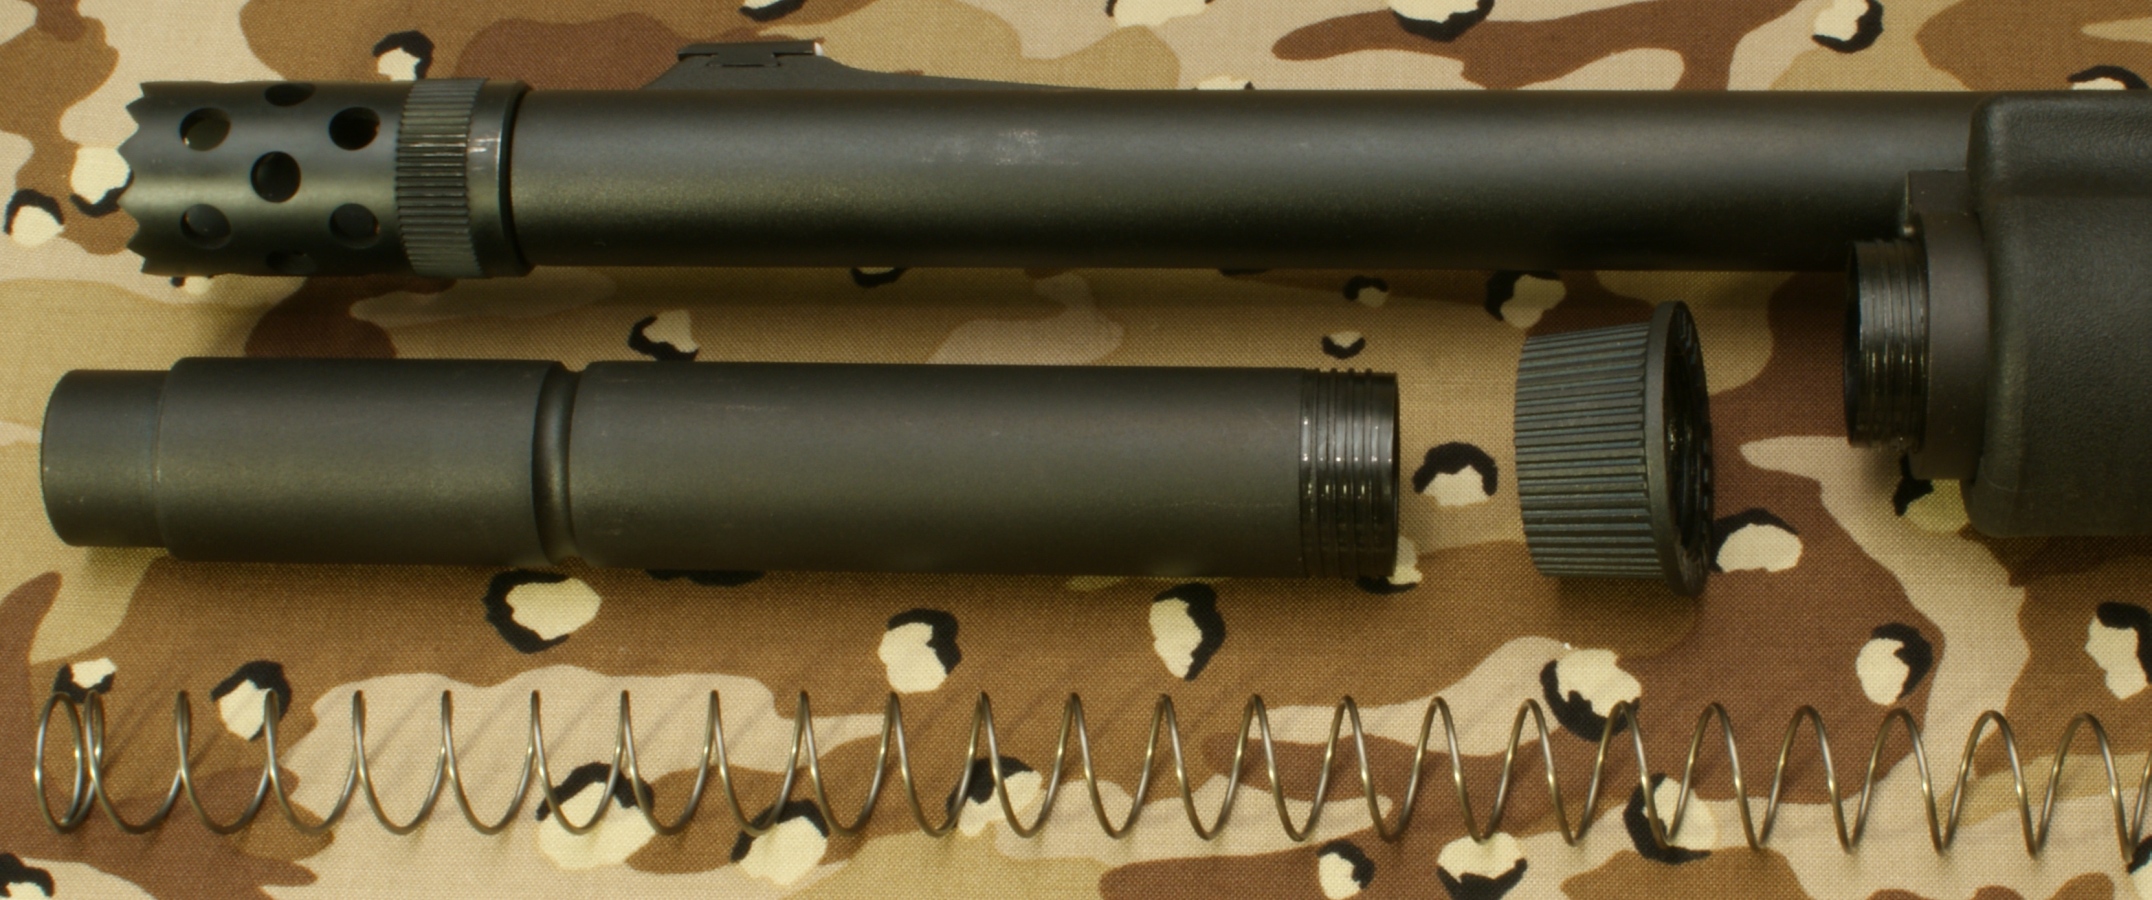
The actual extension tube can be removed at the same time that you remove the magazine cap. Remember that the magazine spring is held in place by the cap/extension tube, so you should be careful once the cap is screwed off the magazine tube because the spring is under compression.
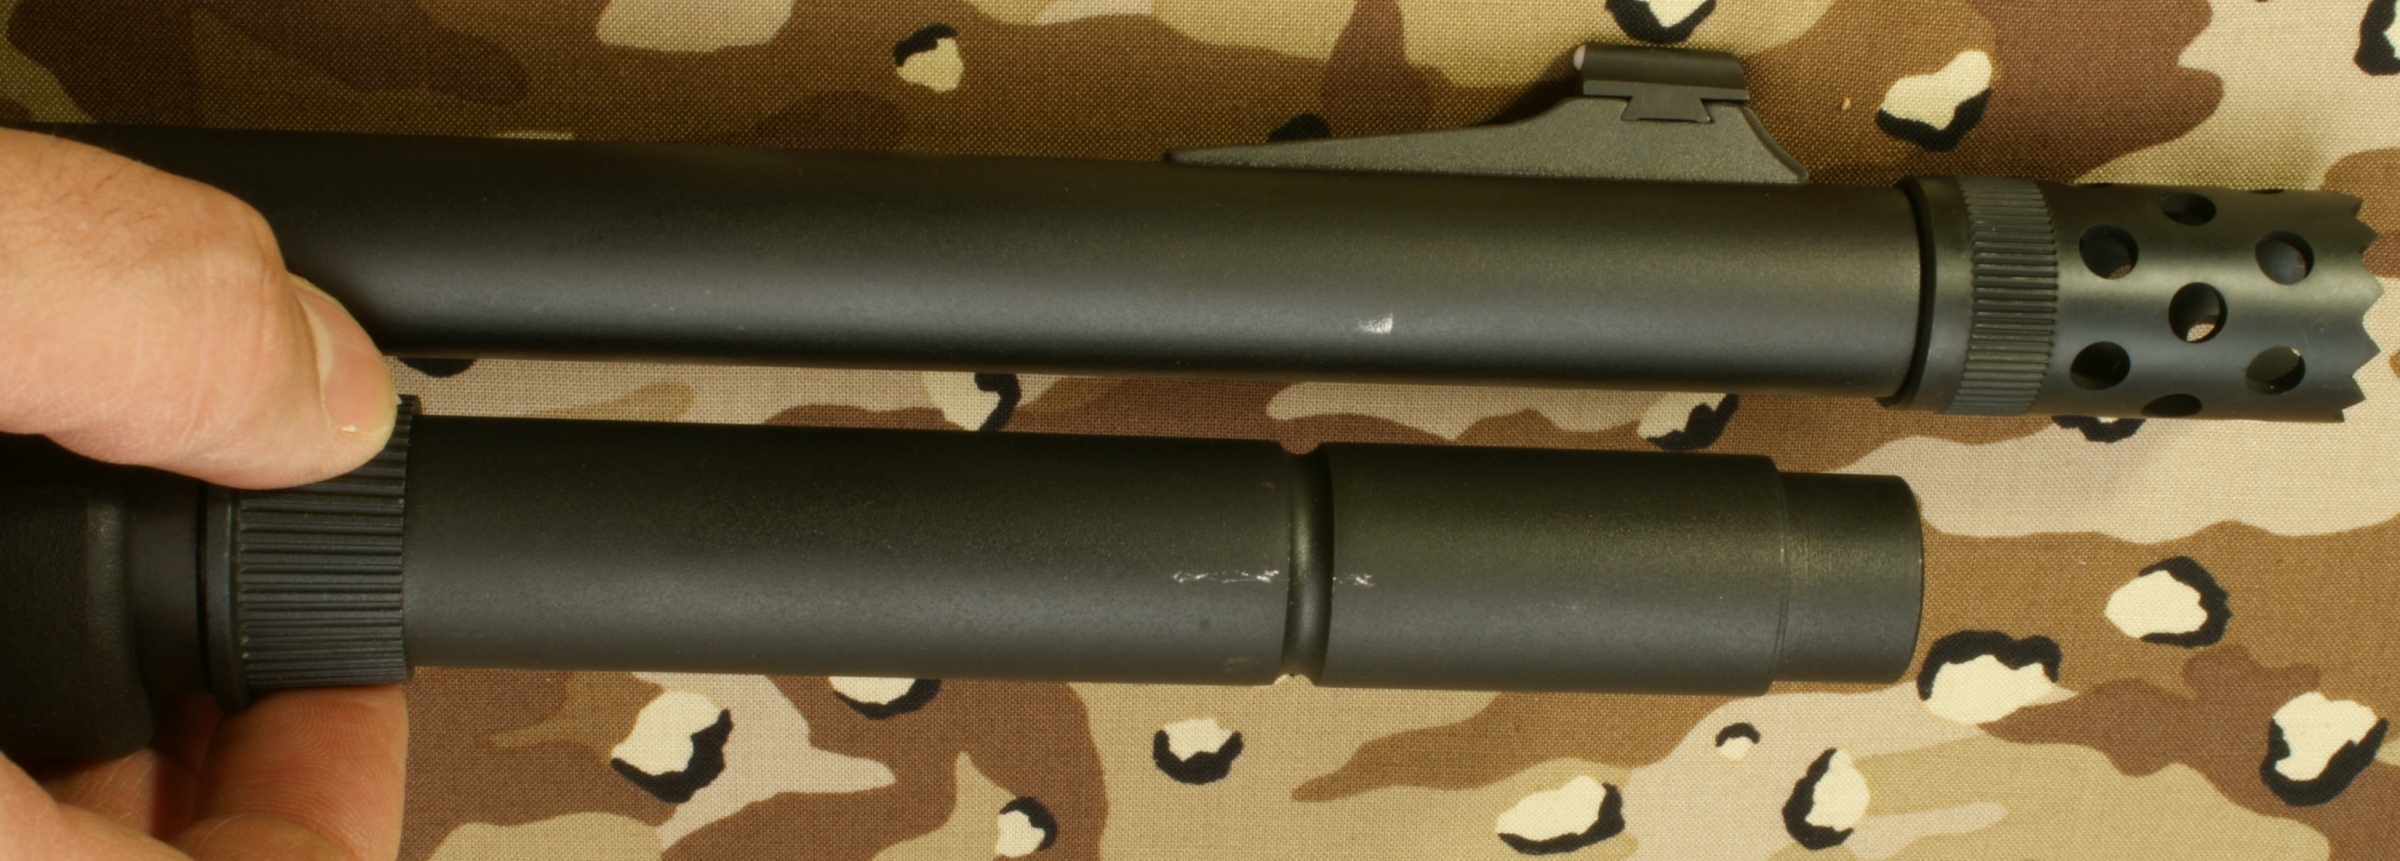
The 2-shot extension tube is actually threaded into the magazine cap and can be removed if needed.
Step 2: Removal of the Barrel
With the magazine cap removed and the action at about mid travel, you are able to pull the barrel out of the receiver and off the magazine tube.

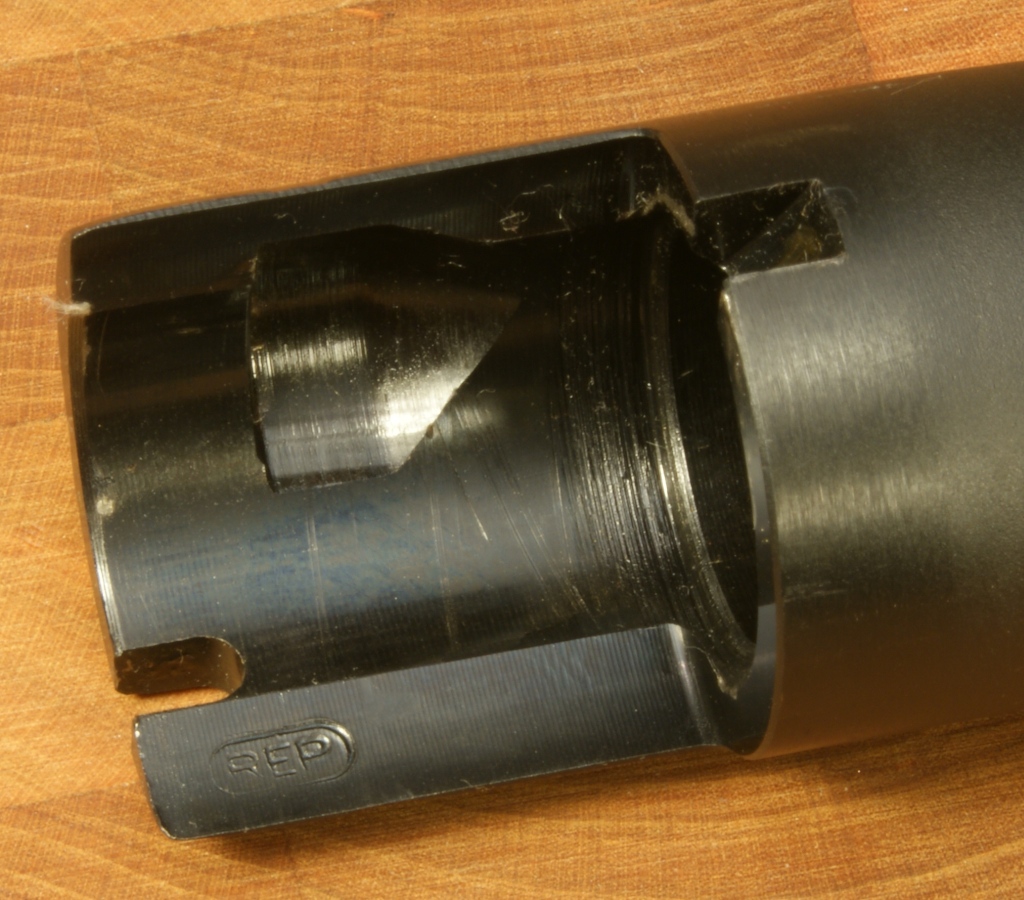
The circled "REP" mark below (left photo) on the chamber end of the barrel stands for "Remington English Proof". This mark is applied after the firearm has passed it's proof test which consists of shooting the shotgun with a high pressure shell to proof pressure check the shotgun. On the bottom of the barrel is a lug that includes a spring loaded pin that seats in the indents on the magazine nut to keep the nut from working loose when shooting the shotgun.
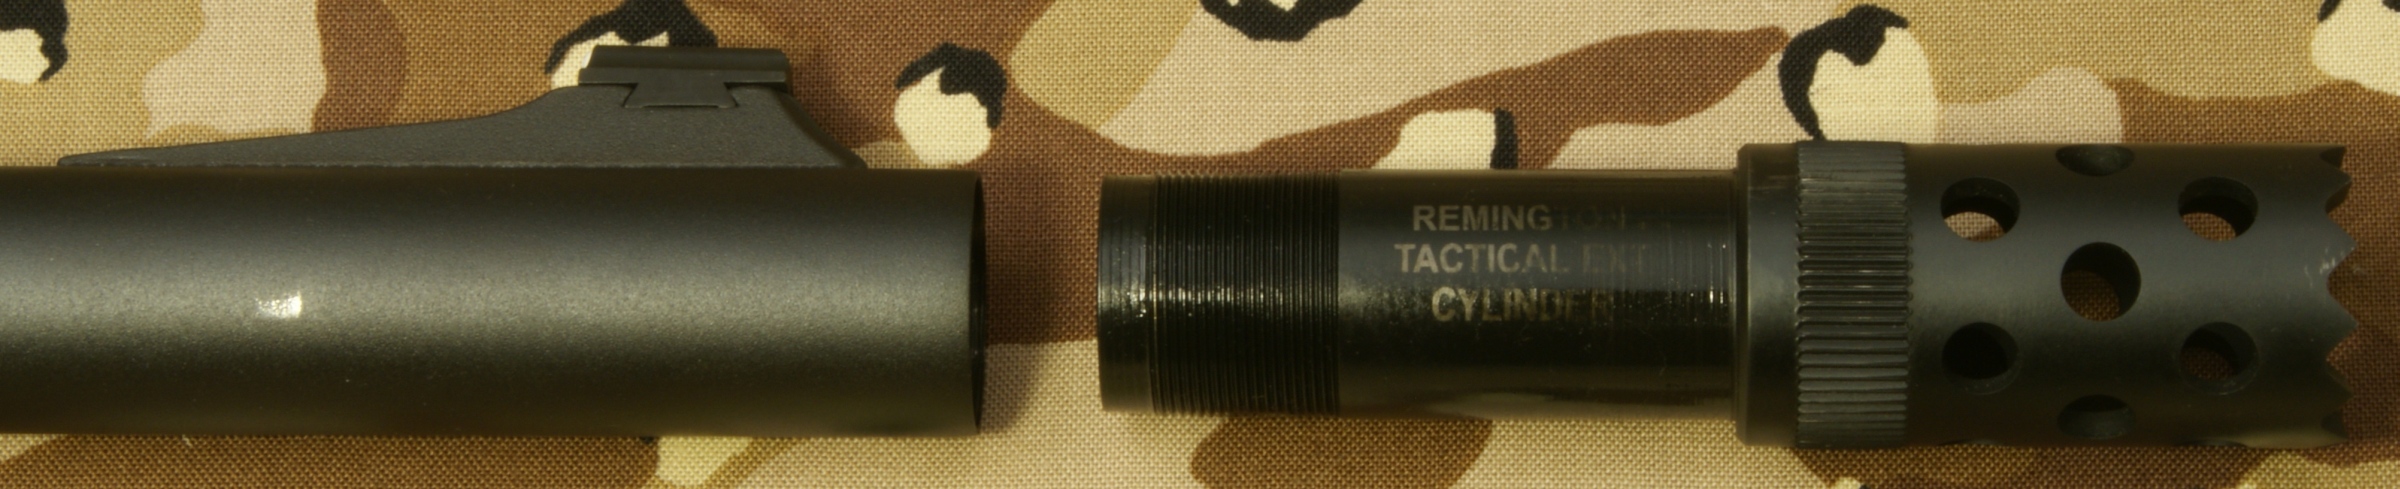
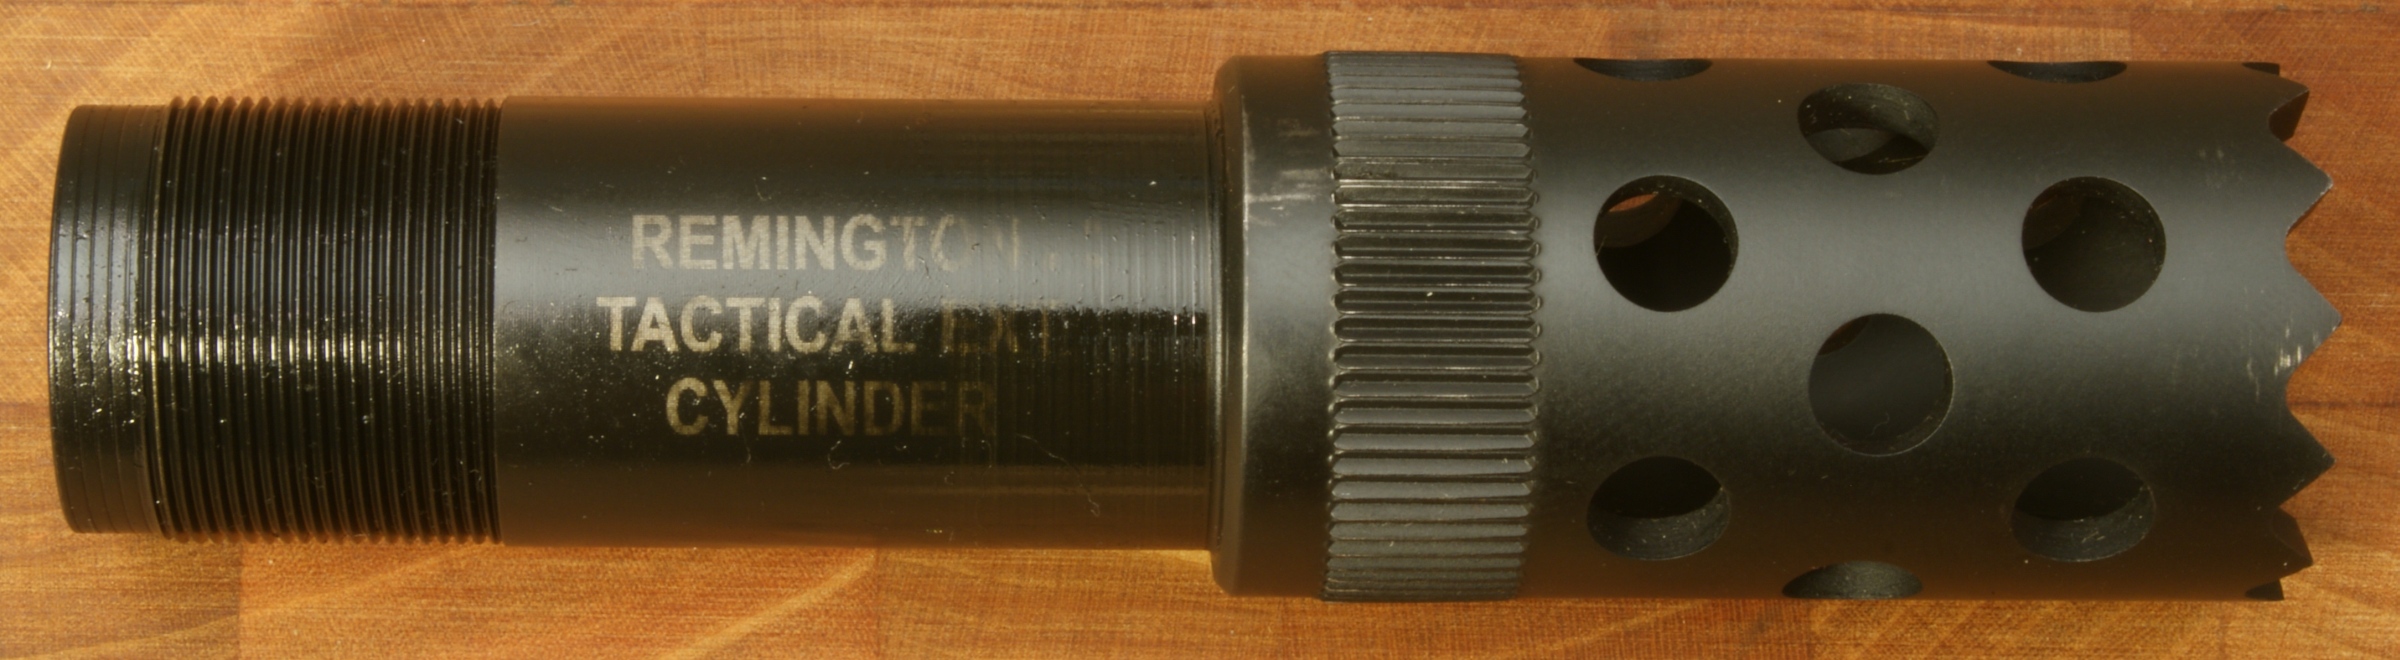
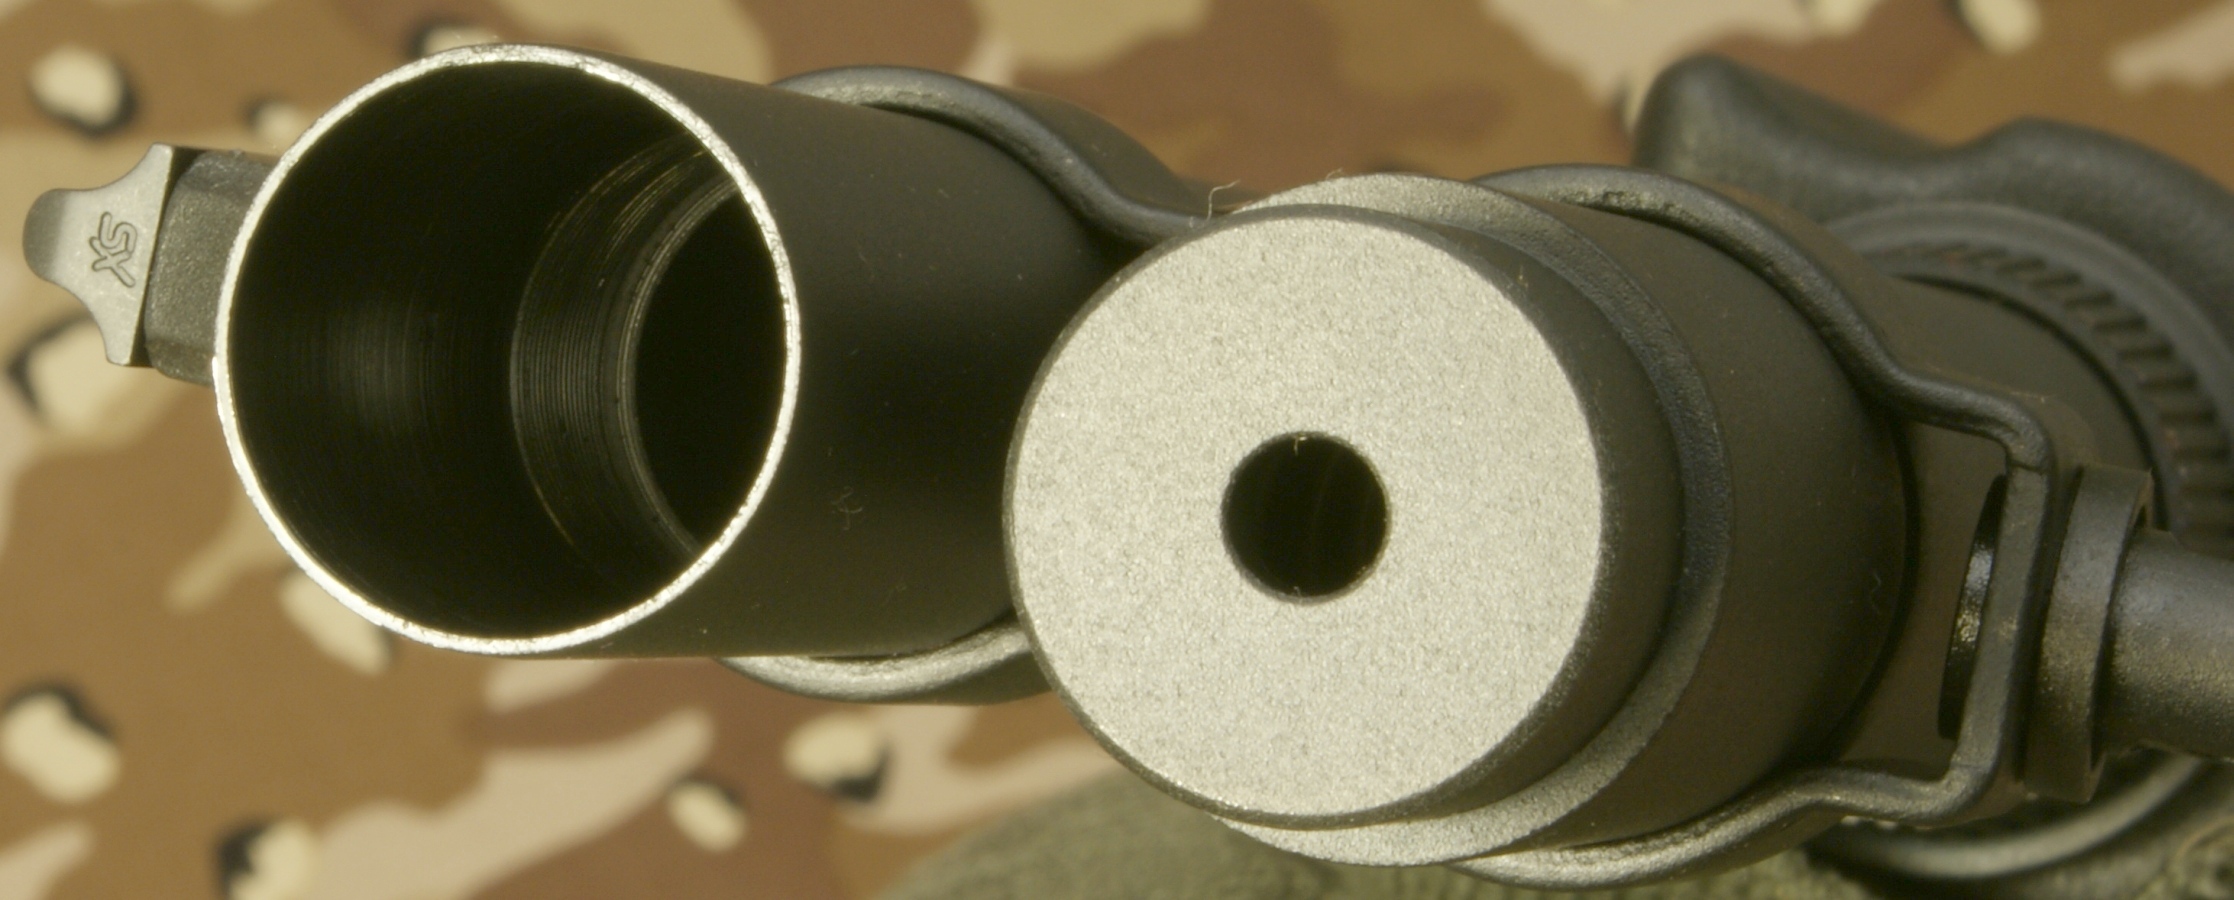
Step 3: Removal of the Tactical Choke
Removal of the choke is just a matter of grabbing it with your hand and unscrewing it out of the barrel. This is a "Cylinder" choke that has no constriction and you should be able to shoot nearly any shot or slug without damaging the choke and barrel.
In the photo below you can see the threaded area inside the barrel for the choke and also thinness of the front of the barrel. When the choke is removed you should always be careful not to drop the barrel because this thin wall on the end is much easier to bend with impact than when the choke is installed.
Step 4: Removal of the Fore-end, Slide Assembly and Breech Bolt
With the action all the way open, push up on the carrier from below then press and hold the left shell latch (shiny piece of metal just behind the orange follower shown below) as you slide the fore-end off the magazine tube.
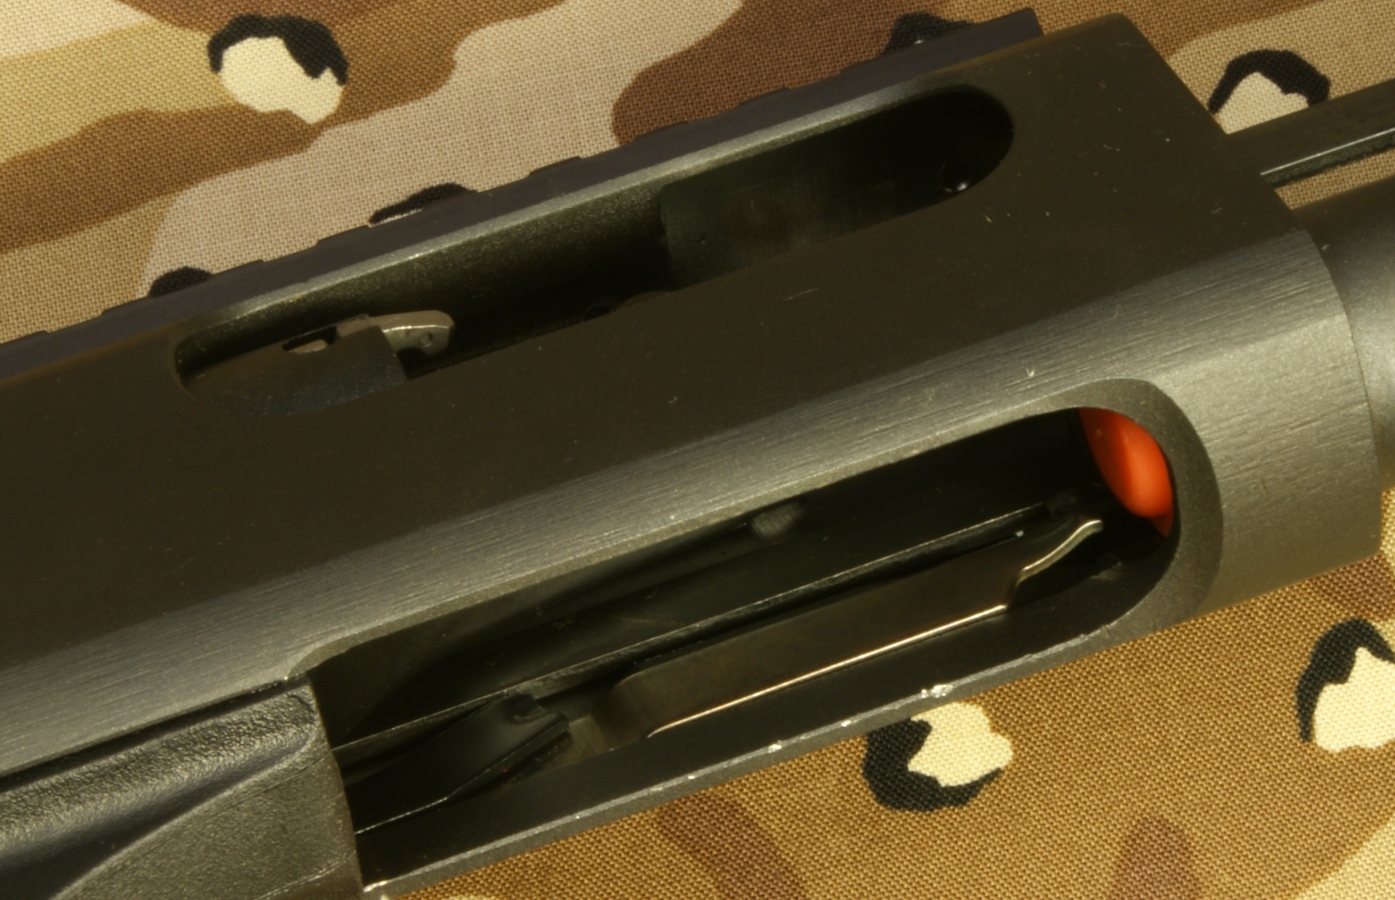
The slide assembly rests in the notches of the action bars and the breech bolt assembly sits on top of the slide assembly. When the fore-end is removed, these items may fall off if you are not holding the shotgun level with the barrel up.
Step 5: Removal of the Trigger Assembly
Removal of the Trigger Assembly is done by pushing out the two trigger plate pins. The rear pin on this shotgun was easy to remove, but the forward pin required the use of a punch throughout the entire effort.
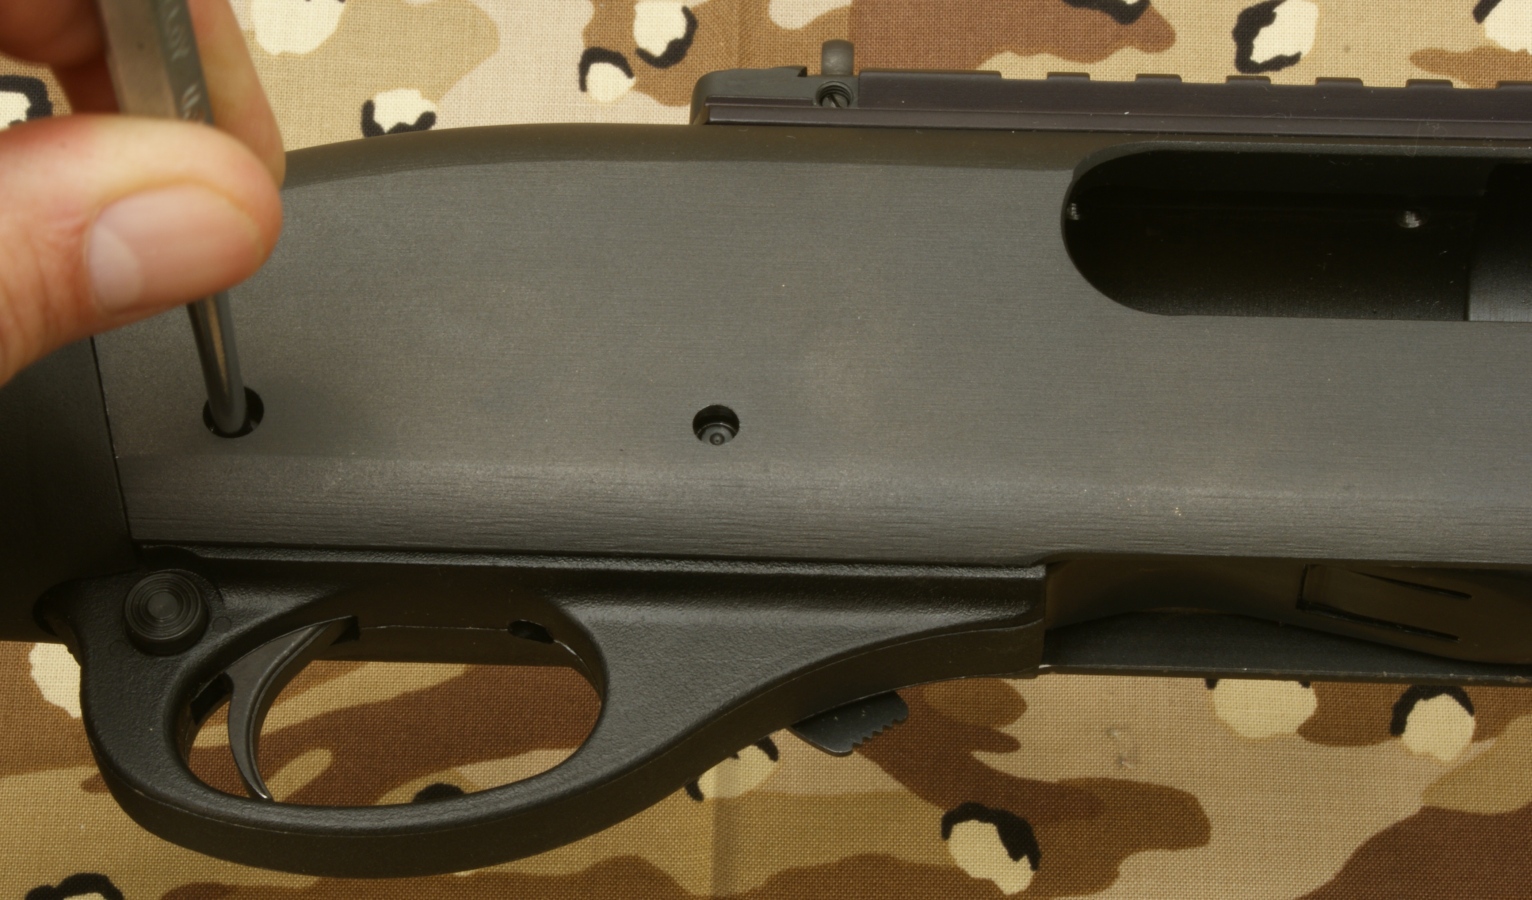
With the pins removed, you can pull the trigger assembly out of the receiver. Mine was a snug fit but still came out without a problem.
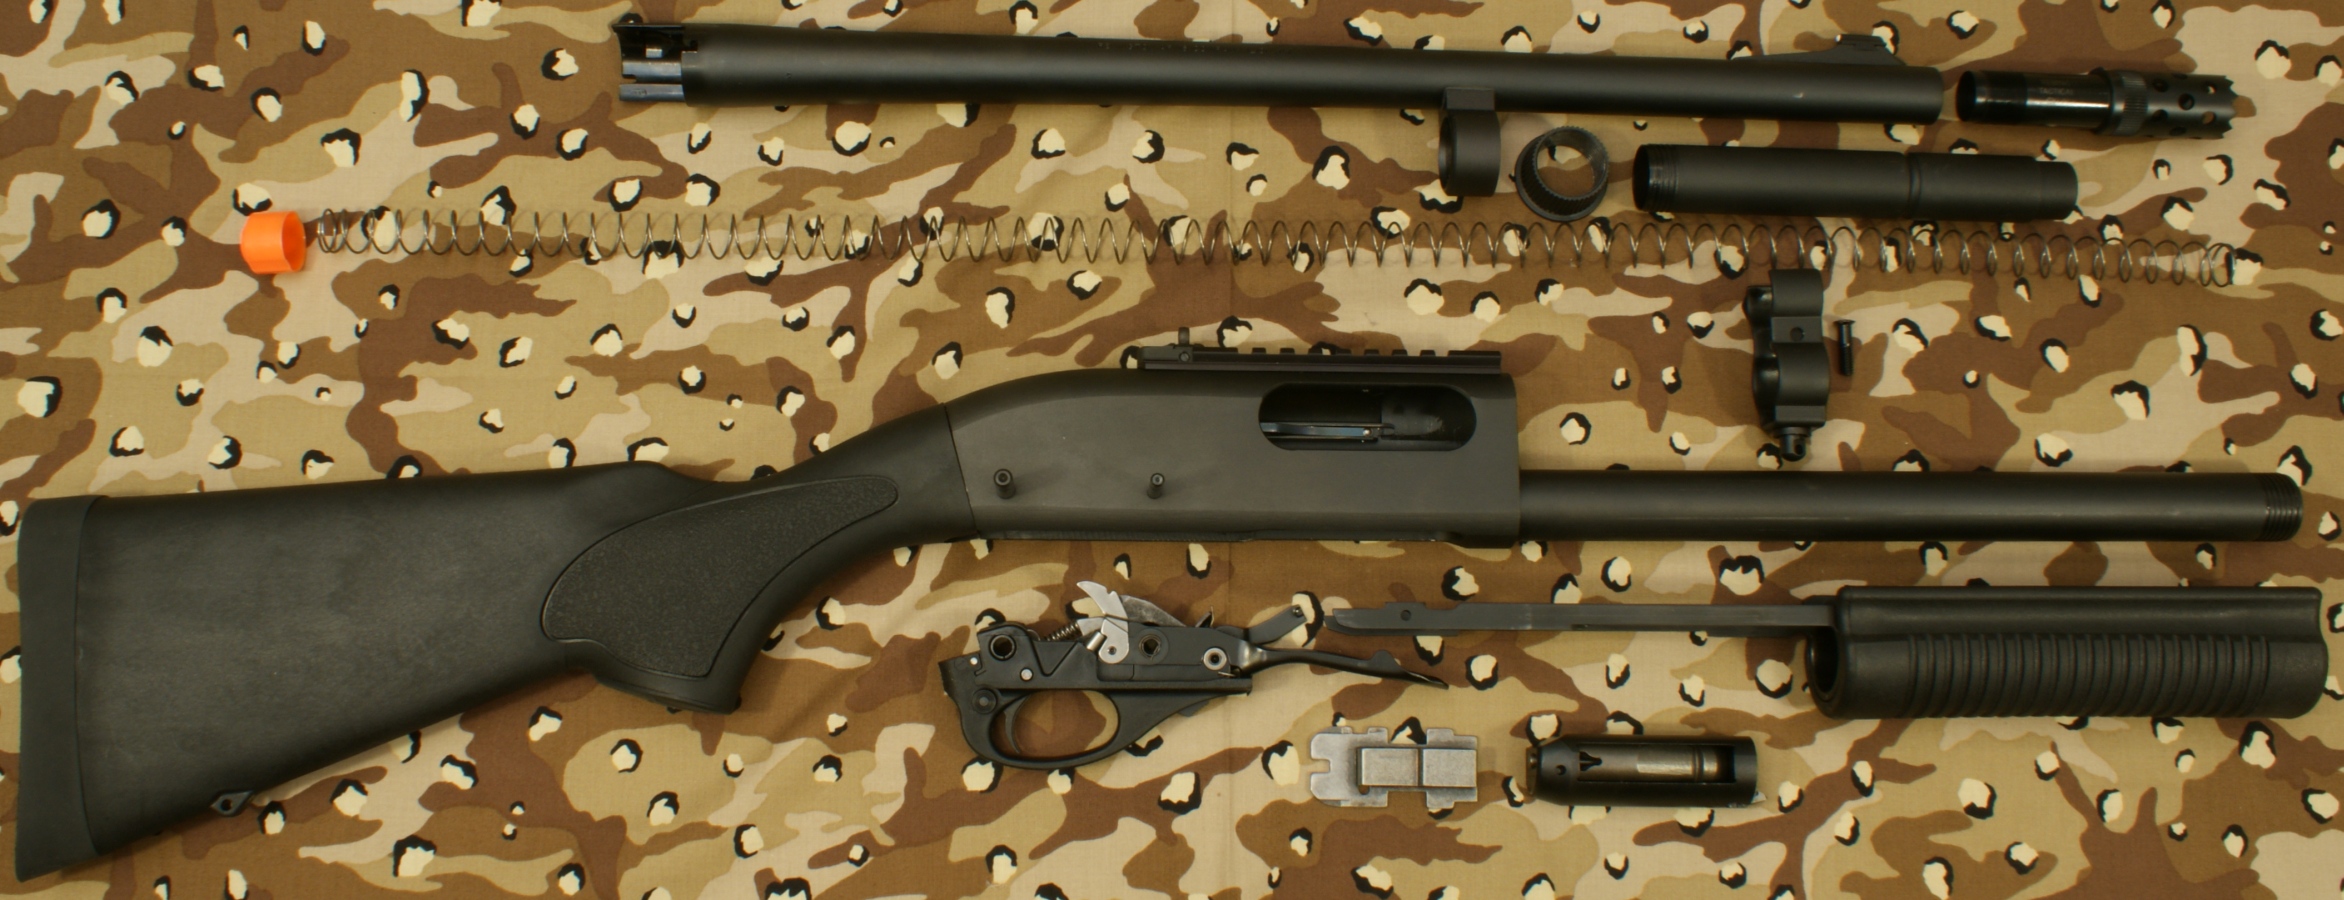
The Normal Disassembled Level for Cleaning
This is the level at which Remington identifies (per the Owner's Manual) to disassemble the shotgun for cleaning. The photo below shows all of these basic parts and assemblies. I also agree that you should be able to clean your shotgun at this level.
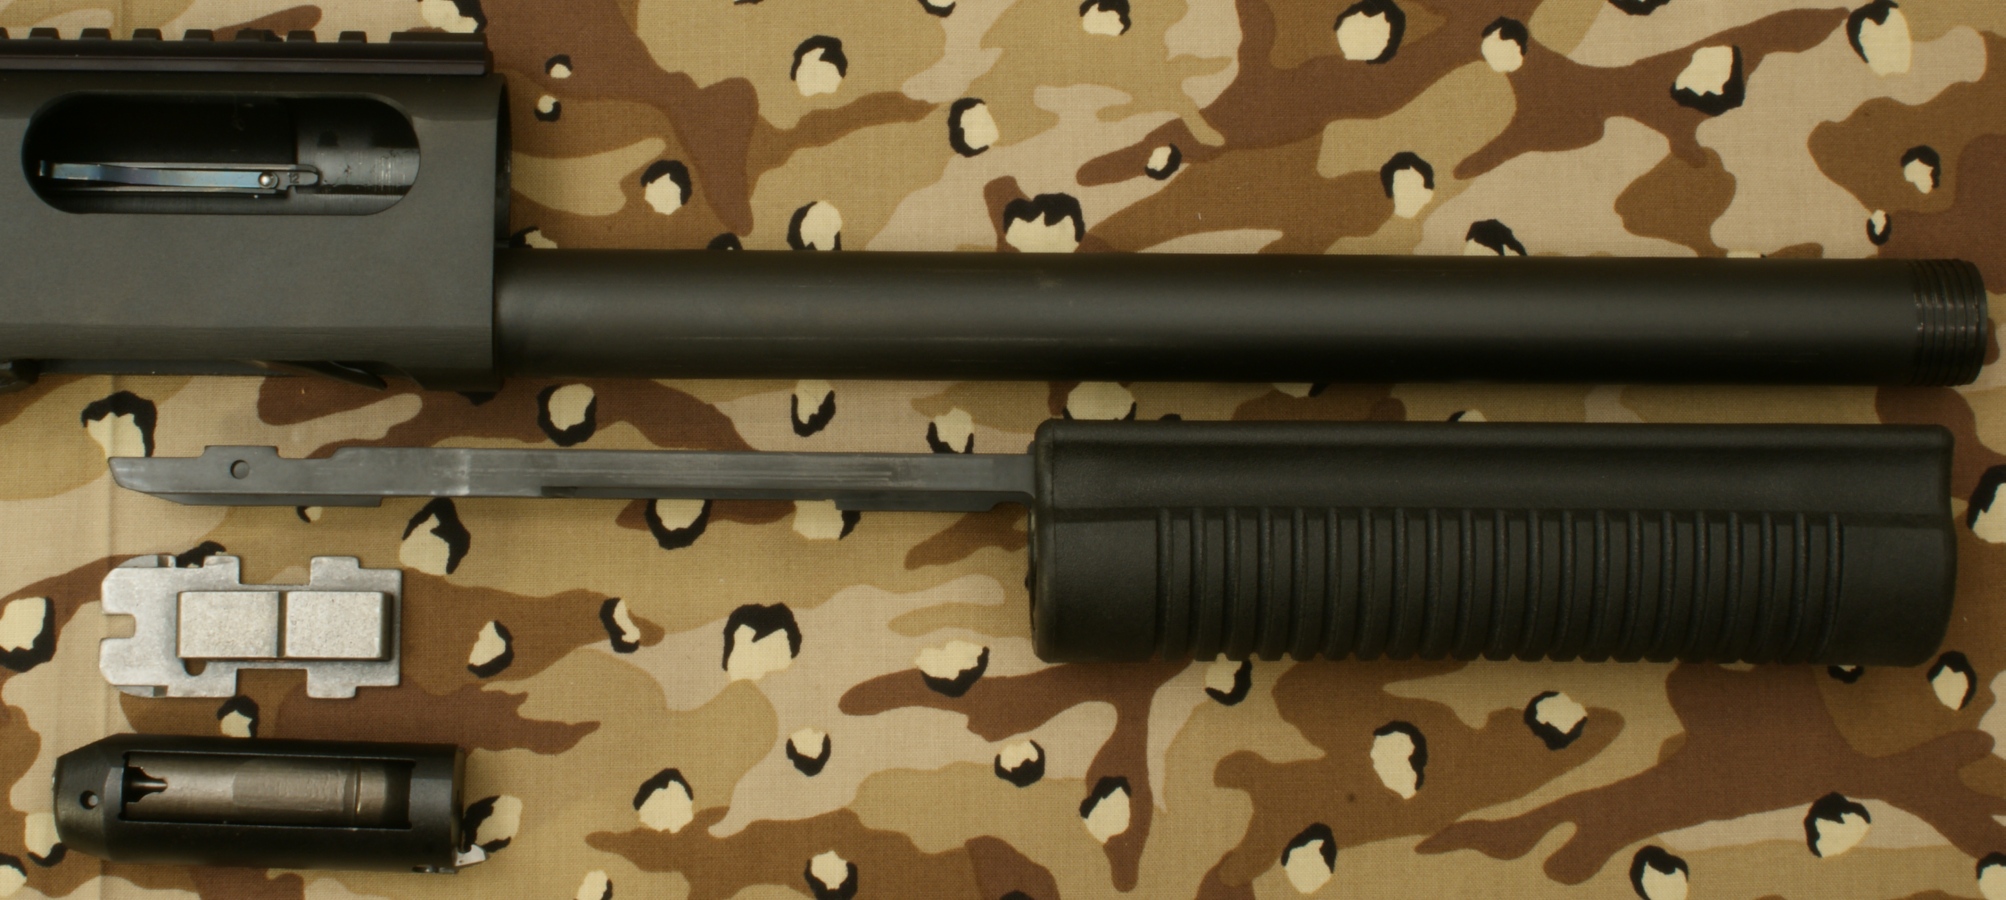
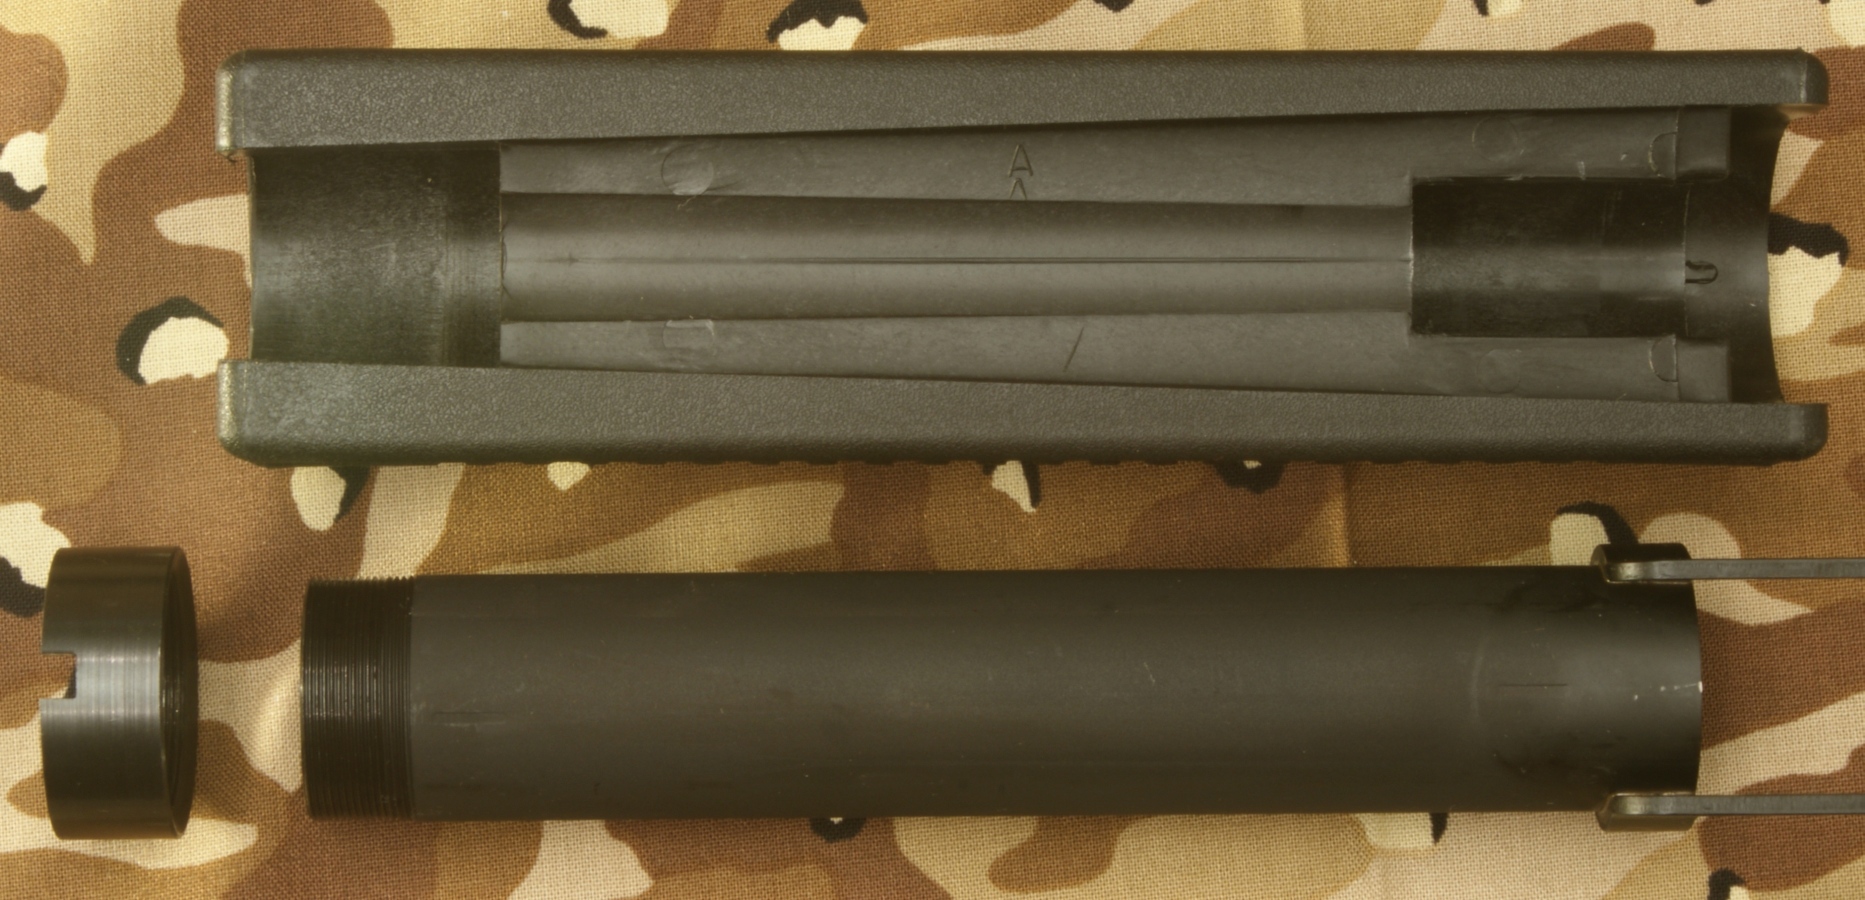
Removal of the Fore-end from Fore-end Tube
Unless you plan on replacing your fore-end with an aftermarket product, you would not need to remove it from the fore-end tube. If you decide you want to replace the fore-end, you unscrew the fore-end tube nut and then slide the fore-end tube out of the synthetic fore-end. I was able to place a small screwdriver across the two slots to loosen the tube nut.
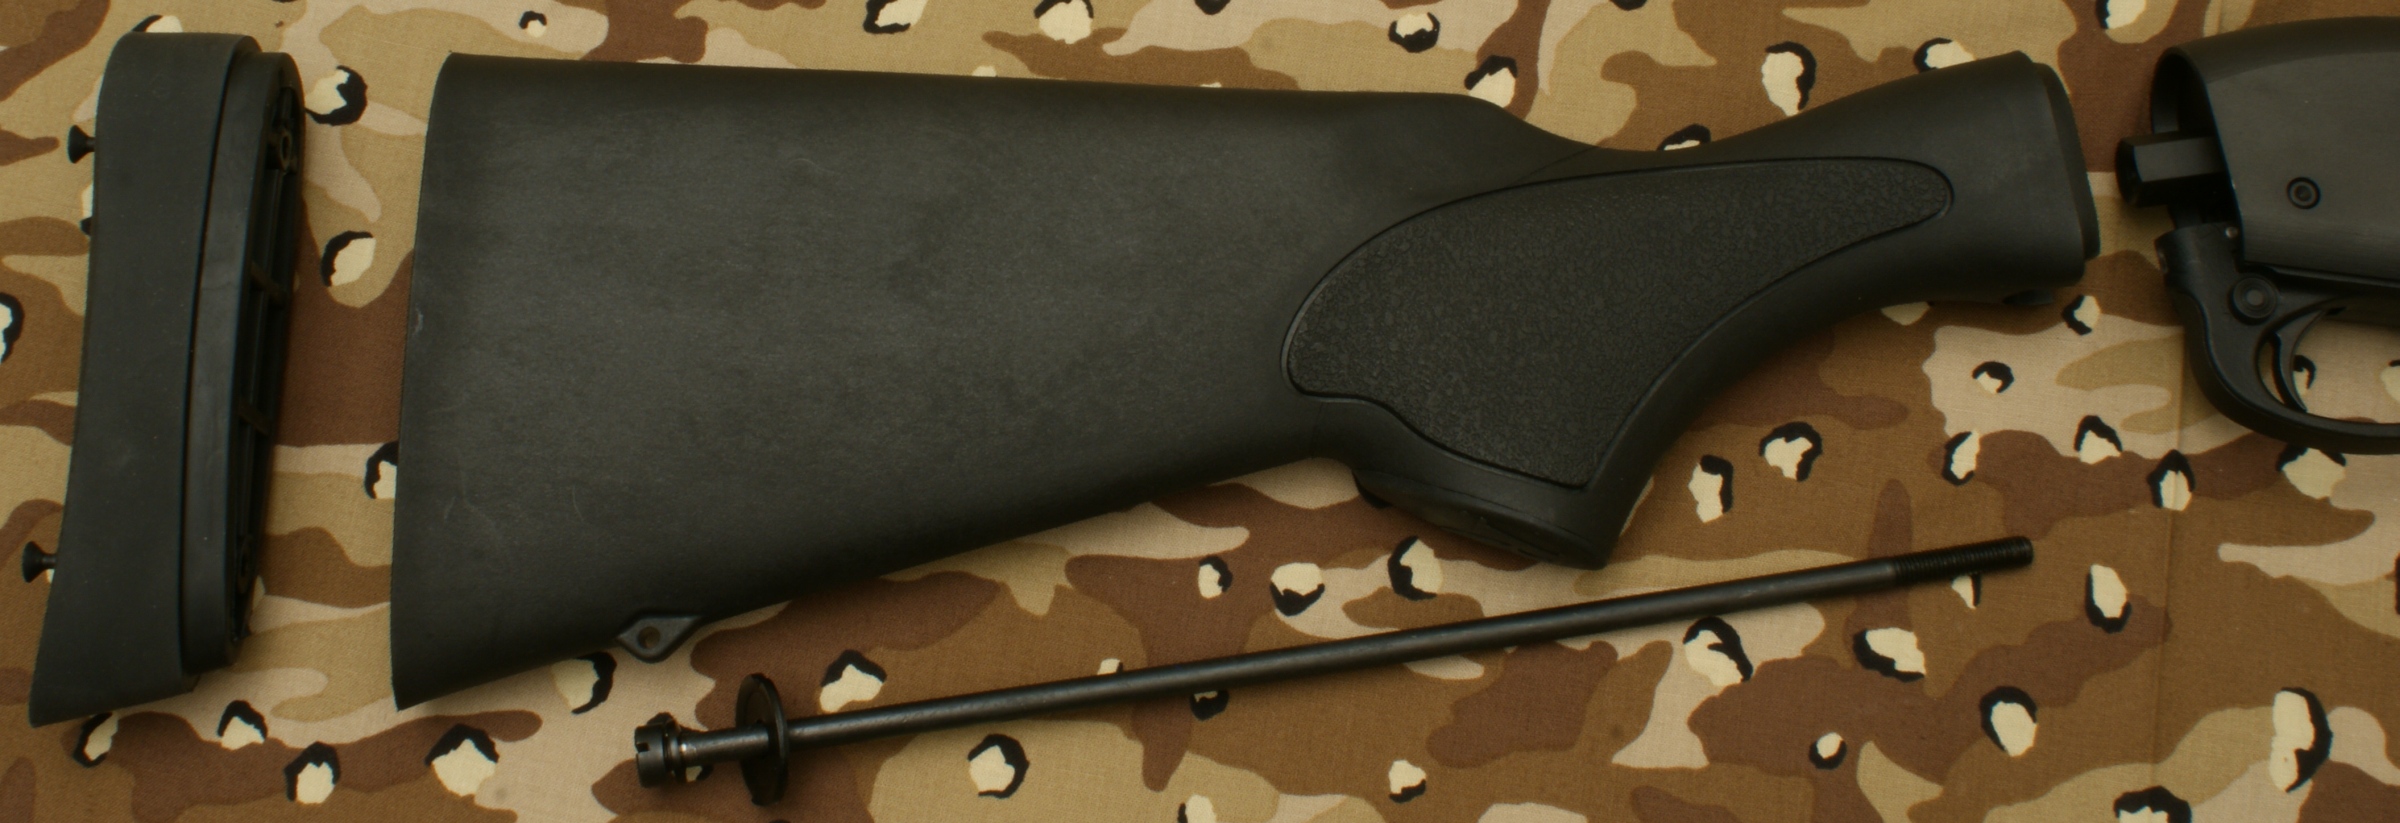
Removal of Buttstock
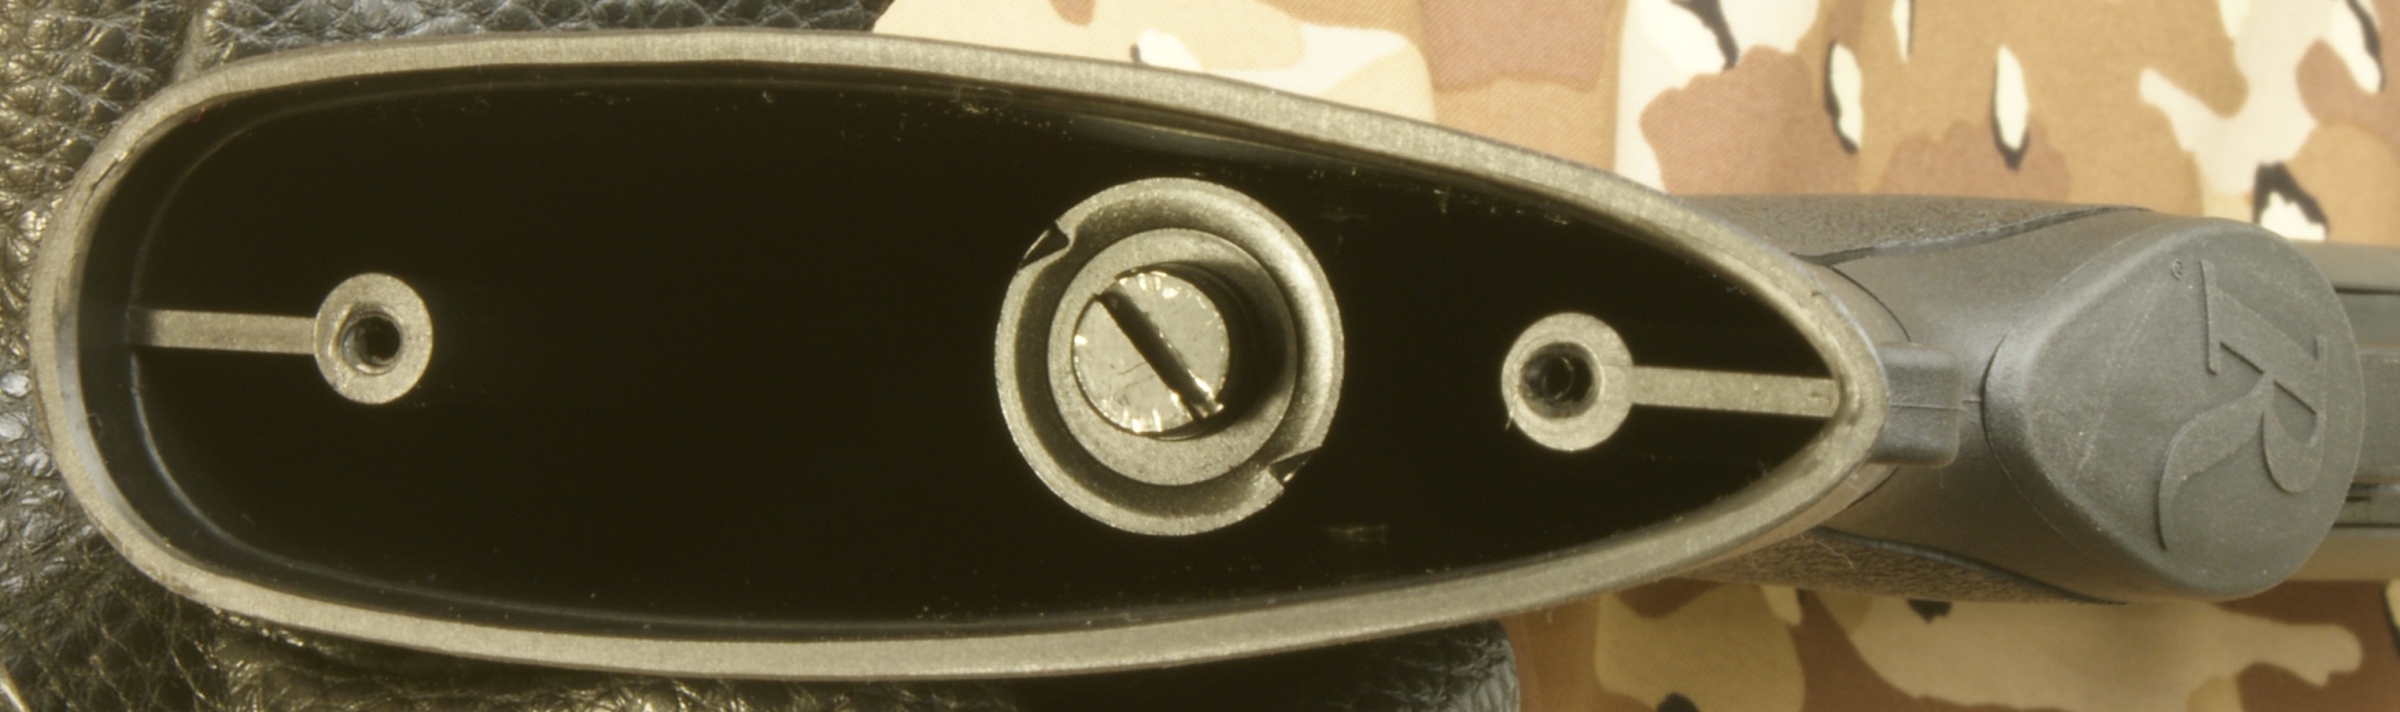
Just like the fore-end, removal of the buttstock is not required for normal cleaning, but you may want to remove the buttstock if you choose to replace it with an aftermarket product. To remove the buttstock, you first remove the rubber butt pad. This butt pad is held in place by two drywall type screws.
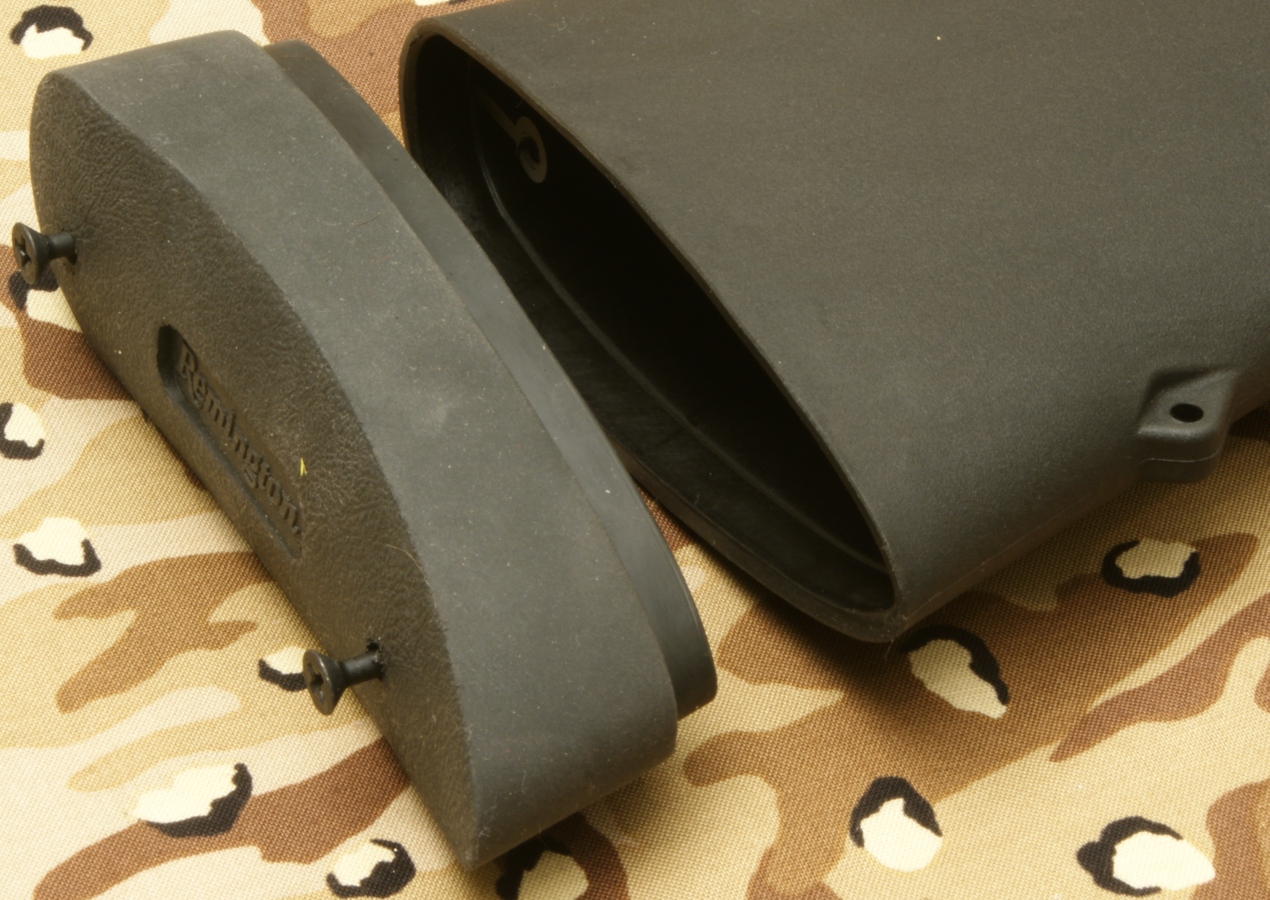
Under the butt pad, you see the head of the stock bolt. Once you remove the stock bolt, the buttstock will easily separate from the receiver.
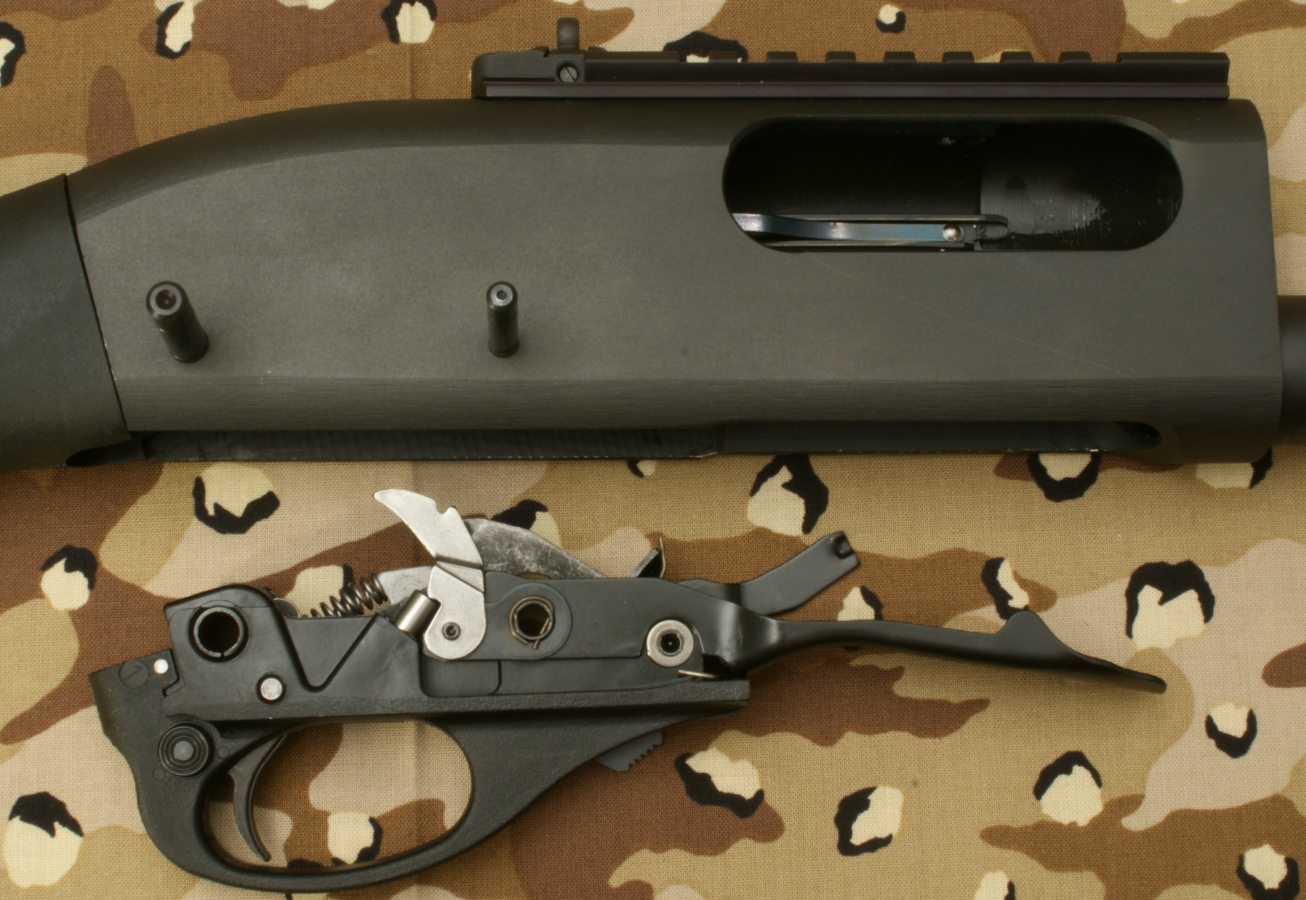
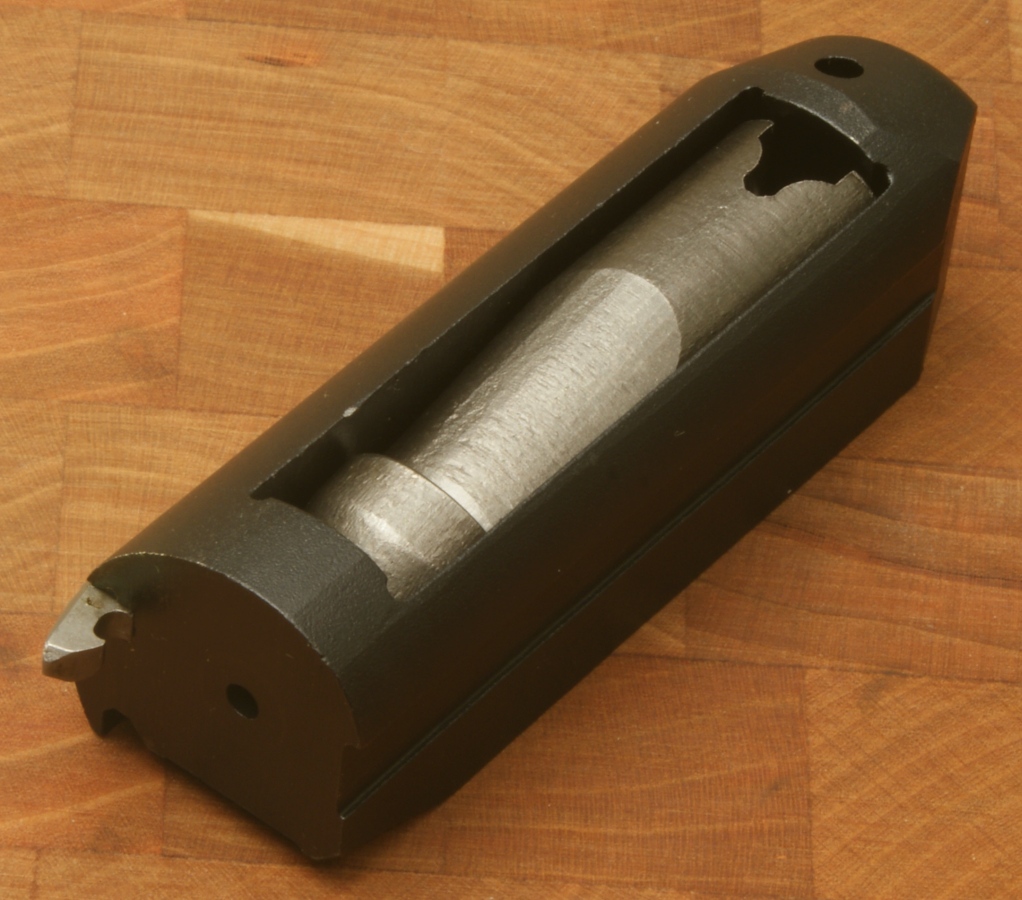
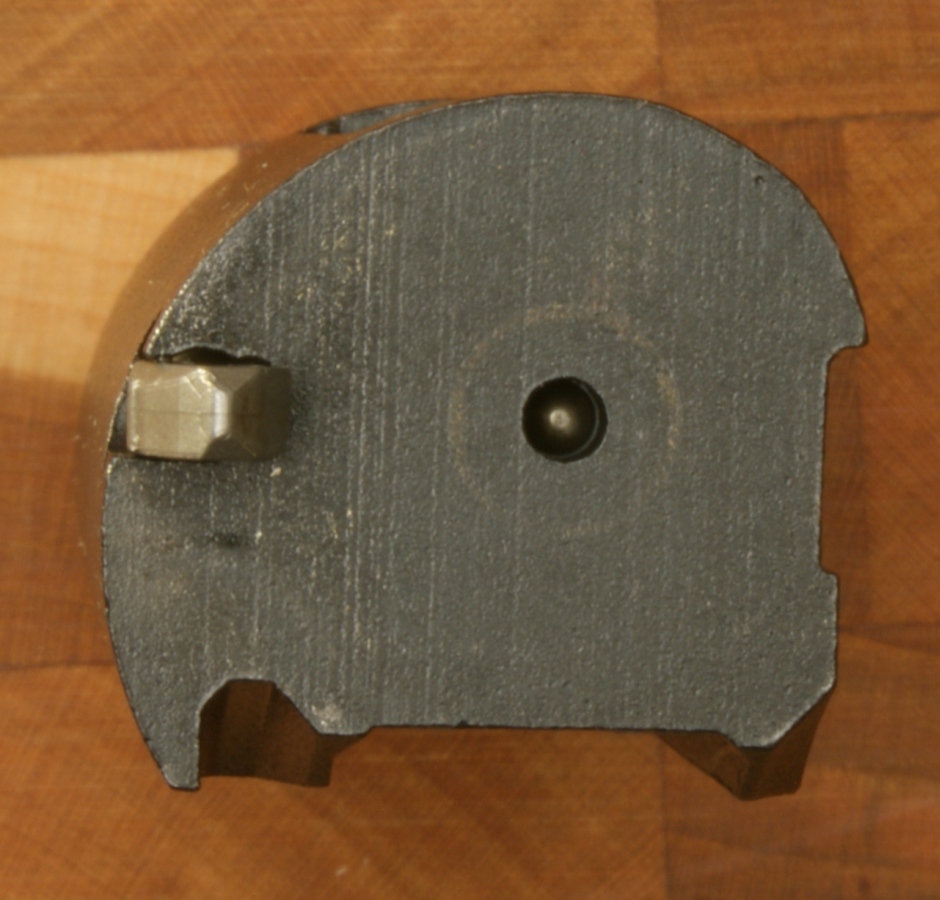
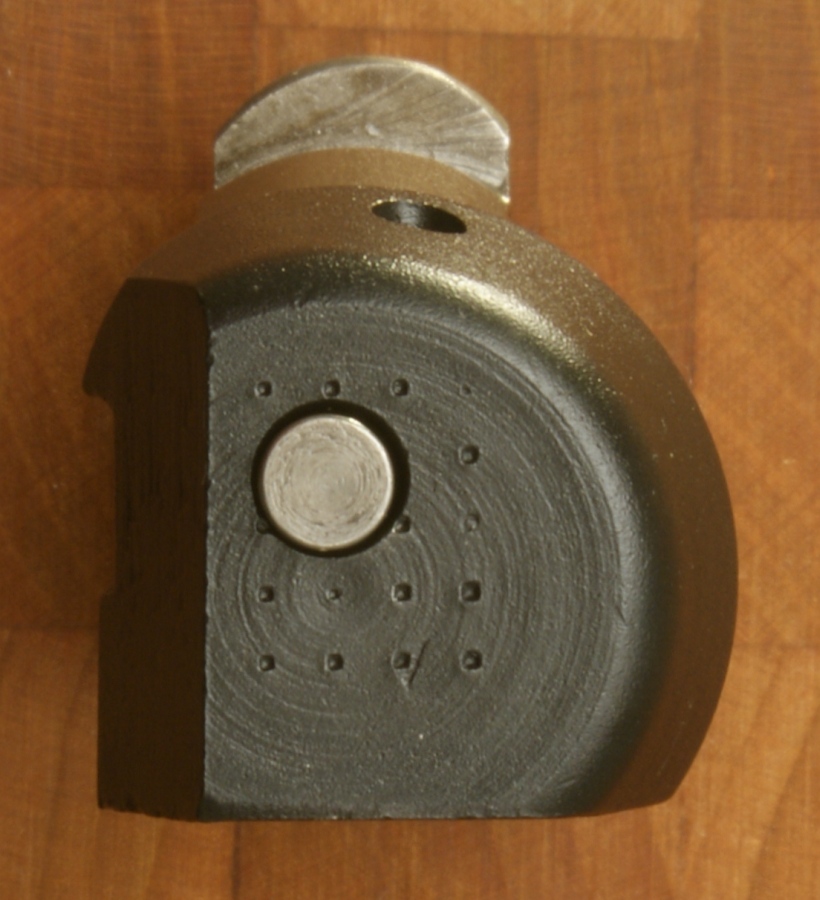
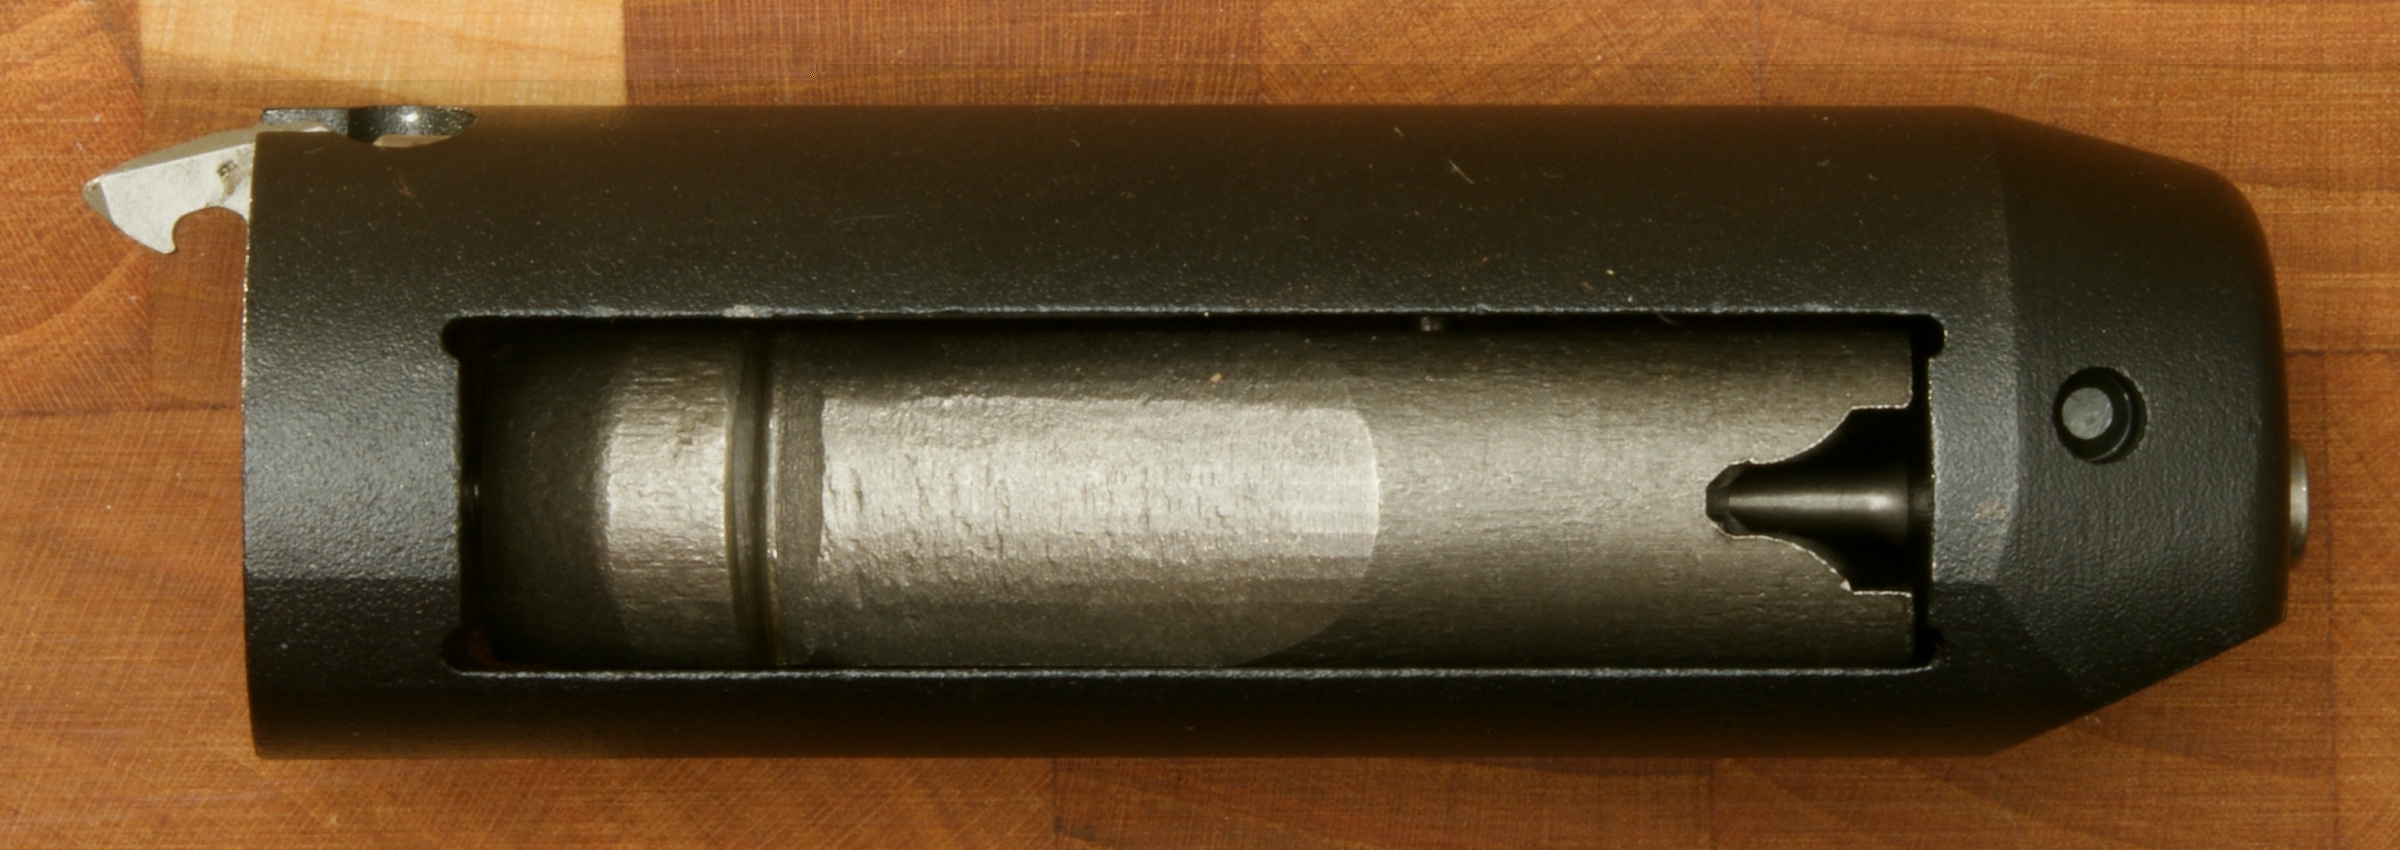
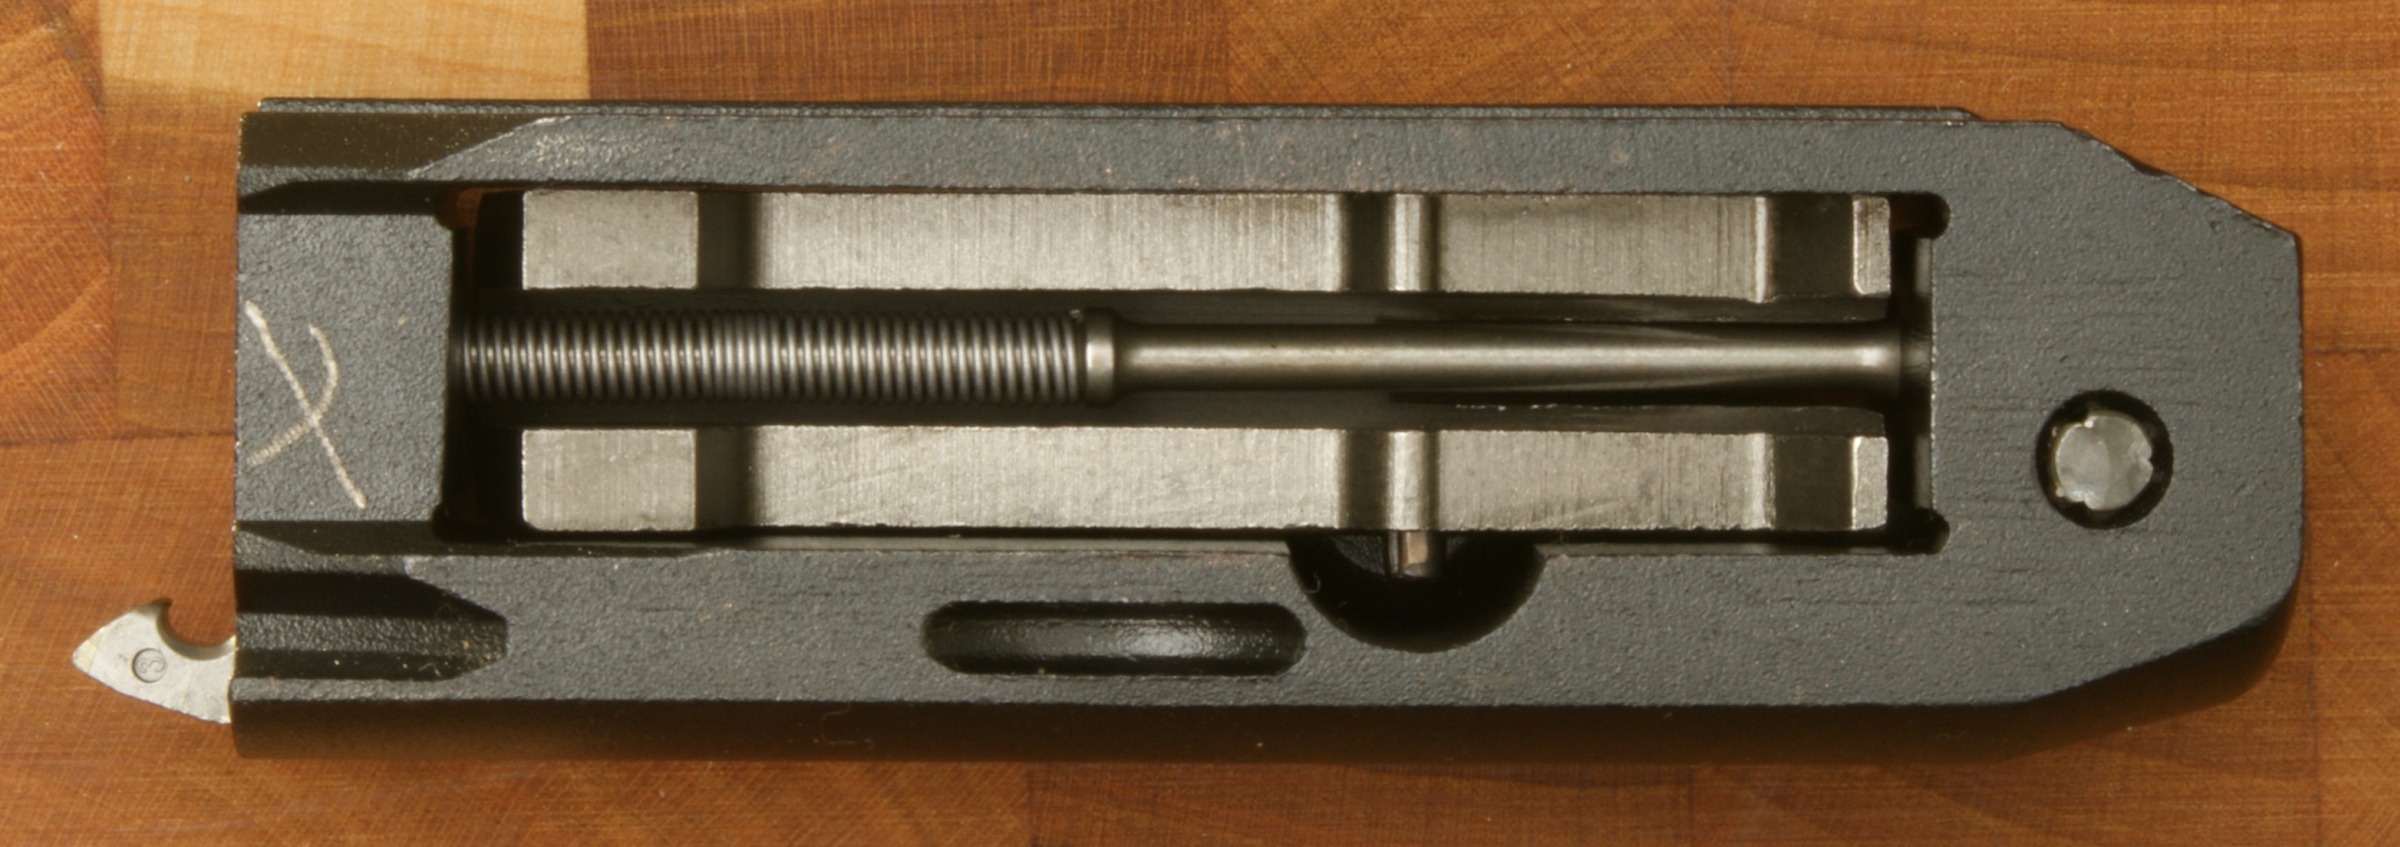
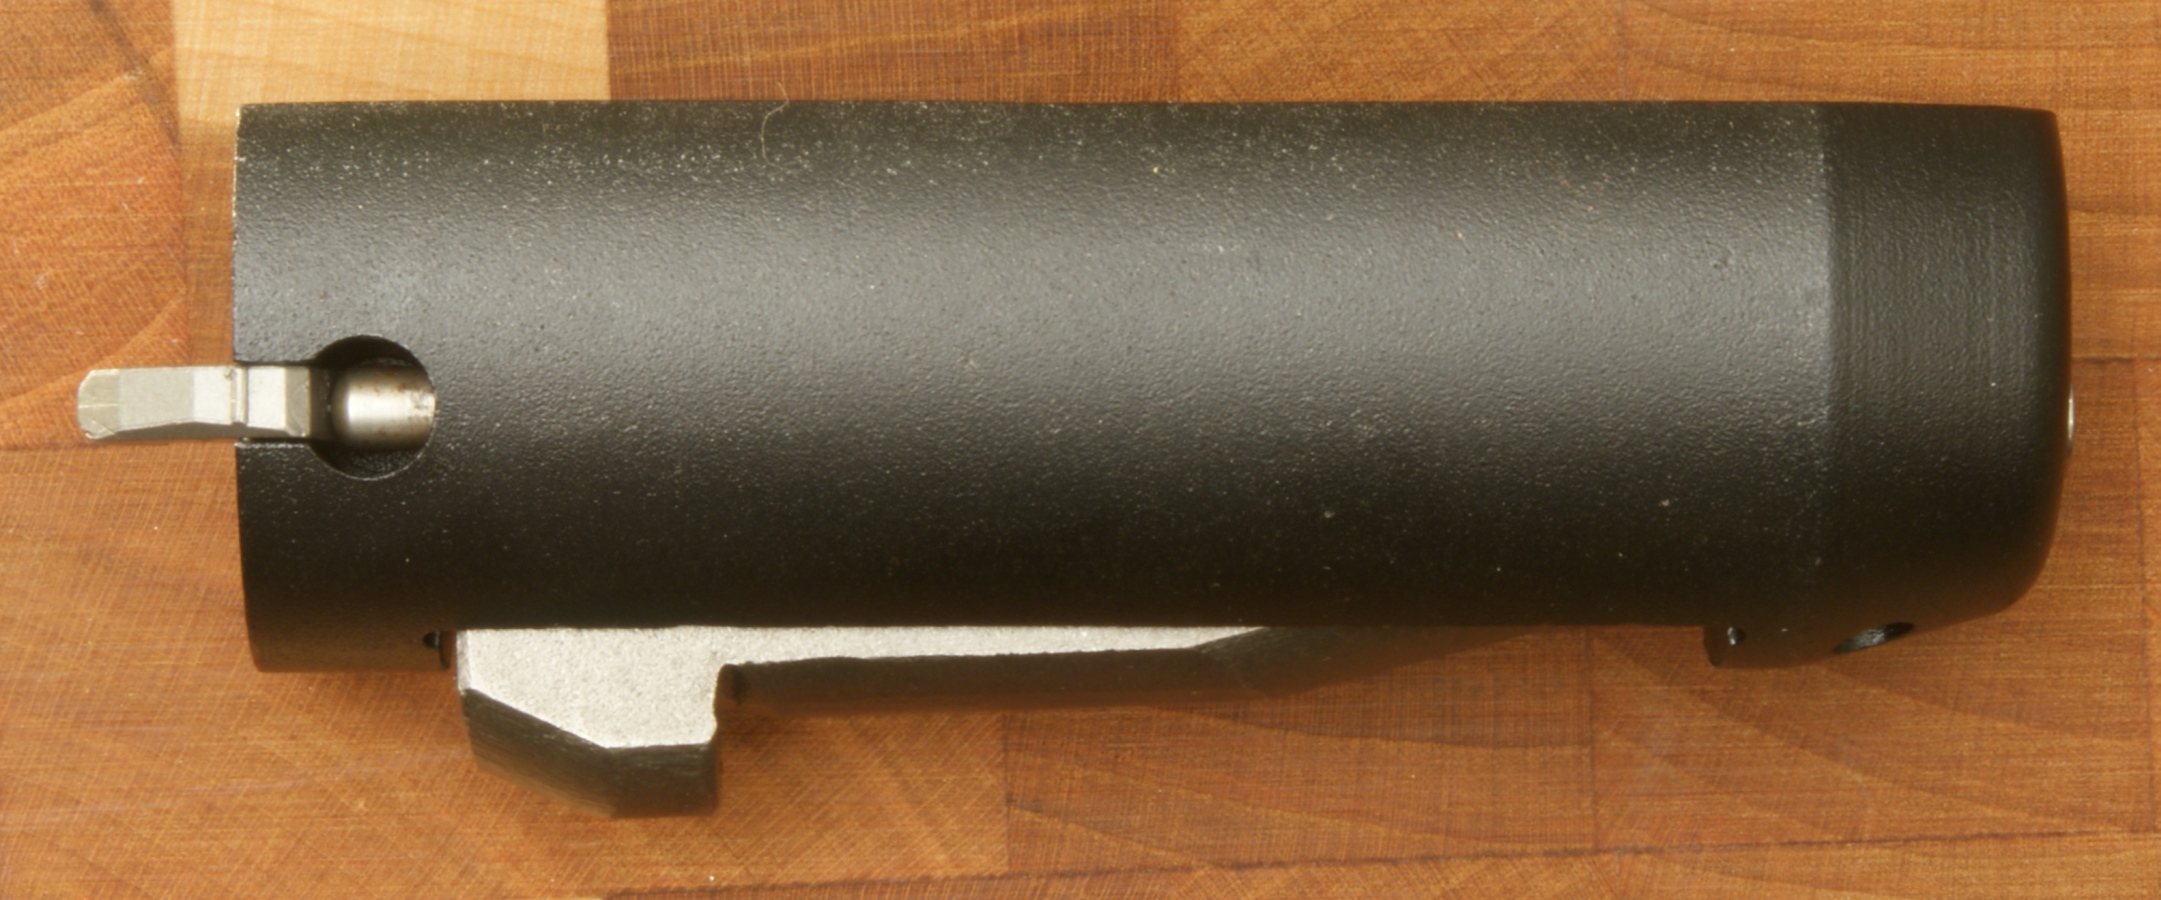
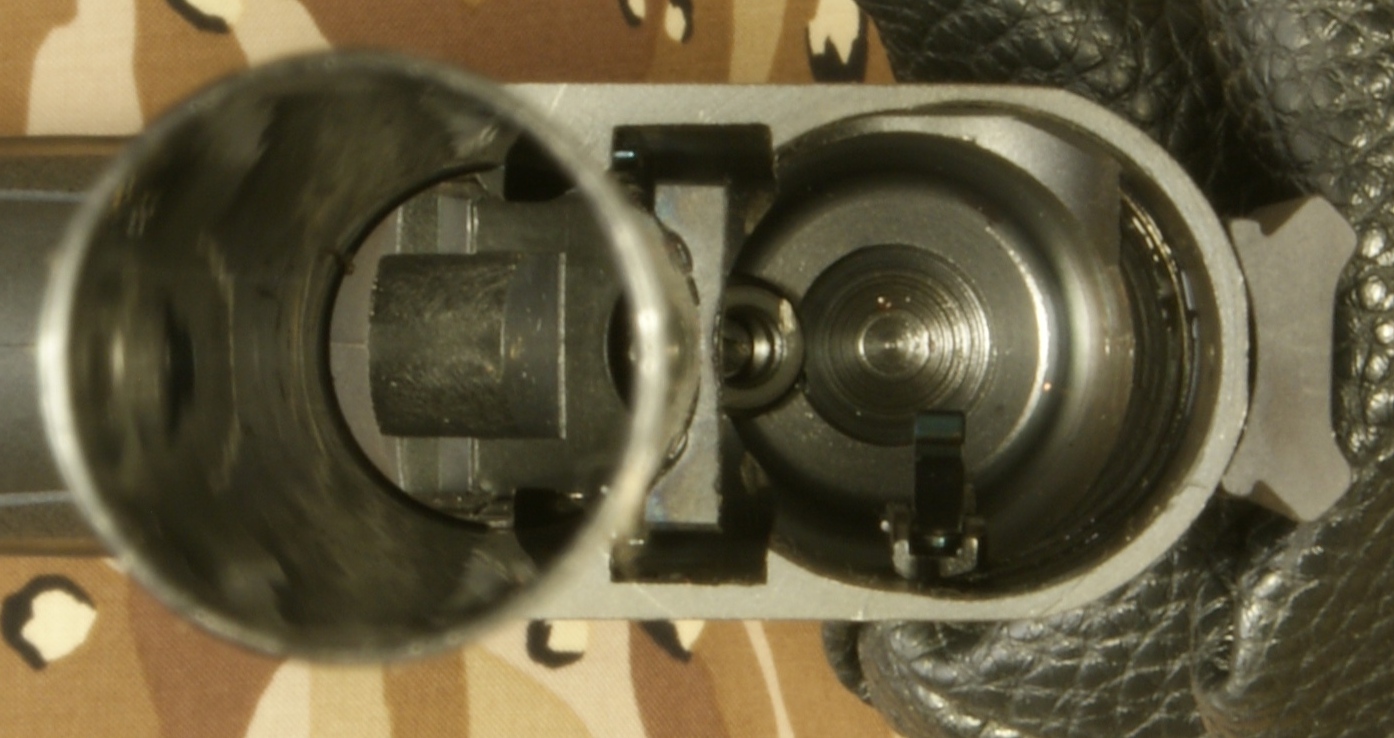
Breech Bolt Assembly
The next series of photos is of the breech bolt assembly. Although further disassembly is possible, you should be able to clean the assembly with application of a cleaning solvent and brush. The key components that make up this assembly are the breech bolt (black), locking block (silver), firing pin and spring, and the extractor.

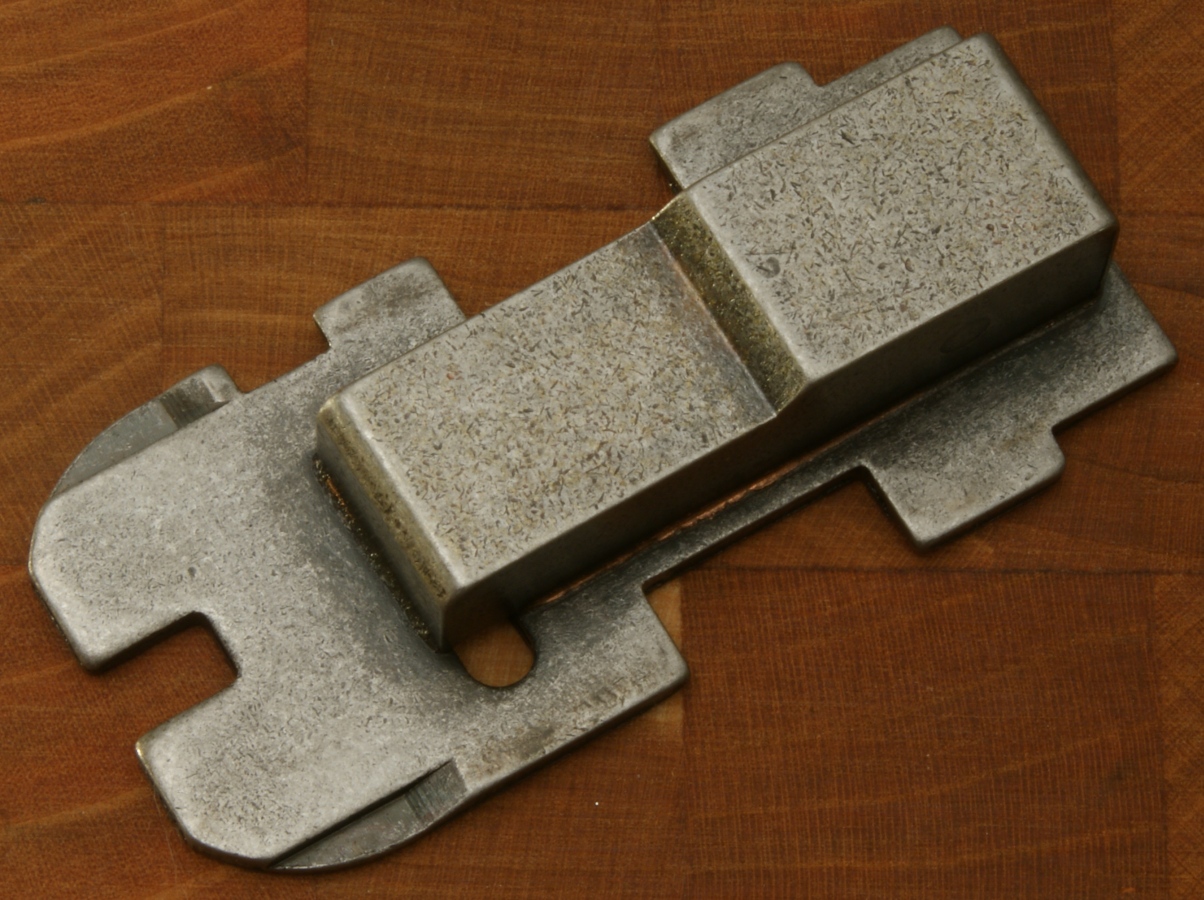
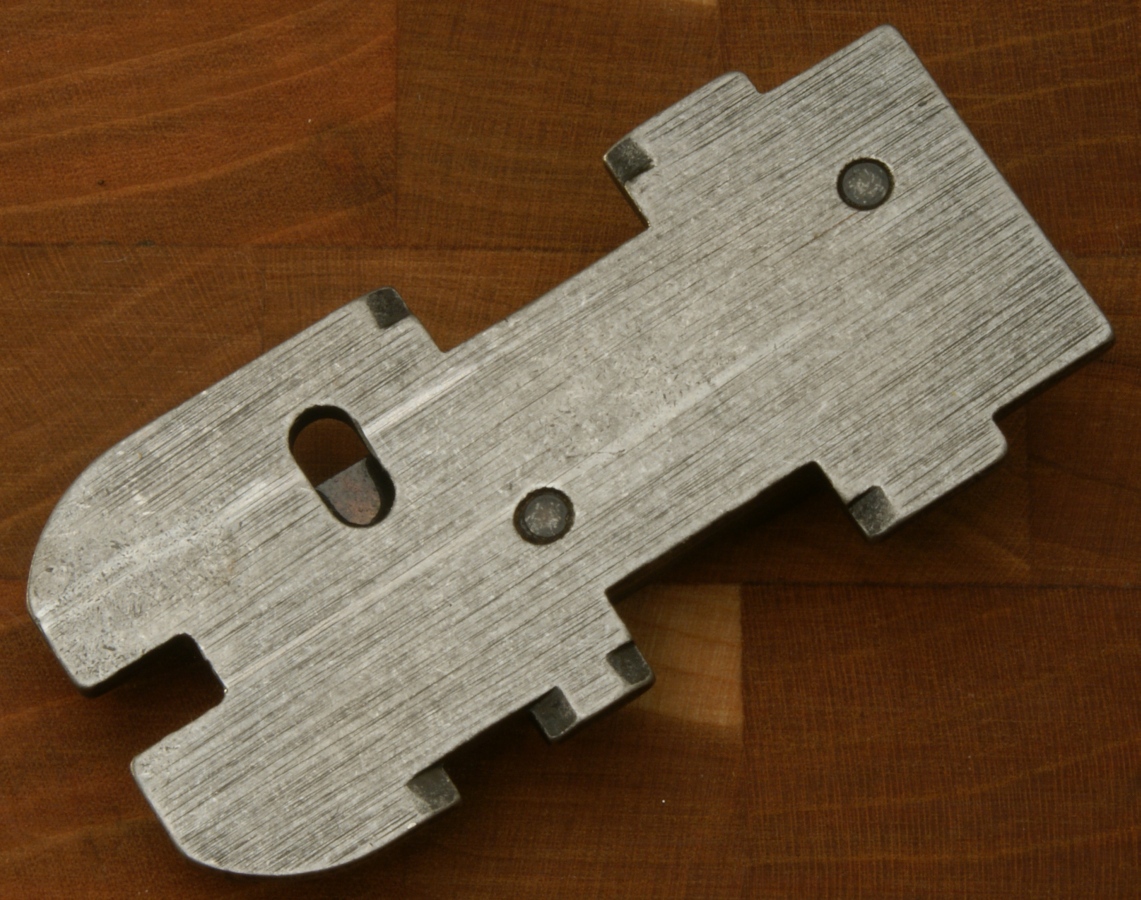
Slide Assembly
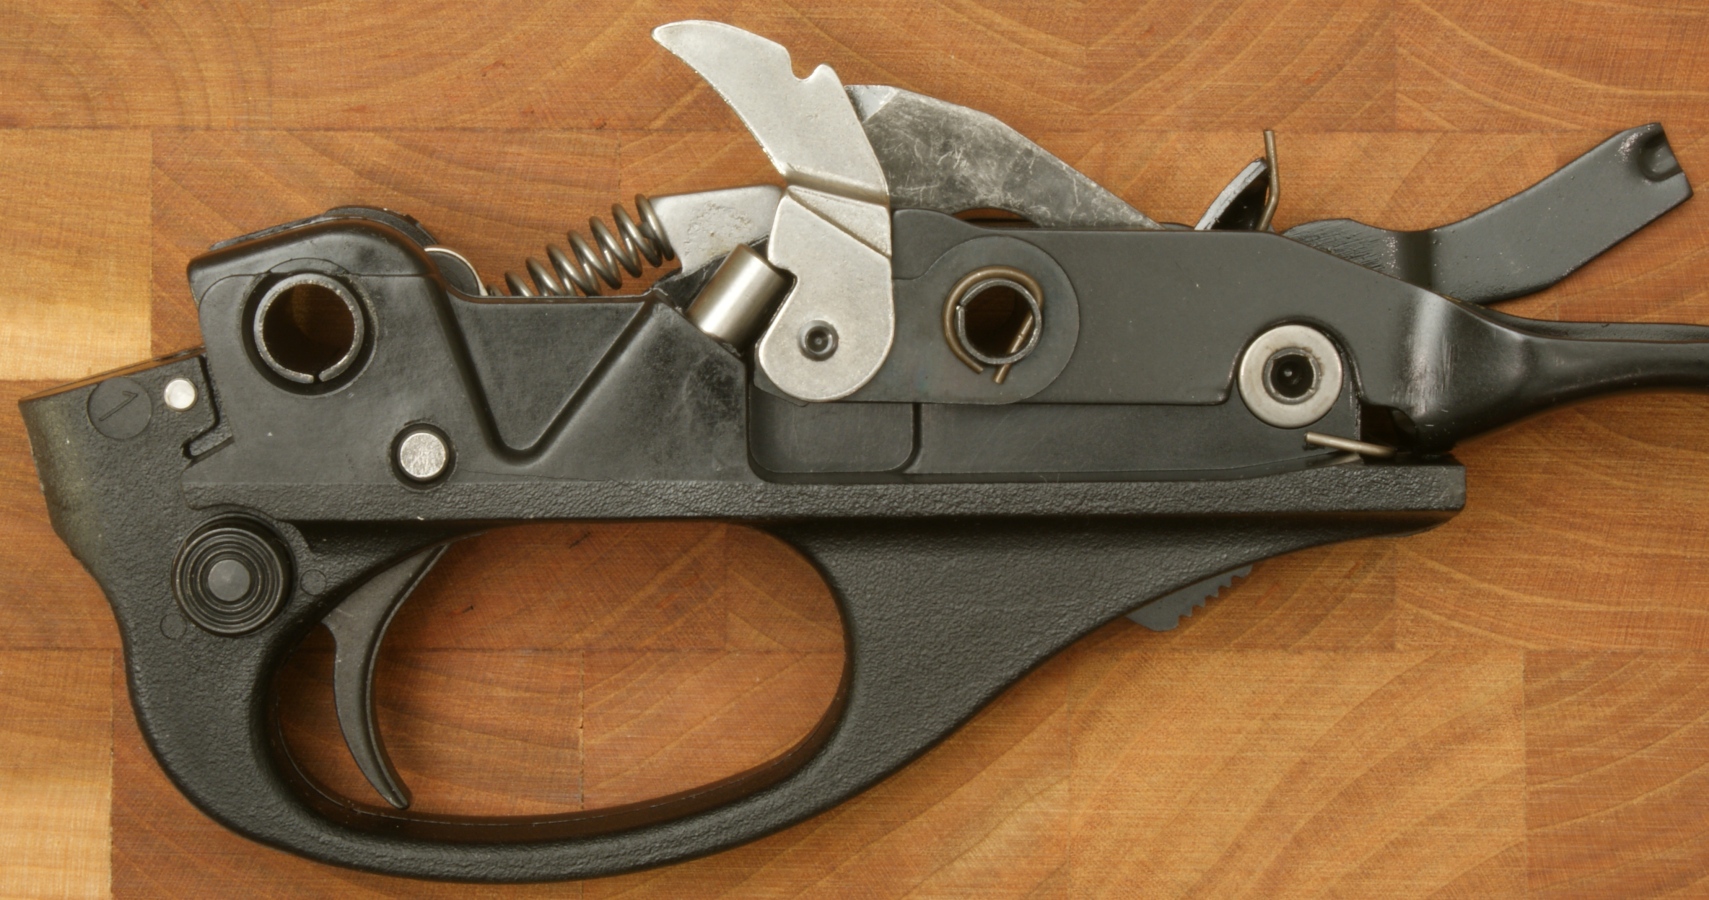
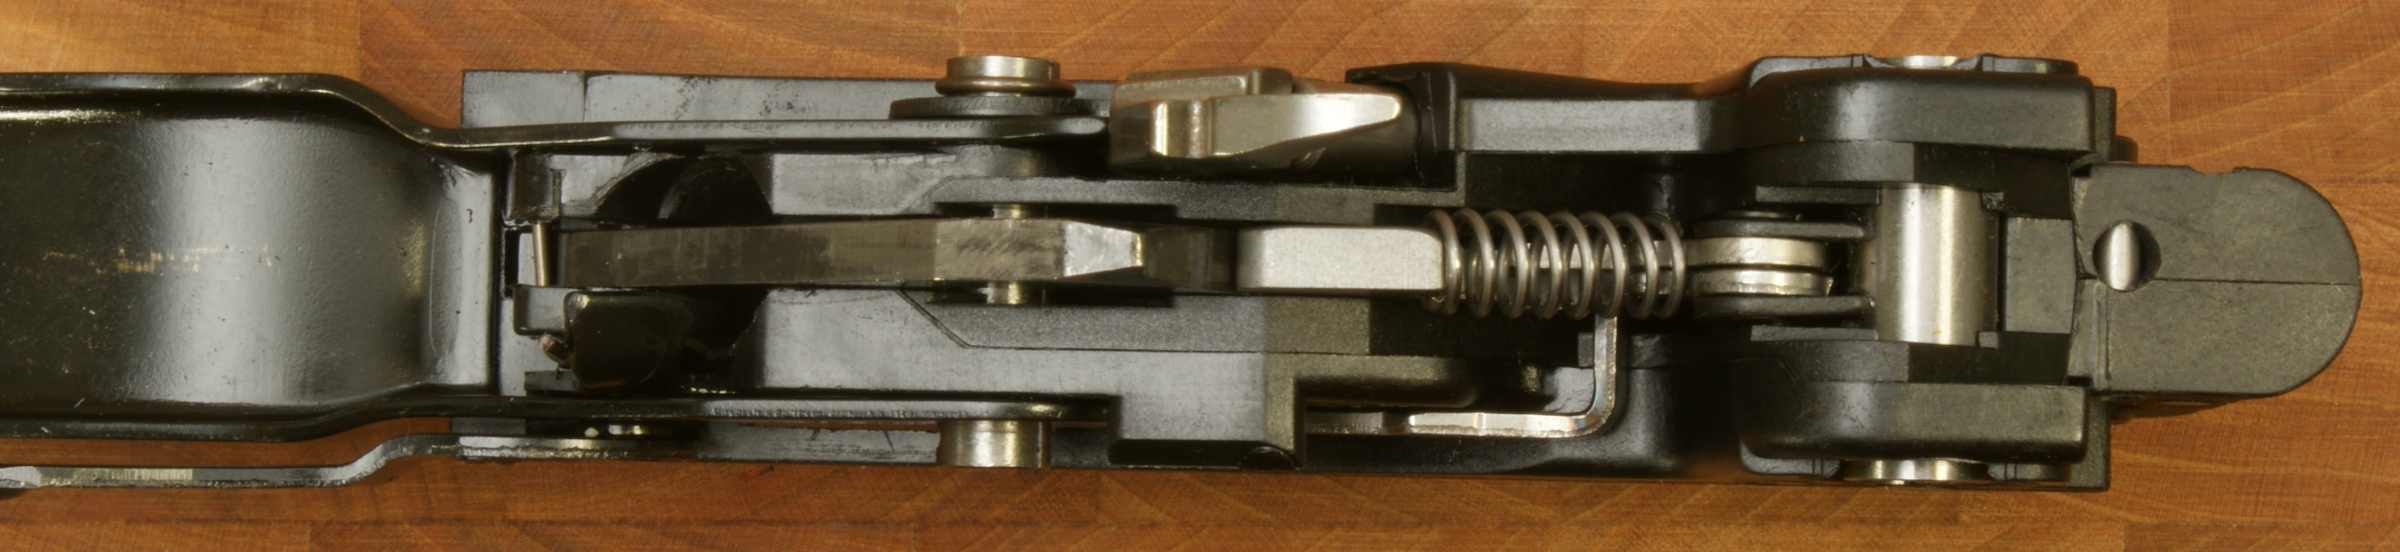
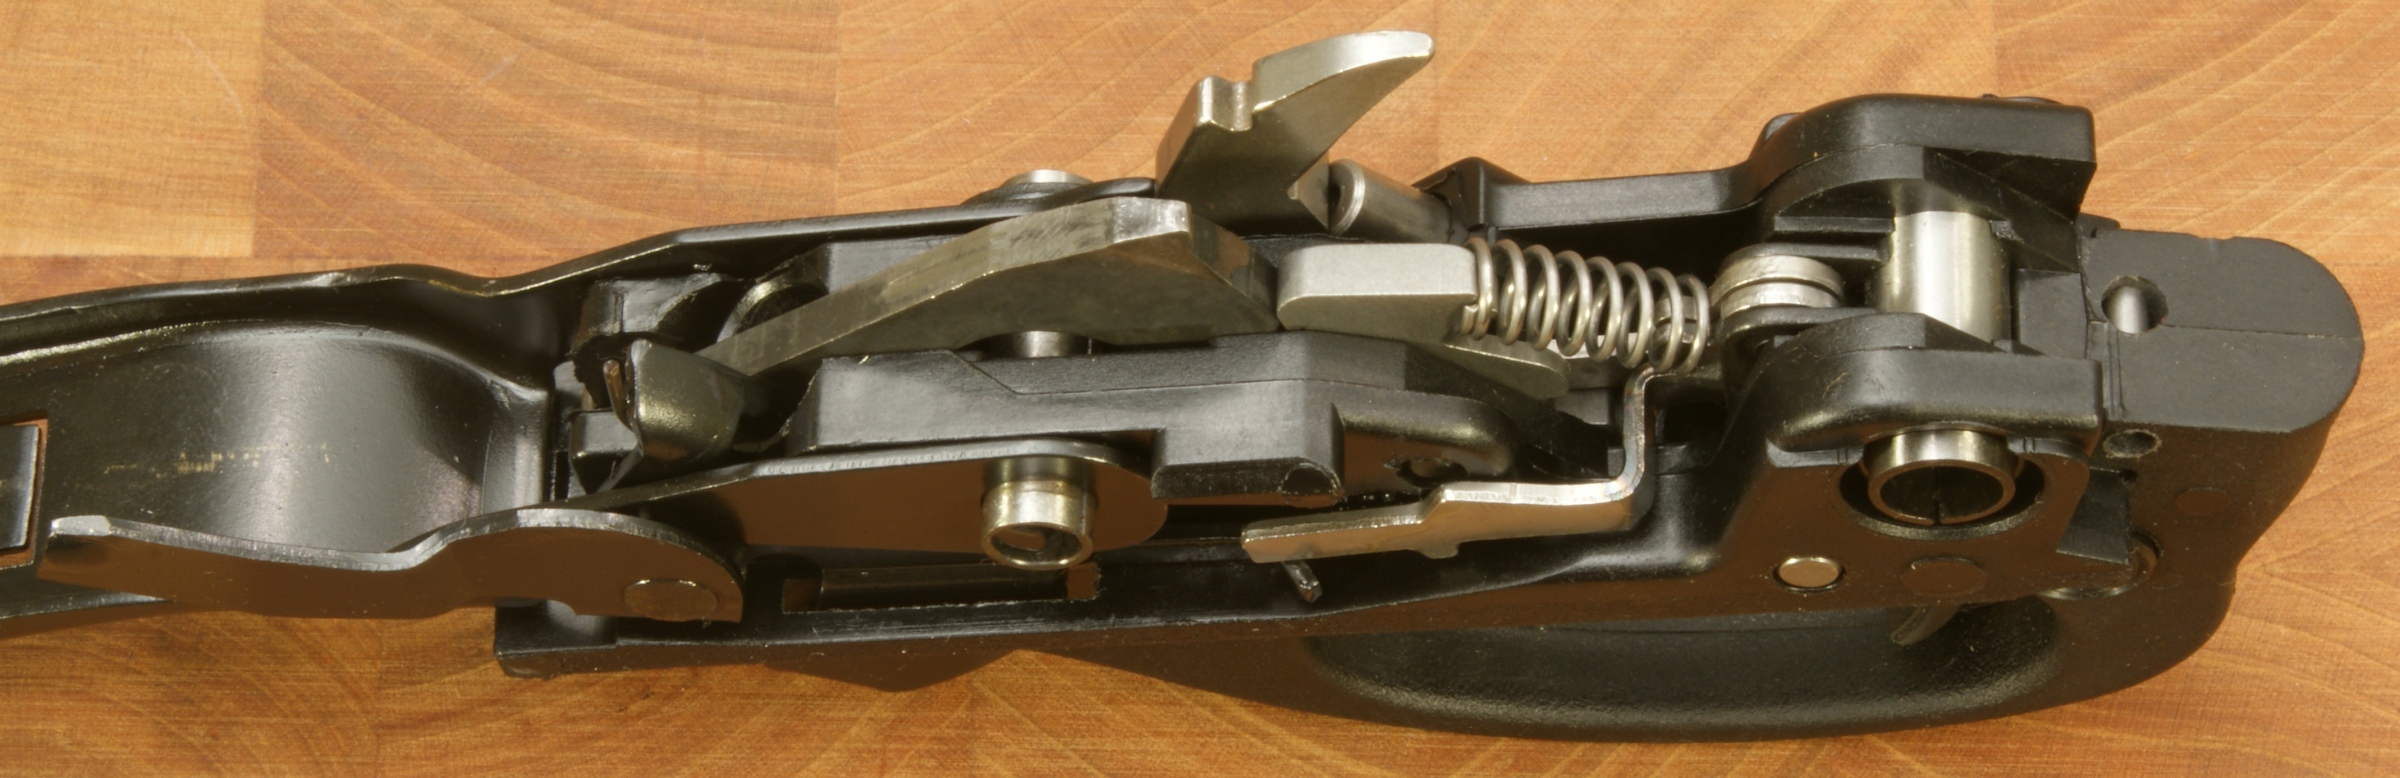
Trigger Assembly
The next several photos show the trigger assembly (shown with hammer cocked). There are 29 parts (according to the Owner's Manual) that make up this assembly so I will not make an attempt to list them all, but the key features are the trigger plate (synthetic housing), trigger, safety, hammer, action bar lock, and carrier.

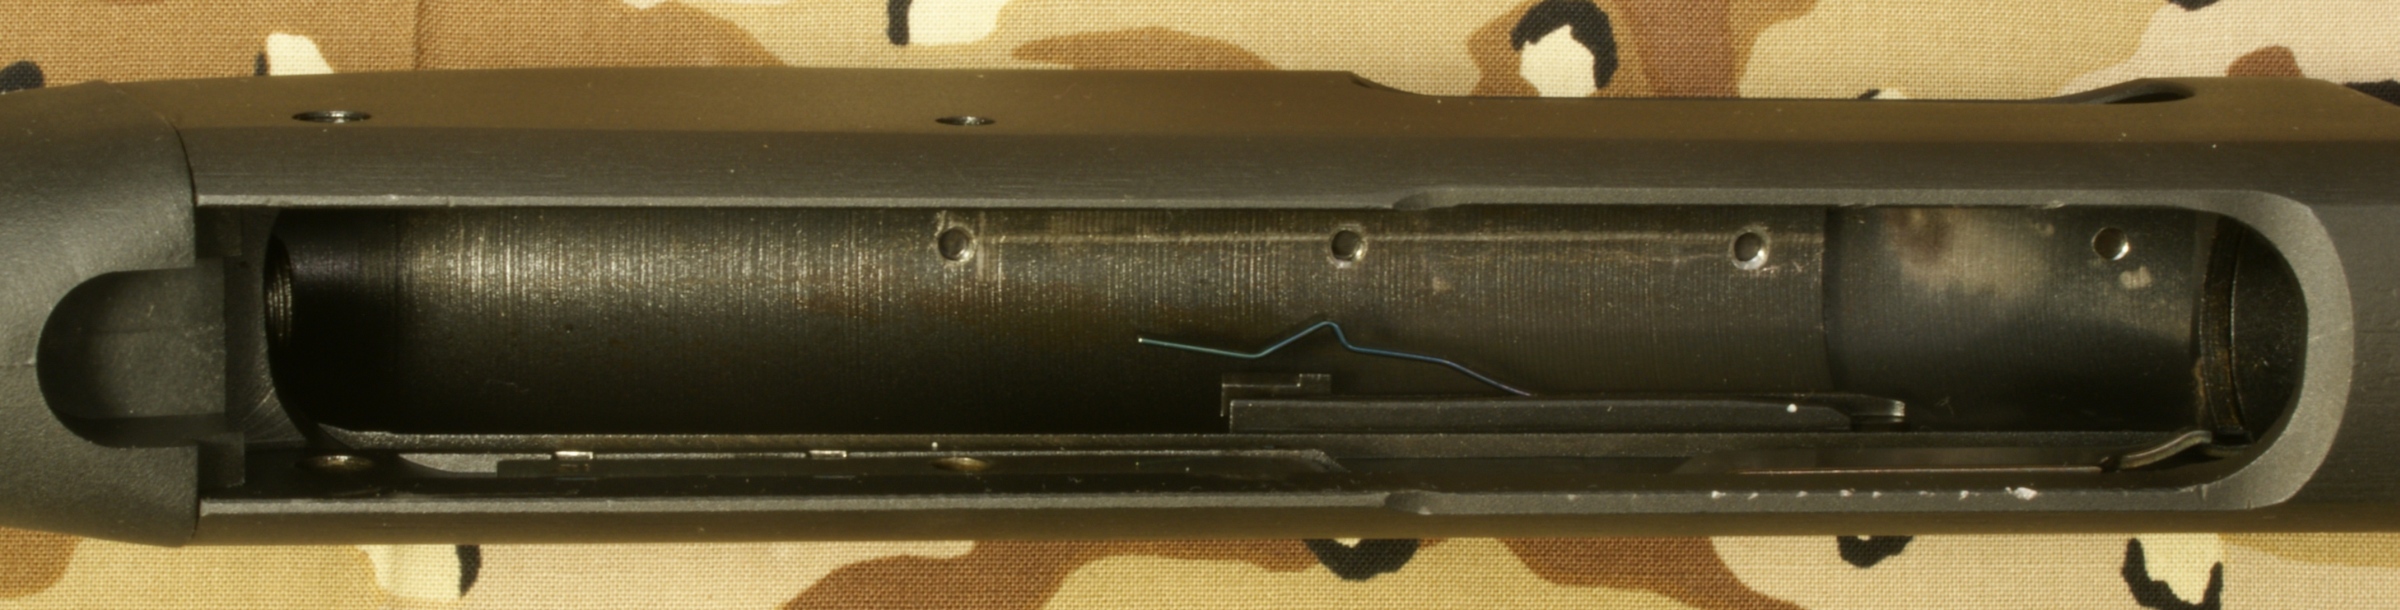
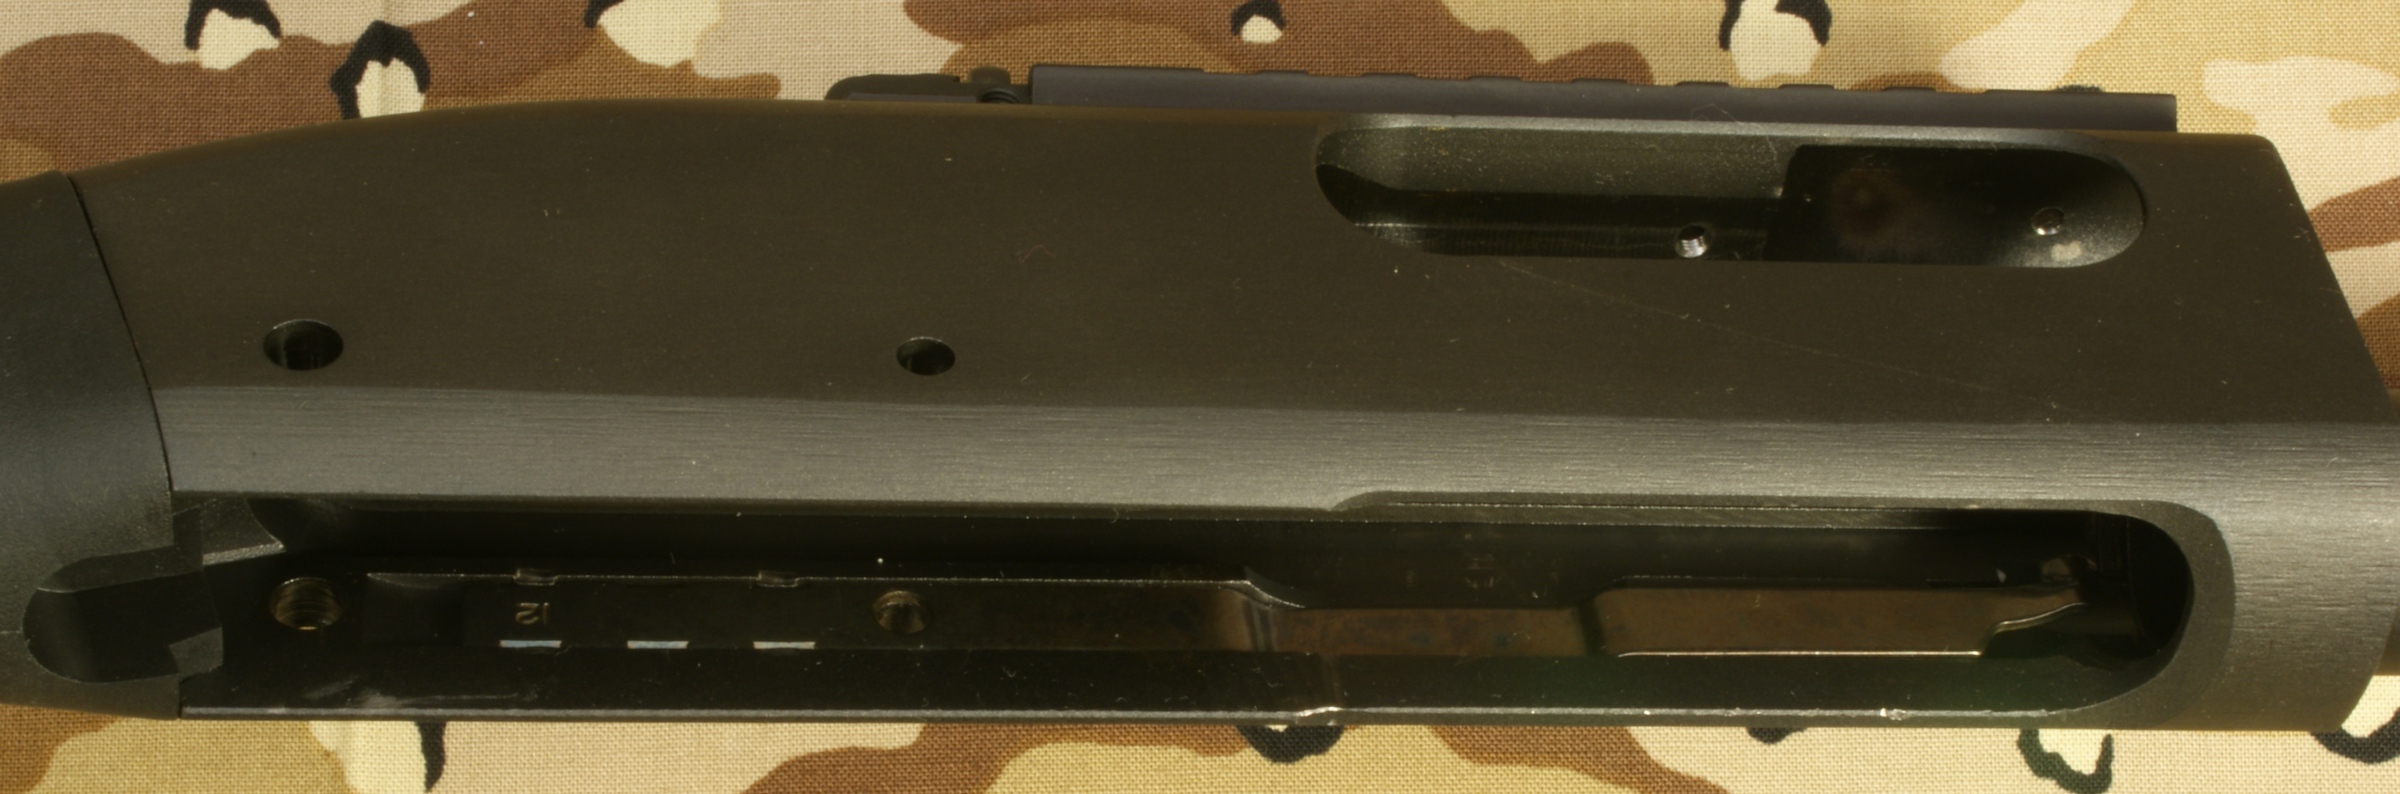
Receiver
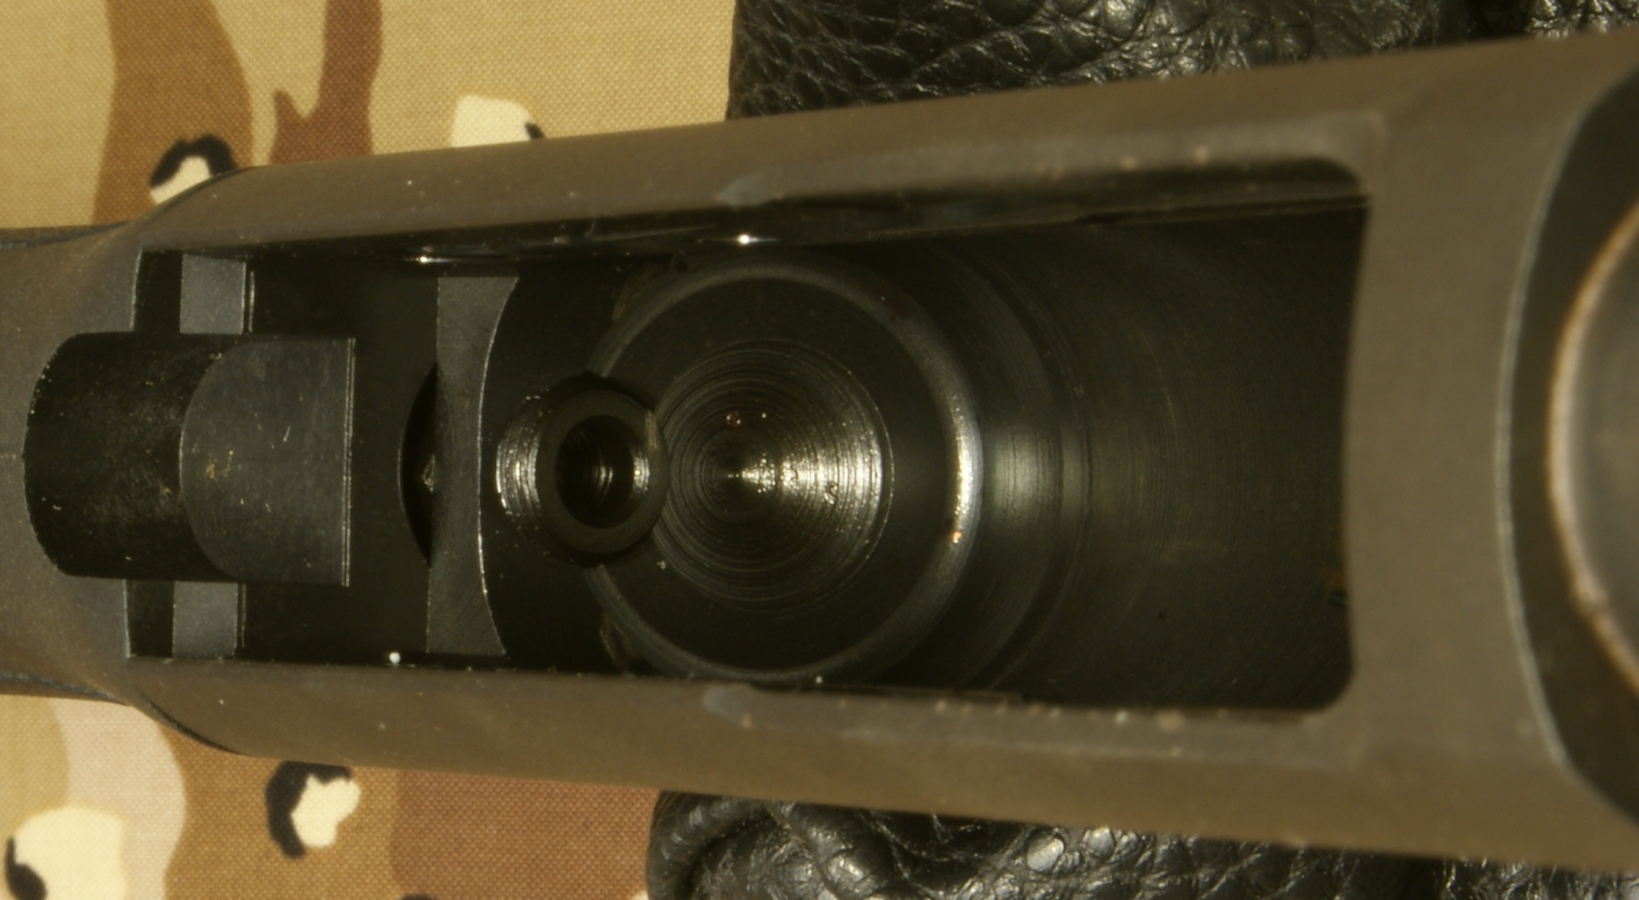
The next set of photos show the receiver assembly. The components that make up this assembly are the receiver, ejector, shell latches, and receiver stud.
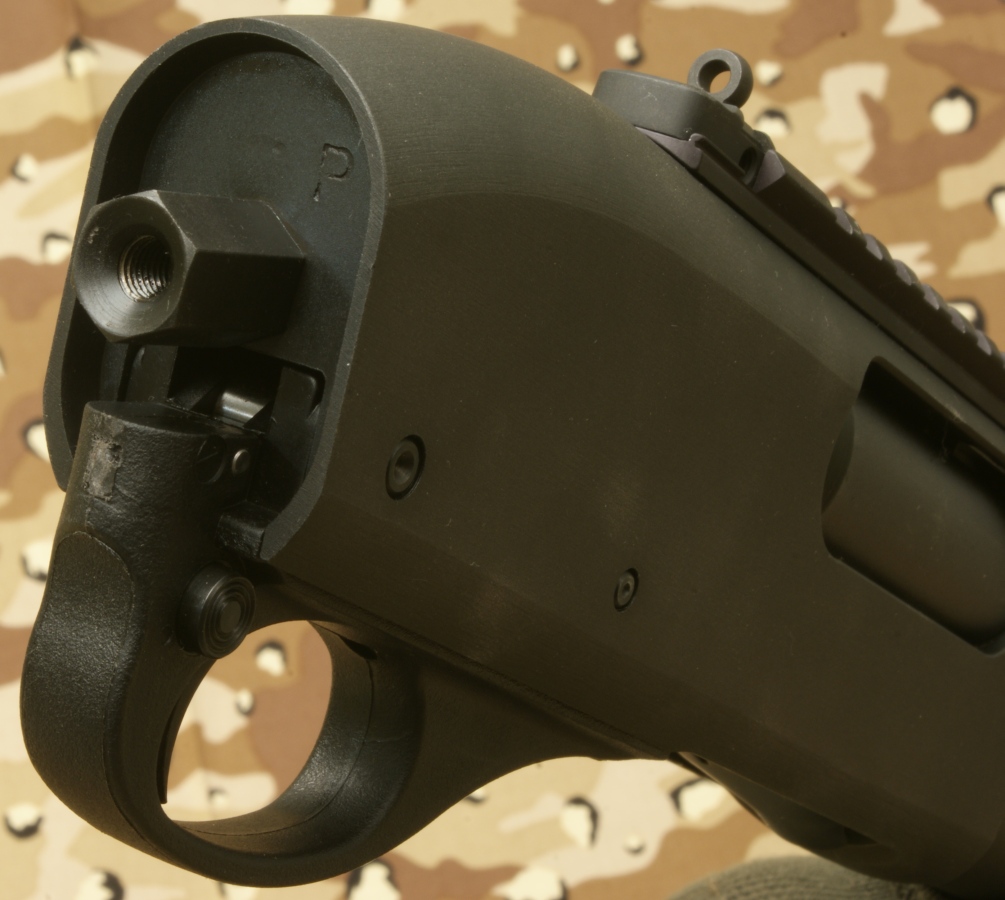
Just like the barrel, after proof testing, the receiver was stamped with a "P" as shown below to indicate that it had been proof tested.
Considering the number of photos in this part and the previous parts of the review, you should have a good idea on what you get when you purchase the Remington 870 Express Tactical Shotgun. All of this information is great, but the real test is how the shotgun functions and handles. I cover these items in the range testing portion (Part 5) of this shotgun review. The following links are provided to help you navigate to the other parts of this review.
- Part 1 - Introduction, Specifications and Summary
- Part 2 - What's In The Box
- Part 3 - External Features
- Part 4 - Disassembly and Internal Features (this page)
- Part 5 - Range Test
Or
If you would like to be notified about future Gunsumer Reports reviews via Facebook, make sure "You Like This" by clicking the Facebook "Like" button at the bottom or top of this page. If it already says "You Like This" beside the button, clicking it again will uncheck the "Like" status and you will not be notified.
| Share on Facebook | |
© 2010, 2011, 2012, 2013, 2014, 2015, 2016, 2017, 2018, 2019, 2020, 2021, 2022, 2023 & 2024 Gunsumer Reports™, All rights reserved.
FTC Disclosure