|
|
Gunsumer Reports TM Providing Detailed Objective Reviews for Firearms and Firearm Accessories |
Wheeler Engineering
Professional Scope Mounting Kit Combo Review
December 28, 2011
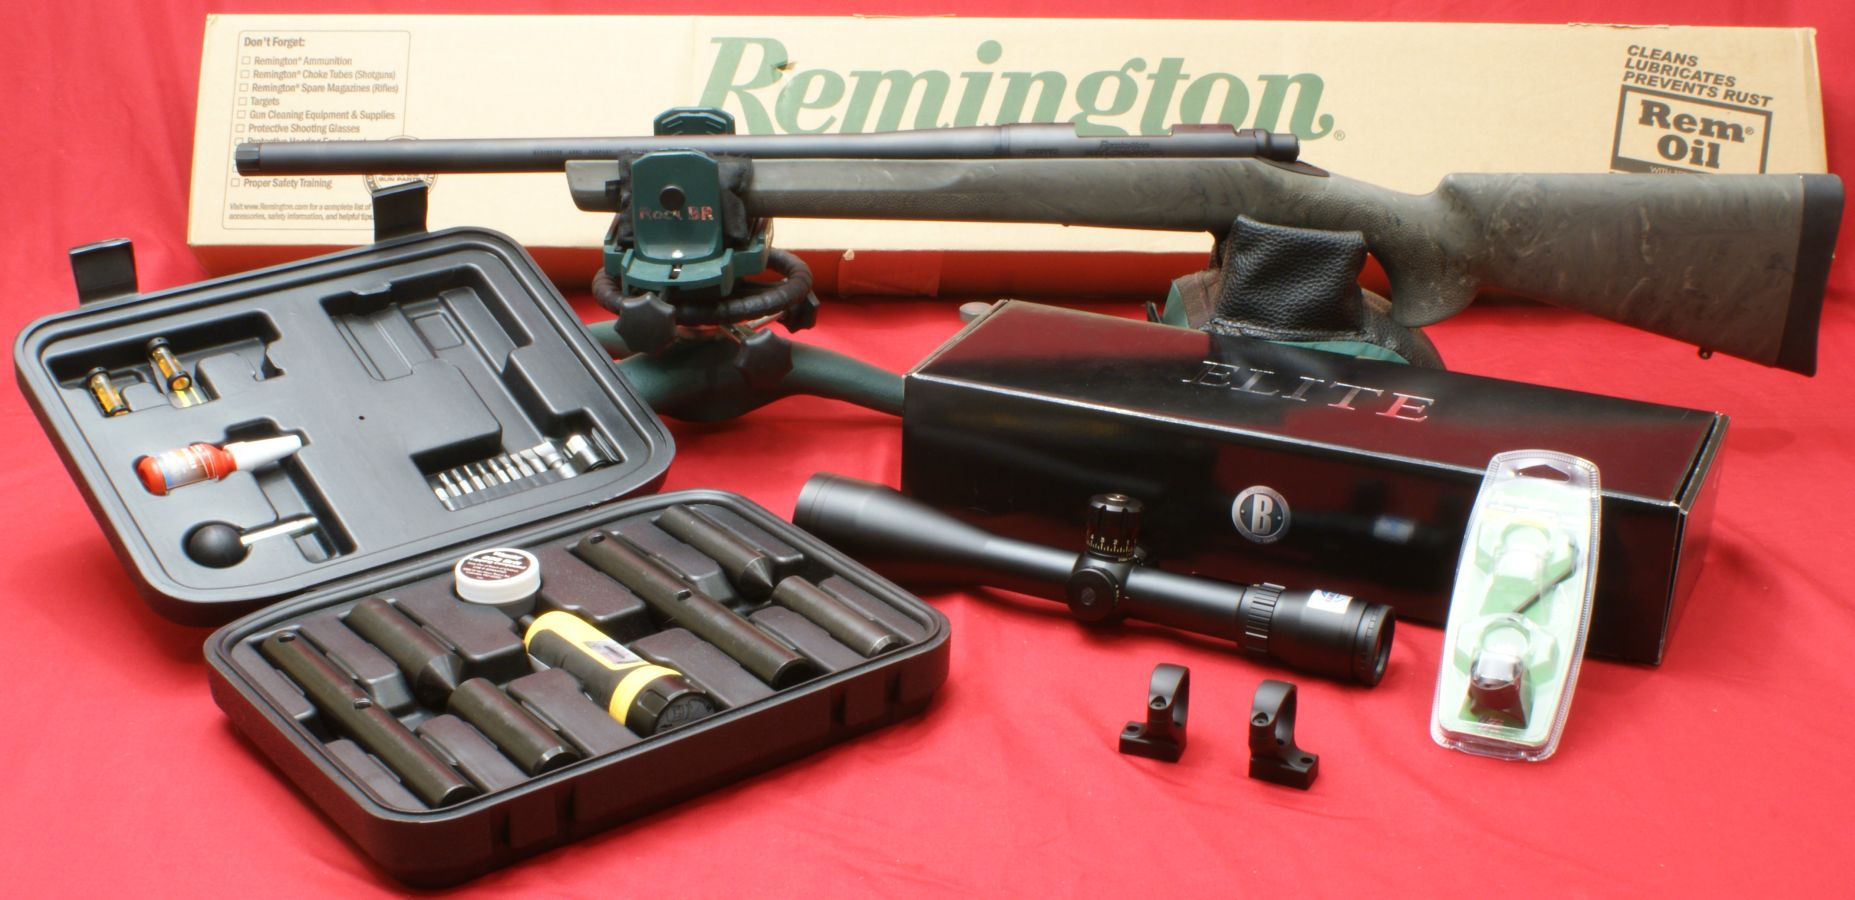
Whether you're trying to squeeze out the maximum accuracy from your rifle, trying to protect a high quality scope by not pre-stressing the tube, wanting to ensure your fasteners are properly torqued and will not work loose, or just wanting to do your best job possible in mounting your scope, Wheeler Engineering produces a Professional Scope Mounting Kit that will address most issues encountered when installing a scope. Wheeler actually makes three versions of this kit. One is for 1" rings, another for 30mm rings and the last is a combo kit that contains everything to install a scope using either 1" or 30mm rings. Although this review is of the Professional Scope Mounting Kit Combo, you will see all the components that come with the other two kits. The Combo Kit retails for $149.99 at the Wheeler Engineering website (actually Battenfeld Technologies website because Wheeler Engineering is part of Battenfeld family of brands). At the time of this review, you can find the Combo Kit at various online stores from $90 to $120 which account for some Christmas/Year End sale prices.
The Wheeler Professional Scope Mounting Kit takes care of three critical items when it comes to mounting a scope. The first is alignment of the rings. The second is leveling/alignment of the reticle crosshairs. The last is properly torqueing and thread locking all fasteners.
During my reviews I like to show and compare my results
to the manufacturer's claims where possible so the following text in
colored italics was taken directly from the
Wheeler Engineering website
on 12/26/11 and gives an overview of the features
for the Professional Scope Mounting Kit. The
![]() ,
,
![]() and
and
![]() are my way to keep up with details that I have covered in this
review with either photos, commentary or both.
are my way to keep up with details that I have covered in this
review with either photos, commentary or both.
-
This complete kit provides everything necessary to mount virtually any 1-inch or 30mm scope the correct way, including an instructional DVD.
 Proper scope
installation is critical to the accuracy of your firearm.
Proper scope
installation is critical to the accuracy of your firearm.
-
Alignment and Lapping of rings ensure maximum surface area contact between scope tube and rings.
This
not only helps the rings hold the scope more securely but also
protects your scope from damage misalignment can cause.
The
Wheeler Alignment Bars, Lapping Bars and Lapping Compound allow
you to achieve the perfect fit between scope and rings.
-
Reticle Leveling is also a key component to the accuracy of your set up.
Crosshairs that are not properly
leveled will result in errors in left/right windage especially
at longer distances.
Misalignment can also compromise true
linear movement from turret adjustments.
The Wheeler
Level-Level-Level makes it quick and easy to get the reticle
perfectly aligned with your gun.
-
Securing Fasteners properly is critical to accuracy as well.
Precisely controlled torque along with
thread locking compound will keep your scope held securely in
place.
Professional grade bits and the F.A.T. Wrench are the
perfect combination to properly secure fasteners without
deformation.
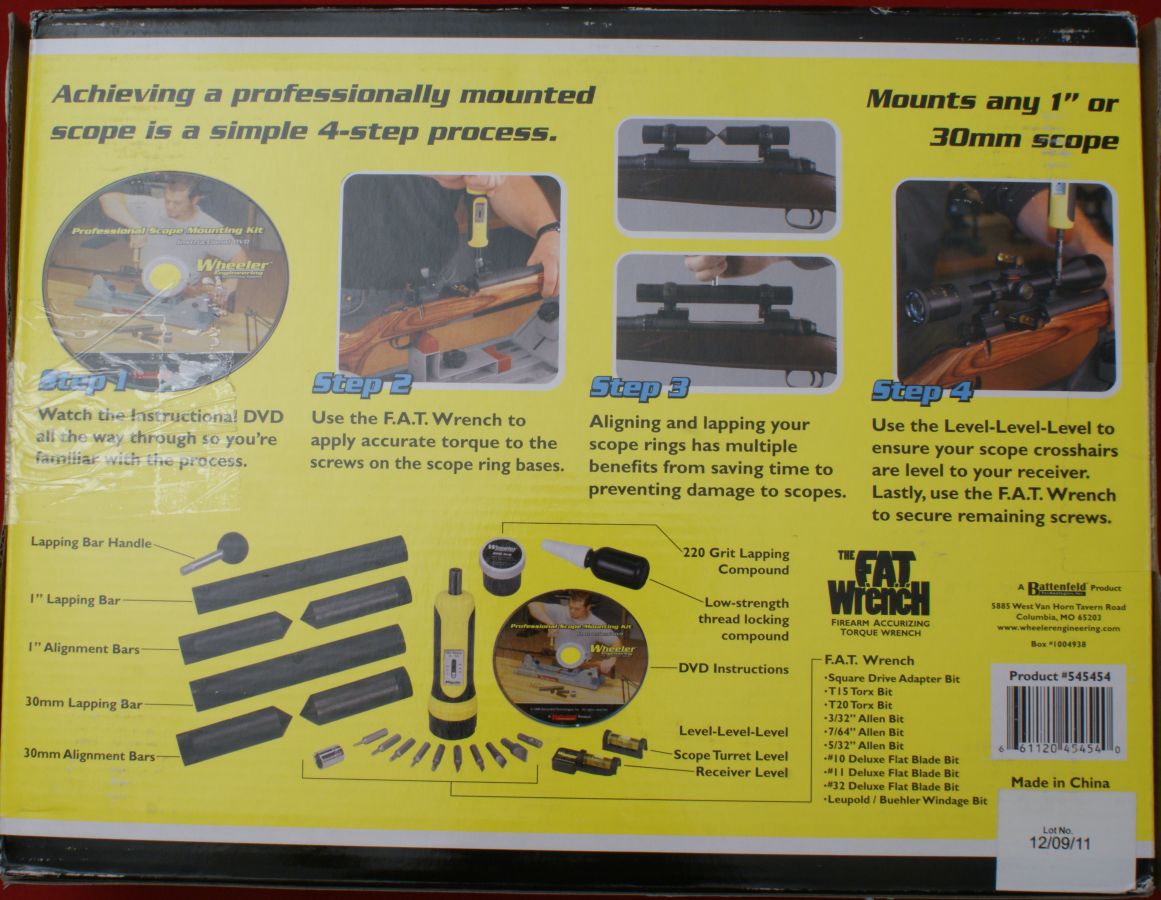
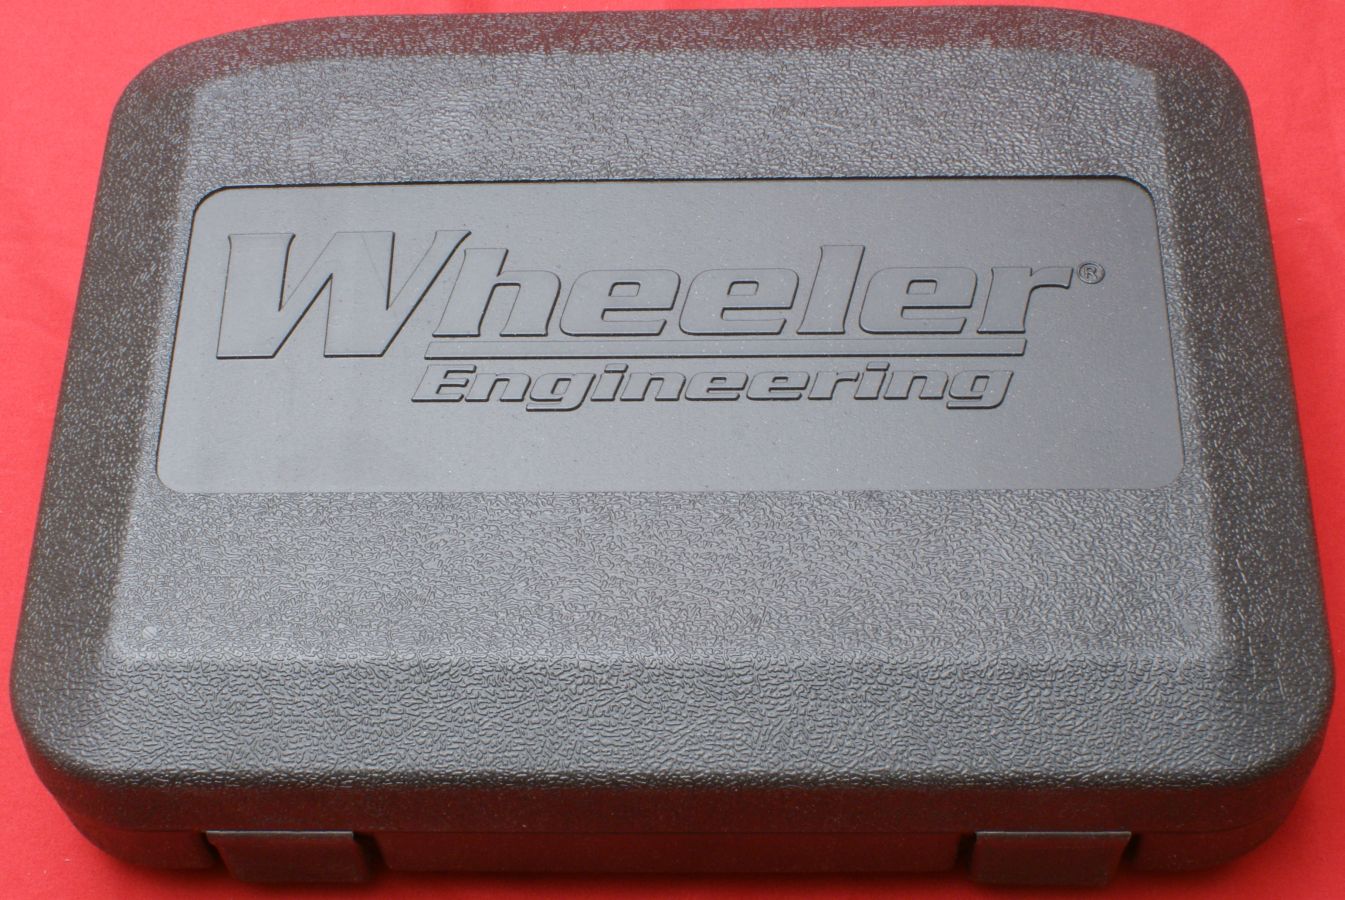
The Wheeler Professional Scope Mounting Kit Combo comes boxed as shown below. This is actually one of the newer kits that now comes with a storage case (great idea on Wheeler's part).
Figure 1
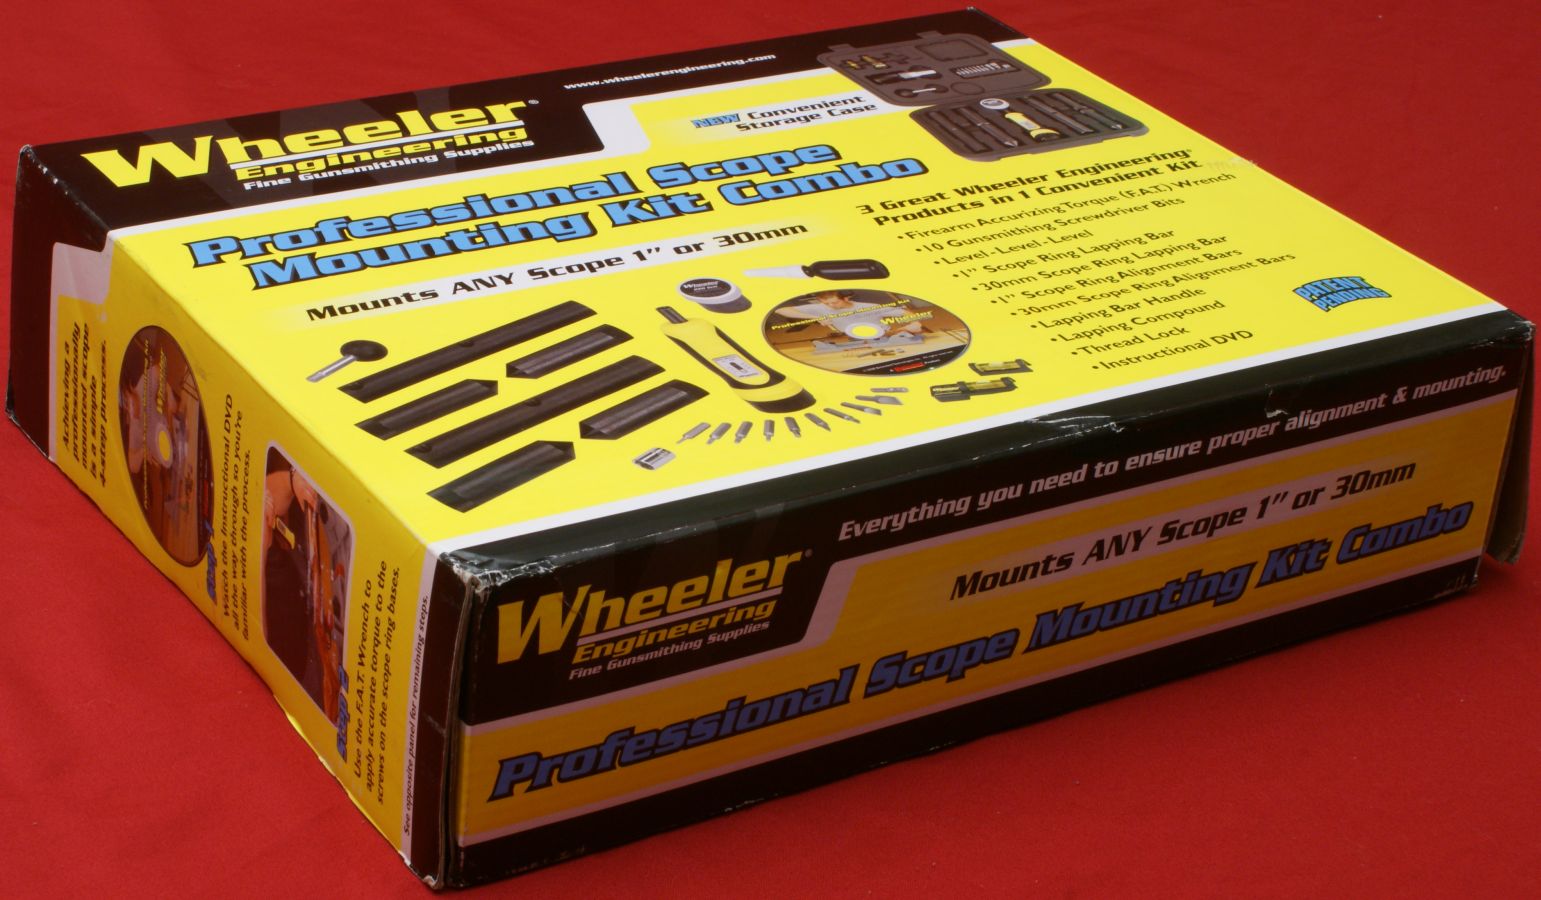
I have included photos for all sides of the box so you can look at Wheeler's advertising information just like you would be able to if you were to pick it up at the store. Keep in mind that you can click on any photo in this review to bring up a high resolution photo so you can see the fine details.
Figure 2
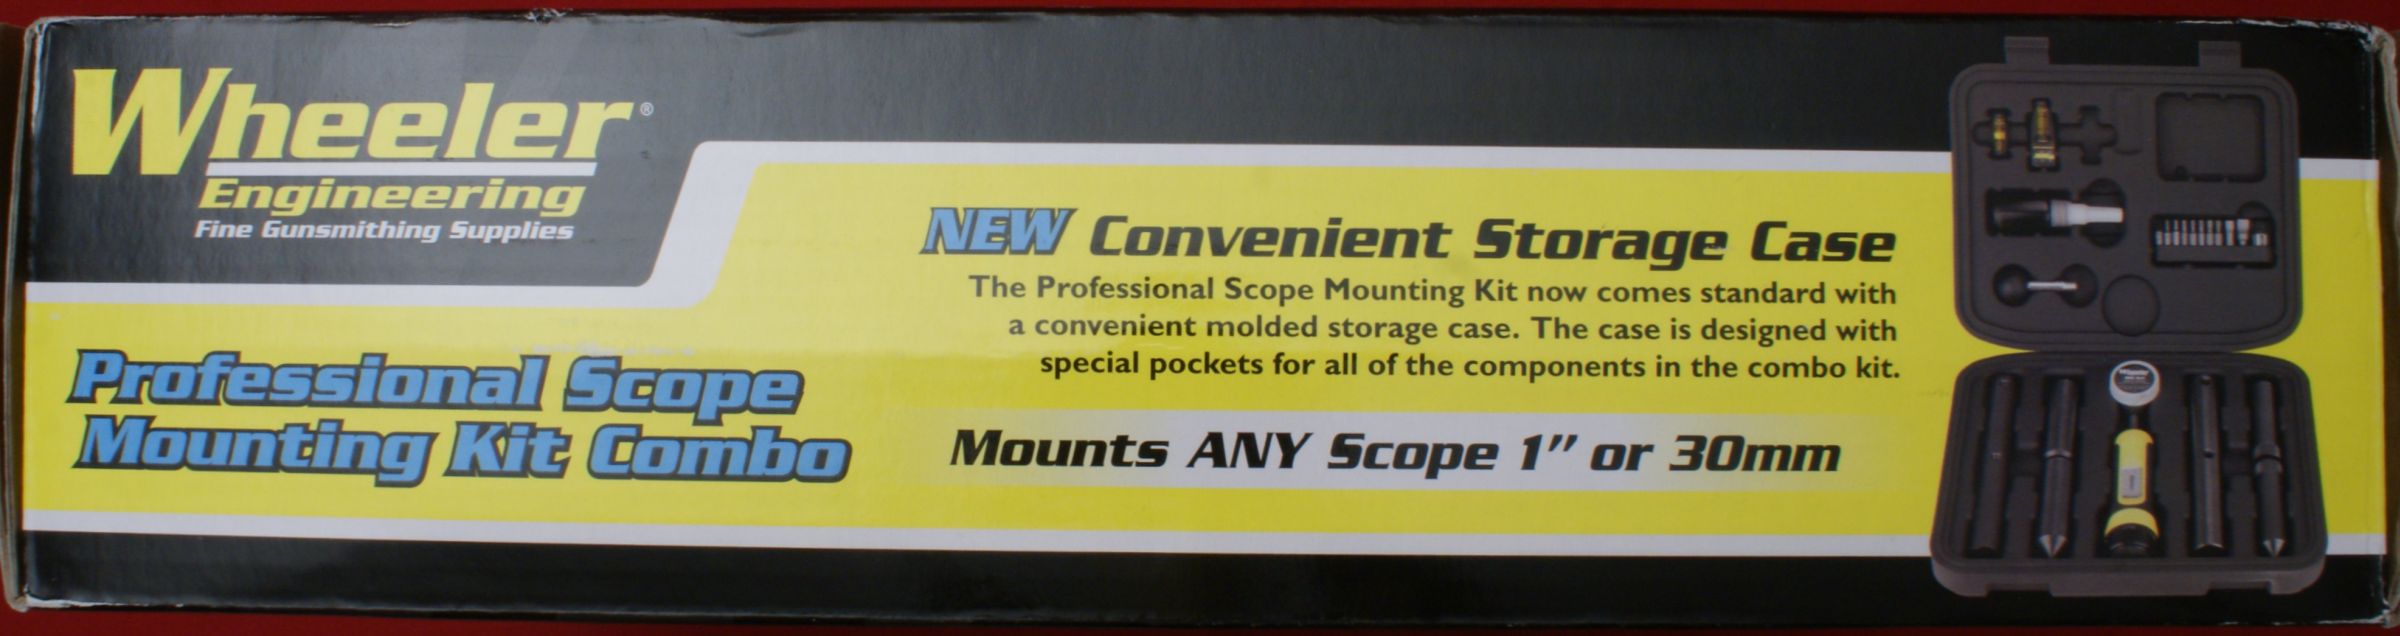
Figure 3
Figure 4
Figure 5
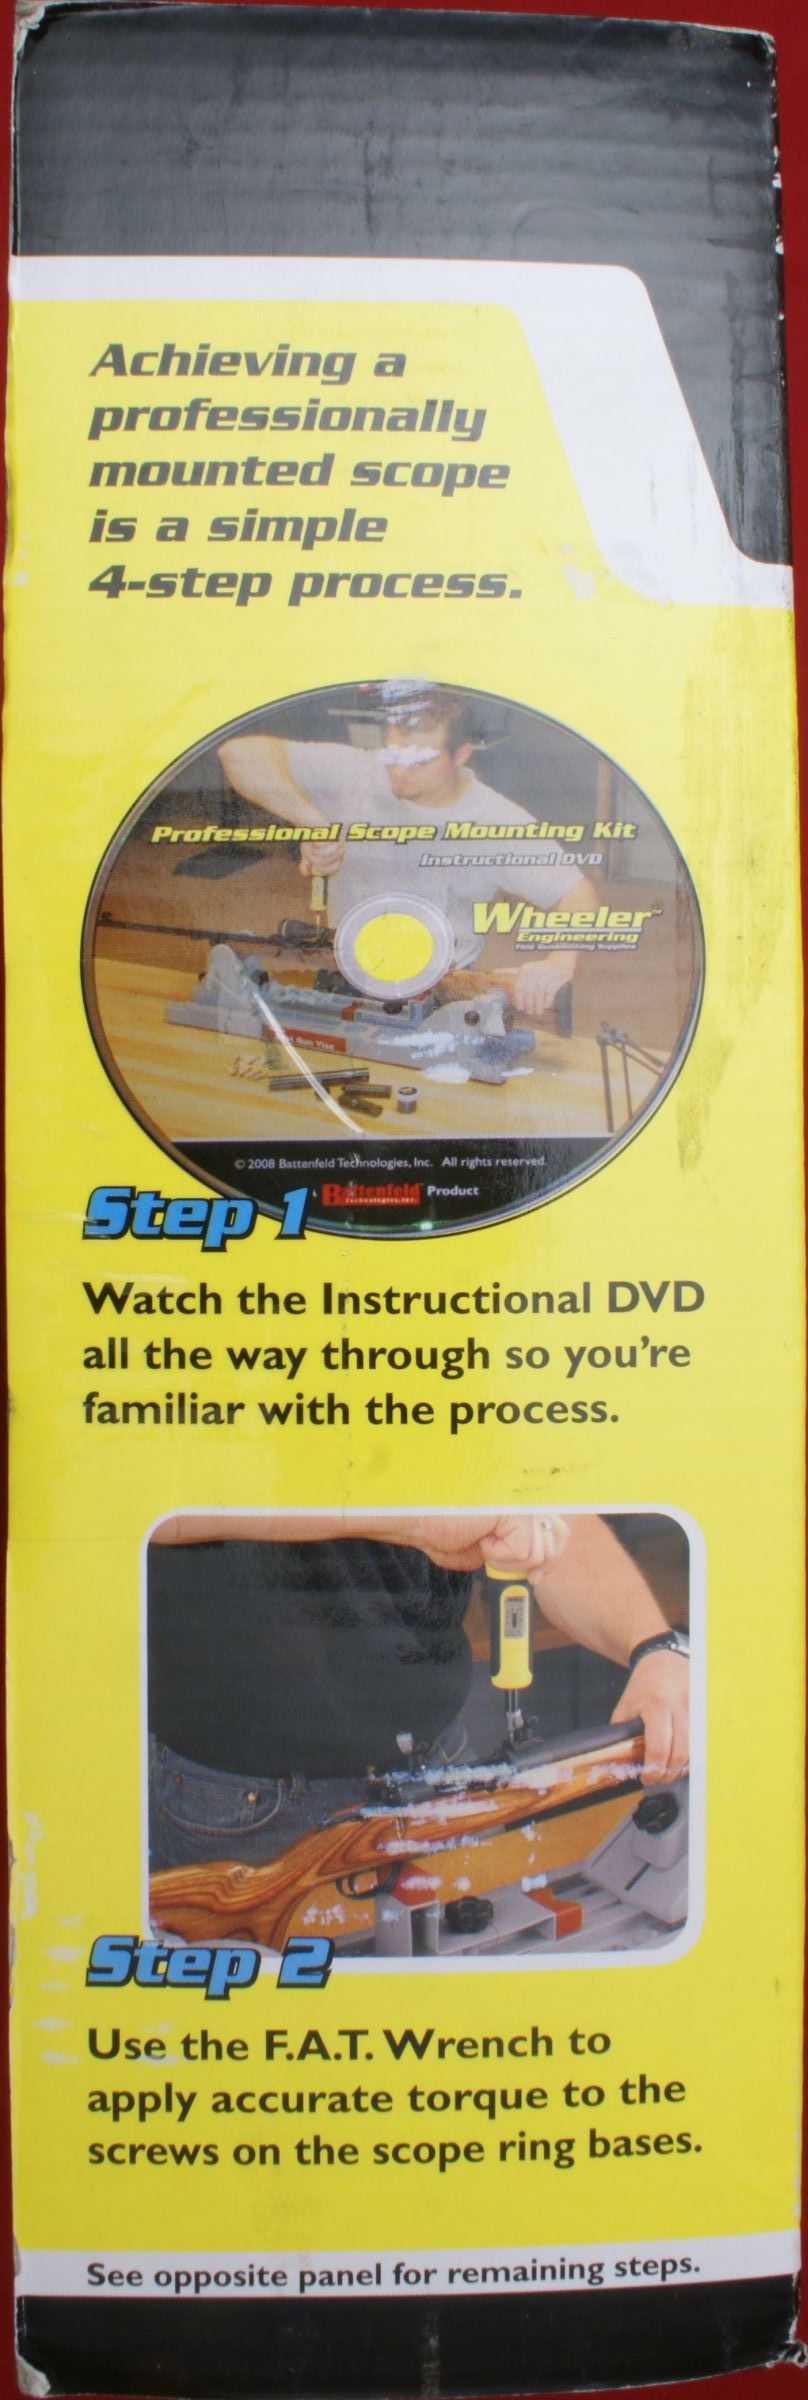
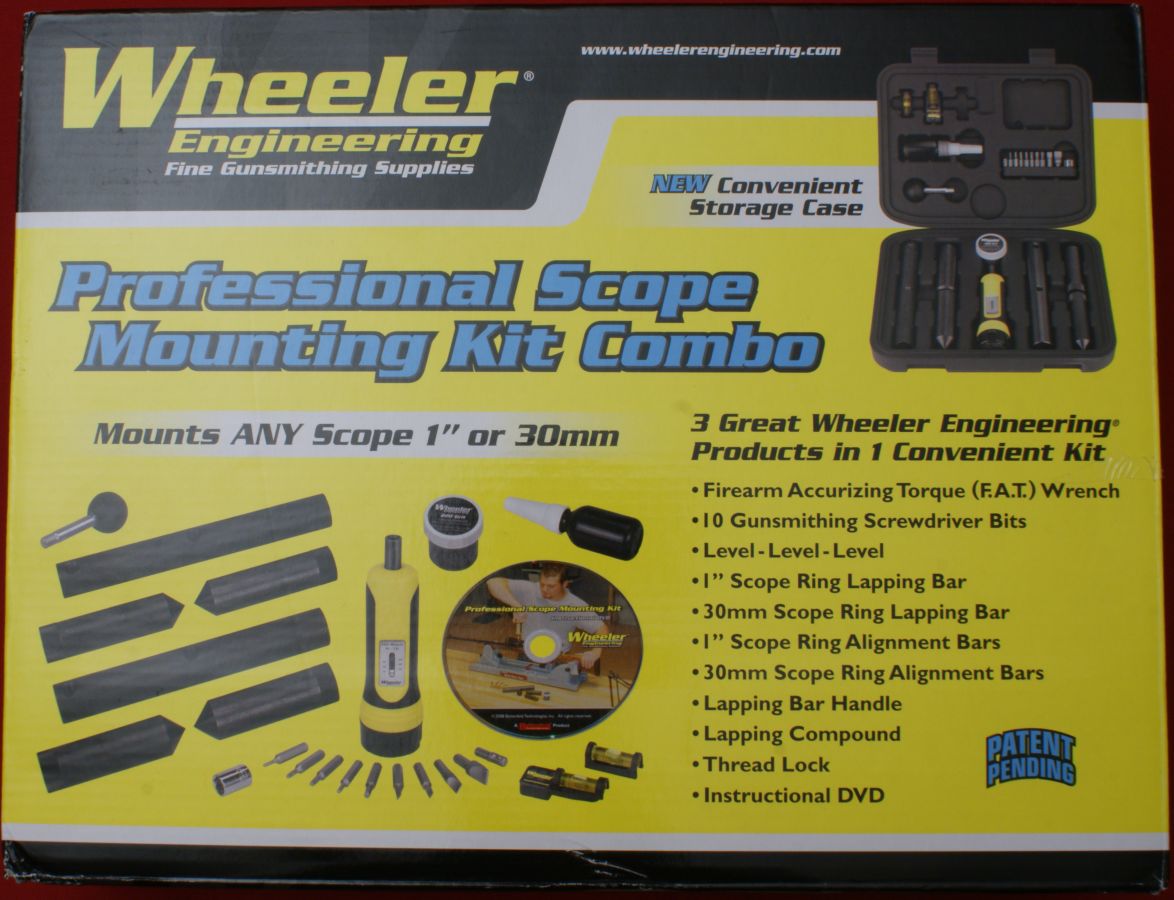
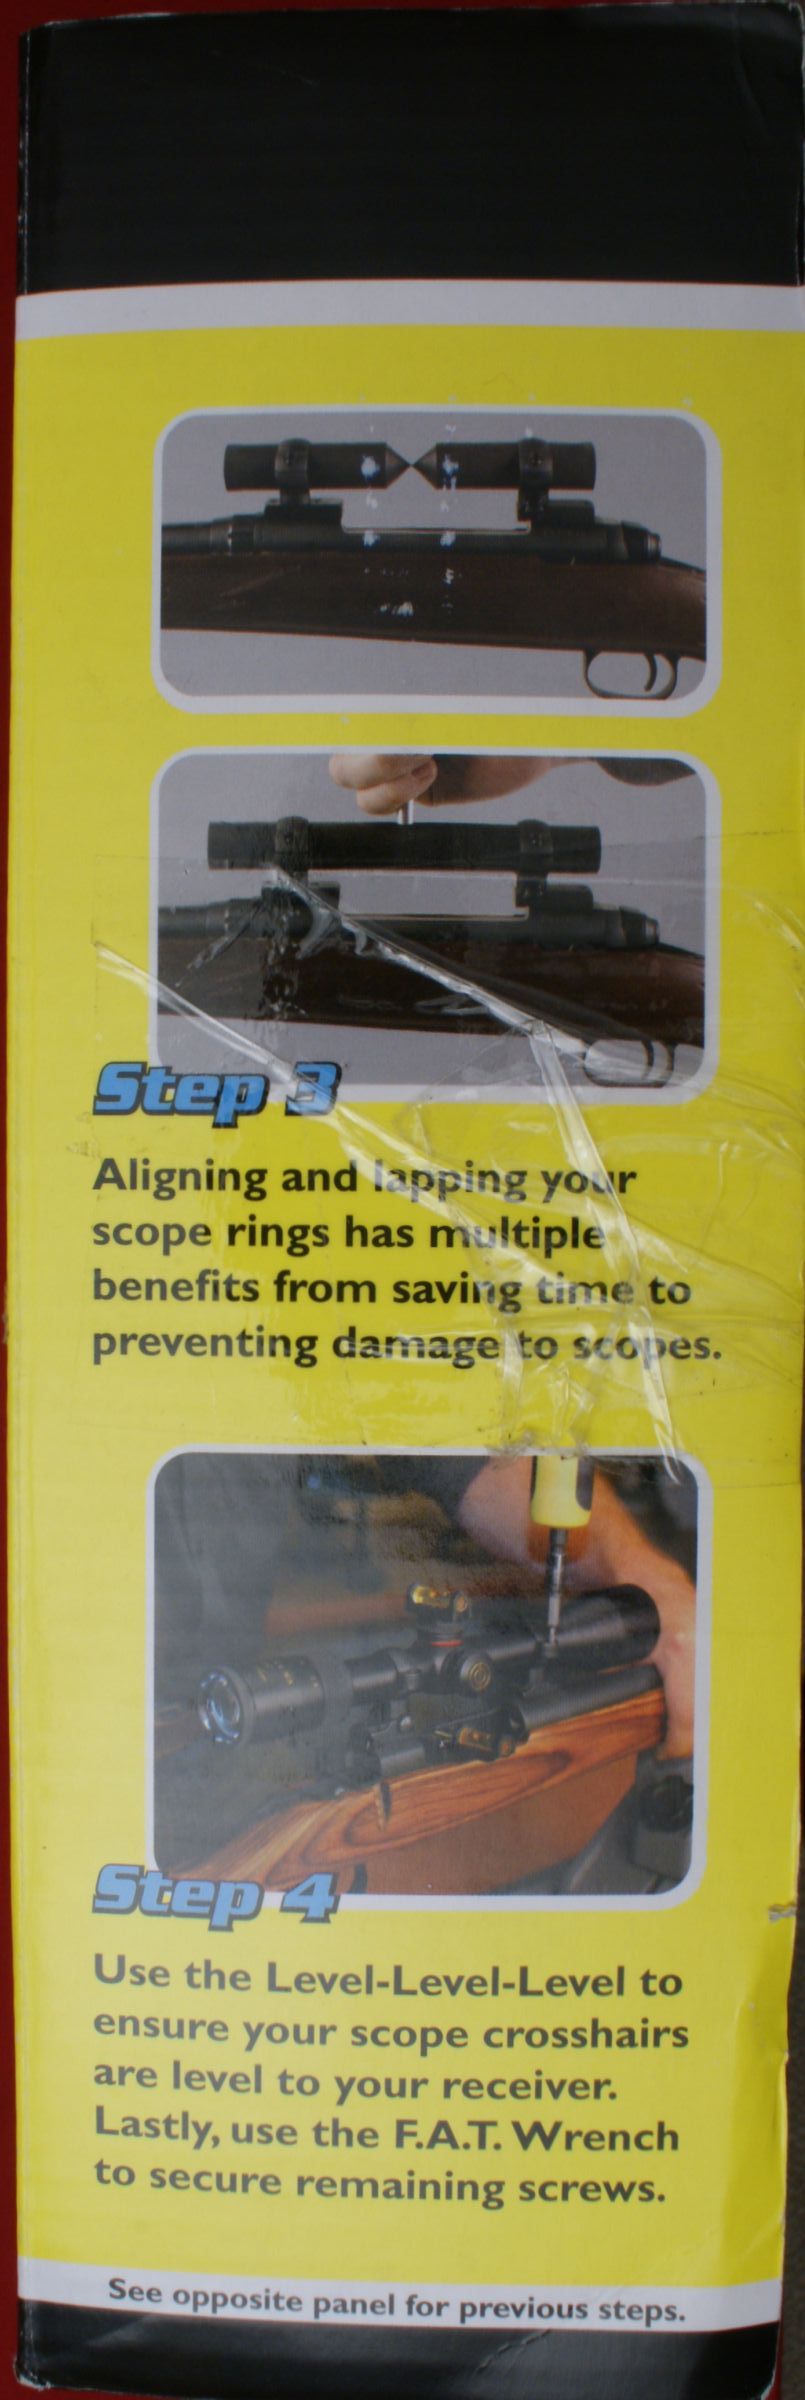
Figure 6
Figure 7
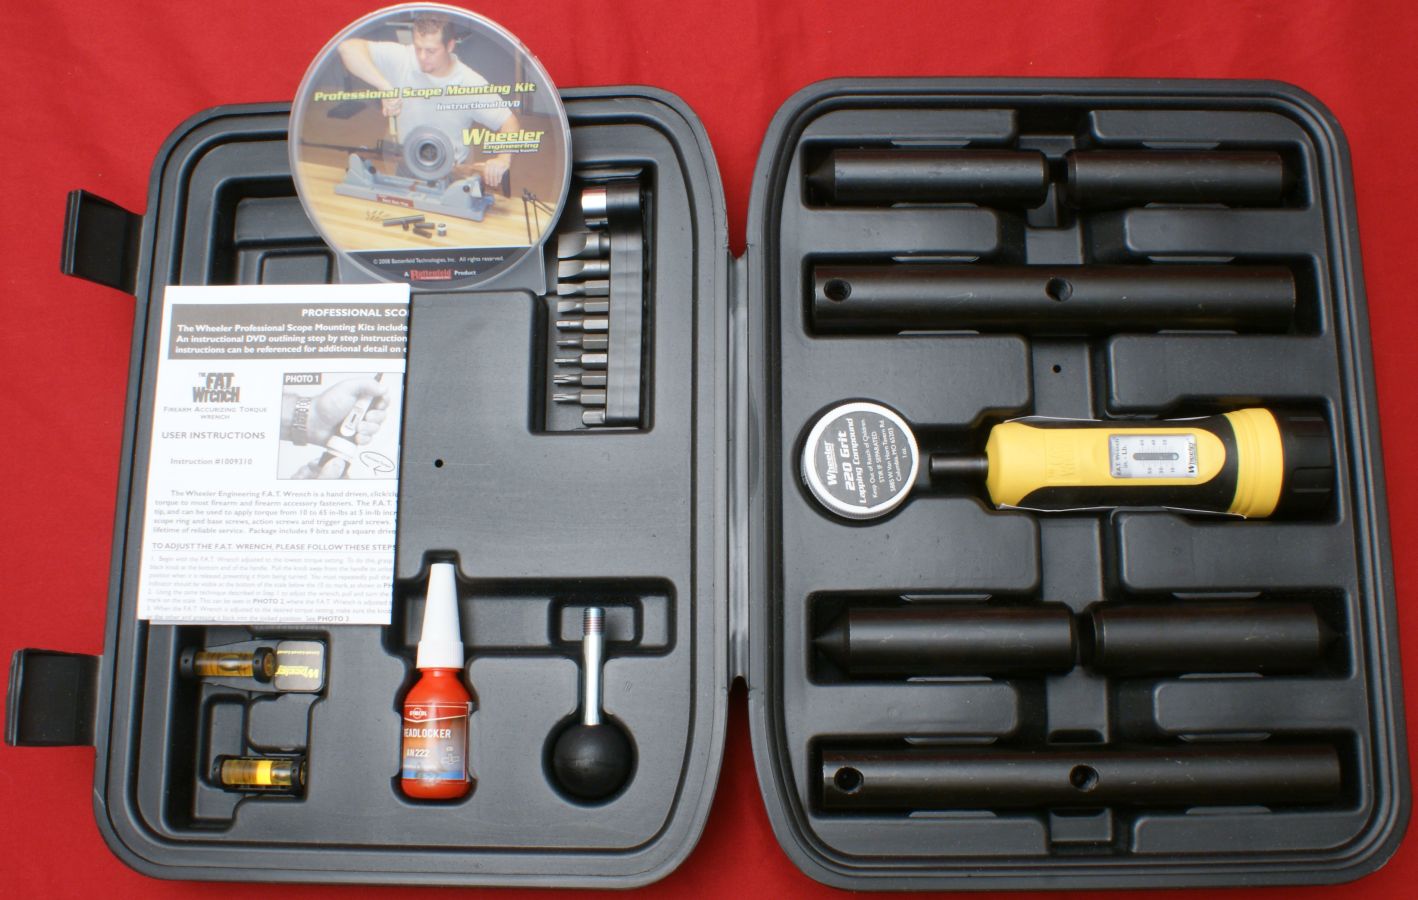
All components from the kit are stored in this polymer case.
Figure 8
When you open the case, you see all the components inside. The combo kit includes the following items and all items (except DVD and Instructions) snap securely in place within the kit.
- F.A.T. Wrench torque screwdriver and Calibration Certificate (under F.A.T. Wrench in photo below)
- 10 Gunsmithing Screwdriver Bits
- Level-Level-Level - This is actually two pieces in the kit.
- 1" Scope Ring Lapping Bar
- 30mm Scope Ring Lapping Bar
- 1" Scope Ring Alignment Bars
- 30mm Scope Ring Alignment Bars
- Lapping Bar Handle
- Lapping Compound
- Thread Locker
- Instructional DVD
- User Instructions
- Case
Figure 9
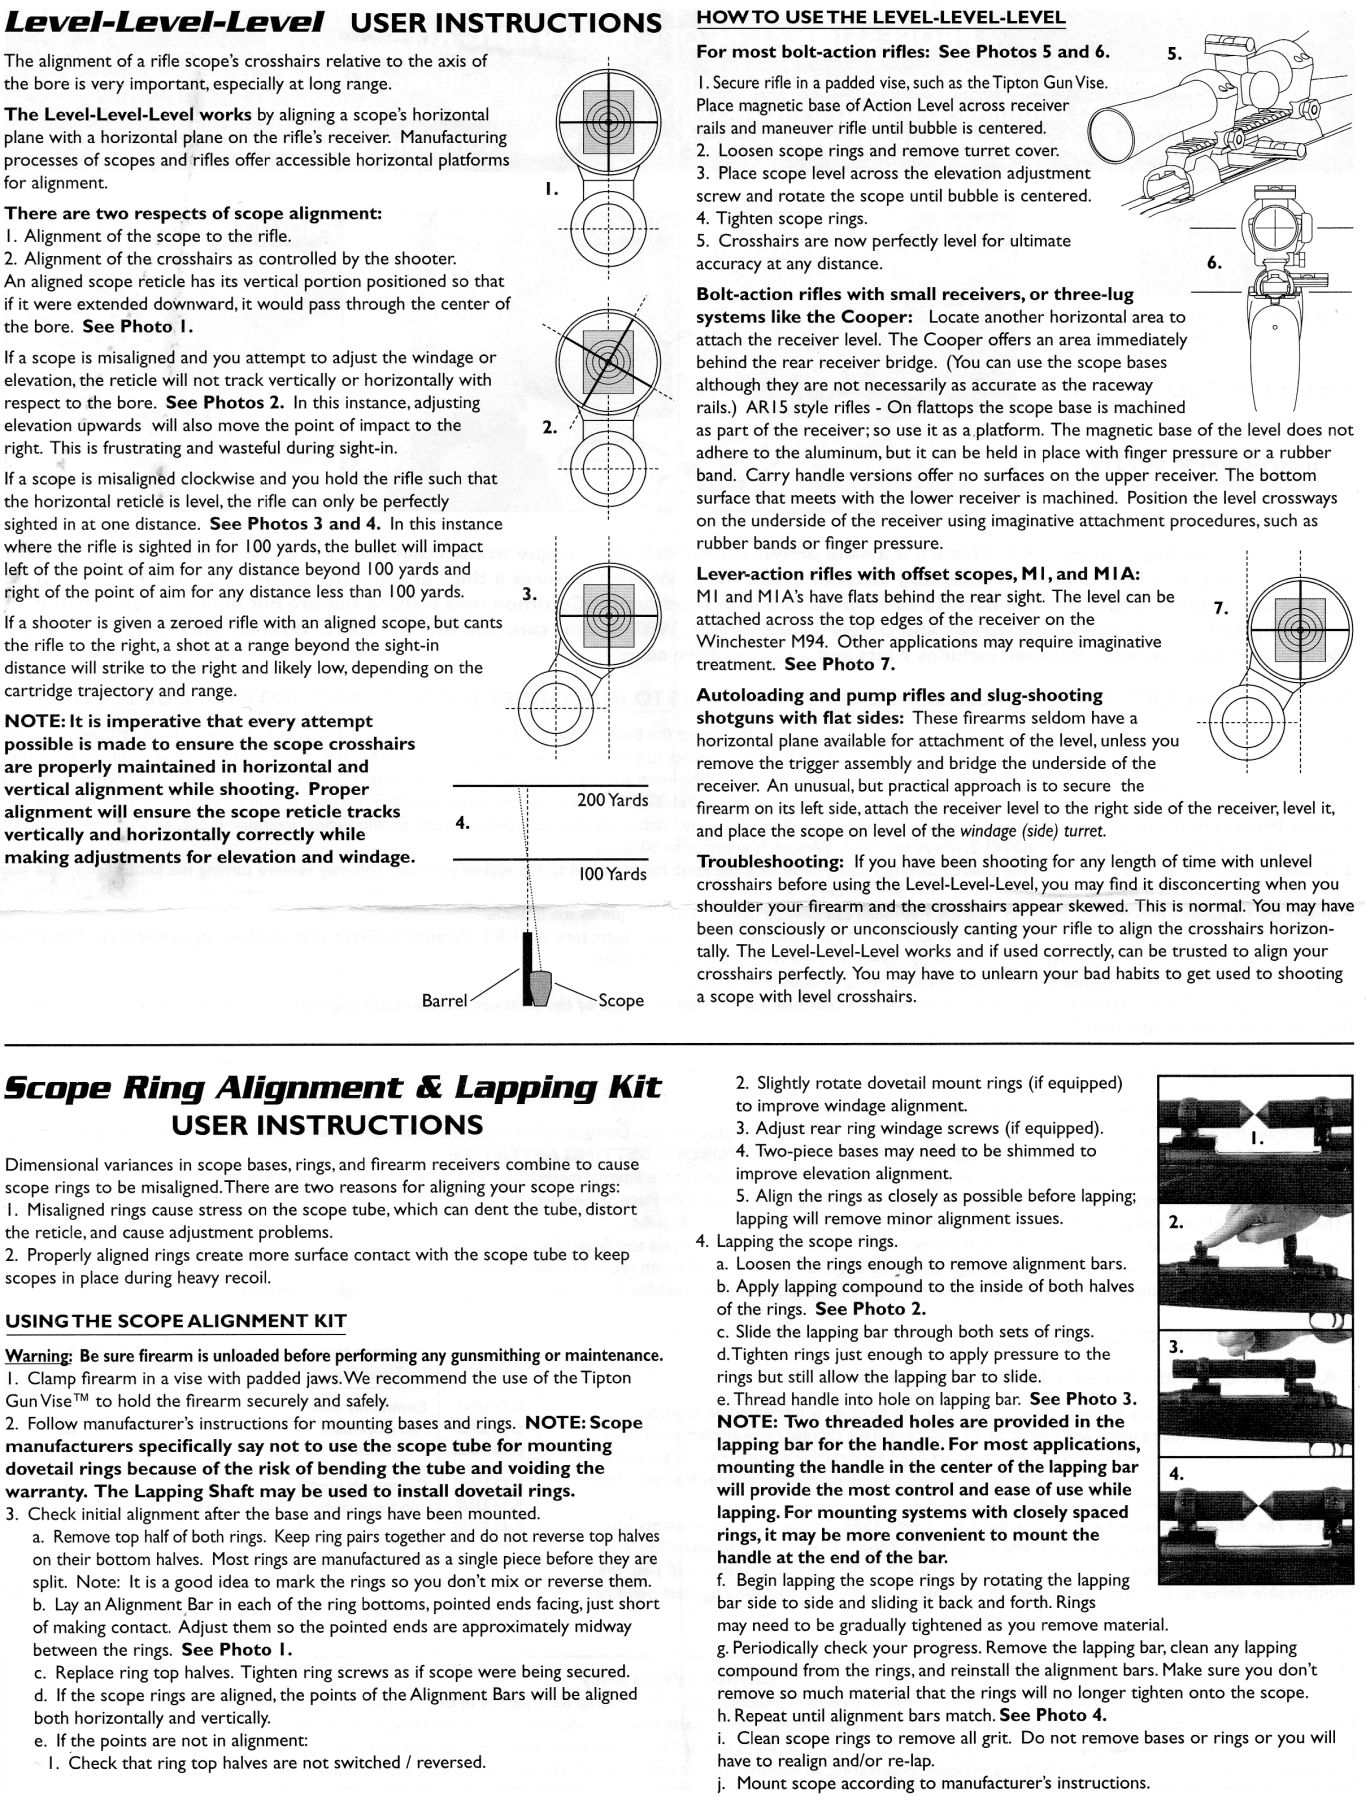
Since the user instructions contain details on the use of the F.A.T. Wrench, Level-Level-Level, and Scope Ring Alignment & Lapping, I scanned these instructions and you can click on the photos below to be able to see and read them.
Figure 10
Figure 11
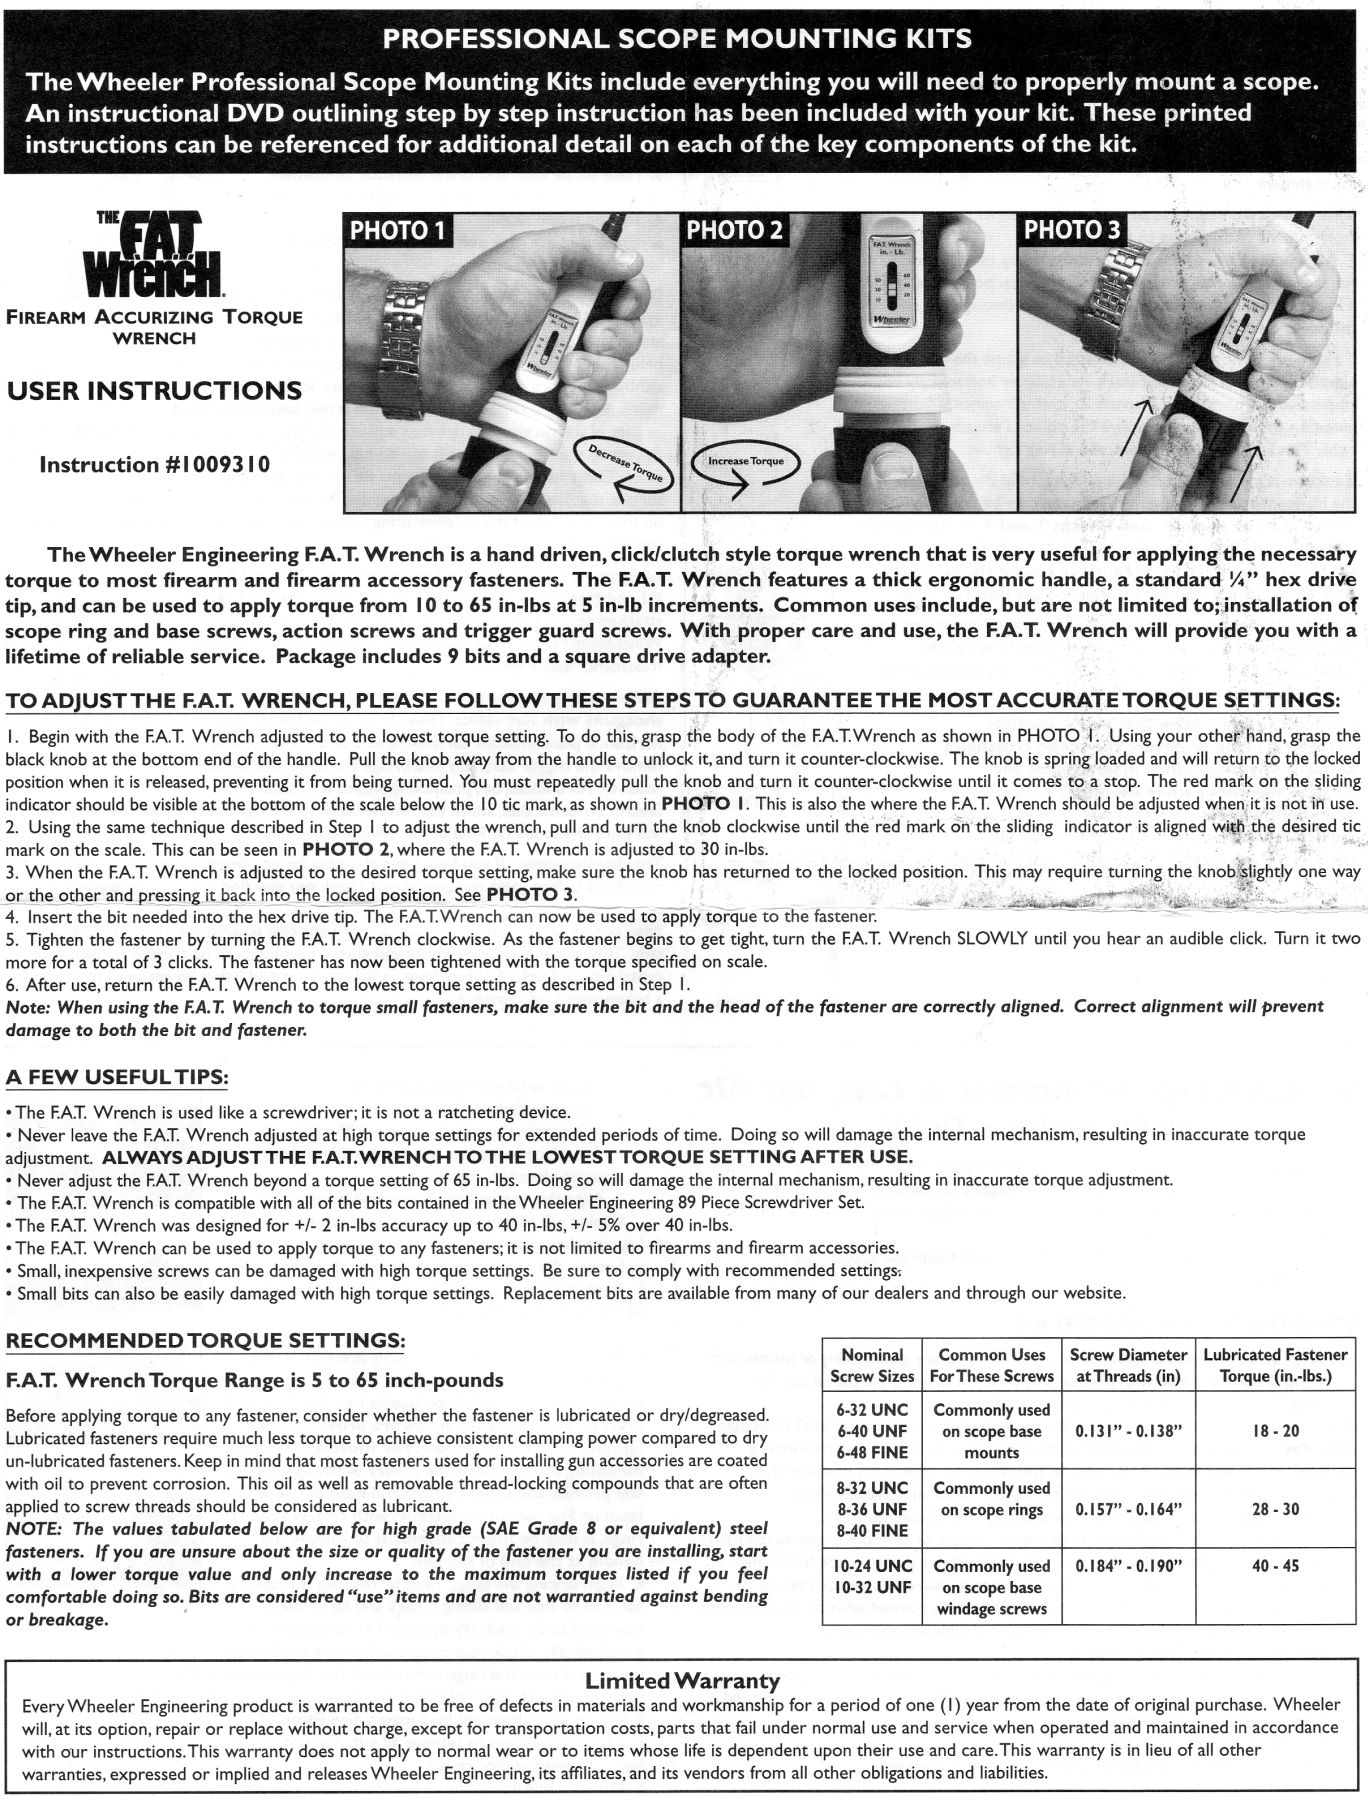
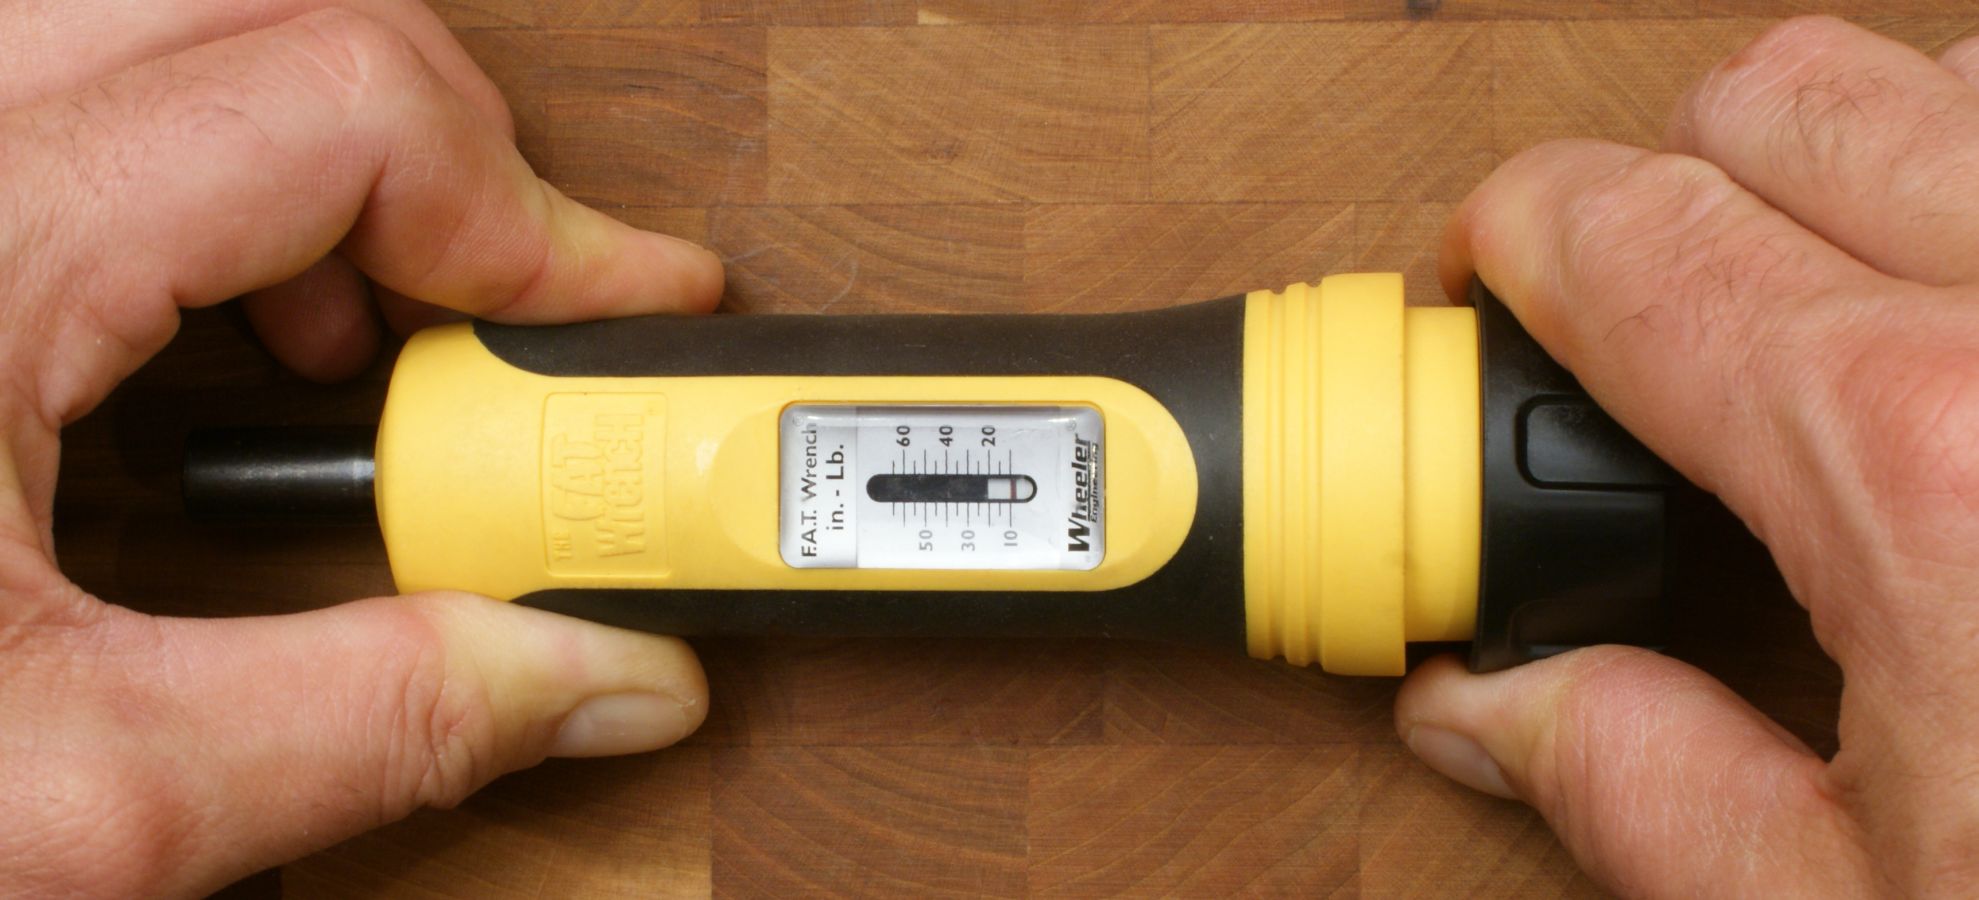
F.A.T. Wrench
The Wheeler Engineering F.A.T. (Firearms Accurizing Torque) Wrench will probably become one of the most used items from the Combo Kit. Not because the other items in the kit are not important, but because there are other situations that require torqueing fasteners than just when installing a scope. The day I received the kit, I used this torque wrench to install my Burris FastFire II Red Dot Sight on one of my revolvers.
Figure 12
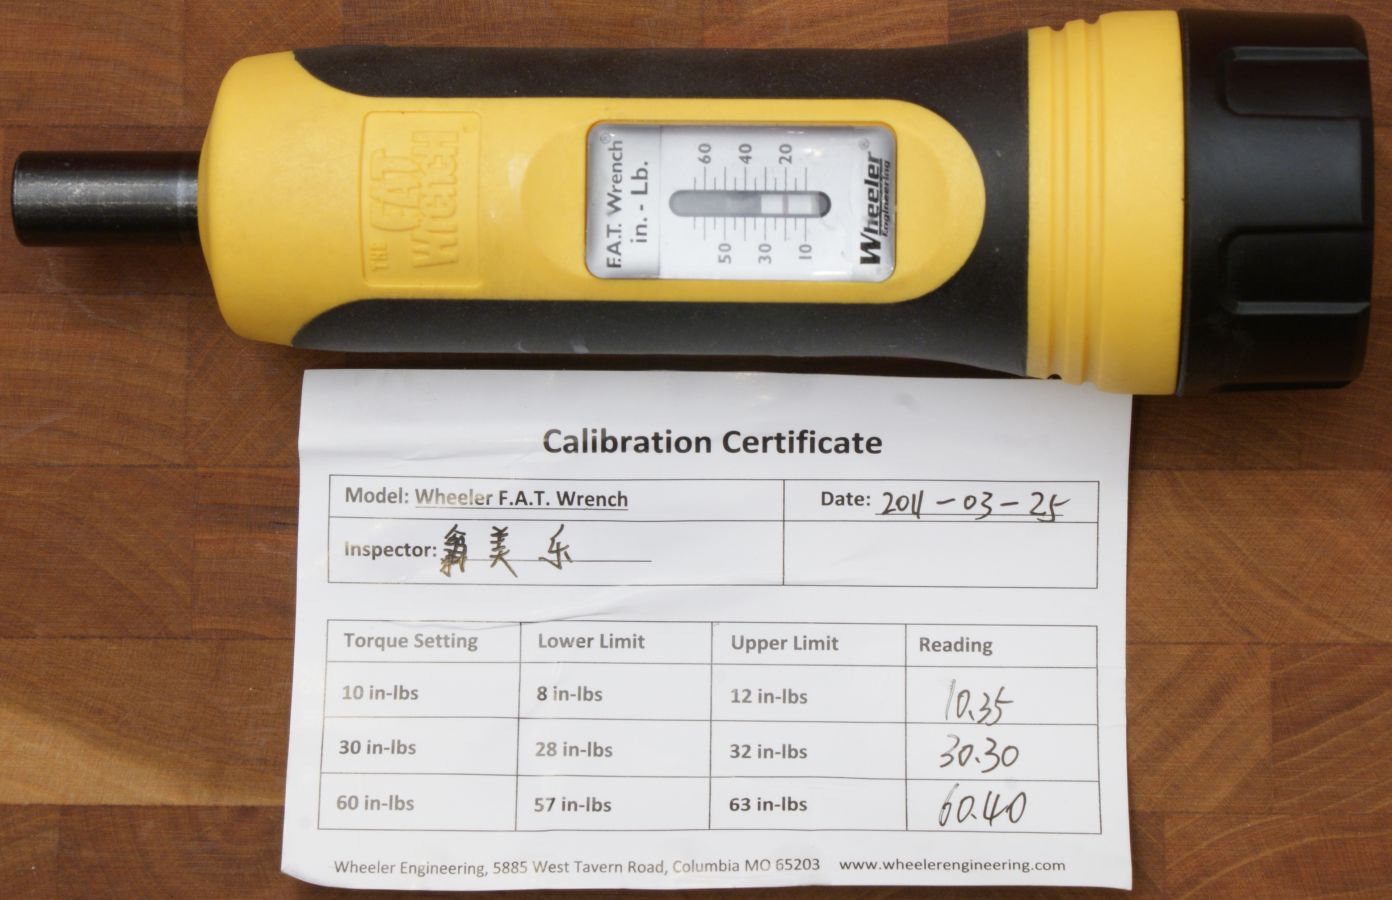
This torque wrench allows you to properly torque fasteners from 10 to 60 in-lbs of torque ±2 in-lbs. The F.A.T Wrench includes a scale on the side of the wrench that shows the value of torque you will apply. In the photo below, the torque is set at 20 in-lbs. The wrench also comes with a Calibration Certificate showing that it was tested at the factory prior to shipment. In this case, the torque was within 0.40 in-lbs of the desired value which is clearly within the ±2 in-lbs specified.
Figure 13

To adjust the torque you pull the bottom cap of the wrench out and turn the cap. Turning the cap clockwise increased the torque and counterclockwise decreased the torque. The end of the wrench that holds the various bits has a magnet at the bottom of the bit hole to hold the bits in place.
Figure 14
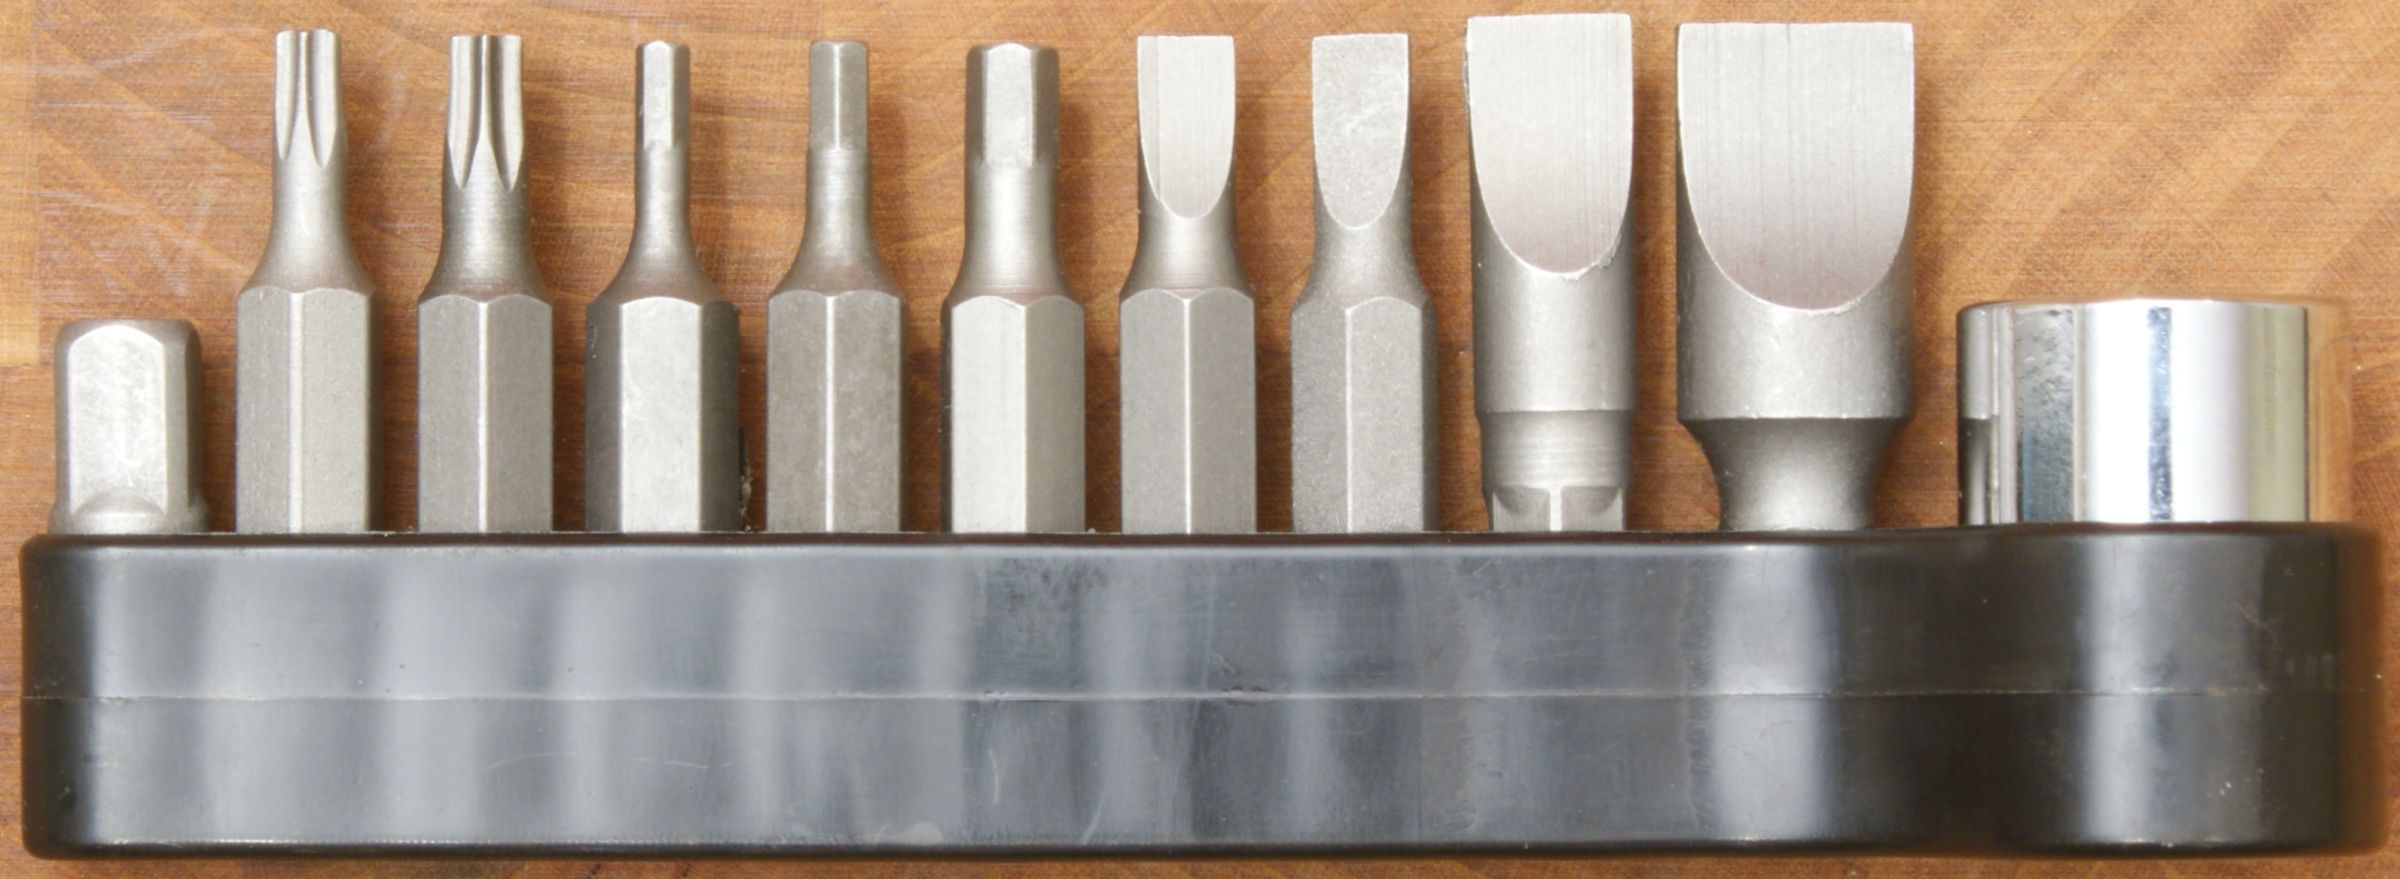
Gunsmithing Screwdriver Bits
The kit comes with 10 bits that fit in the end of the F.A.T. Wrench (or any other driver that accepts the standard ¼" hex bits) and a 1/4" drive 1/2" six-point socket. The bits provided with the kit are;
- 1/4" Drive Adapter
- 888-427 - T15 Torx Bit
- 809-890 - T20 Torx Bit
- 874-877 - 3/32" Allen Bit
- 449-509 - 7/64" Allen Bit
- 192-418 - 5/32" Allen Bit
- 110-795 - #10 Flat Blade Bit
- 616-759 - #11 Flat Blade Bit
- 293-231 - #32 Flat Blade Bit
- 608-712 - Leupold/Buehler Windage Bit
- 1/4" drive 1/2" Six-point Socket
I found it odd that this set of bits is slightly different than what comes with the F.A.T. Wrench when purchasing the wrench by itself (not in a scope mounting kit) based on the advertising at the Wheeler website. It seems Wheeler removed the T10 Torx bit and added the 7/64" Allen Bit. Based on my experience, I believe this selection of bits does a pretty good job of covering most scope/optic mounting situations.
Figure 15

Figure 16
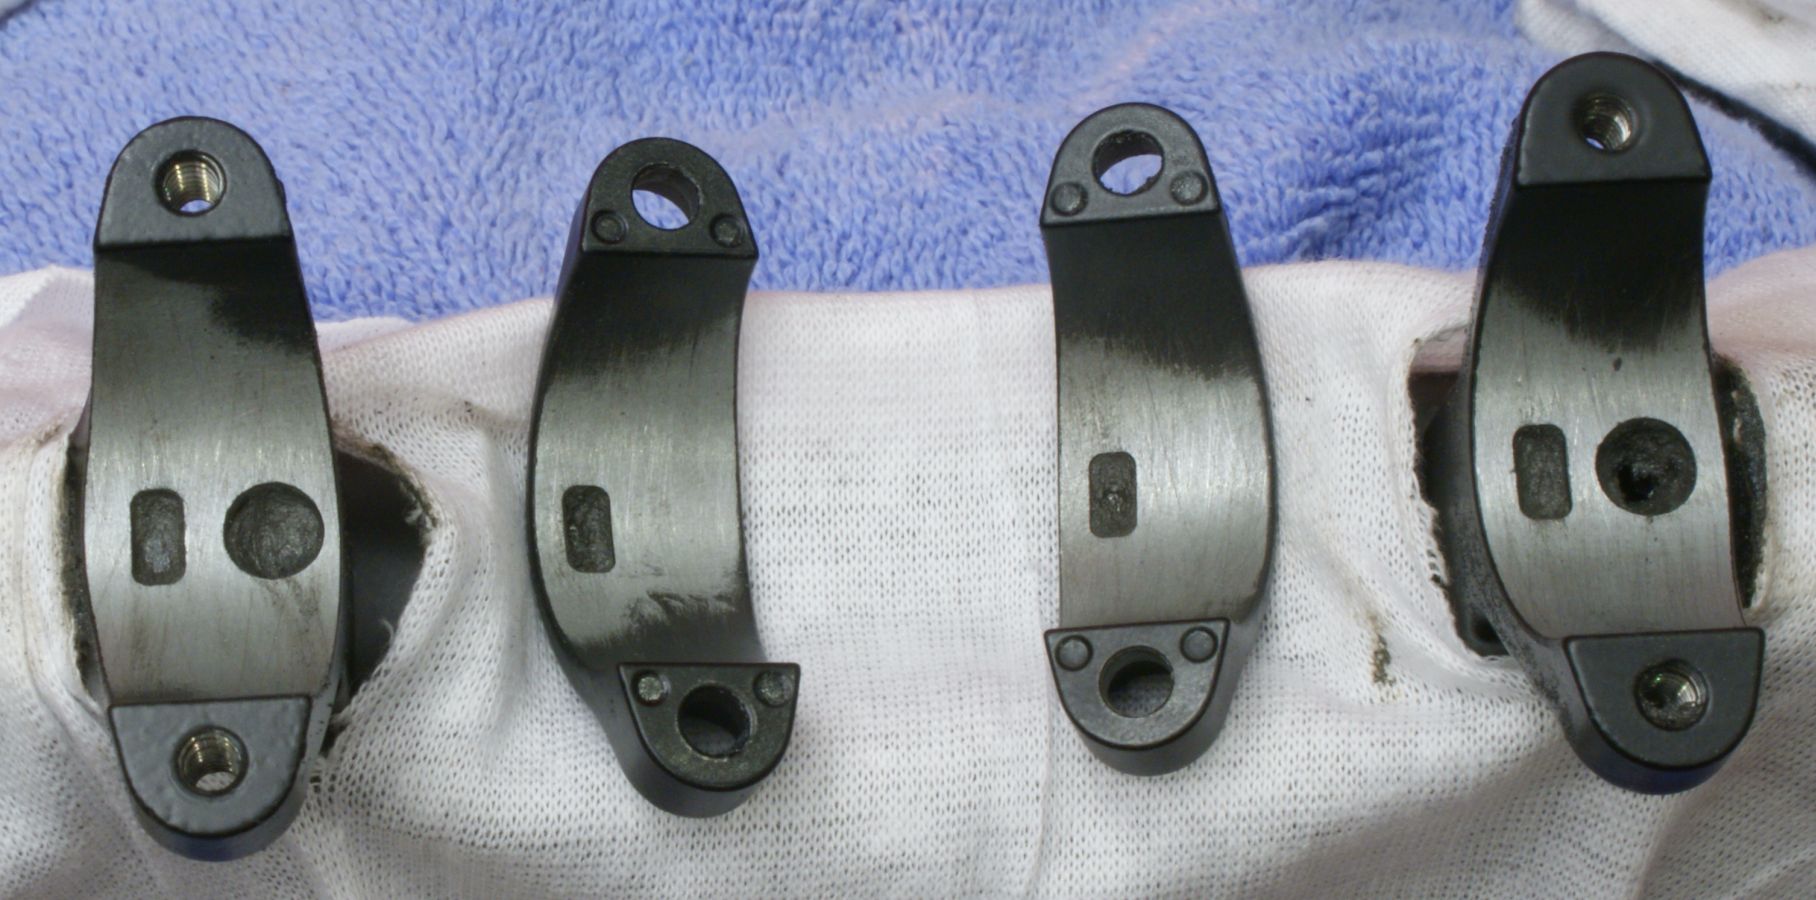
Alignment and Lapping Bars
All of the alignment and lapping bars are made from solid steel which is why the kit weighs so much. Wheeler provides two alignment bars and one lapping bar for each scope mounting size (1" and 30mm). Based on current market trends, I can see Wheeler Engineering needing to provide other diameter bars for some of the new ring/scope sizes hitting the market (i.e. 35mm & 40mm). You can already purchase these bars separately, so I don't believe you would have to purchase a whole kit to add new sizes in the future.
Figure 17 - 1"
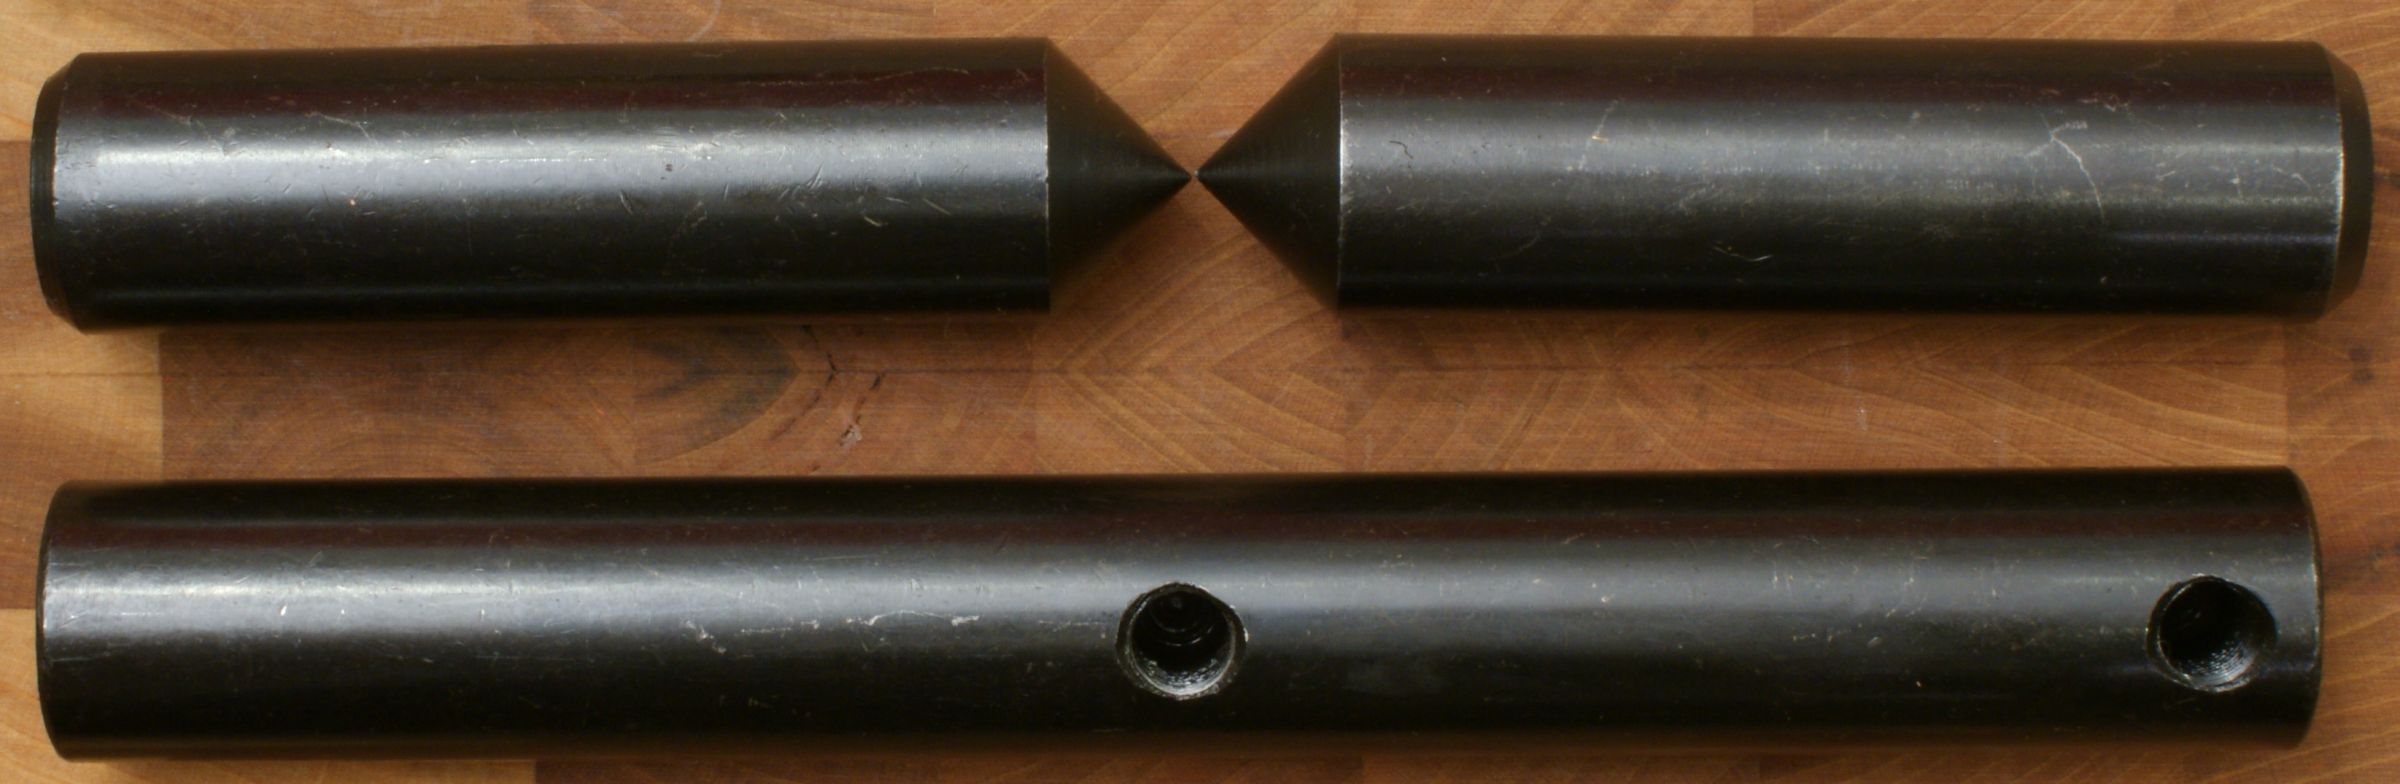
The alignment bars have a coned shape on each end to aid in making sure your front and rear rings are pointing directly at each other. The lapping bar has two holes so you can choose which location you would like to mount the lapping bar handle.
Figure 18 - 30mm
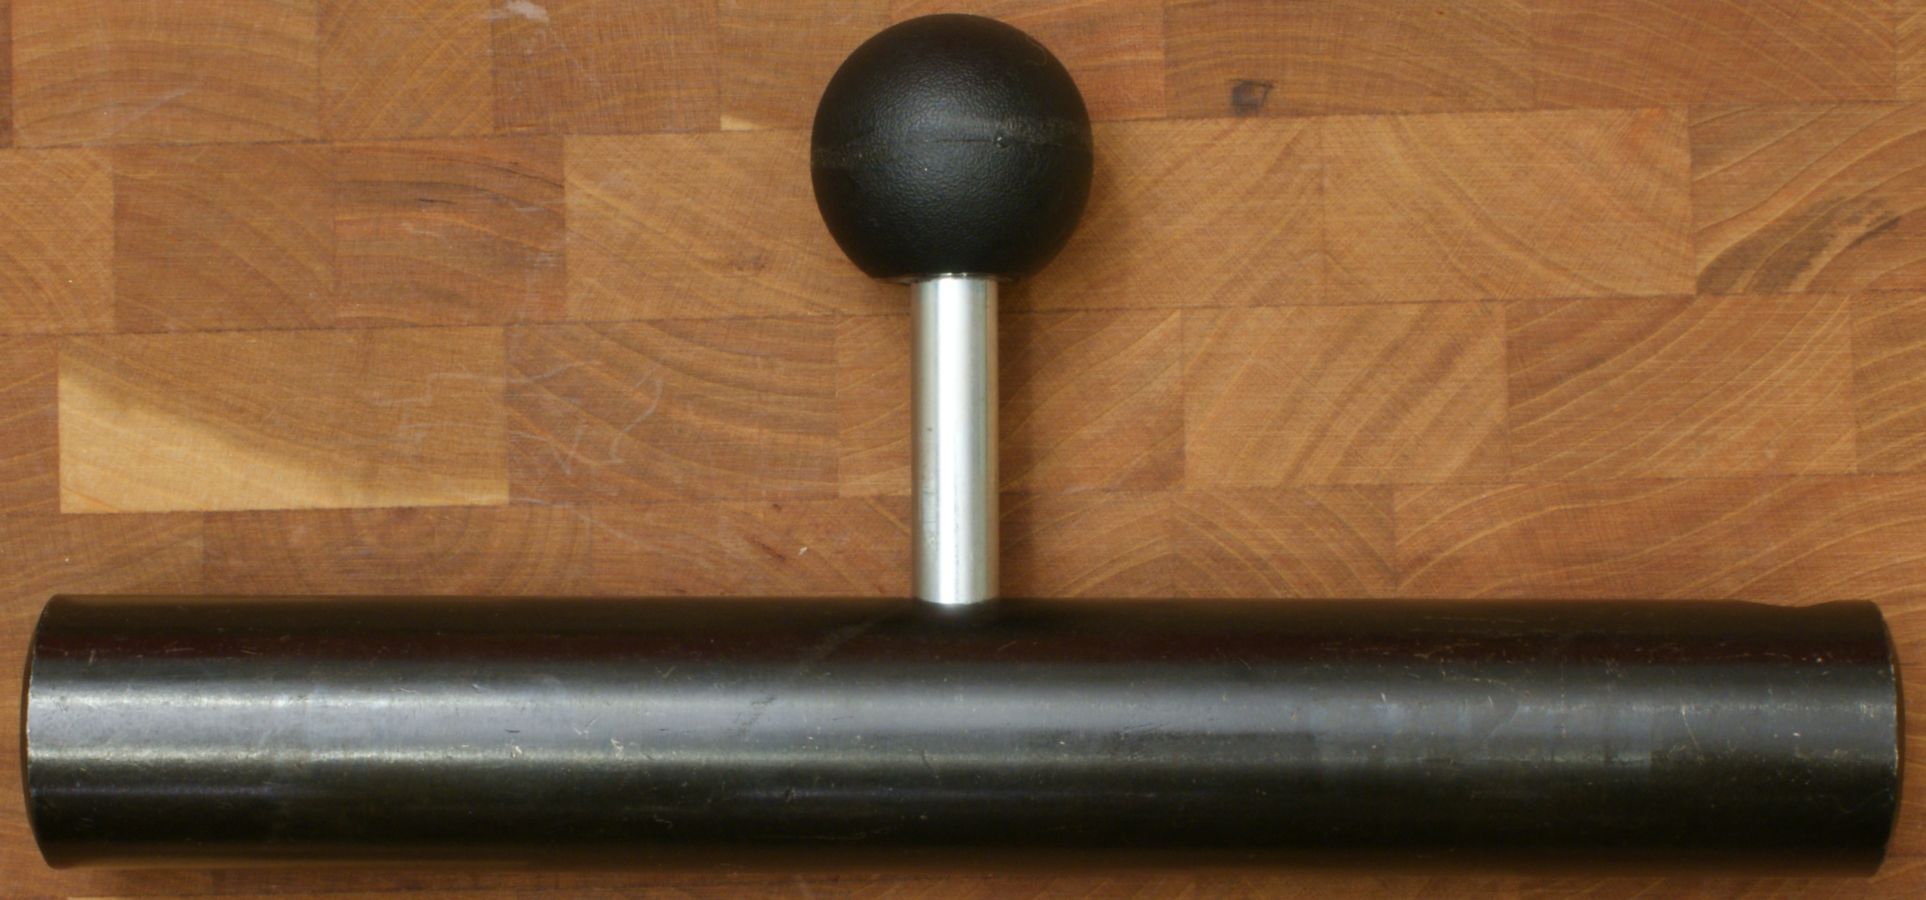
Lapping Bar Handle
The lapping bar handle can be installed in two positions on the lapping bar. In most cases you would install the handle in the center hole, but in extreme cases where the rings are very close together you may want to install the handle in the end position.
Figure 19
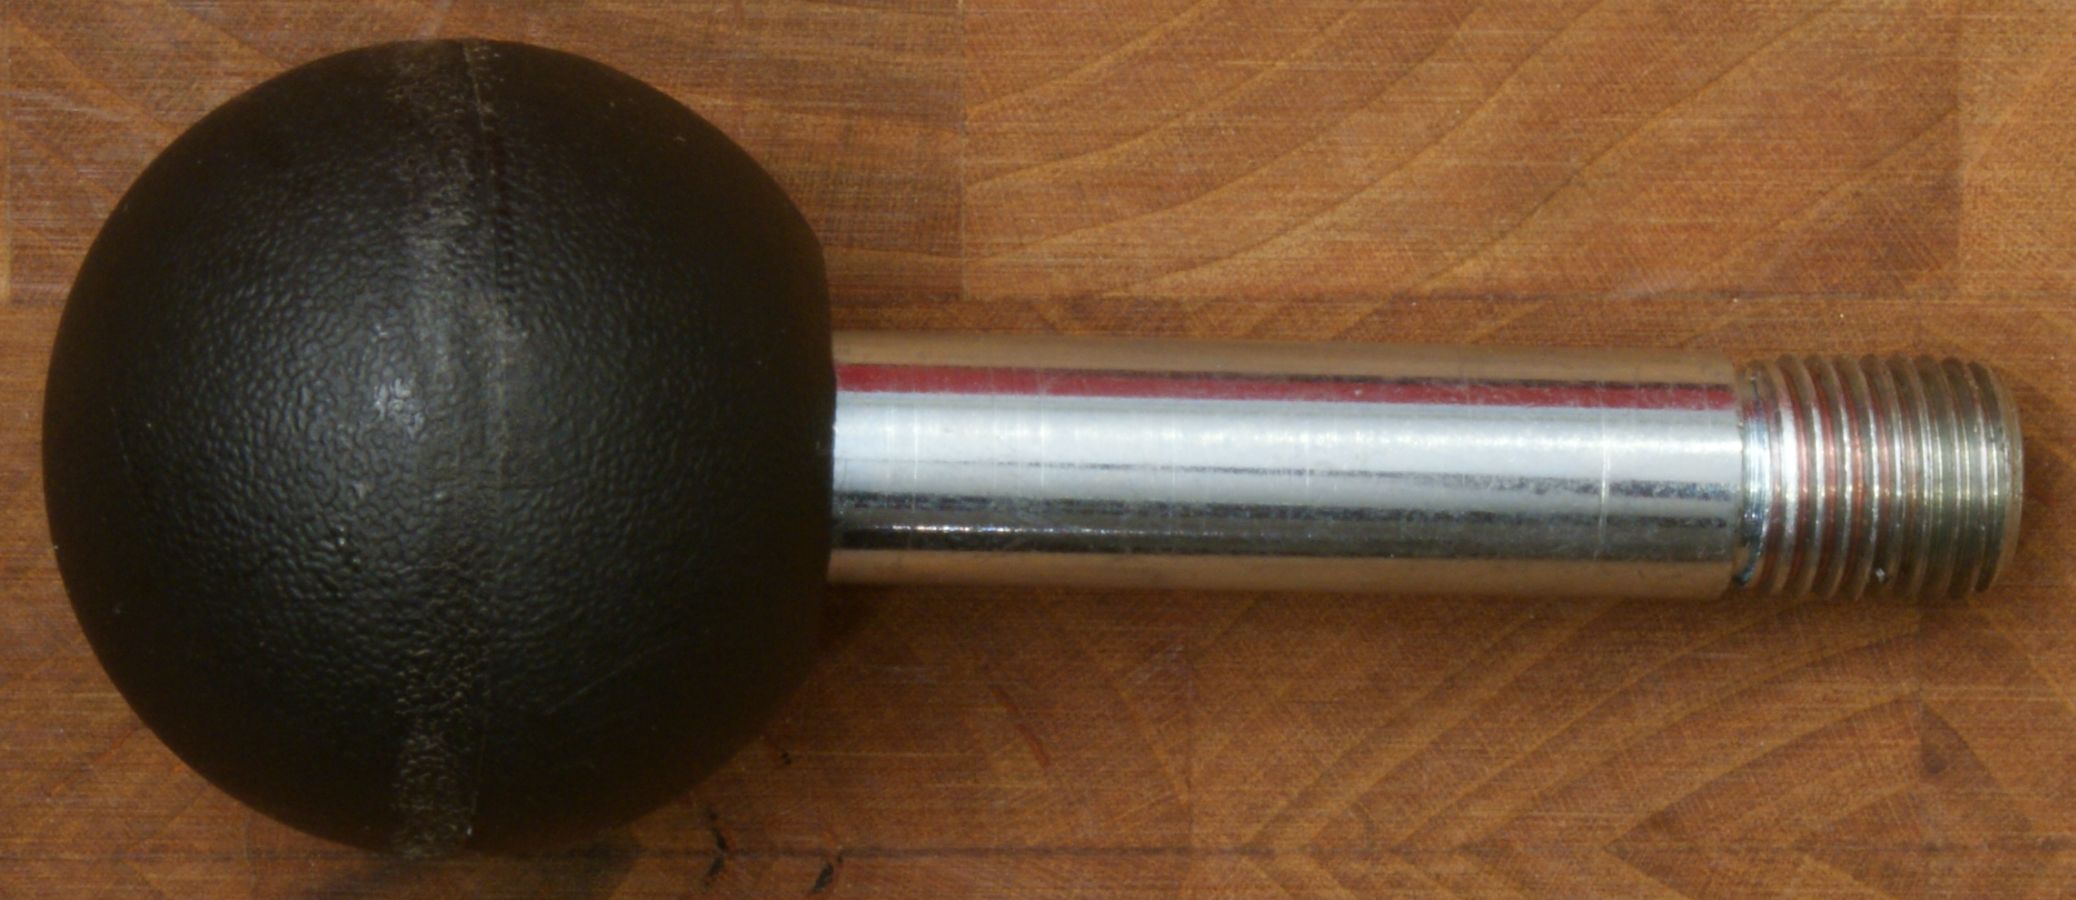
Figure 20
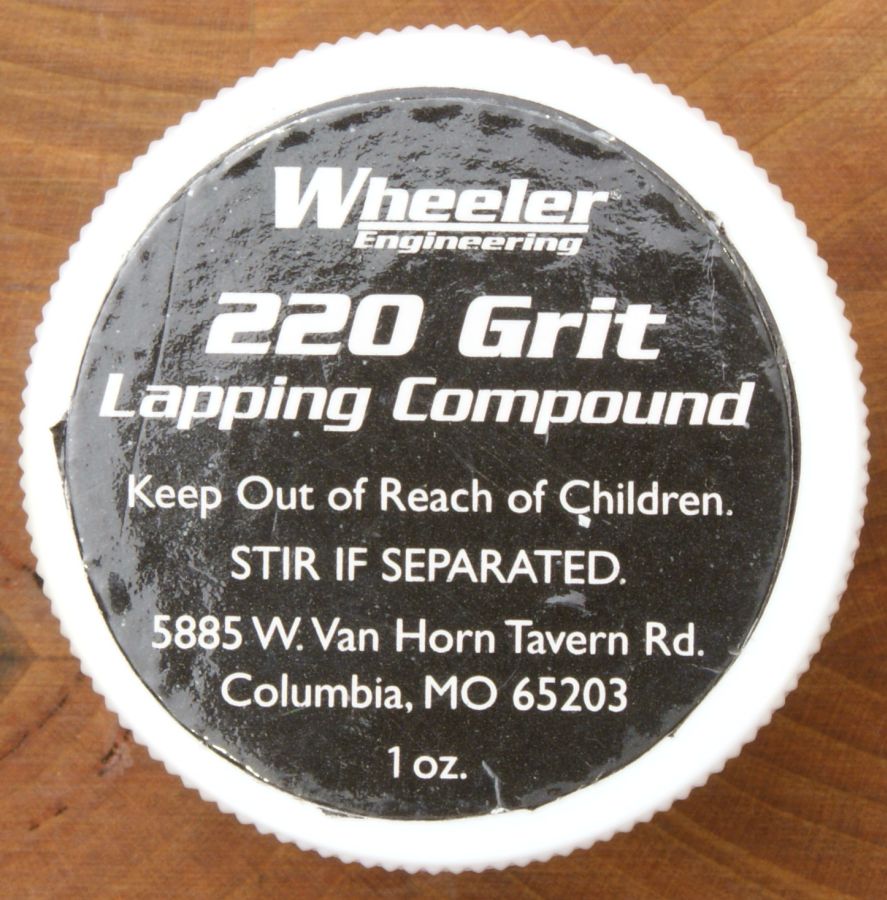
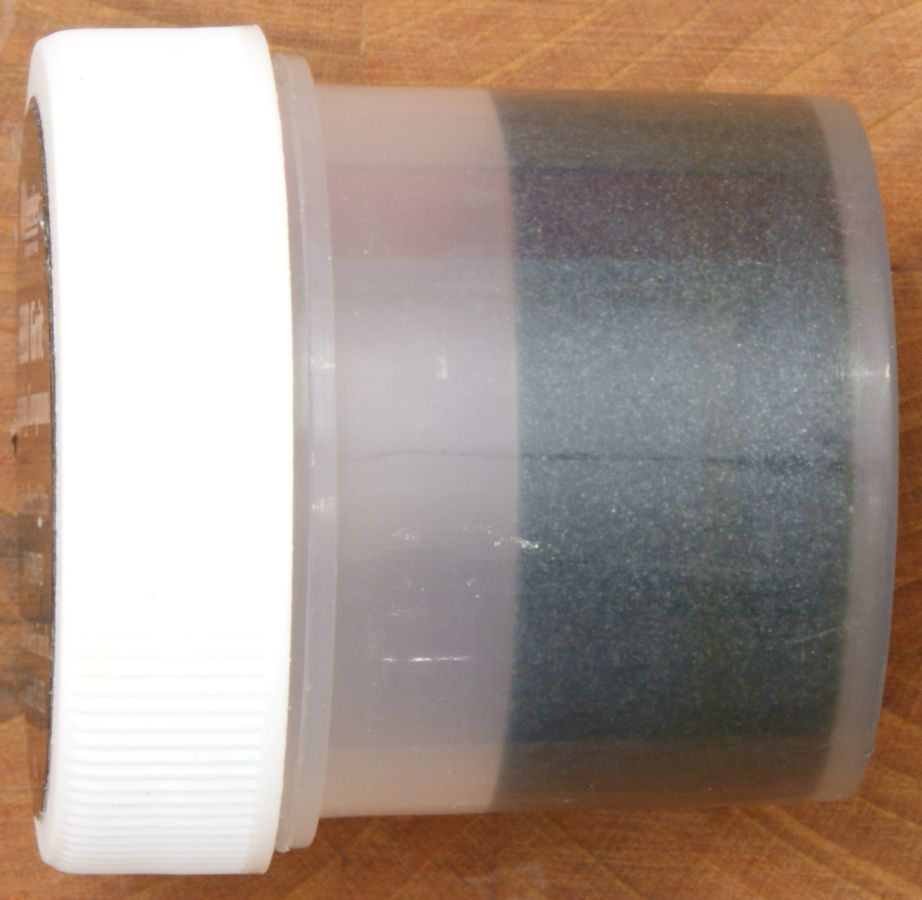
Lapping Compound
The kit comes with 1 ounce of 220 grit lapping compound. Just as the label on the lid states, you will most likely need to stir the compound to remix the components. Based on the amount of compound I used in this review for lapping one set of rings, I estimate you probably have enough compound to do 4 to 5 scope installations. If you run out of compound, you can always order more from the Wheeler website by going to this link.
Figure 21
Figure 22
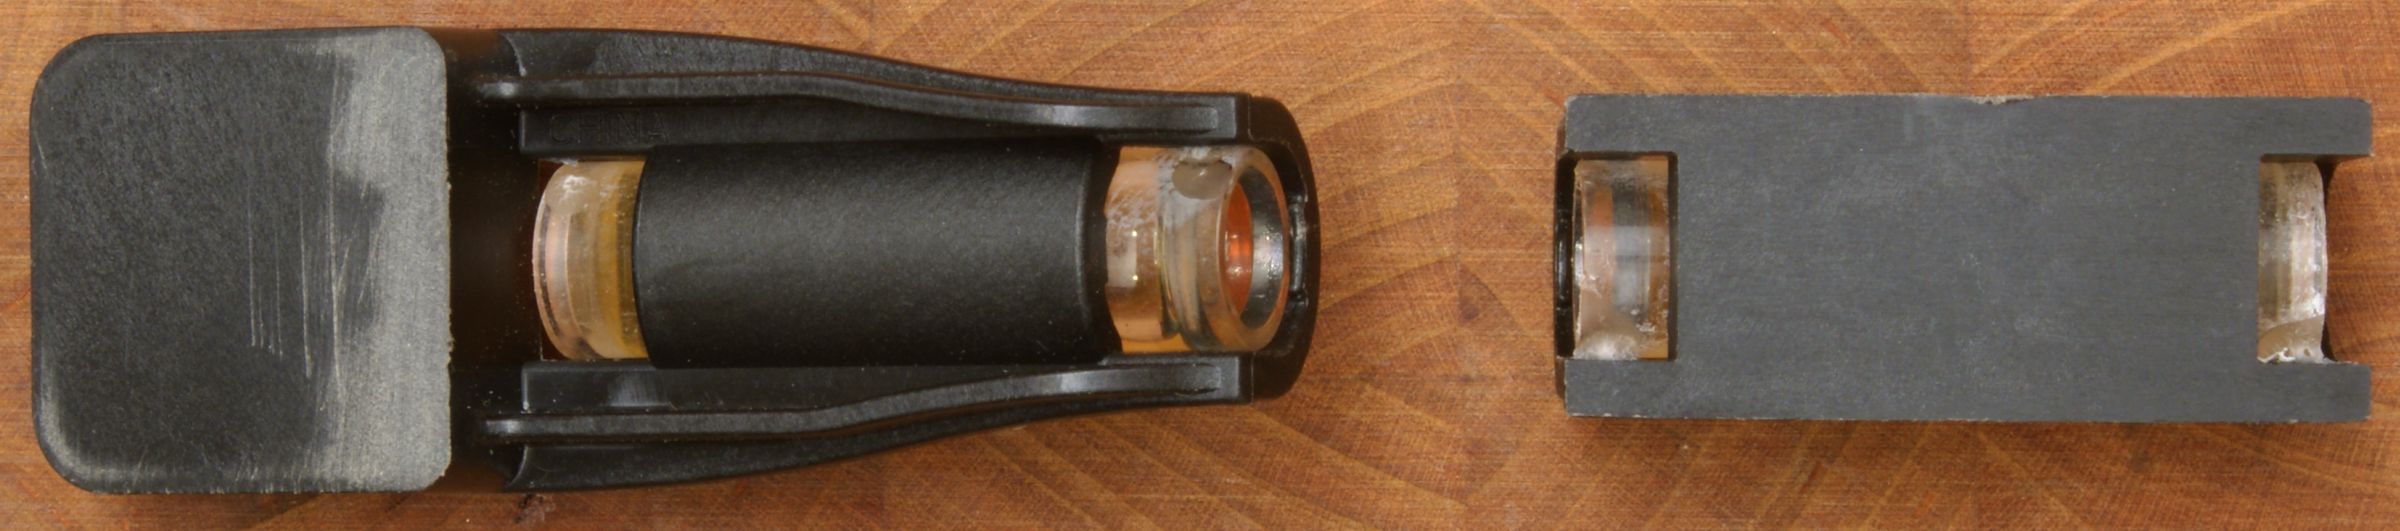
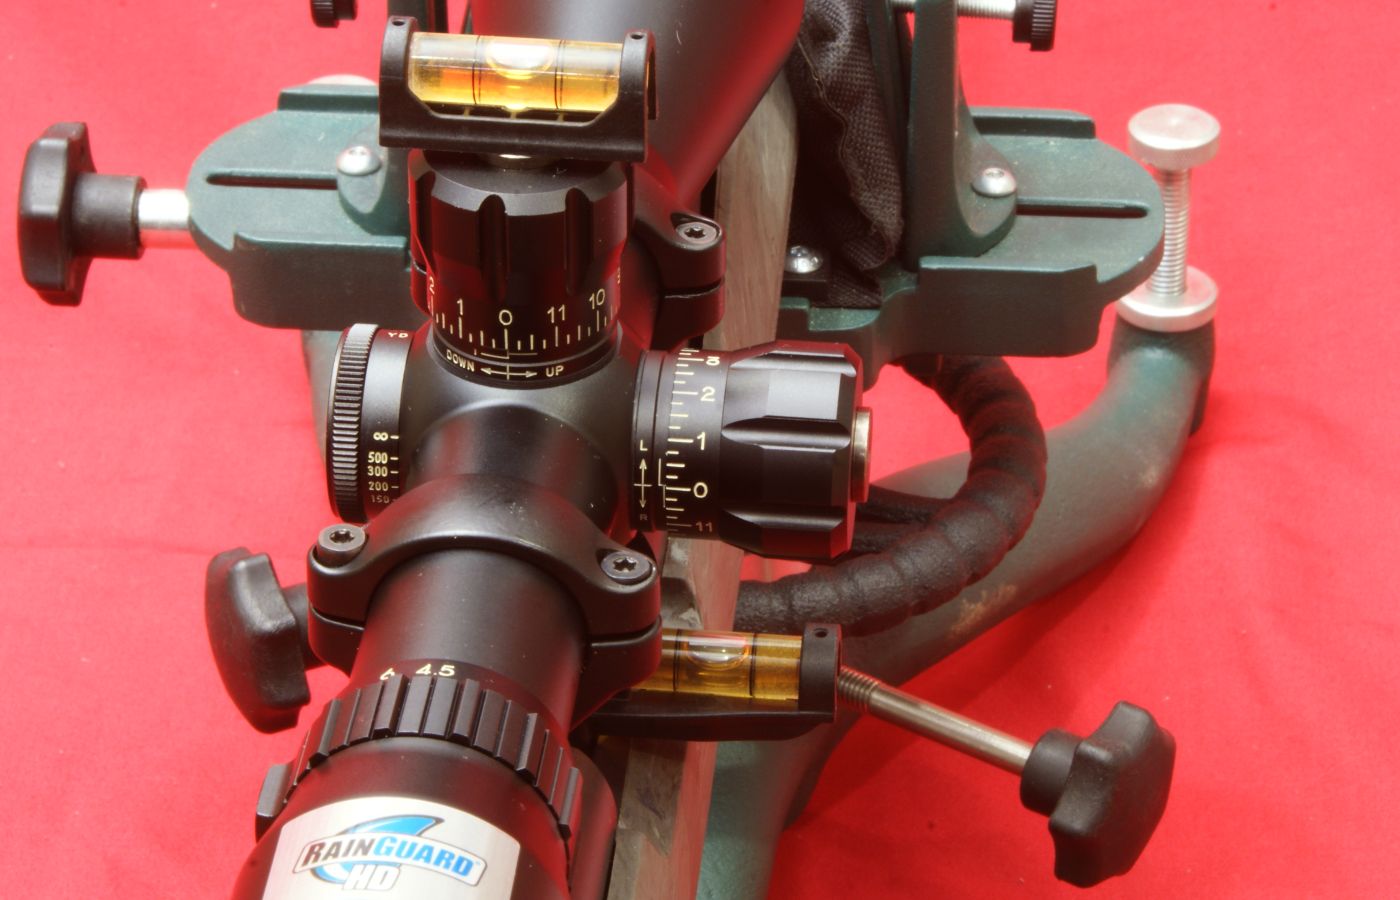
Level-Level-Level
Honestly I'm not big on the name of this product, but as long as it works, that's all that counts. You get two bubble levels and both have magnetic bases. The larger level (action level) is used to place on the rails (shelf) inside of the receiver or any other flat spot on your receiver. The other is used to place on the elevation turret cap. In some cases where you don't have a flat horizontal surface on your receiver, you may want to lay the firearm on it's side and place the action level on the side of the receiver and then the other level on the top of the windage turret cap. Once you have the receiver leveled and the surface of the turret cap leveled to match, you then have the crosshairs properly leveled (hence level-level-level).
Figure 23
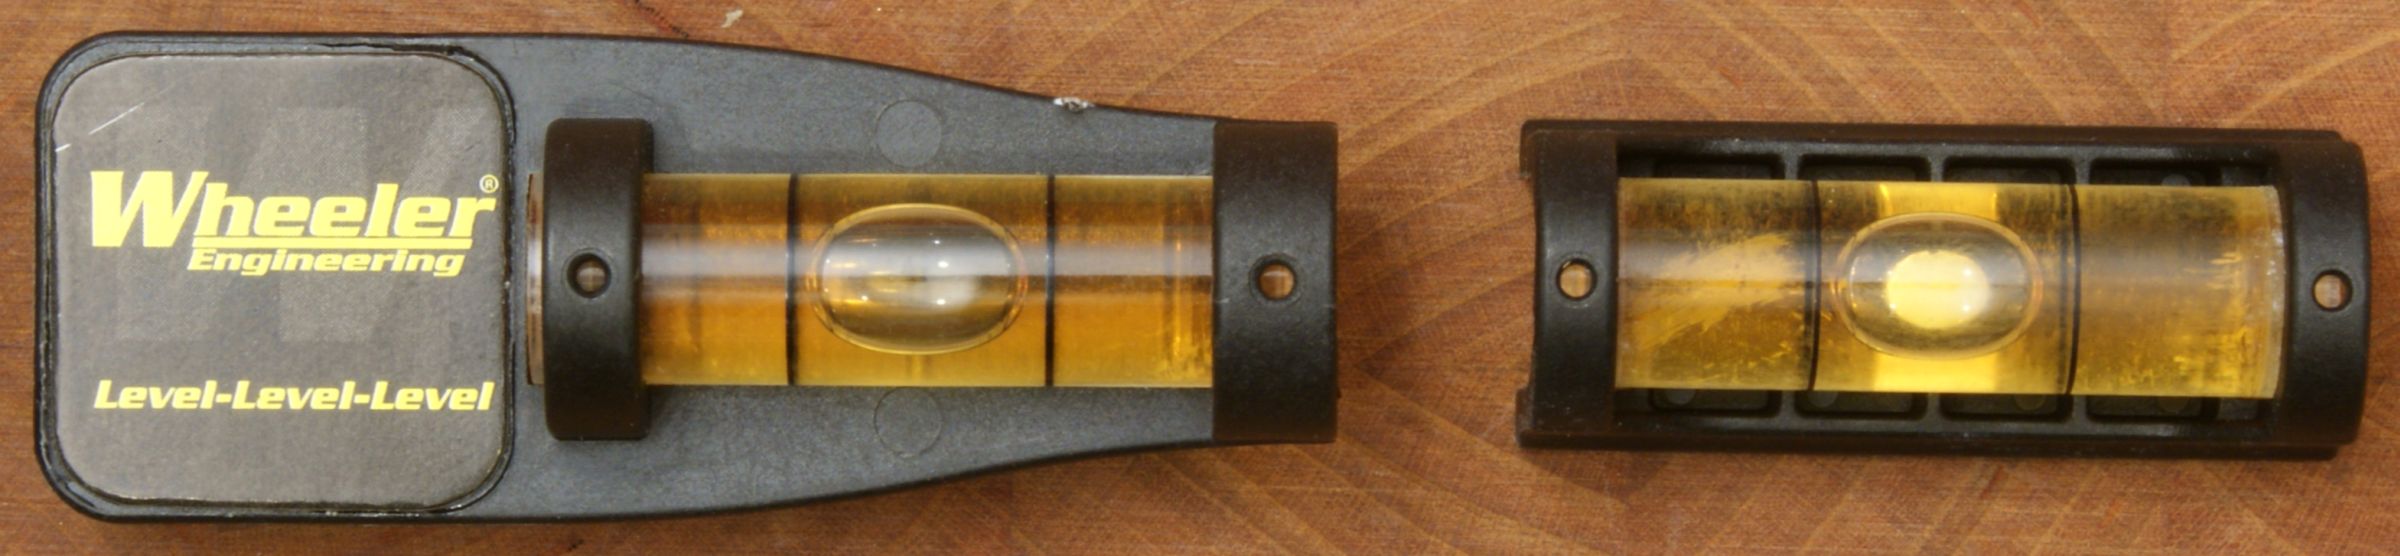
Figure 24
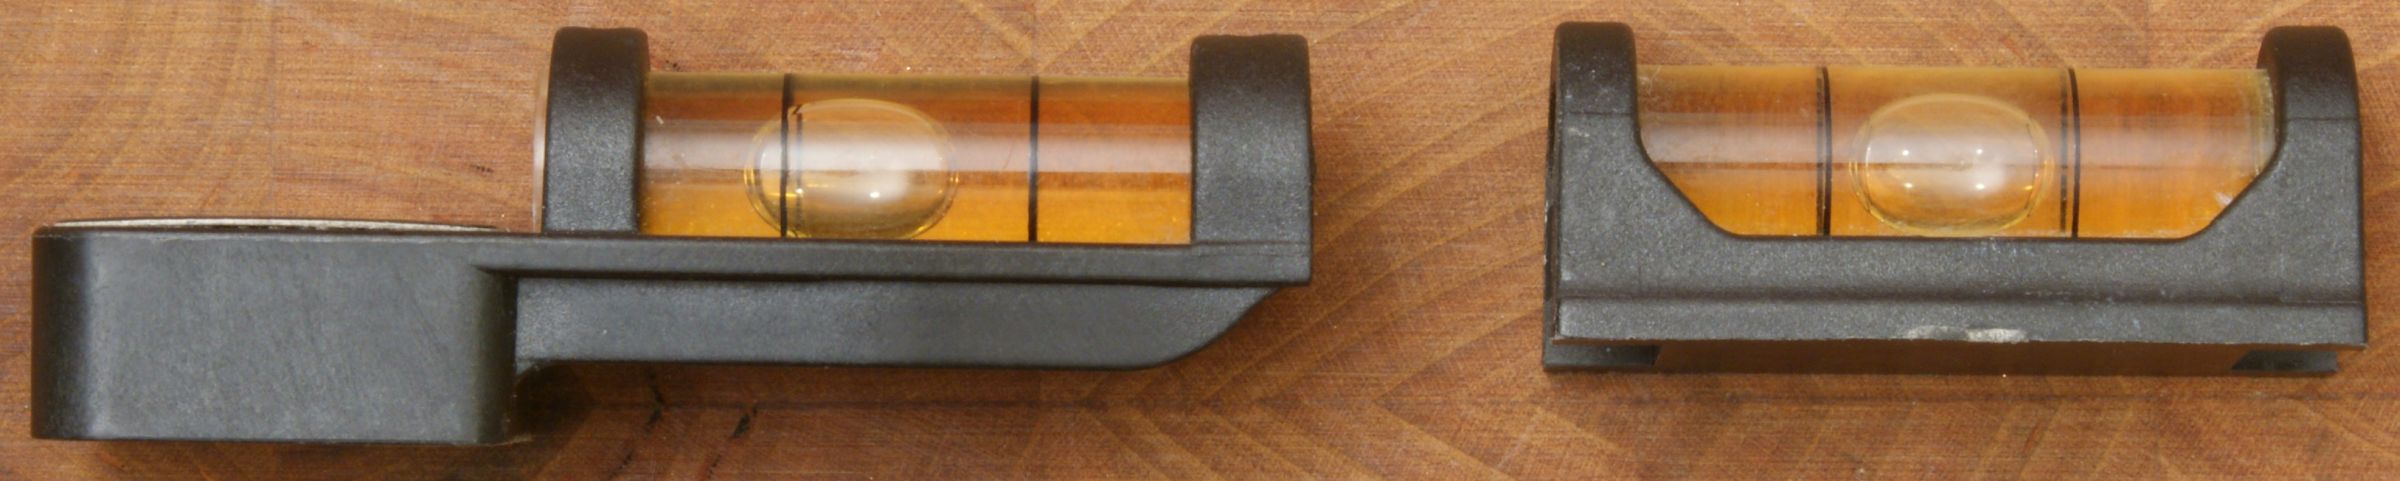
Figure 25
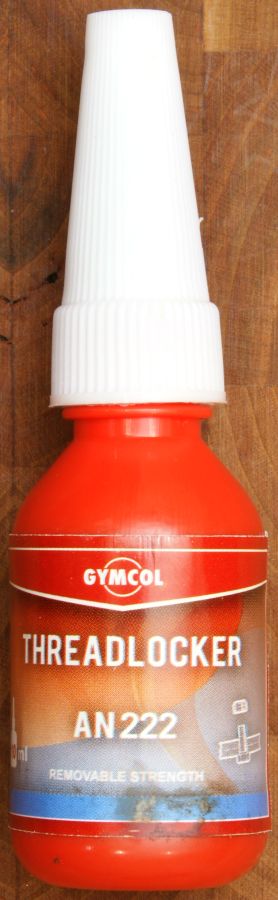
Thread Locker
The kit comes with 10 ml (1/3 ounce) of thread locking compound. The bottle states that the thread locker is "removable strength" so this must be comparable to the "Blue 242" Loctite. The working time and full cure time between this product and Loctite are also about the same.
Figure 26
Figure 27

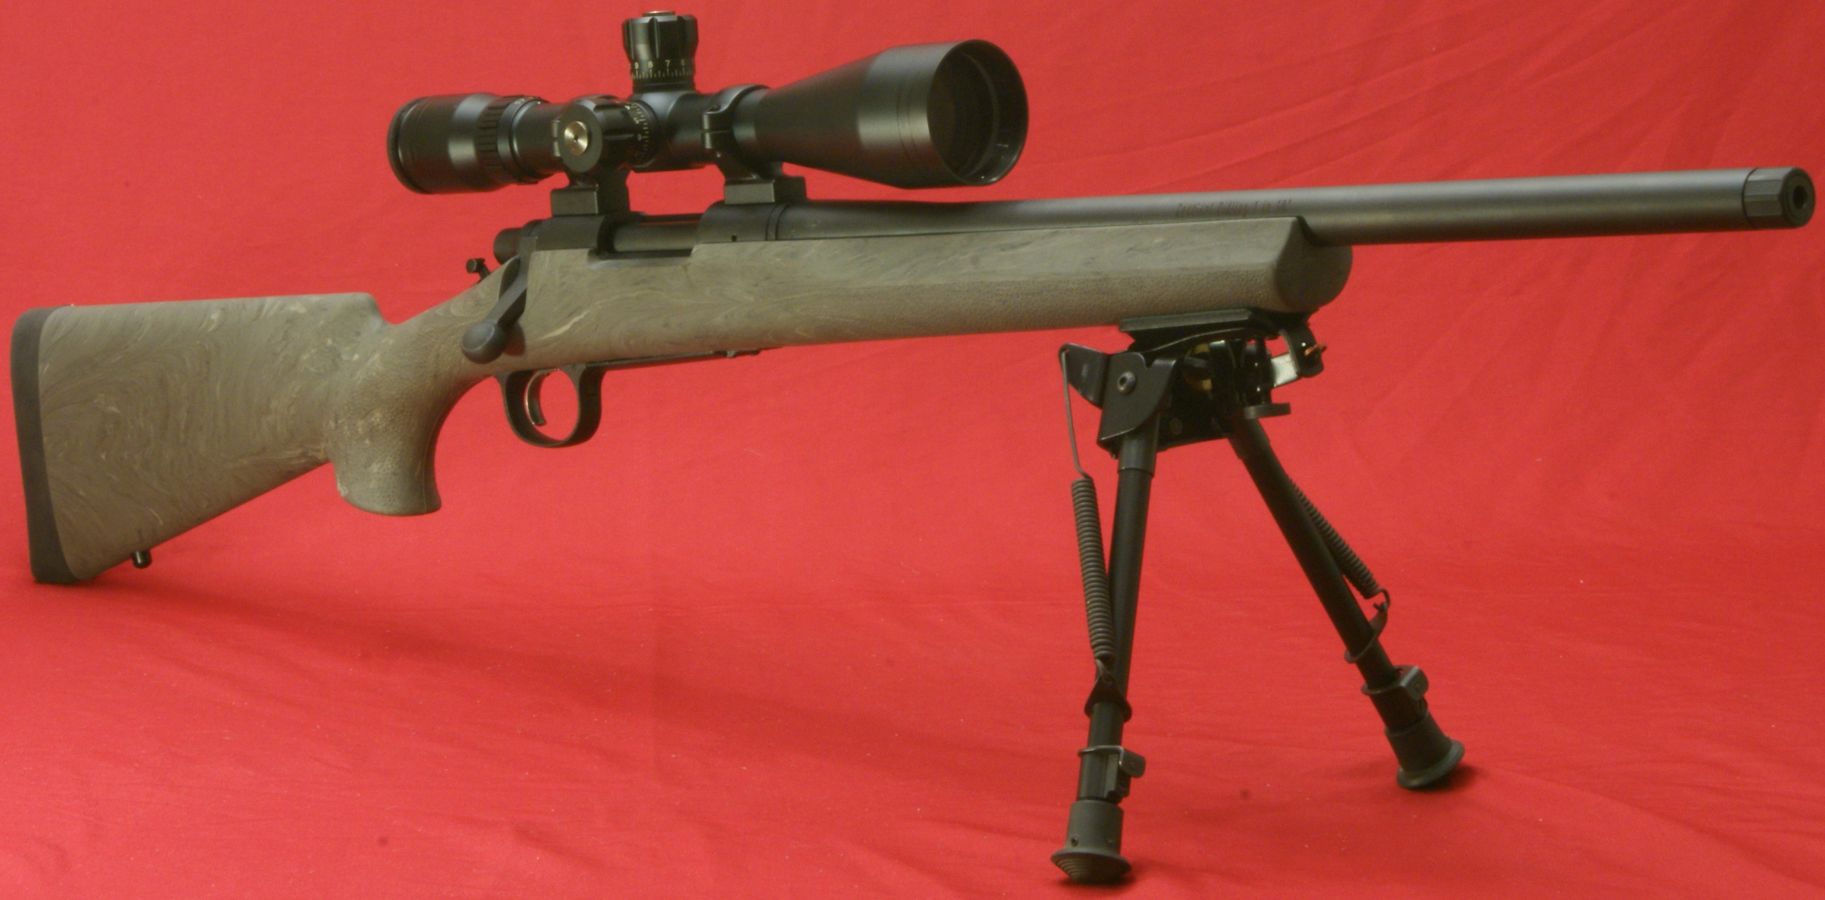
Wheeler Engineering includes a video showing a scope installation on the Instructional DVD provided with the Professional Scope Mounting Kit and you can view this video by going to this link. In their video, Wheeler shows installing a two piece ring and base set. For my installation, I decided on using the Remington 700 Integral Mounts for my Remington 700 SPS Tactical AAC-SD Rifle. The steps for using these mounts are slightly different but the key concepts are the same. For my installation, I also choose to install the Bushnell Elite Tactical 4.5-30x50 Scope.
Figure 28
Step 1 - Safety
When working with a firearm, Step 1 is always make sure the firearm is unloaded. Next I mounted the rifle securely in my Caldwell Rock BR Shooting Rest and placed a bag under the buttstock.
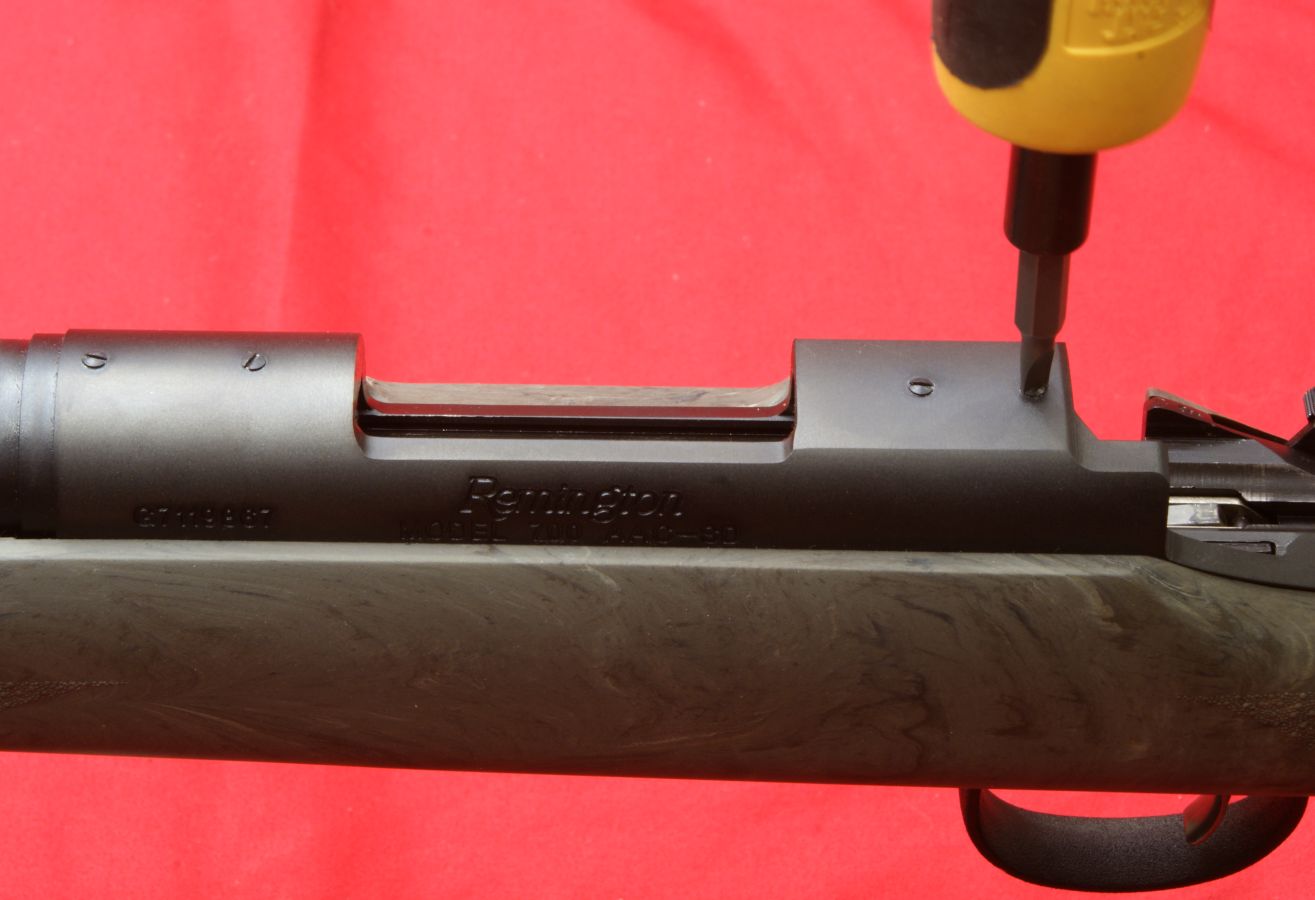
Step 2 - Remove Plugs
Remove the screws that fill the drilled and tapped holes in the top of your receiver. If you ever want to see these tiny screws again, I suggest immediately placing them in a zip lock bag. With the screws removed, you may want to clean the holes with some type of solvent to remove the oil in the threads if you plan to use the thread locking compound. If you used solvent on the top of the receiver, make sure you wipe a light coat of oil back over the top of the receiver to help prevent corrosion in the future.
Figure 29
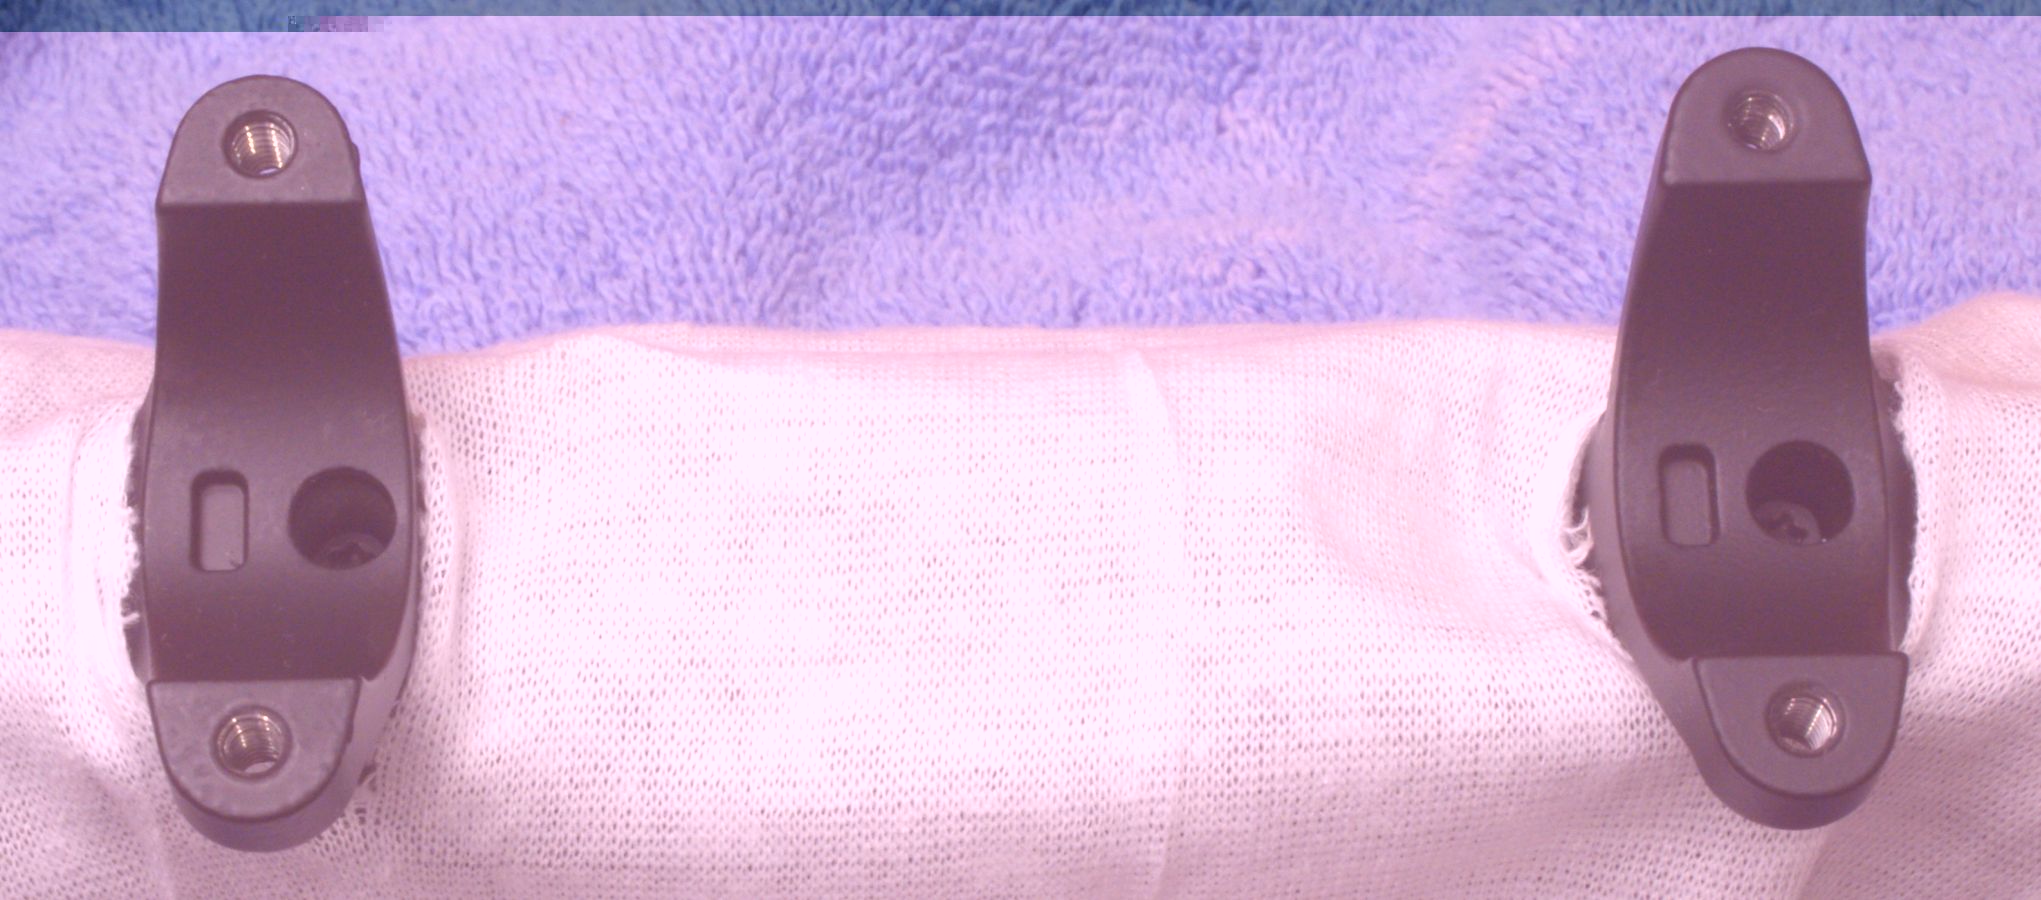
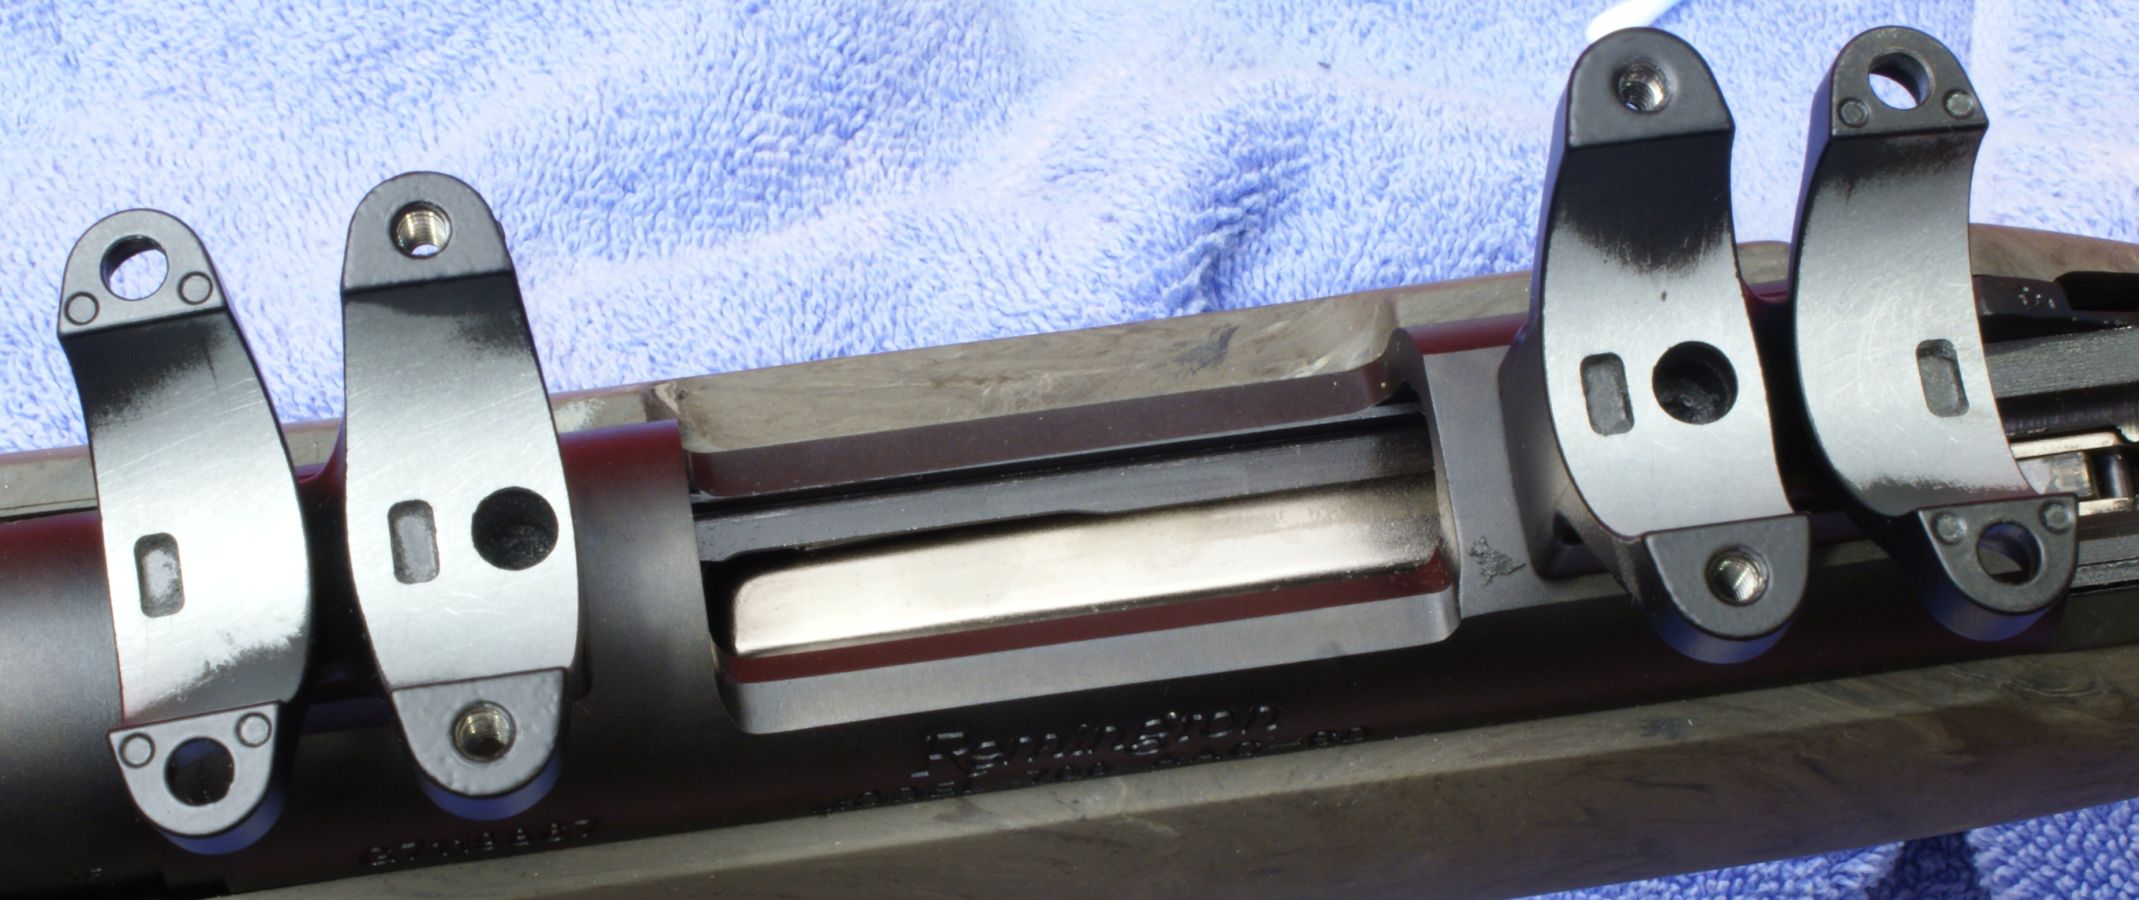
Step 3 - Installing Rear Mount
In the case of the Remington 700 Integral Mounts, the rear mount can only be installed in one orientation as shown below. Install the rear mount and just barely tighten the fasteners.
Figure 30
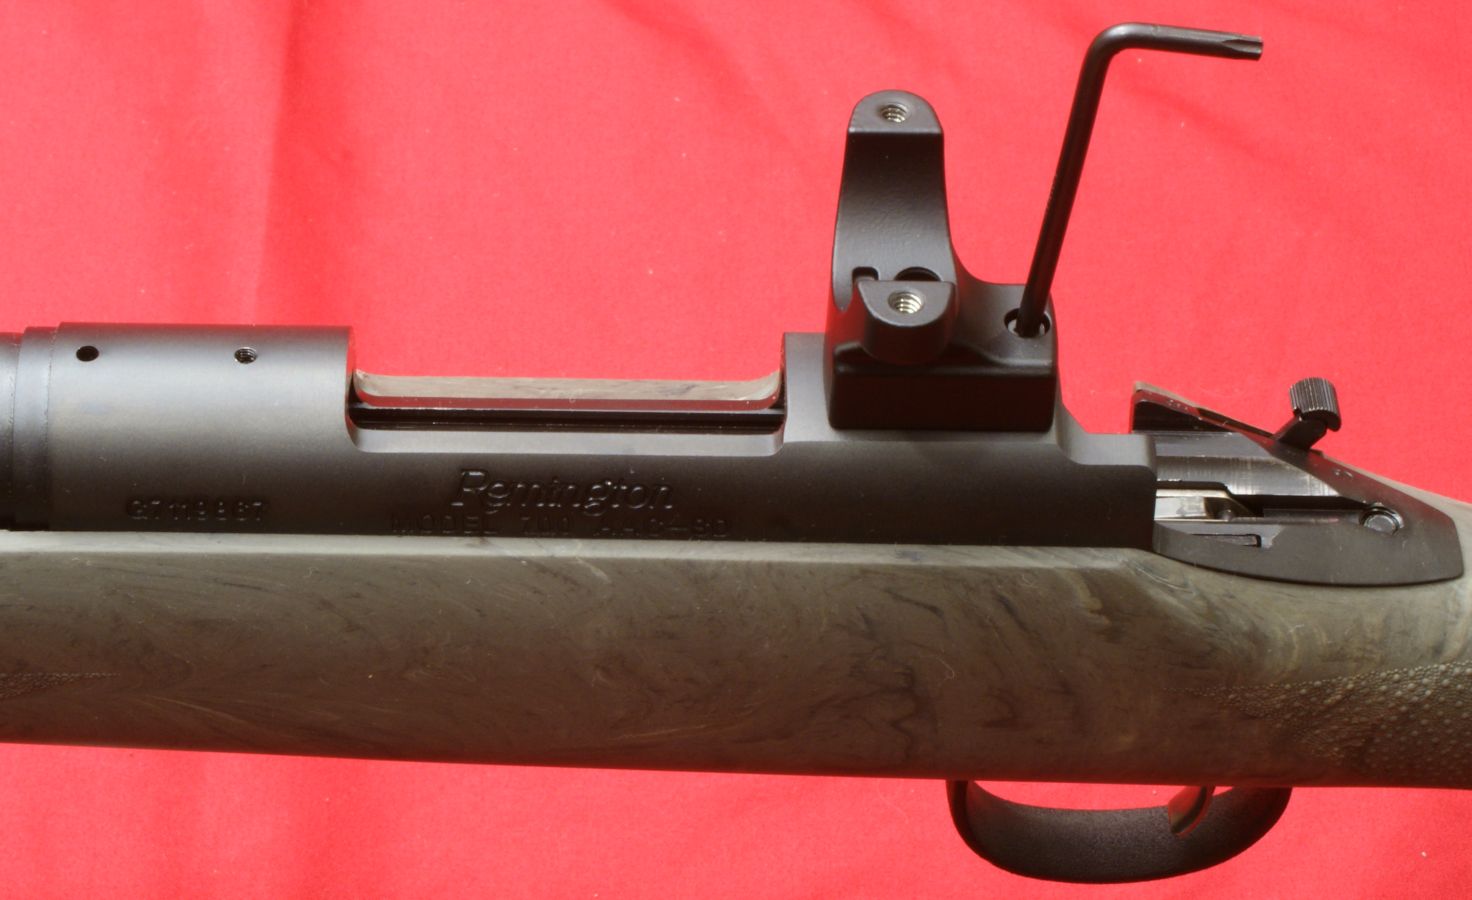
Step 4 - Installing Forward Mount
In the case of the Remington 700 Integral Mounts, the forward mount can be installed with the ring on the forward side or rear side of the mount. In the photo below I show the mount with the ring on the rear side. Barely tighten these fasteners also.
Figure 31
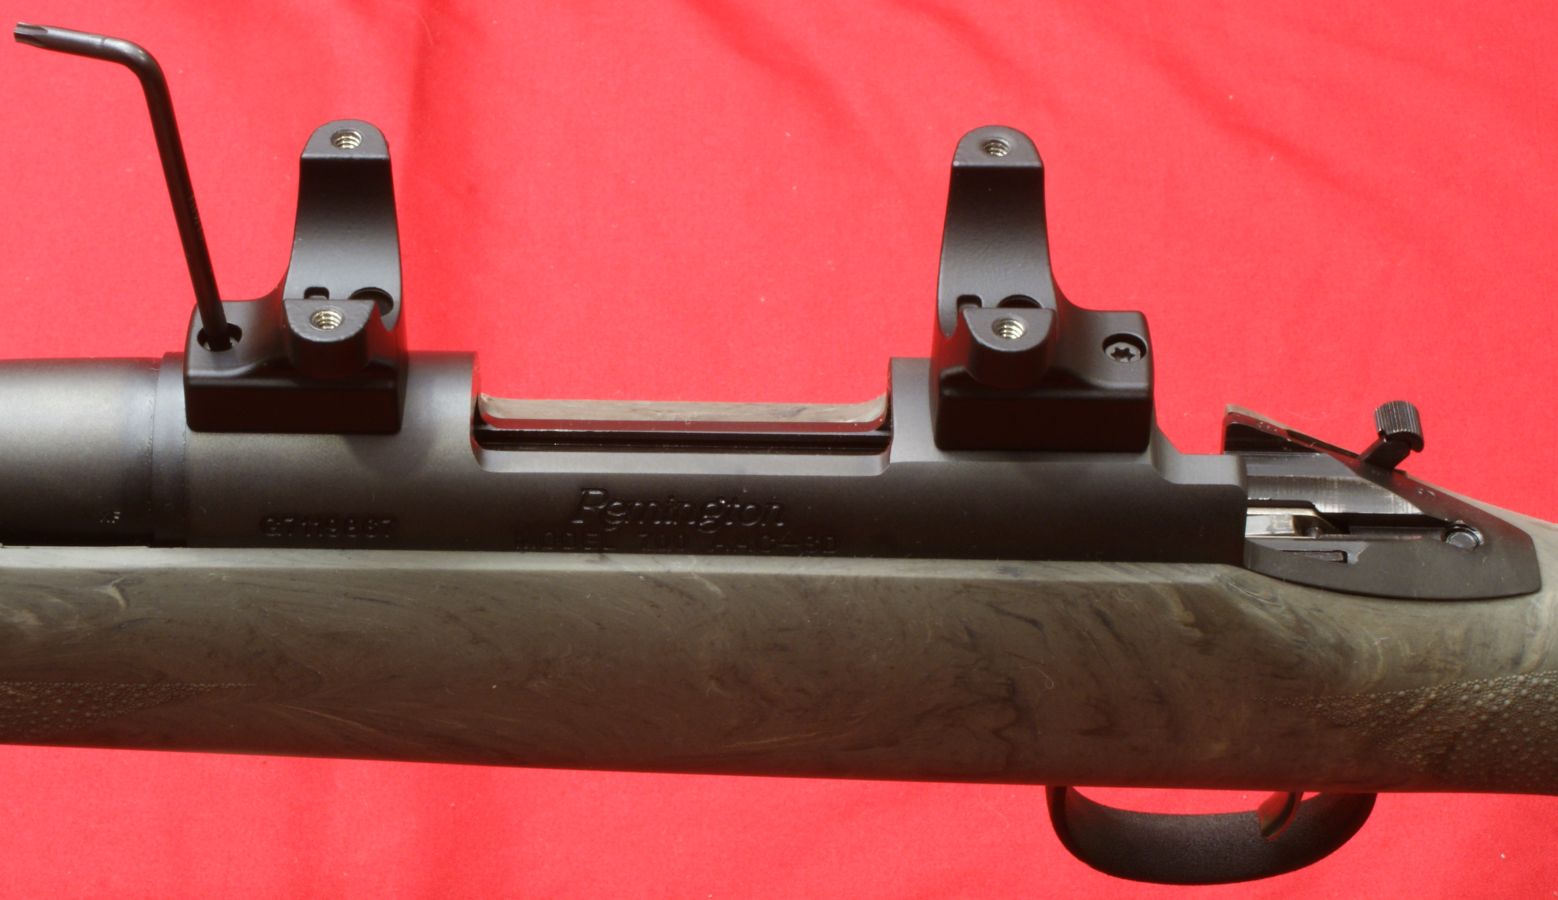
Next place your scope on the rings and install one of the caps to hold the scope in place so that you don't knock it off when you adjust the scope to your approximate eye relief position. Once you have adjusted the eye relief position, take a look at your front mount and then decide if you want to keep the orientation of the mount or rotate the mount so that the ring is on the forward side of the mount. In my case, I decided to keep the mount as shown based on the scope position to give me the proper eye relief. Although I could have possibly flipped the forward mount to gain additional spacing between the mounts, I chose the balanced look with the turret at the approximate center of the rings.
Figure 32
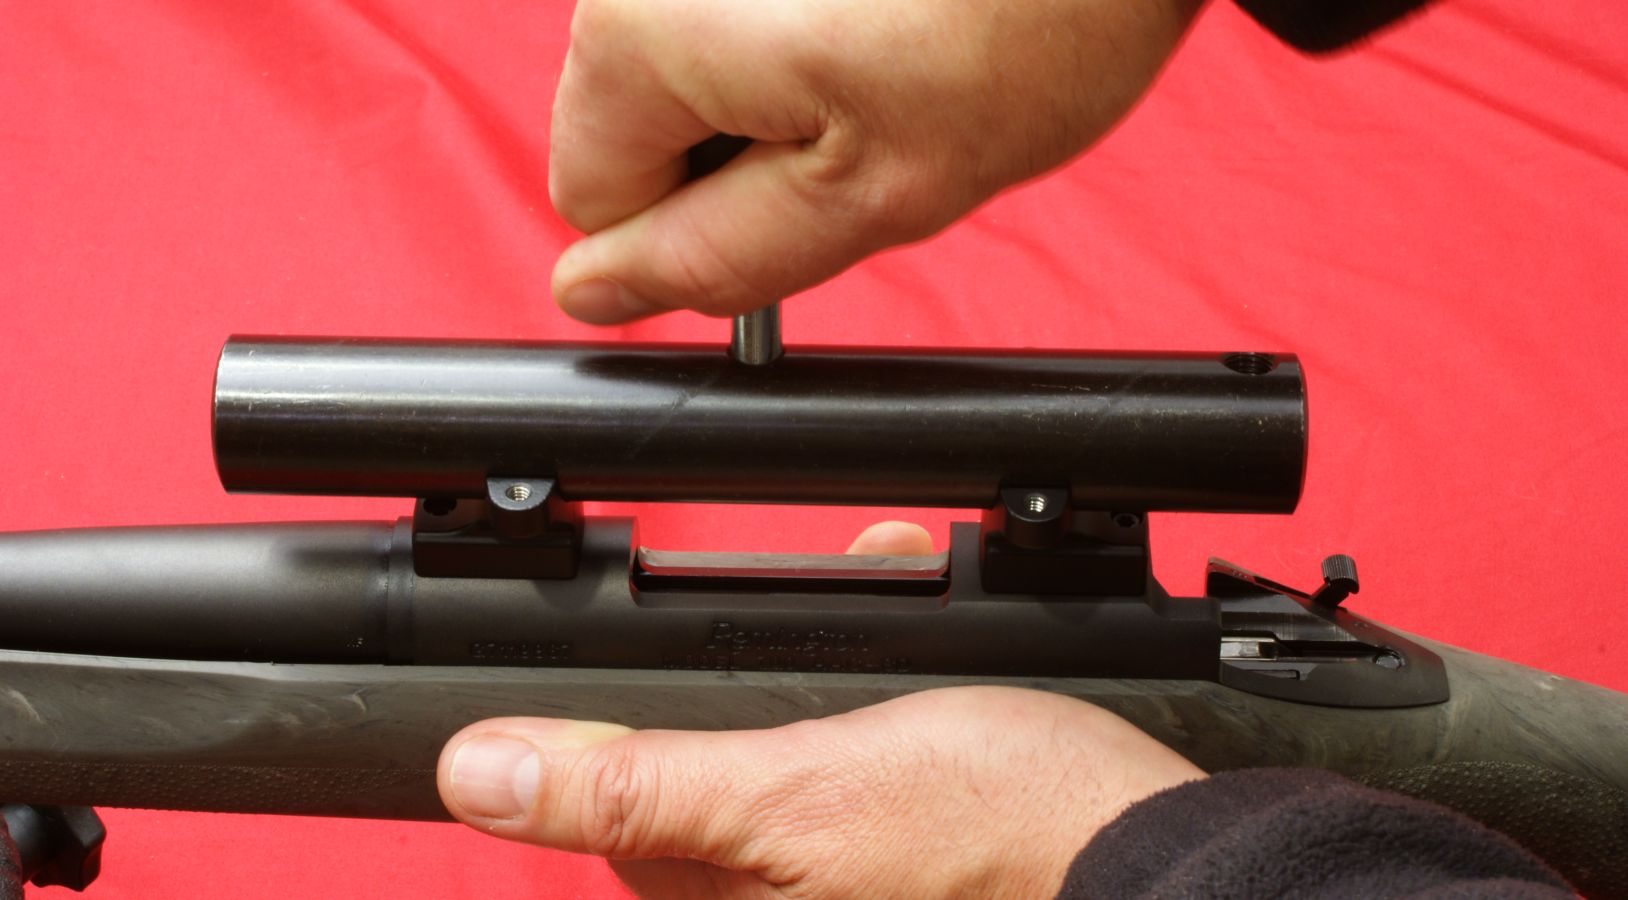
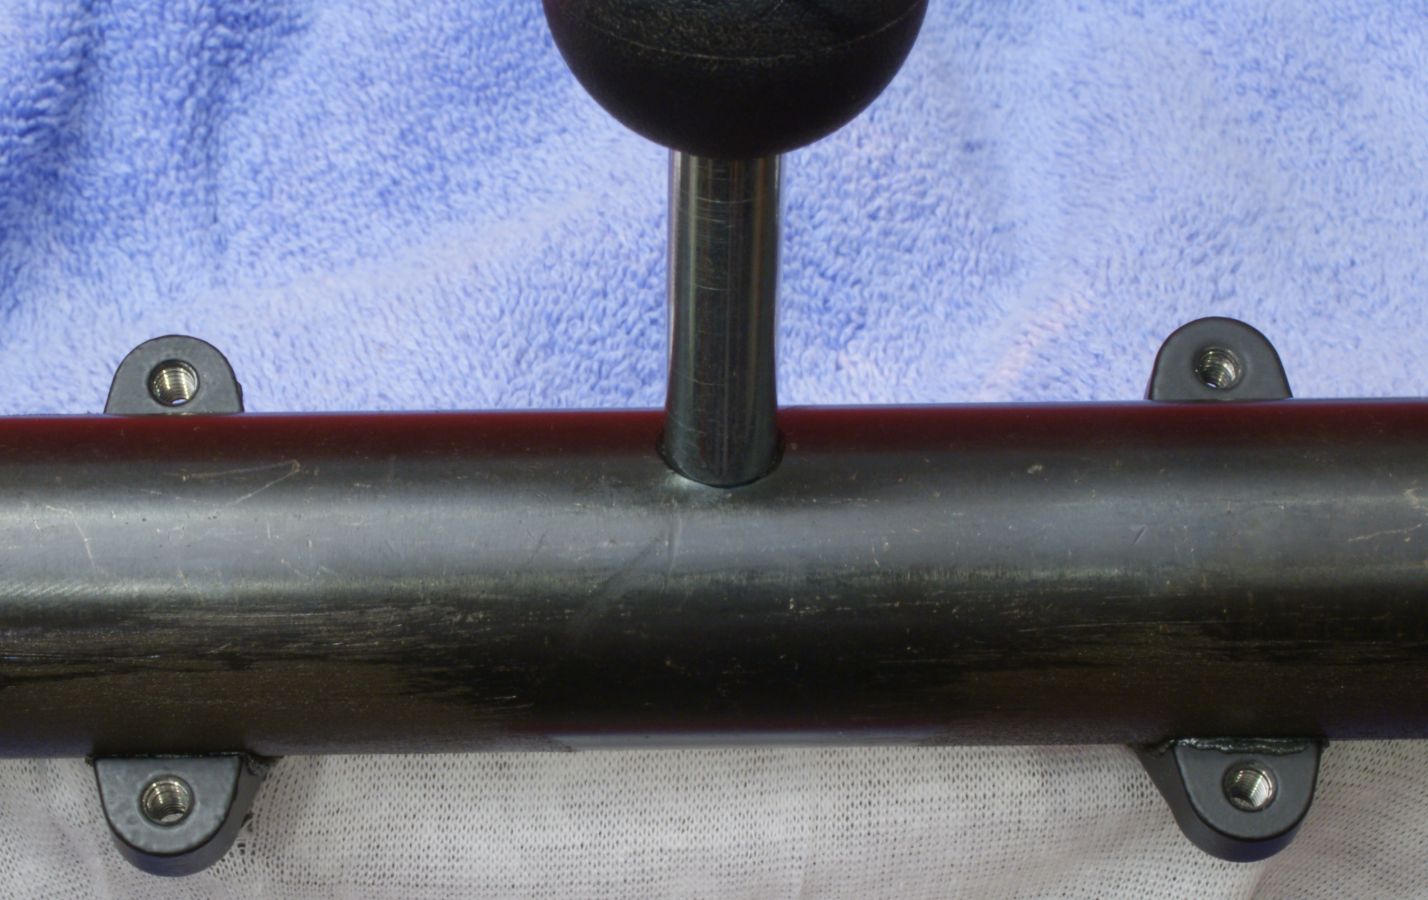
Step 5 - Setting Initial Alignment
Since there is a very small amount of free-play in the ring/receiver attachment and since the attachment screws were barely tight, I took the lapping bar and placed it in the lower halves of the rings and pressed it down very firmly and from side to side to try and align the free-play of each ring.
Figure 33
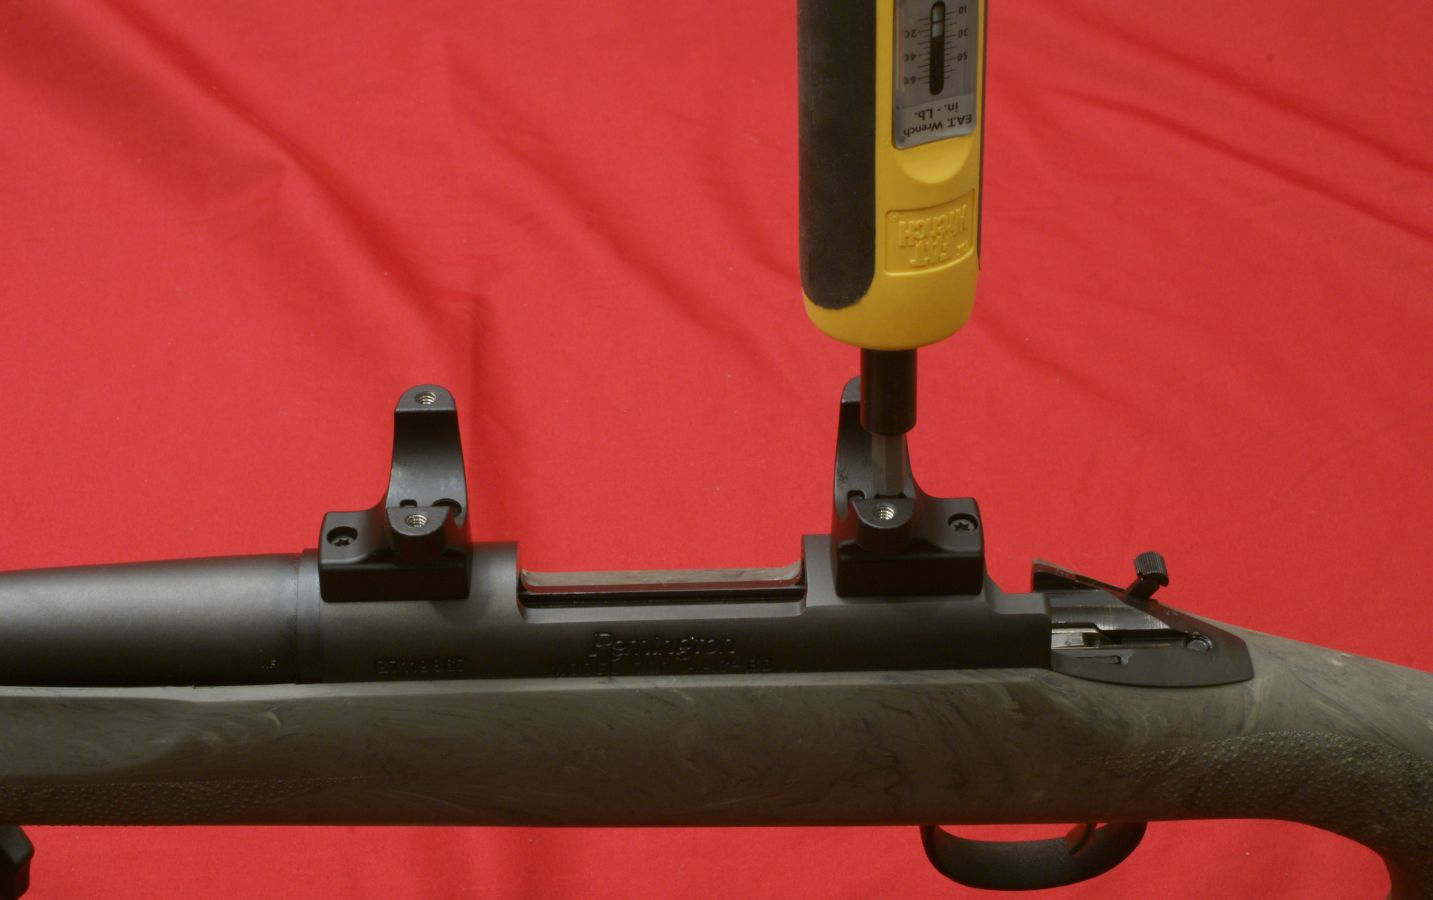
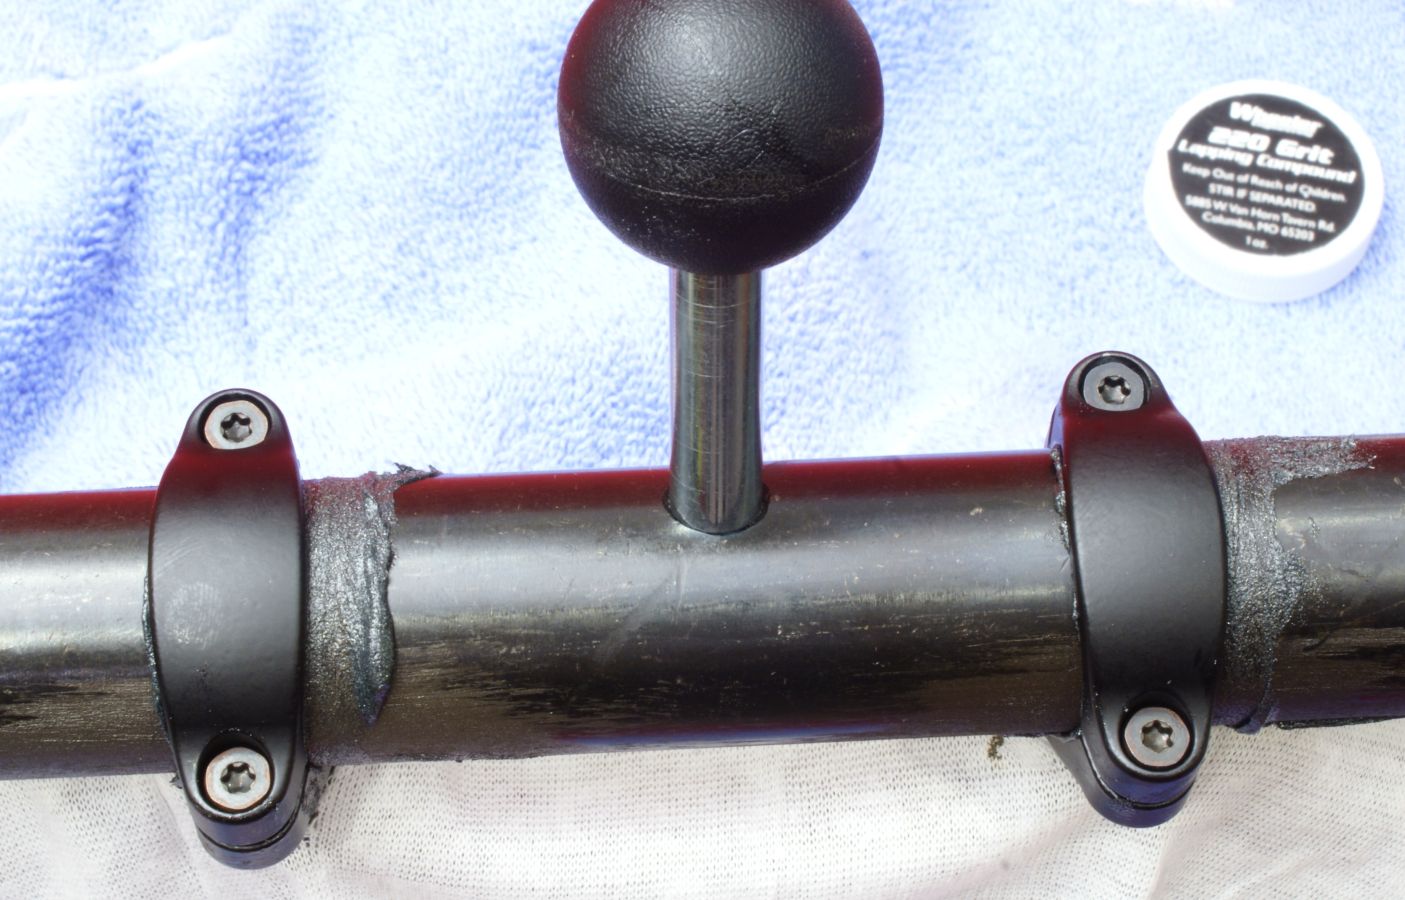
Step 6 - Torque Mount Screws
With the mounts roughly aligned, snug each mount screw to hold the mounts securely in place and then remove the screws one at a time and apply one drop of Thread Locker to the threads and re-snug the screws. Since the instructions that came with my mounts didn't state a torque value for these fasteners, I used the torque value provided with the F.A.T. Wrench User Instructions for a #6 screw. I torqued the four fasteners to 18 in-lbs using the F.A.T. Wrench.
Figure 34
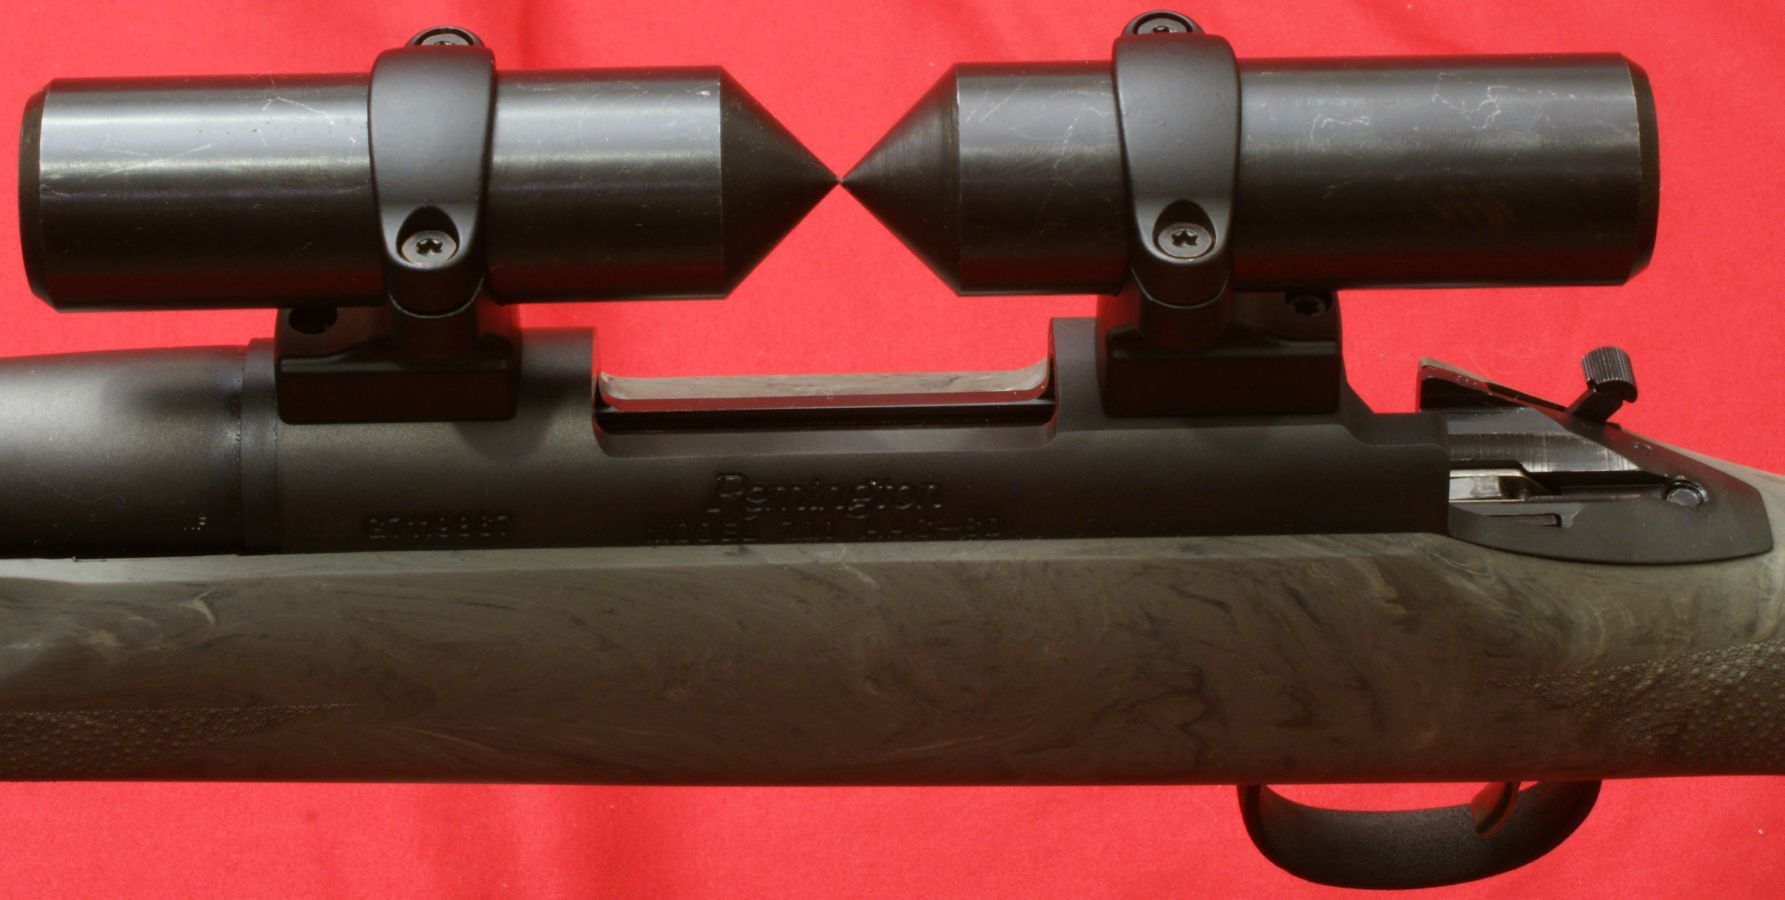
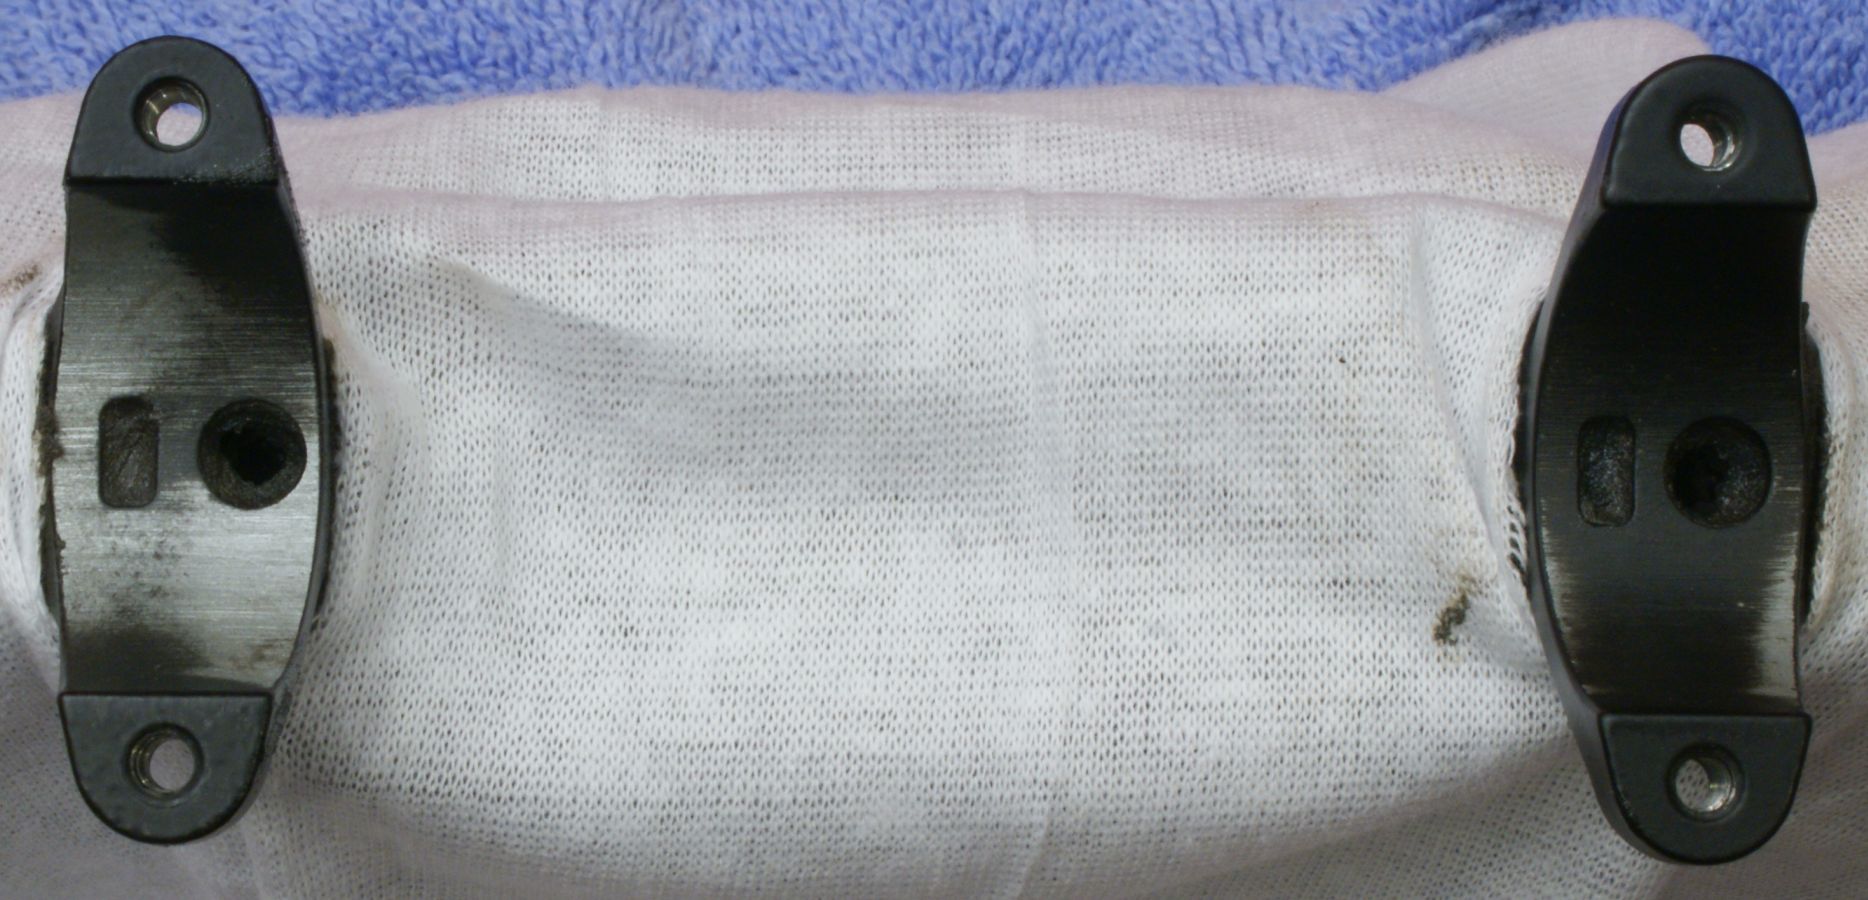
Step 7 - Checking Alignment
Although this is not a required step, I wanted to see how well aligned the rings were after torqueing the mounts screws. To do this I installed the two alignment bars and snugged the caps to see how close the center points came together. The photo below shows it was pretty close, which I would hope it would be. If it were not close, the User Instructions states that "Two-piece bases may need to be shimmed to improve elevation alignment". If there were significant misalignment at this point, I would consider getting new bases than try the shimming process. If new bases didn't correct the issue, I would next consider going with a different style of mounts and rings.
Figure 35
Step 8 - Preparing for Lapping
To minimize cleanup, I cut two holes in a cleaning rag and placed it around the rings and over the receiver. One thing I should have also done was cut some small strips of cloth to put down in the fastener holes so that cleanup would be easier because the lapping compound did work down into the holes. I also placed an old towel under the rifle so that I had a place to put the lapping bar and caps during the process. Since they were covered with lapping compound, I wanted to minimize my cleanup.
Figure 36
Step 9 - Optional Step Showing Initial Lapping Results on Lower Mounts
In this step, I put lapping compound on the bar and lower ring halves without the caps installed and performed about 2 minutes of lapping. This step is not required but I decided to do this to give you an idea of two things. The first is how little area that may be in contact on your scope rings without lapping. The second is how important it is to try to apply uniform pressure to the lapping bar when lapping rings.
Figure 37
Below you can see that this effort removed a large area on the front ring and small areas on the rear ring. Because of the offset handle, I believe it forces you to put more down force on the ring in the direction you are moving the handle. Also pushing away appears to have been the more powerful stroke when lapping than pulling towards you based on the material removed from the rings. Also note that the rear ring had a high spot on the rear side that wore down first before any other surfaces of the ring. This high spot would have been the primary contact surface if these rings were not lapped.
Figure 38
Step 10 - Lapping Rings
For the actual lapping process, I placed the caps over the lapping bar with lapping compound on the bar and underneath the caps. I tightened the cap fasteners so that it was hard to move the lapping bar but still possible. I lapped the rings for about 4 minutes and had to continually re-snug the cap fasteners to maintain pressure on the surfaces.
Figure 39
The photo below shows the results of this lapping session. Since I felt that the rear ring and both caps could be lapped in a little better due to the amount of surface that still had the black finish showing, I decided to do another 4 minute session of lapping. Note that when you remove the caps you should pay very close attention to the orientation of the caps. Once you start lapping, your caps are now truly matched to the lower mount and must always be reinstalled in the same position.
Figure 40
This photo below shows my final results after lapping. Just based on the amount of surface that was brightly polished, I should be getting a much higher percentage of surface in contact with the scope when the caps are installed and torqued.
Figure 41
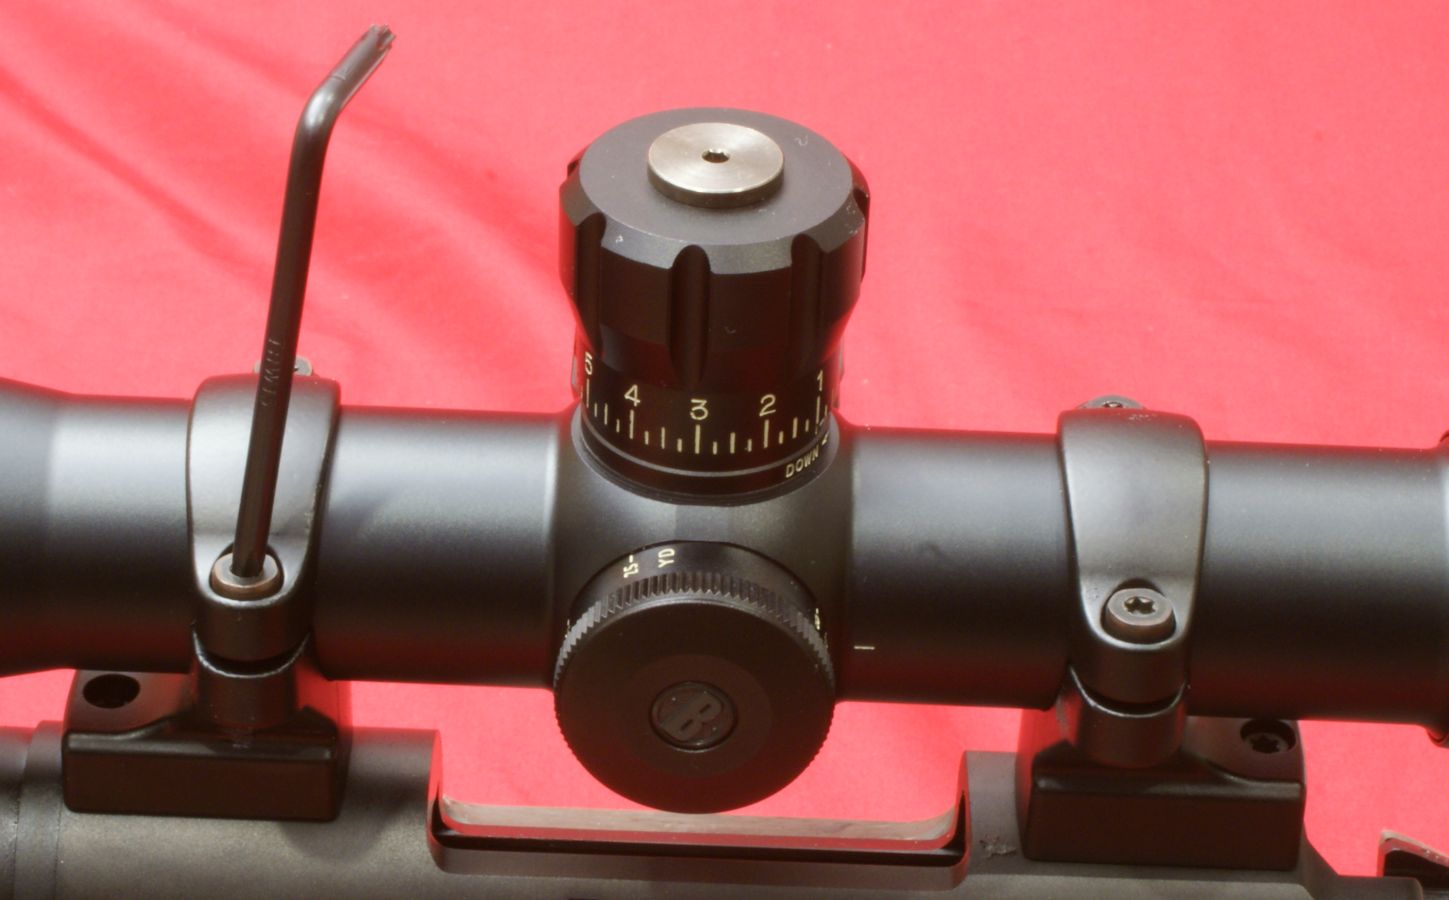
Step 11 - Set Eye Relief
After thoroughly cleaning the mounts, install your scope and lightly tighten the cap screws so that you can still slide the scope as needed while you adjust the scope to your proper eye relief position.
Figure 42
Step 12 - Level Reticle
To level the reticle, I placed the action level (larger level) inside the receiver on the rails (shelf) of Model 700. I made sure the level was in contact with both rails on each side of the receiver. Then I leveled this bubble by adjusting the position of the rifle in the rest. Based on your firearm, you may need to adapt the leveling process as required. See the leveling instructions in the User Instructions provided with the kit.
Figure 43
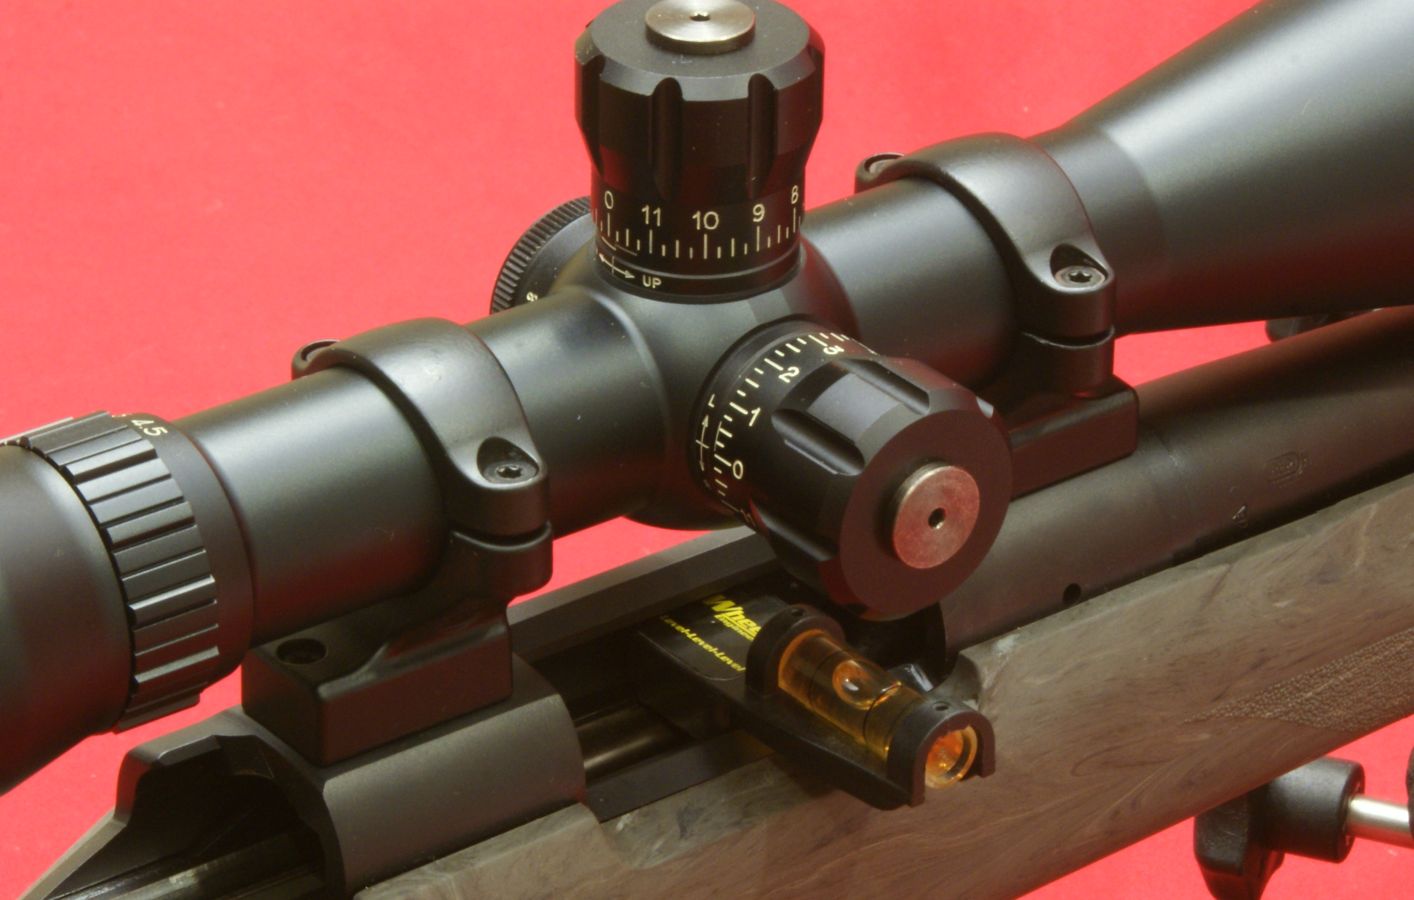
Next place the other bubble level on top of the elevation cap and rotate the scope until both bubble levels indicate the same level reading. You should also try to make the bubble axis perpendicular to barrel axis and make sure the rifle is also level front to back. Doing this gives you the greatest accuracy when using these levels. Once you are satisfied with the level of your crosshairs, then snug your cap screws making sure to keep the same amount of gap between the cap and base on each side.
Figure 44
Step 13 - Torque Cap Screws
Before you torque the fasteners, this step would be the place where you would remove each cap screw and put a drop of Thread Locker on the threads prior to final torqueing. Note that I did not use the thread locking compound on any of the screws in this review because as with most of my review products, I tend to move items from one firearm platform to another based on what I'm reviewing and I can see a high potential to use this scope on other review rifles in the future. Since the instructions provided by Remington for installing the Integral Mounts didn't include a torque for the cap screws, I used the minimum torque provided in the F.A.T. Wrench User Instructions for the #8 screw which was 28 in-lbs and torqued the caps accordingly.
The Rifle
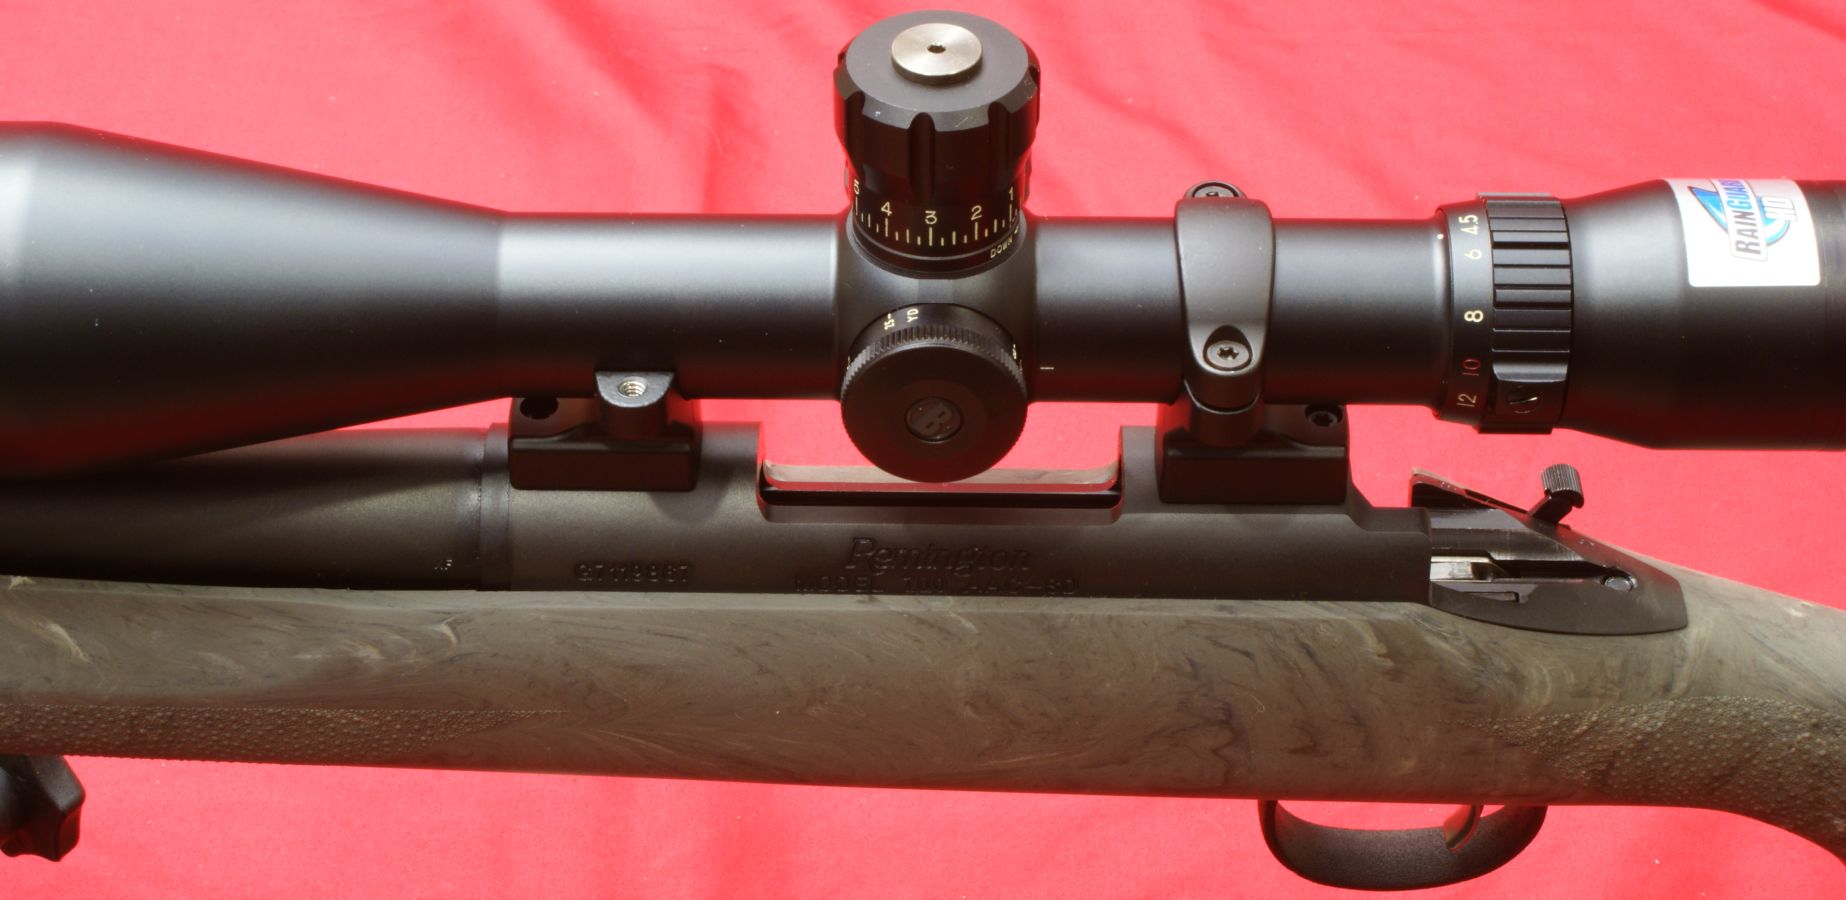
The next two photos show the final results of my efforts and I'm very pleased with the scope installation. As a recap of the components, the scope is the Bushnell Elite Tactical 4.5-30x50mm Scope which was installed on my Remington Model 700 SPS Tactical AAC-SD Rifle using the Remington Model 700 Integral Mounts.
Figure 45
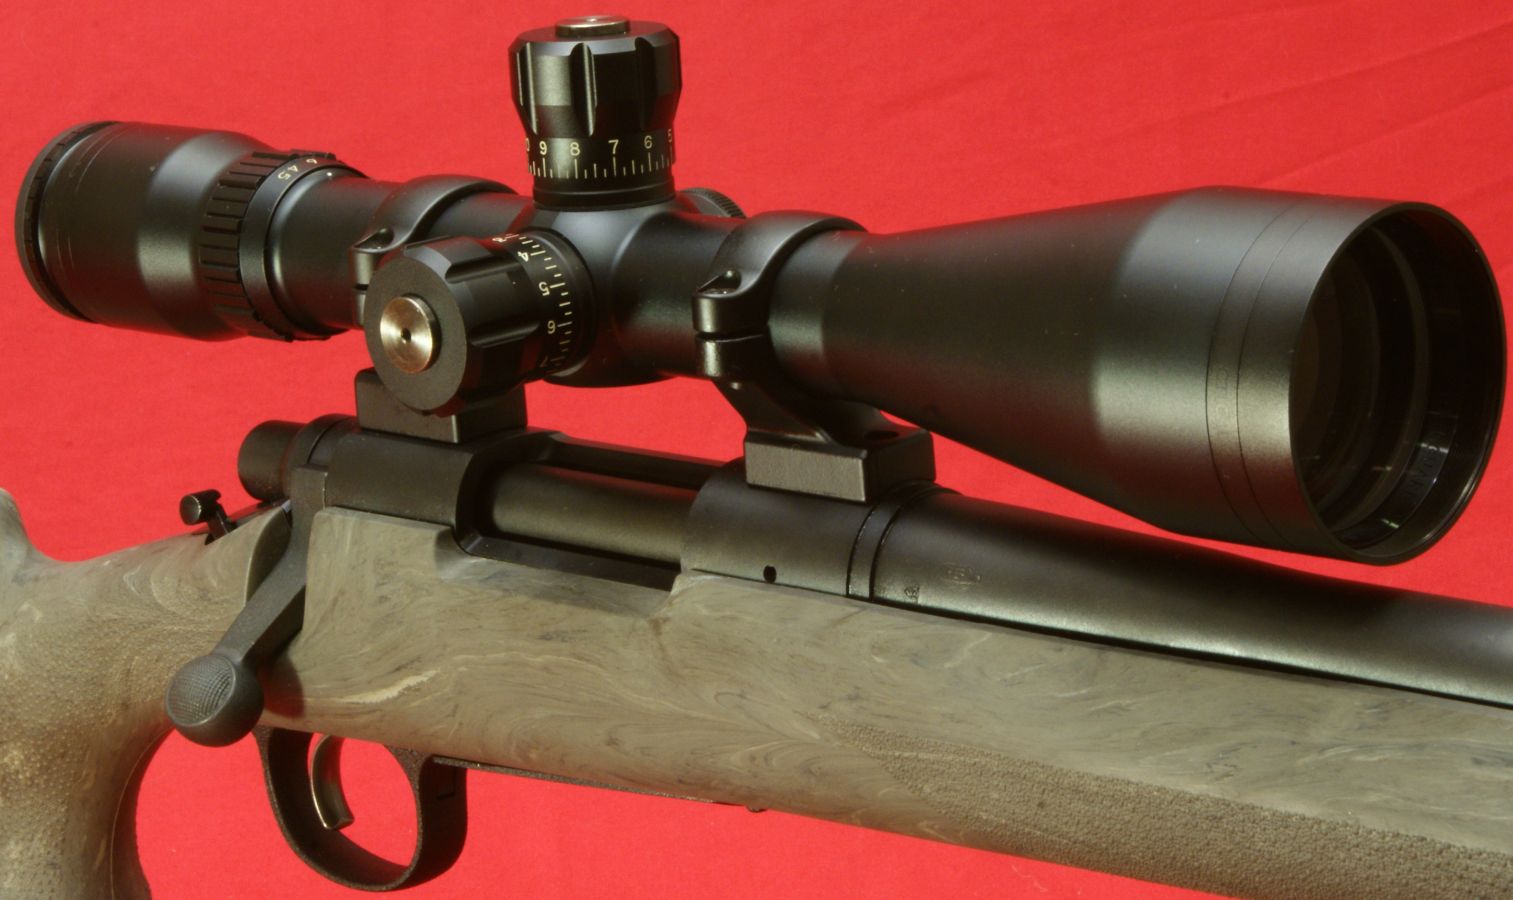
Figure 46
Bottom Line:
This was my first experience using the Wheeler Engineering Professional Scope Mounting Kit and I can honestly say that I was very pleased with the results and the components provided with the kit. I'm confident that my scope tube is not pre-stressed, all fasteners are properly torqued and that the crosshairs are correctly leveled. The Wheeler Engineering Instructional DVD shows installing two-piece mounts and this review shows installing integral (one-piece) mounts. Between these two sources, you should get a pretty good idea on how to use the scope mounting kit. Although you can purchase all the components of the kit separately, I believe the best value comes by purchasing them in kit form which should save you about $30 and provide you with a hard case to store the items when not in use. At a street price between $90 and $120, this is a good investment that should last a lifetime and it is hard to put a price on the confidence you will feel knowing that your scope is properly mounted on your rifle.
Or
If you would like to be notified about future Gunsumer Reports reviews via Facebook, make sure "You Like This" by clicking the Facebook "Like" button at the bottom or top of this page. If it already says "You Like This" beside the button, clicking it again will uncheck the "Like" status and you will not be notified.
| Share on Facebook | |
© 2010, 2011, 2012, 2013, 2014, 2015, 2016, 2017, 2018, 2019, 2020, 2021, 2022, 2023 & 2024 Gunsumer Reports™, All rights reserved.
FTC Disclosure