|
|
Gunsumer Reports TM Providing Detailed Objective Reviews for Firearms and Firearm Accessories |
Varmint Target Review
November 9, 2012
There are a few things I have come to appreciate over the years and one of them is reactive targets. While growing up around the mining industry, there was never a shortage of sediment ponds for shooting floating targets in the water and doing so was a good way to break the monotony of the day. Today there are probably hundreds of dollars in lead, broken glass and rusted tin cans waiting to be discovered by future archeologists as a result of my shooting adventures. Later in life, some of my first home built reactive targets were tennis balls and cans tied to strings and hung from limbs. Over the past several years, I have found myself purchasing more and more manufactured reactive targets. I will be honest that I would prefer to shoot something that moves or makes sound far more than any paper targets on the market. I'm not knocking paper targets, because there is a clear need and I use a lot of them. I'm just trying to make the point that when it comes to boosting the fun, something other than paper typically wins.
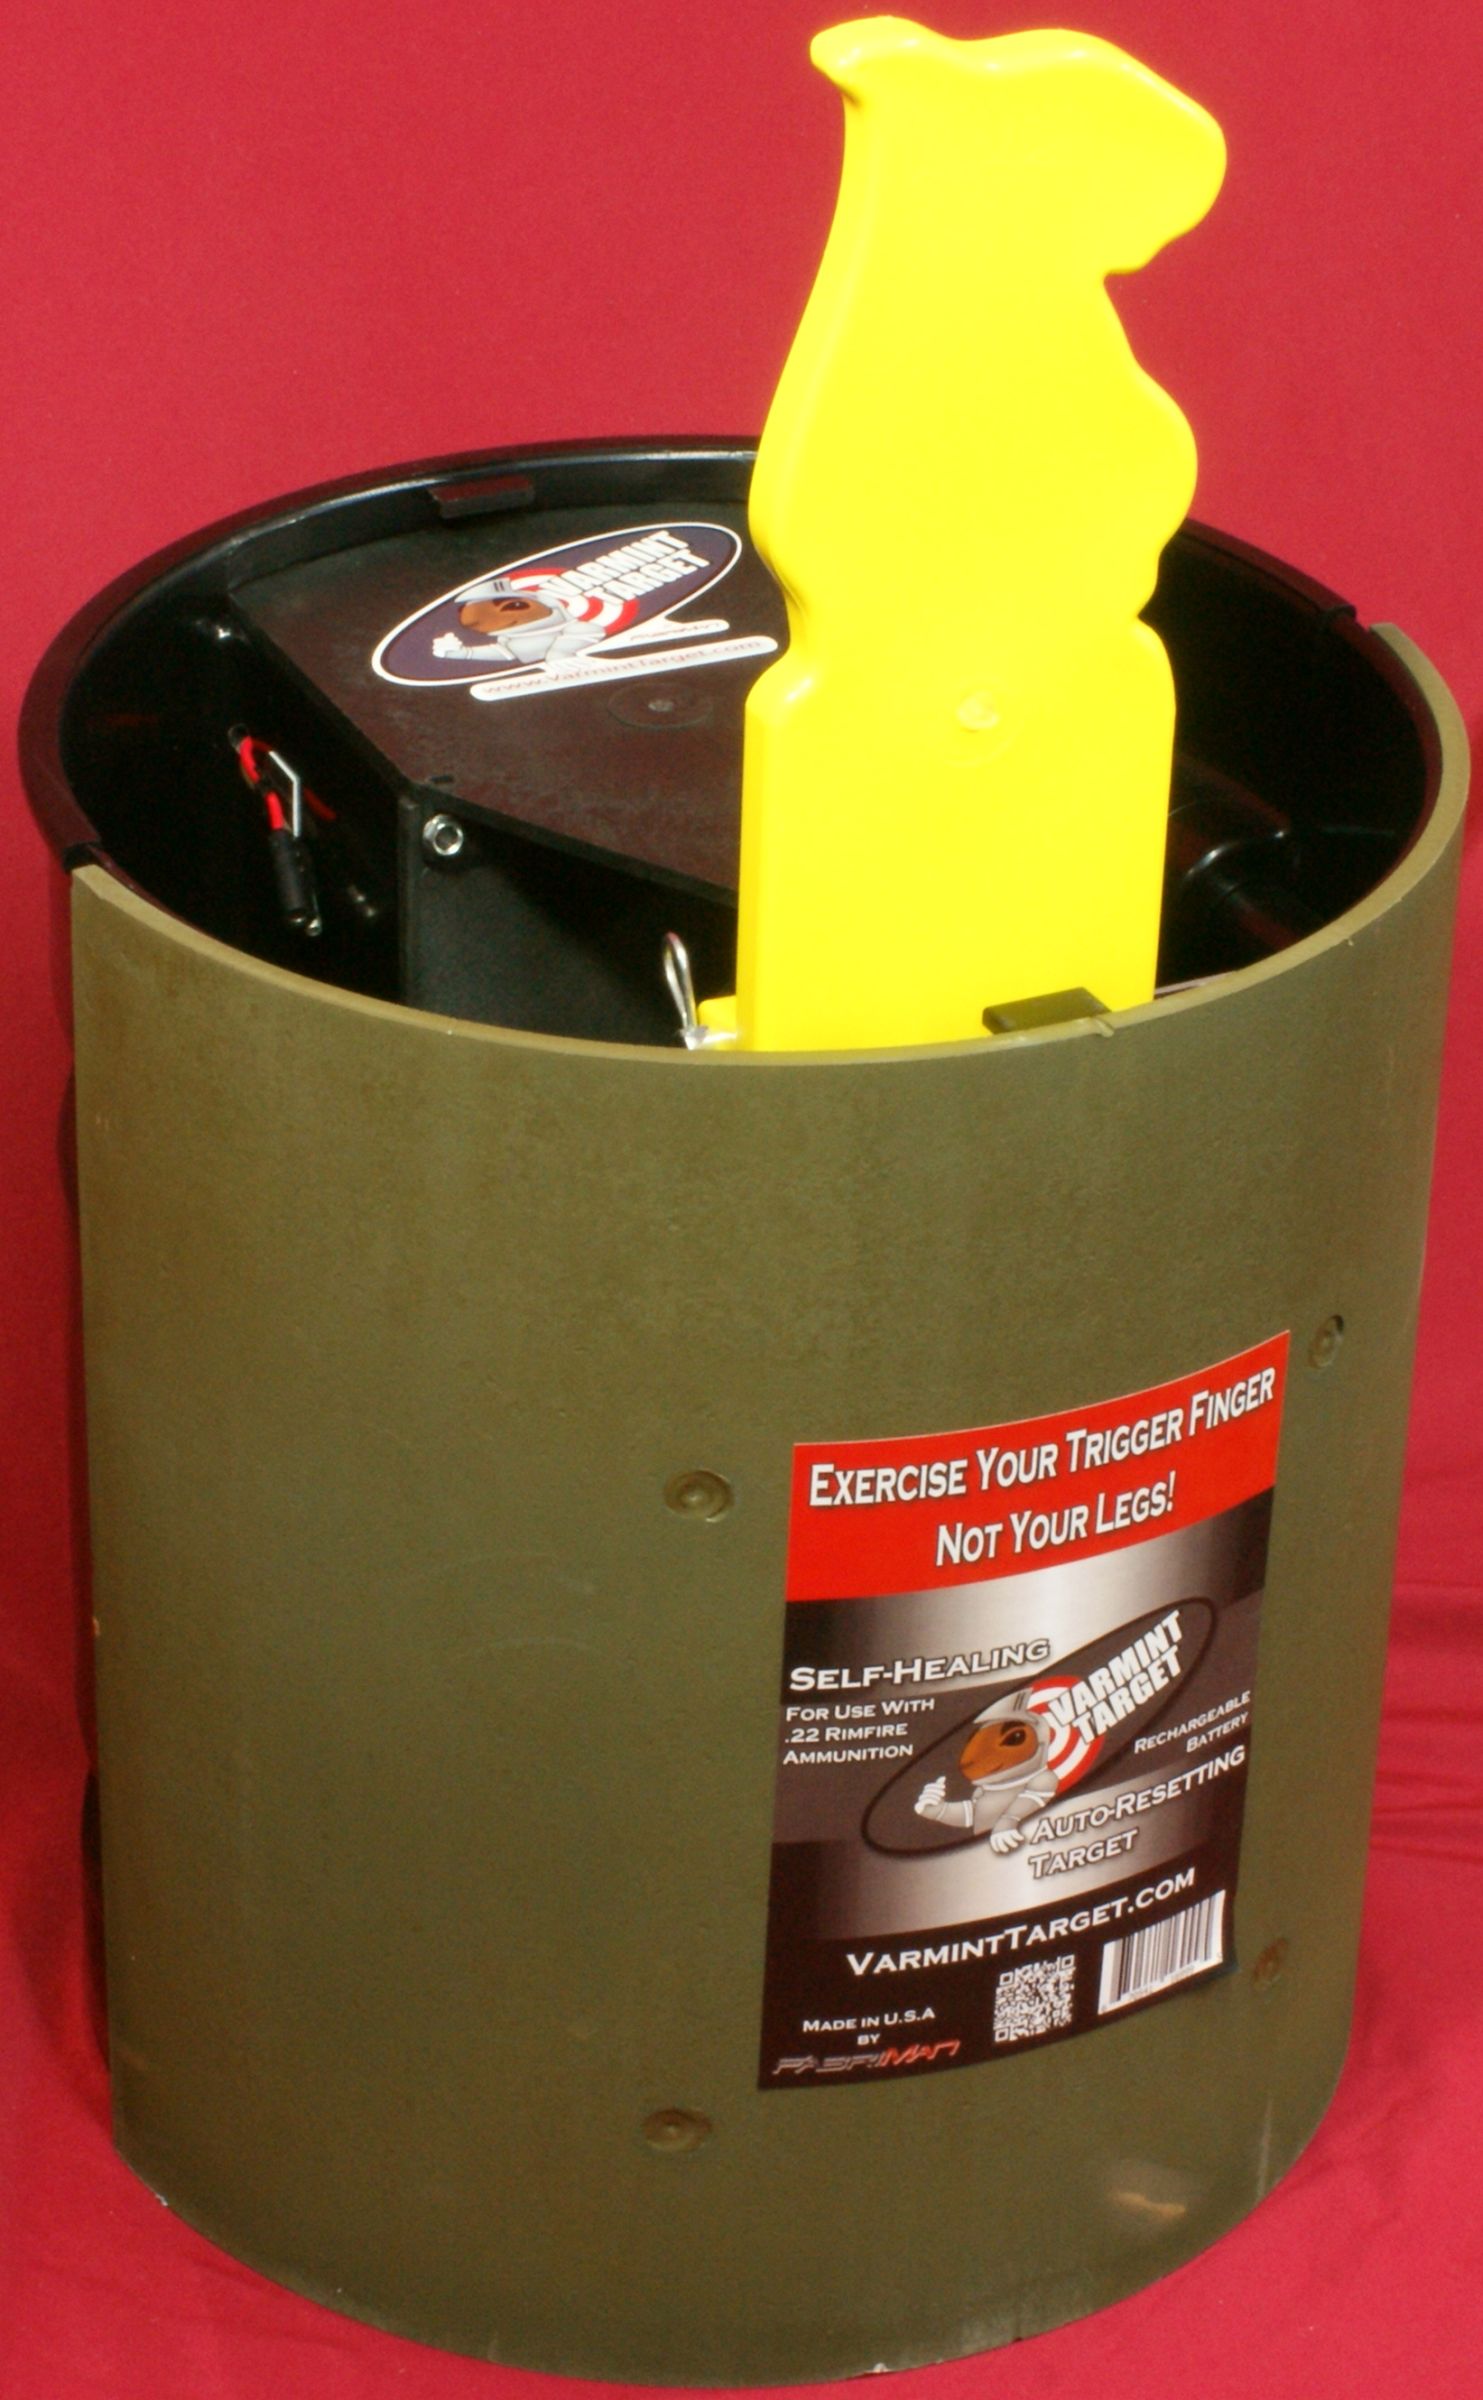
A new reactive target that was introduced this year is the Varmint Target. The key features that make the Varmint Target unique are that the target has a self healing urethane prairie dog that pops up from a can when you turn the target on. Once you shoot the target, the prairie dog will flip over, retract into the can, reset to a vertical position and then pop up again. When I first checked out the Varmint Target website, I immediately thought of the "whack-a-mole" game where moles stick their heads up and you whack them down with a club. Varmint Target actually has a video showing multiple targets setup with the prairie dogs popping up in a random pattern. I like this concept of a resetting target so I had to get one for a review.
During my reviews I like to compare my results
to the manufacturer's claims where possible so the following text in
colored italics was taken directly from the
Varmint
Target website
on 10/24/12 and gives the Key Features and Specifications
for the Varmint Target. The
![]() ,
,
![]() and
and
![]() are my way to keep up with details that I have covered in this
review with either photos, commentary or both.
are my way to keep up with details that I have covered in this
review with either photos, commentary or both.
Overview
- Target practice was never intended as part of a regimen to build bulging calves and heavy-duty hamstrings. Walking back and forth to reset a tactical target can make firing your weapon feel like an endless walk to nowhere. A durable, lifelike target simulates a more realistic training experience that is less time consuming and cost- effective to you.
-
It can be the perfect tool
to acclimate inexperienced shooters to engage a true to life
target.

-
The Varmint Target is built to withstand the punishment of
target practice, the rigors of the elements and it displays the
resilience of a product made here in the United States of
America.
- Its powder-coated high impact steel construction sets it apart from other targets that use paper or plastic construction and are designed for high-cost, disposable replacement parts.
- The Varmint Target has been tested under the most severe conditions possible and its unquestionable durability has proven it to be peerless among other indoor/outdoor targets.
Key Features
-
Auto-Resetting Self-Healing Target
Specifications
-
Base Model - No Game Modes
-
For rimfire .22 ammo
- 36 lbs
-
Front Steel Protection Plate
1/4" thick
-
Constructed from High-Quality Polymers
-
Self-Healing Target
-
Rechargeable 12 volt battery, with
Charger
-
Twist On Lid with Handle
-
Can be buried for use
-
Made in the U.S.A.
-
MSRP: $249
plus free shipping and handling
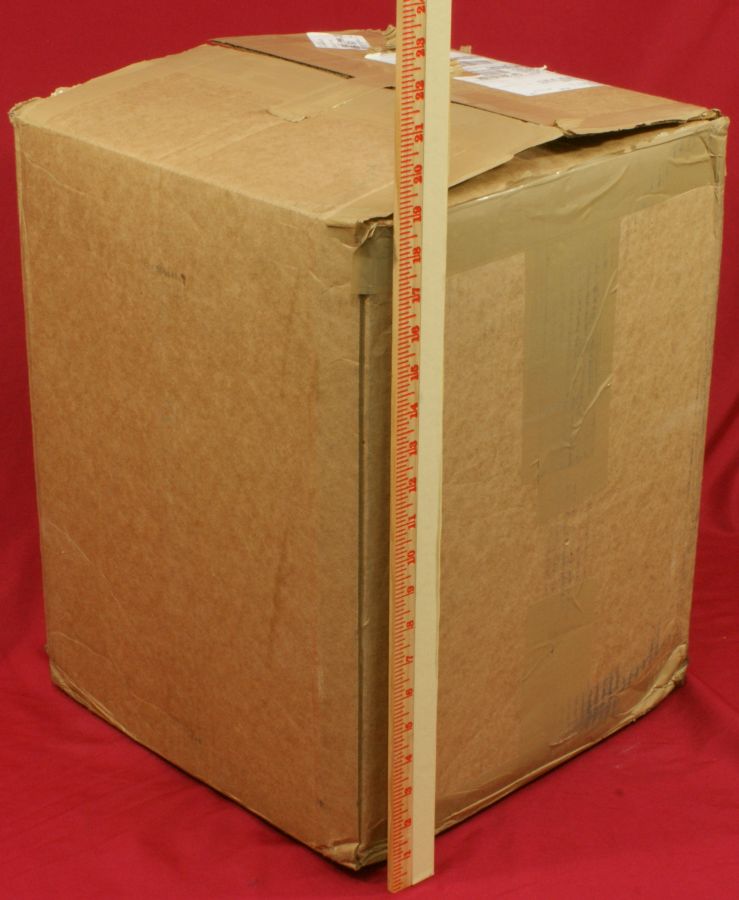
When you purchase a Varmint Target it will come boxed as shown below.
Figure 1
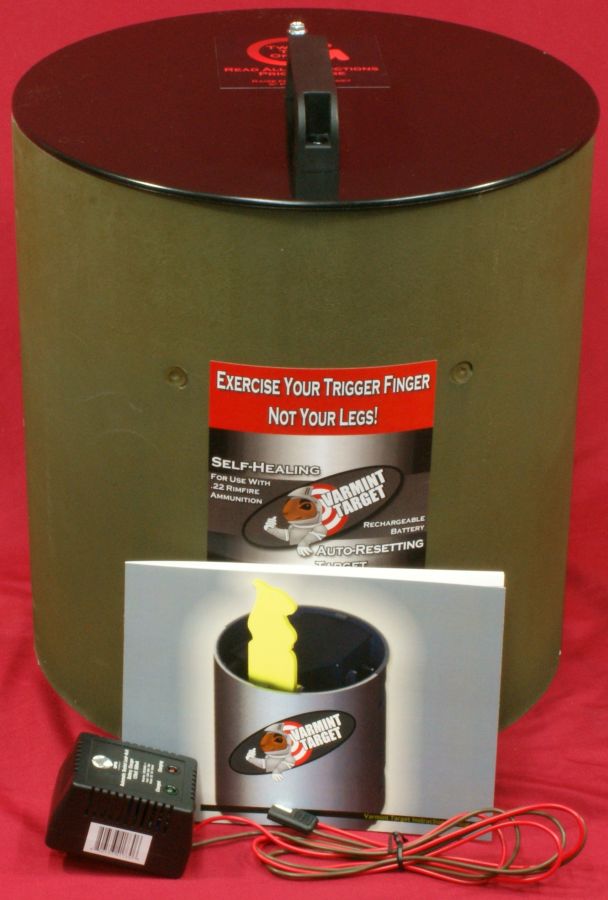
After removing the components from the box, you see the box contained the Varmint Target, Charger and Instruction Manual.
Figure 2
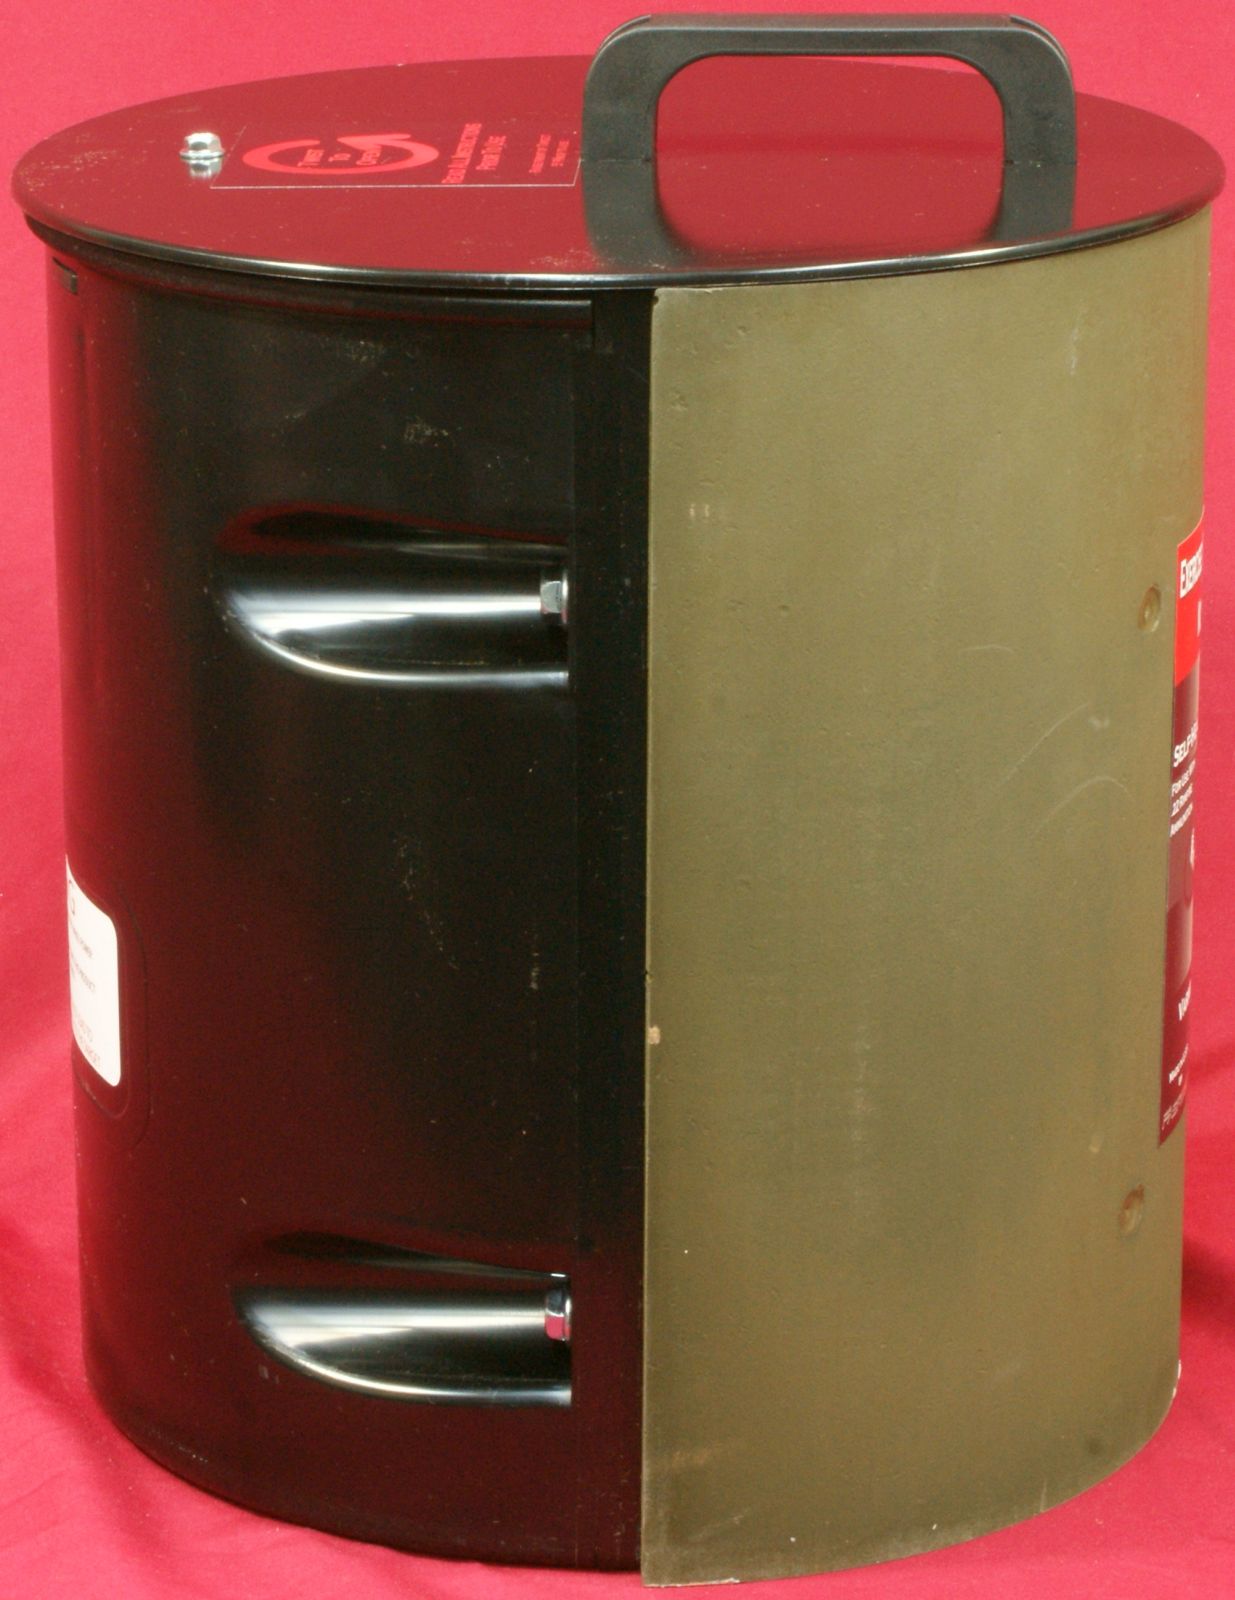
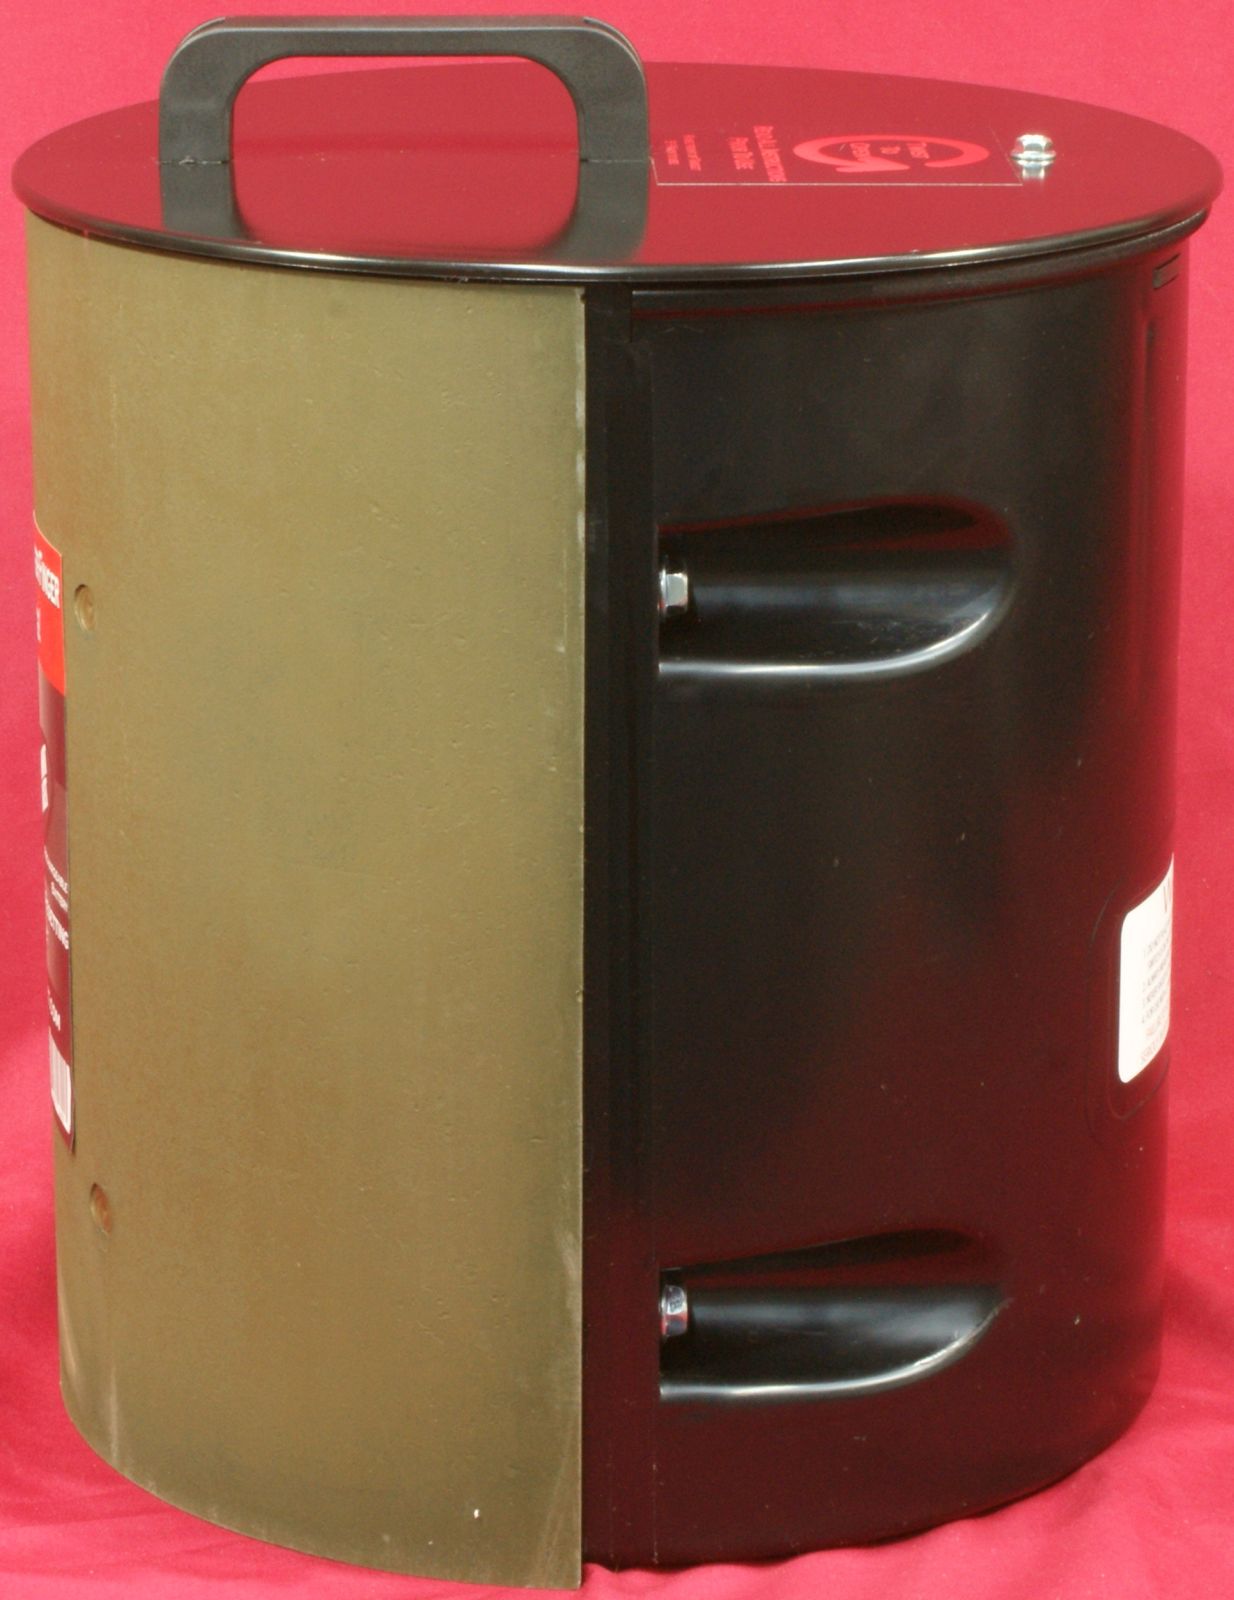
As you can see below, the target housing is made from a molded black polymer material which has a can or bucket shape and a 1/4" thick steel curved plate is bolted on the front half to give some armor protection to the mechanical workings inside the can.
Figure 3
Figure 4
Figure 5

The polymer can housing is made from two parts (front and back). You can see in the photo below the four bolts that attach the two halves together and the standard warnings label on the back of the can.
Figure 6
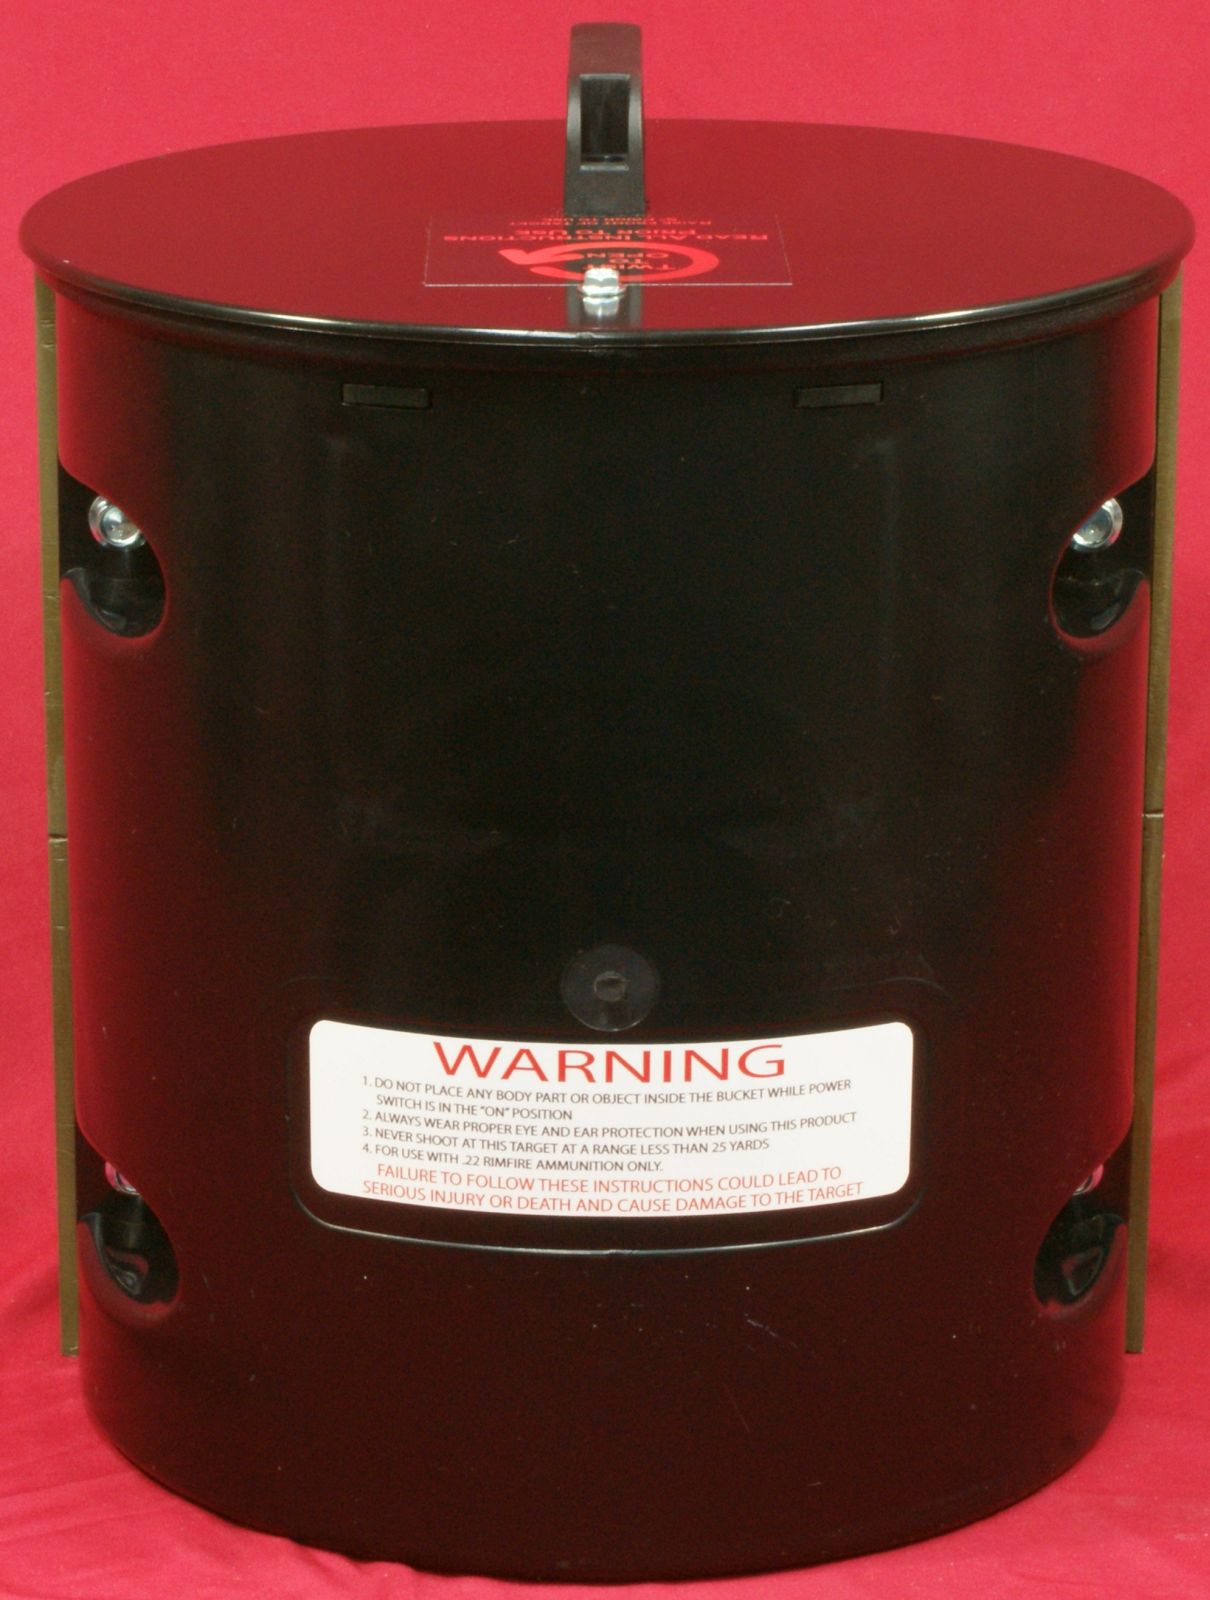
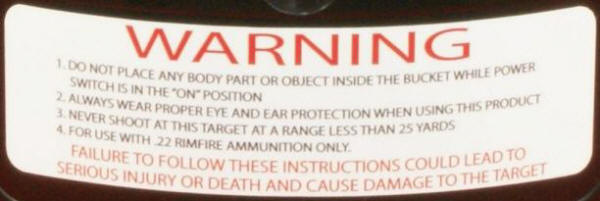
The warning on the back of the can is show below. The Instruction Manual lists some additional warnings like:
- Practice proper gun safety and use eye/ear protection
- Tilt front of target up 5 degrees prior to use
- After use, turn target off and replace lid to avoid excess moisture and debris from entering bucket. Do not allow bucket to fill with water.
- Do not sit or stand on bucket.
- Never use target while charging. Always disconnect the batter charger prior to using.
- Do not use replacement parts other than those from Varmint Target.
- Intended for those over 18 or under direct supervision of an adult.
- Always shoot perpendicular to target. Never shoot at a downward angle into the target.
Figure 7
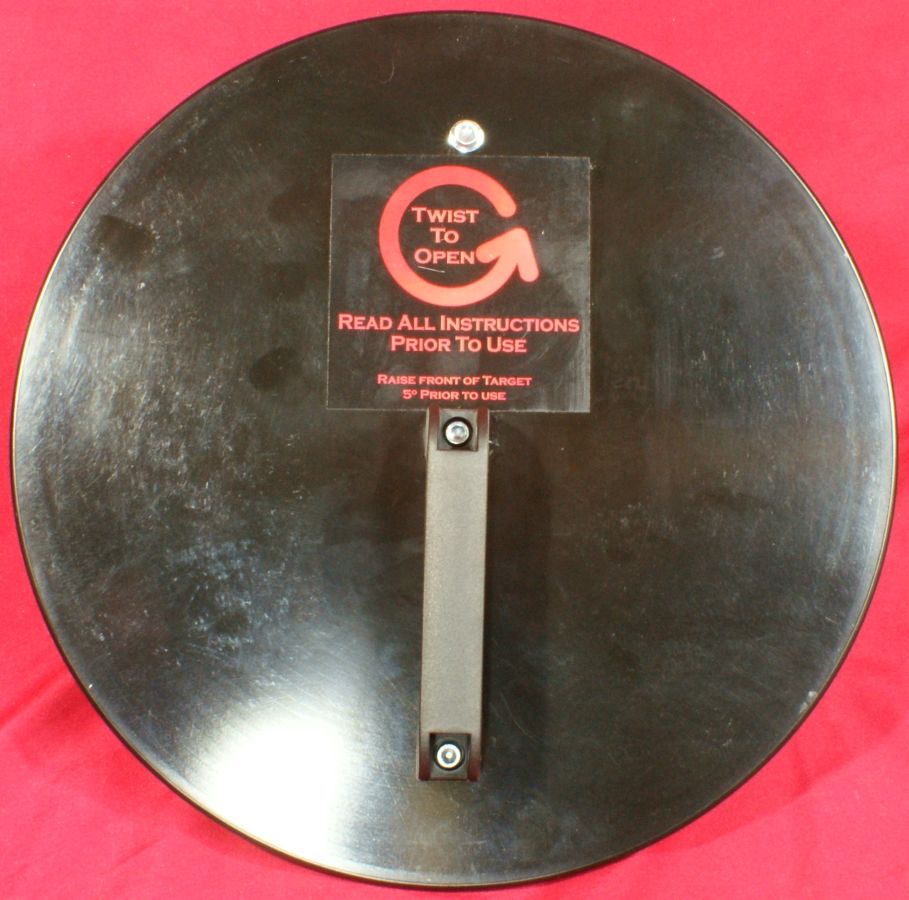
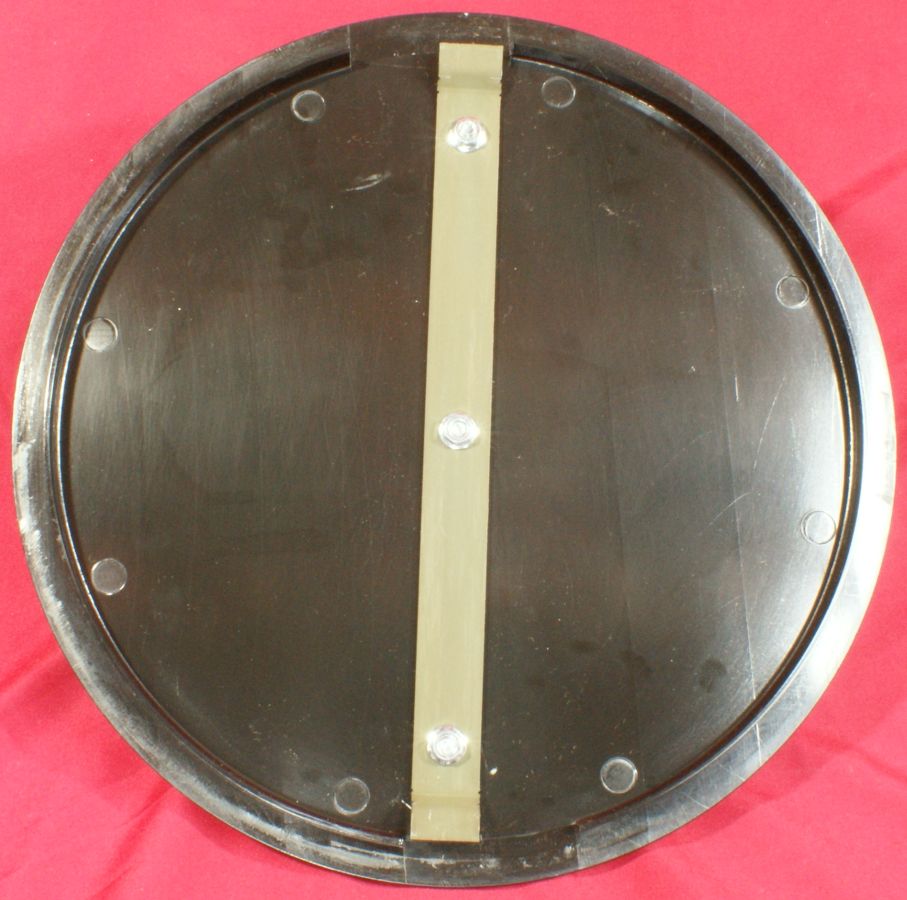
These next two photos show the top and bottom of the target.
Figure 8
Figure 9
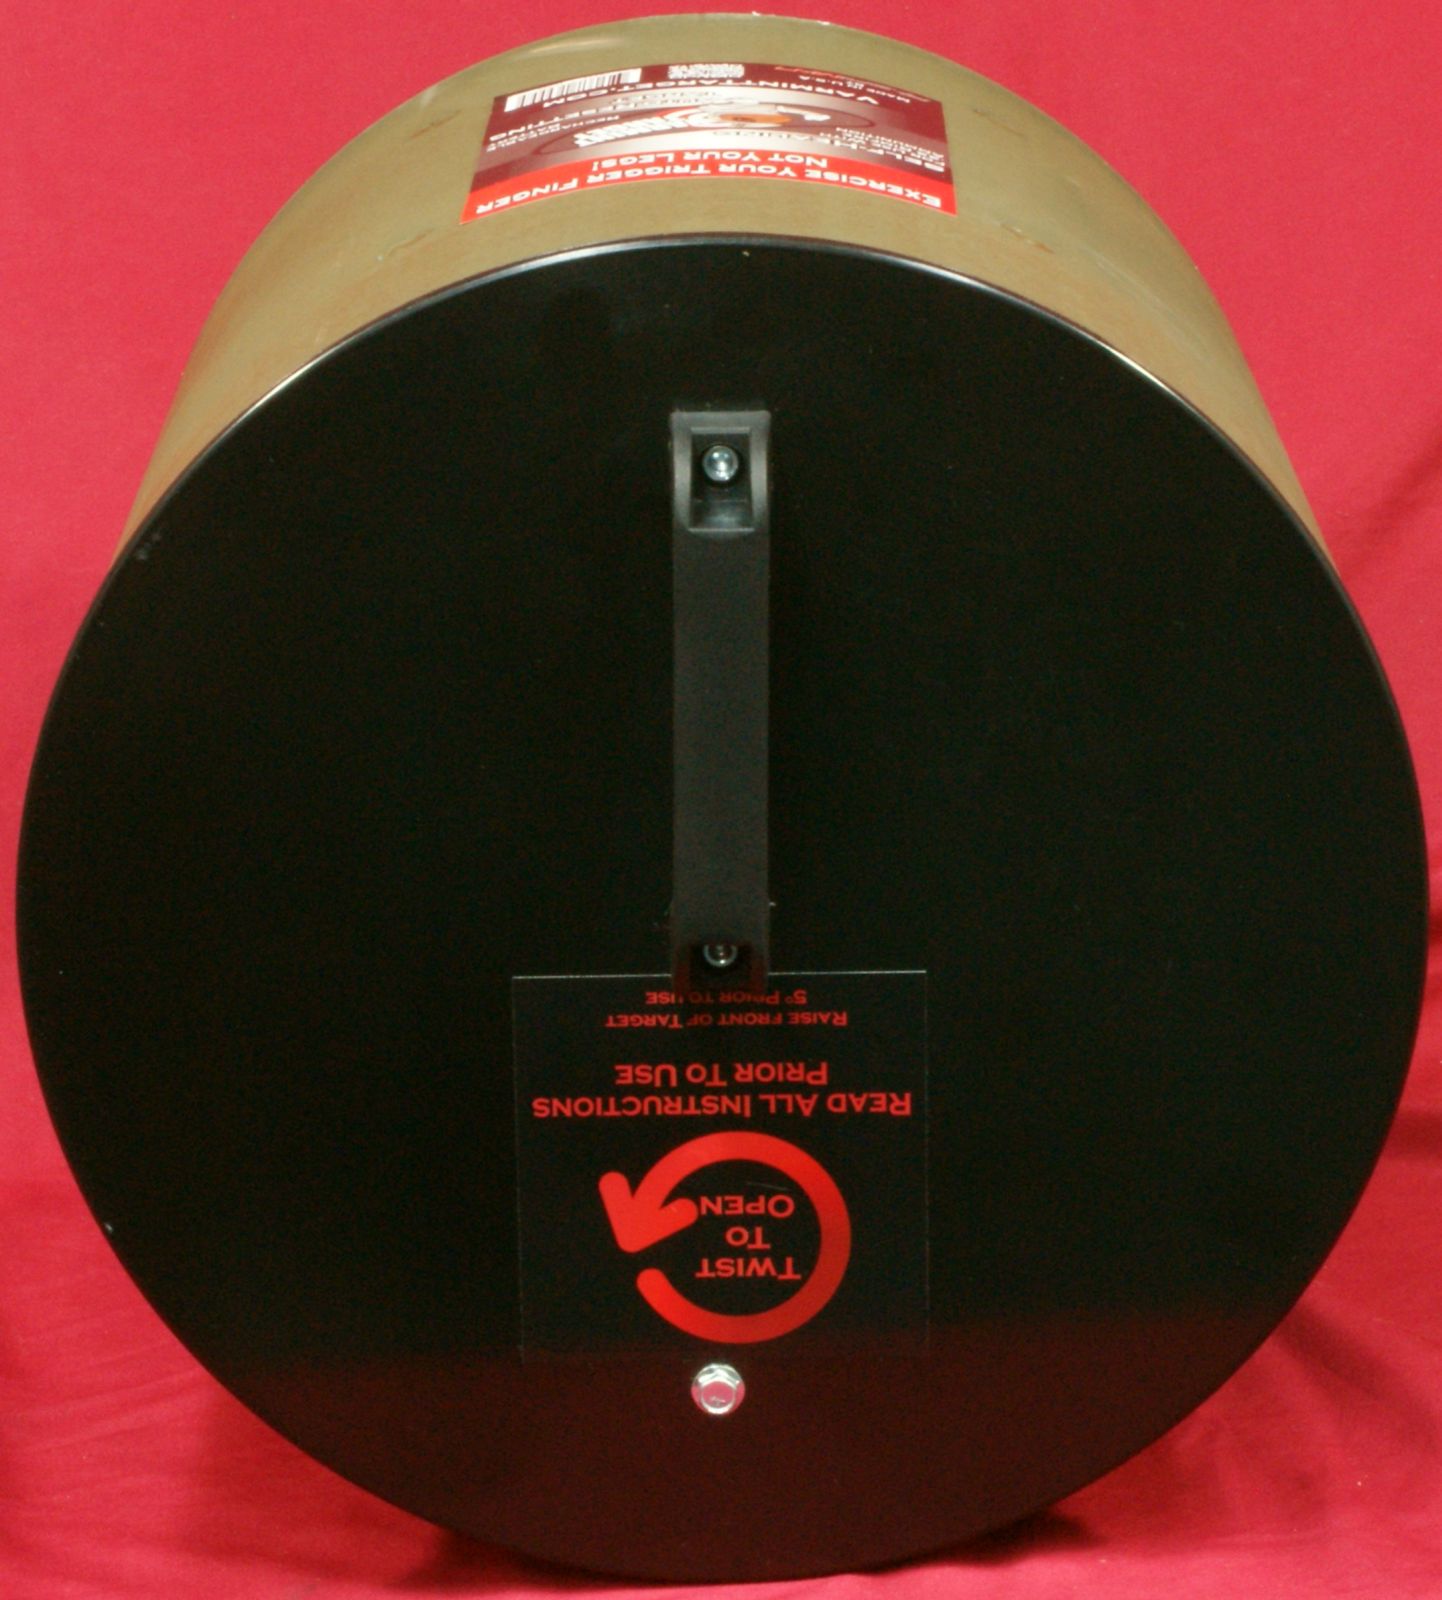

To remove the can (bucket) lid, you must twist the lid using the handle. Also the handle can be used for carrying the target when the lid is properly installed. The bottom of the lid has a metal bar that engages under tabs on the bucket to secure the lid. There is also a lip that extends down on the lower surface of the lid that holds the lid in proper alignment. Overall I feel the lid would do a pretty good job of keeping moisture out of the bucket. If you were to leave the target out in the rain, and if it were a blowing rain, there is a chance you might get some moisture to seep under the lid since the lip is on the inside of the bucket.
Figure 10
Figure 11
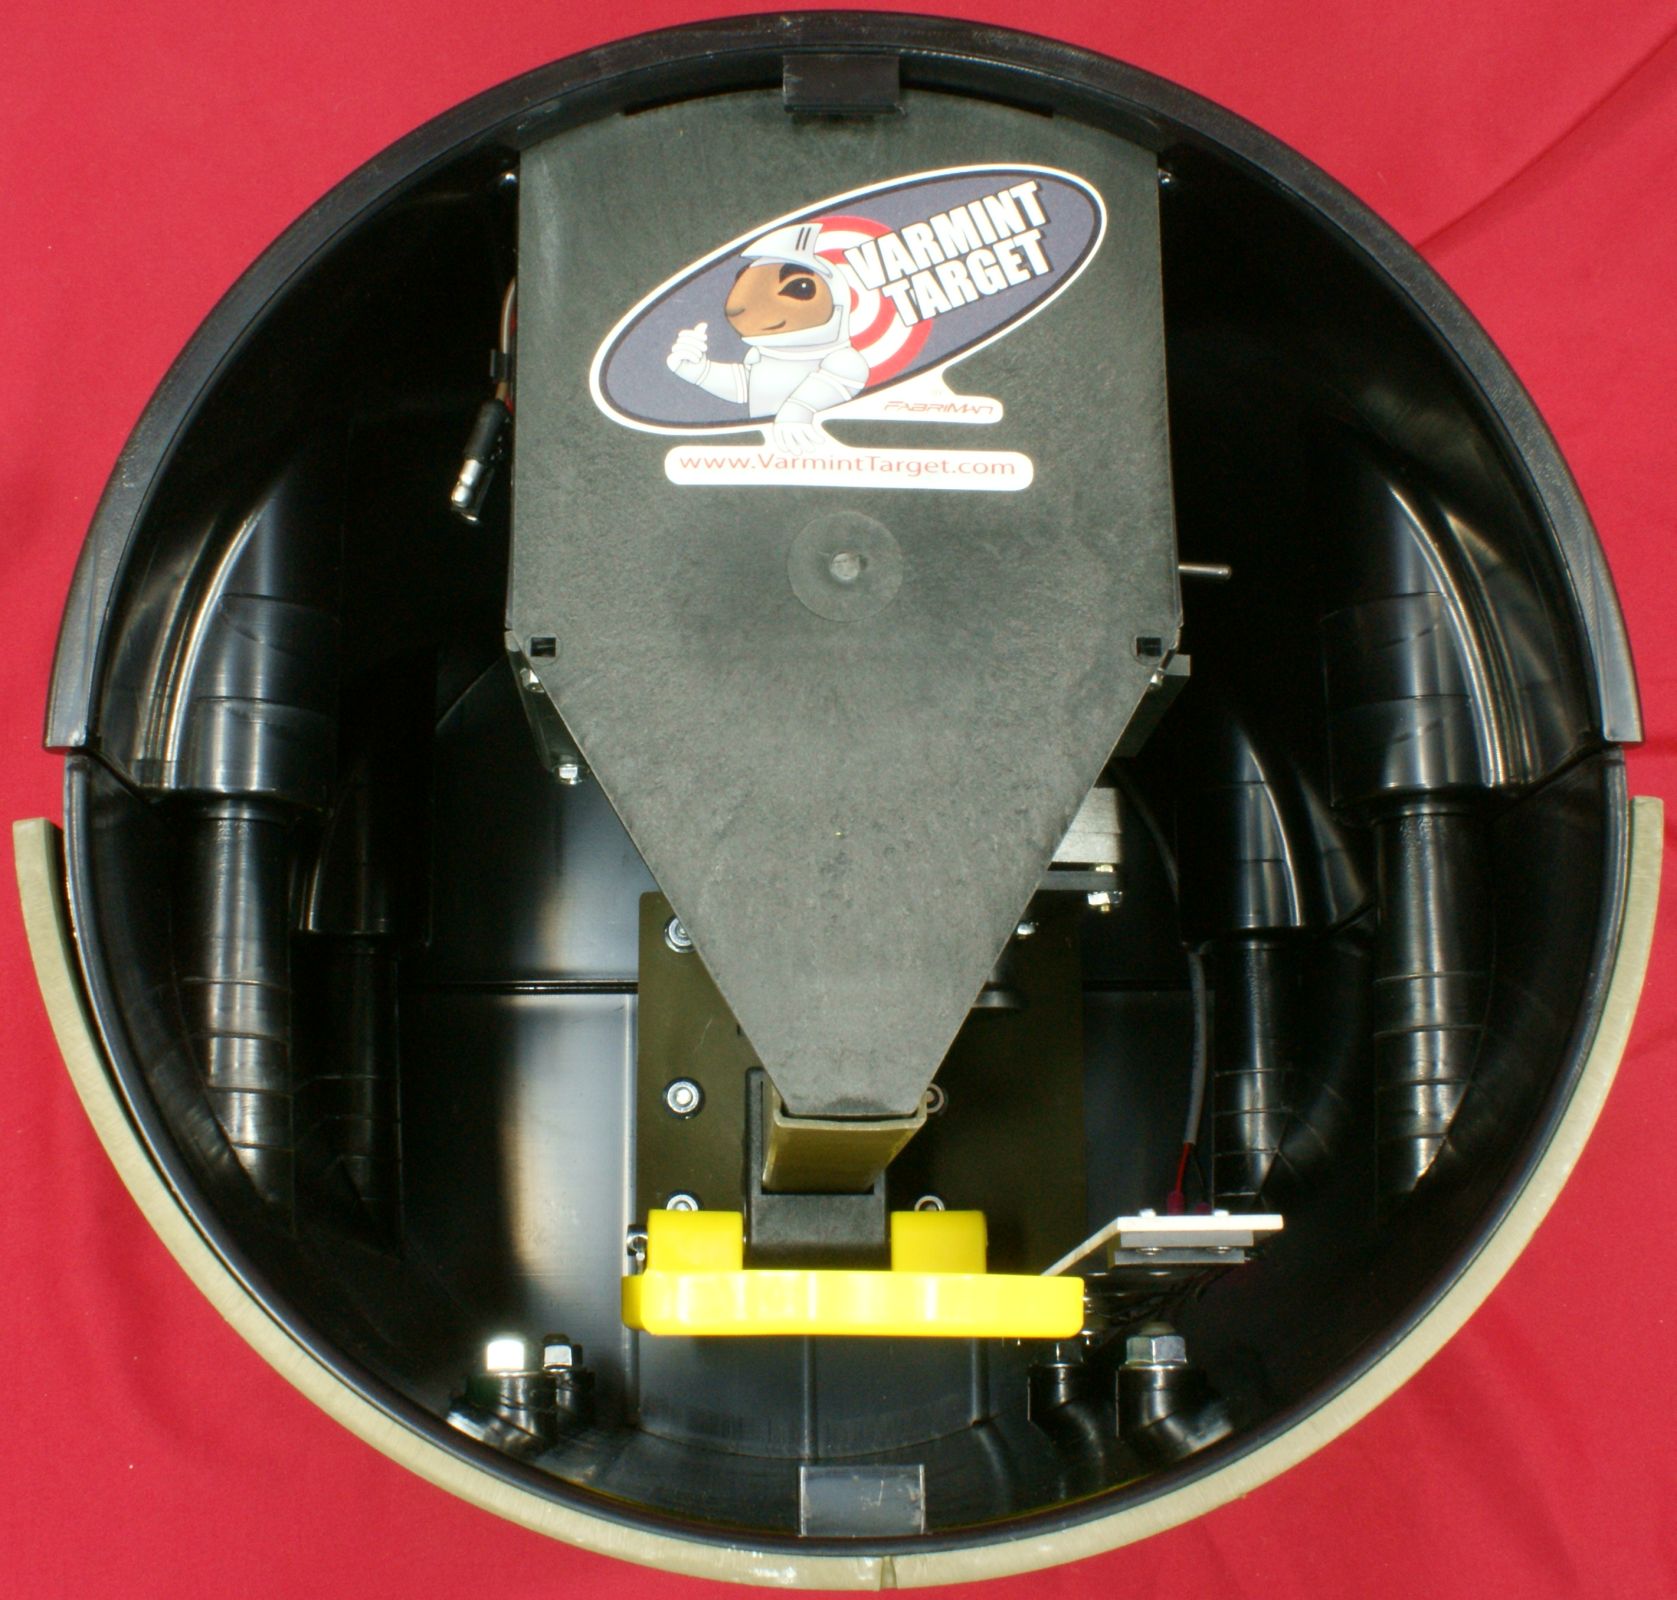
With the lid removed, you get your first peek into the inside of the Varmint Target bucket. Everything seems to be well built and gives the impression of durability.
Figure 12
On the right side of the battery compartment is a simple "On/Off" switch. This basic model Varmint Target does not have any "game modes". I'm not exactly sure what game modes would be available other than one where the target pops up at random times and stays up for random durations. When the switch is "On", the target will pop up. When the target is flipped over, it will retract inside the bucket causing the target to flip back forward (reset) into the up position and will cycle the target back up.
Figure 13
On the left side of the battery compartment is the plug connector for charging the battery. The connector is hooked in a clip to keep it from dangling around. You can slip the connector out of the clip to help with plugging the connector into the charger.
Figure 14

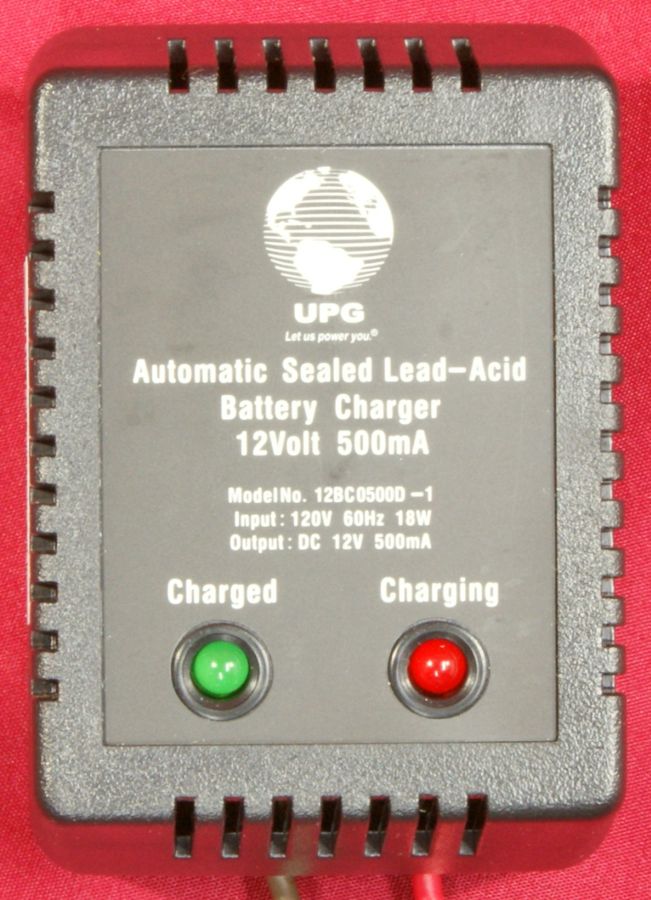
The charger plugs into a standard 120V outlet and is designed to charge 12V Sealed Lead-Acid batteries. The charger has two lights; one showing that the battery is charging and the other showing when the battery is fully charged. Since the Instruction Manual didn't give much detail on how long you should charge the battery (it said "at least one hour"), I searched and found the specifications related to this charger and you can see them by going to this link. The text below was taken directly from the specifications and gives you a good idea on how the charger works.
The 12BC0500D-1 charger begins its charge cycle on “fast-charge”, providing the battery with constant voltage of 15VDC, and regulated current of 500mA. This charge cycle is indicated by the red LED. As the charging cycle progresses, the terminal voltage of the battery will rise to an eventual 15VDC. At this point, the charger senses this voltage, and the fast-charge circuit cuts-off, also turning off the red LED. The “float-charge” circuit then comes on along with the green LED, providing the battery with a constant voltage of 13.8VDC. This voltage can be left on the battery indefinitely without damage, and keeps the battery fully charged, ready for use at all times.
When I plugged the charger in and started charging the battery, the red "charging" light was on. I let it charge for 24 hours and the green "charged" light did not come on. After the 24 hour charge, I used the target for all my remaining range tests.
Figure 15
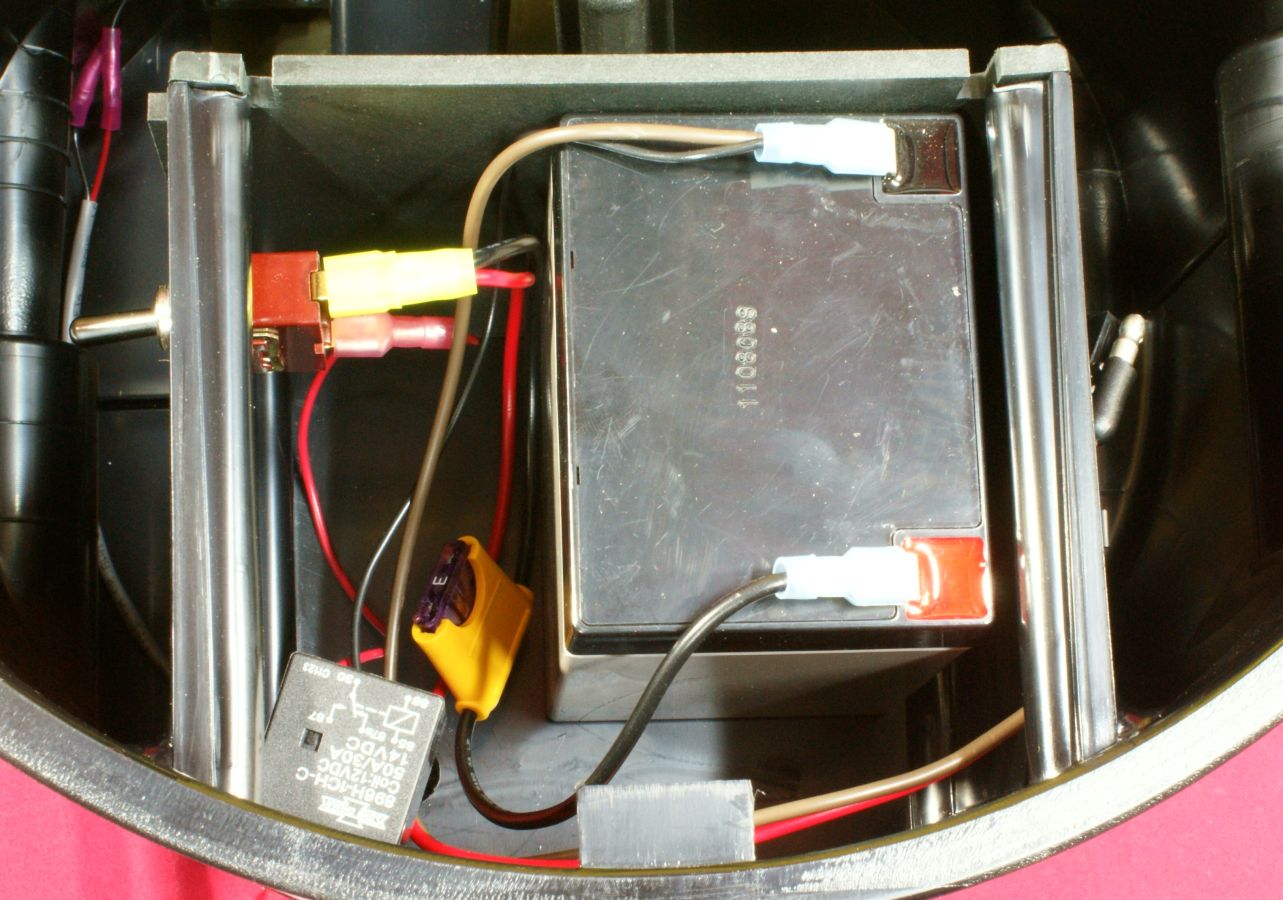
Removing the battery cover was easily done by first removing the two screws at the front top edge of the battery compartment. With the cover removed, you can see the battery, fuse, on/off switch and simple controller.
Figure 16
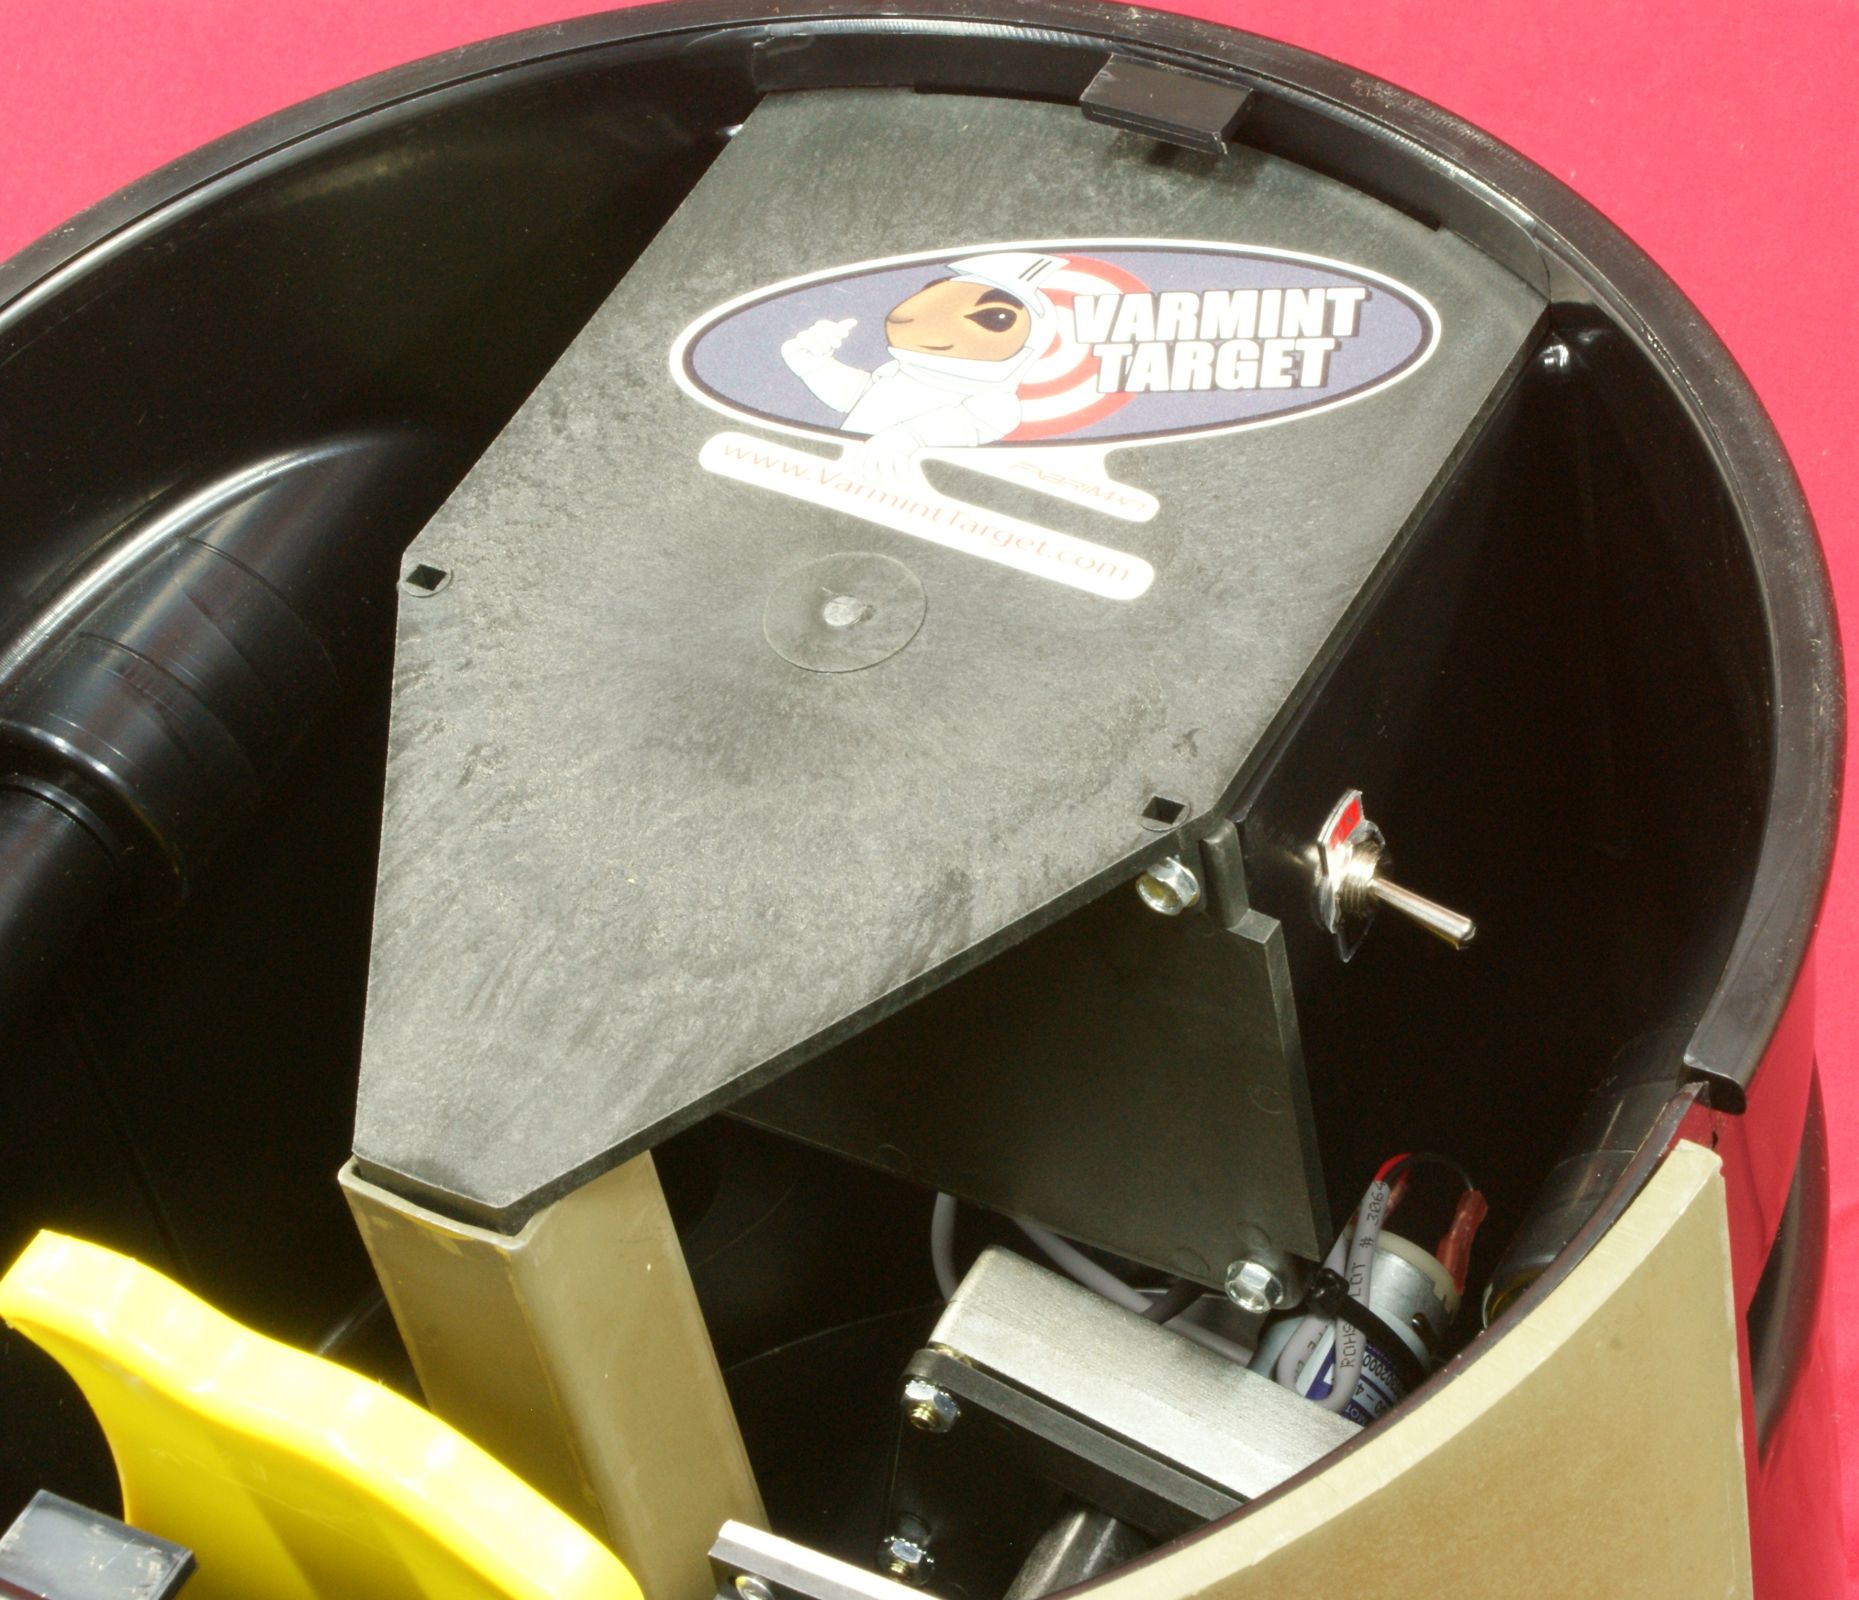
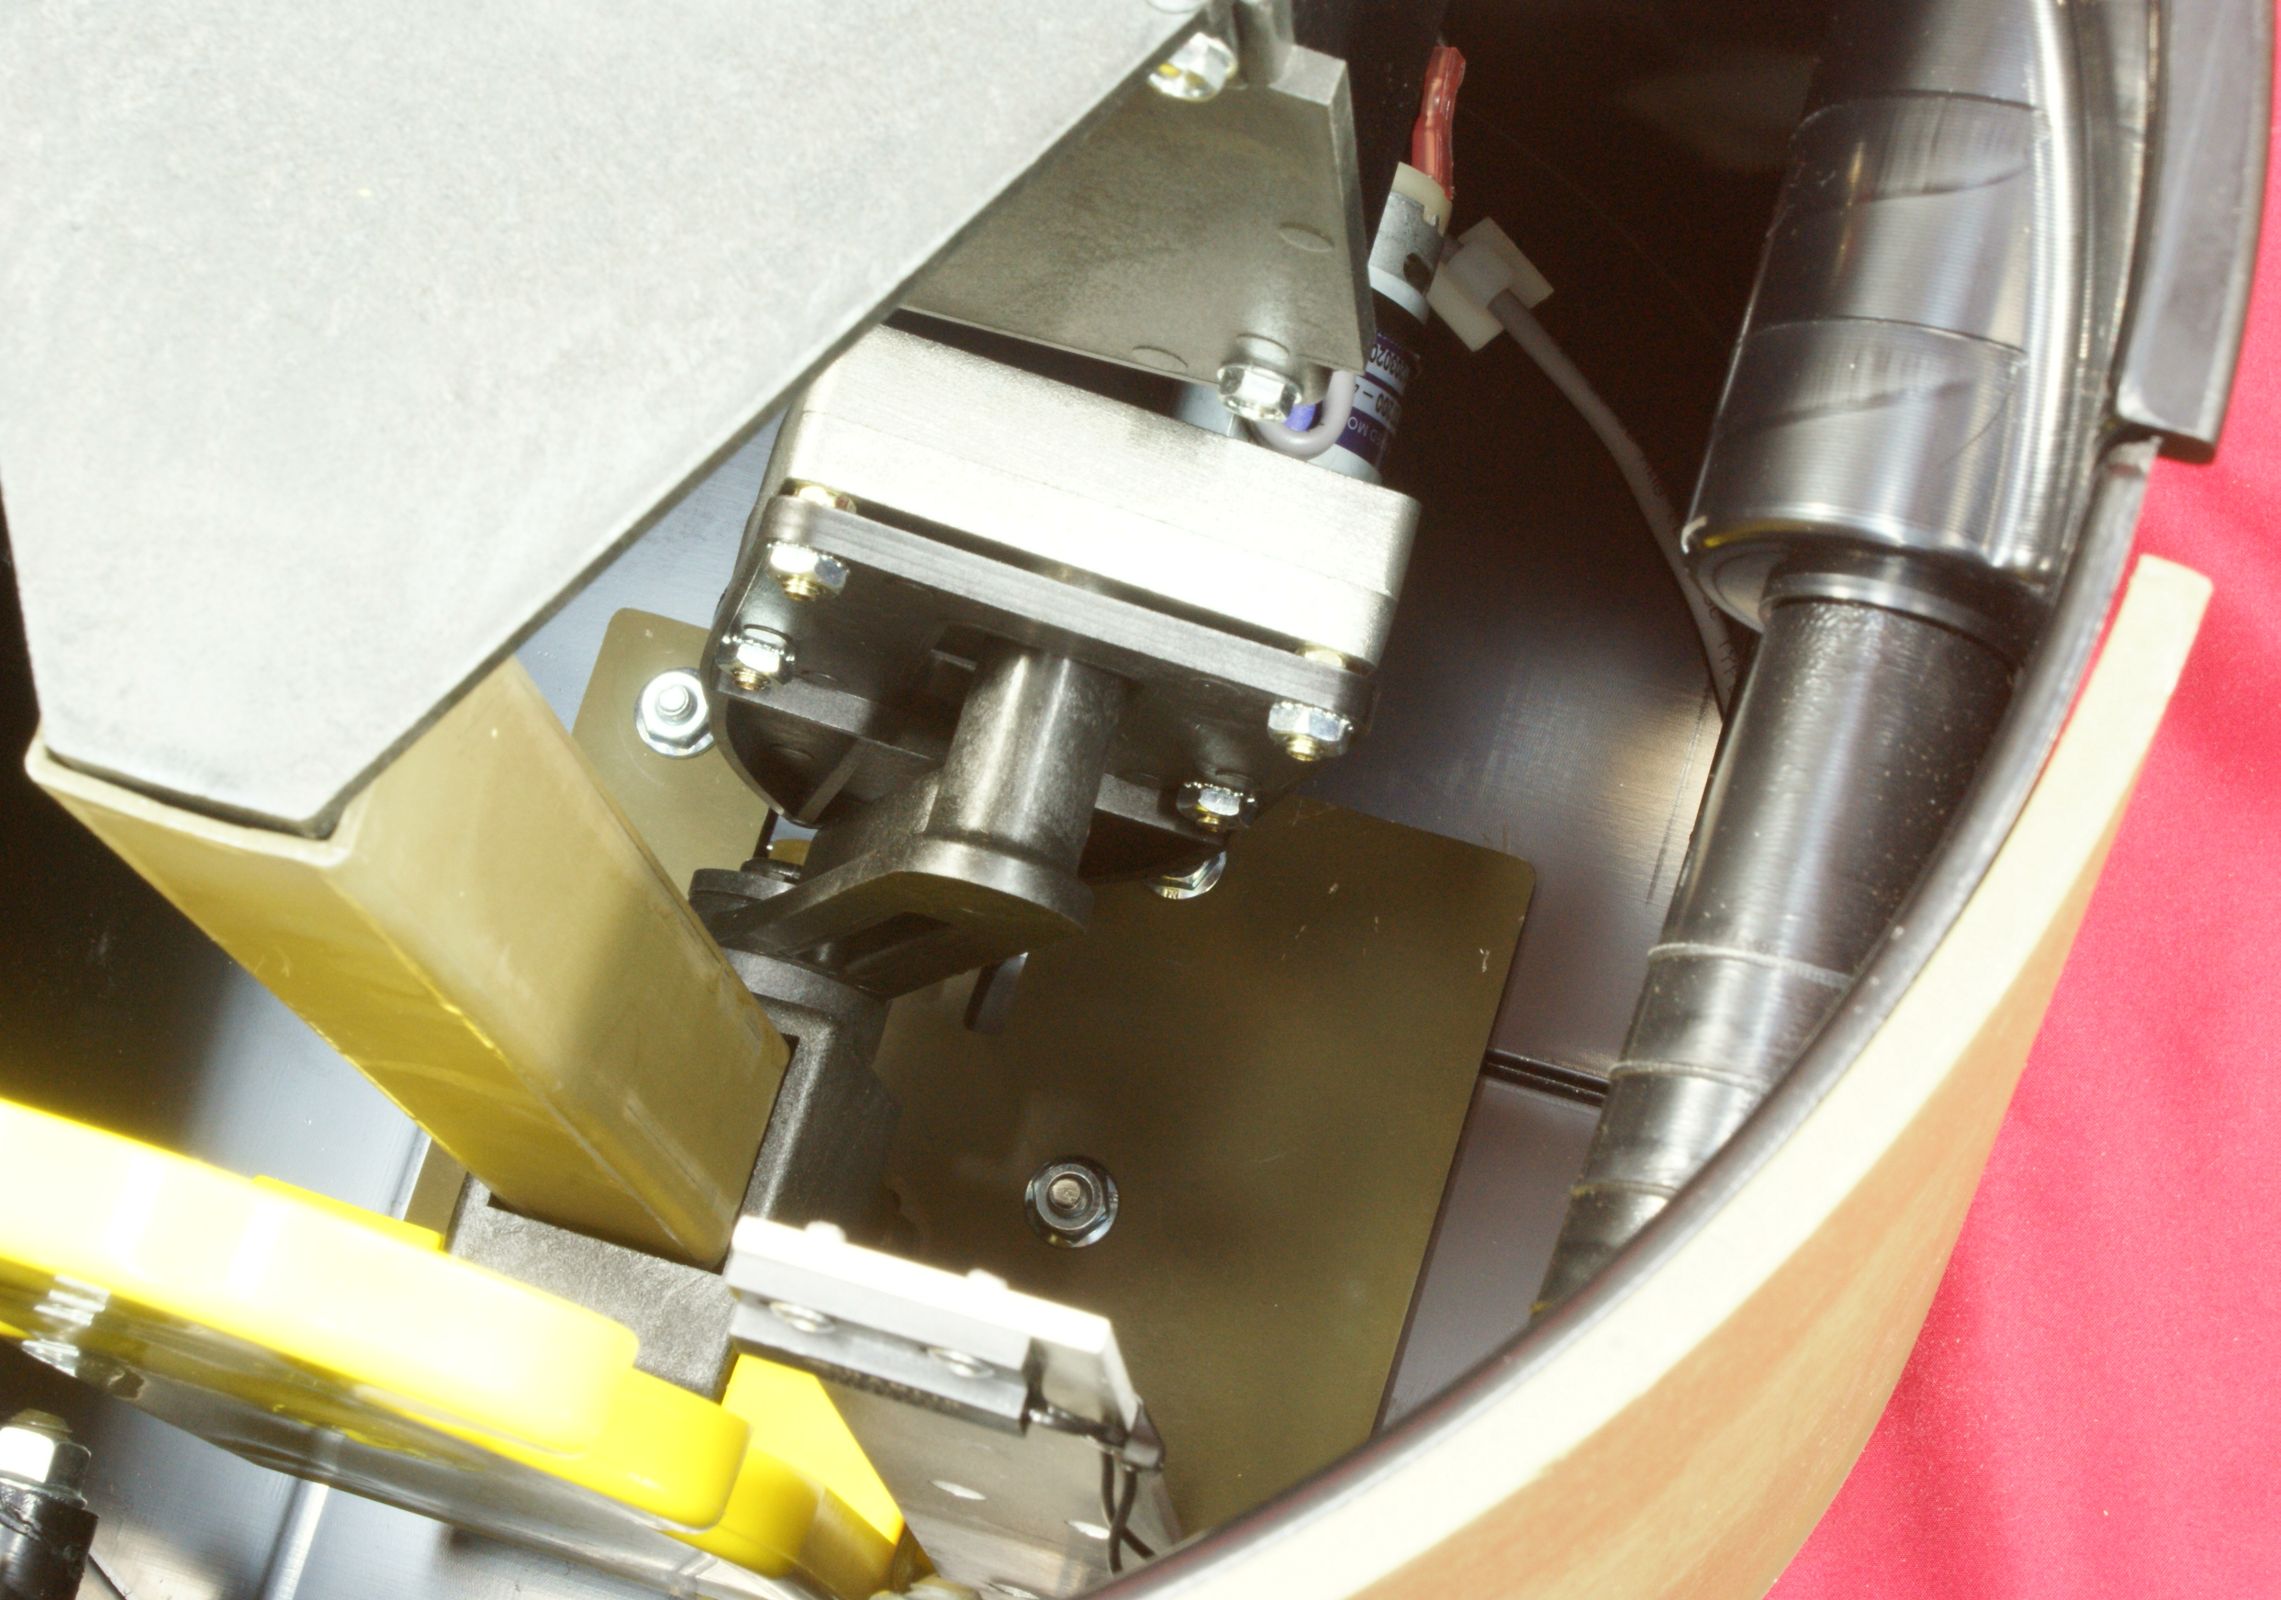
When looking inside the target, you see the motor, rotation arm and post which the target slides on. Make sure you watch the video below to see exactly how the target operates.
Figure 15
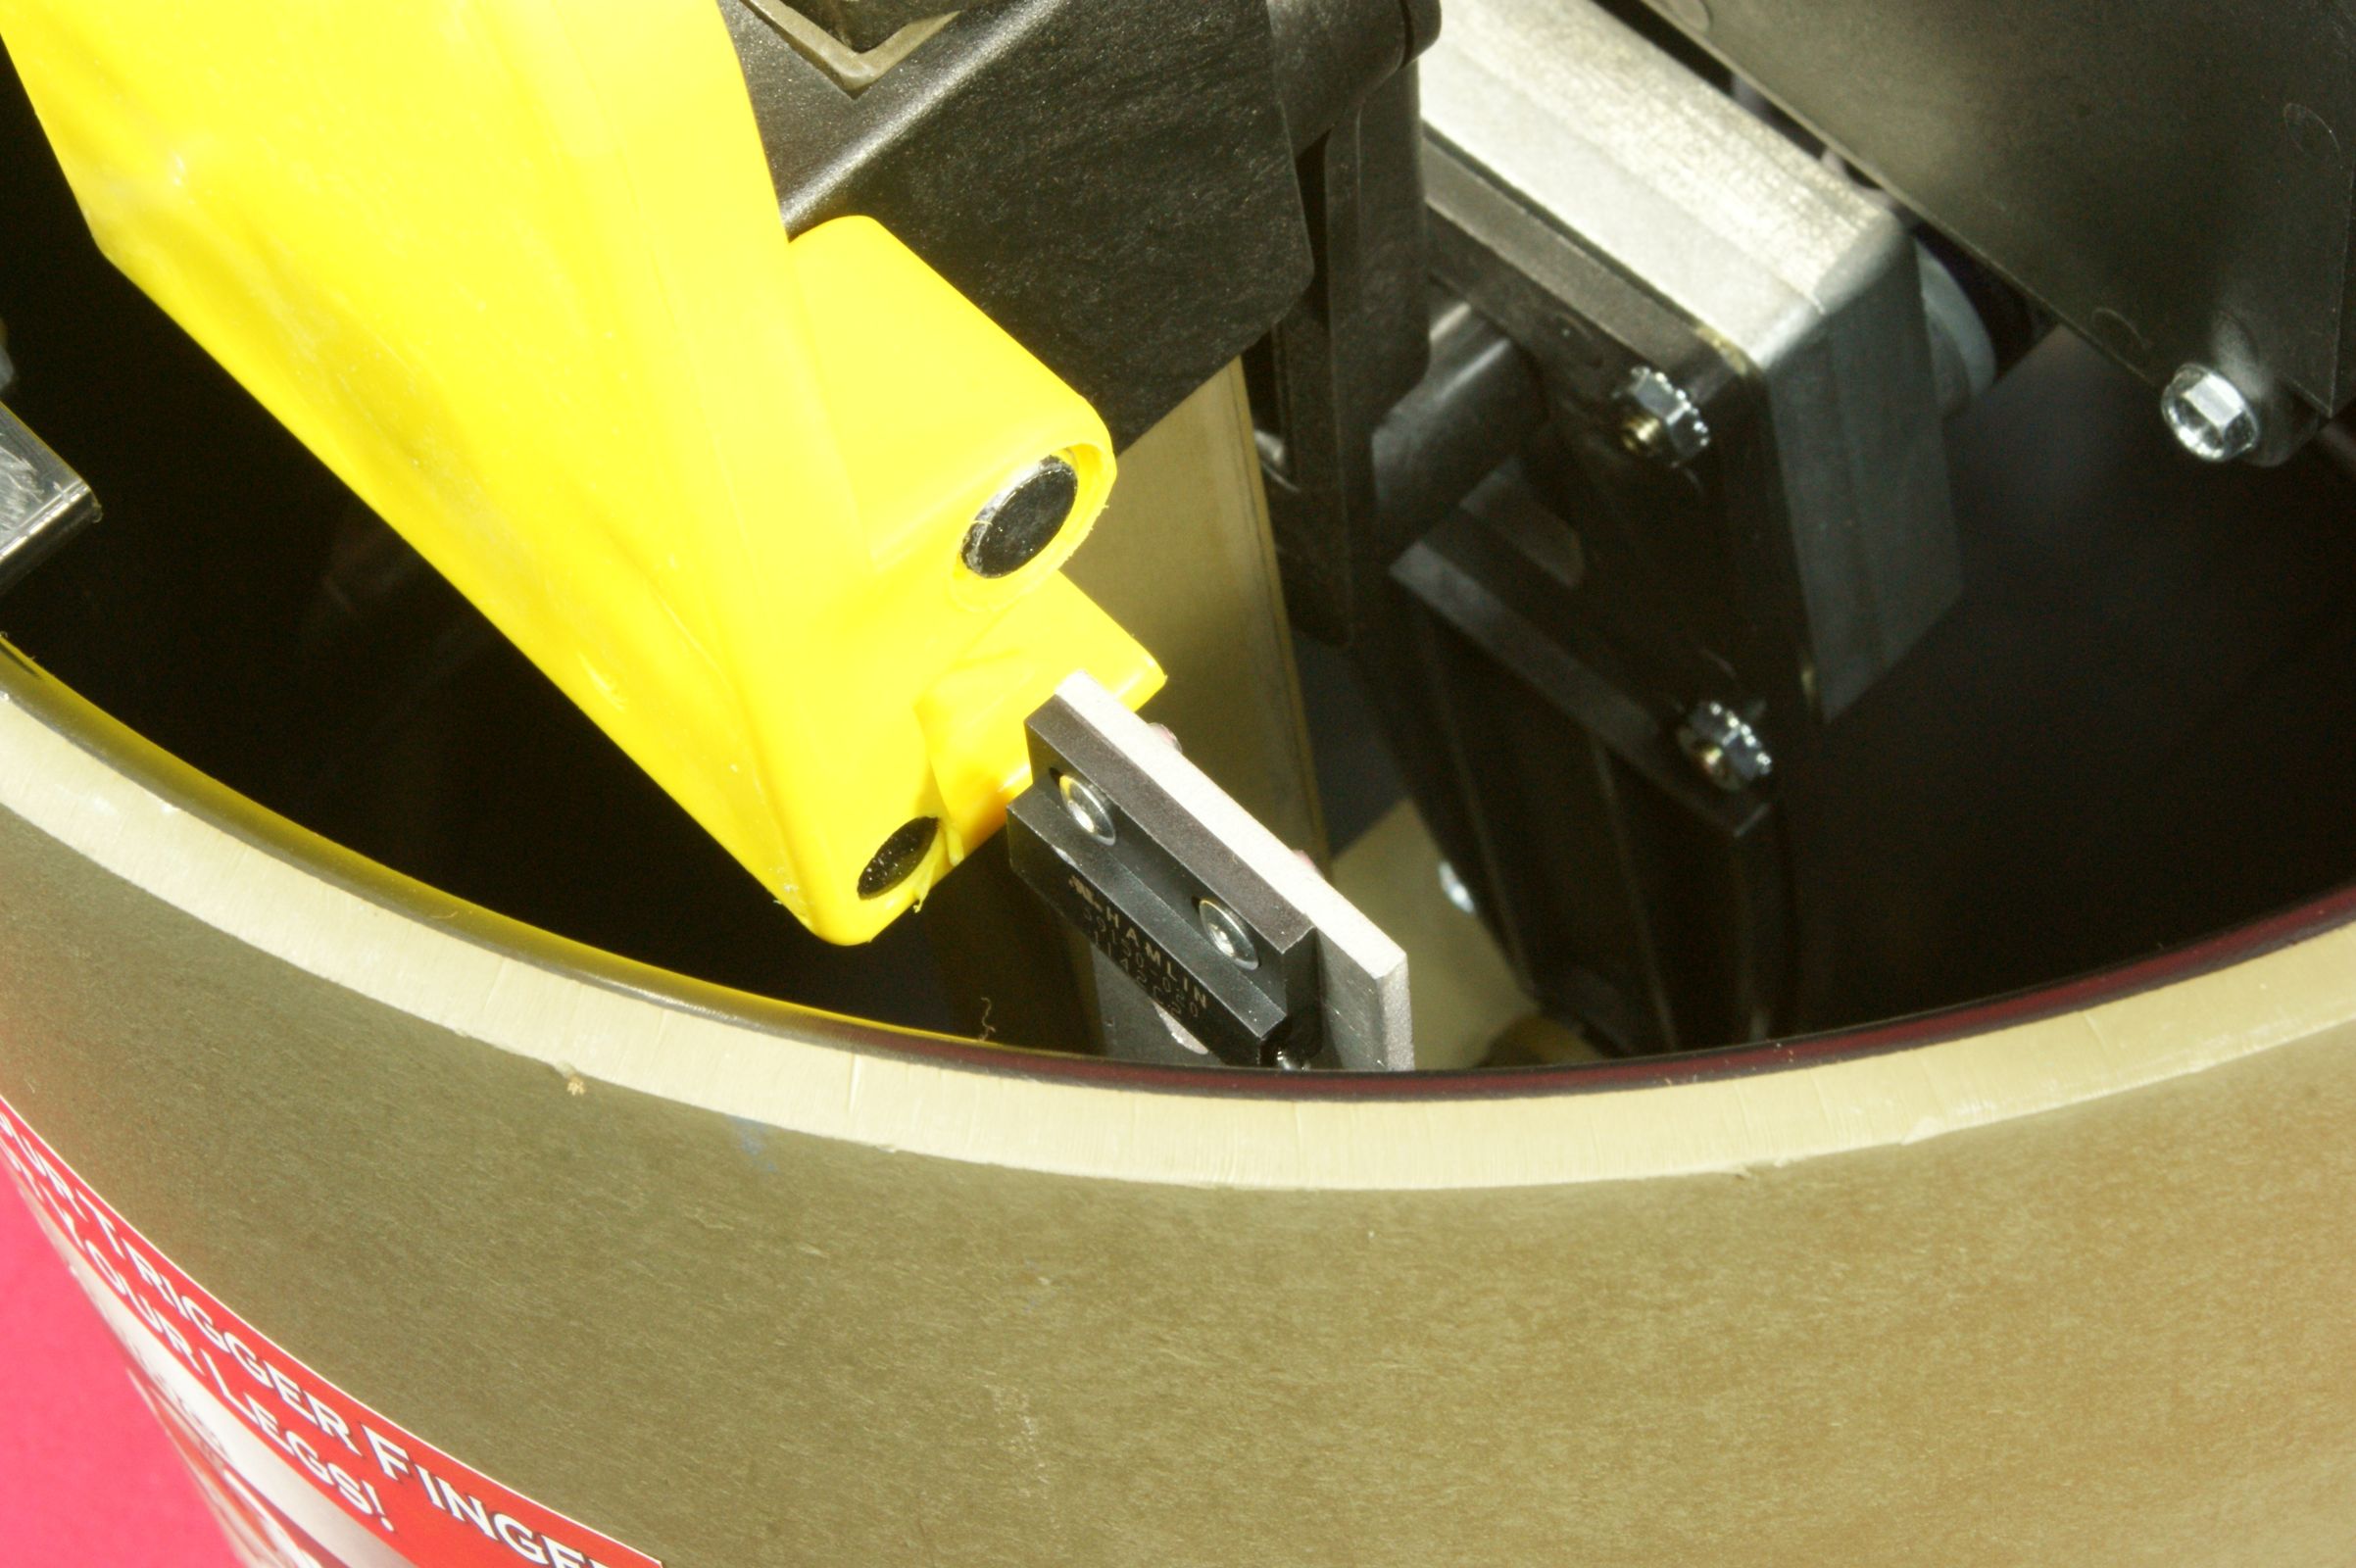
Each of the self healing targets has a magnet embedded in the bottom right corner of the target. This magnet triggers something inside the sensor. When you flip the target, the magnet moves away from the sensor causing the motor to cycle. When the target is reset and cycled back to the top position, the sensor recognizes the magnet and turns the motor off.
Figure 16
When the self healing target (prairie dog) is full extended out of the bucket, it stands about 8" tall and 4" wide at the widest point. The target is made from some type of urethane material and the Instruction Manual states that targets should be replaced every 6 months or 300-600 rounds. Varmint Target sells replacement targets in a pack of 5 for $60. Since 300-600 rounds could easily be a single shooting session, especially if you have multiple shooters using rimfire ammunition, I suggest you shoot smart. Start shooting at the head and work yourself down to get the most out of a single target.
Figure 17

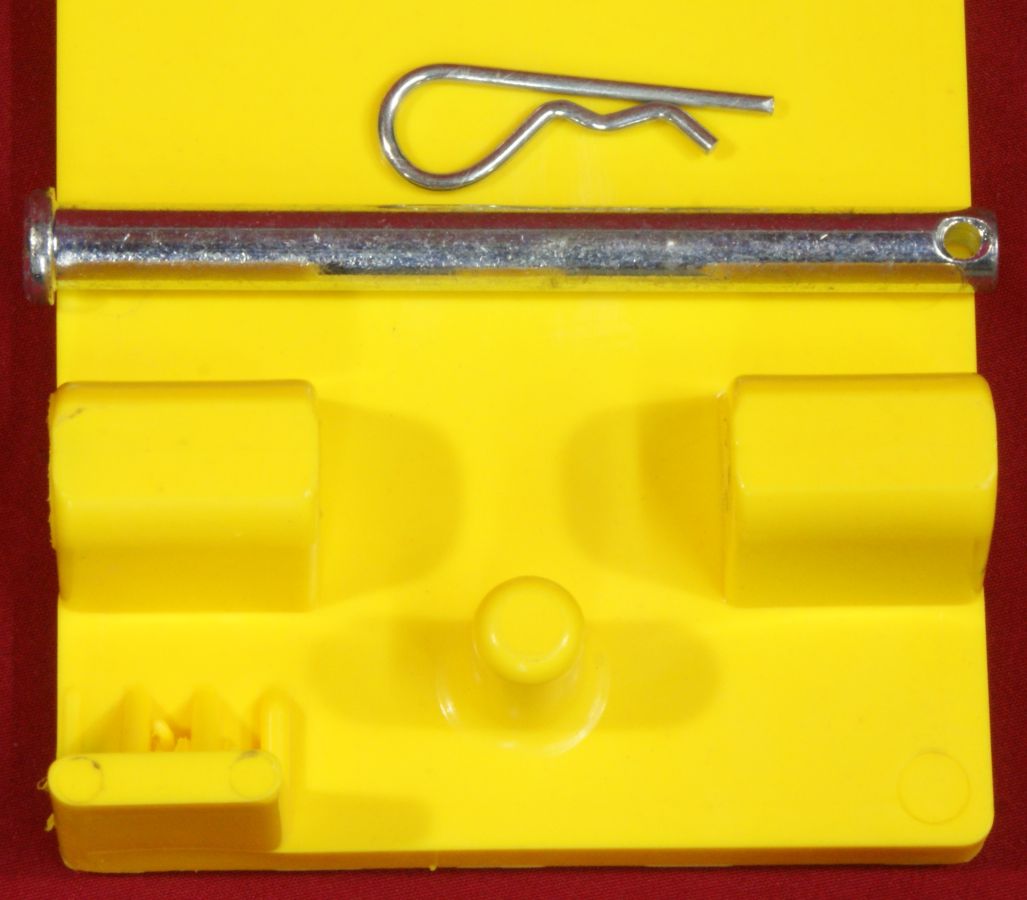
Changing targets is simple. You pull the spring clip and then pull the cross pin at the base of the target. Make sure the target is turned off when doing this so it will not try to retract as you remove the pin.
Figure 18

Figure 19
This next video covers some of the information above and gives you some more details on how the Varmint Target actually works and shows the target taking some hits out at the hunting camp.
Other than practicing normal gun safety, there are a couple of things to remember when setting up your Varmint Target.
- Rimfire .22 Ammunition - The target and Instruction Manual clearly state to use rimfire ammunition. If you decide to shoot it with more powerful ammunition, be prepared to wear out your targets more quickly and potentially damage your target in the event of shots hitting the steel plate. The Varmint Target instructions talk about burrying your target for use and doing so would help to alleviate potential target damage. I'm not suggesting shooting the target with anything other than rimfire ammunition, but if I did, I would make sure there is a dirt berm in front of the target so that only the body of the prairie dog is visible.
- Minimum 25 Yards - This is to ensure that stray bullets which hit the metal plate don't splatter back and create a safety issue.
- Tilt The Front Of The Target Up 5 Degrees - Most likely this is to ensure that you don't accidentally drop a bullet over the front lip of the can and into the back battery box.
- Never Shoot At A Downward Angle Into Target - Again, this is to ensure you don't shoot into the battery box or controls.
Figure 20
All of the above information gives you a good idea on what you get when you purchase a Varmint Target, but I feel a couple of the key features that people are wanting when purchasing a target system like this are convenience, novelty and fun. Varmint Target produced a video illustrating the convenience and fun of their target and it is worth a watch. Convenience, novelty and fun are pretty subjective aspects of a target and are clearly hard to measure because they are based on each individual's preference. Here are a few of my comments on each of these aspects.
- Convenience - I feel that convenience with this target system falls in the line with a "pay me now or pay me latter" philosophy. The question is whether you feel that charging the battery, maybe swapping out a prairie dog, and setting up the target outweighs multiple walks back and forth at the range.
- Novelty - There is no doubt that this target has a high novelty factor (or maybe I should call it a cool factor). Knocking over a target and then having it automatically reset may be just the thing that separates the men from the boys when it come to their toys. Also, I believe the novelty factor would increase significantly with multiple targets and a game mode. My impression is that this novelty factor also comes into play when you are working with younger shooters and teaching them about the sport of shooting.
- Fun - For me, shooting is fun, shooting reactive targets is more fun, and shooting cool reactive targets is even more fun. I go back to the days at the amusement parks were you paid a dollar and had a blast knocking over targets with a BB gun. Get your buddies together, setup your own range with a variety of targets, make up some rules, get out your stop watch, and you might just experience a whole new level of fun.
Lastly, I have to talk about the price. At an MSRP of $249 (was originally $334), I'm sure a few of you may still feel sticker shock. Fortunately, Varmint Target provides free shipping and handling which can be between a $20 and $30 dollar savings depending on your location. There is no doubt that this target has a high complexity factor when you consider it combines custom molded parts, weldment, armor plate, rechargeable battery, electronics, sensors and a self healing target, all of which add to the cost. After getting more information on the Varmint Target, I found out that this Target is a true "Made in the USA" product. The owners know that they could send the plans overseas and get them built cheaper, but doing that defeats what the makers of the Varmint Target are trying to do. It is more important for them to keep jobs in the USA, potentially limiting their customer base, than maximize profits. For me, I don't mind paying a little more for an American made product because in the end I feel that I'm investing in America which is a good thing. Since the Varmint Target was introduced at the beginning of 2012, they have had good success and are getting interest from the NRA and the Boy Scouts of America. Hopefully in time production rates will increase which may bring costs down and make them affordable to a greater number of shooters.
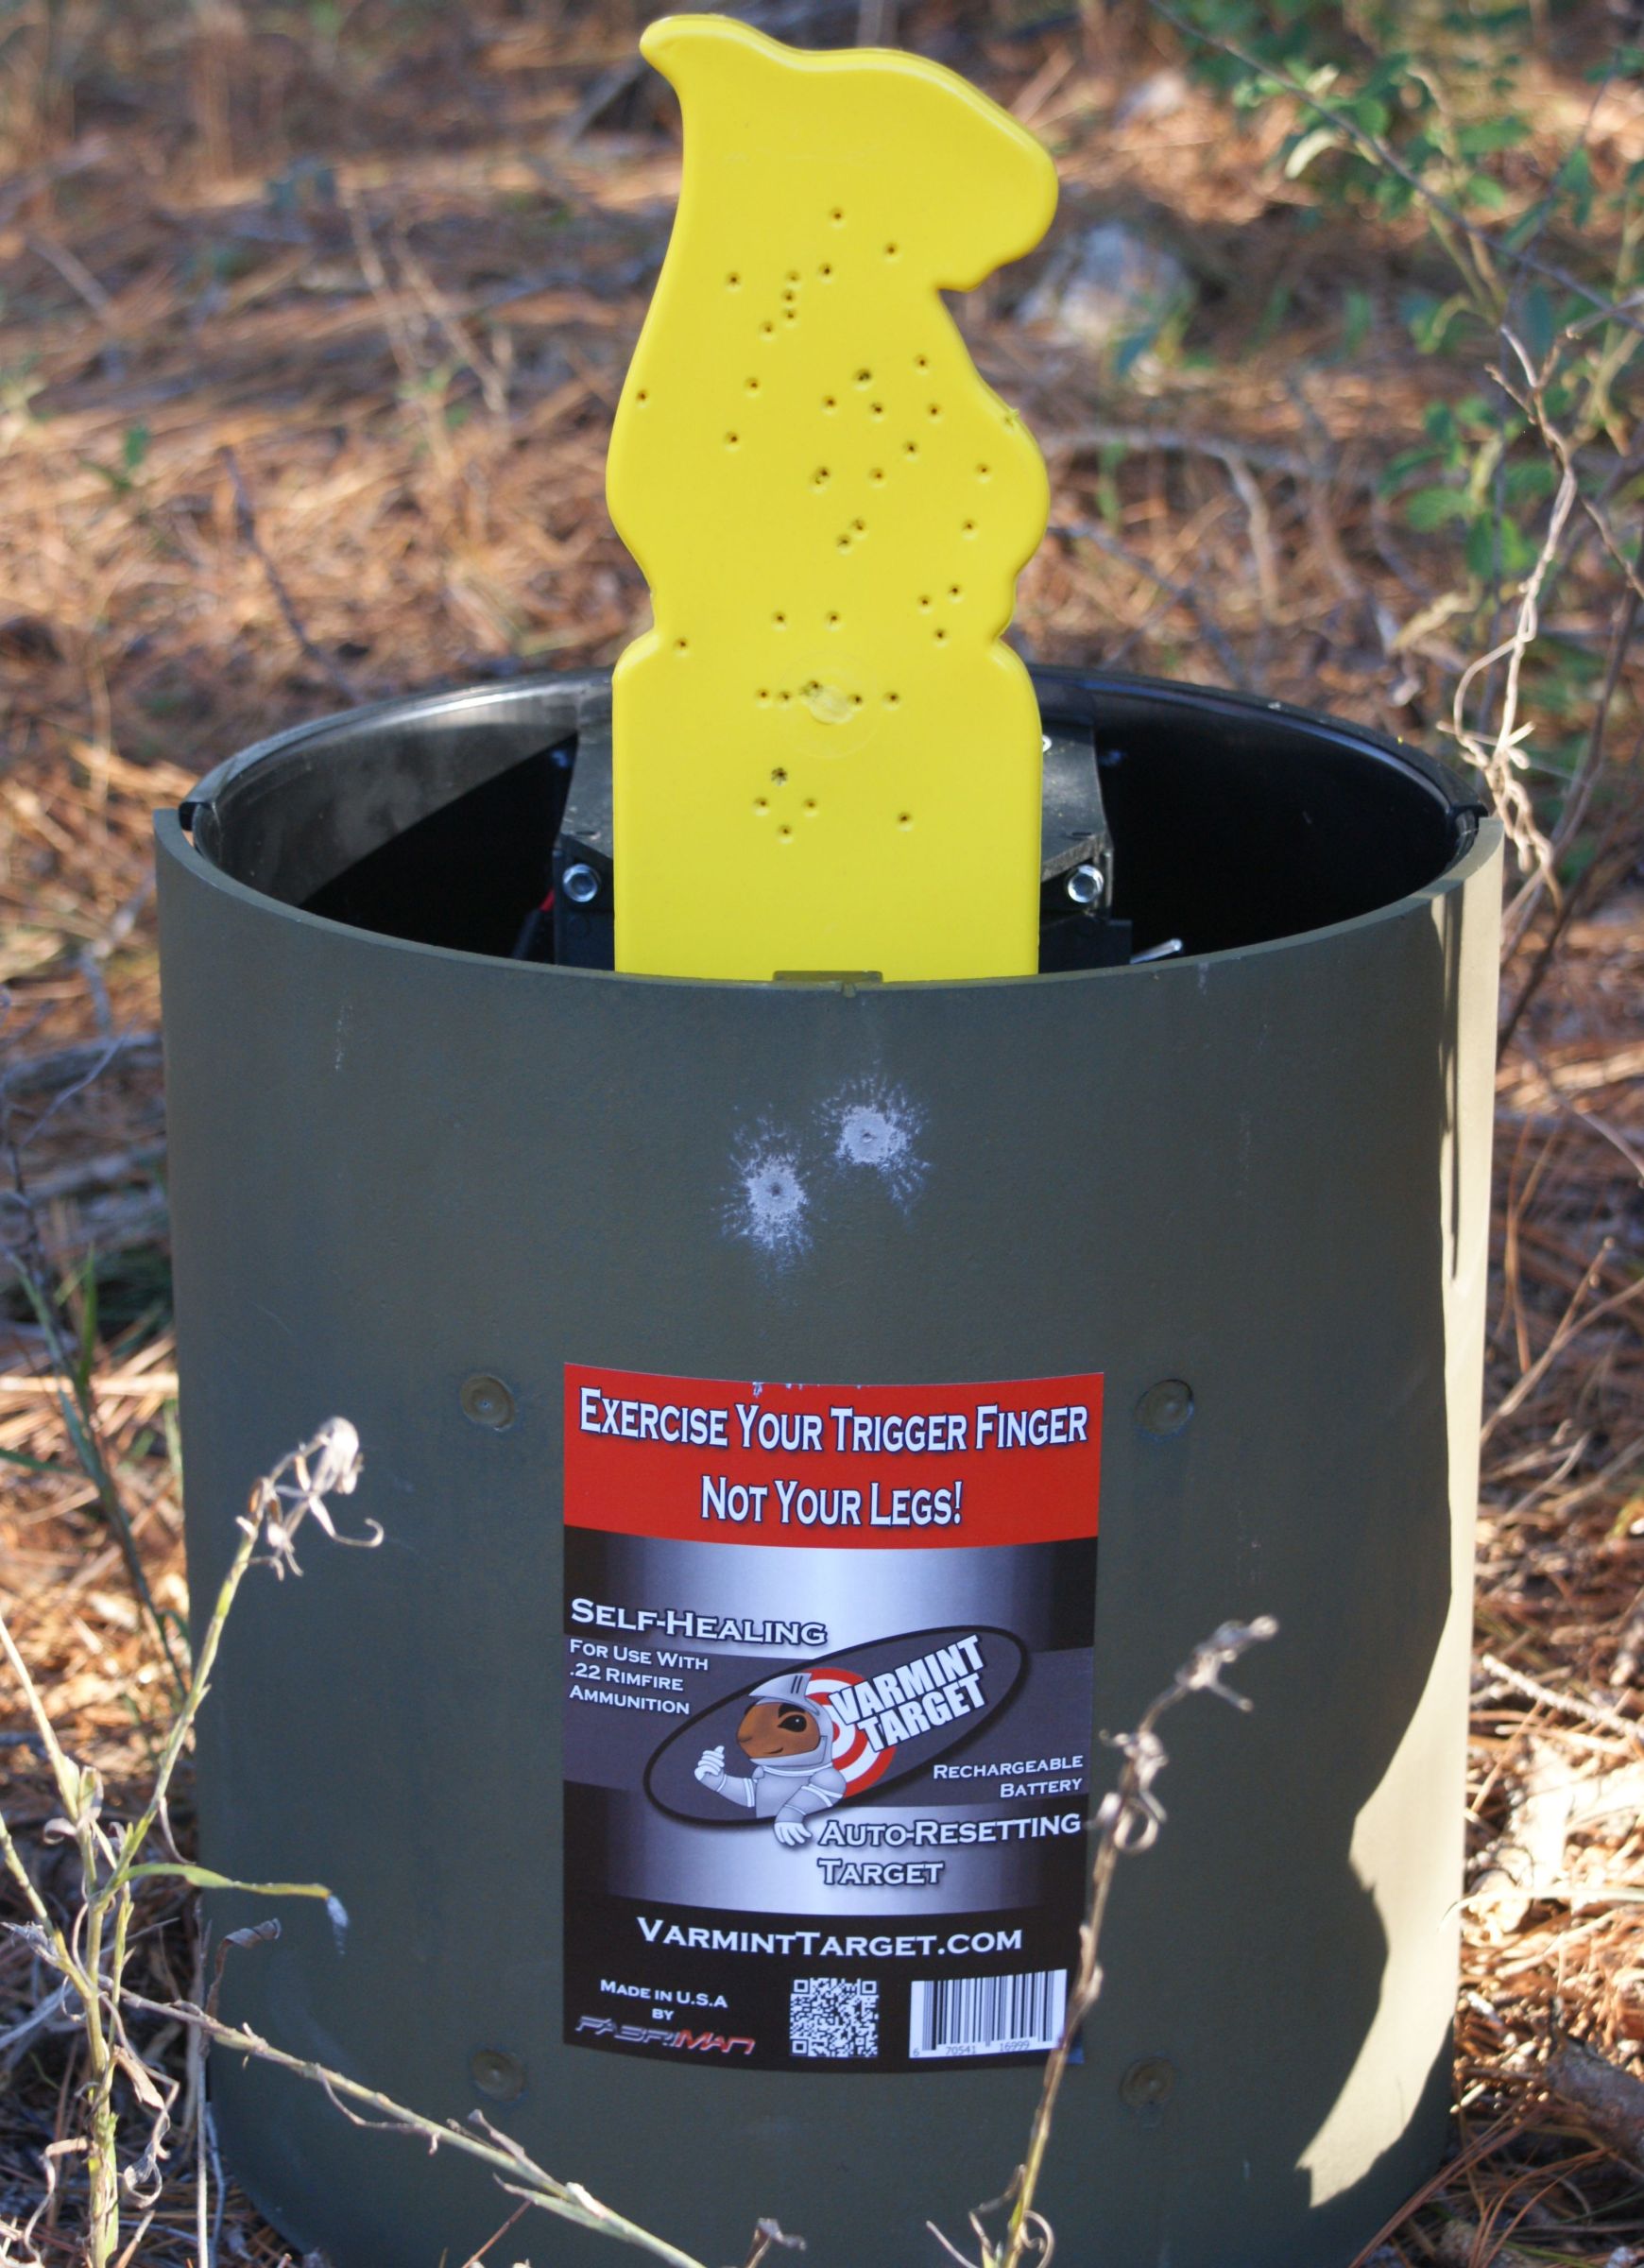
The photo below shows my 14 year old niece having fun shooting the target for the first time.
Figure 21

The urethane prairie dog does a good job as handling the rimfire ammunition. You can also see that the armor plate took a couple of hits. There was a very slight dimple where the round impacted the plate, but I wouldn't consider the dimple as any type of significant damage to the plate.
Figure 22
These next few photos show the bullet impacts to the prairie dog (front and back) and the armor plate.
Figure 23
Figure 24
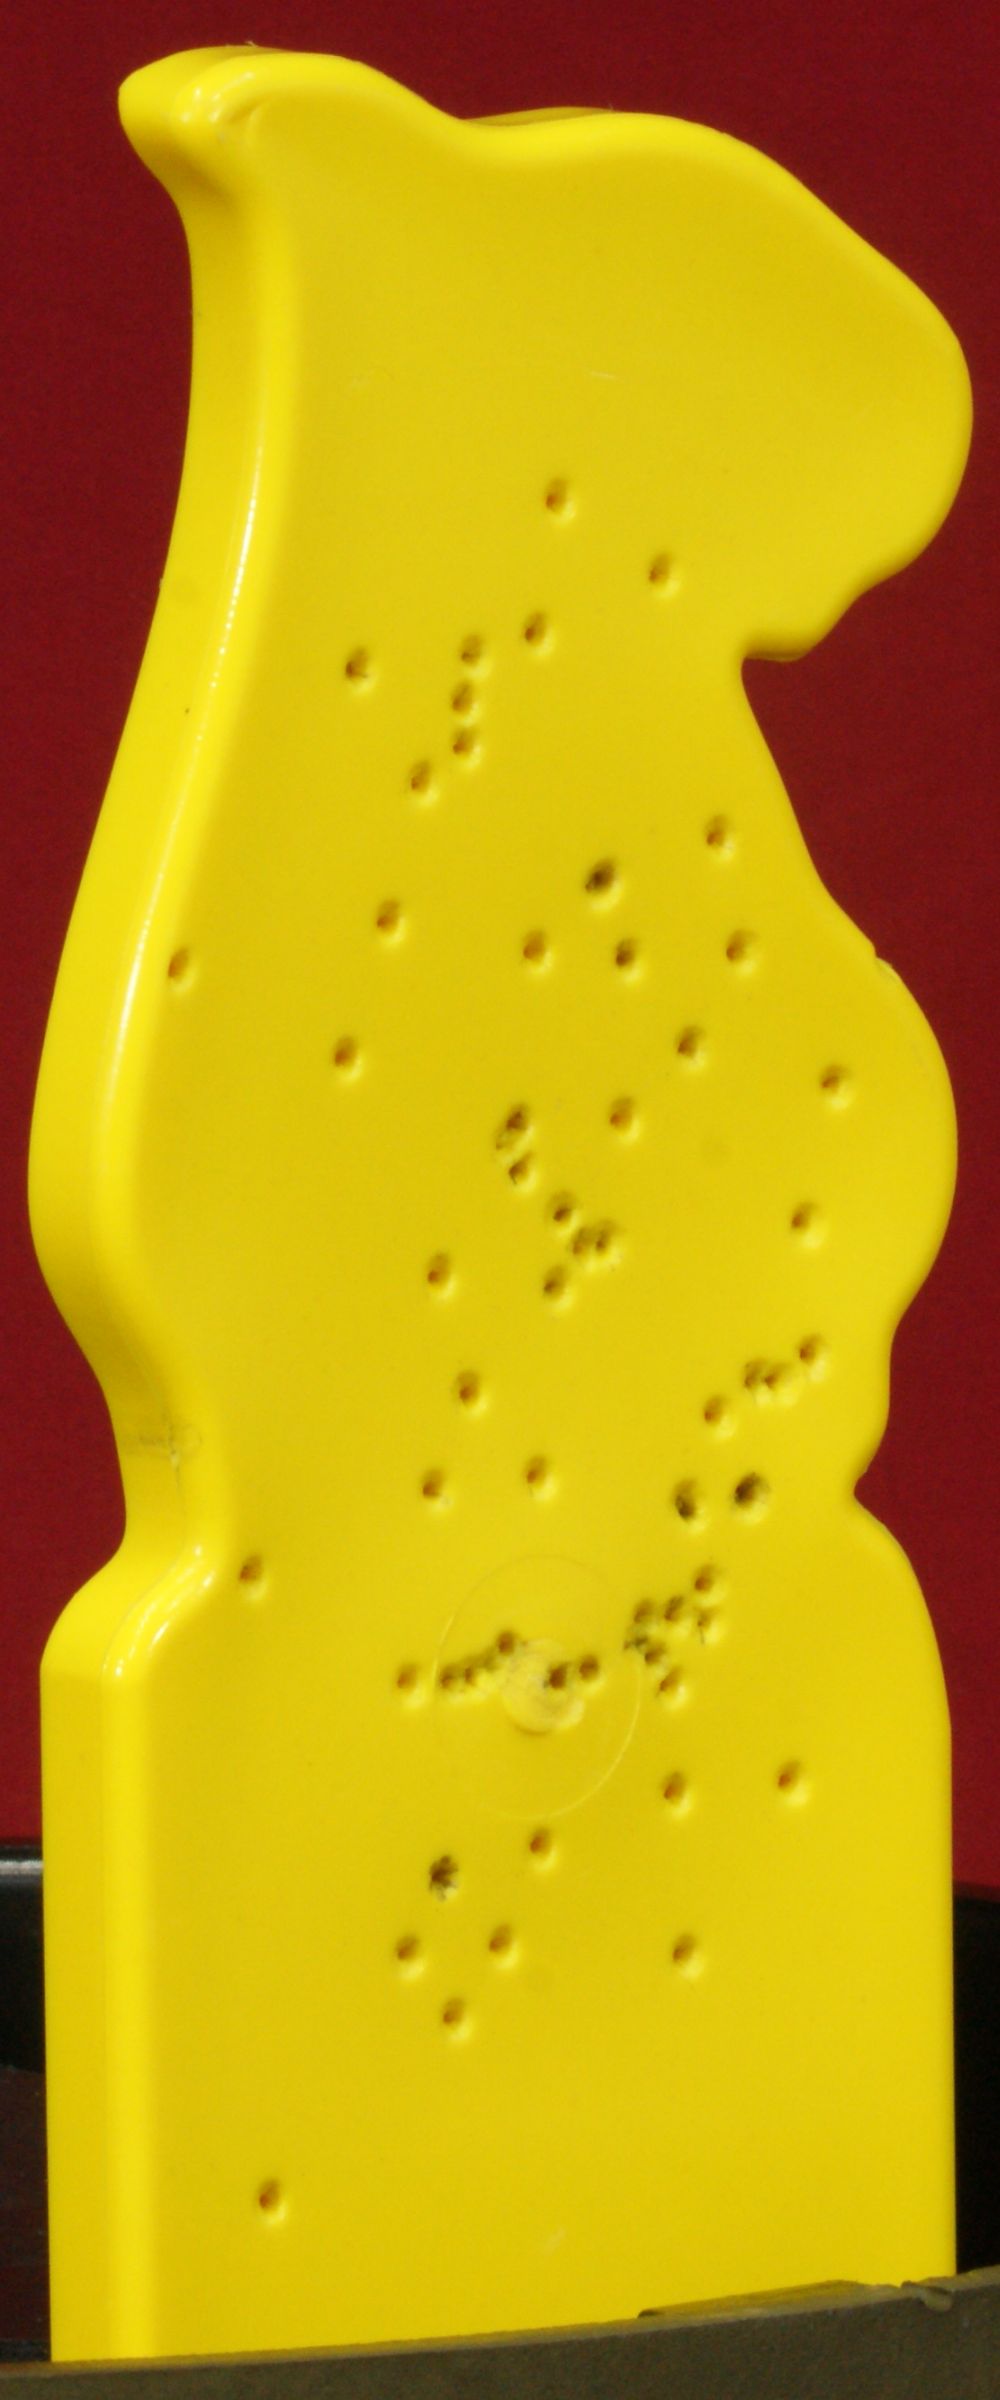
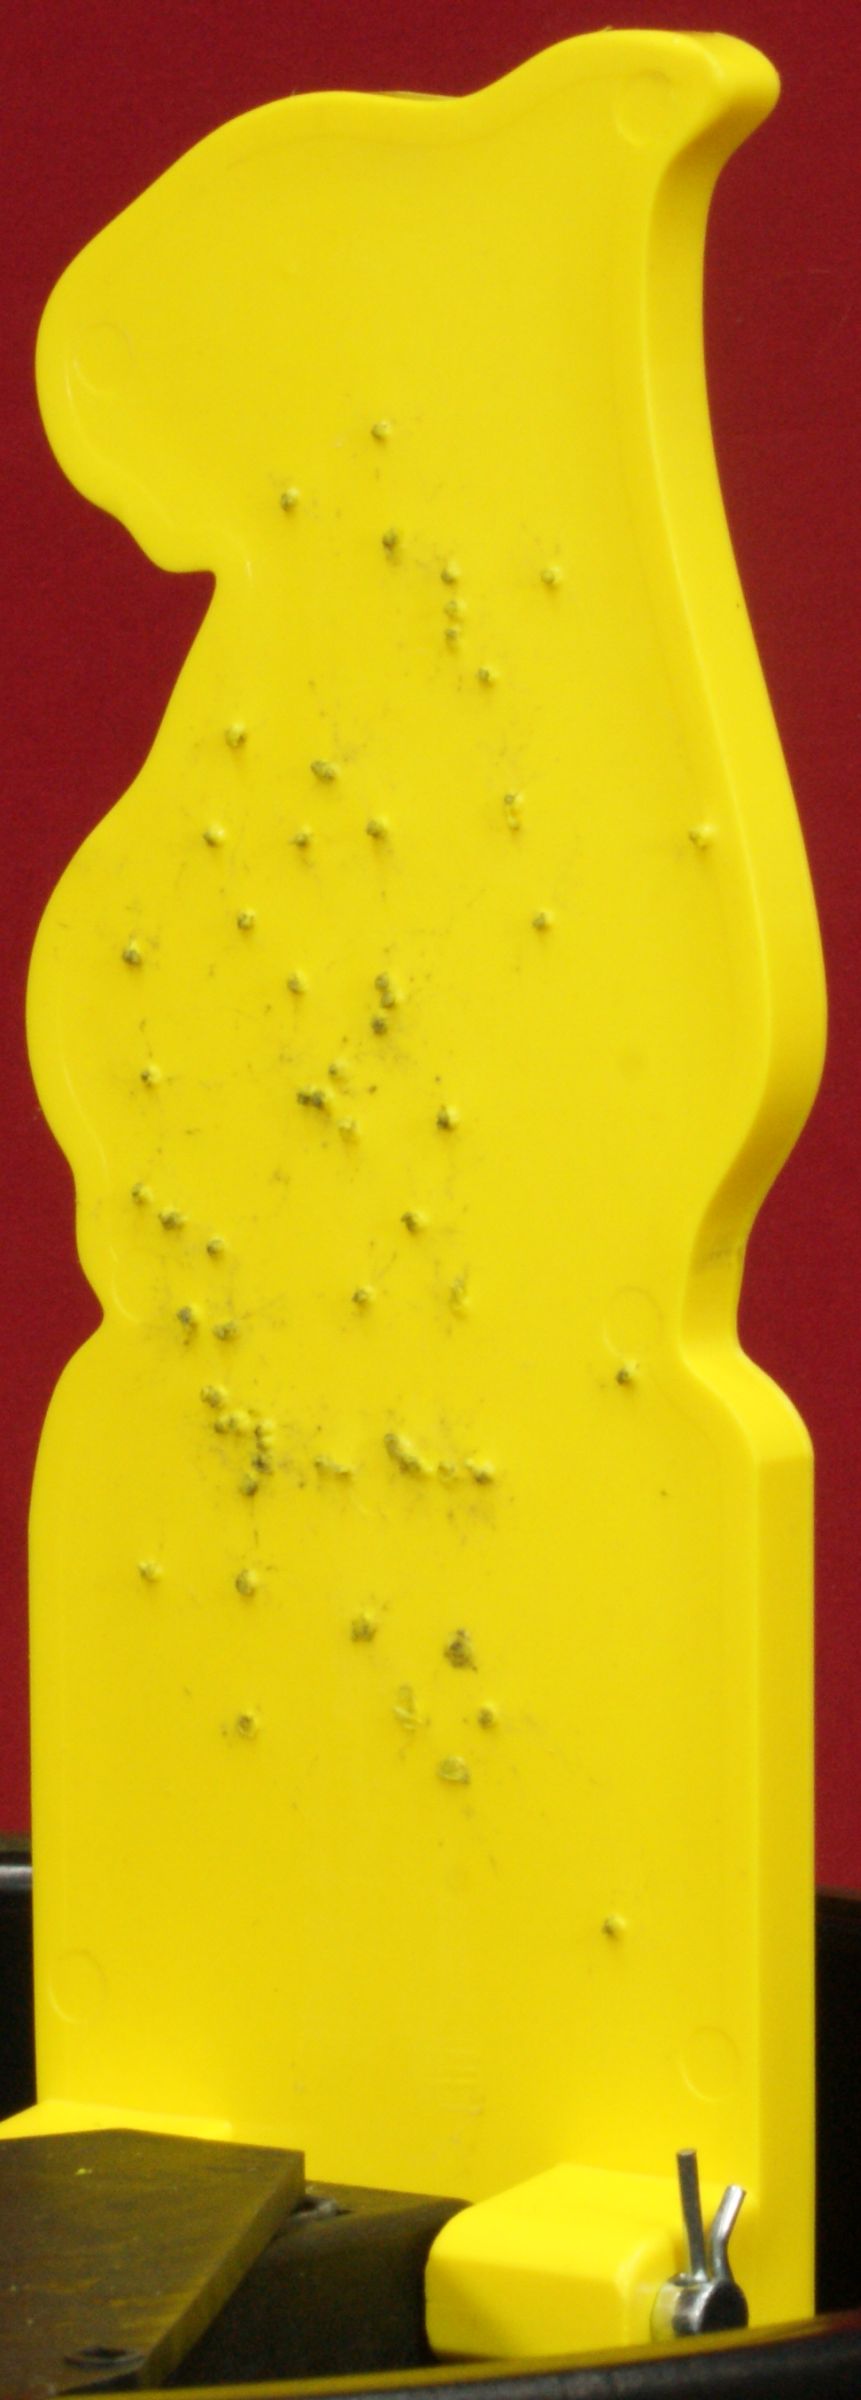
Figure 25

Bottom Line:
From everything I have seen and evaluated, the Varmint Target looks like a good product. It seems well built and should give you years of fun provided you follow the instructions for setting up the target to ensure you don't shoot inside the target by accident. It is not an inexpensive target, but if you've priced decent targets, you already know that many of them are pricey. American made is a big plus and should be considered when comparing costs with other targets. Also, Varmint Target provides free shipping and handling which should be considered when comparing targets. This basic model does not come with any game modes and having some could add to the potential fun. Replacement targets seem reasonably priced at $60 for a 5-pack and you should be able to easily replace most of the components yourself should you have an issue in the future. If you are in the market for a reactive target with character, take a close look at the Varmint Targets when considering the next addition to your shooting range.
Updated 2/27/13:
Varmint Target has been able to reduce the price down from an MSRP of $334 to $249 which is a huge difference. They also now offer the target without the steel front for those wanting to burry the target and save a little money. This new target has an MSRP of $199.
Or
If you would like to be notified about future Gunsumer Reports reviews via Facebook, make sure "You Like This" by clicking the Facebook "Like" button at the bottom or top of this page. If it already says "You Like This" beside the button, clicking it again will uncheck the "Like" status and you will not be notified.
| Share on Facebook | |
© 2010, 2011, 2012, 2013, 2014, 2015, 2016, 2017, 2018, 2019, 2020, 2021, 2022, 2023 & 2024 Gunsumer Reports™, All rights reserved.
FTC Disclosure