|
|
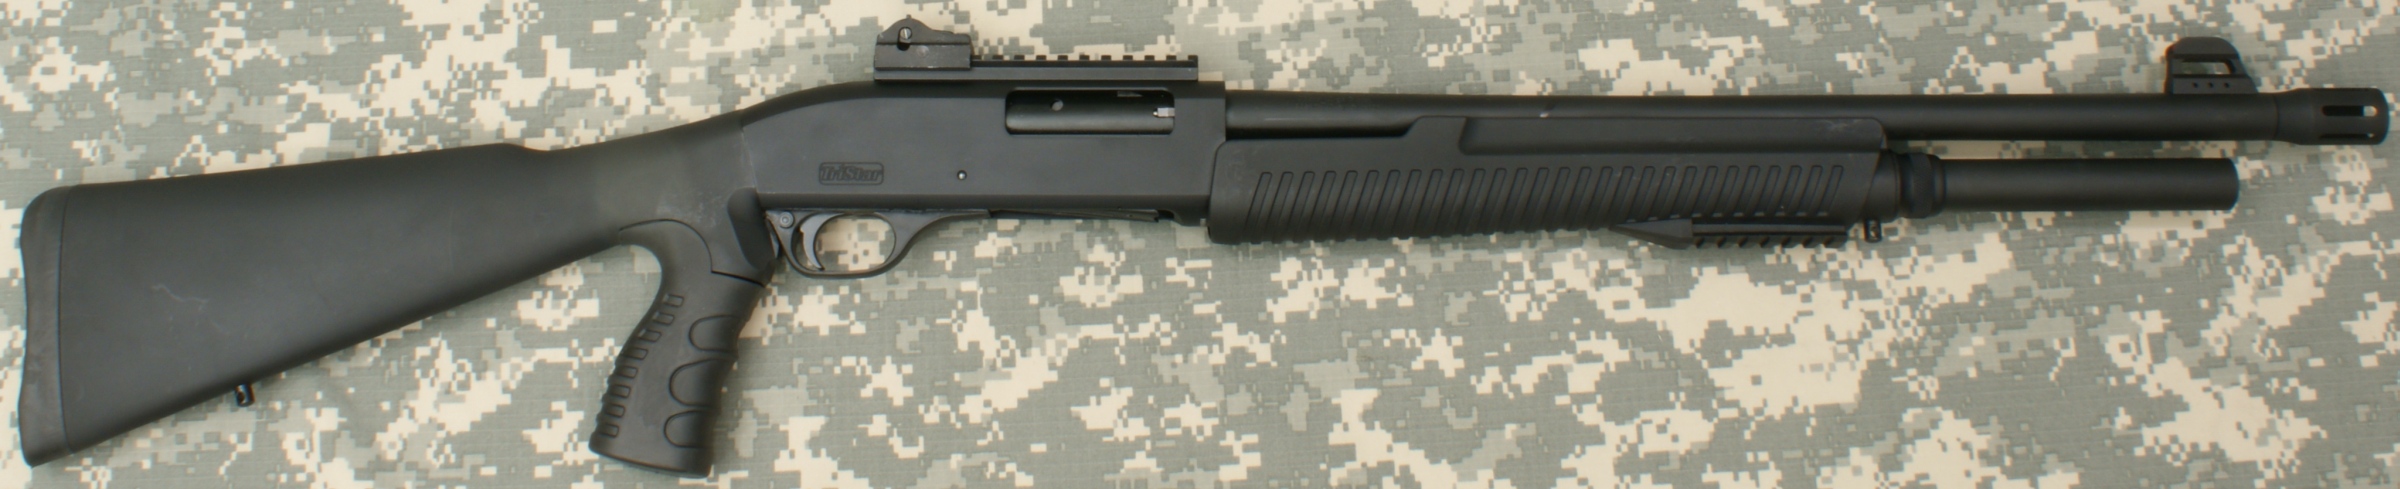
Gunsumer Reports TM Providing Detailed Objective Reviews for Firearms and Firearm Accessories |
TriStar Cobra Force Shotgun Review
Part 4 - Disassembly
July 6, 2011
In this part of the review, I will show and discuss the disassembly of the TriStar Cobra Force Shotgun. For disassembly, in general I will follow the basic steps outlined in the Instruction Manual, and I recommend that you always use the instructions provided by the manufacturer as the primary source for disassembly of any firearm. Most importantly, always make sure the shotgun is unloaded (chamber and magazine tube) and then check it one more time before you begin disassembly.
Step 1 - Remove the Magazine Cap
Since the action on this shotgun is spring loaded, I let the action remain in the fully closed position for disassembly. On this shotgun, the magazine cap is actually not a cap, but instead it is more like a thumb nut. When you loosen the magazine cap, you can remove it from the end of the magazine tube.
Figure 1
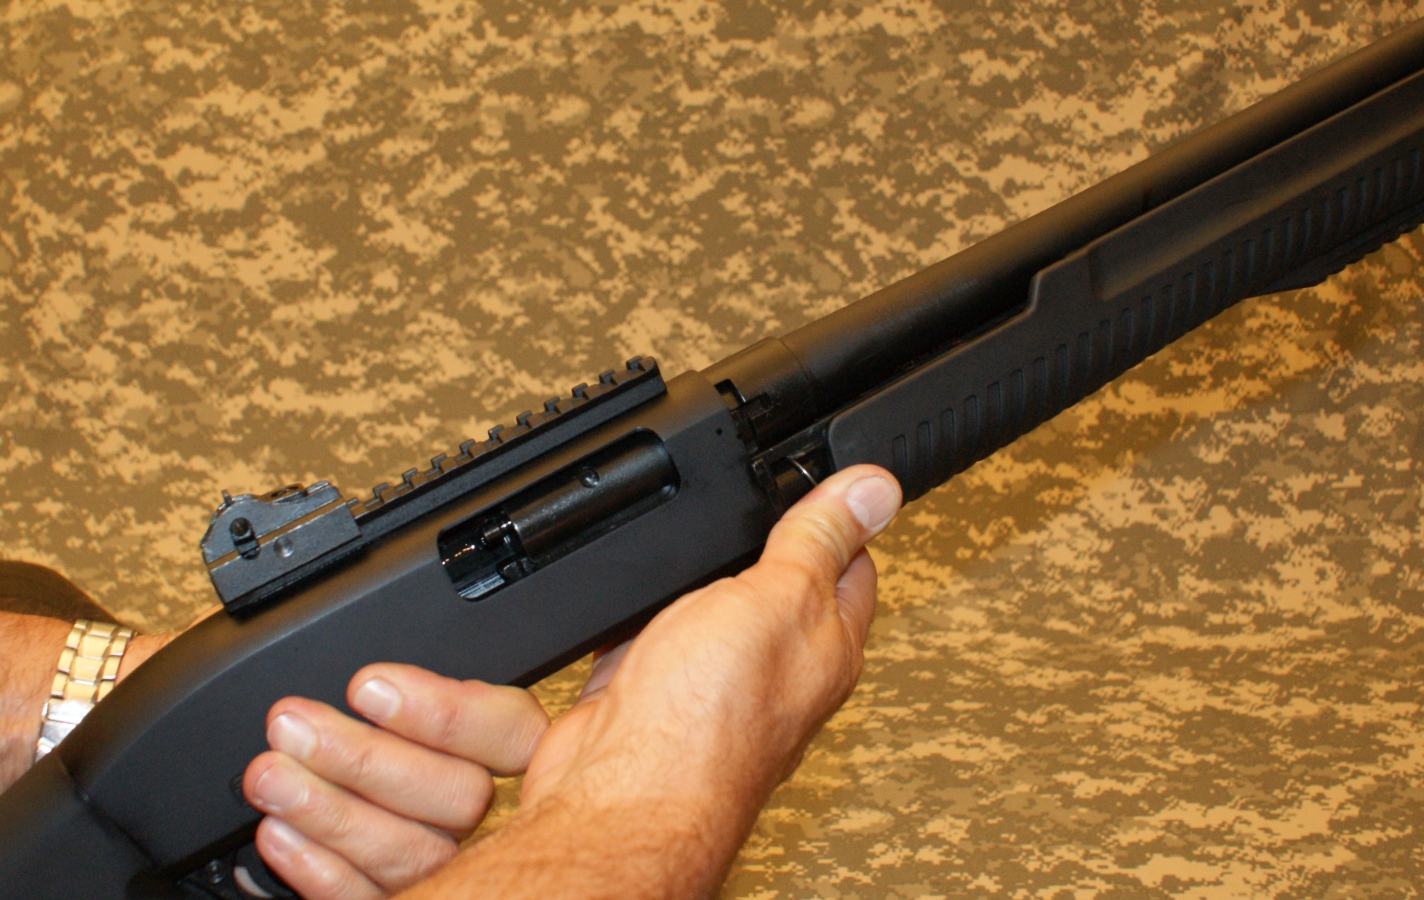
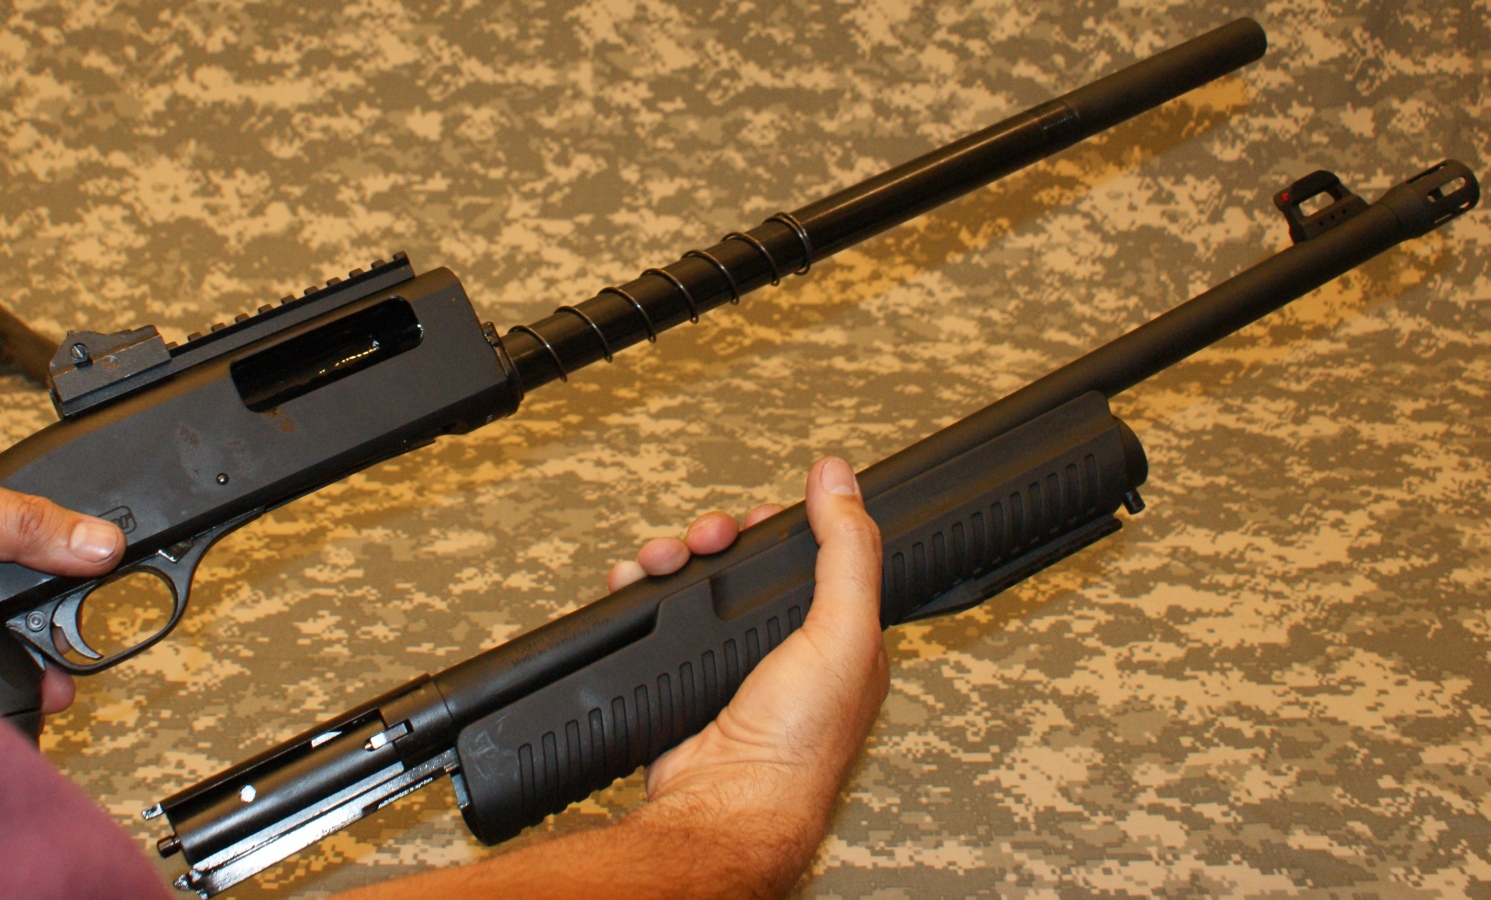
Step 2 - Remove Barrel, Forend and Bolt Assembly
With the magazine cap removed, you can apply pressure at the base of the forend and start pushing the barrel, forend and bolt assembly out of the receiver.
Figure 2
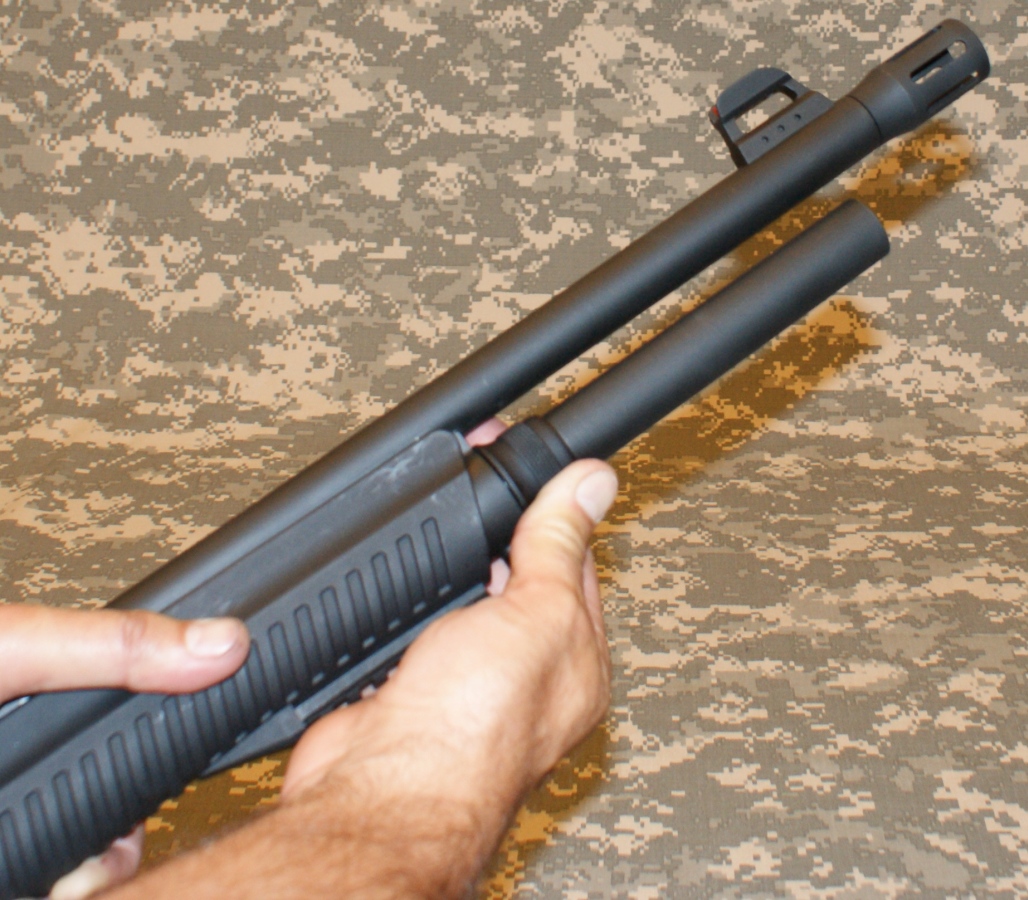
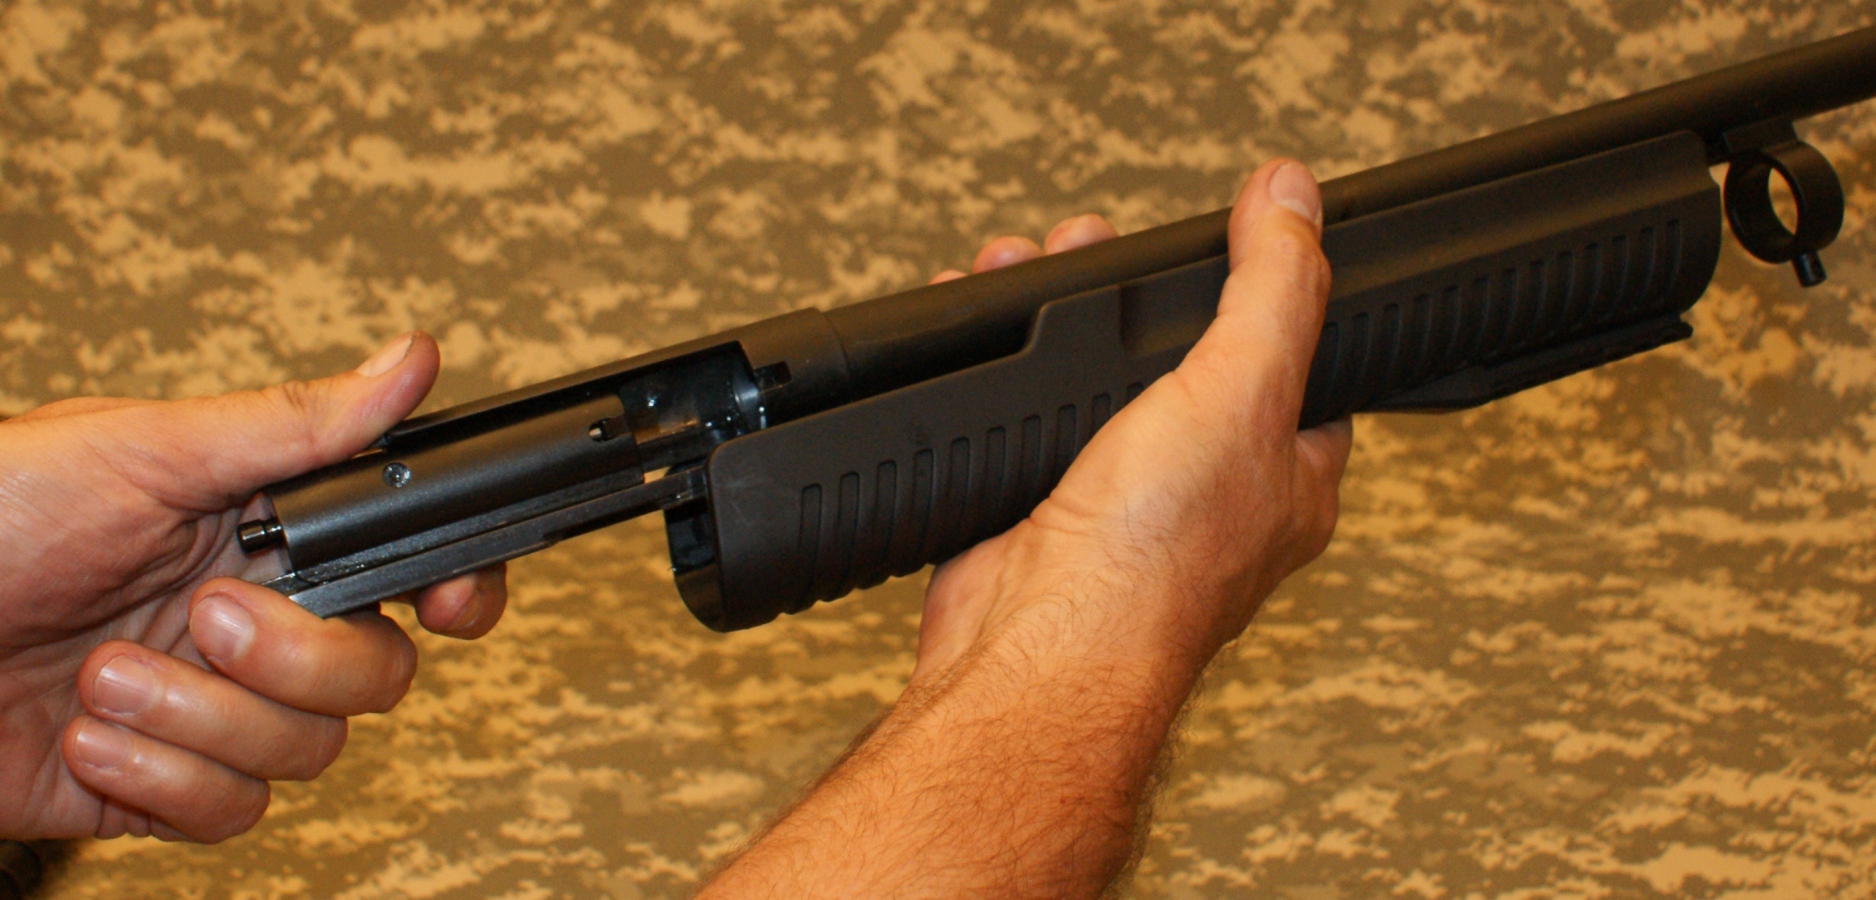
Once out of the receiver, you can continue to push it off the magazine tube.
Figure 3
The barrel, forend and bolt assembly come easily off the magazine tube and stayed together making this portion of the disassembly very simple.
Figure 4
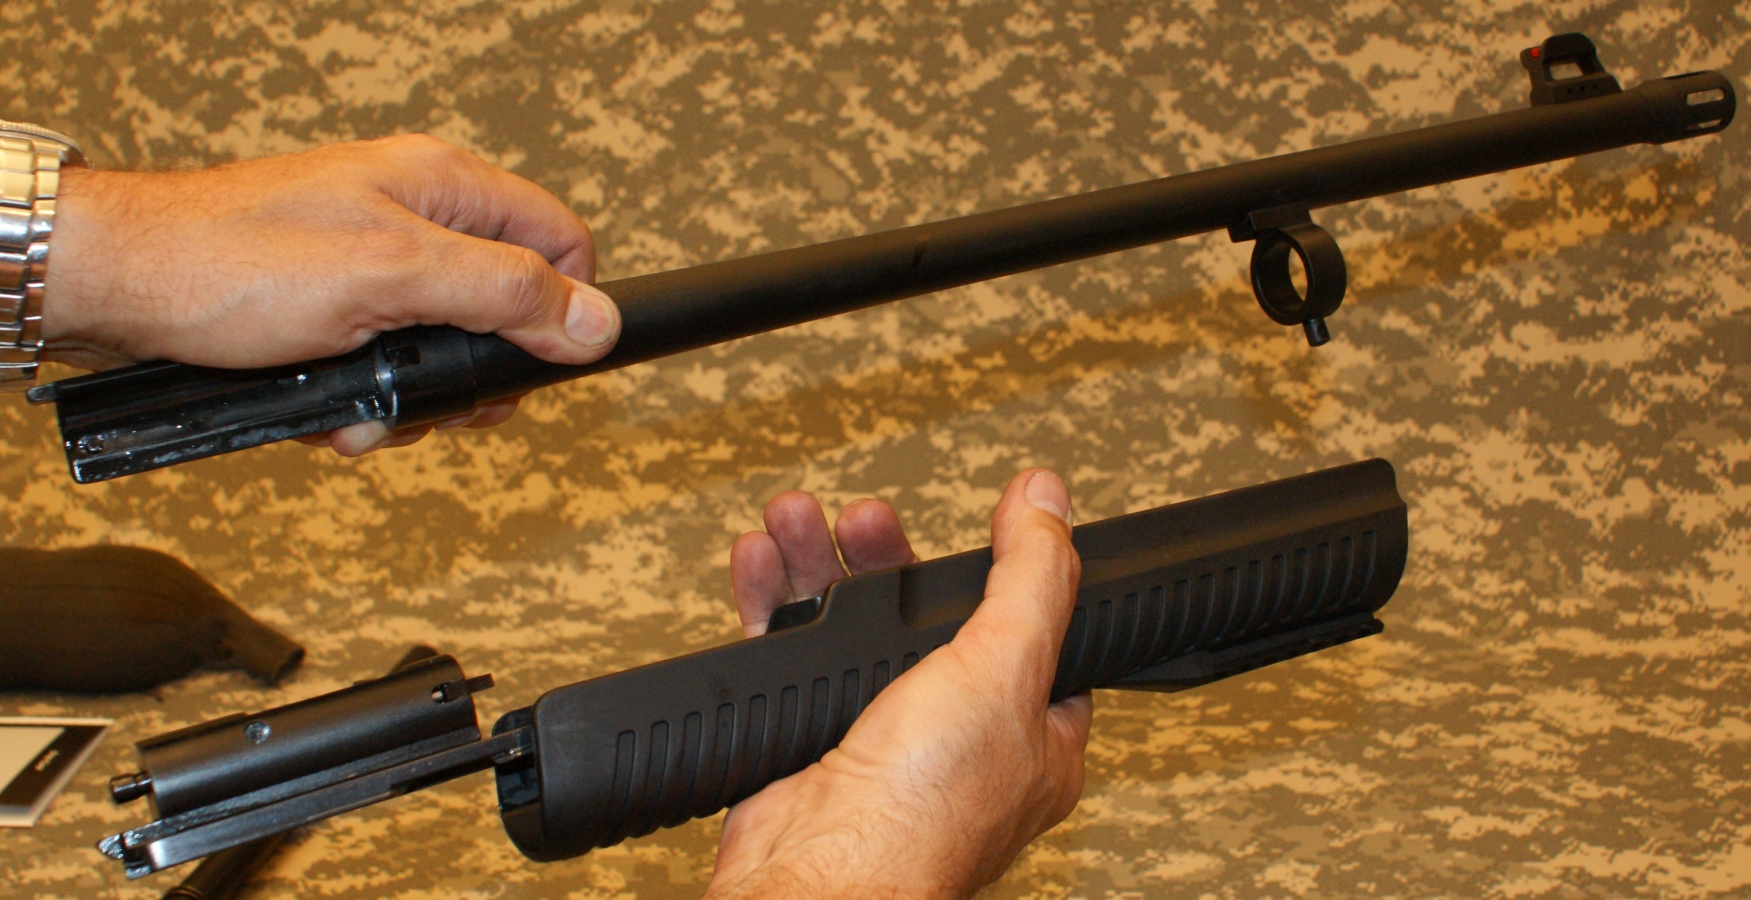
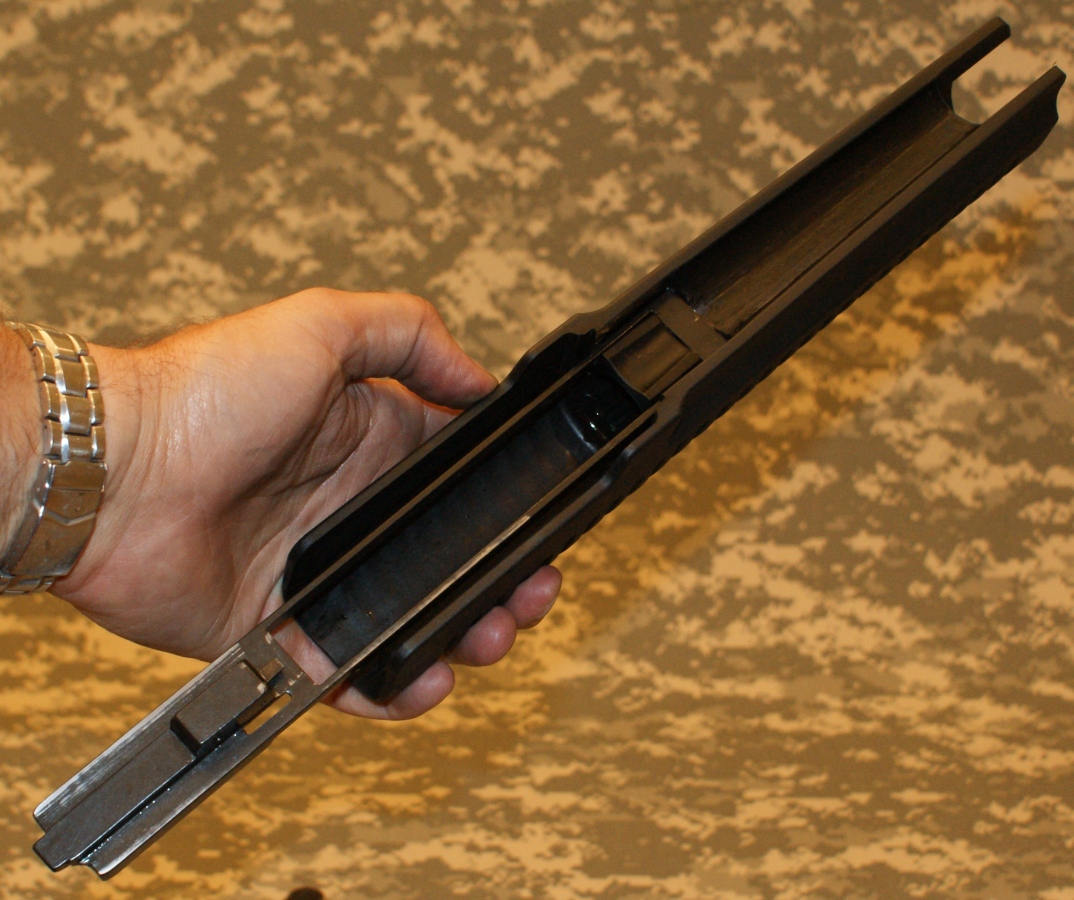
Step 3 - Remove the Barrel
You can remove the barrel by pushing forward on the barrel while pulling back on the forend.
Figure 5
The barrel lifts easily out of place. Notice that the bolt assembly is still sitting on the action bar. It was very nice that it didn't want to fall off immediately after taking it out of the receiver.
Figure 6
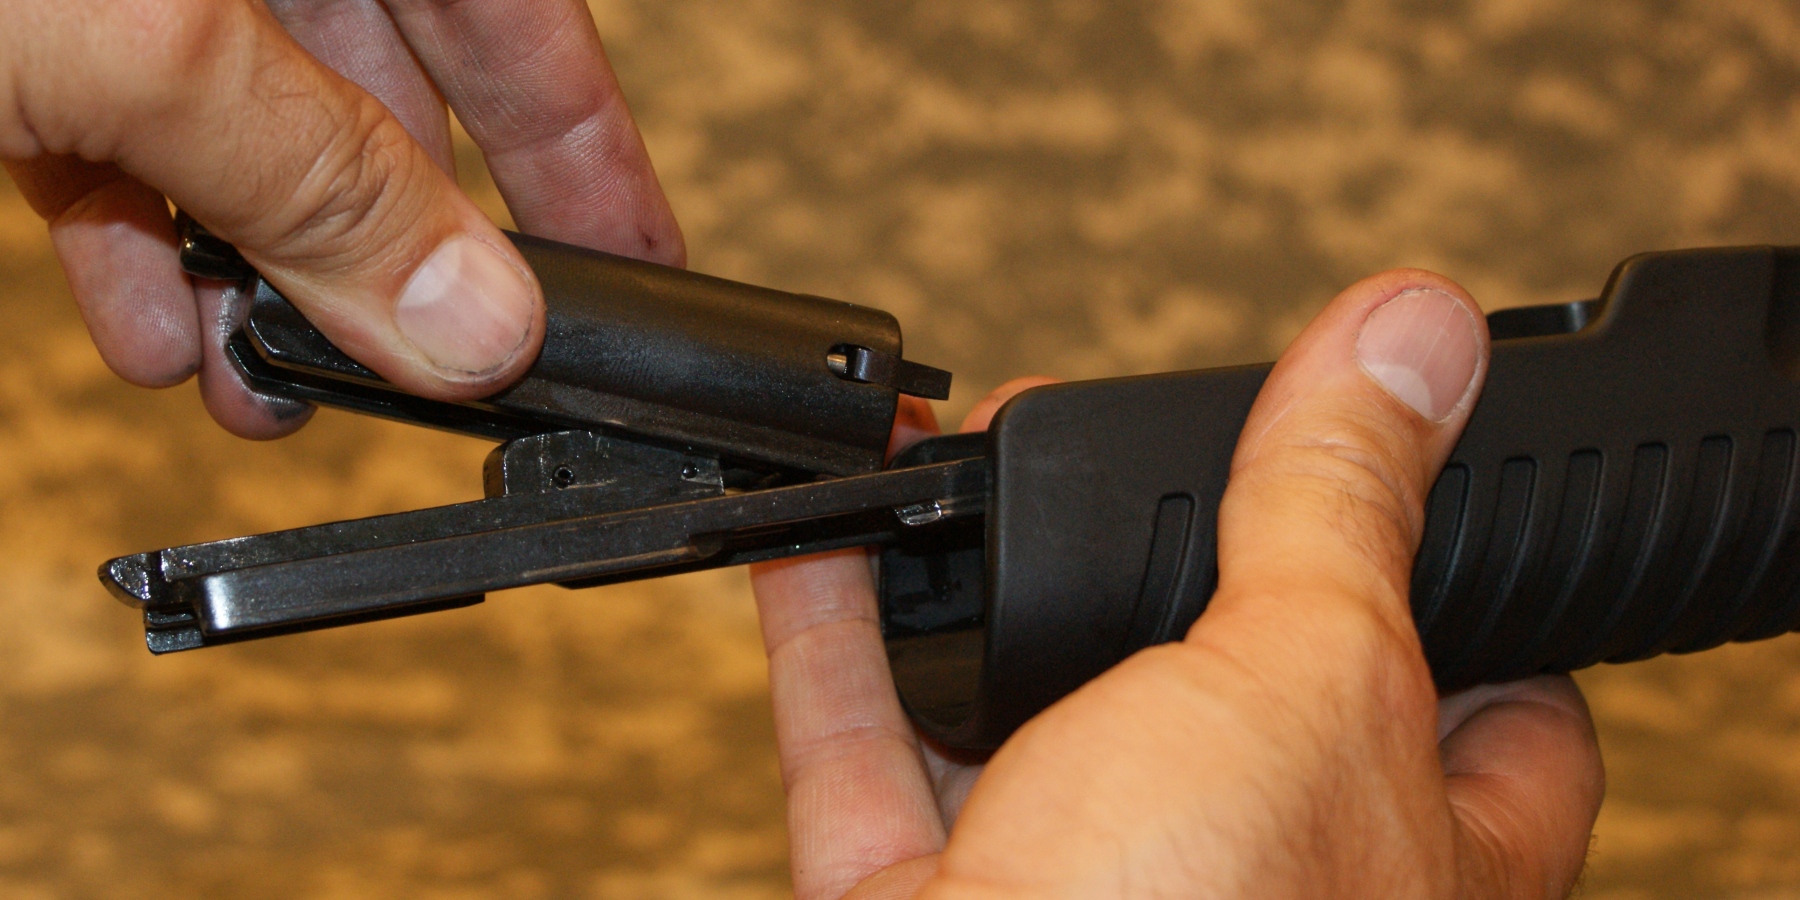
Step 4 - Remove the Bolt
To remove the bolt, you lift up of the rear potion of the bolt and slide the bolt assembly forward.
Figure 7
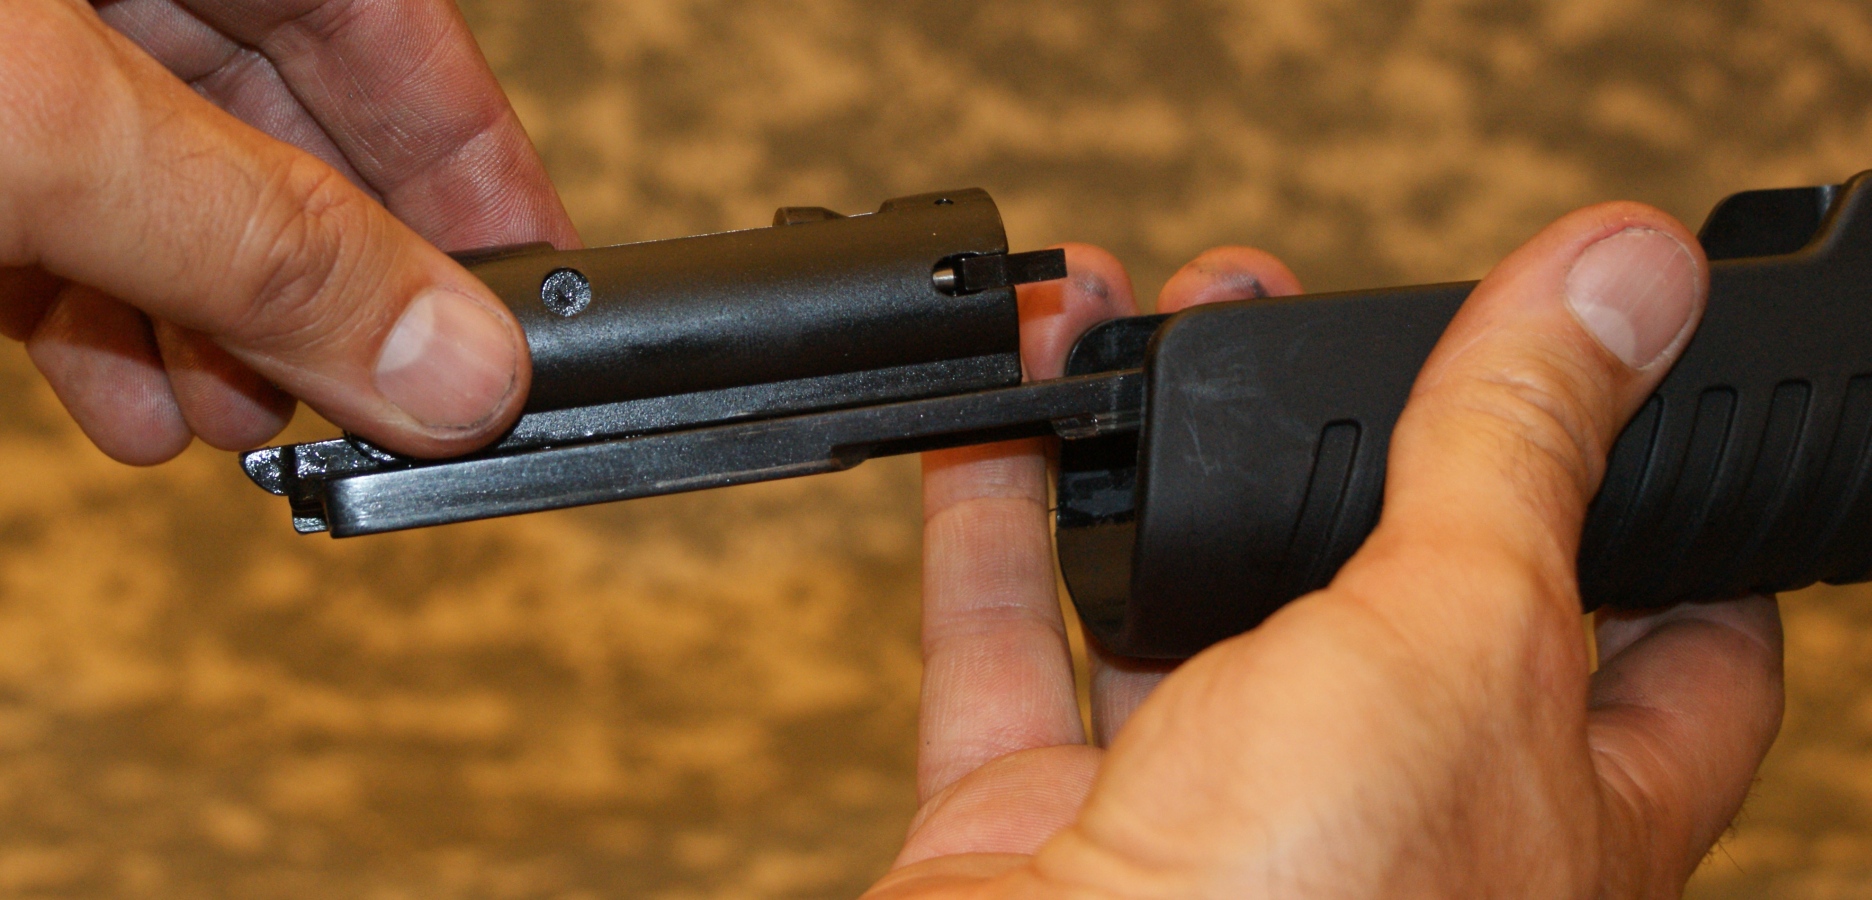
Figure 8
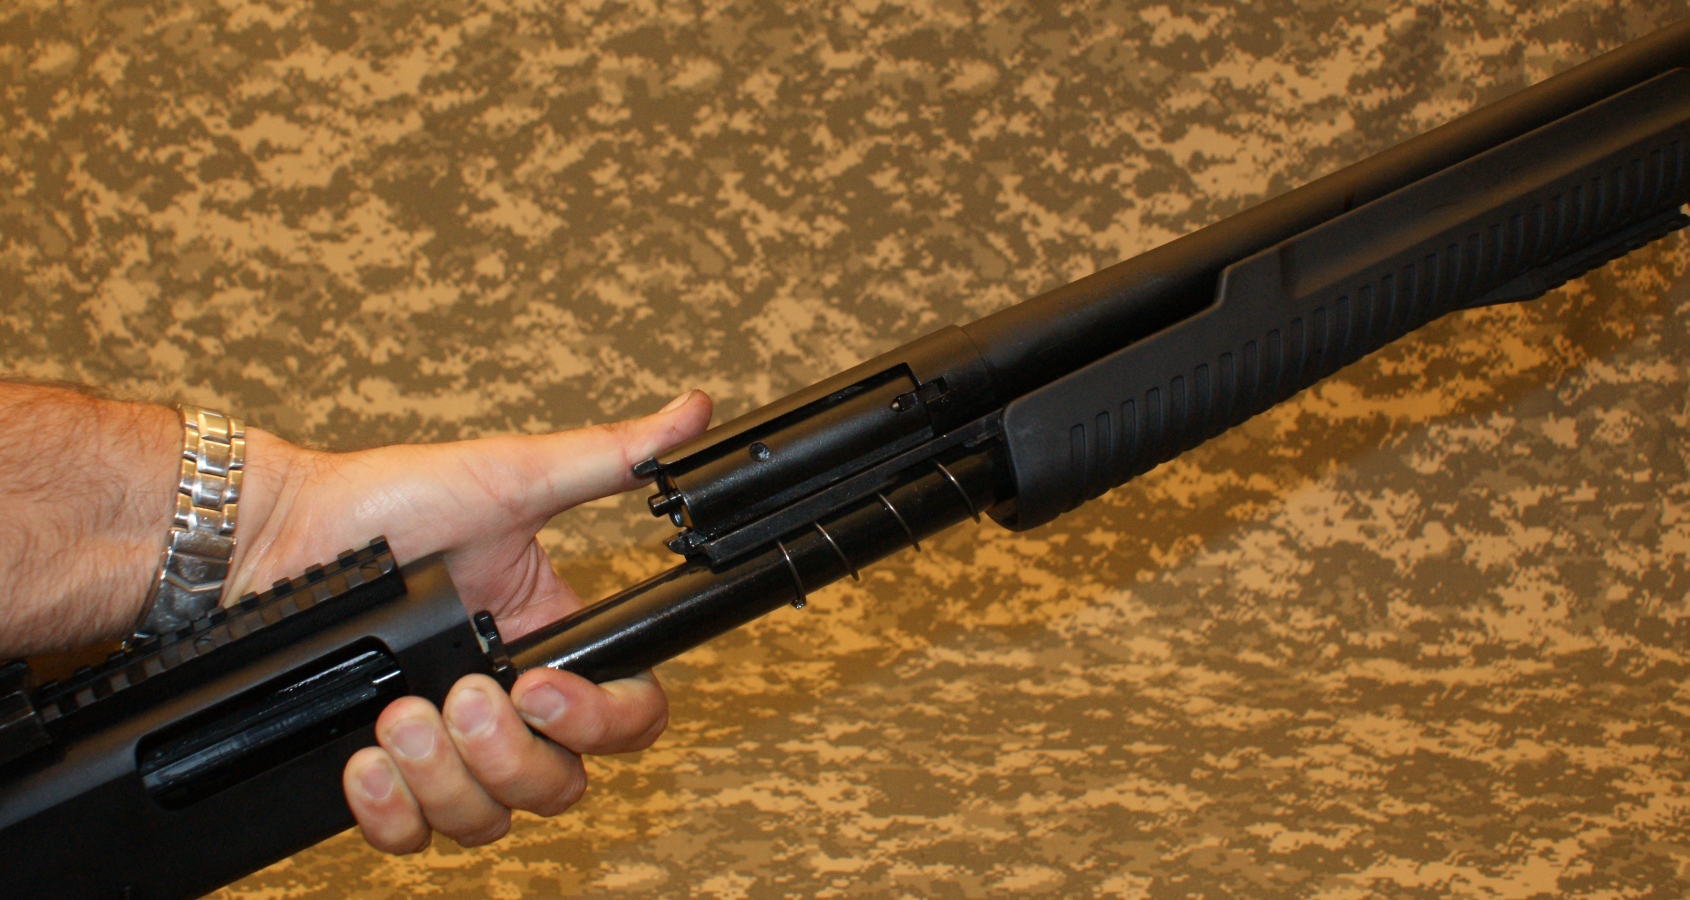
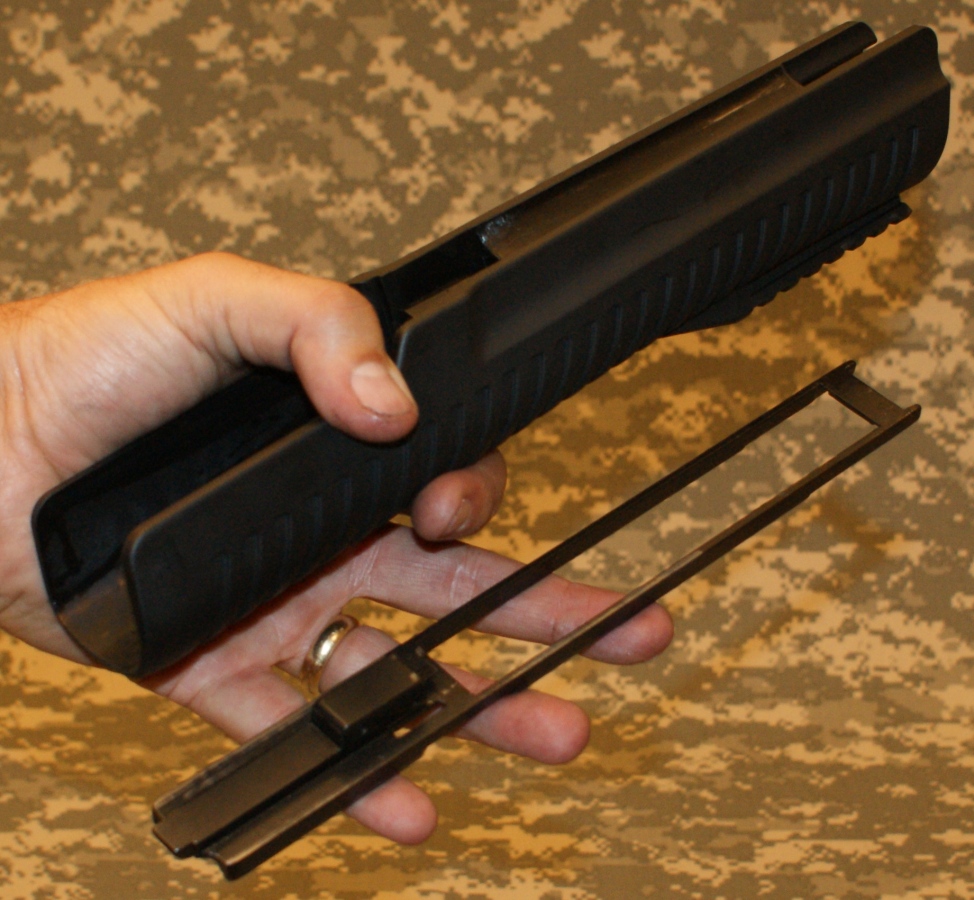
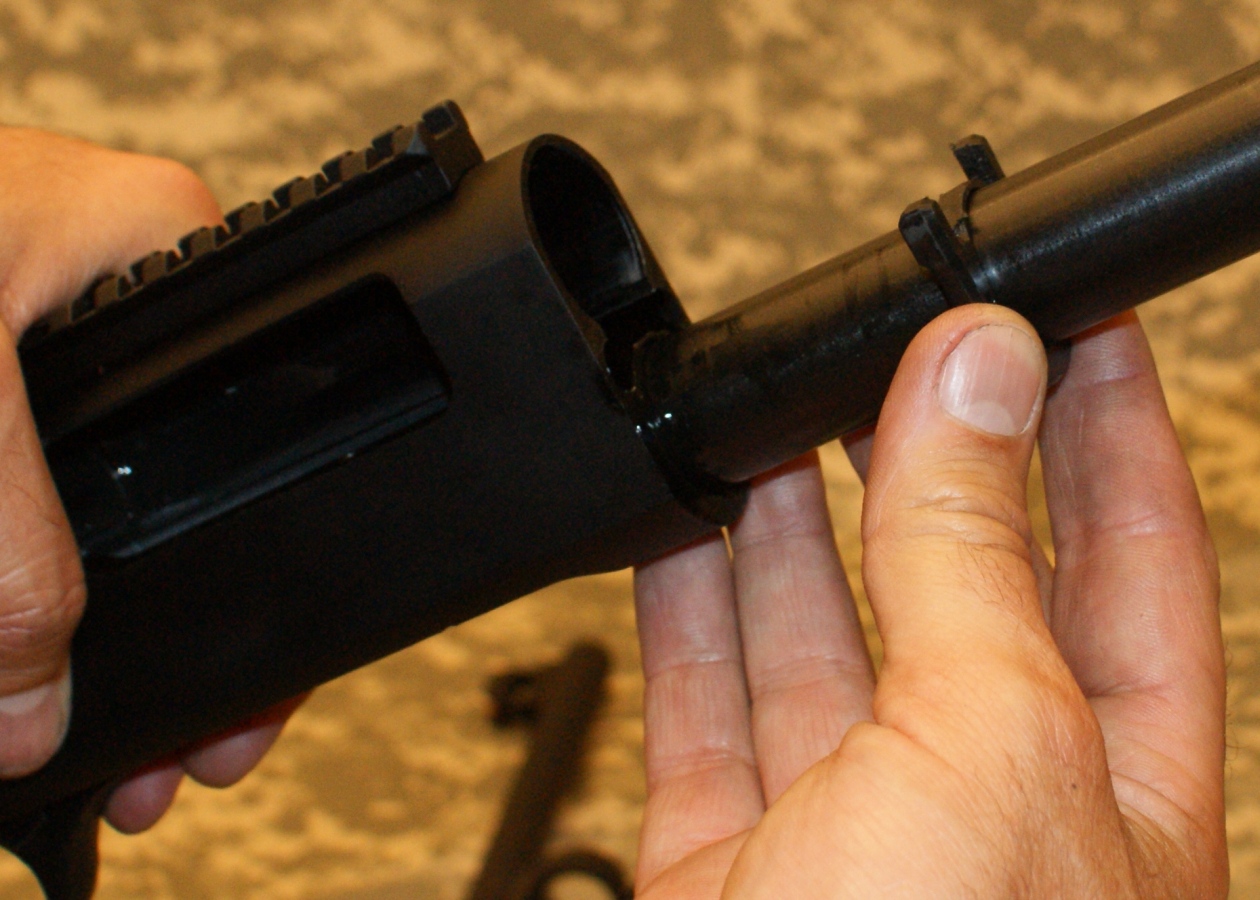
Step 5 - Remove the Action Bar
The front of the action bar is nested in the forend.
Figure 9
To remove the action bar, simply pull up on the back portion of the action bar and it will come out of the forend.
Figure 10
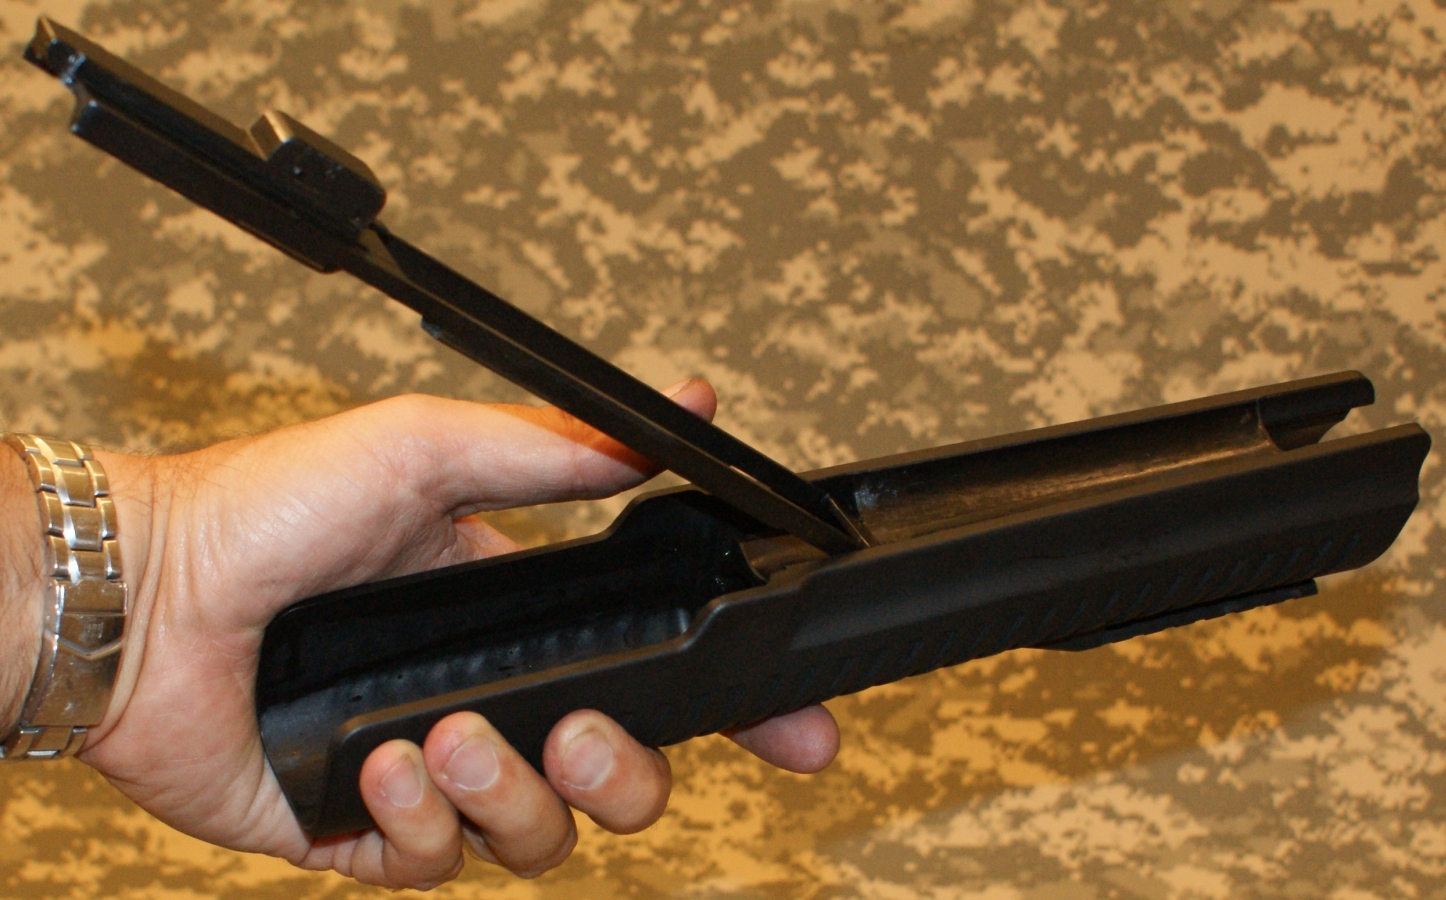
Figure 11
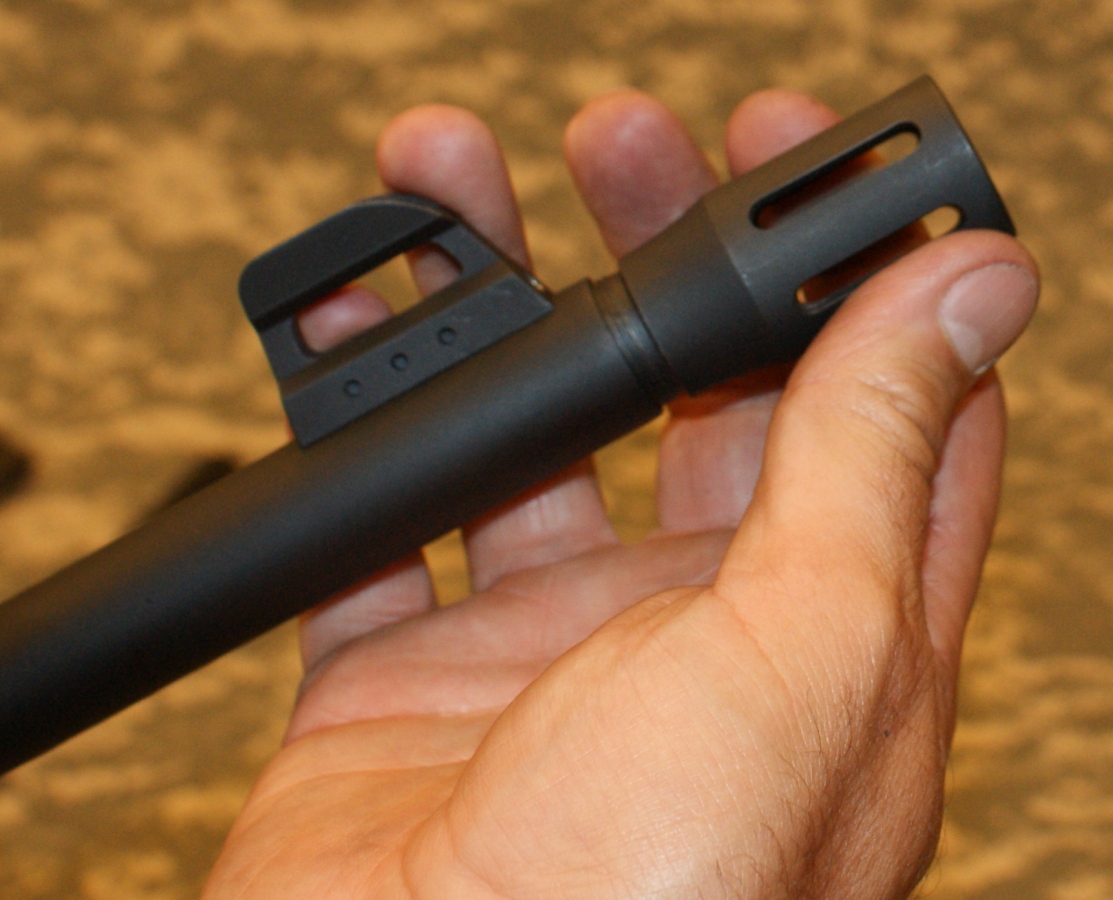
Step 6 - Remove the Choke
The flash hider choke can be removed from the barrel using your hands. If the standard choke is installed, you can use the choke key provided with the shotgun to remove the standard choke.
Figure 12
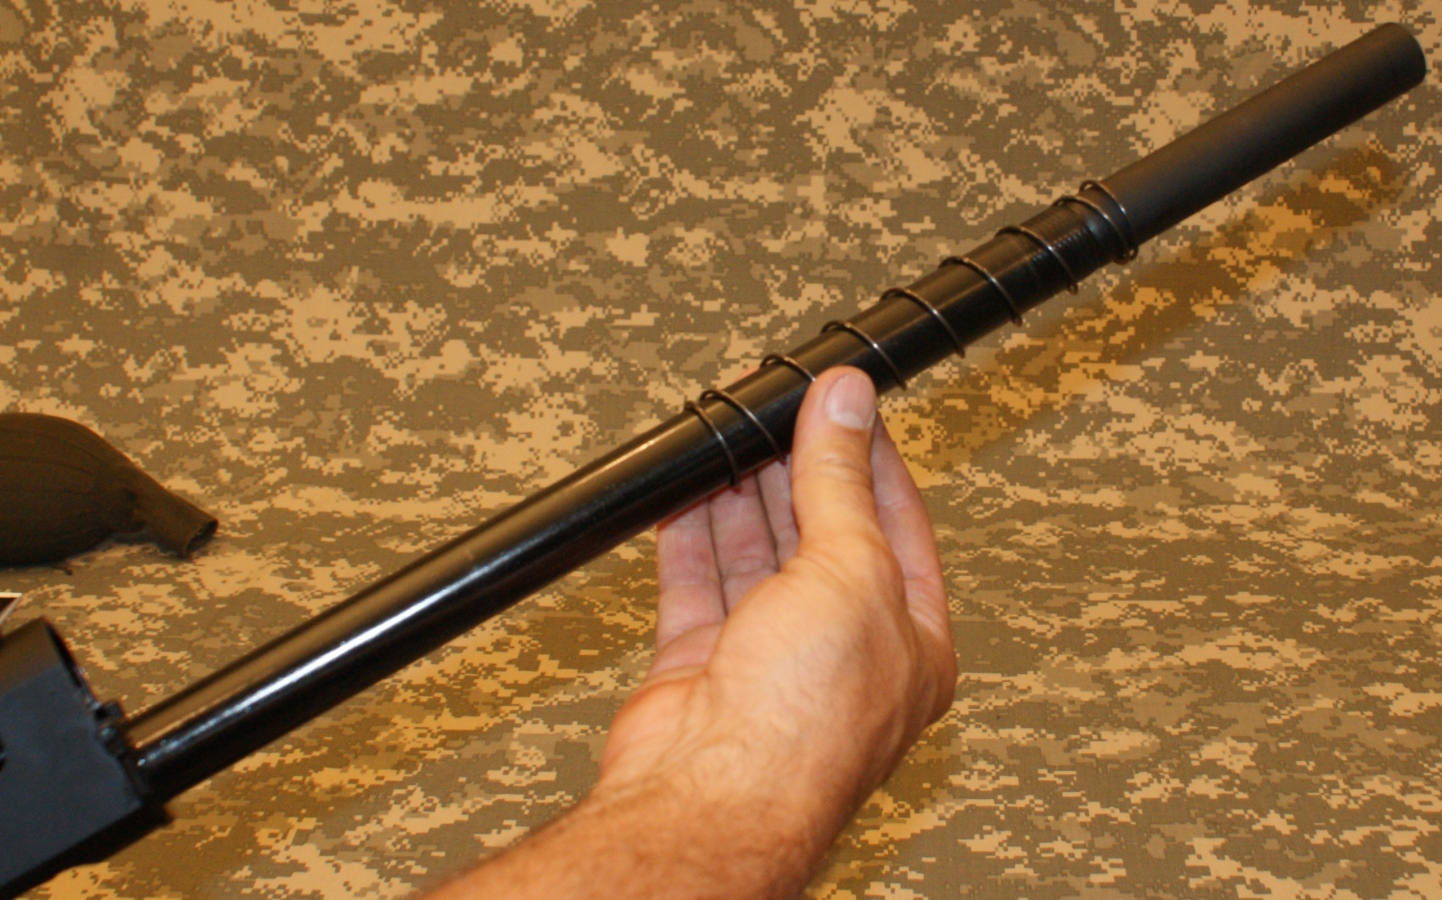
Step 7 - Remove the Forend Spring and Spacer
The spring that provides the spring assisted forward action will slide over the end of the magazine tube.
Figure 13
You can also remove the small synthetic spacer by sliding it off the end of the magazine tube.
Figure 14
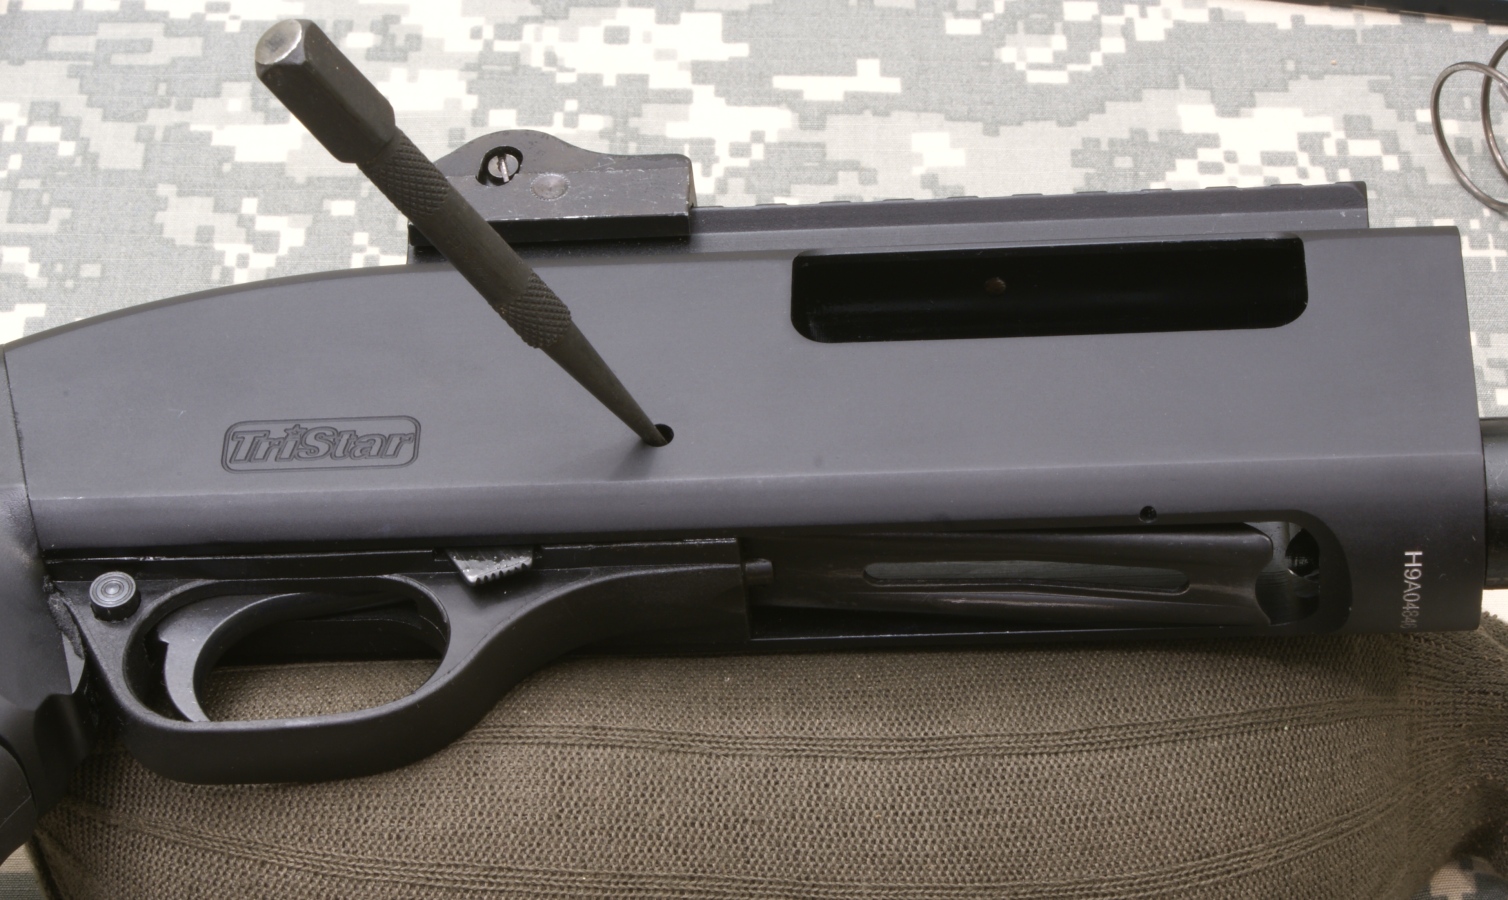
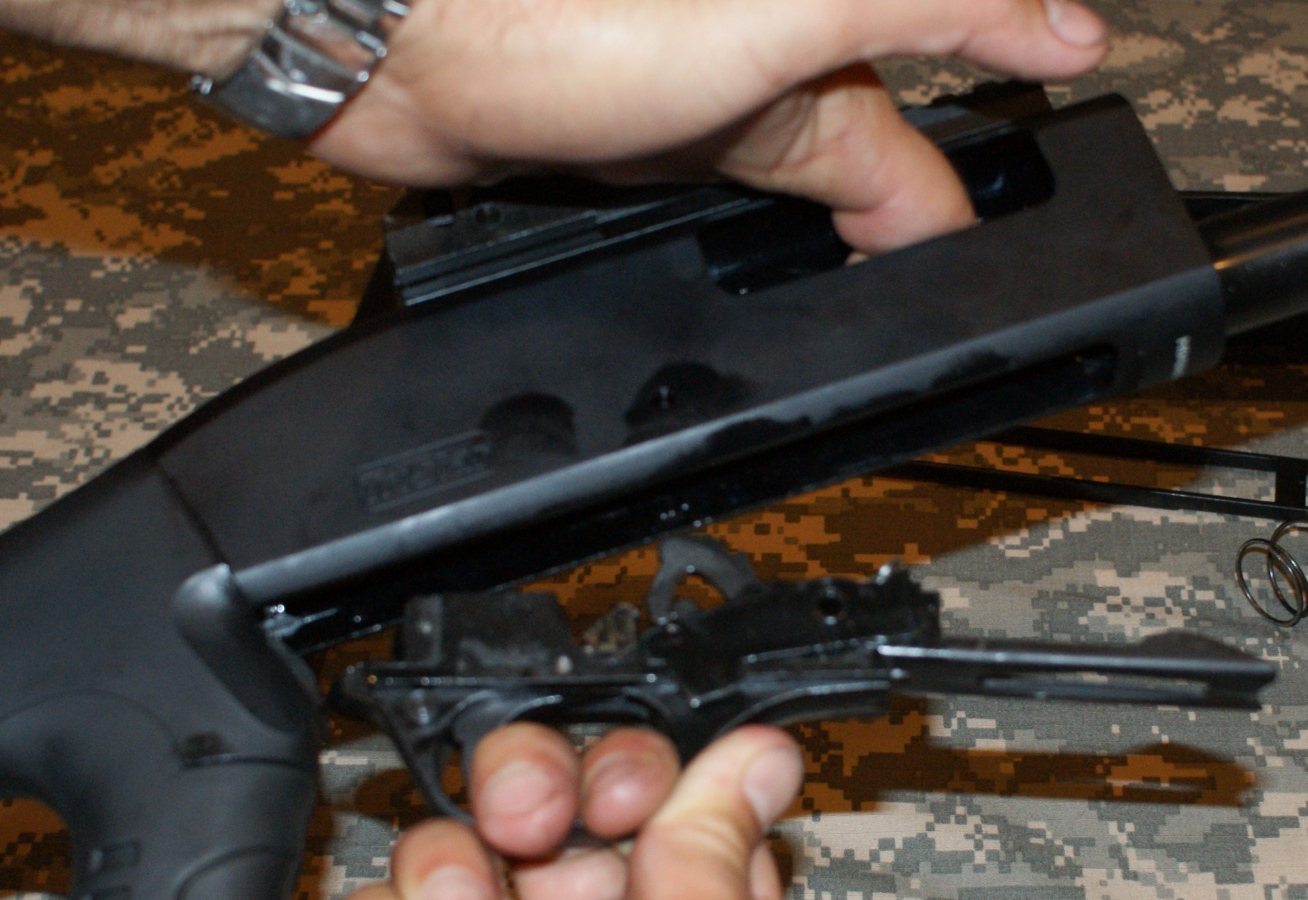
Step 8 - Remove the Trigger Plate Assembly
Place the receiver on a soft surface and use a punch to press out the single trigger plate pin.
Figure 15
Next place your finger in the ejection port and press the magazine extractor towards the side of the receiver. You will pull down and forward to rotate the trigger plate assembly out of the receiver.
Figure 16
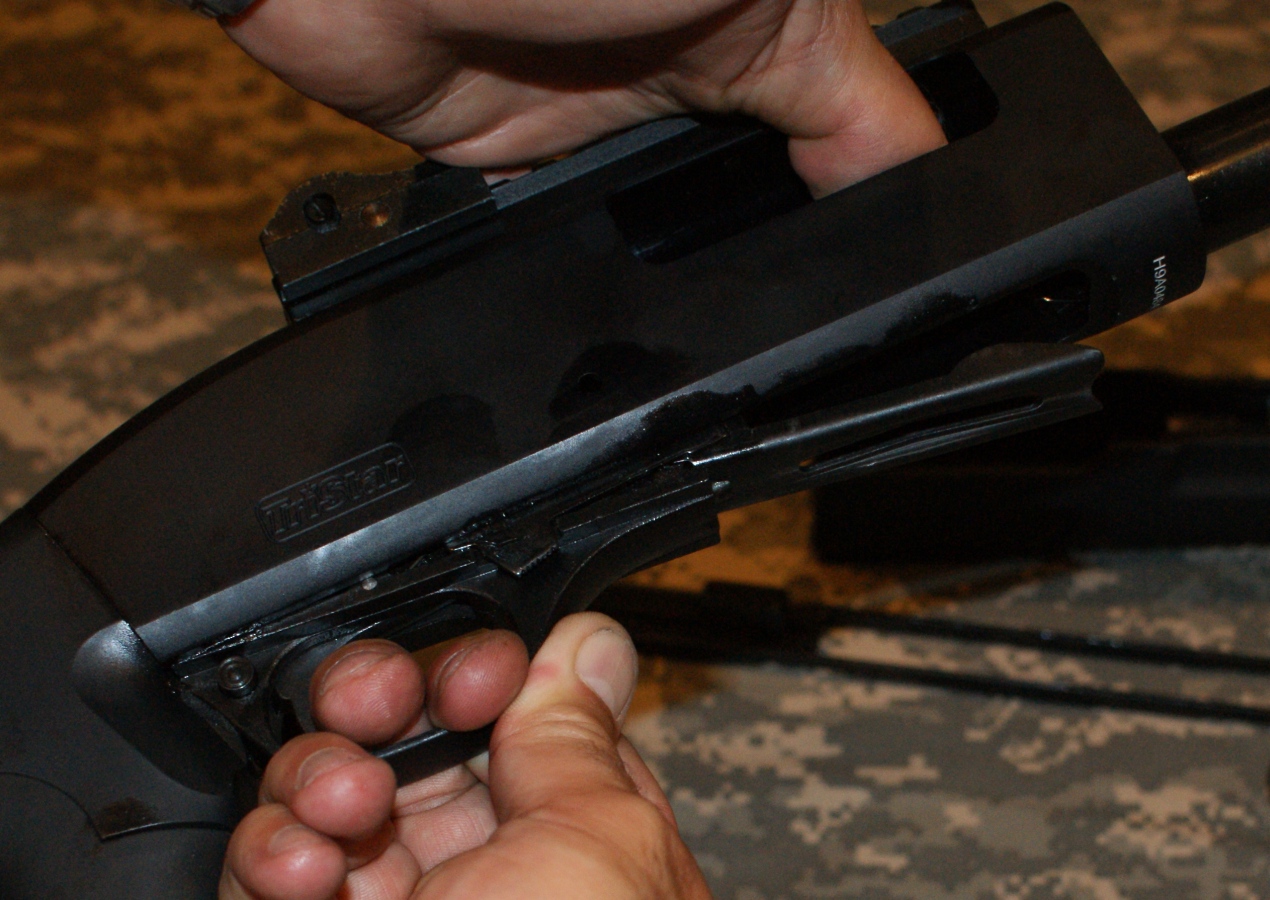
It takes a little finesse, but it will come out. You can also see that the TriStar Cobra Force Shotgun comes well lubricated from the factory.
Figure 17
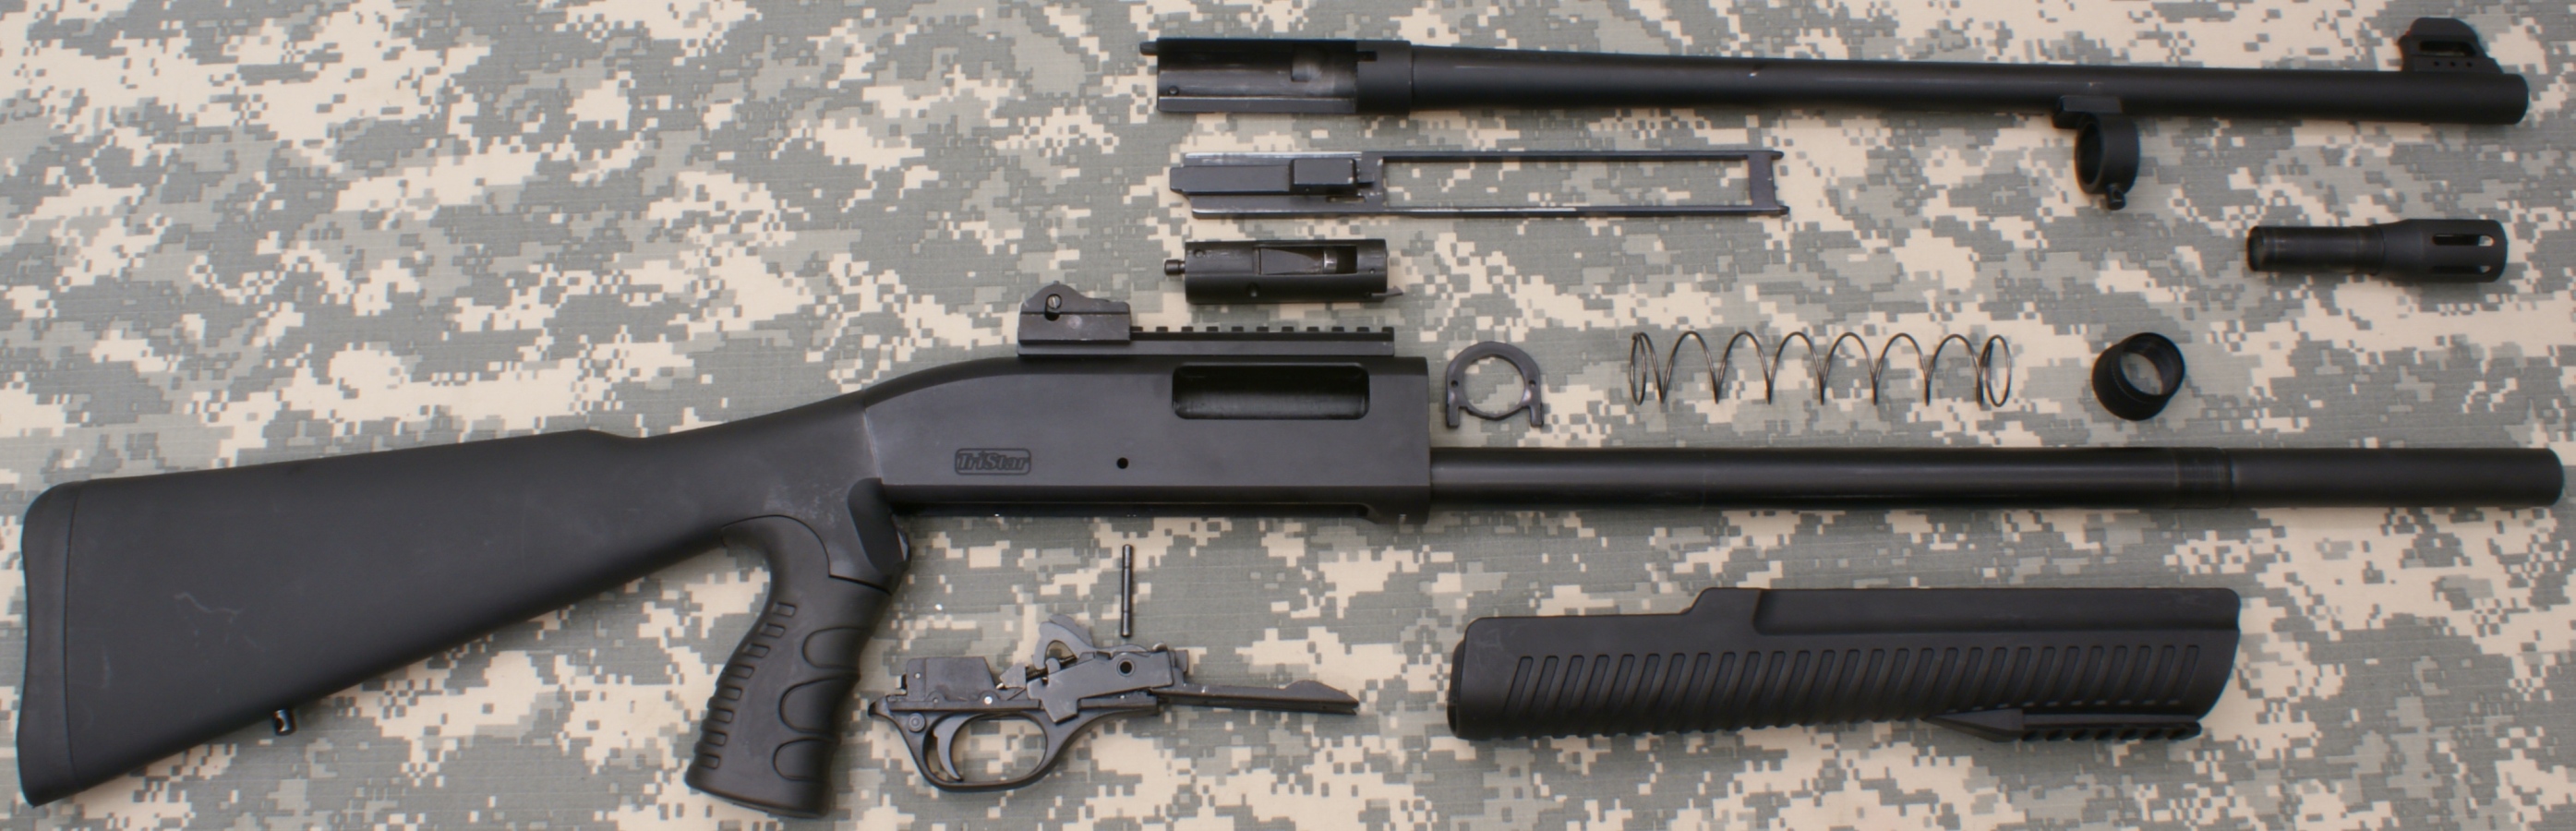
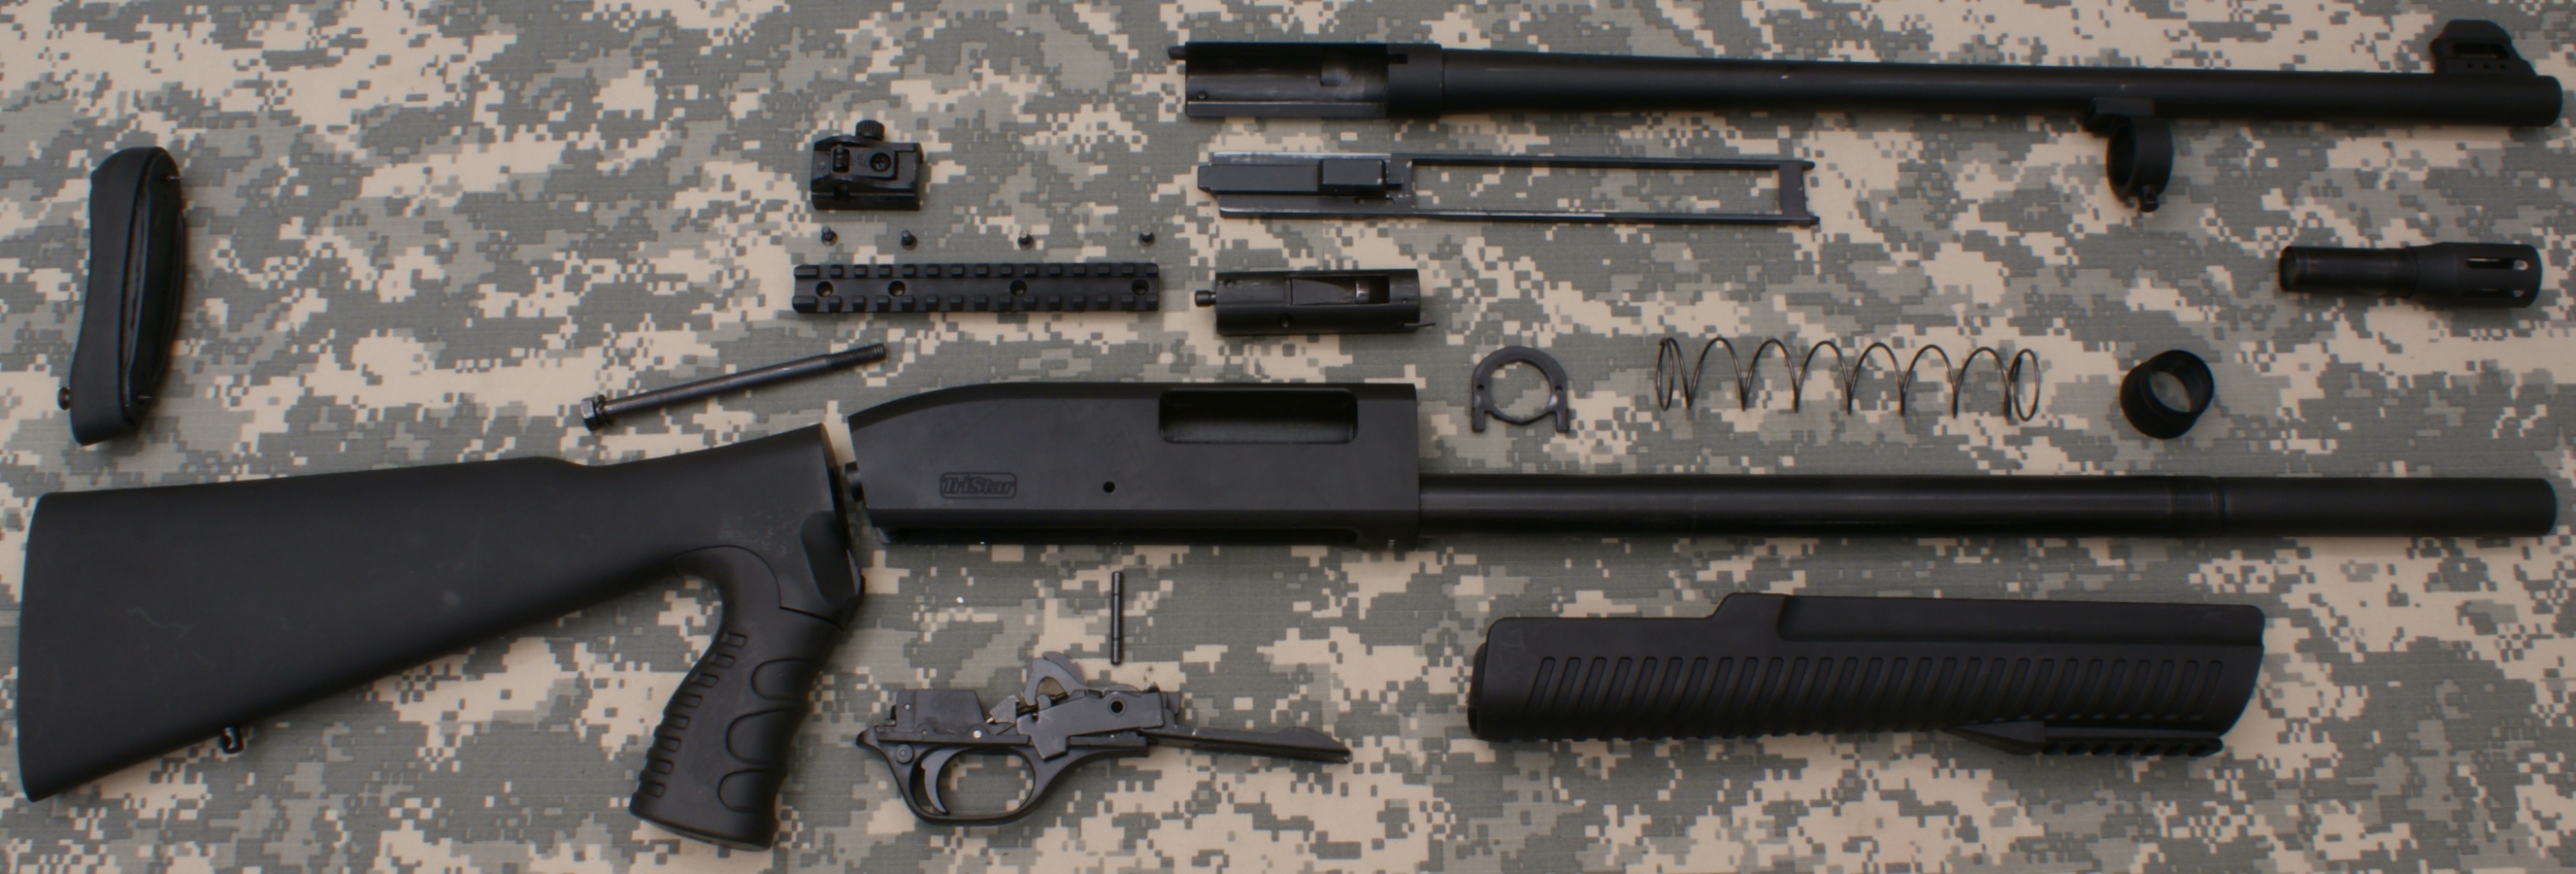
Normal Disassembly
The photo below shows the disassembled parts after what I would consider a normal disassembly. Actually removal of the trigger plate assembly was not covered in the Instruction Manual, but I feel it is part of the process. Overall I would say this is a very simple shotgun to disassemble.
Figure 18
Additional Disassembly
These next steps show further disassembly of the shotgun which is not necessary for normal cleaning of the shotgun.
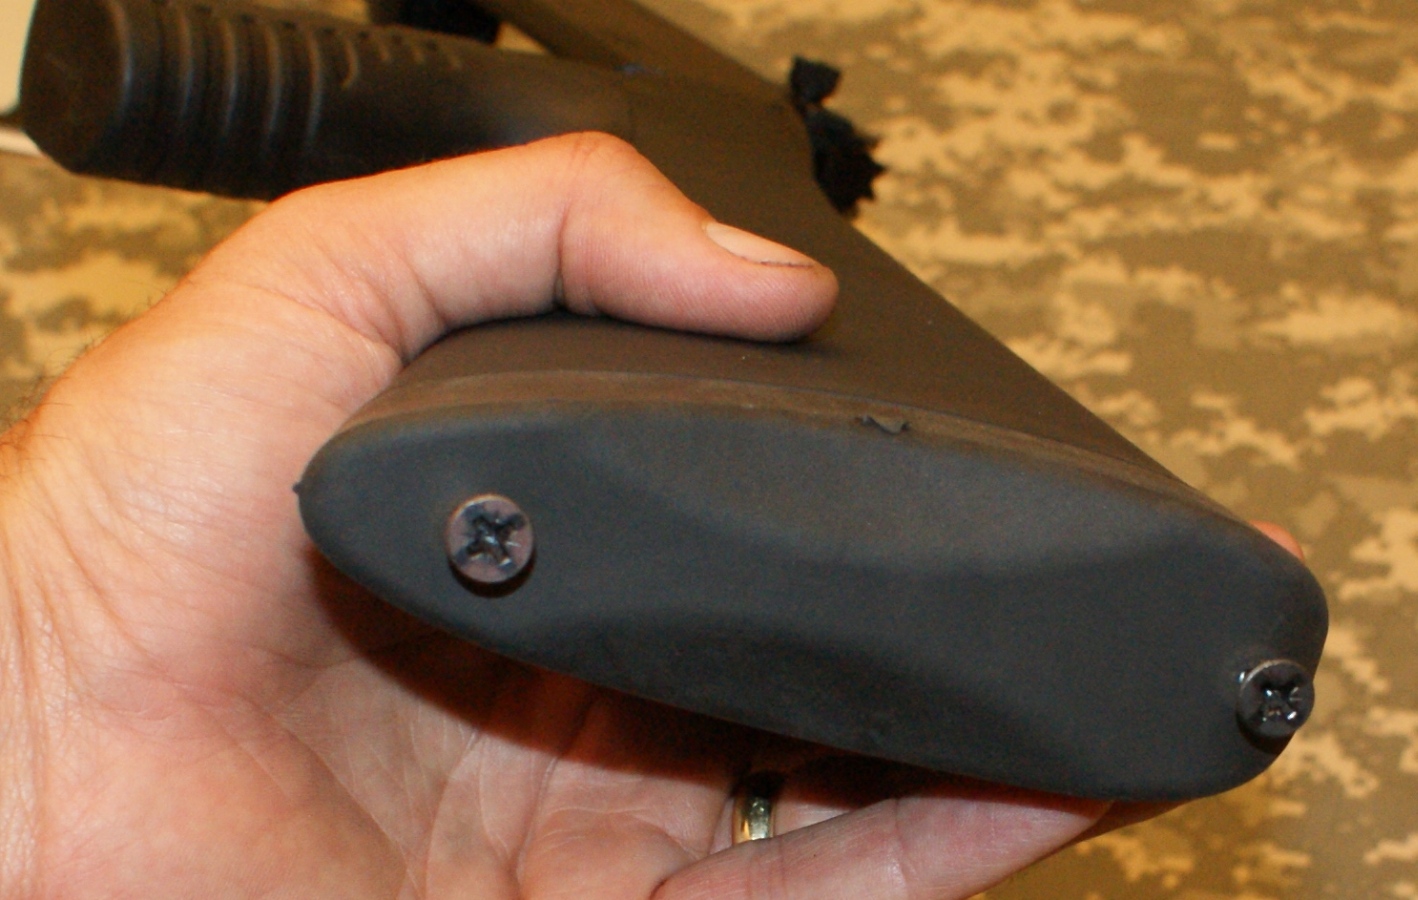
The recoil pad can be removed by using a Philips screwdriver and placing it through the holes in the recoil pad and loosening the screws.
Figure 19
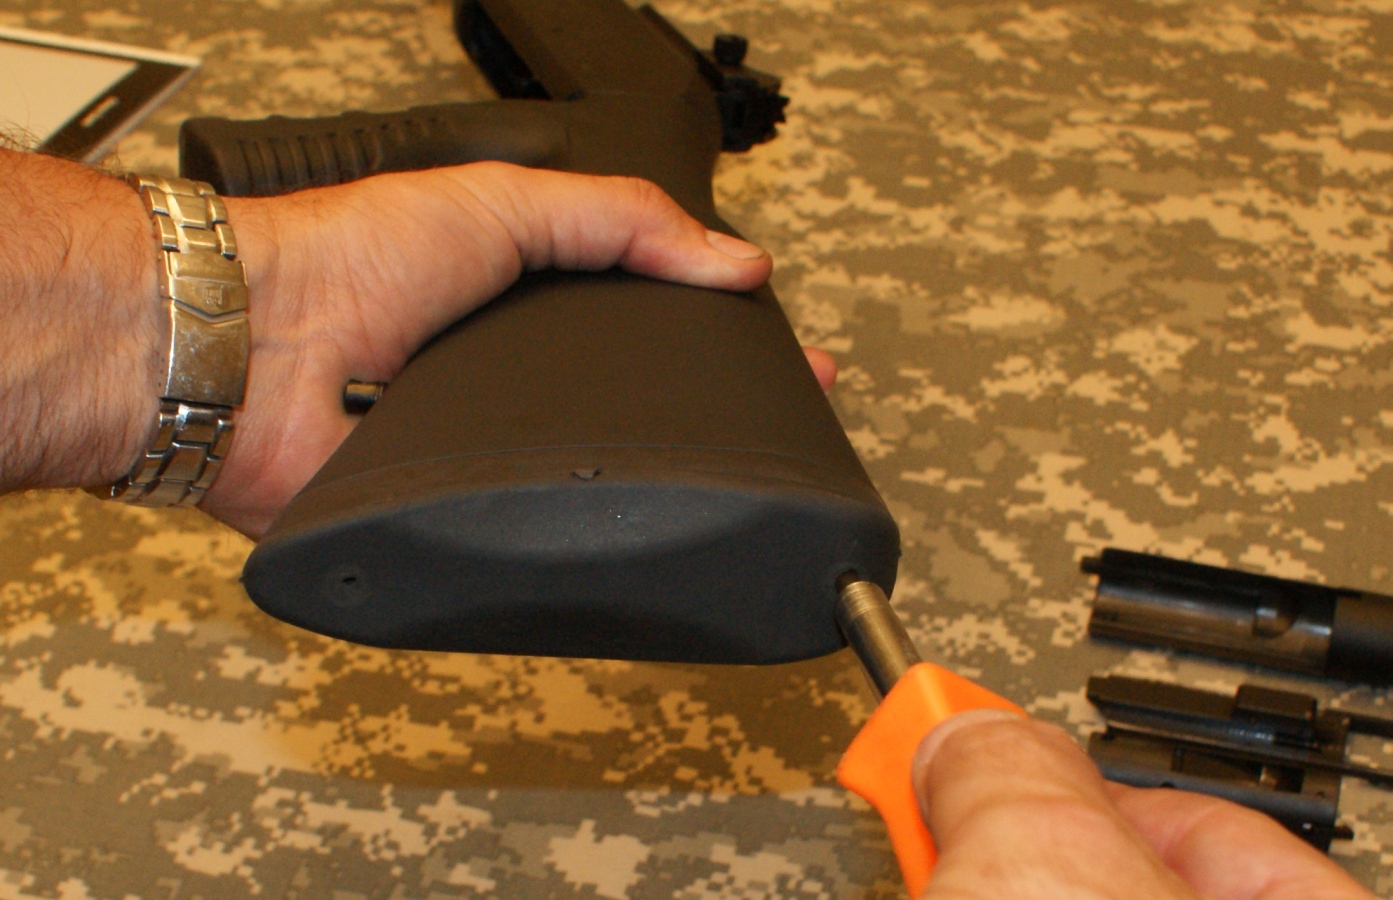
Figure 20
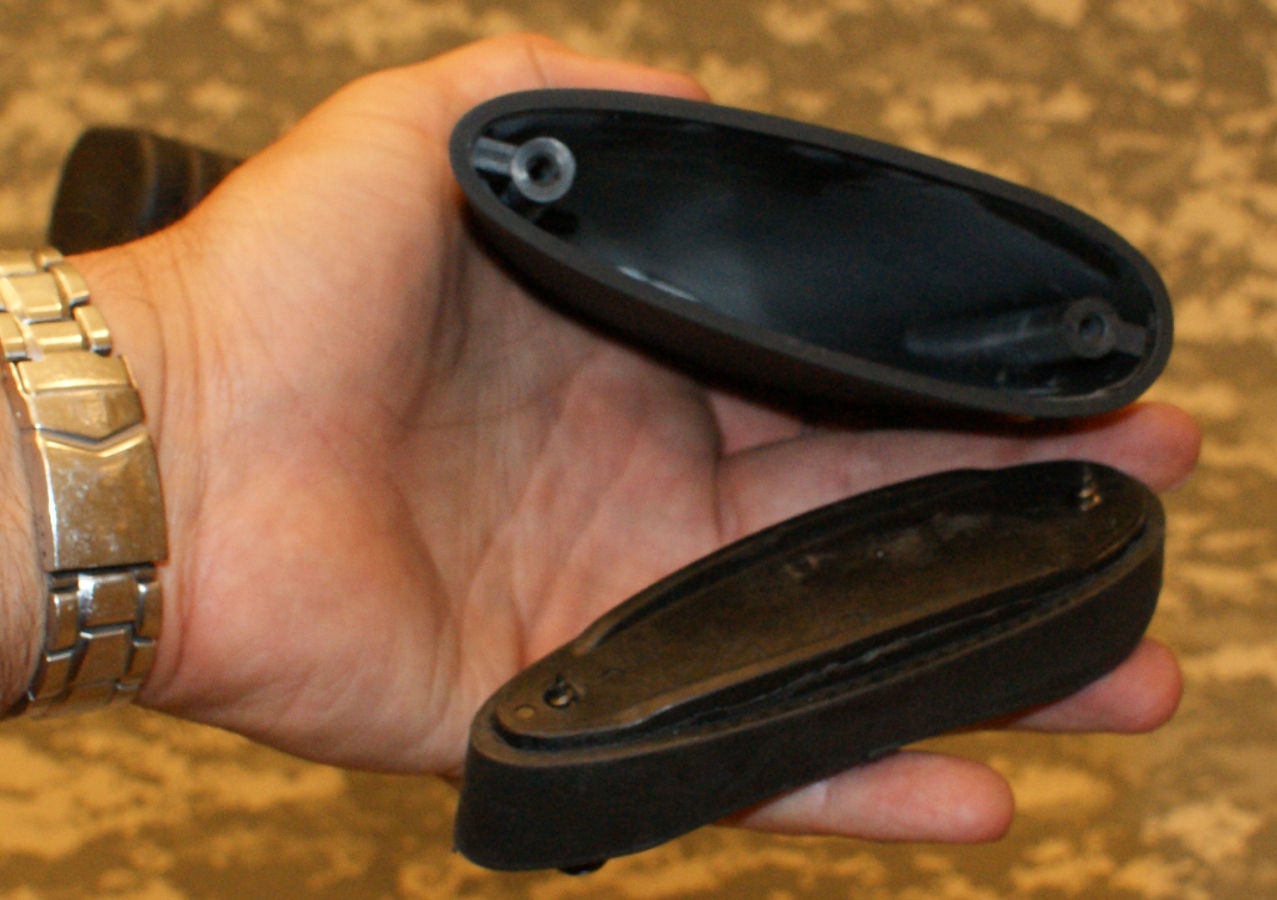
Once you back the screws out far enough, the recoil pad can pop off the end of the stock.
Figure 21
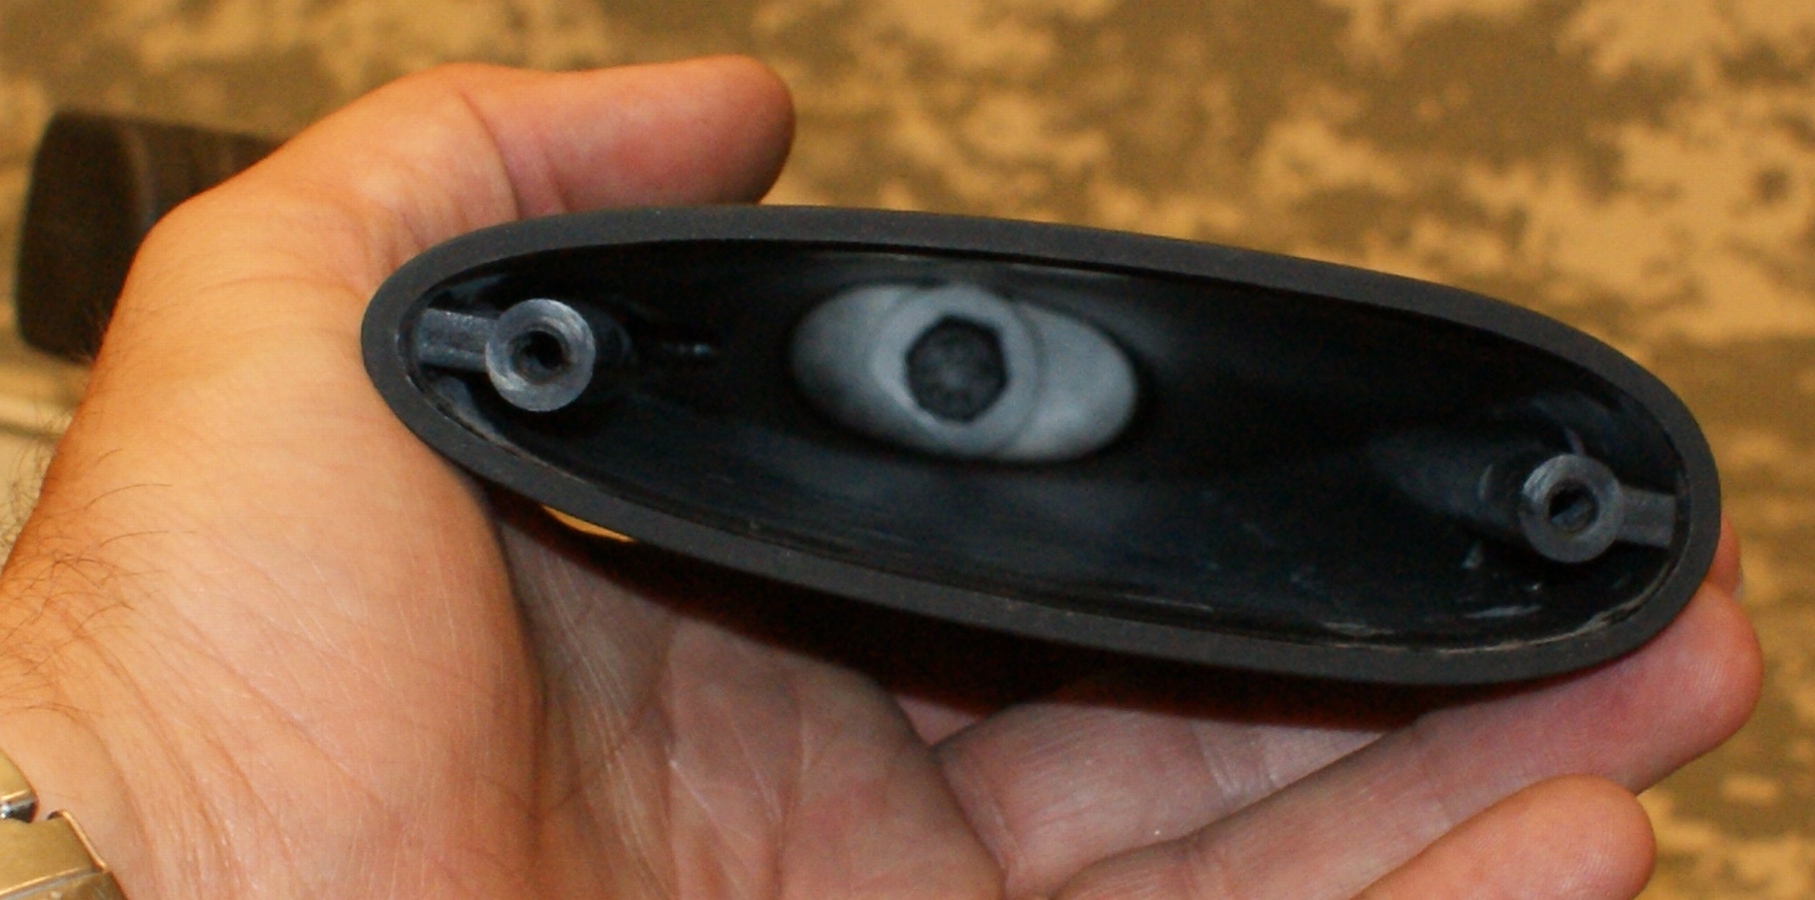
When you look down the stock, you will see the stock bolt. Using a socket and long extension, you are able to remove the bolt which allows you to remove the stock.
Figure 22
The rear sight can be removed by a normal screwdriver or by hand if the thumb nut is not too tight.
Figure 23
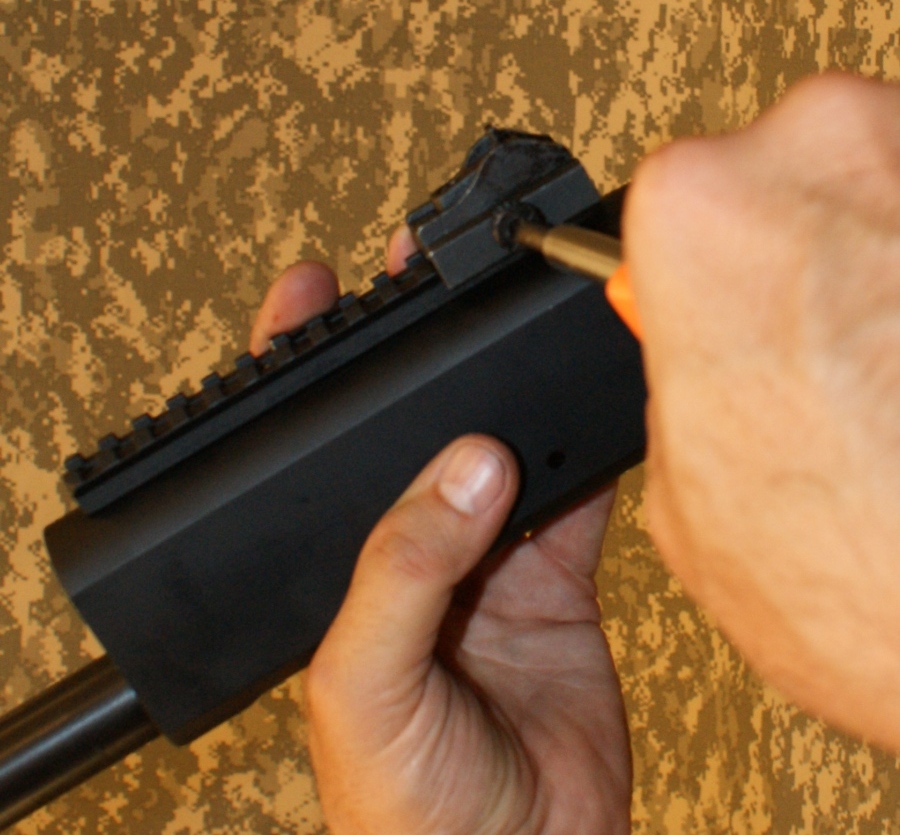
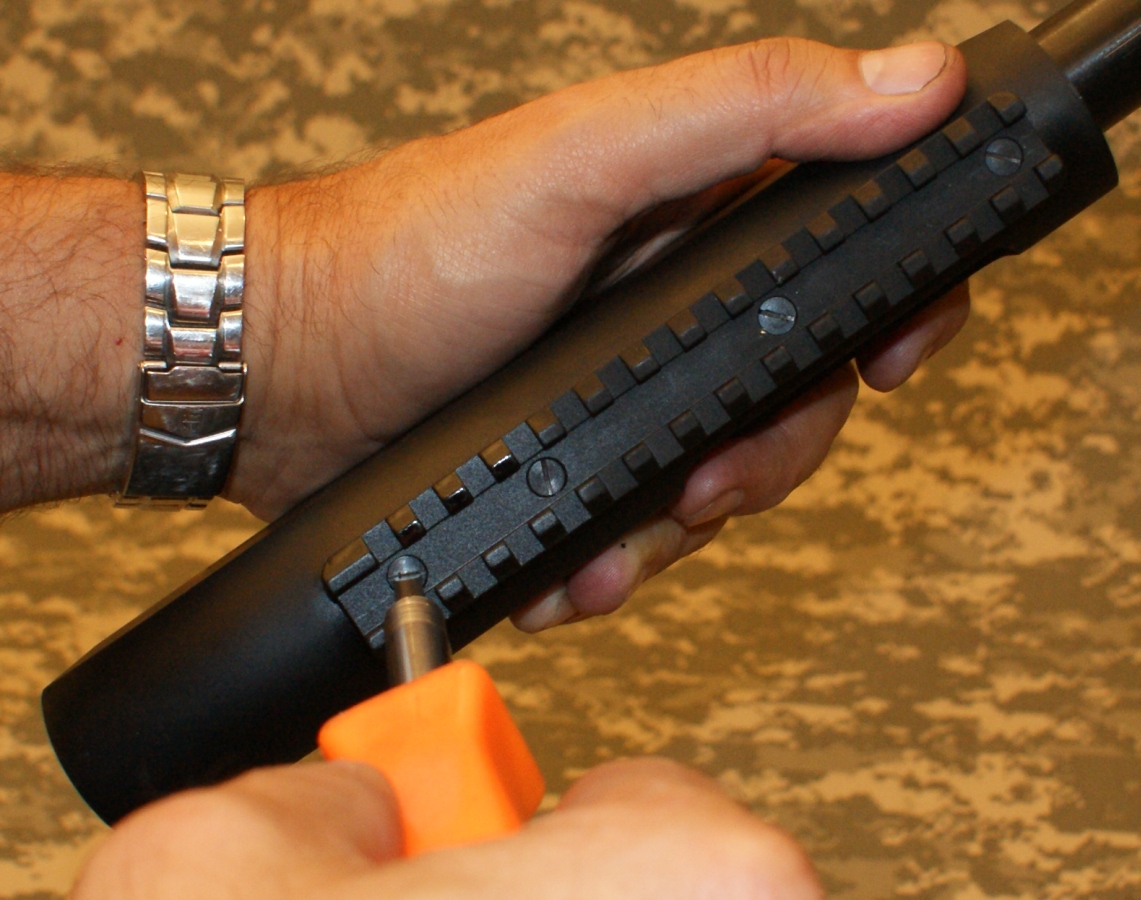
The receiver mounted rail is held in place by 4 screws which can be easily removed. The screws on my shotgun were only snug tight and I recommend you checking the tightness on your new shotgun. Beware that if you over tighten the screws you could strip out the threads in the aluminum receiver. If you want to ensure that they will not loosen with use of the shotgun, I recommend using some type of thread locking compound (i.e. Loctite).
Figure 24
The photo below shows the shotgun in a maximum disassembled level for most people. I would not recommend taking apart the trigger plate assembly unless you are skilled with reassembly of these mechanisms. Although they look simple, it is easy to lose a part or not get it back together correctly.
Figure 25
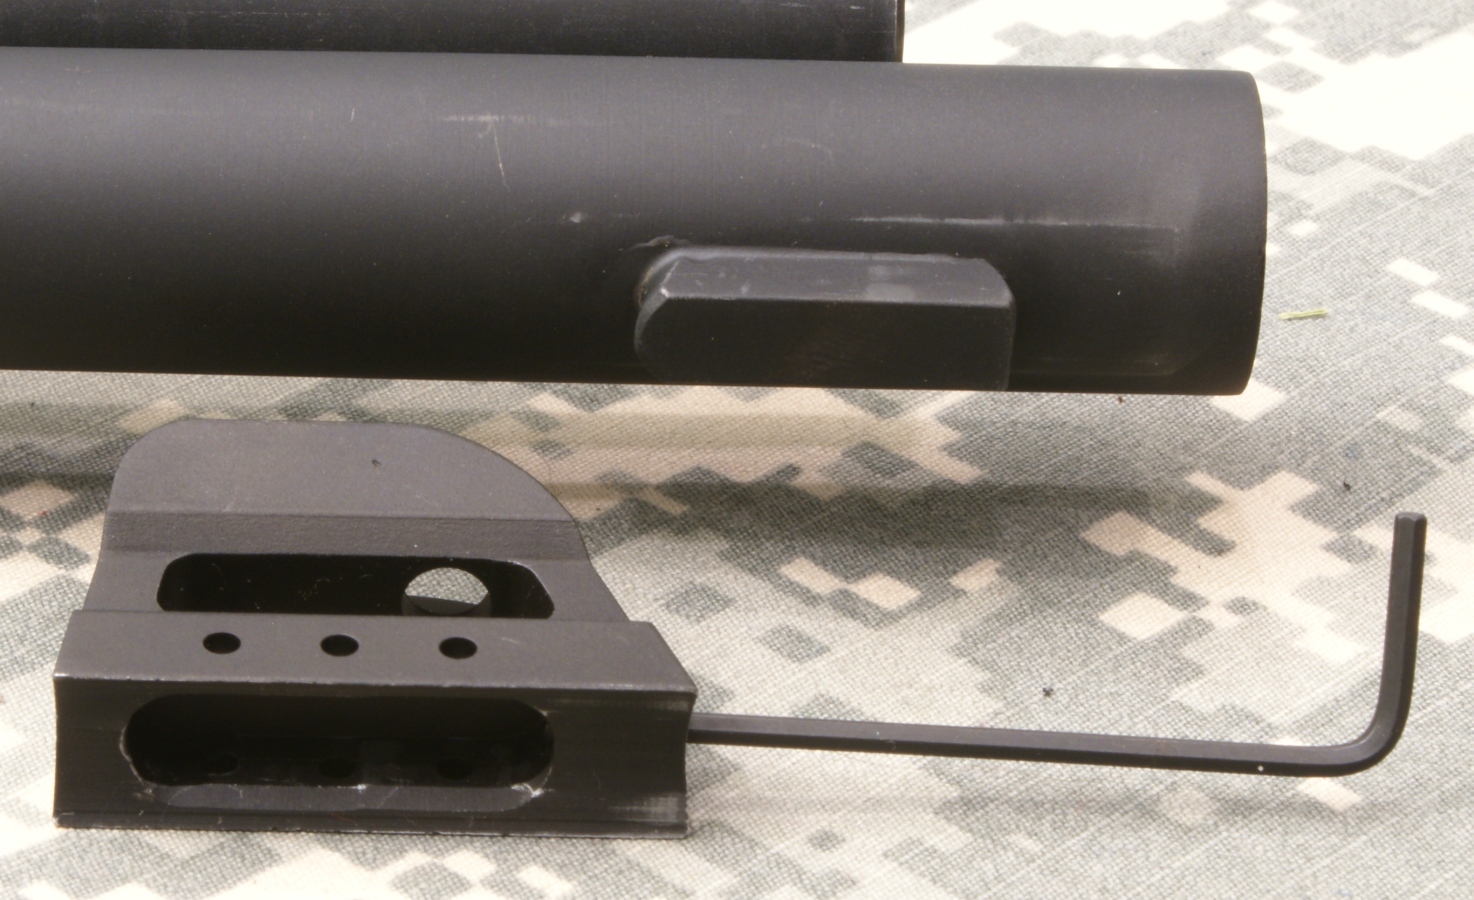
Front Sight Removal
After range testing, I found the front sight had worked loose, so I decided to remove it as shown below. With a 1.5mm hex wrench, I loosened the set screw and was able to pull the sight off the block attached to the barrel.
Figure 26
Thoughts
Overall I would have to say that disassembly is very simple, maybe one of the easiest I have done. I didn't find the Instruction Manual to be very detailed, but if you have ever disassembled a shotgun, it is pretty straight forward. The only part that was a little tricky was getting the trigger plate assembly out of the receiver. Since this was not covered in the Instruction Manual, I had to figure out the correct technique but doing so was not rocket science.
You can view the other parts of this review by using the links below or feel free to add a comment on the "Reader's Comments" page.
- TriStar Cobra Force Shotgun Review: Part 1 - Introduction, Specifications and Summary
- TriStar Cobra Force Shotgun Review: Part 2 - What's in the Box & First Impressions
- TriStar Cobra Force Shotgun Review: Part 3 - External Features
- TriStar Cobra Force Shotgun Review: Part 4 - Disassembly (this page)
- TriStar Cobra Force Shotgun Review: Part 5 - Internal Features
- TriStar Cobra Force Shotgun Review: Part 6 - Range Testing
Or
If you would like to be notified about future Gunsumer Reports reviews via Facebook, make sure "You Like This" by clicking the Facebook "Like" button at the bottom or top of this page. If it already says "You Like This" beside the button, clicking it again will uncheck the "Like" status and you will not be notified.
| Share on Facebook | |
© 2010, 2011, 2012, 2013, 2014, 2015, 2016, 2017, 2018, 2019, 2020, 2021, 2022, 2023 & 2024 Gunsumer Reports™, All rights reserved.
FTC Disclosure