|
|
Gunsumer Reports TM Providing Detailed Objective Reviews for Firearms and Firearm Accessories |
Thompson/Center Arms Dimension Rifle Review
Part 4 - Disassembly and Changing Calibers
November 25, 2012

In this part of the Thompson/Center Dimension Rifle Review, I show how to disassemble the rifle along with the basic steps for changing calibers. Since this rifle is a bolt action rifle, and since T/C has done a great job in making changing barrels easy, you will find that both of these are relatively easy tasks.
Disassembly (Field Stripping)
These steps below are a general guide for disassembling your Dimension Rifle, yet you should always consider the manufacturer's Safety & Instruction Manual as the official source of information when handling and disassembling your rifle. T/C has done a good job with their descriptions and photos in the manual, along with providing many safety related comments and warnings.
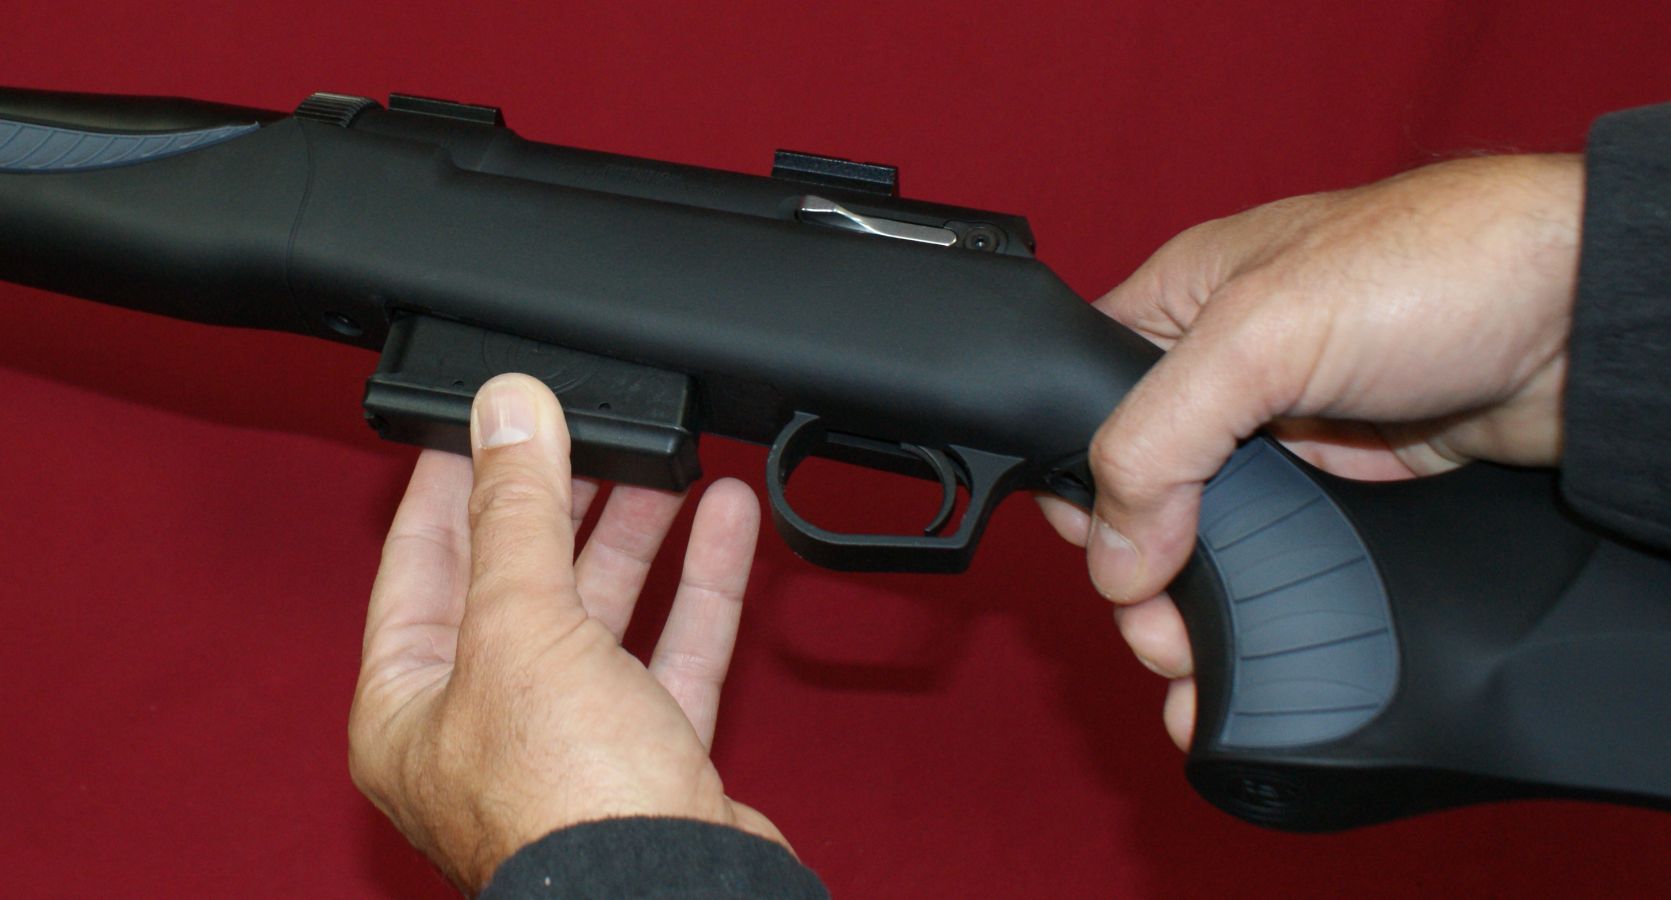
Step 1 - Unloading & Safety
The first step when preparing to disassemble or clean any firearm is verifying that the firearm is unloaded and the safety is in the "safe" position. I start out by first checking the safety and removing the magazine.
Figure 1
Then I lift the bolt handle and pull the bolt fully to the rear and inspect the chamber to verify that the rifle is unloaded.
Figure 2
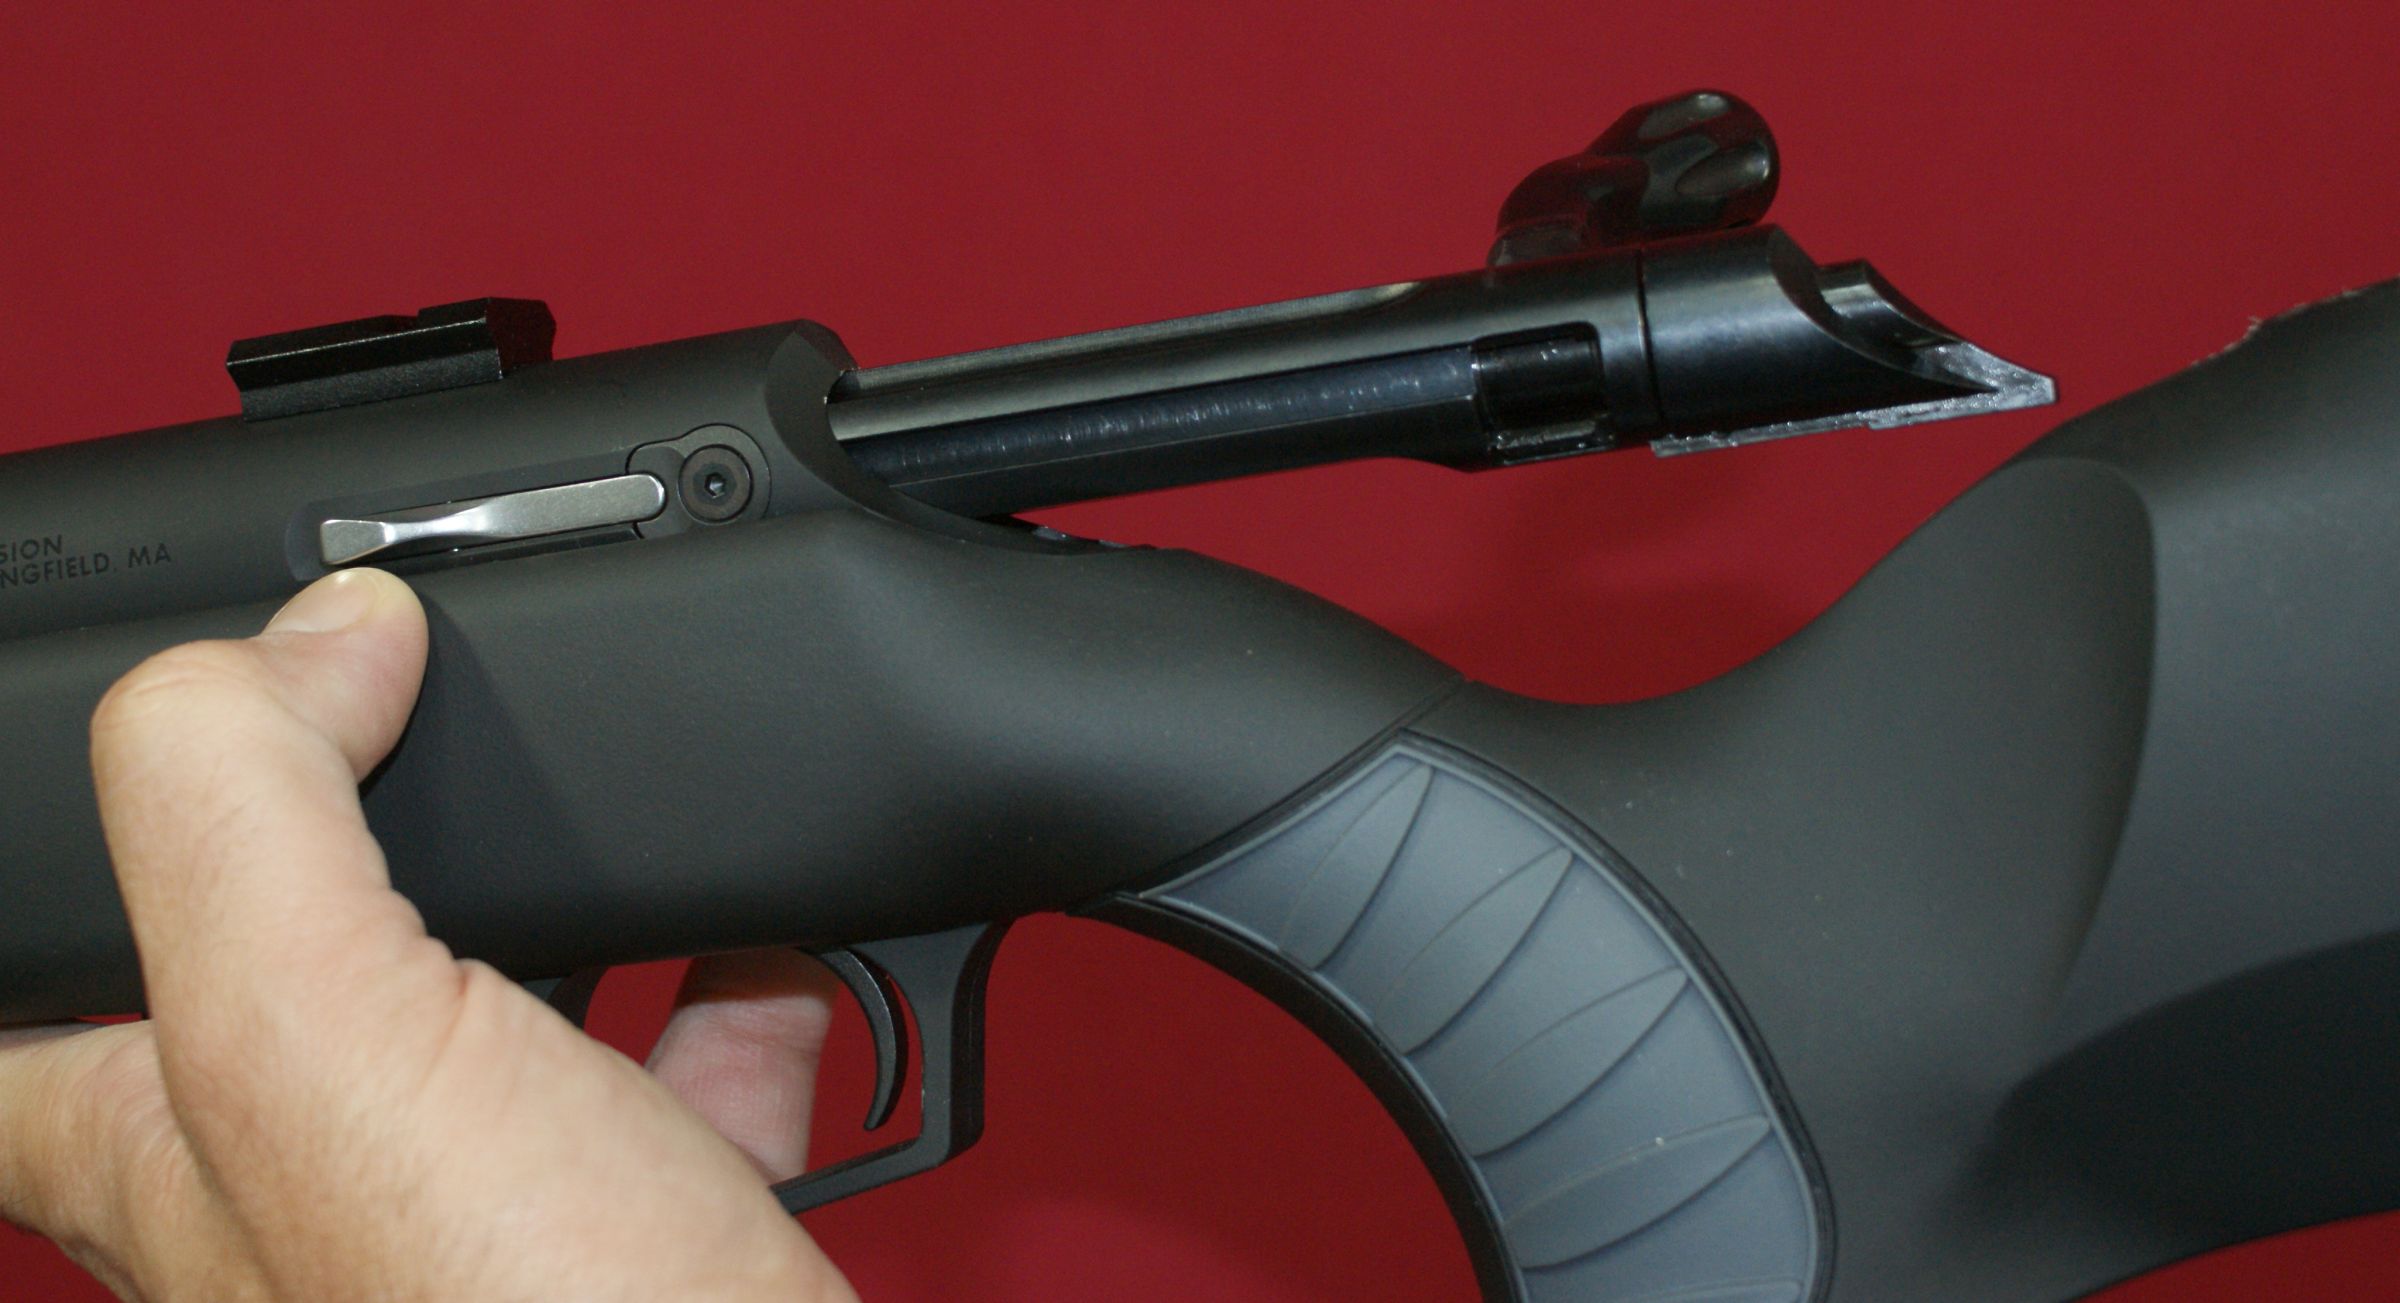
Step 2 - Remove the Bolt
Actually, bolt removal is the trickiest part of disassembly. Due to the high cheek rest (comb) on the buttstock, the bolt cannot be pulled to the rear in its normal up position. To remove the bolt, you must press the bolt stop and rotate the bolt handle down as shown.
Figure 3
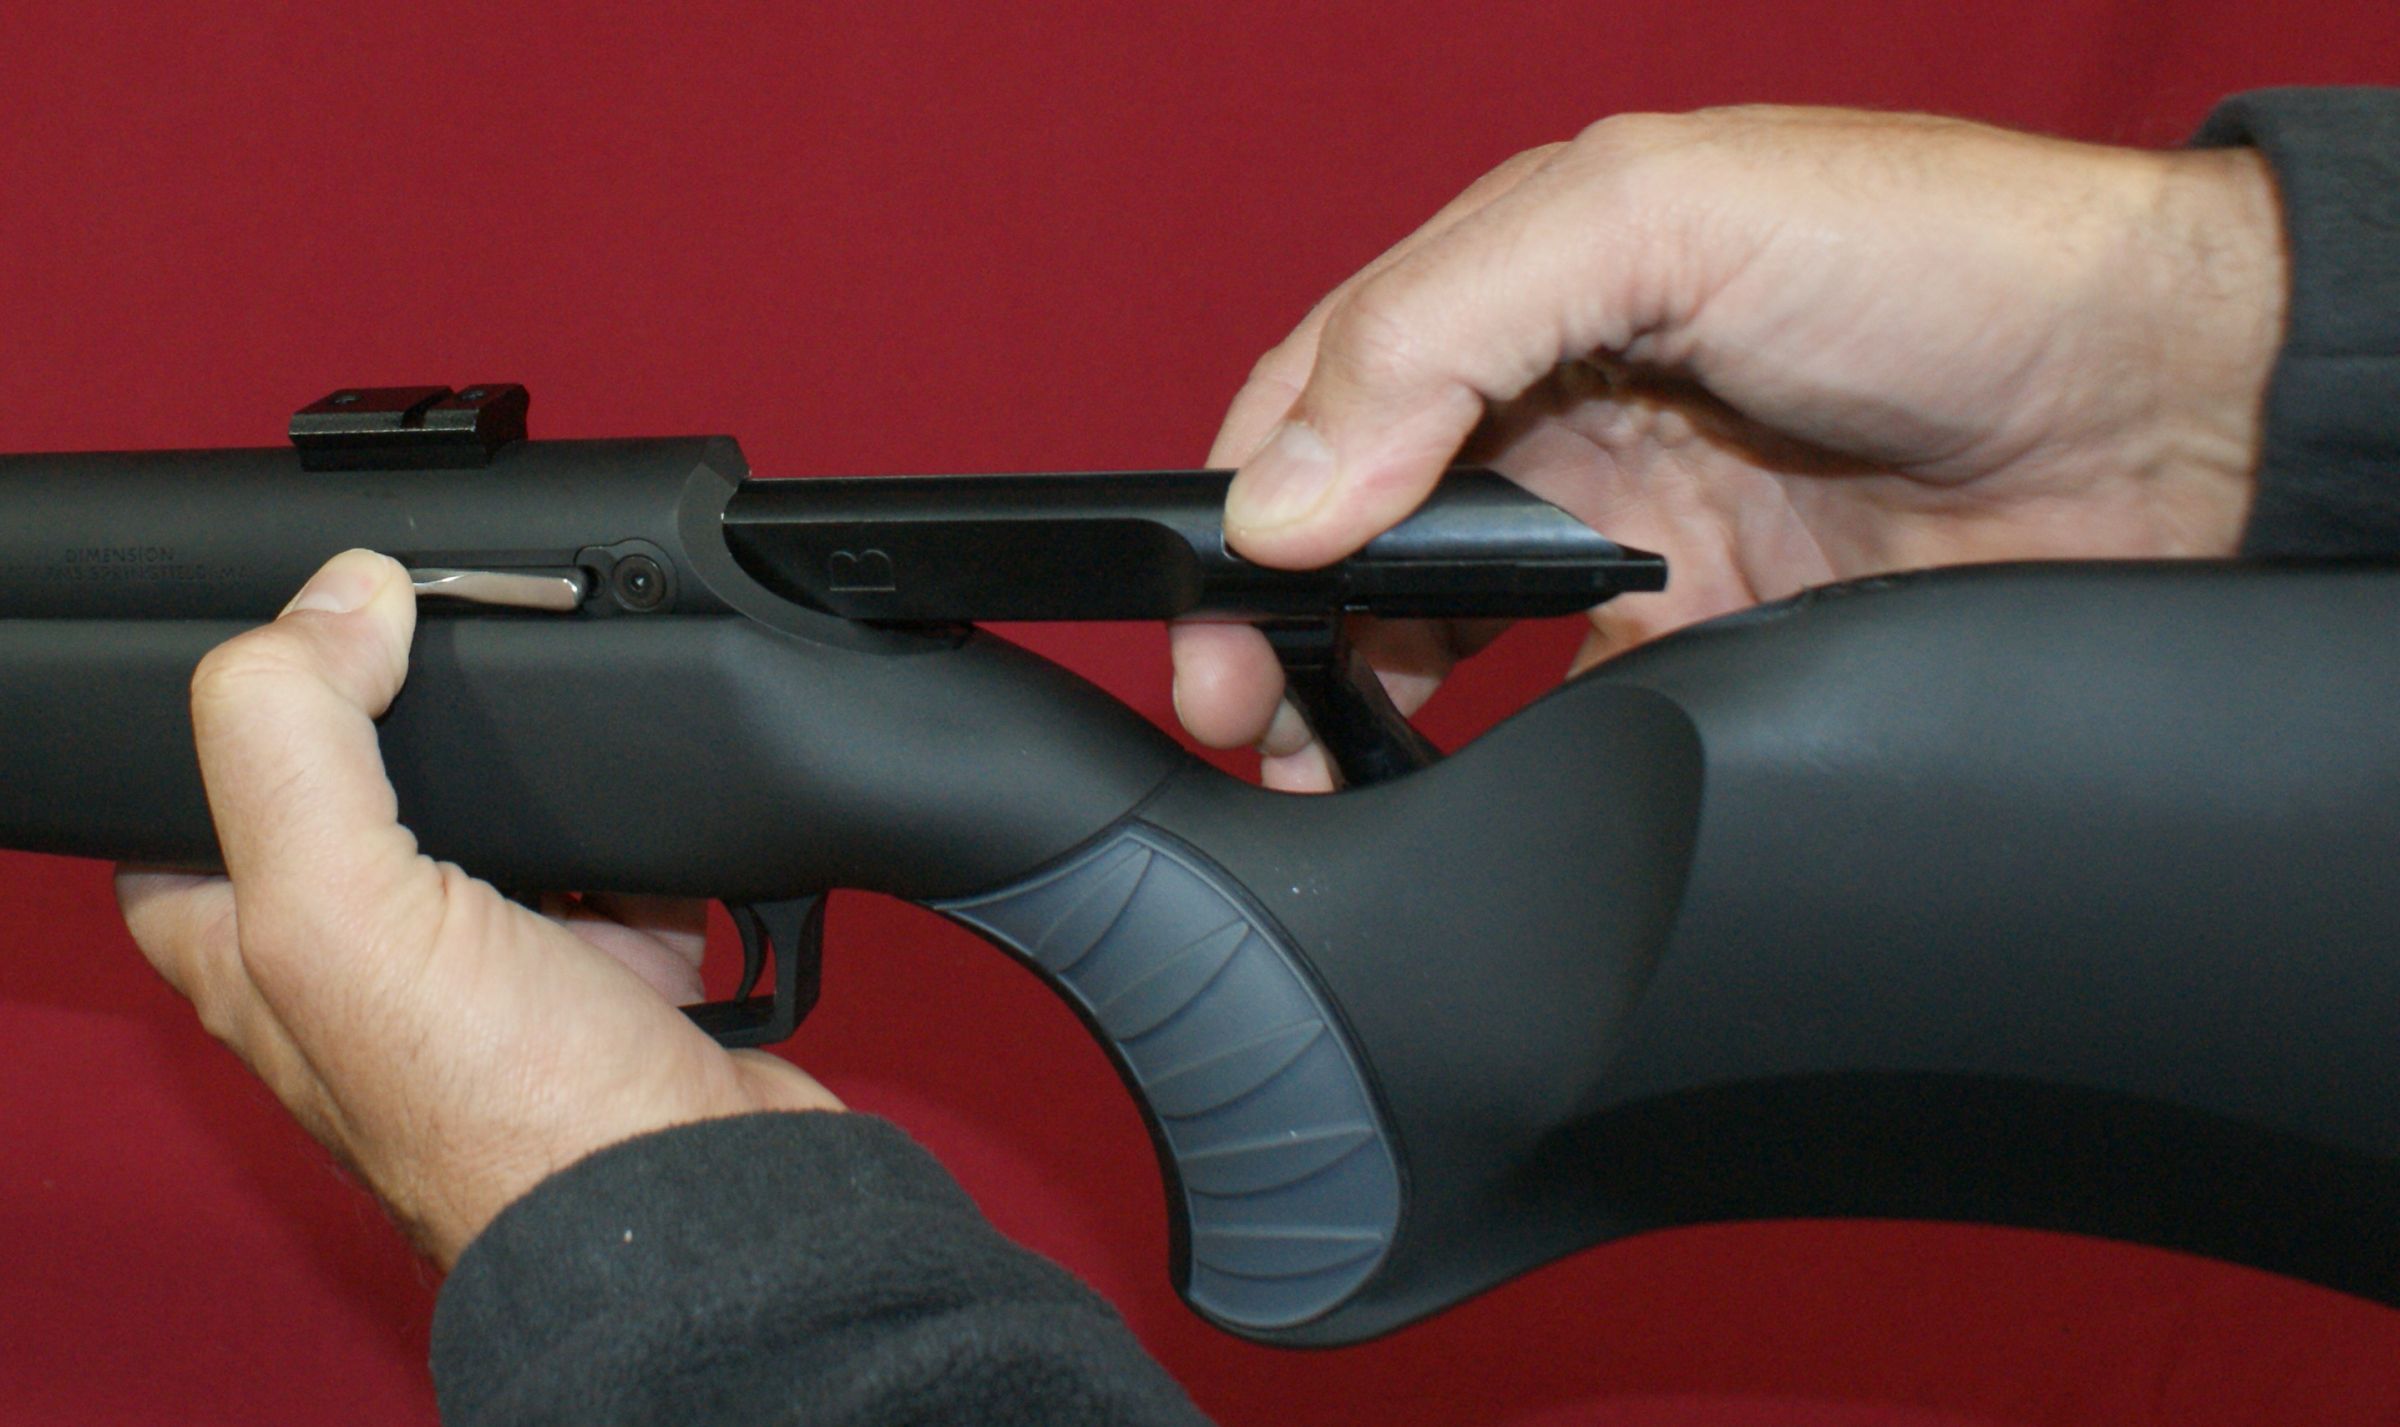
With the handle down (nearly touching the buttstock), you can continue to pull the bolt out of the receiver.
Figure 4
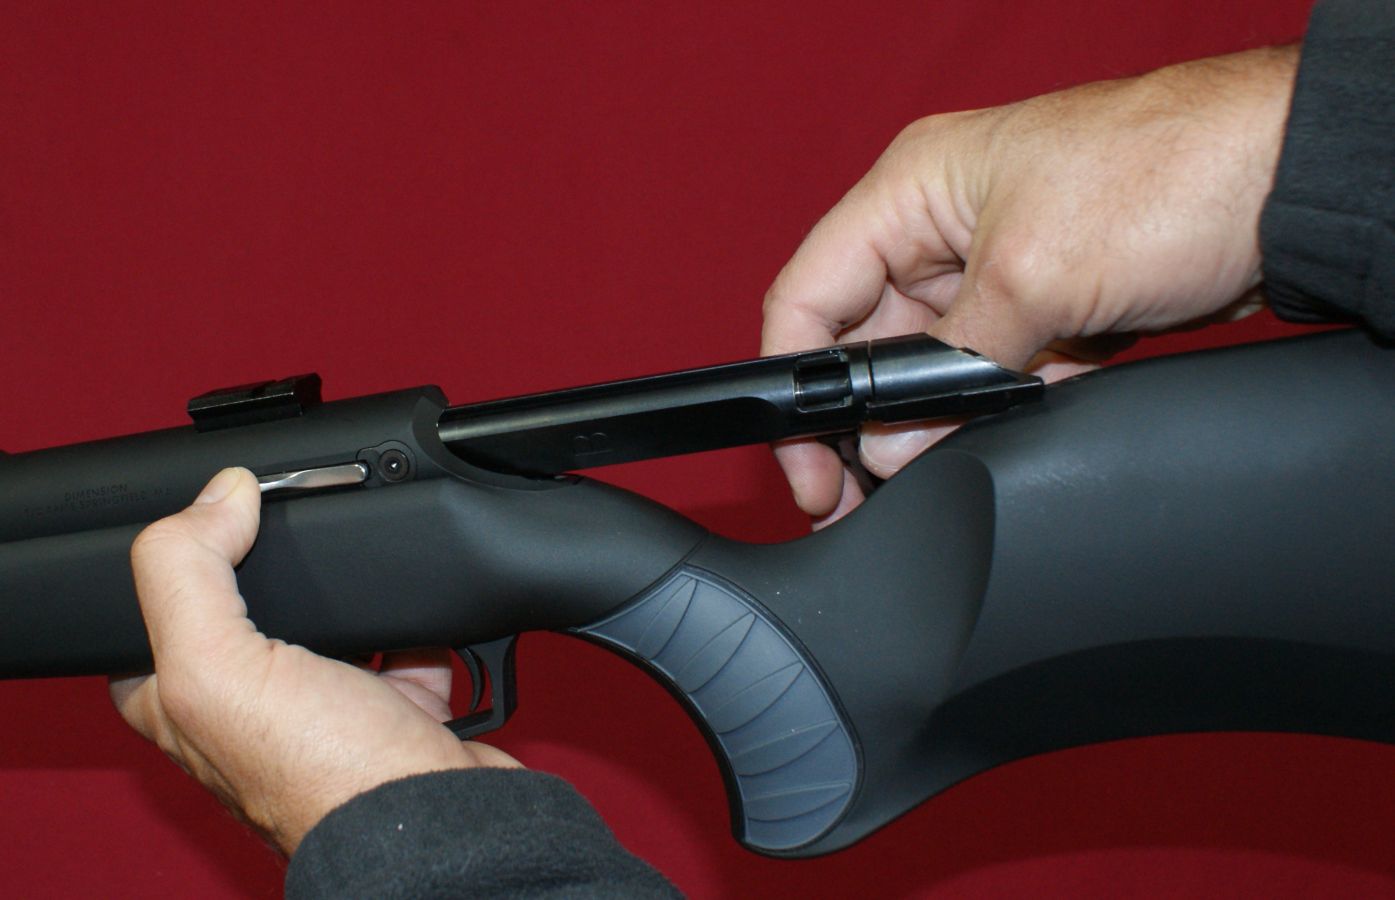
Although it sounds simple, and it is, you will find that there is a "sweet spot" when pressing the bolt stop, rotating the handle down, and pulling the bolt rearward which can be done in a single fluid motion. It took me a couple of times before I found the right combination of motions to make it look smooth and like I knew what I was doing. Like most bolt action rifles, removal of the bolt is all that is needed for normal field stripping for cleaning.
Figure 5
Changing Calibers
Tools
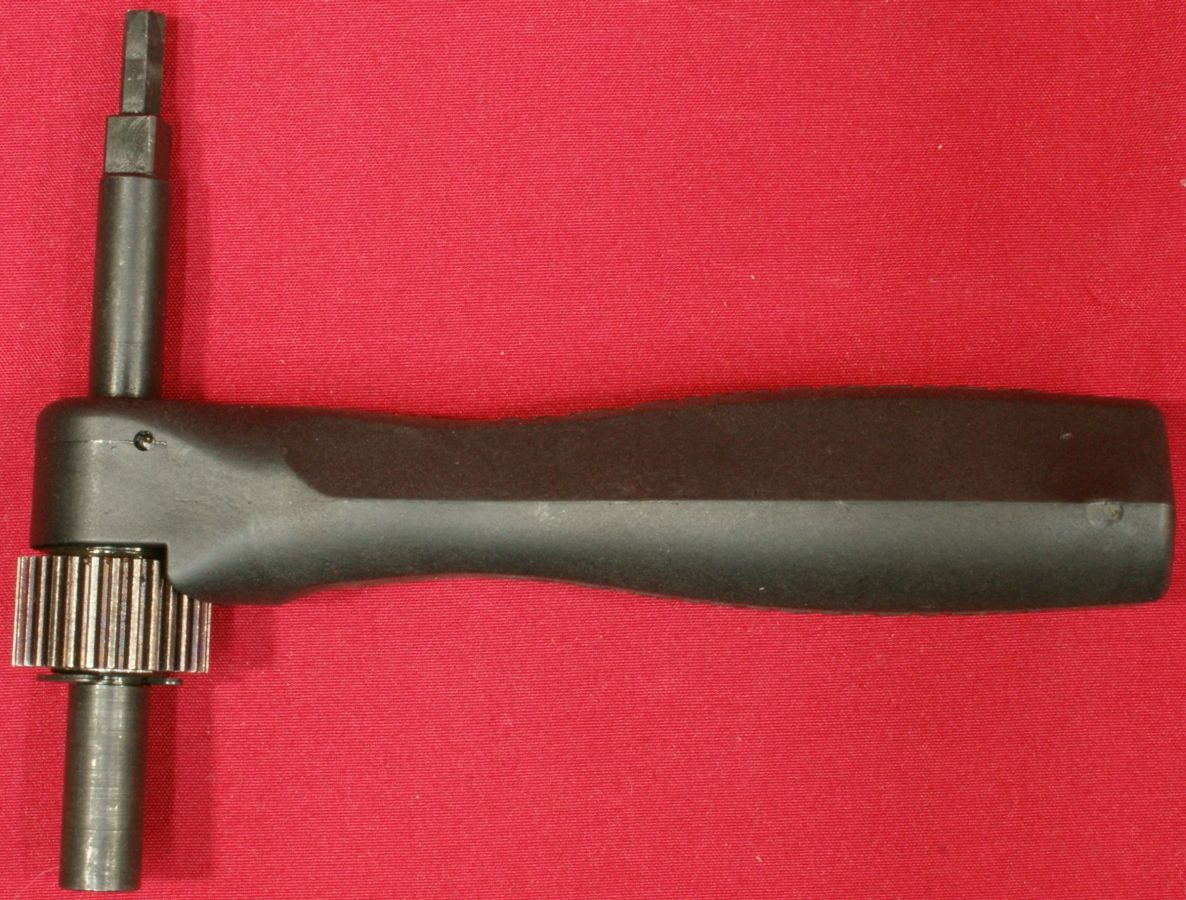
The T/C Dimension Rifle comes with two tools to be used when changing calibers; the Torque Tool and V-Block Wrench. The key features of the Torque Tool are listed below. I measured the torque produced by the wrench and found it to be barely over 55 in-lbs.
- Stock Bolt & Cantilever Bolt (for scope bridge mount) Torque Wrench
- 1/4" Accessory Socket Adapter
- Barrel Nut Gear Interface
- Barrel Nut Tighten/Loosen Pivot
Figure 6 - Torque Tool
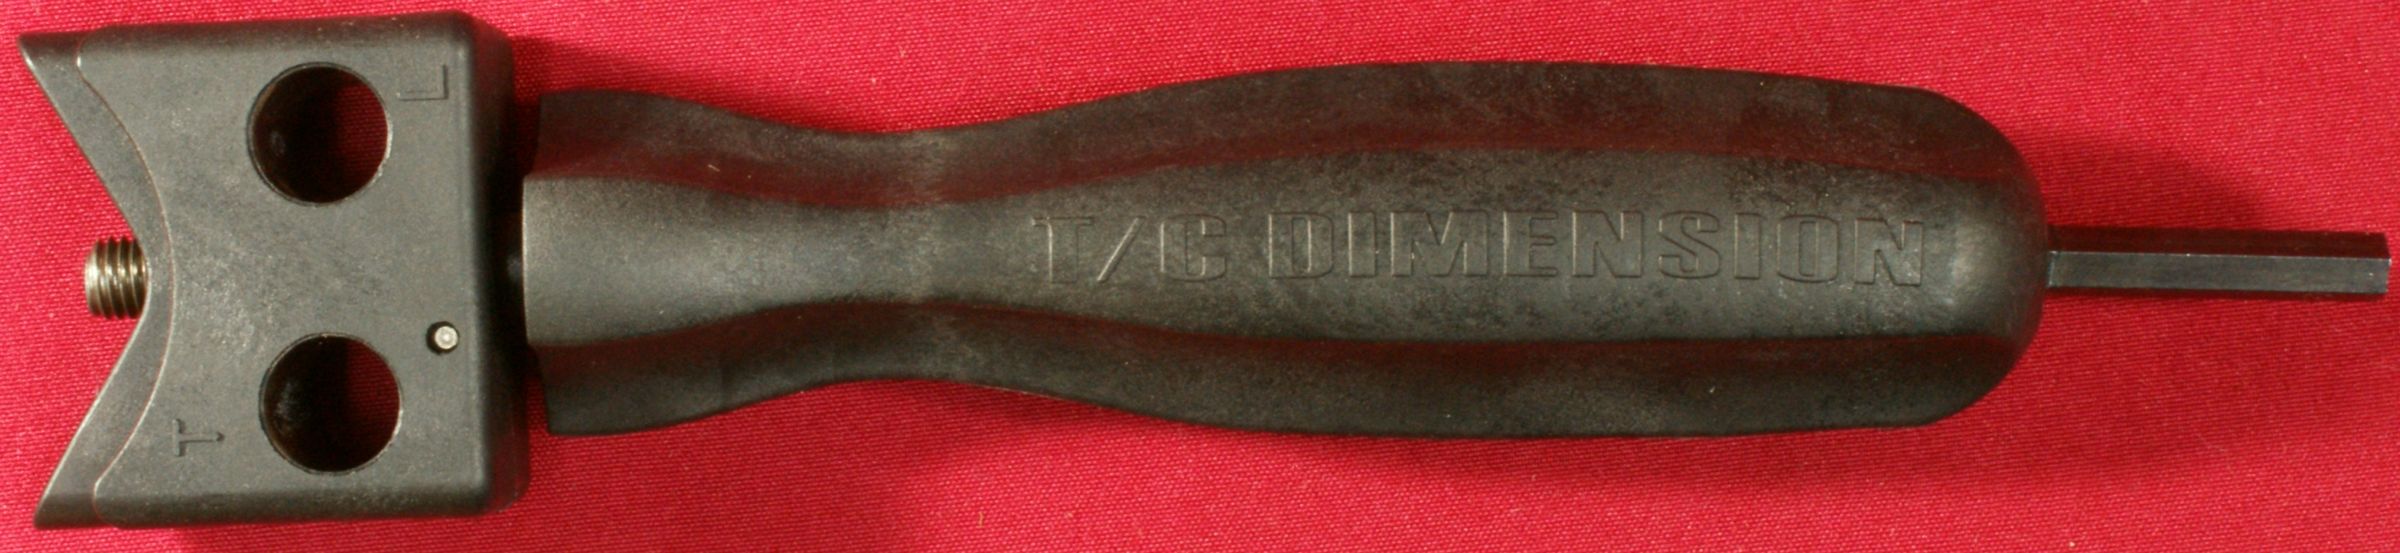
The key features of the V-Block Wrench are listed below.
- Receiver/Barrel V-Block Interface
- Pivot Hole to Loosen (L) the Barrel Nut
- Pivot Hole to Tighten (T) the Barrel Nut
- Hex Wrench for Stock Bolts and Scope Mount Screws
Figure 7 - V-Block Wrench
Step 1 & 2 - Safety and Remove Bolt & Magazine
The first steps are to perform the field stripping described above which is basically making sure the rifle is unloaded with the bolt and magazine removed.
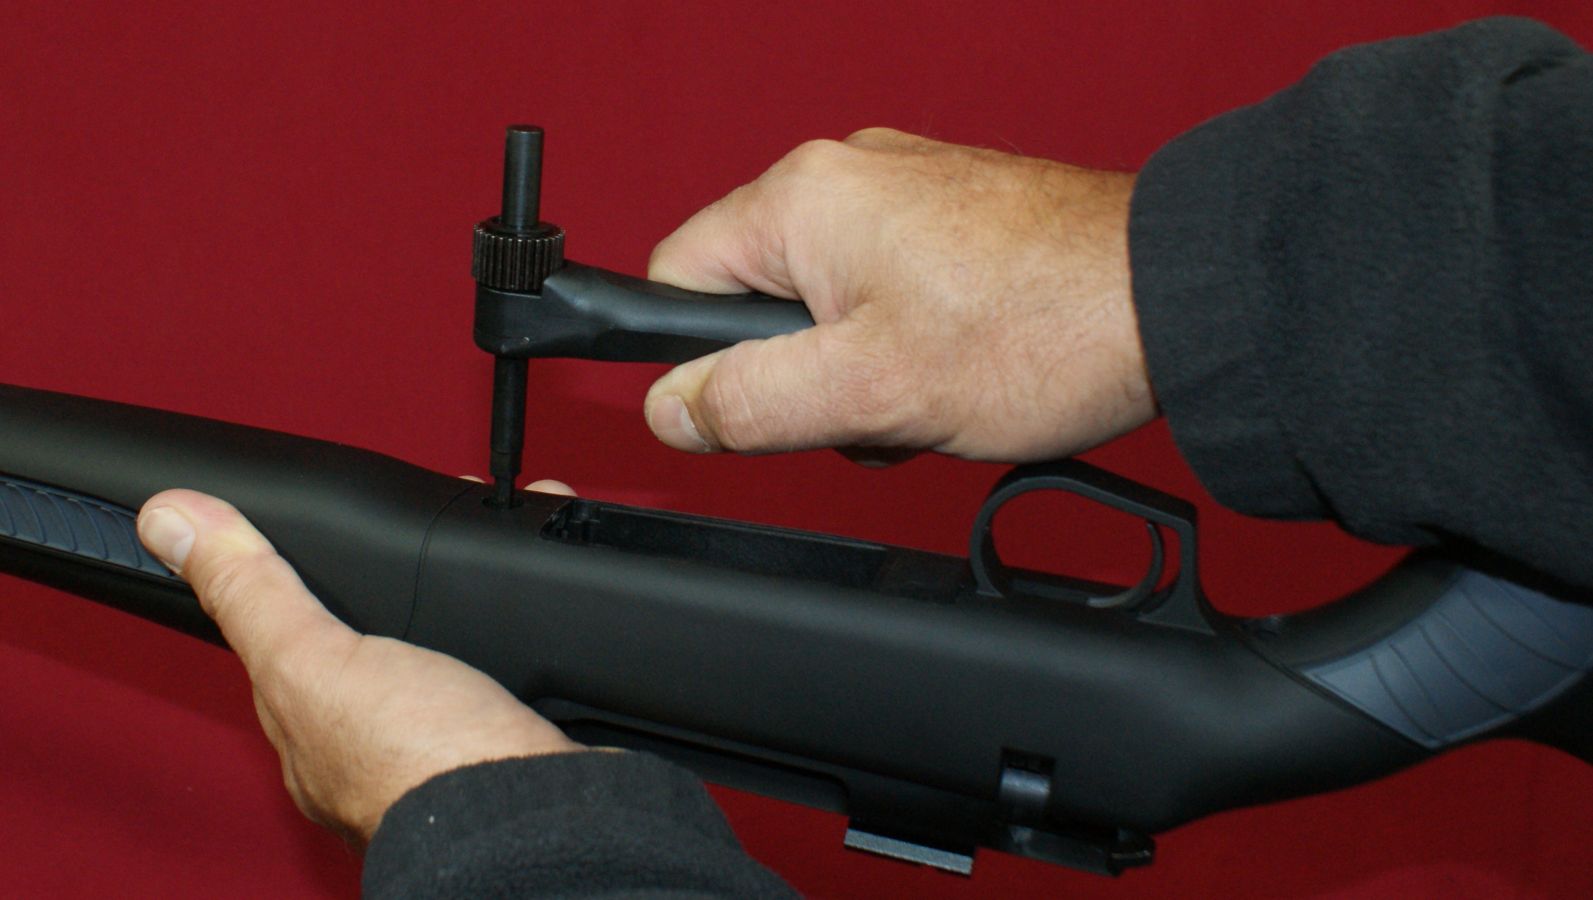
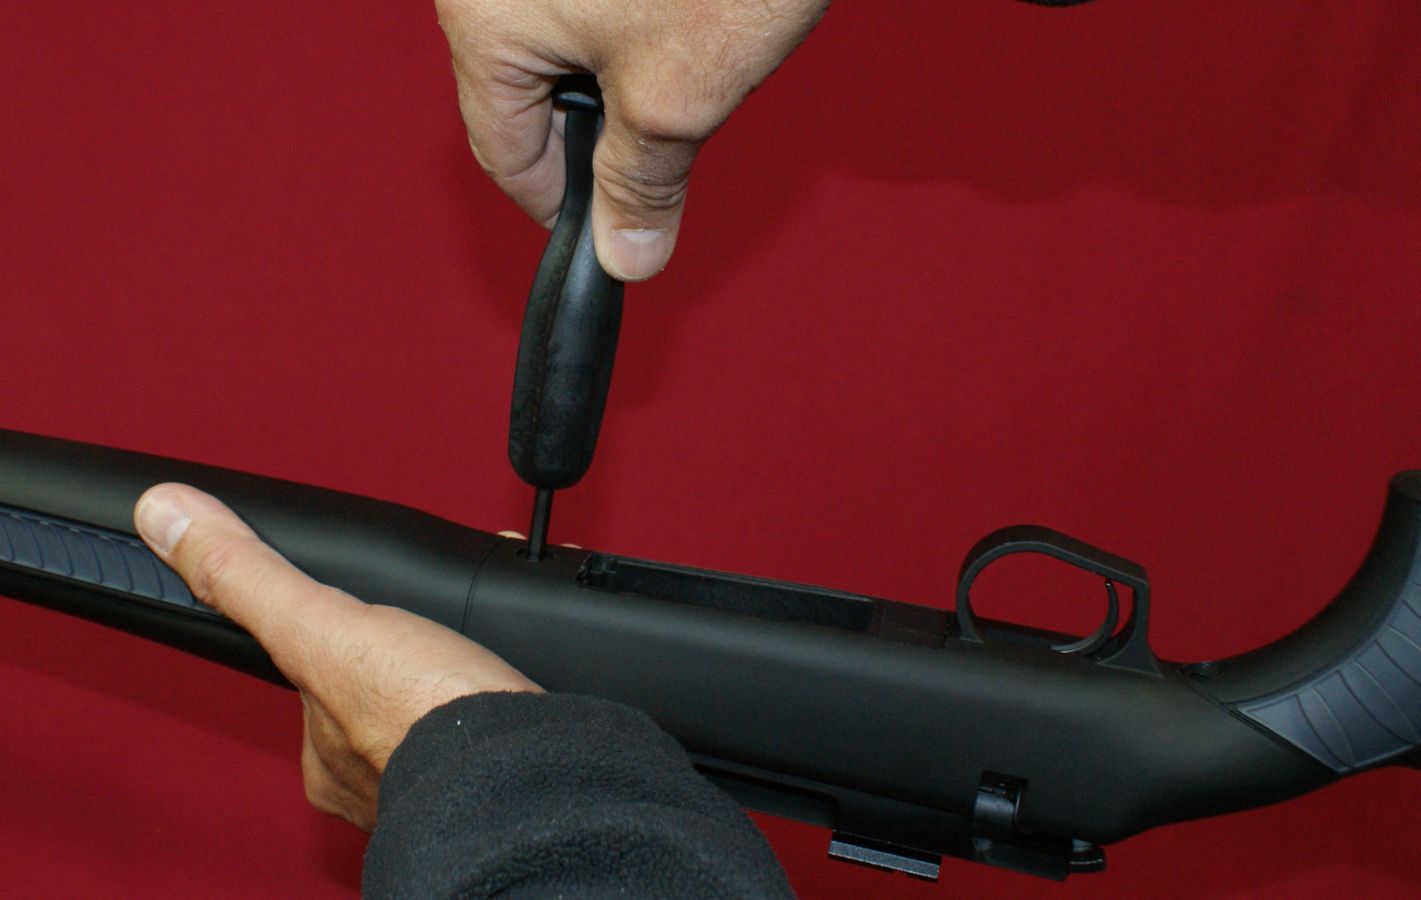
Step 3 - Remove Stock
Loosen the stock bolts located at locations A and B (shown below) by using the Allen wrench side of the Torque Tool.
Figure 8
Once the screws are loose, you can use the V-Block Wrench to loosen the screws the rest of the way. The screws are not intended to be fully removed from the stock. They have retaining features that keep them as part of the stock assembly to prevent you from losing them in the field.
Figure 9
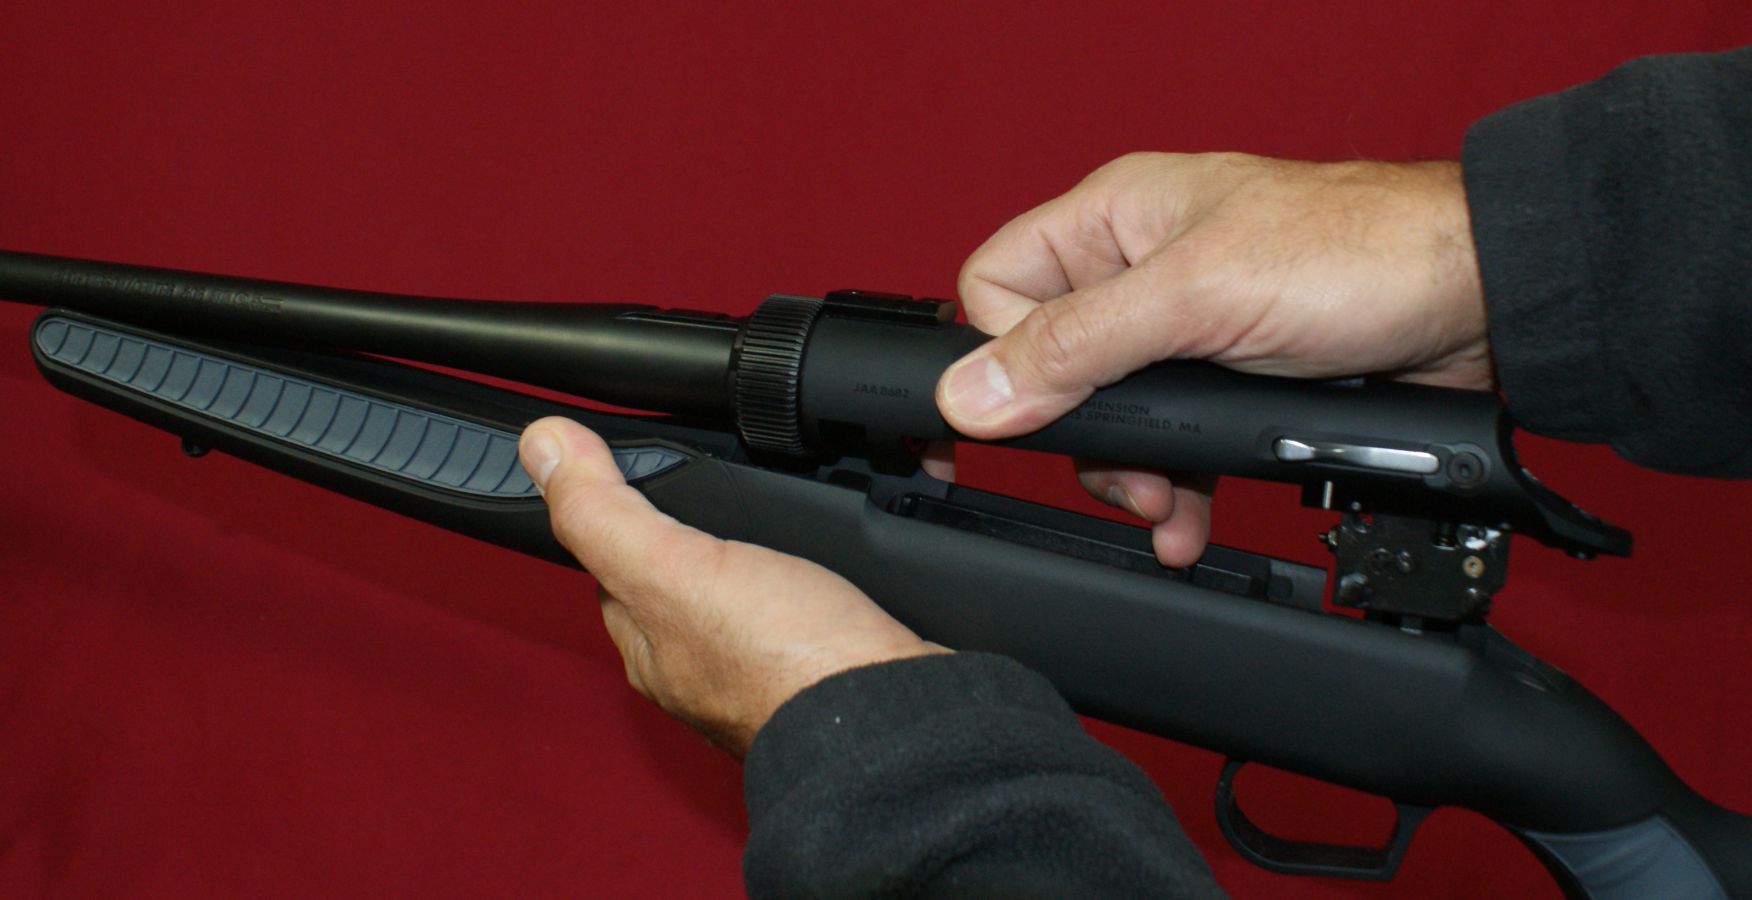
With the two stock screws fully loose from the receiver, you can then lift the receiver and barrel assembly from the stock.
Figure 10
Sometimes when the receiver was removed from the stock, I noticed that the bolt stop lever pin and trigger assembly pins shifted out of their holes slightly depending on how I held the receiver. The stock is the portion of the rifle that holds these pins in place. This is definitely something that you need to pay attention to when the receiver is removed from the stock.
Figure 11

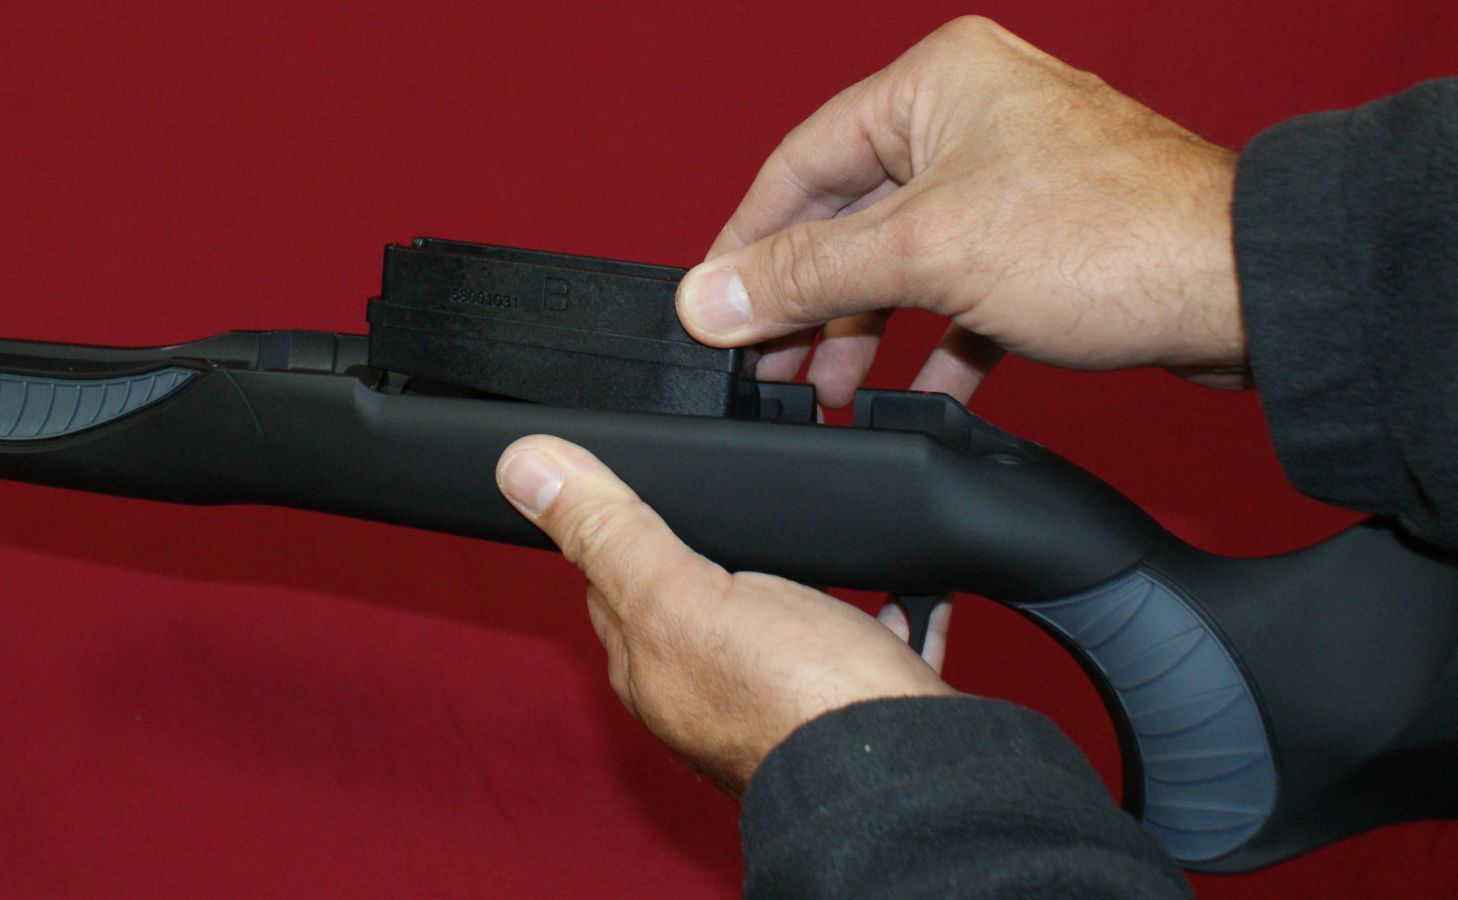
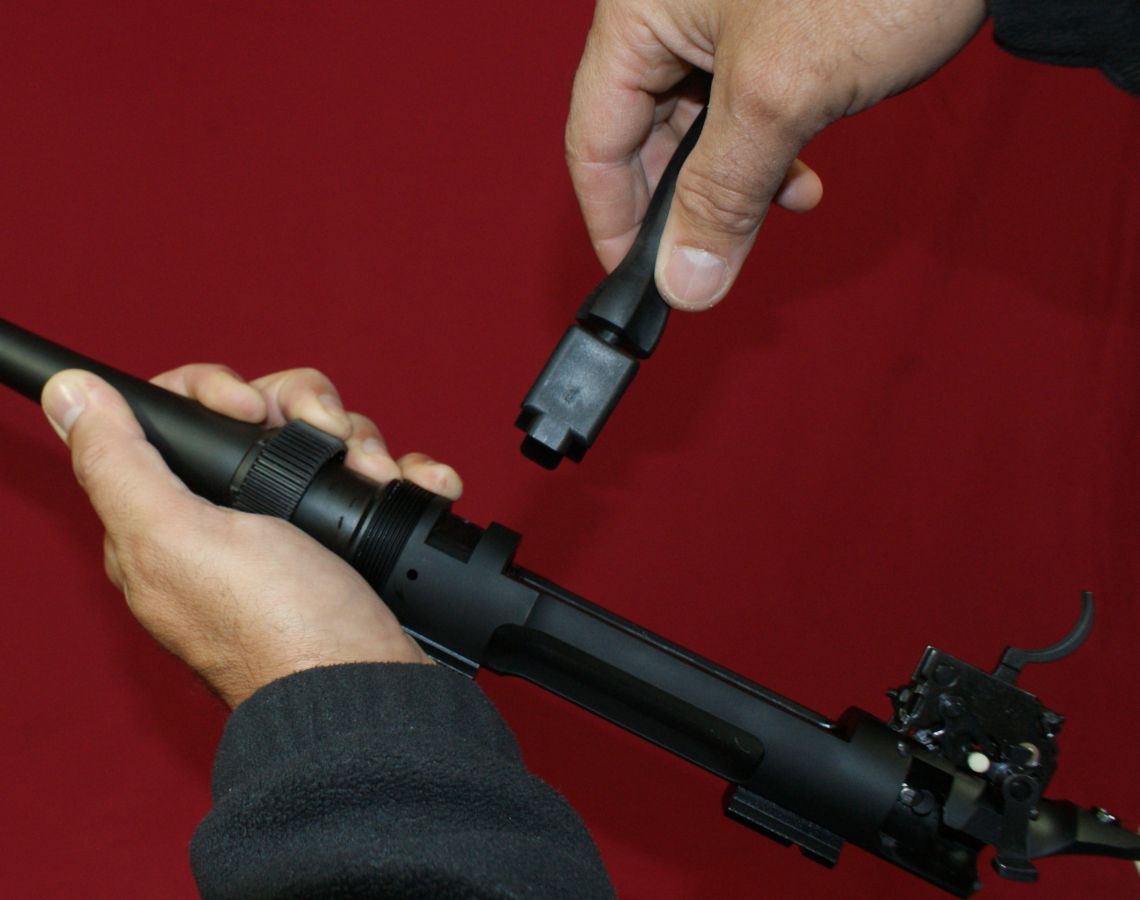
Step 4 - Remove Magazine Adapter
If you are swapping to a different caliber series, remove the magazine adapter and replace it with that of the new series.
Figure 12
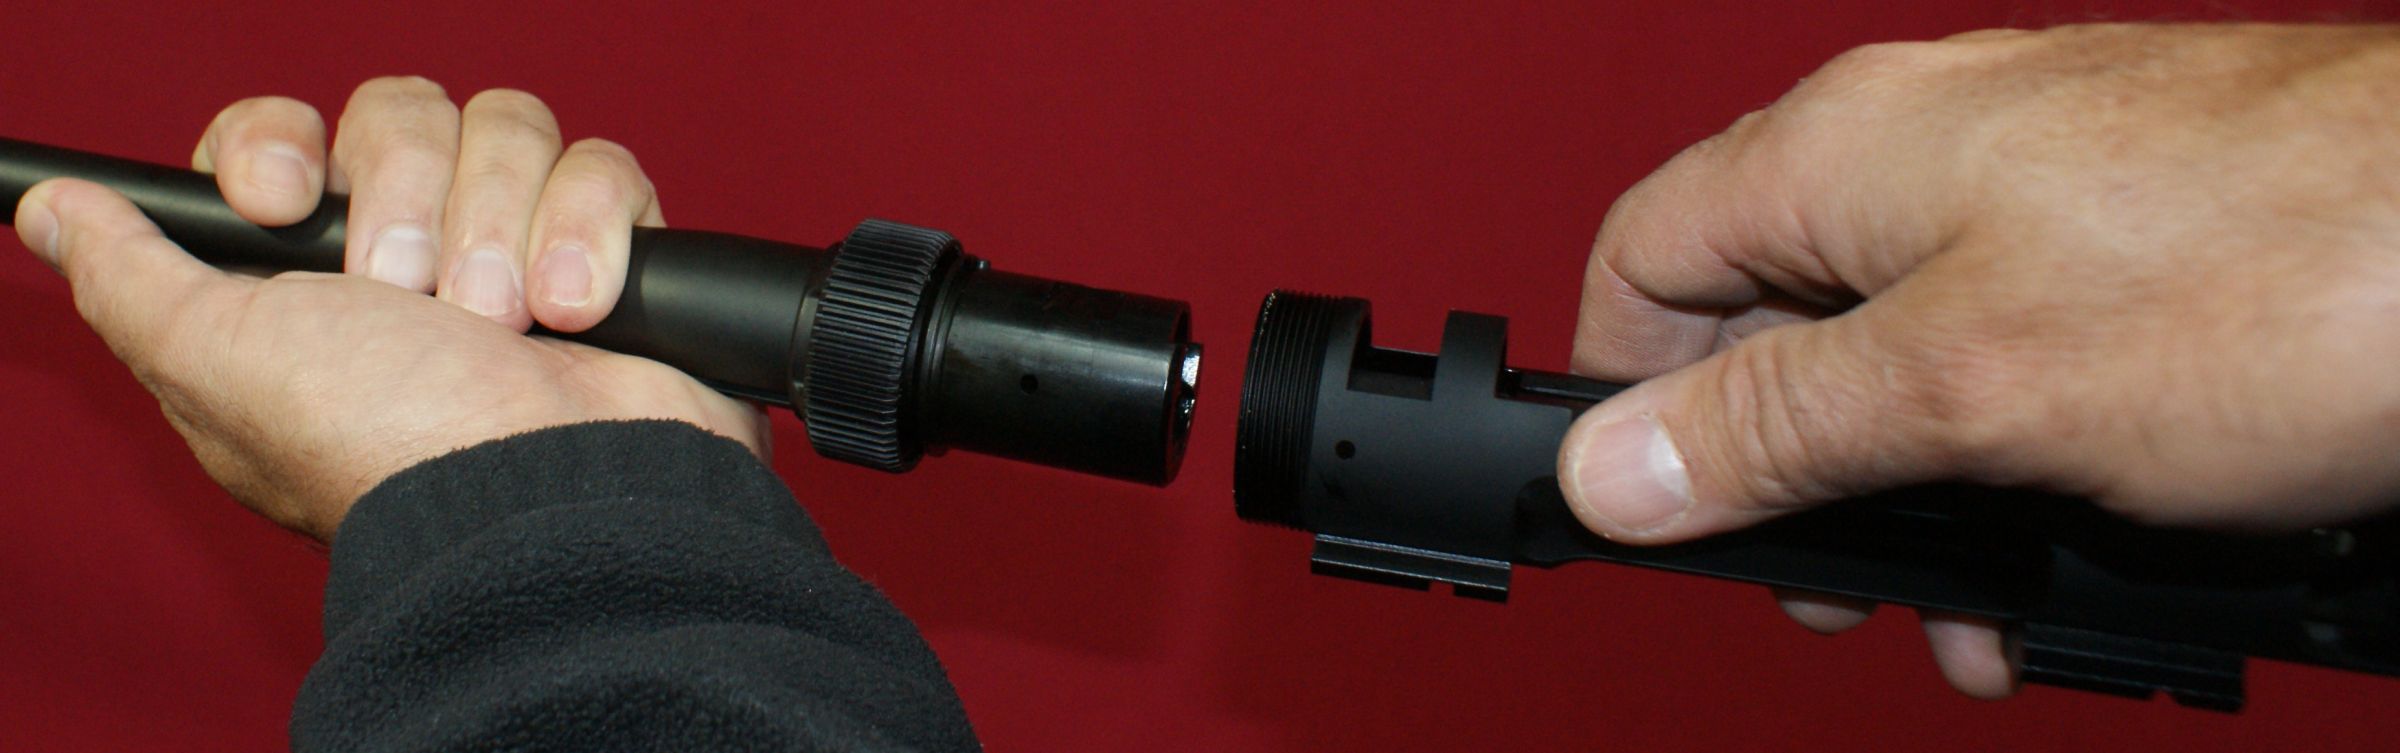
Step 5 - Remove Barrel
On the bottom of the receiver is the location for mounting the V-Block wrench.
Figure 13
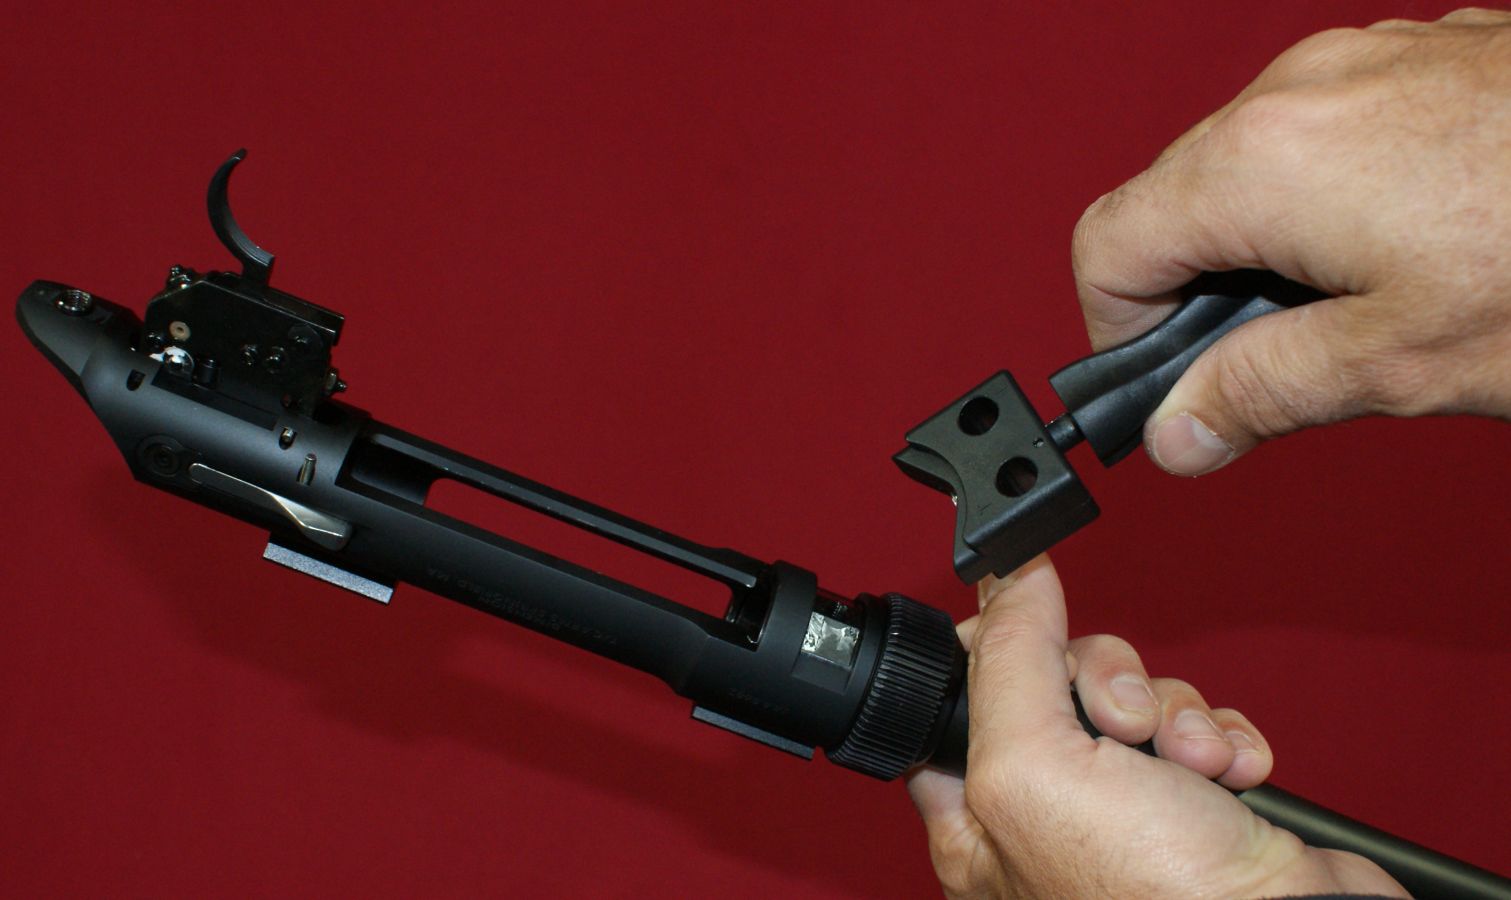
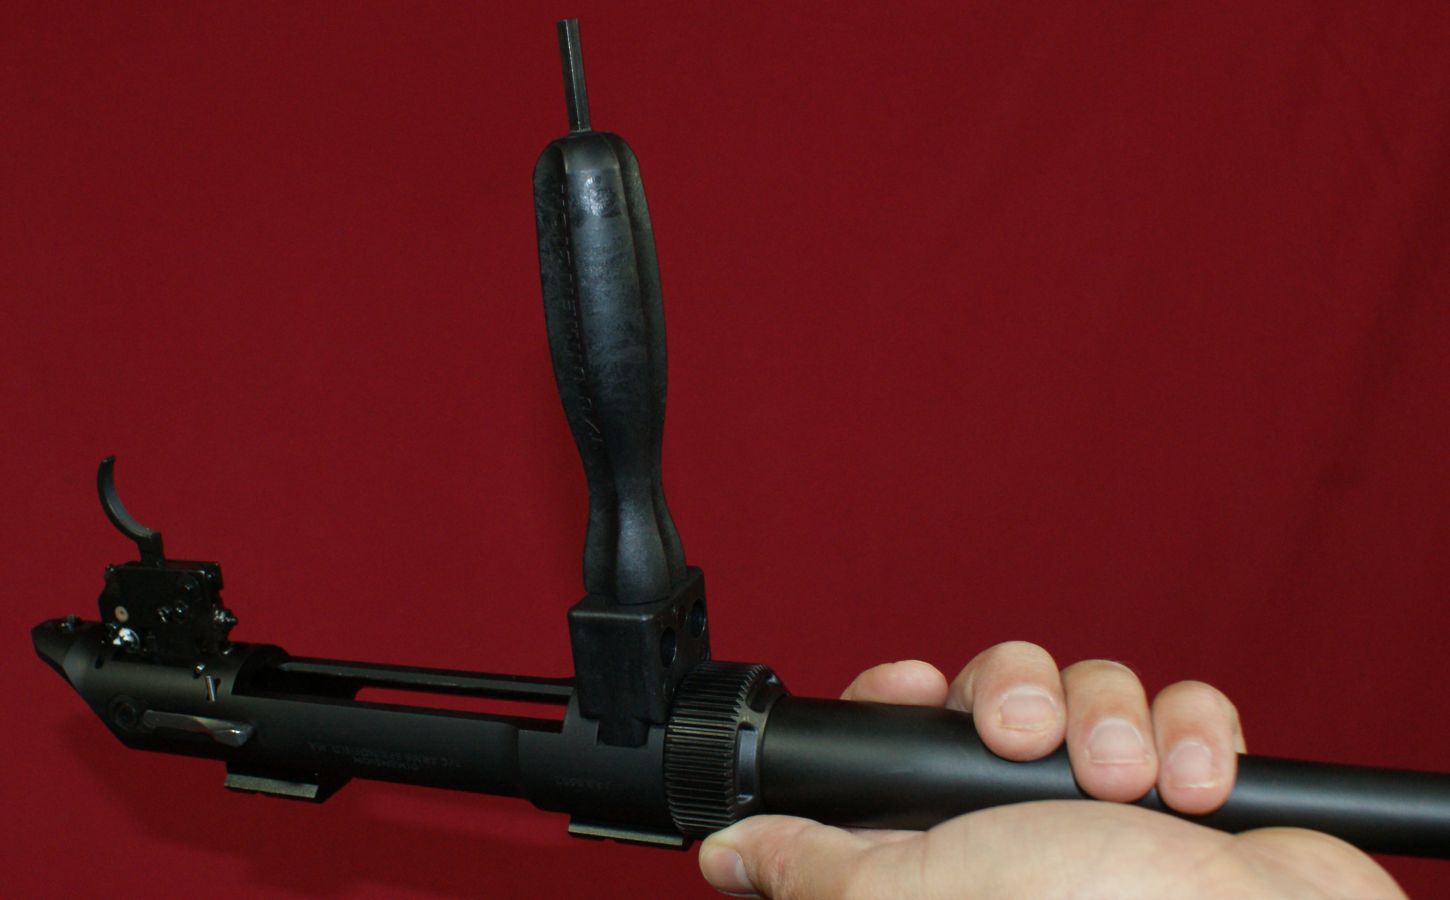
Nest the "V" portion of the wrench over the forward stock bolt hole in the barrel extension and tighten the handle of the V-Block Wrench until it is snug tight. There is not a top or bottom to the V-Block Wrench so you don't have to worry about the orientation.
Figure 14
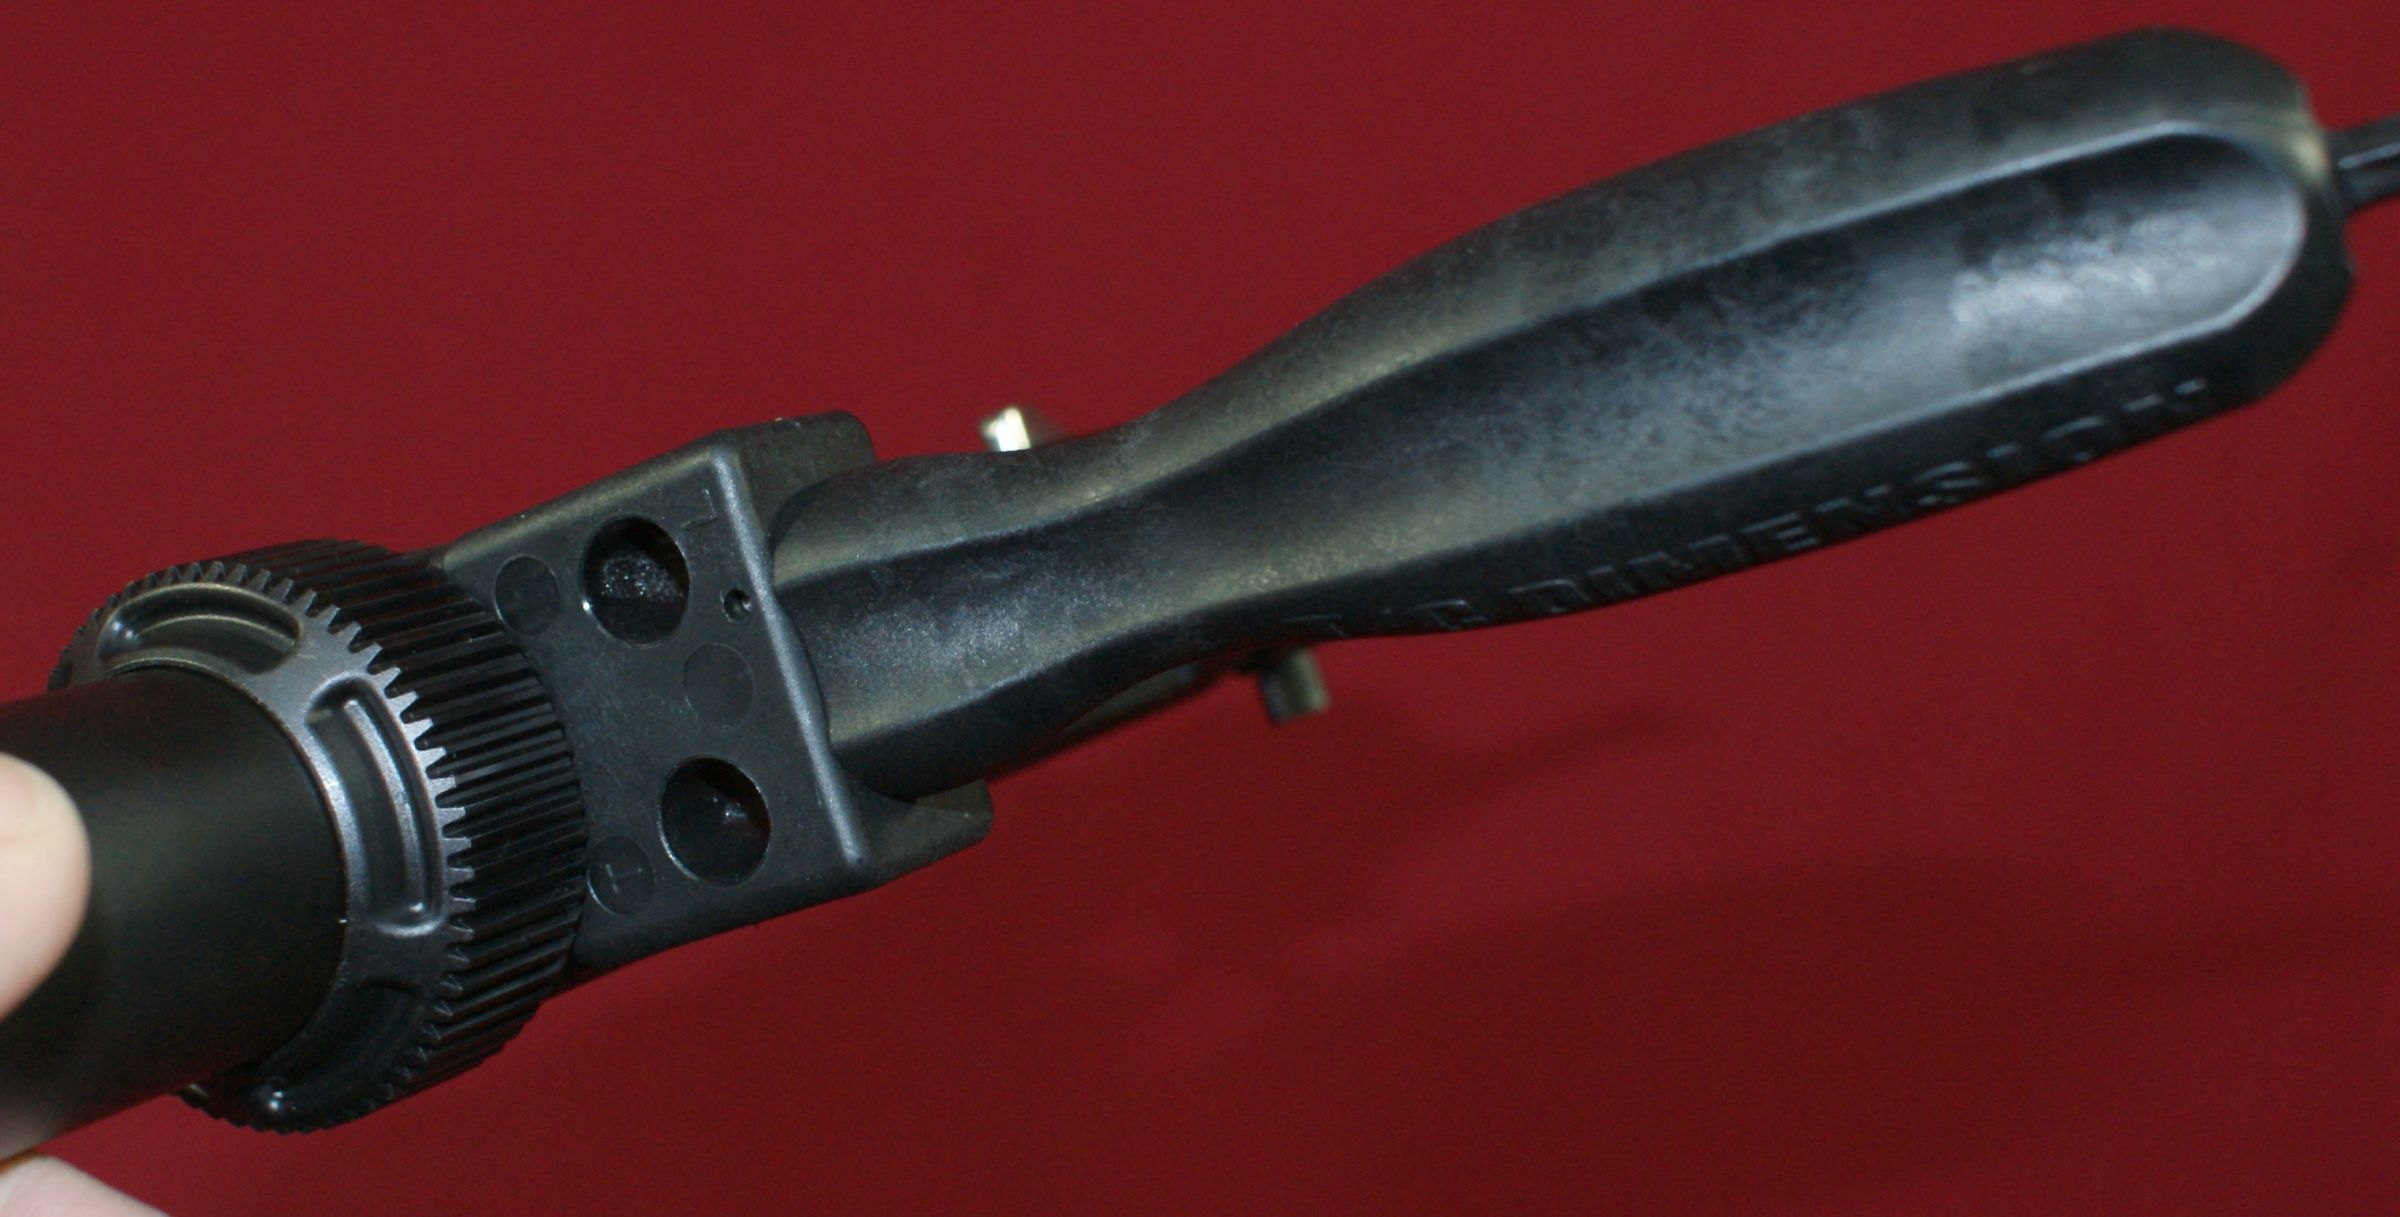
The V-Block Wrench has two holes that are marked "L" for Loosen and "T" for tighten.
Figure 15
Insert the Torque Tool pivot in the correct hole depending on wether you are removing or installing a barrel. The photo below shows the tool in the "L" hole where the handle of the Torque Tool is above the handle of the V-Block Wrench. Make sure the teeth on the gears are fully engaged prior to applying pressure on the tool
Figure 16
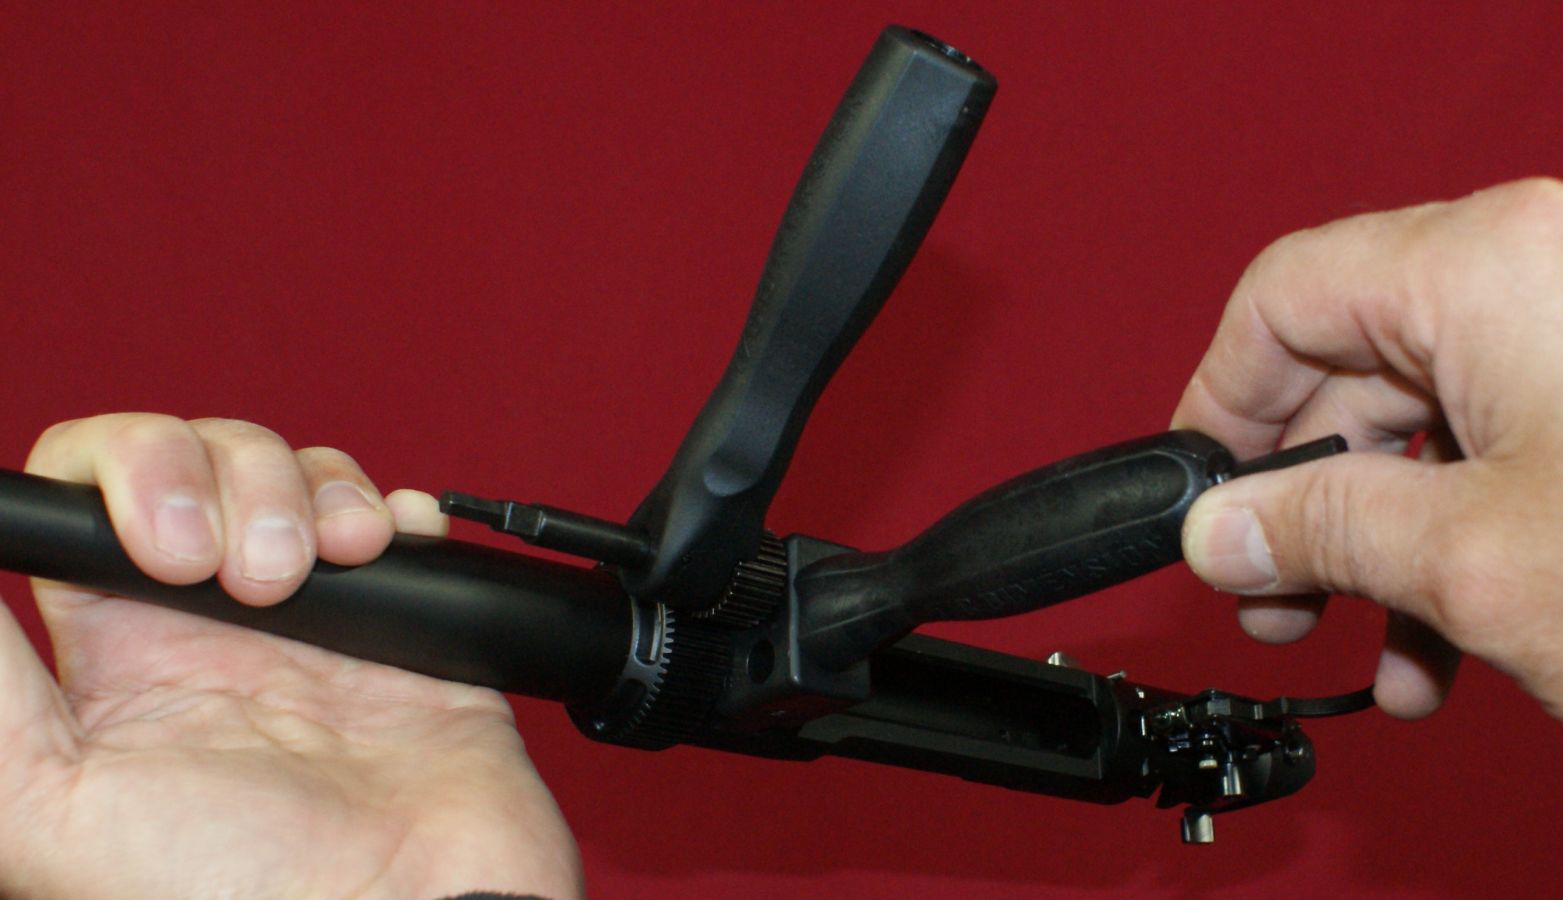
By squeezing on the two handles (like a pair of pliers), the barrel nut will loosen.
Figure 17
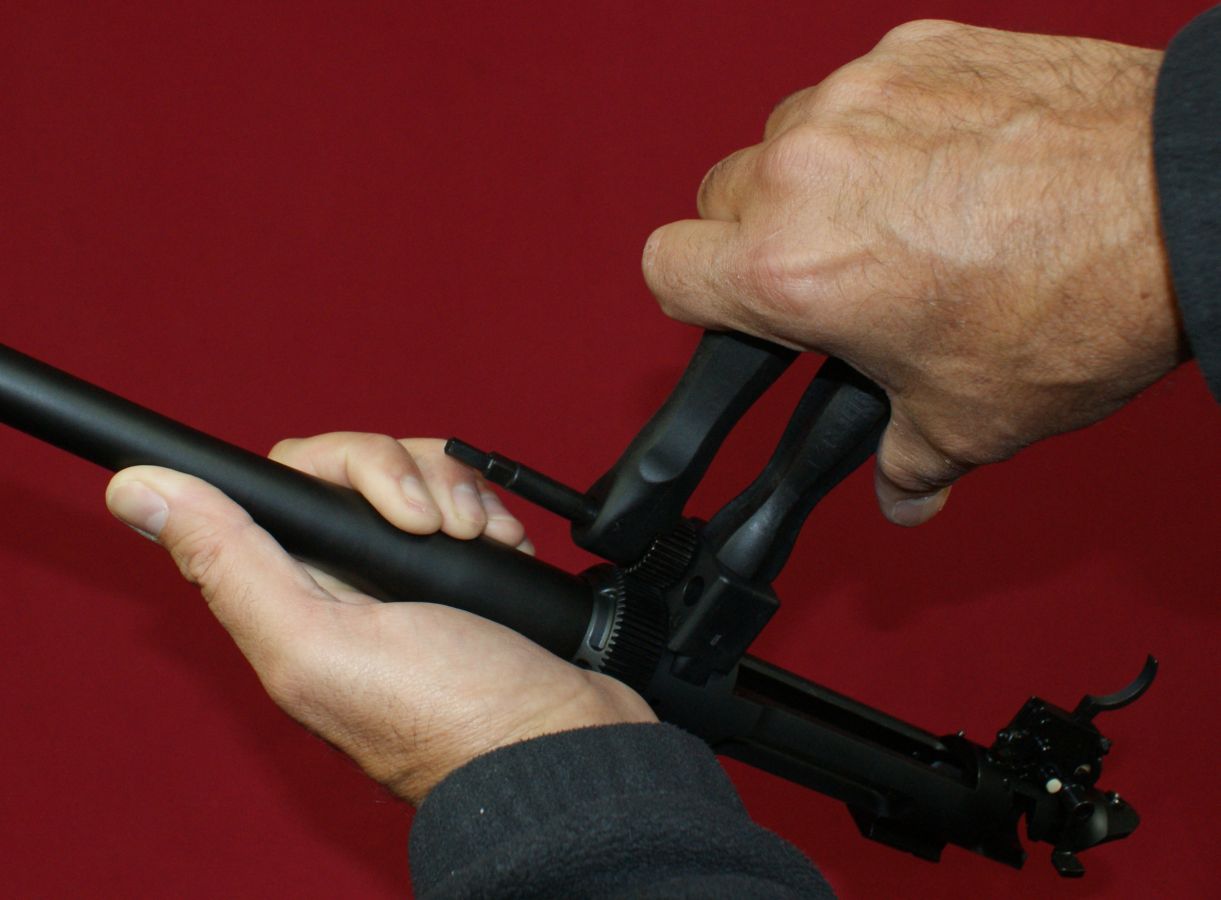
Once you have removed the torque from the barrel nut, you can continue to loosen the nut by hand (no tool needed).
Figure 18
Once you have un-torqued the barrel nut, you can remove the V-Block Wrench. In this case, I removed the wrench after fully loosening the barrel nut, but could have removed the wrench before I completely loosened the barrel nut.
Figure 19
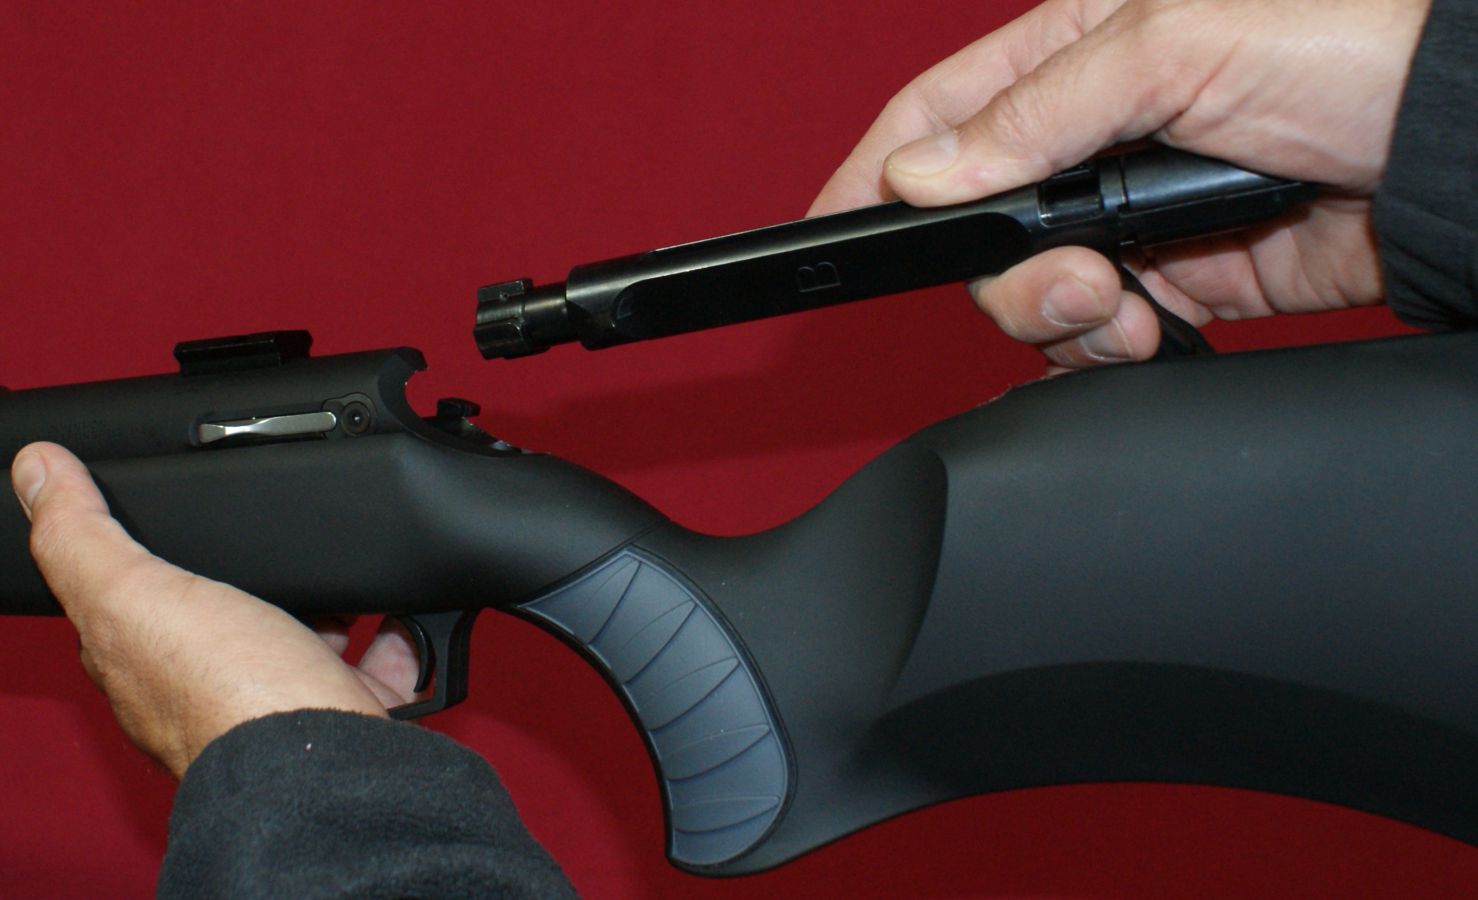
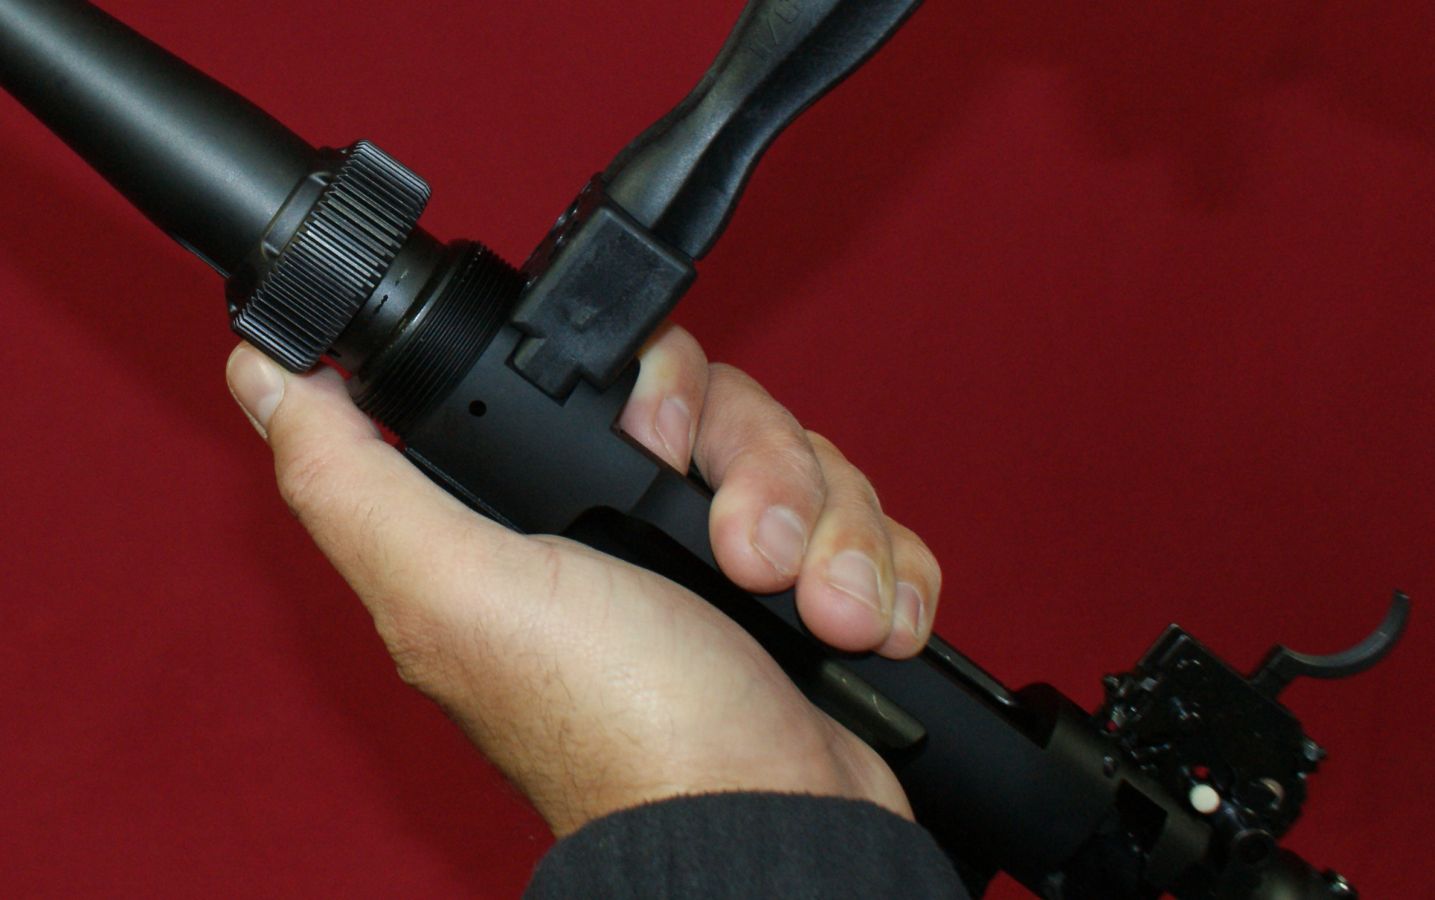
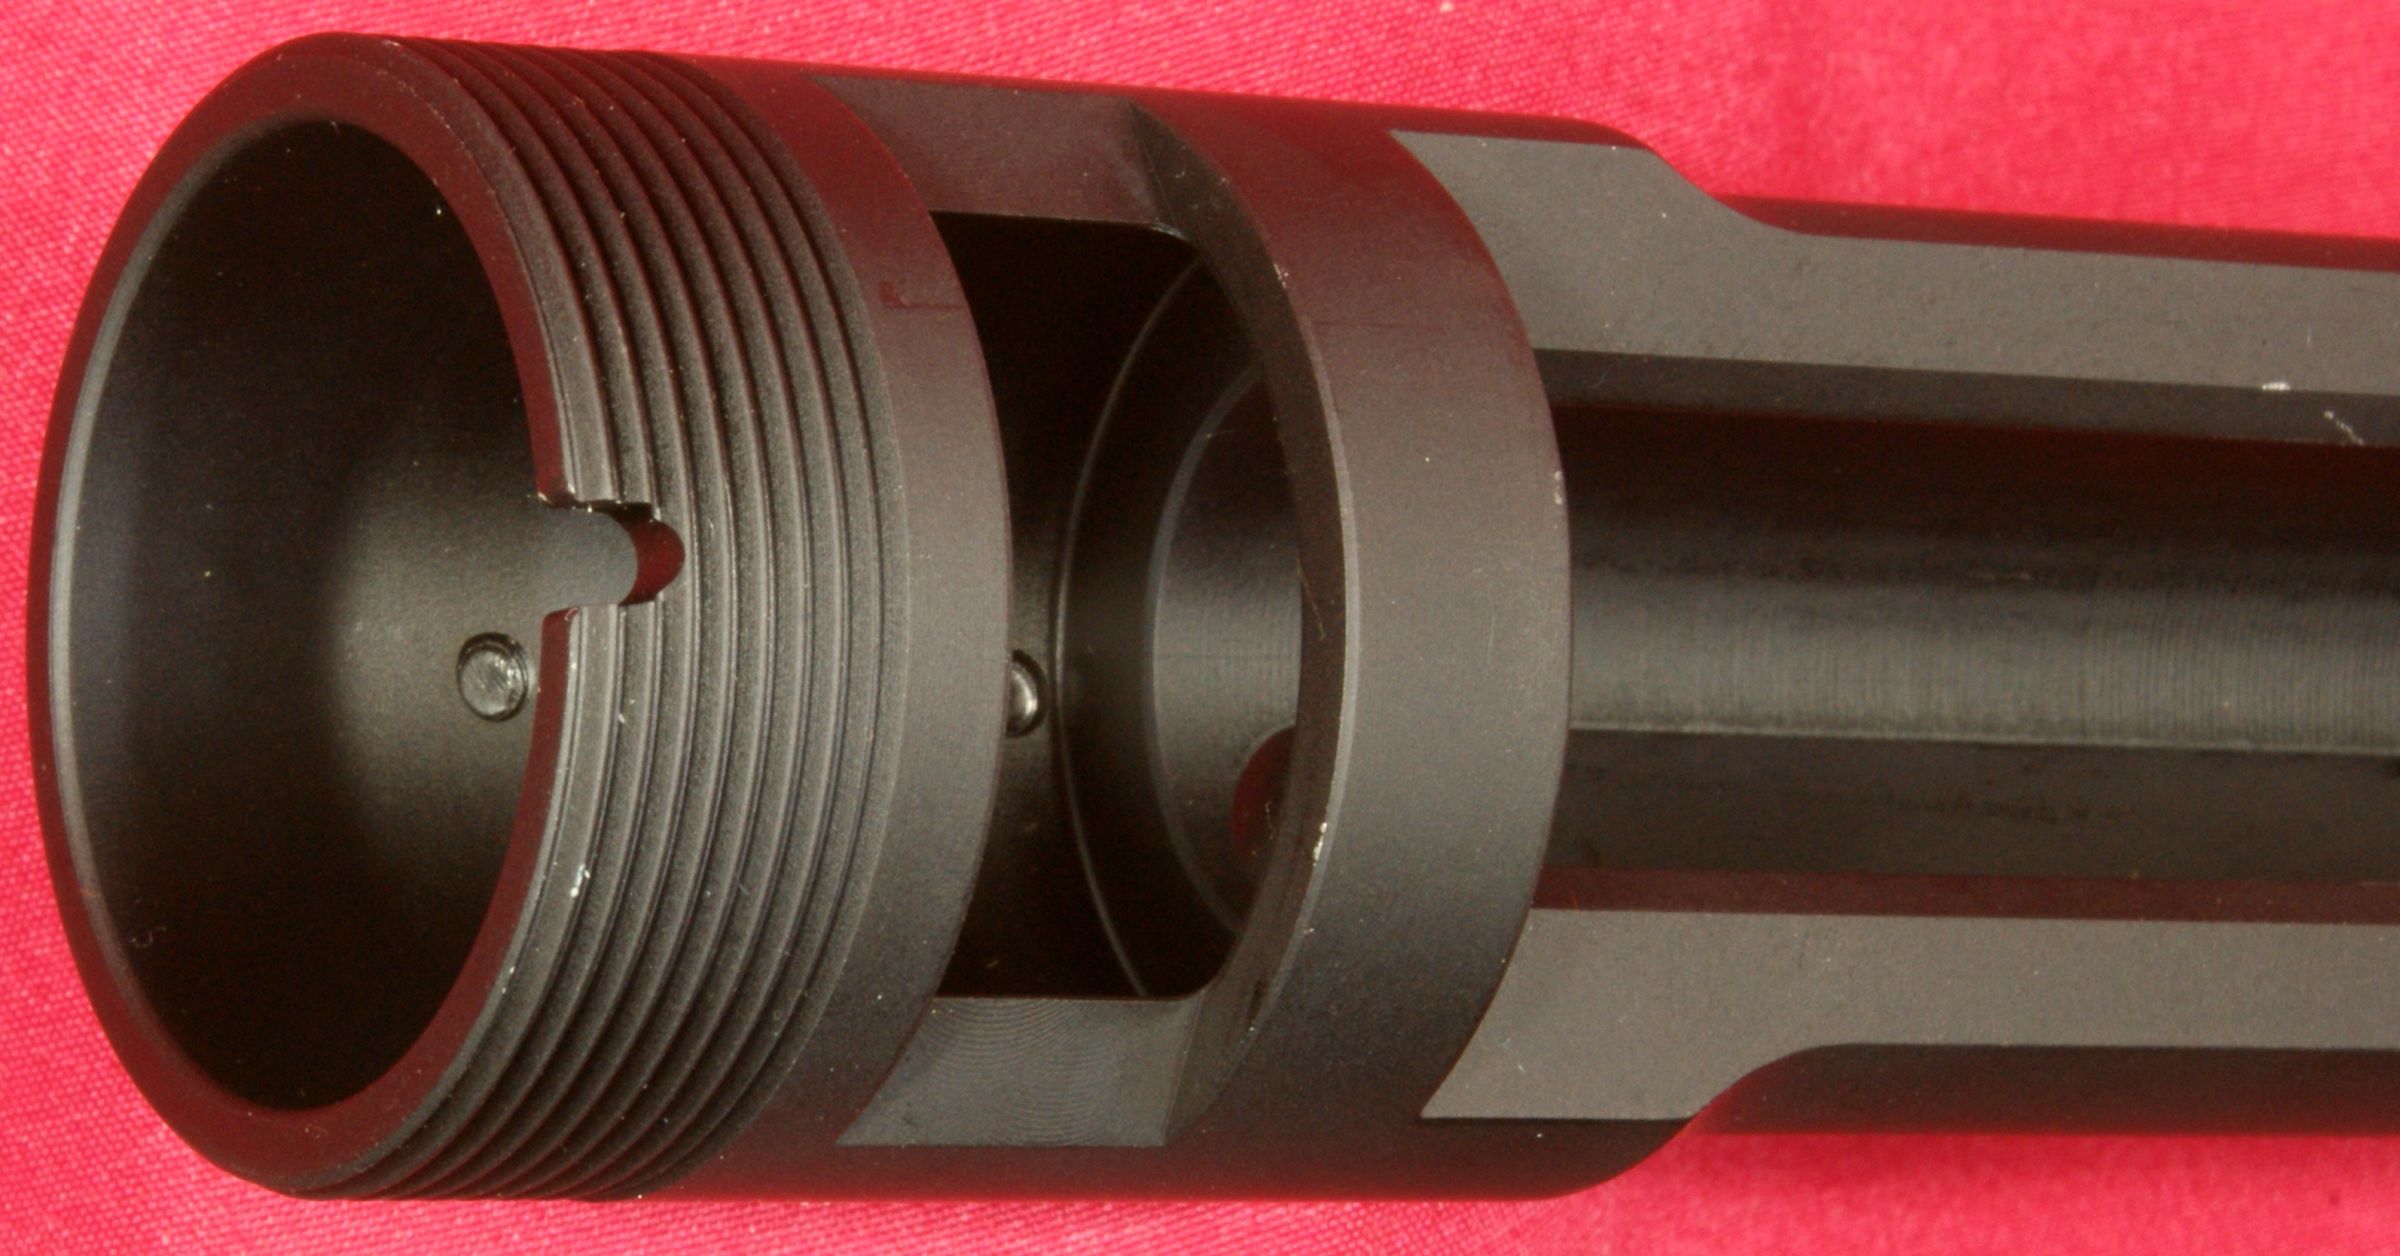
With the barrel nut completely loose and the V-Block Wrench removed, you can slide the barrel out of the receiver.
Figure 20
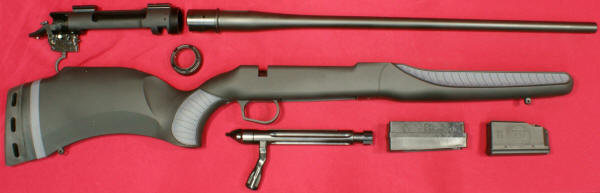
The photo below shows the rifle fully disassembled and ready to configure into a new caliber.
Figure 21
Reassembly
Reassembly is basically these steps in reverse. The two things to note are that the bottom of the receiver has a notch for an alignment pin that is on the bottom of the barrel, and you will use the "T" tighten hole with the Torque Tool during assembly.
Figure 22
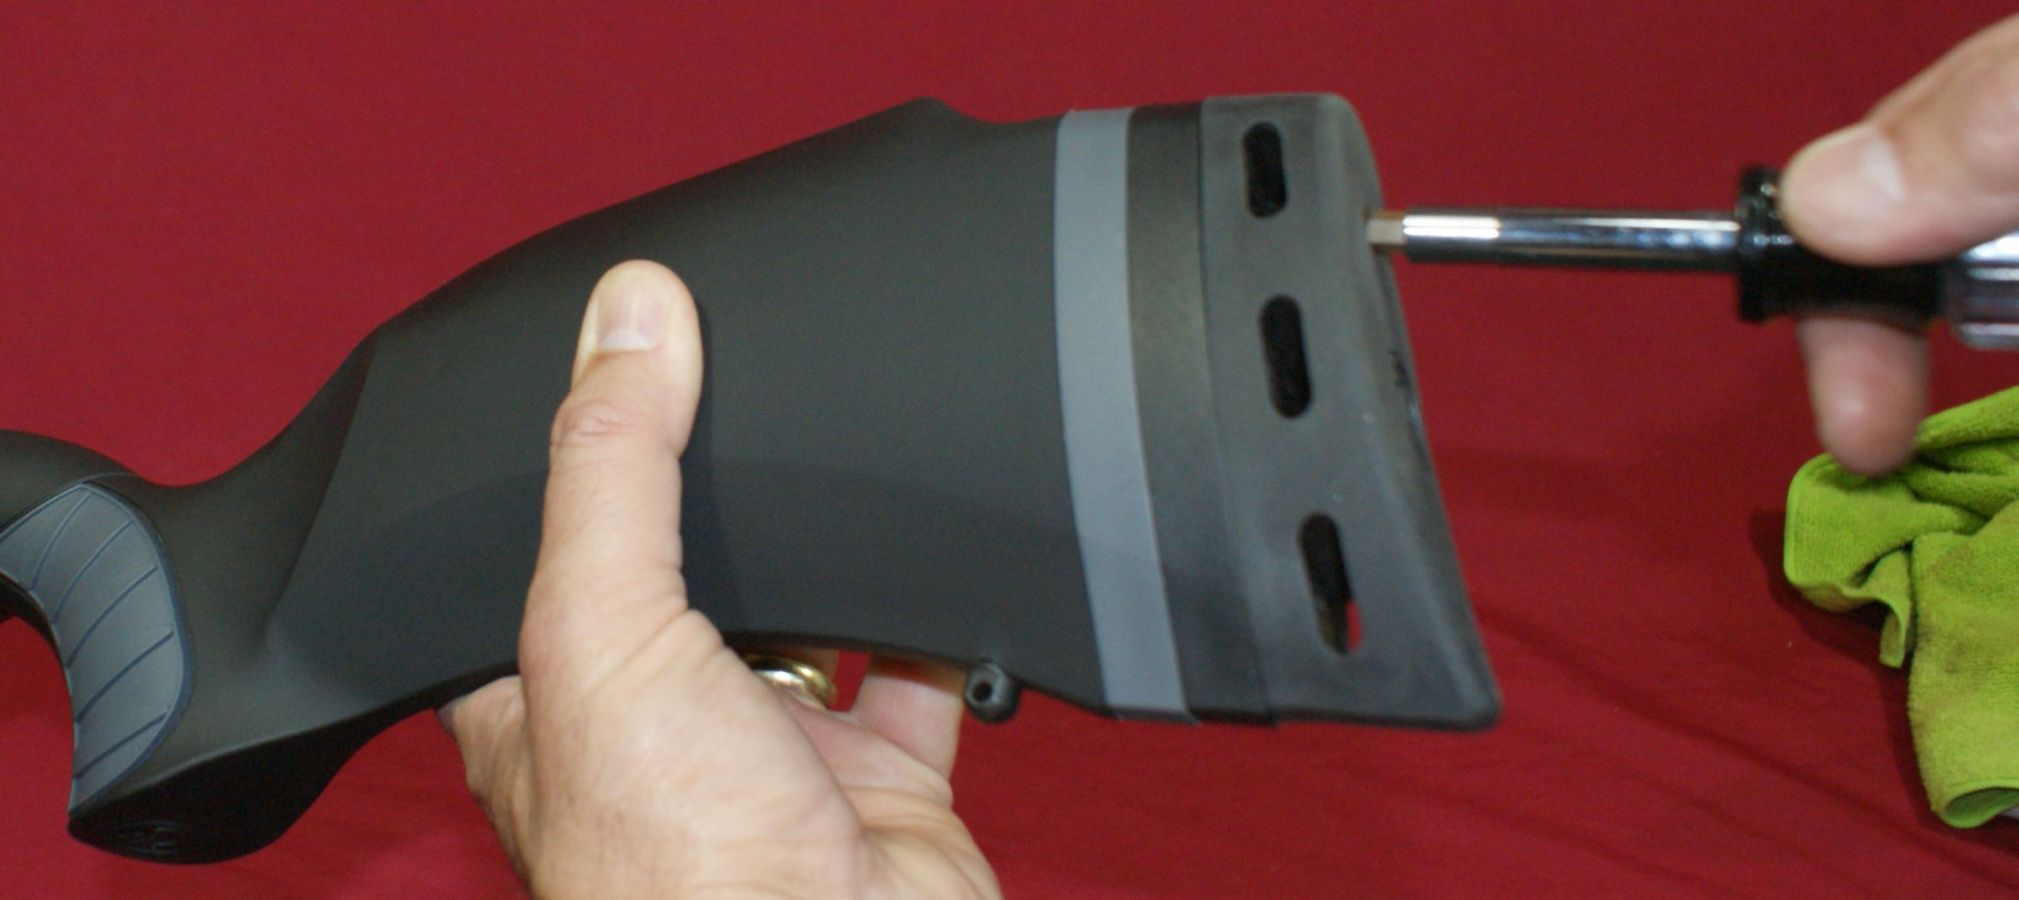
Changing Length of Pull
The Dimension rifle comes with two 1/2" spacers that can be removed to adjust the length of pull to either 1/2" or 1" shorter. To remove these spacers, insert a Phillips head screwdriver in the holes in the buttpad and loosen the two buttpad screws.
Figure 23
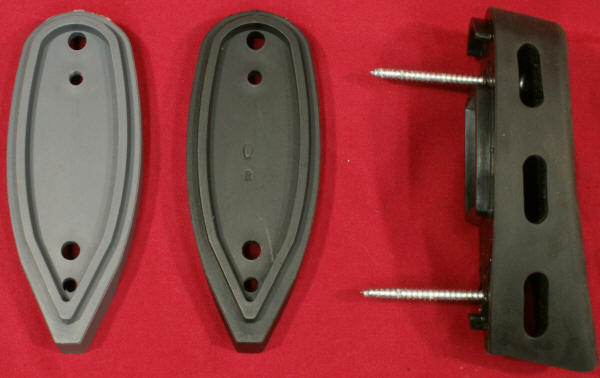
The buttpad will lift off the end of the stock. Inside the buttstock were some foam pieces which are probably there to help dampen noises produced when something hits the buttstock.
Figure 24

Even though the spacers look similar in shape, there is some contour differences that can be seen in the photo above. If you were to shorten your length of pull by 1/2", I believe T/C intended for you to remove the black spacer.
Figure 25
Thoughts
I feel that disassembly and changing out barrels were both very easy tasks. After a couple of sessions range testing the rifle, I feel I was able to remove and reinstall barrels easily in less than 5 minutes which is very reasonable amount of time. The only thing that might need a little tweaking is that the bolt stop lever pin and trigger assembly pins will work themselves out of their holes when the receiver is removed from the stock. This creates a chance you could lose one of the pins when changing barrels. As long as you are aware of this condition it shouldn't be an issue, but a little thread locking compound on the head of the pins might be a good move towards preventing an issue in the future.
For more detailed photos and commentary, make sure you check out the other parts of this review and feel free to leave comments on my Reader's Comments page. The following links are provided to help you see other parts of this review.
- Thompson/Center Dimension Rifle Review: Part 1 - Introduction, Specifications and Summary
- Thompson/Center Dimension Rifle Review: Part 2 - What's in the Box
- Thompson/Center Dimension Rifle Review: Part 3 - External and Operational Features
- Thompson/Center Dimension Rifle Review: Part 4 - Disassembly and Changing Calibers (this page)
- Thompson/Center Dimension Rifle Review: Part 5 - Internal Features
- Thompson/Center Dimension Rifle Review: Part 6 - Range Testing LOC™ Bridge Scope Mount Base
- Thompson/Center Dimension Rifle Review: Part 7 - Range Test
Or
If you would like to be notified about future Gunsumer Reports reviews via Facebook, make sure "You Like This" by clicking the Facebook "Like" button at the bottom or top of this page. If it already says "You Like This" beside the button, clicking it again will uncheck the "Like" status and you will not be notified.
| Share on Facebook | |
© 2010, 2011, 2012, 2013, 2014, 2015, 2016, 2017, 2018, 2019, 2020, 2021, 2022, 2023 & 2024 Gunsumer Reports™, All rights reserved.
FTC Disclosure