|
|
Gunsumer Reports TM Providing Detailed Objective Reviews for Firearms and Firearm Accessories |
Ruger SR9c Review
Part 4 - Disassembly and Internal
Features
February 26, 2011
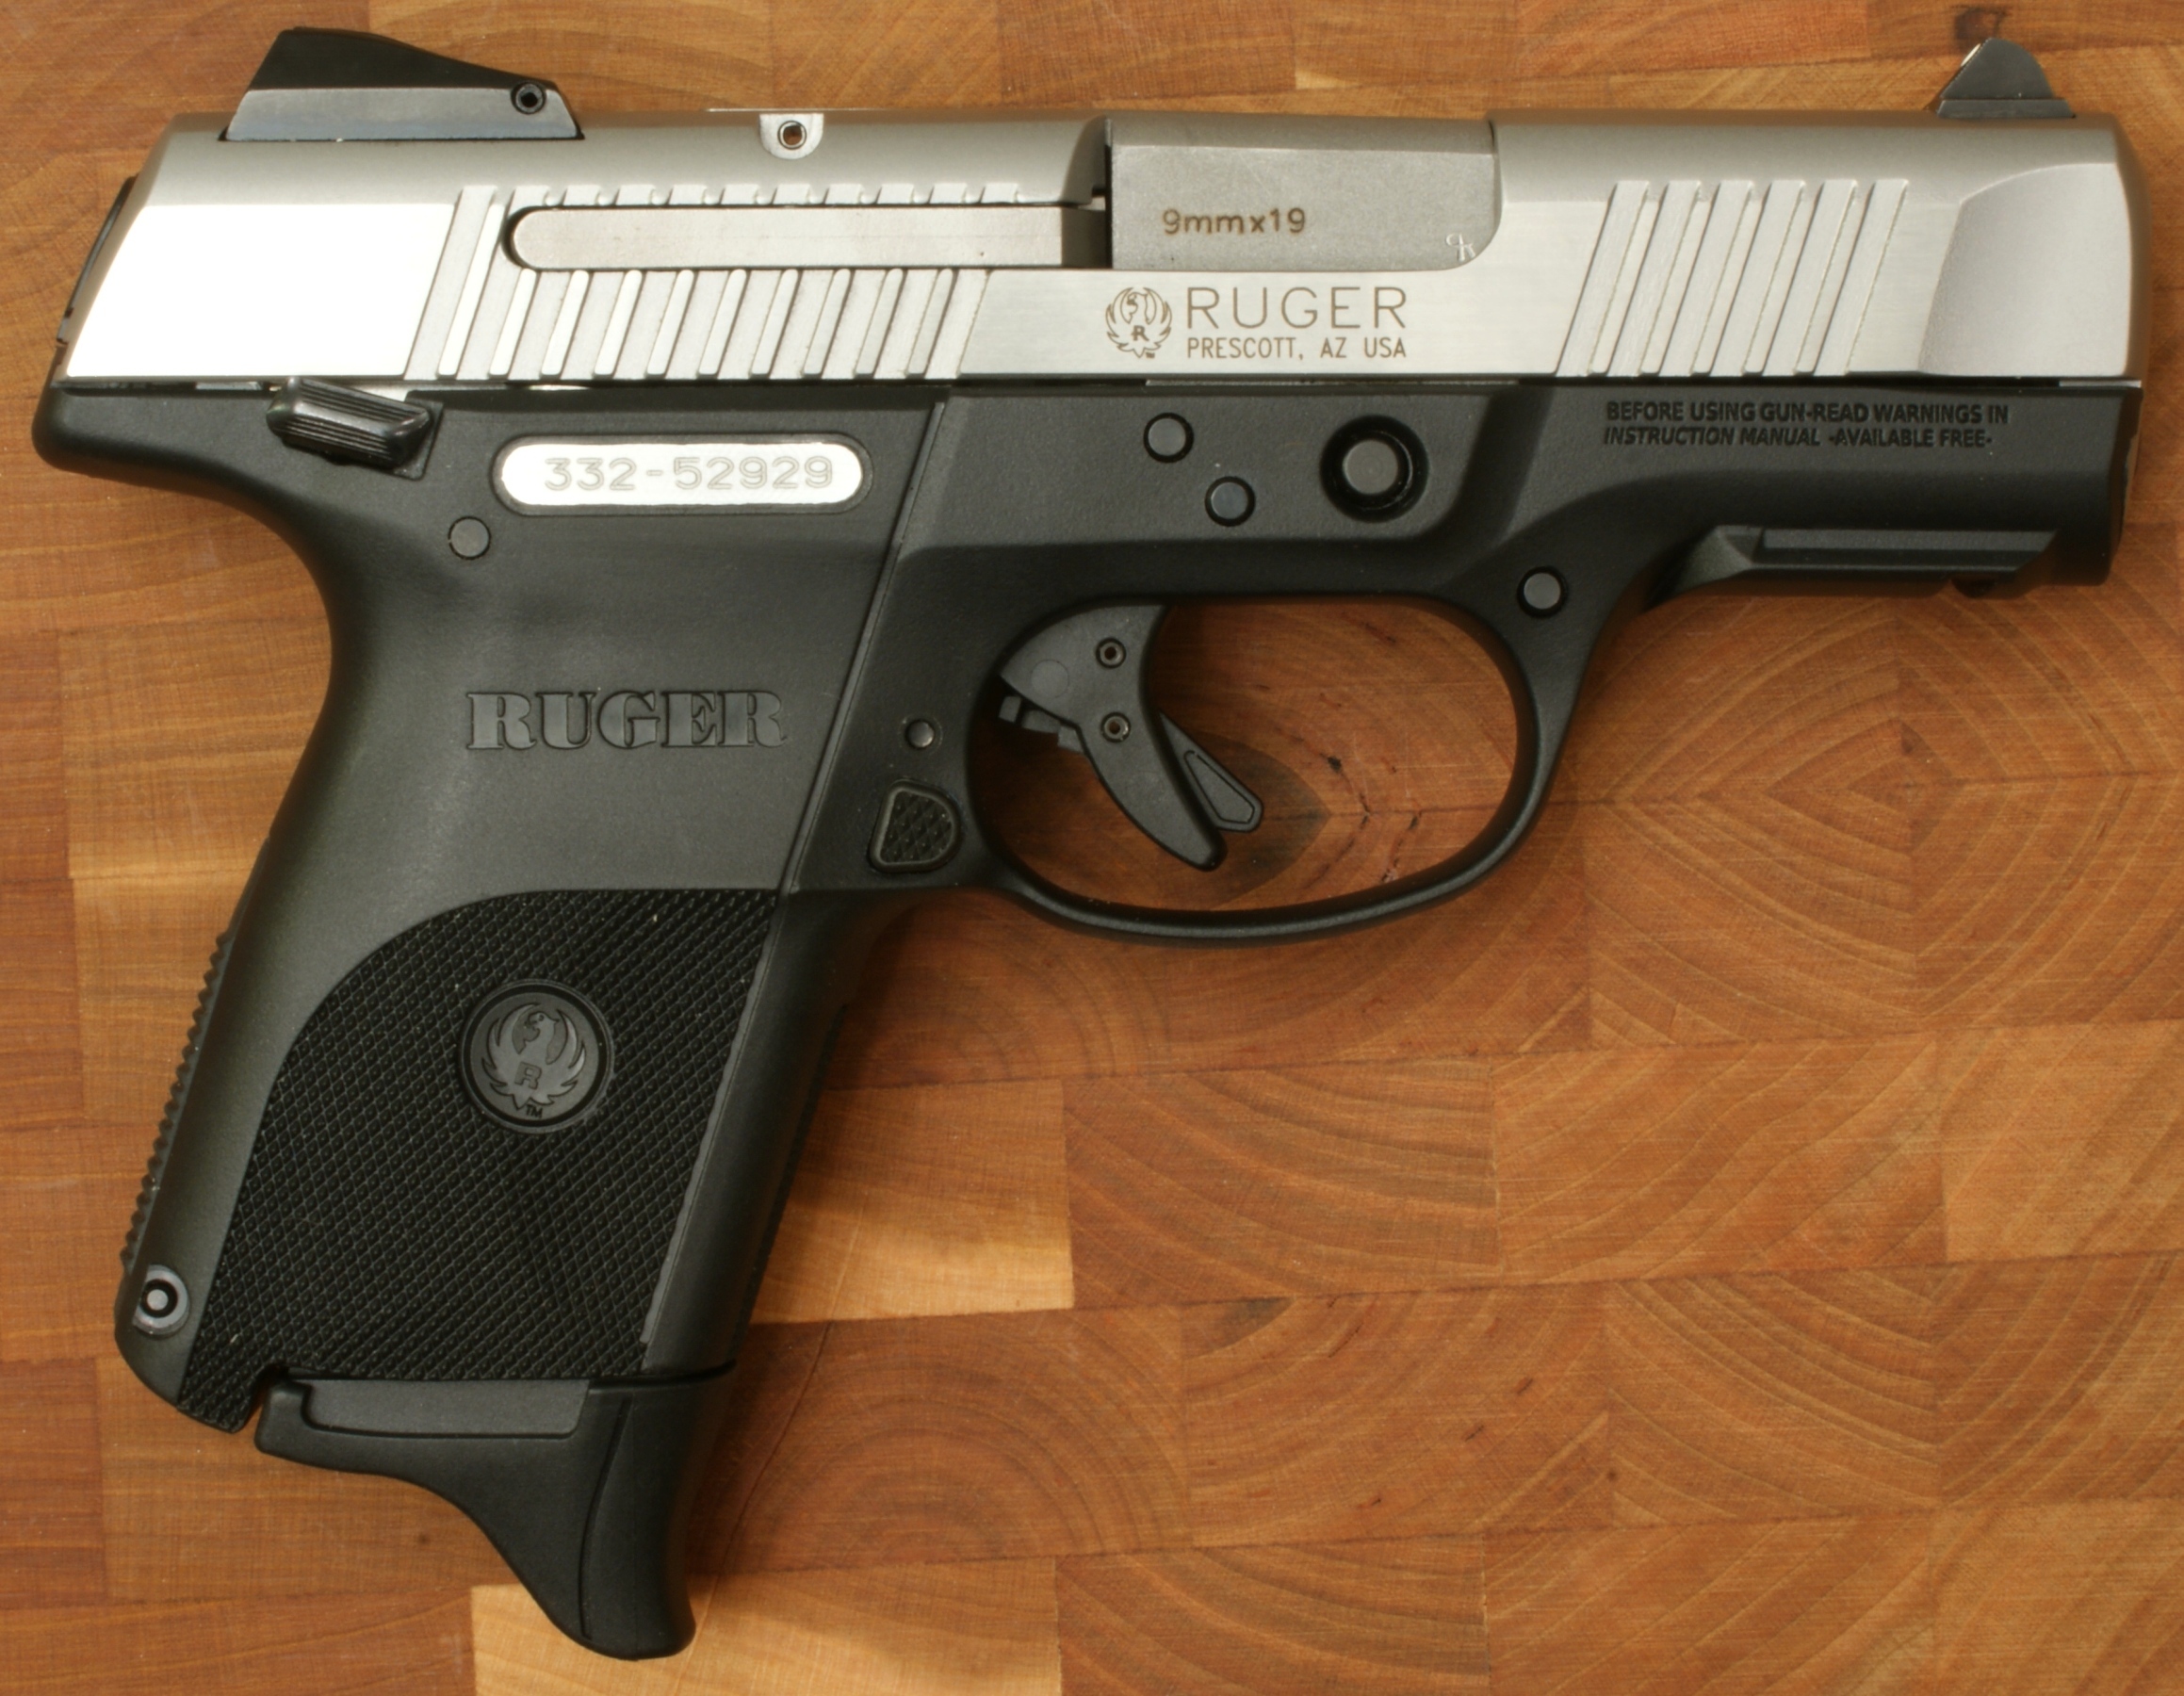
In this part of the review, I'm going to cover disassembly of the Ruger SR9c Pistol and also discuss some of the internal features of this pistol. For disassembly, I'm going to stick with the steps outlined in the Instruction Manual (starting page 23). I think Ruger did a nice job explaining disassembly in the manual so make sure you take a look. Ruger also has videos at their website that cover disassembly, cleaning and reassembly. Go to this link and click on the Ruger SR9c icon (shown below) and you will see a list of videos related to the SR9c.

Step 1 - Remove Magazine
Remove the magazine and make sure the trigger is in the forward position. Most likely, the trigger will always be in the forward position, but make sure just in case.
Step 2 - Lock Slide Back
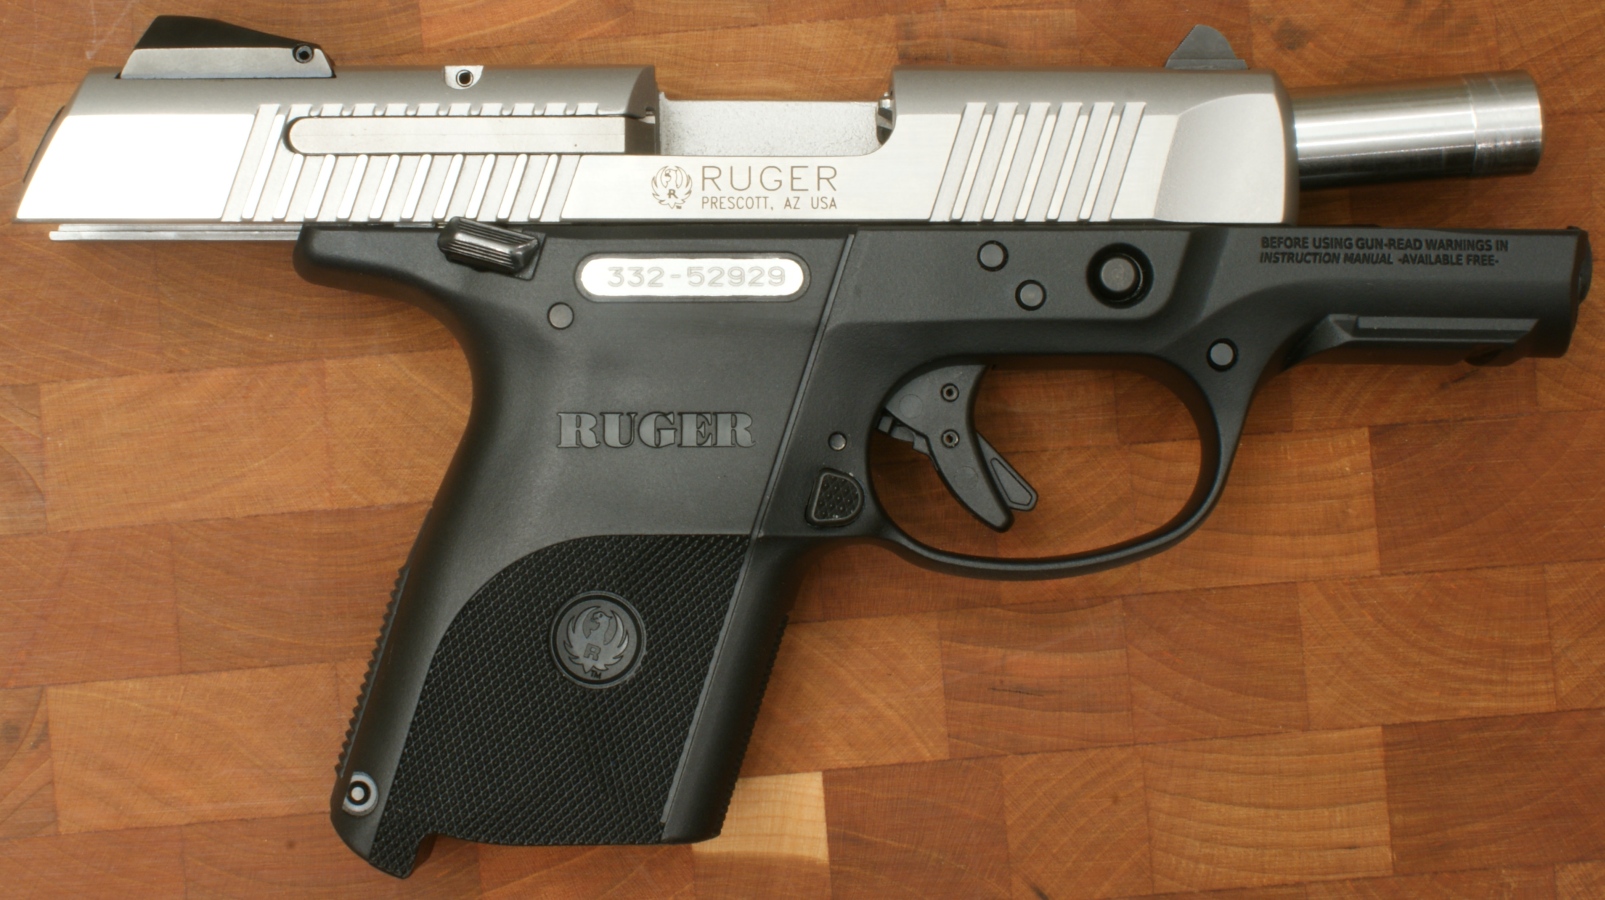
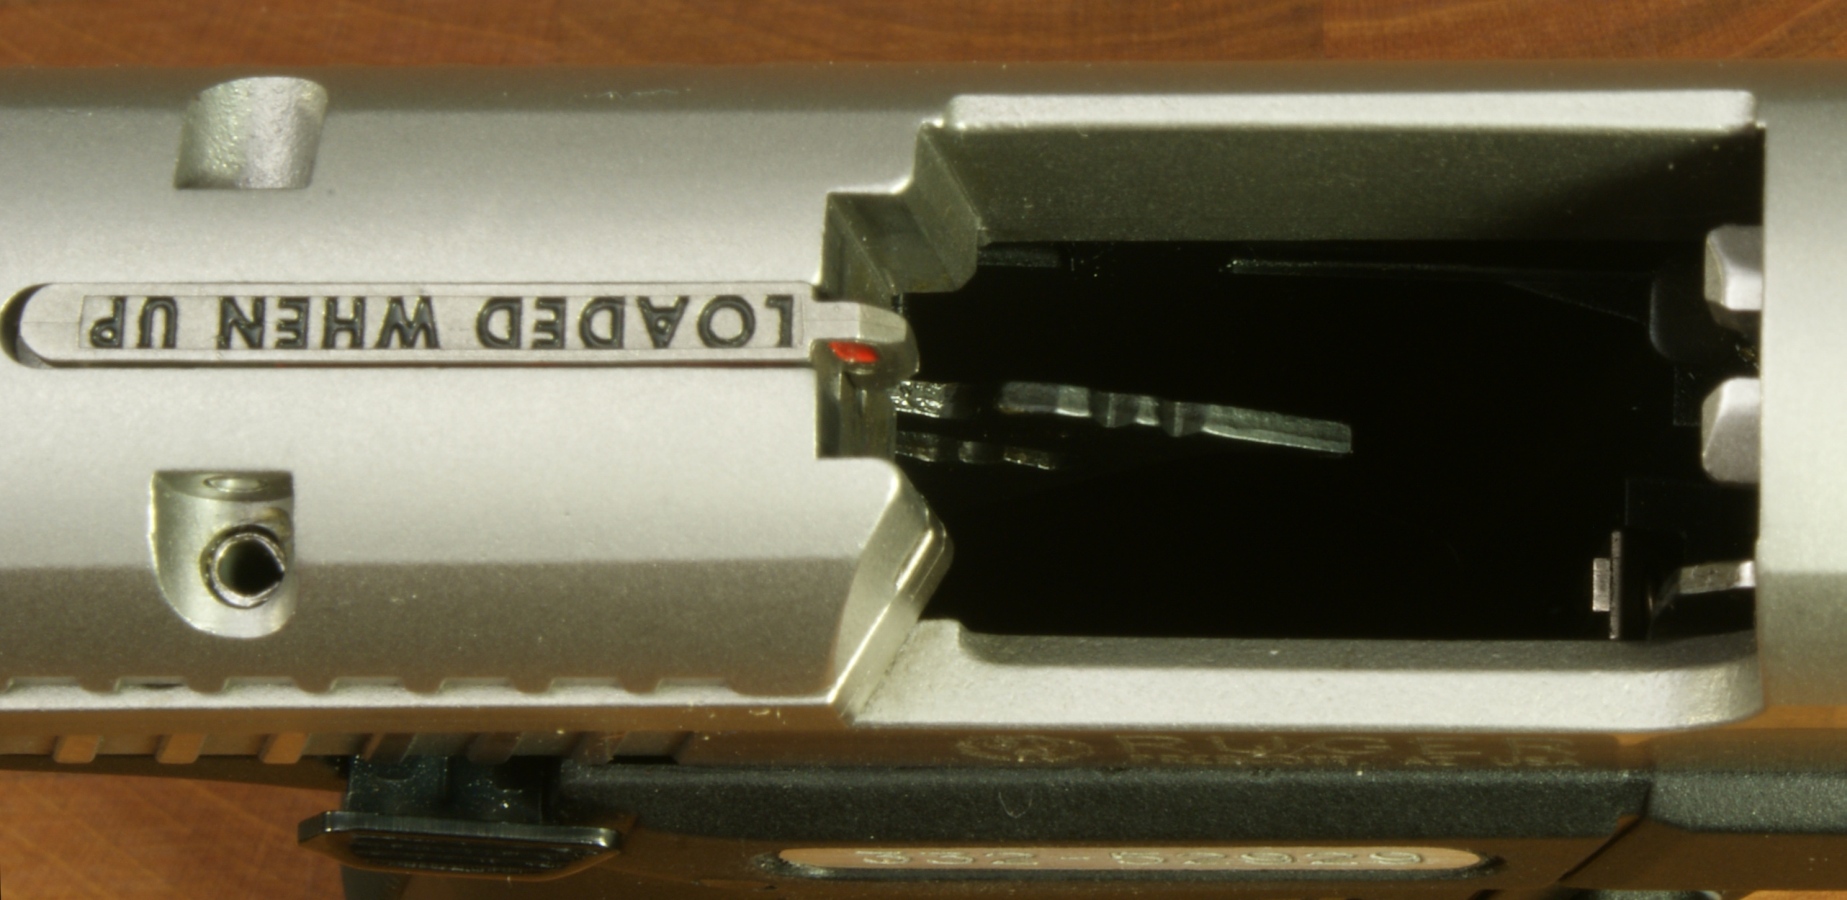
Pull the slide to the rear and lock it in the open position by pressing up on the slide stop. If you have not already done so, this would be a good time to make sure the chamber is empty. The next several photos show the pistol in this configuration. Throughout this review, clicking on a photo will bring up a higher resolution photo showing greater detail.
Figure 1
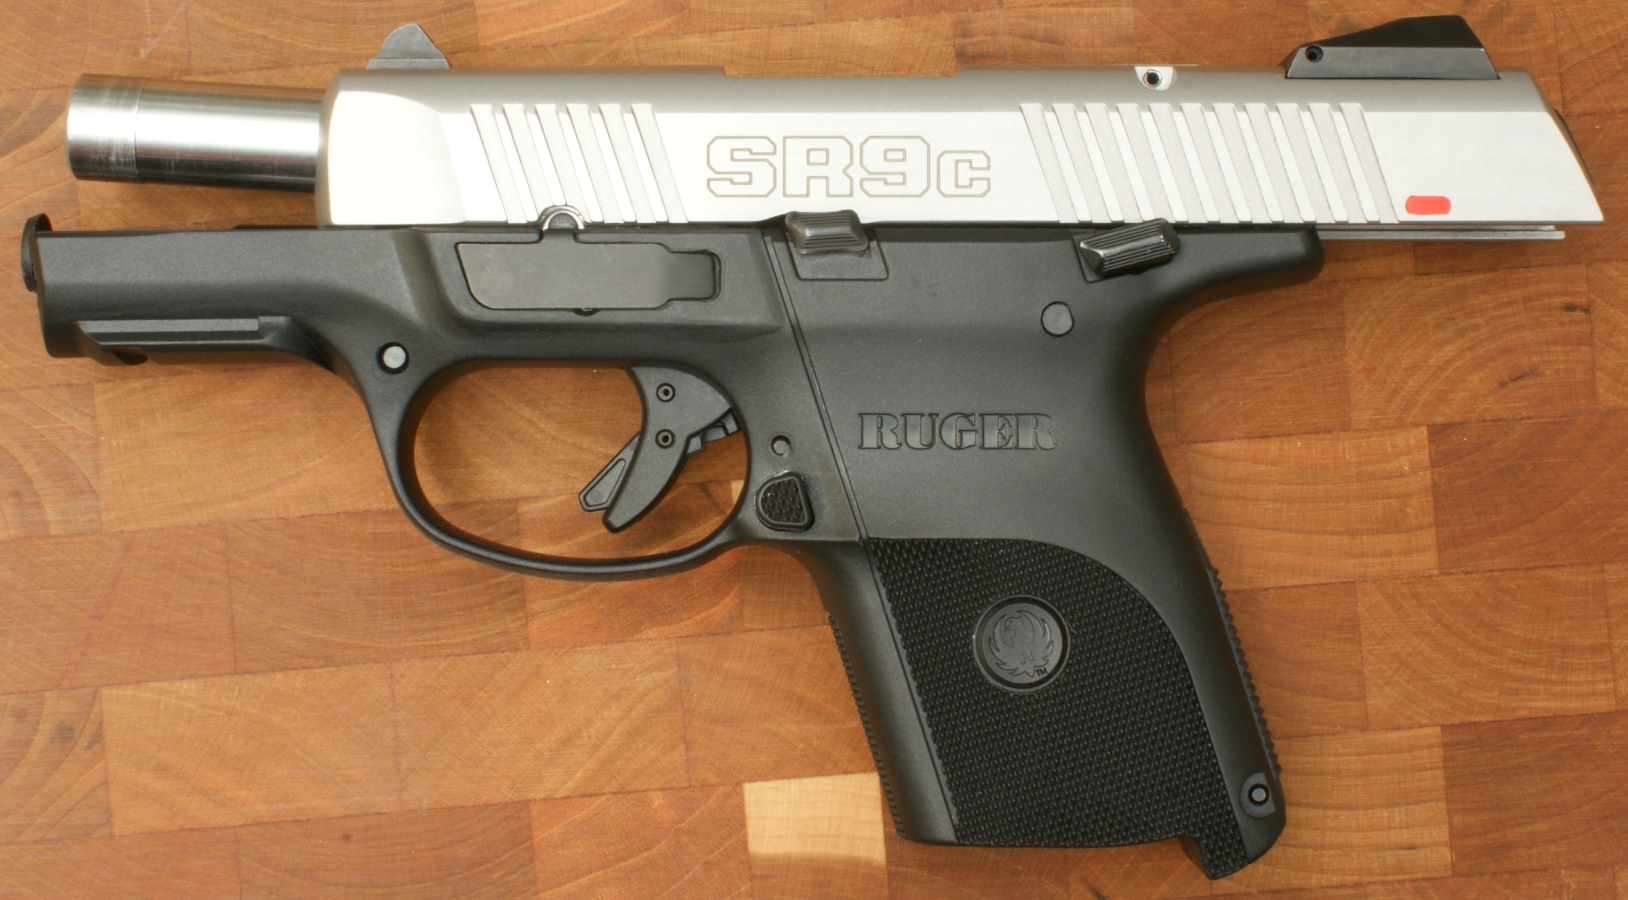
Figure 2

Figure 3

Figure 4
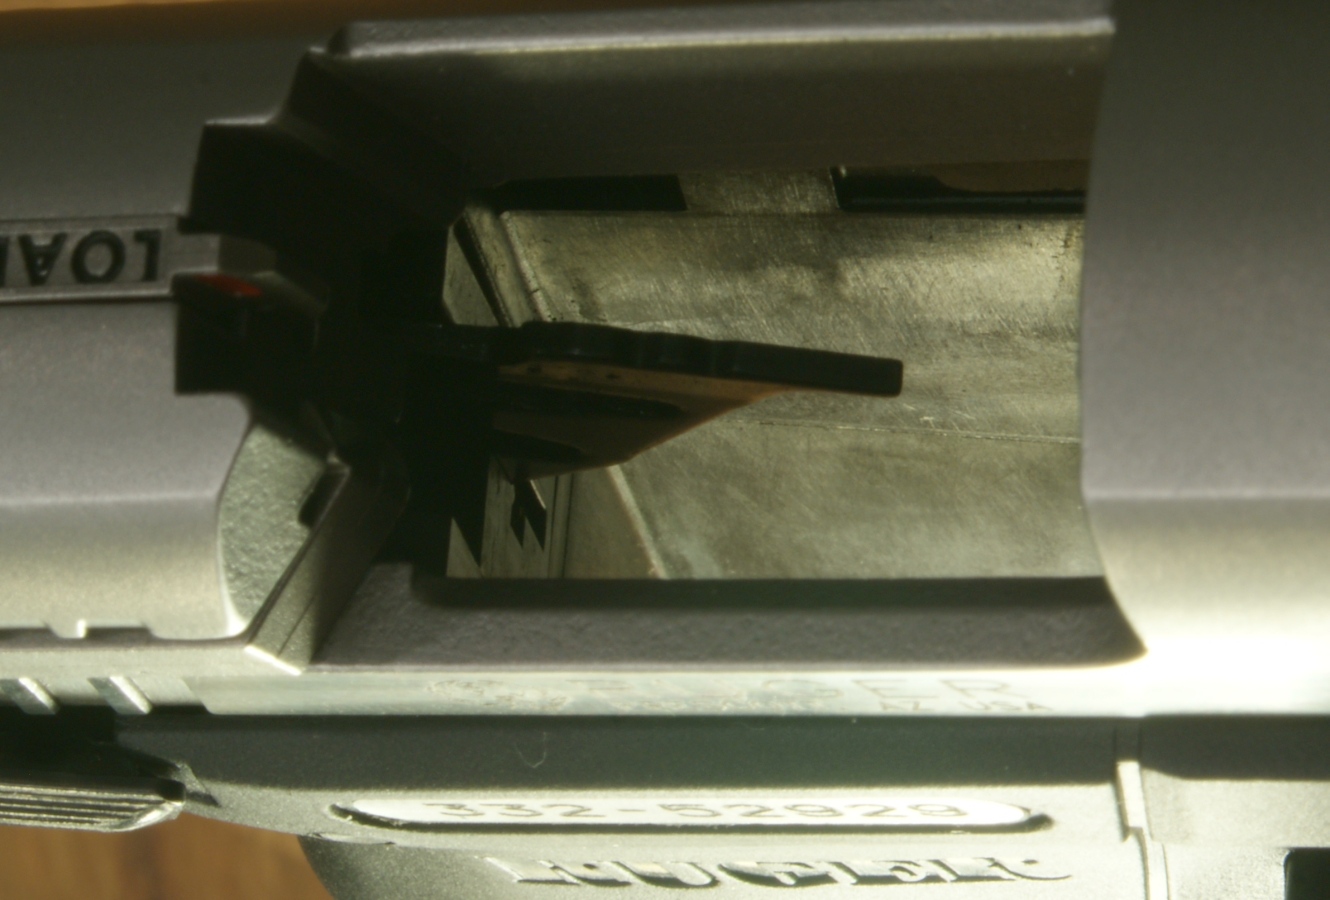
Step 3 - Press Ejector Down
While keeping pressure up on the slide stop to prevent the slide from moving forward, press the ejector down until it stops. The next two photos show the ejector in the up and down positions.
Figure 5

Figure 6
During reassembly, the ejector is pushed up by inserting a magazine. You can also lift the ejector up with your finger.
Figure 7
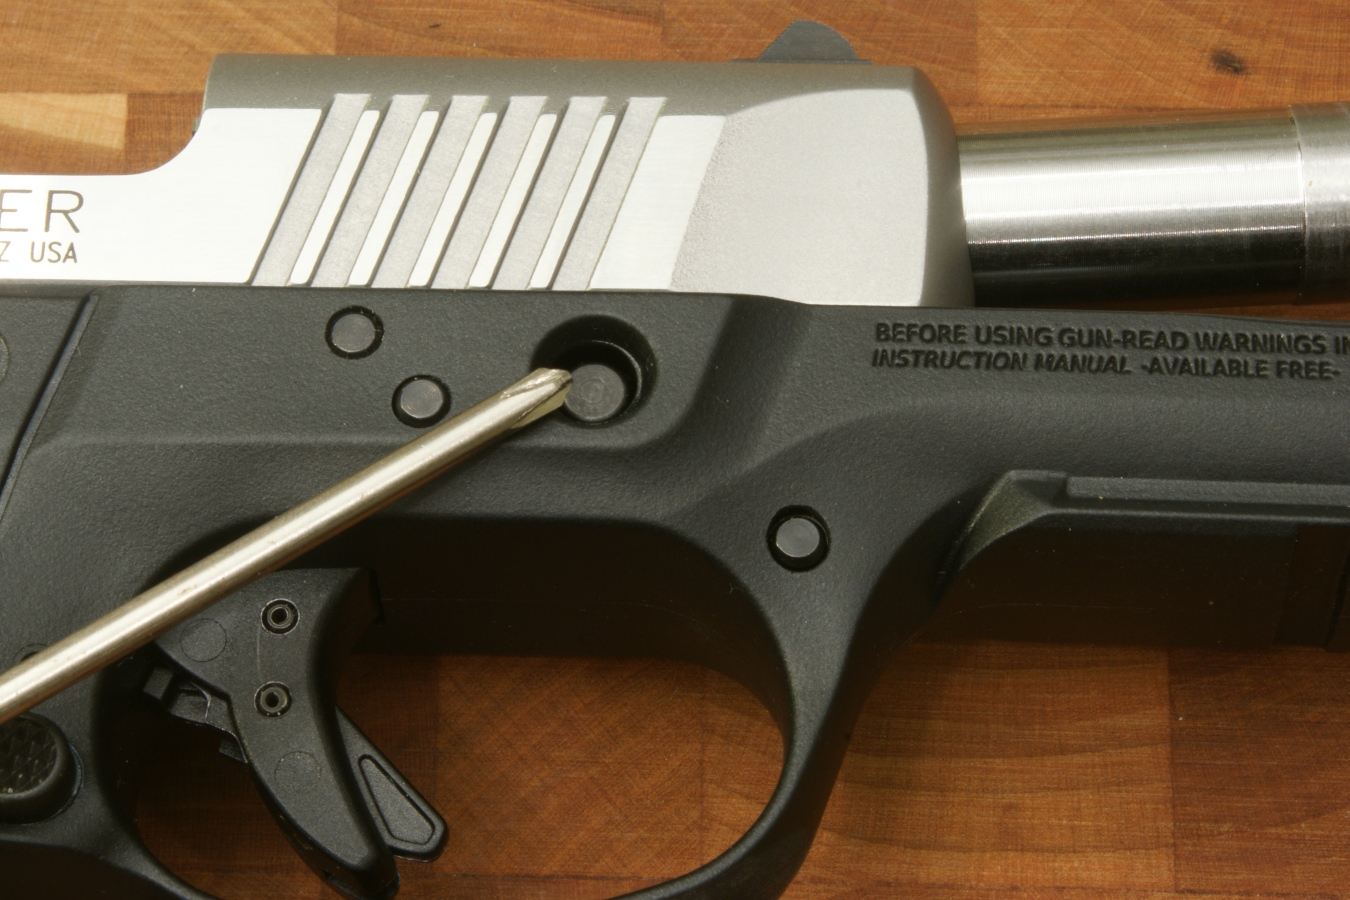
Step 4 - Remove Takedown Pin
On the right side of the pistol, press in on the end of the takedown pin. I was not able to press it in with my fingers and used the end of a small screwdriver.
Figure 8
Once the head of the pin is exposed on the left side of the pistol, you can pull the pin from the pistol. I was able to easily pull the takedown pin out of the pistol.
Figure 9

This photo shows the pistol with the pin removed.
Figure 10
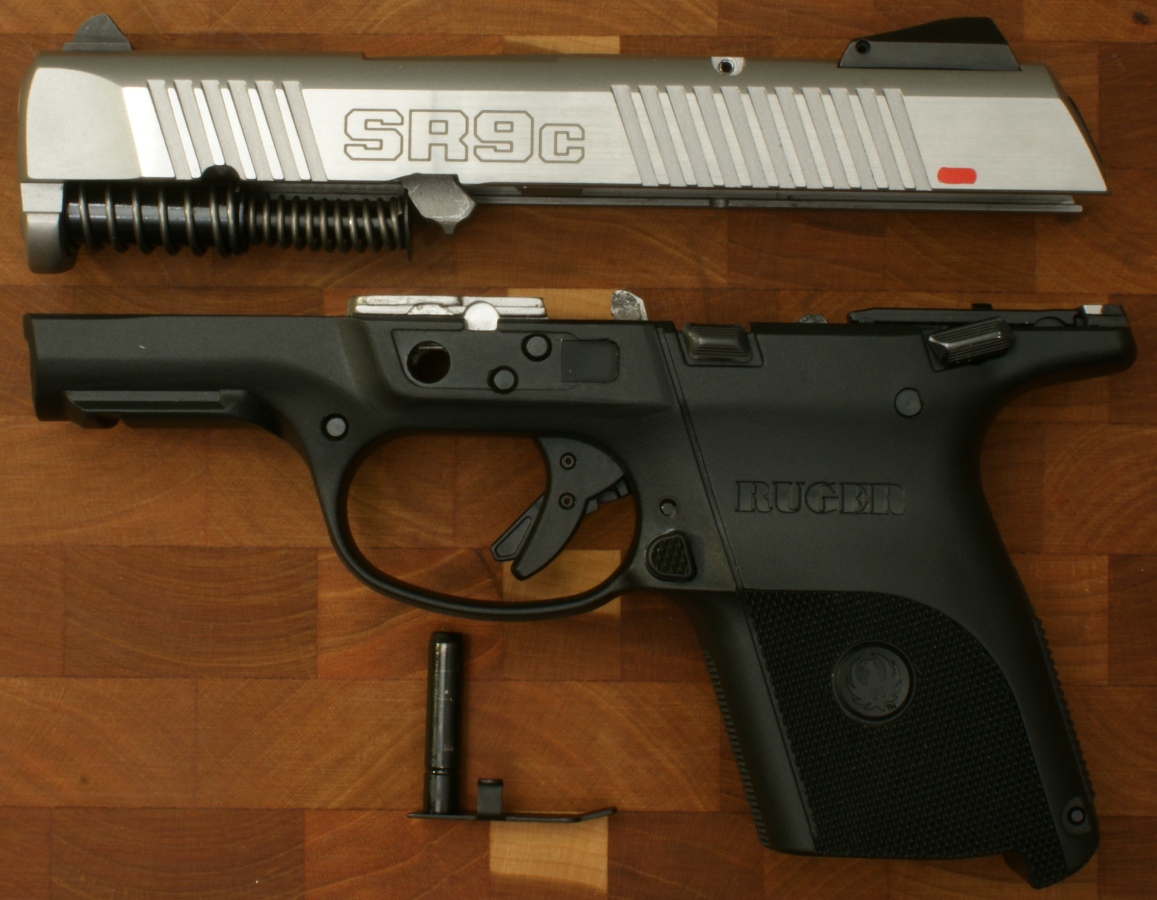
Step 5 - Remove Slide Assembly
Holding the slide in the rear position, push down on the slide stop and ease the slide forward until there is no more spring force.
Figure 11
You can then push the slide forward and remove the slide assembly from the frame.
Figure 12
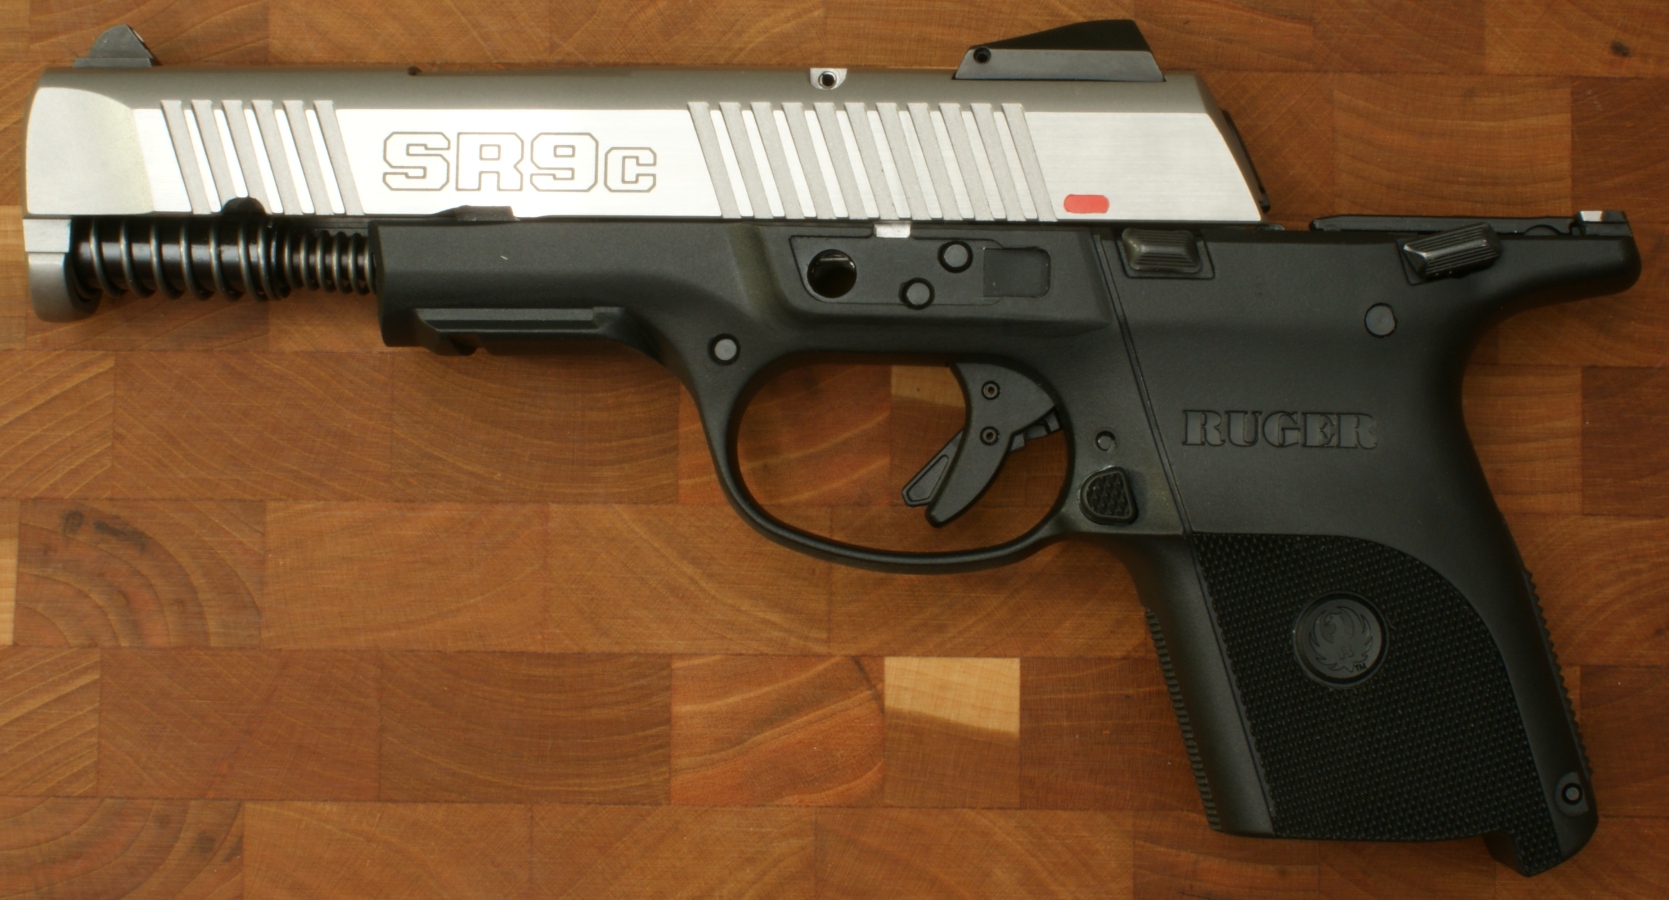
Figure 13
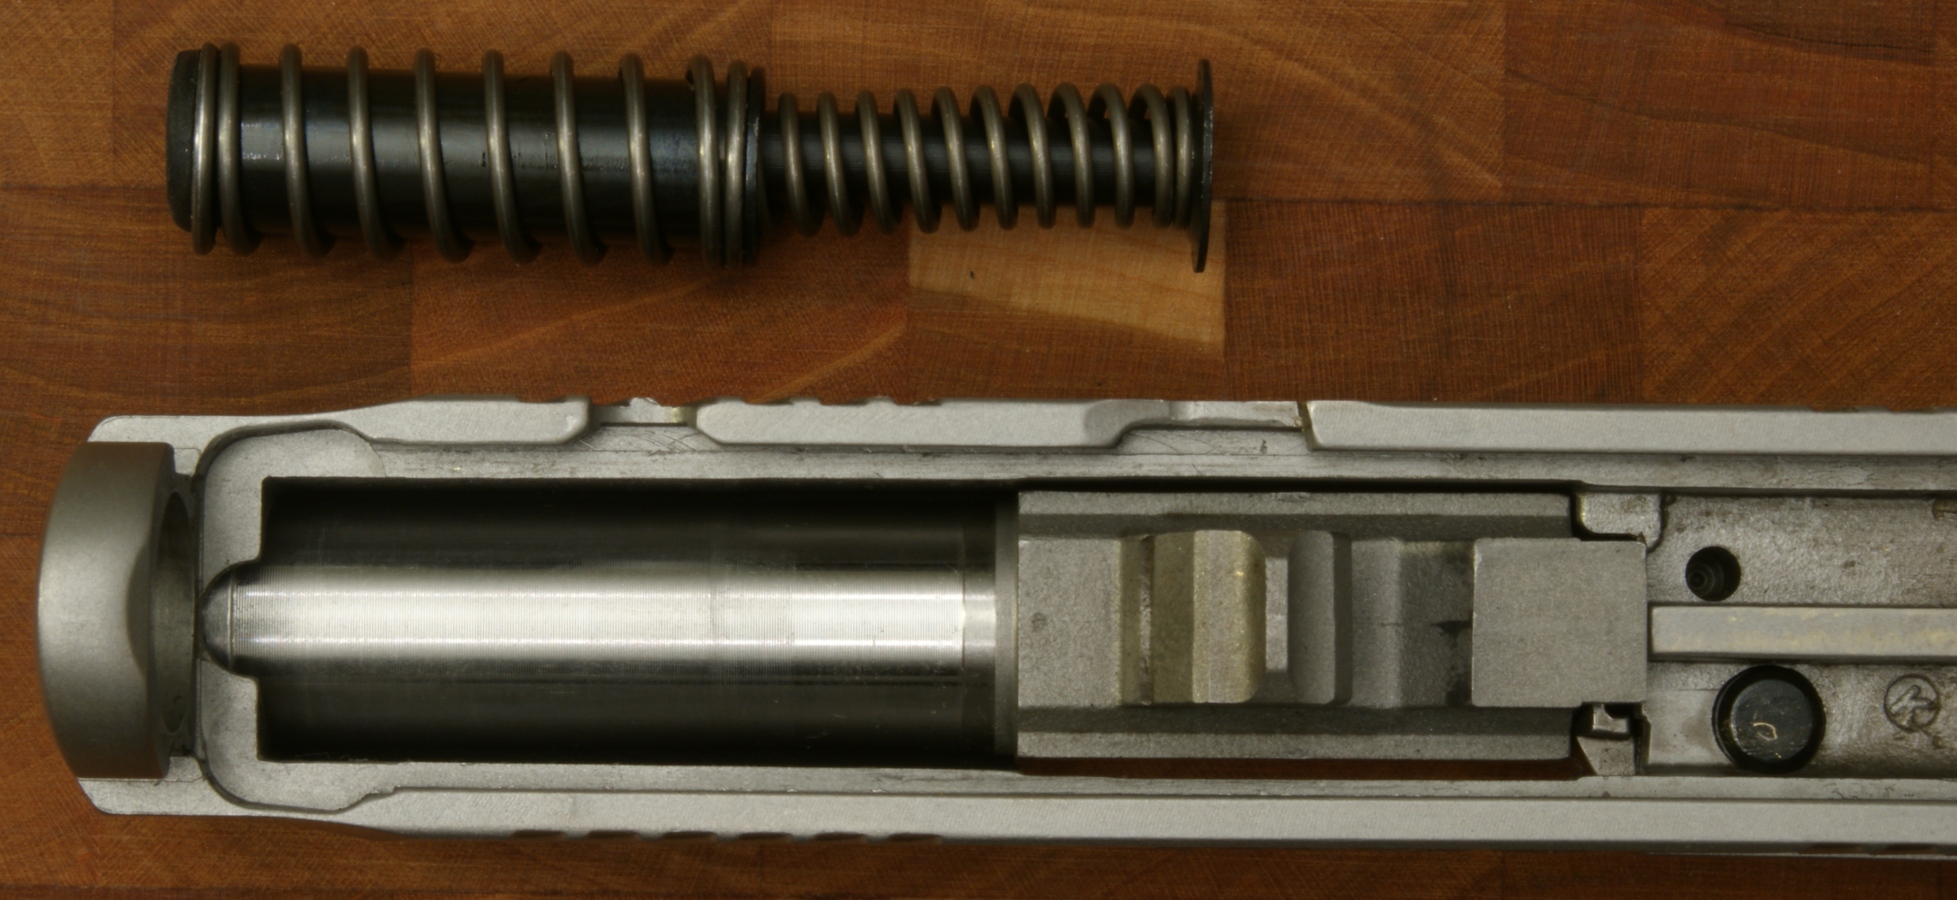
Step 6 - Remove Recoil Spring
With the slide assembly held upside down, slightly depress the recoil spring to disengage it from its seat against the barrel. The recoil spring can then be lifted forward and up to remove it from the slide.
Figure 14
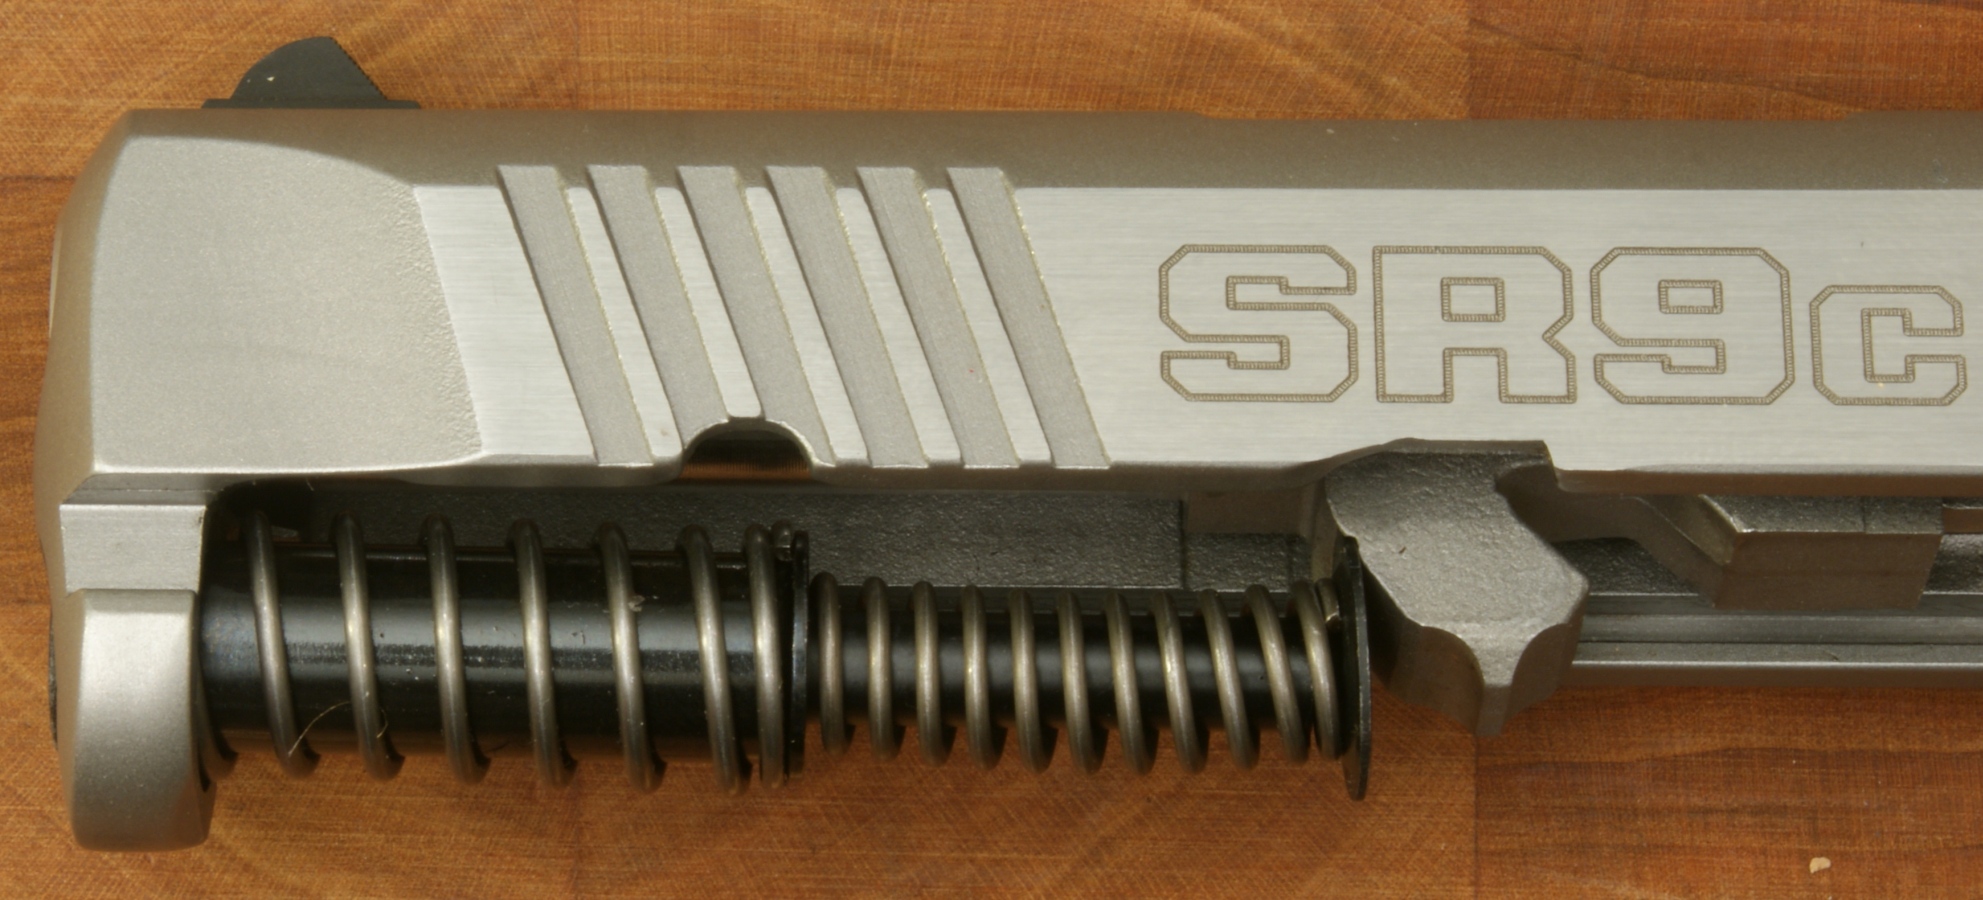
Figure 15
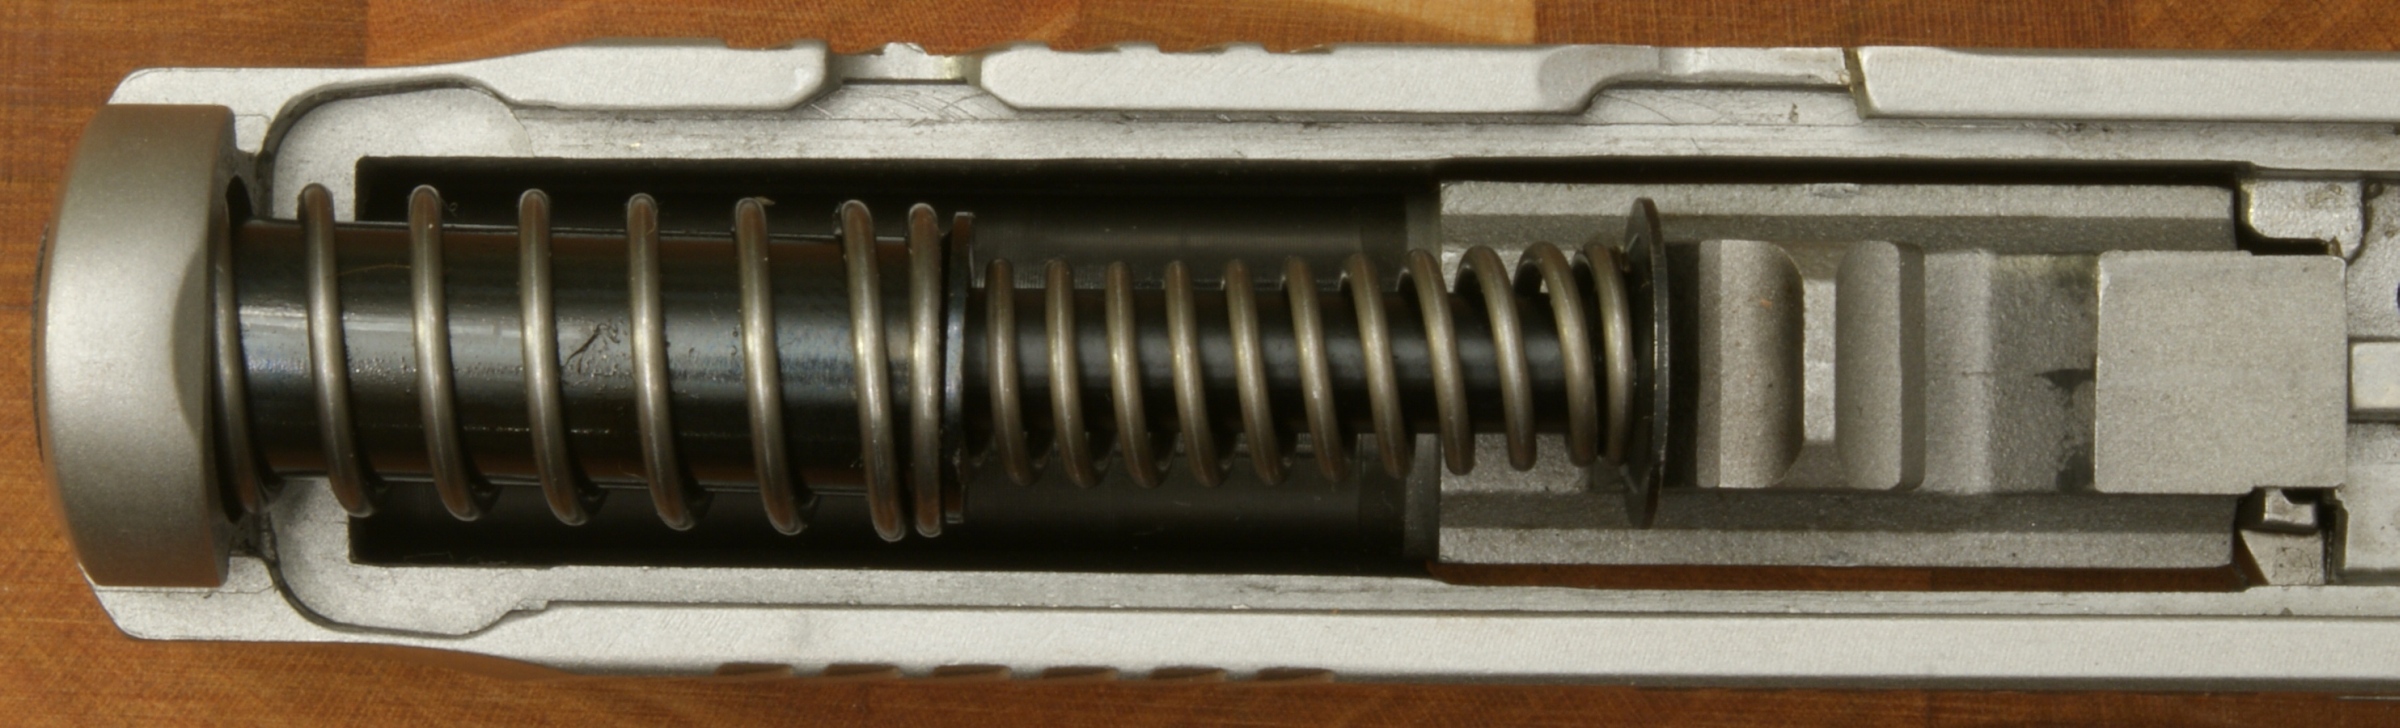
The Ruger SR9c utilizes a dual recoil spring.
Figure 16
Step 7 - Remove Barrel
Move the barrel slightly forward to disengage it form the slide and lift the barrel up and out of the slide.
Figure 17
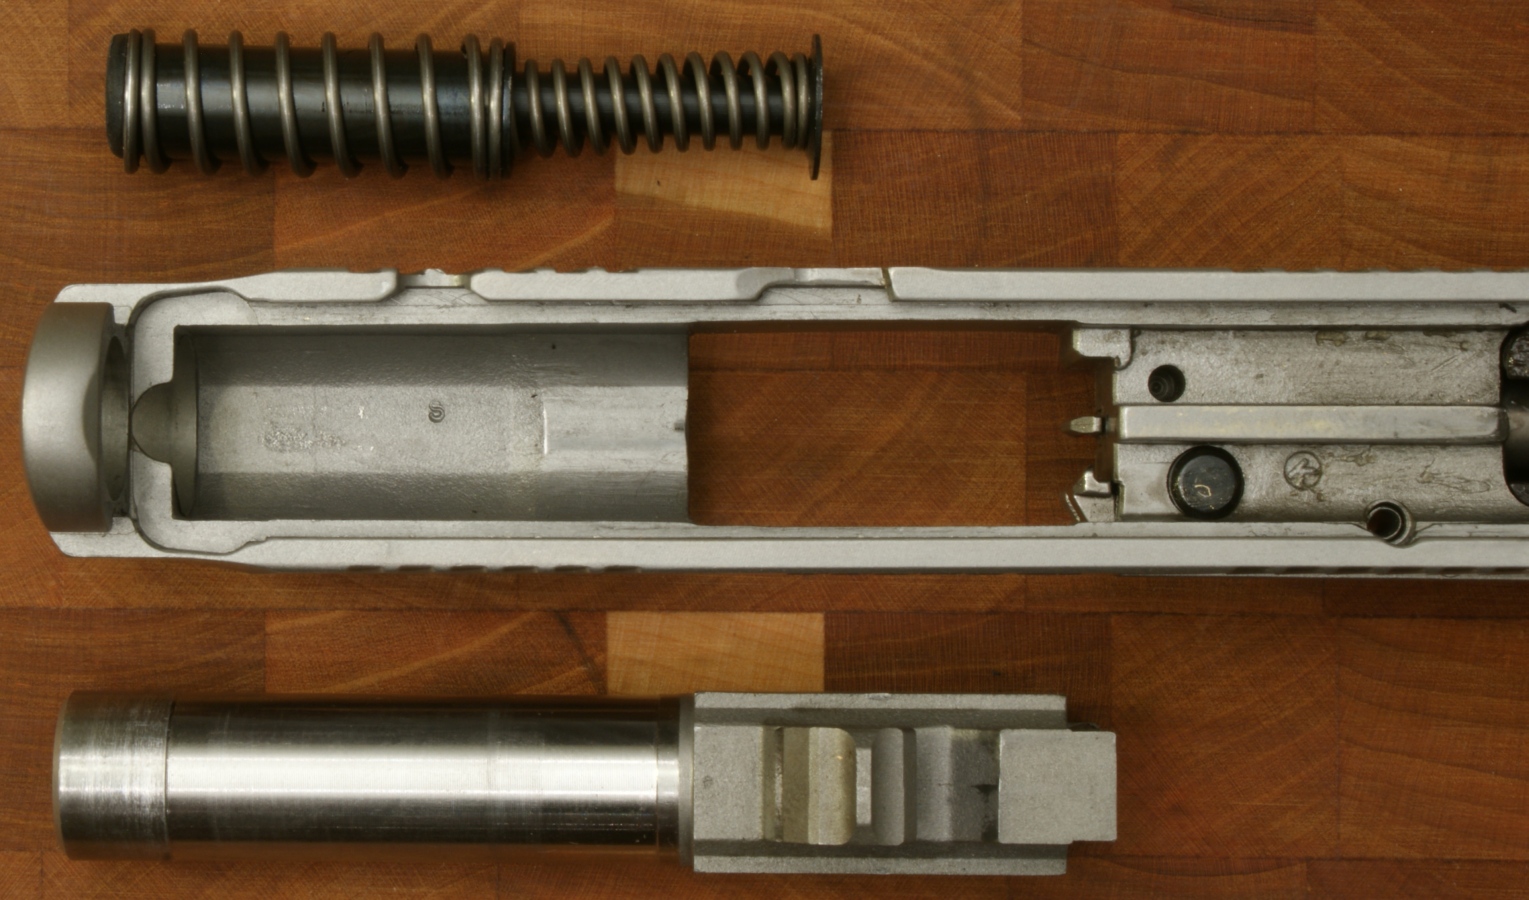
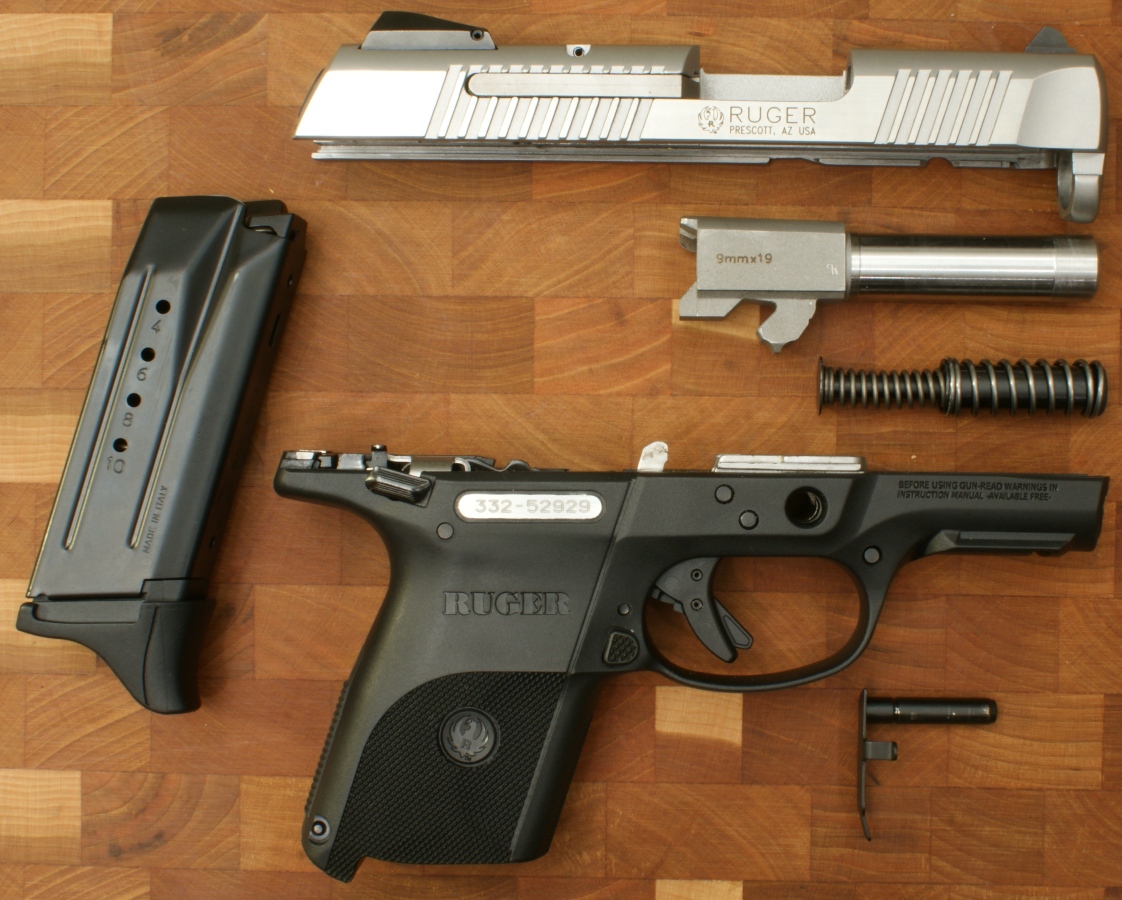
SR9c Fully Field Stripped
The photo below shows the Ruger SR9c fully field stripped. According to Ruger's Instruction Manual, "there is normally no need for further disassembly of the pistol."
Figure 18
Additional Disassembly
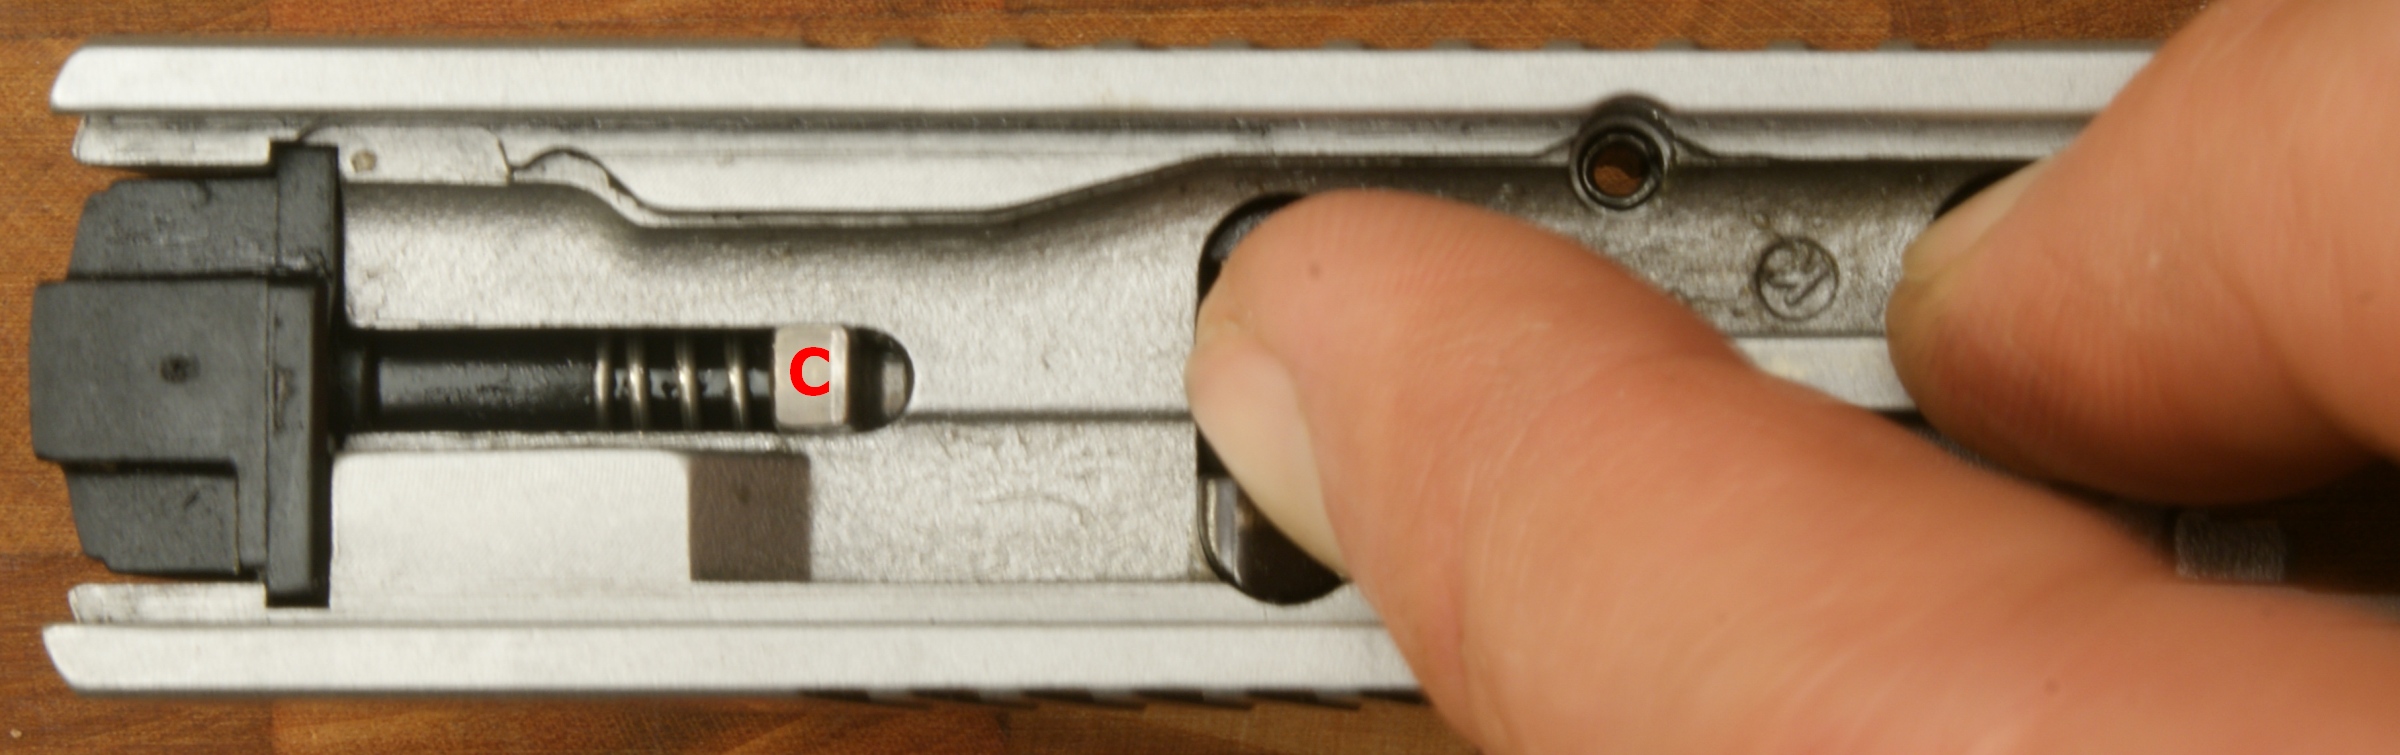
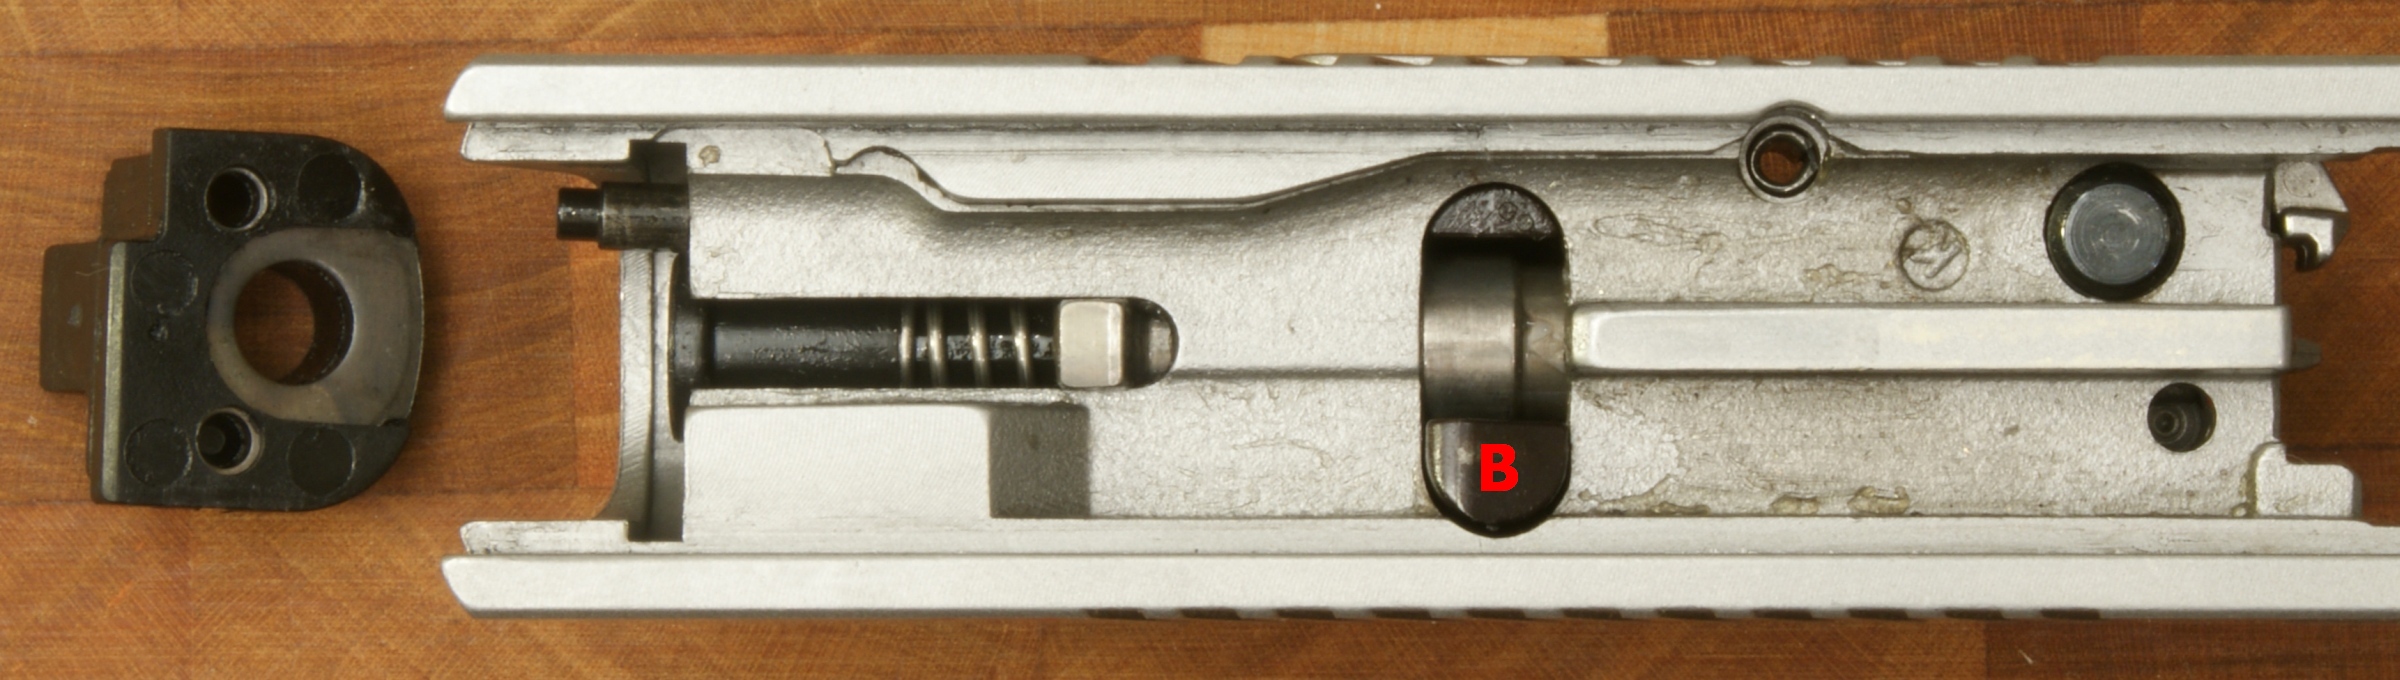
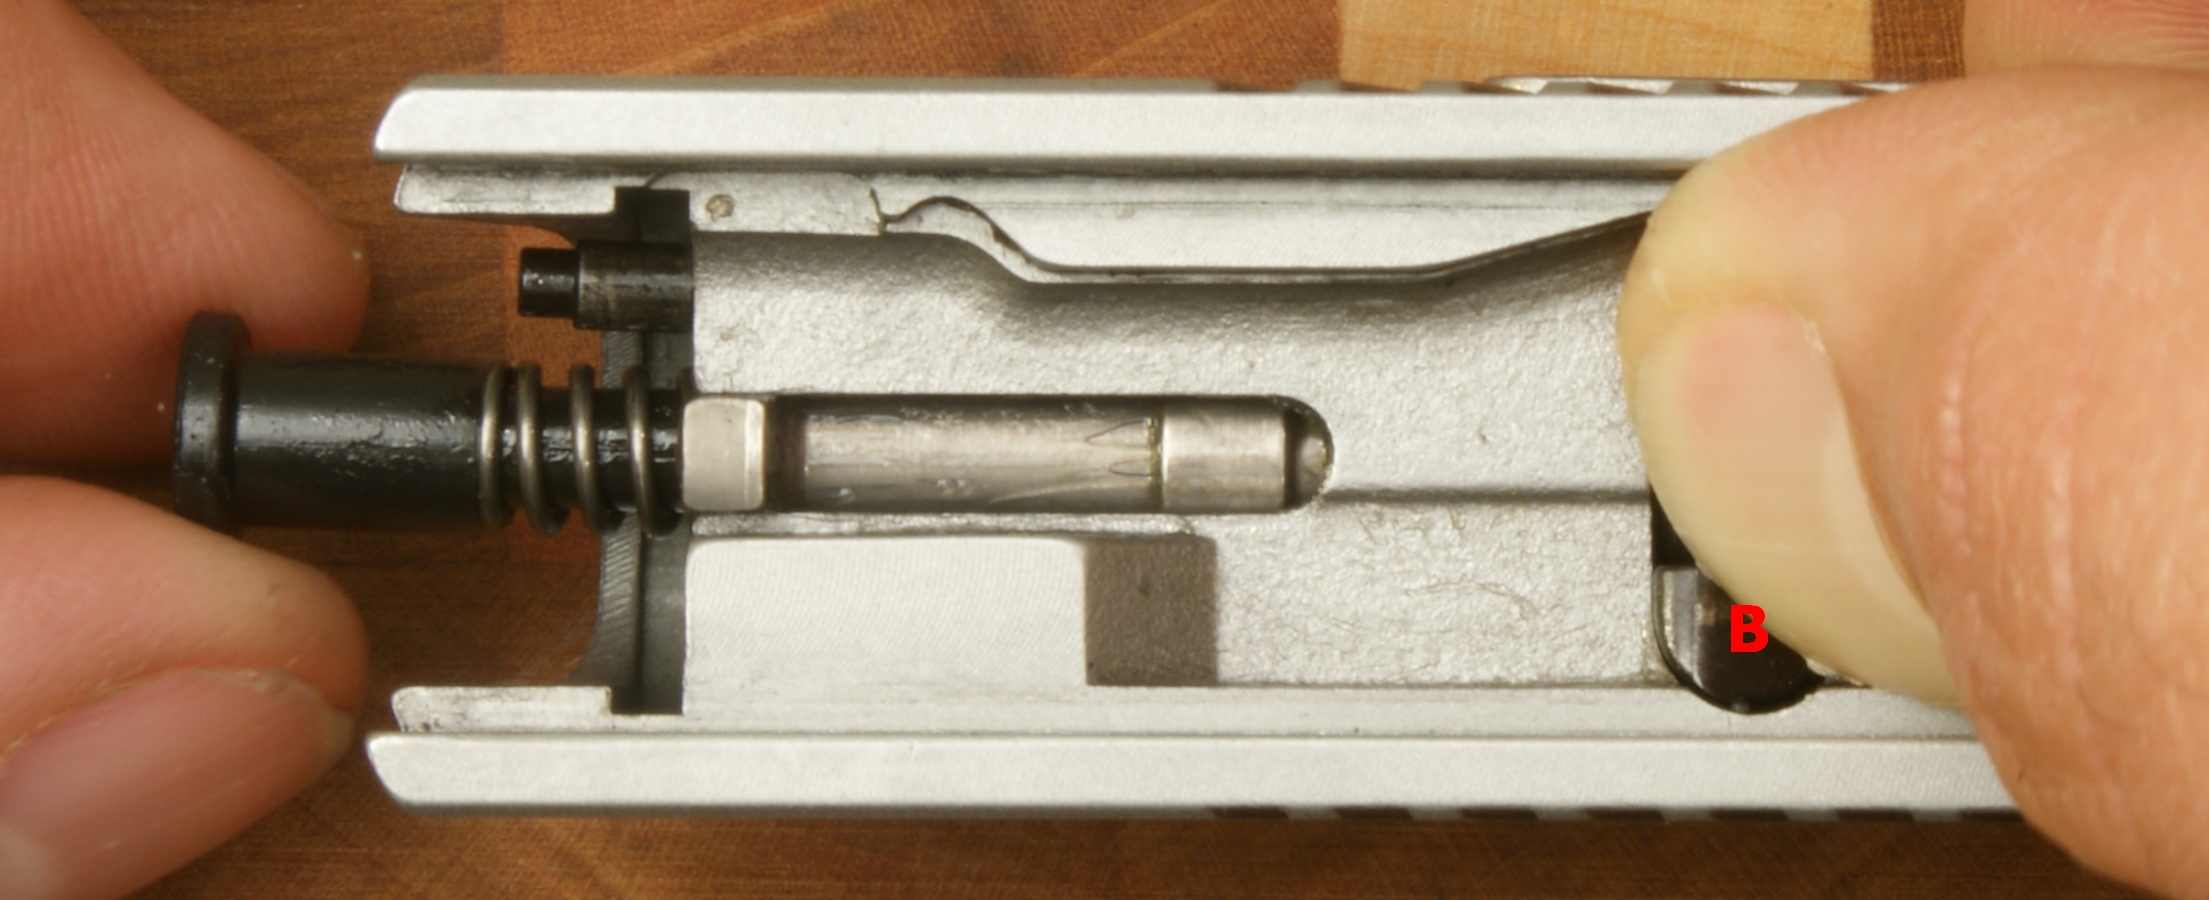
If at some point you would like to thoroughly clean your striker assembly and striker cavity in your slide, you can remove the striker assembly by following these steps. There are three key components you should be aware of when doing this; A - Striker Blocker, B - Magazine Disconnect, and C - Striker Key.
Figure 19
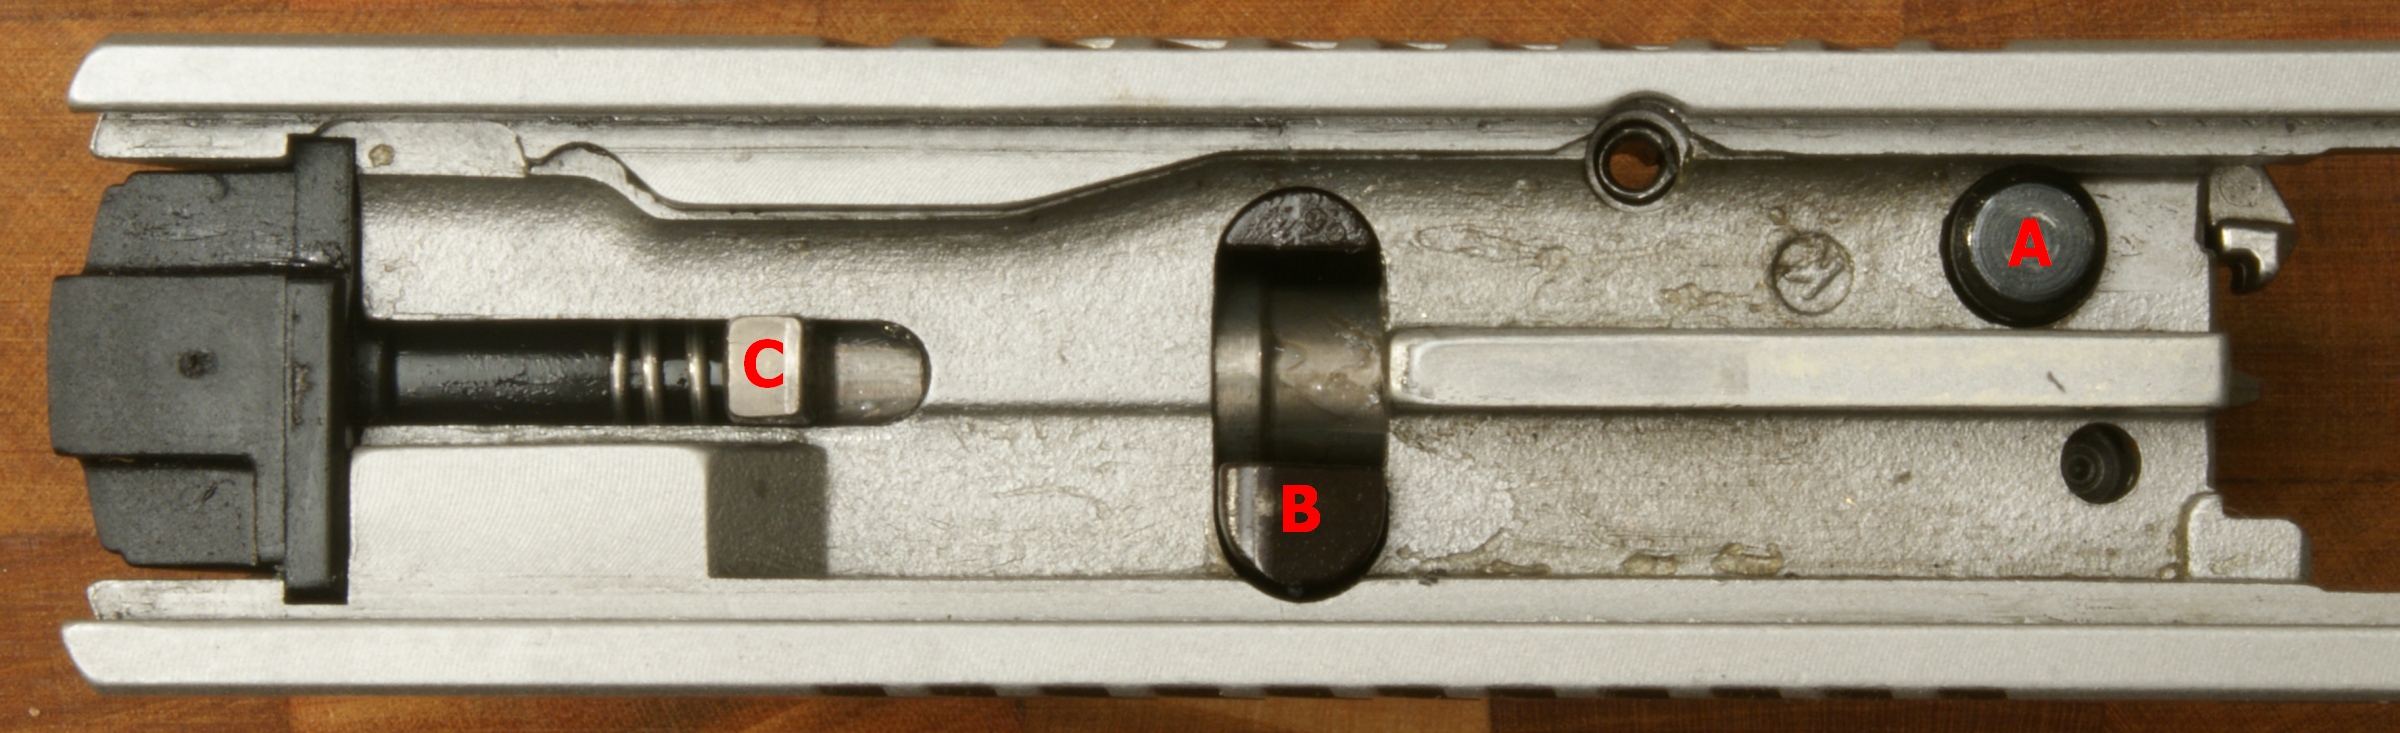
First you press the Striker Blocker (A) and Magazine Disconnect (B) at the same time to allow the Striker Key (C) to move forward to the position shown below.
Figure 20
Now you can remove the Striker Cover (black nylon piece at the end of the slide). Using a small punch, press down on the Striker Cover Plunger and push the Striker Cover out of the slots at the rear of the slide.
Figure 21
Figure 22
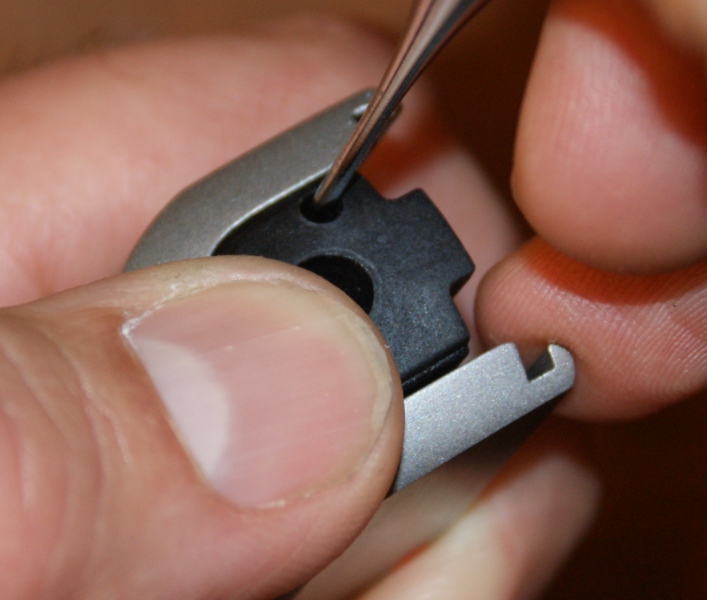
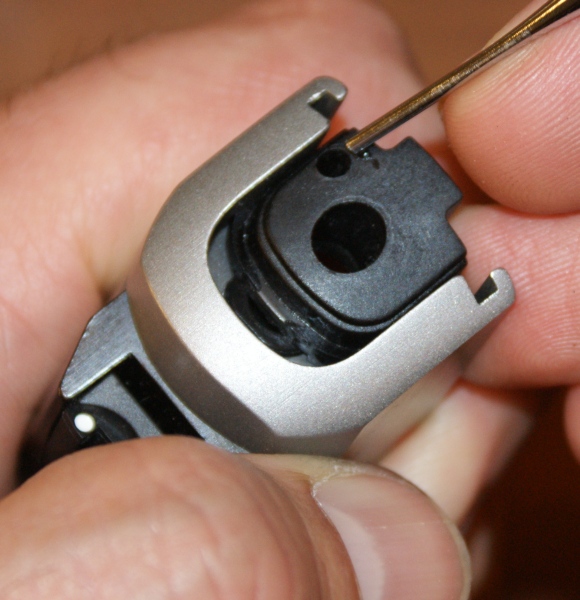
Figure 23
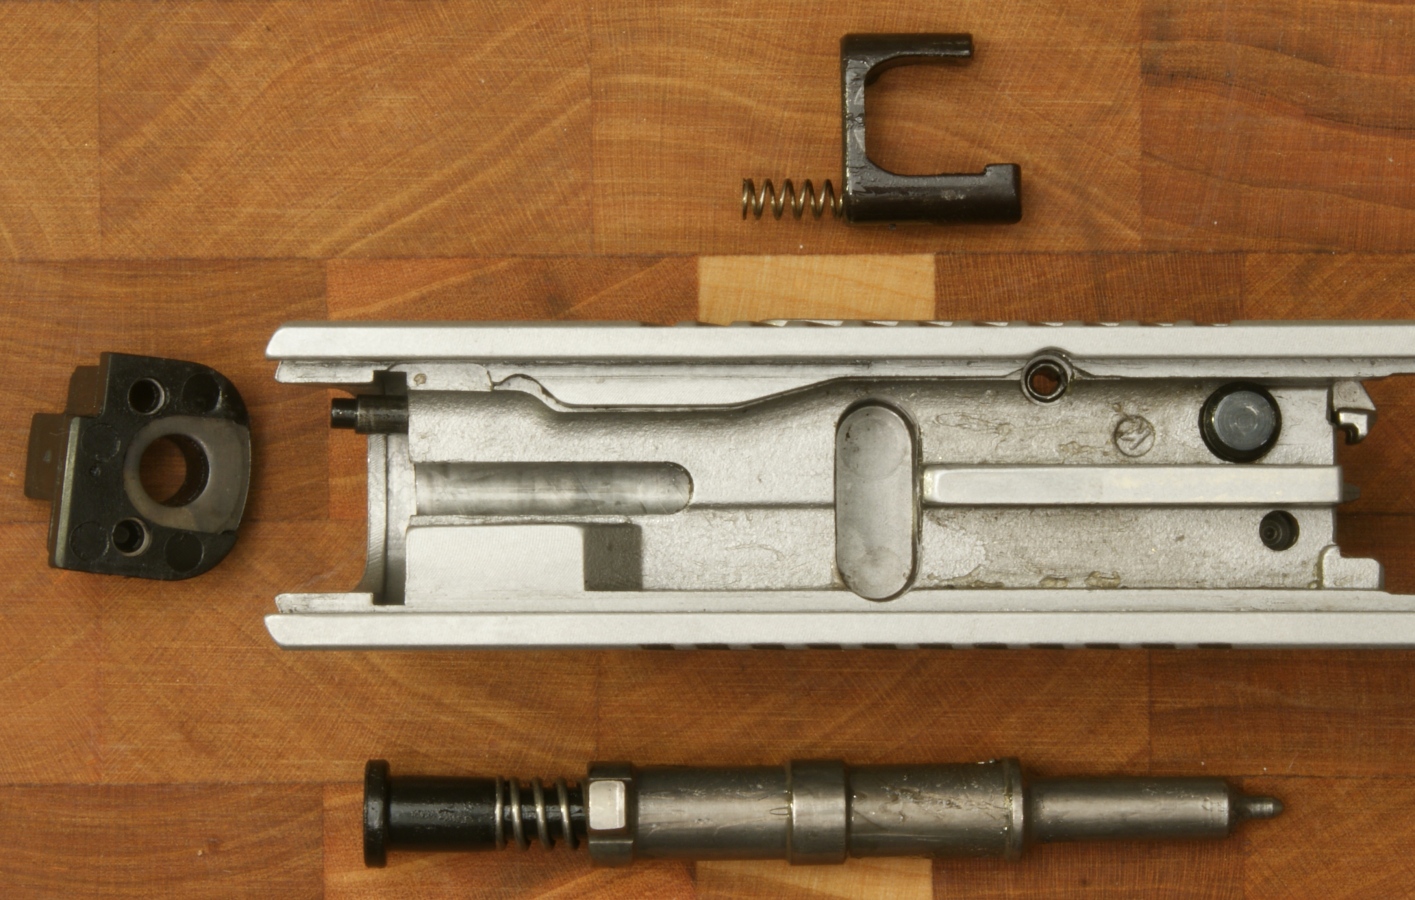
Next, press down on the Magazine Disconnect (B) and you can remove the Striker Assembly from the slide. As a note, the right lip of the magazine presses the Magazine Disconnect up when the slide is forward. If a magazine is not installed, the disconnect is down which blocks the travel of the striker and will not let the striker impact the cartridge, even though the pistol seems to fire when you pull the trigger.
Figure 24
You can then remove the Magazine Disconnect by pulling it out of the slot in the slide. These pieces are shown below.
Figure 25
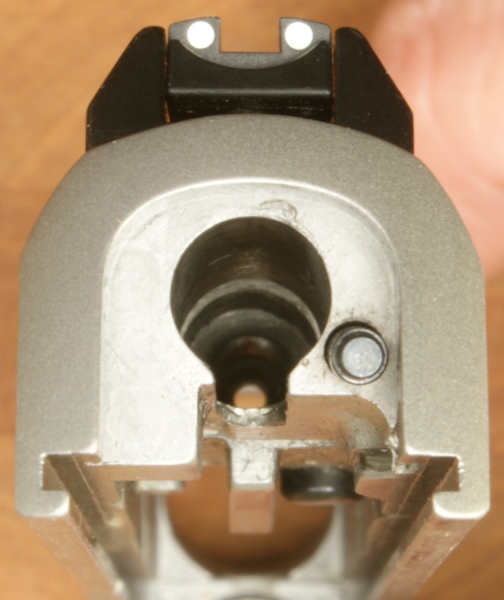
This last photo shows a view looking down the striker cavity in the slide. Reassembly is basically the reverse of these steps.
Figure 26
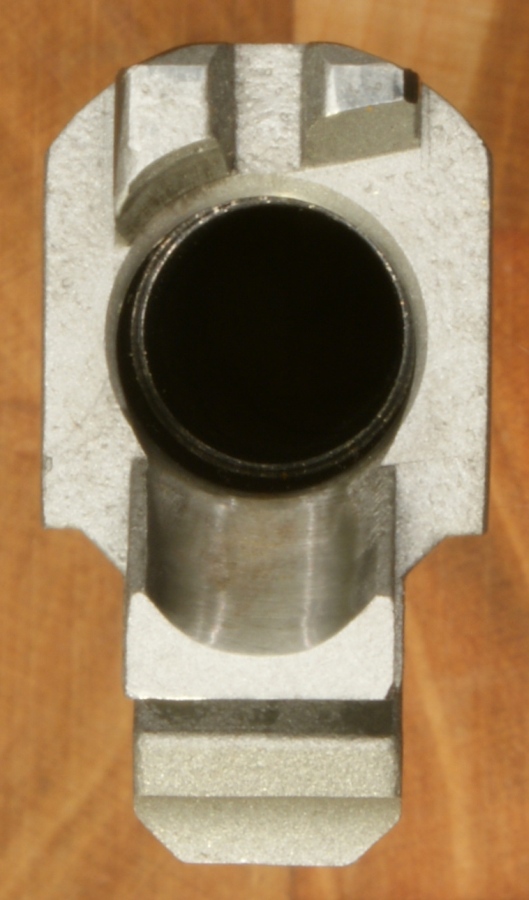
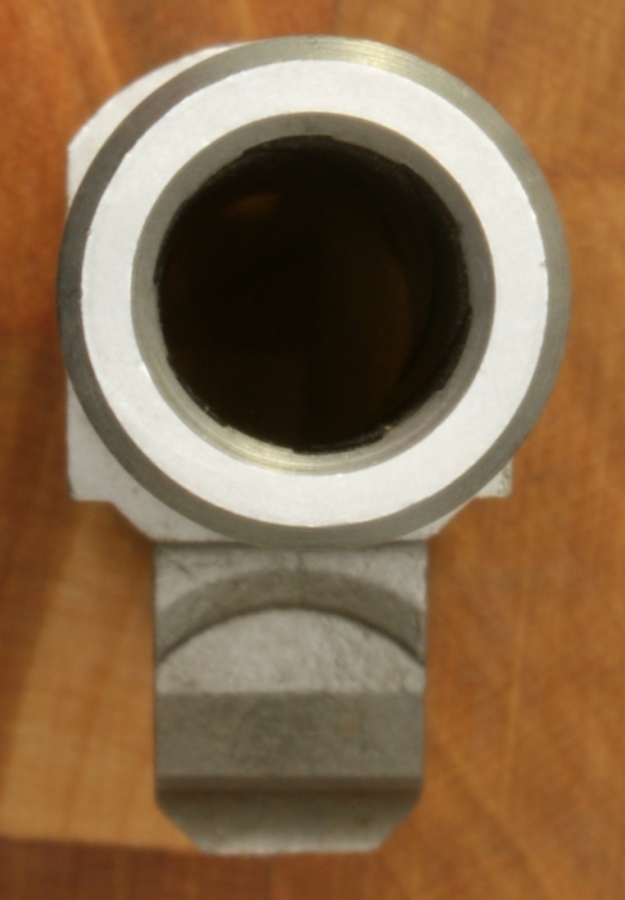
Barrel
The barrel on the Ruger SR9c measures 3.50". Since barrel length is measured from the end of the barrel to the breech face, the barrel length is the total length of the part below. The barrel is an investment casting which is made from SAE 410 (or UNS4100) stainless steel in Ruger's Pine Tree Casting facility. I have read several other reviews that talk about castings in a negative light. A casting does not always equal inferior quality or durability. The F-22 aircraft, the most advanced aircraft in the world, "incorporated 61 castings on the F-22; many of them utilized in critical structural applications." You can read this technical paper on the F-22 here. Another thing to remember is that Ruger has it's own casting facility and has been in the castings business since 1963. Ruger is not some low budget import company that was low bid on a casting contract. My last point is that Ruger is responsible and liable for their products. I know everyone wants to make a profit, but I don't think Ruger would take on the risk of putting an inferior critical component in their pistol.
The photos below show the barrel from all sides. The barrel is a casting and the critical areas get final machined into the configuration shown below. This machining is clearly seen by looking at the exterior barrel surface (shiny). Also, each barrel gets proof tested and you can see the proof mark "R" stamped into the barrel in the photo below. I have read several other reviews that comment negatively on the matte finish of the exposed barrel chamber area. My impression is that the surface finish is better matte than polished because the matte finish more closely matches the upper surface of the slide. I also would not consider this to be a true negative aspect of the pistol, but instead just a matter of personal preference.
Figure 27
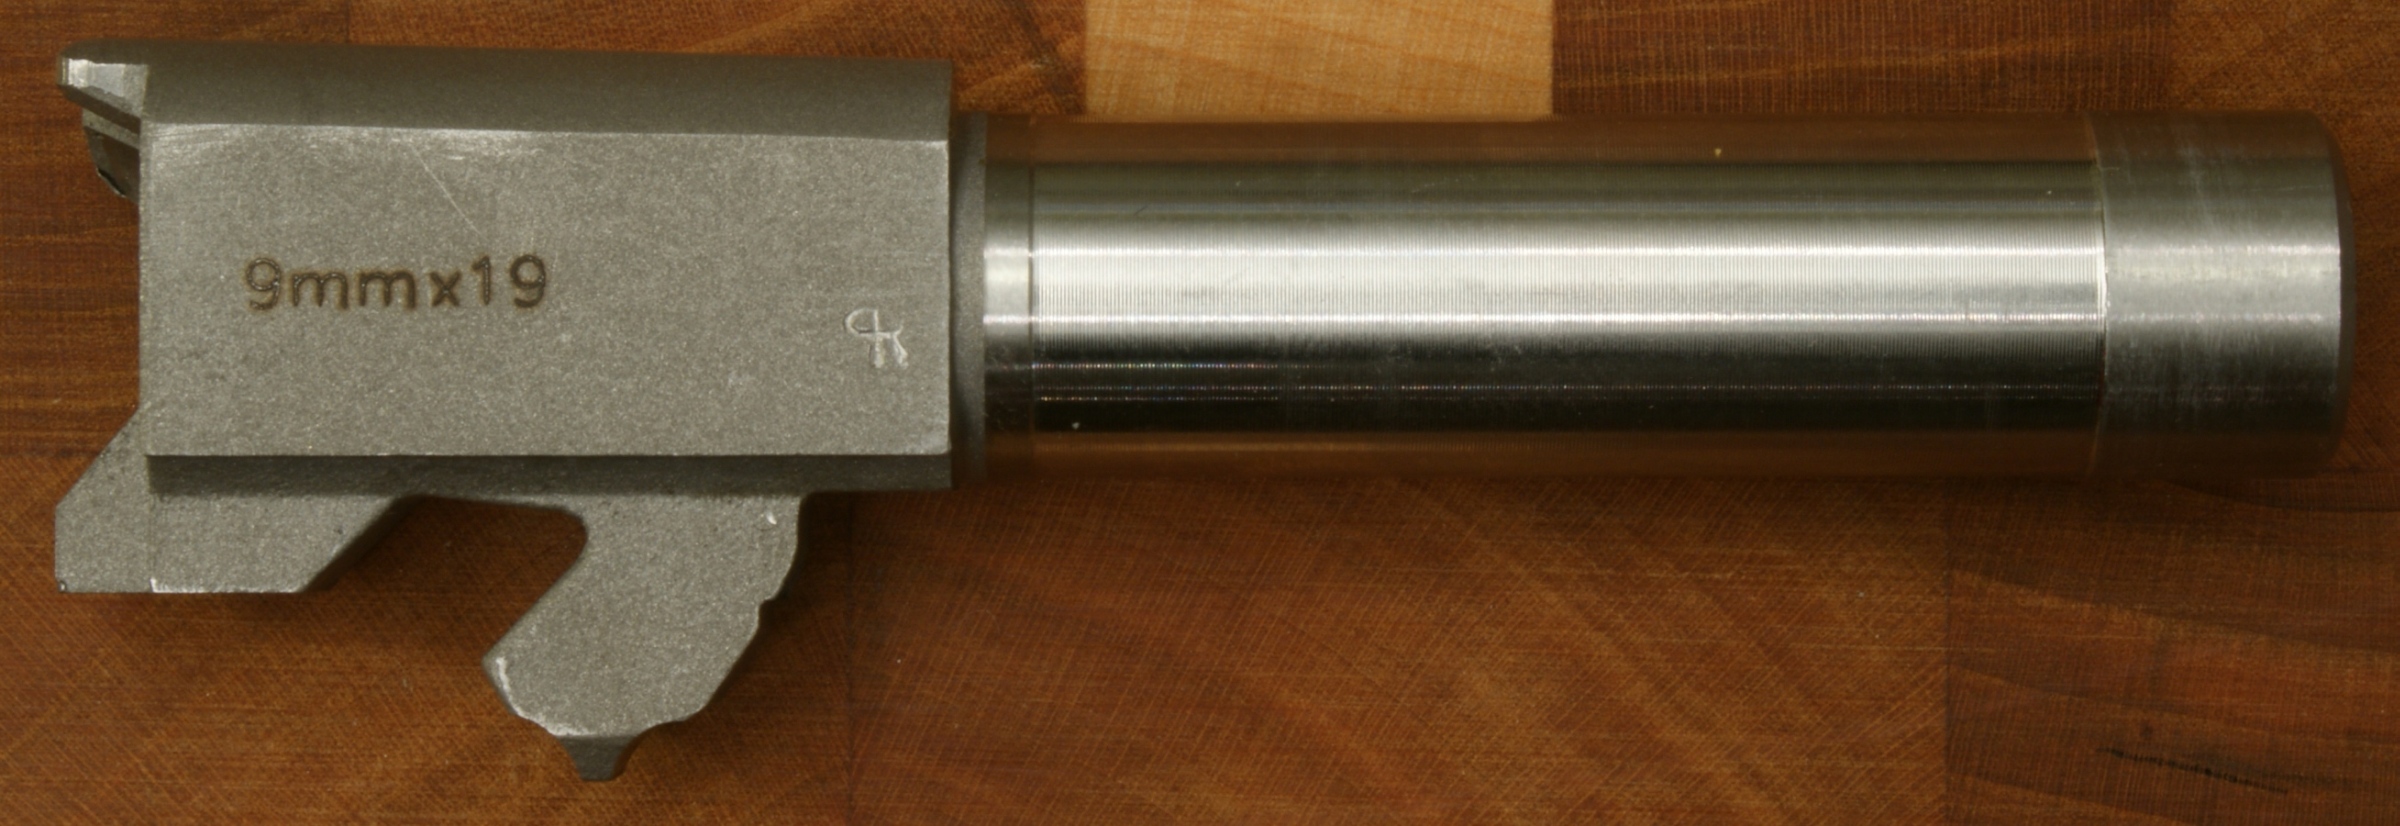
Figure 28
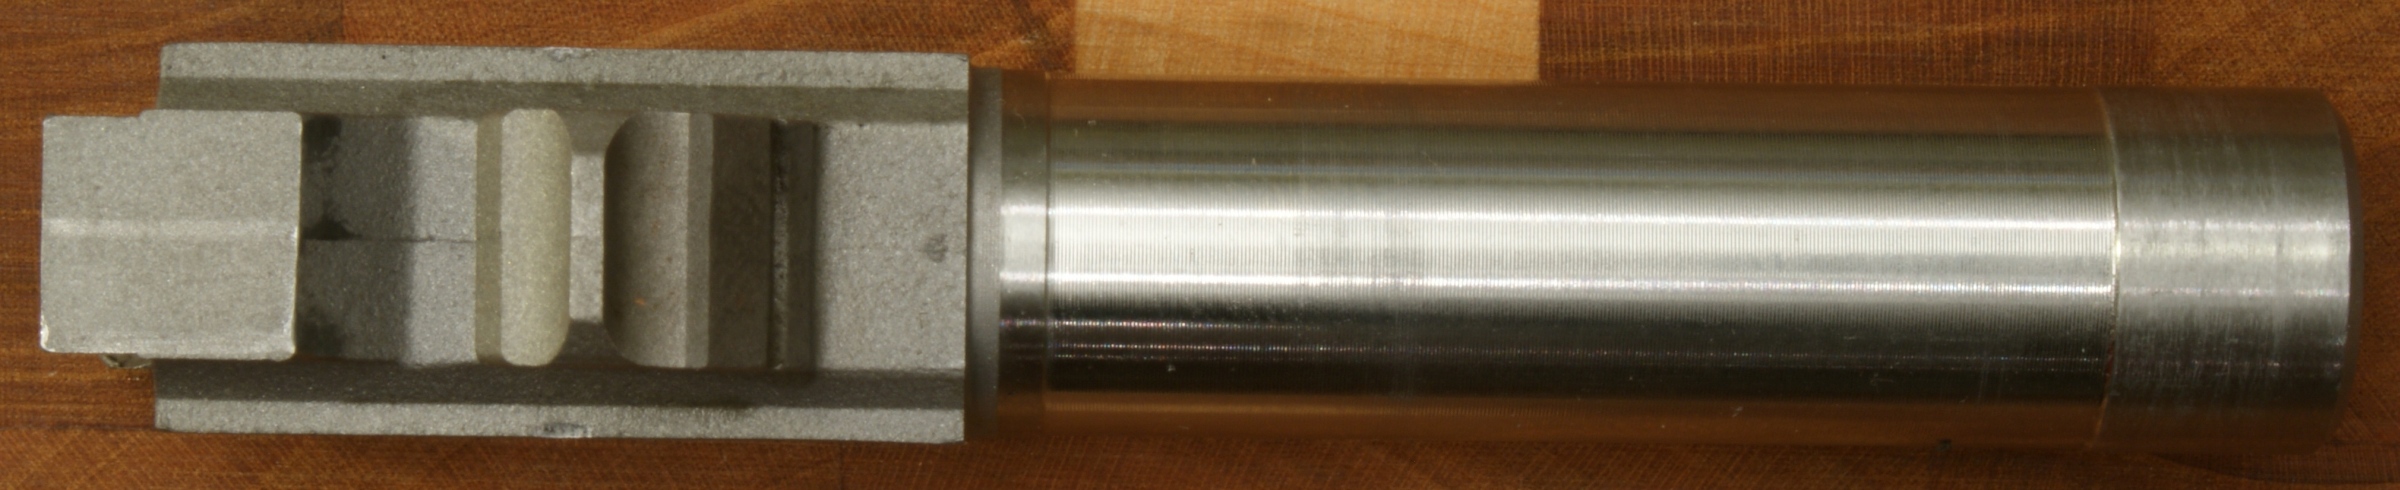
Figure 29
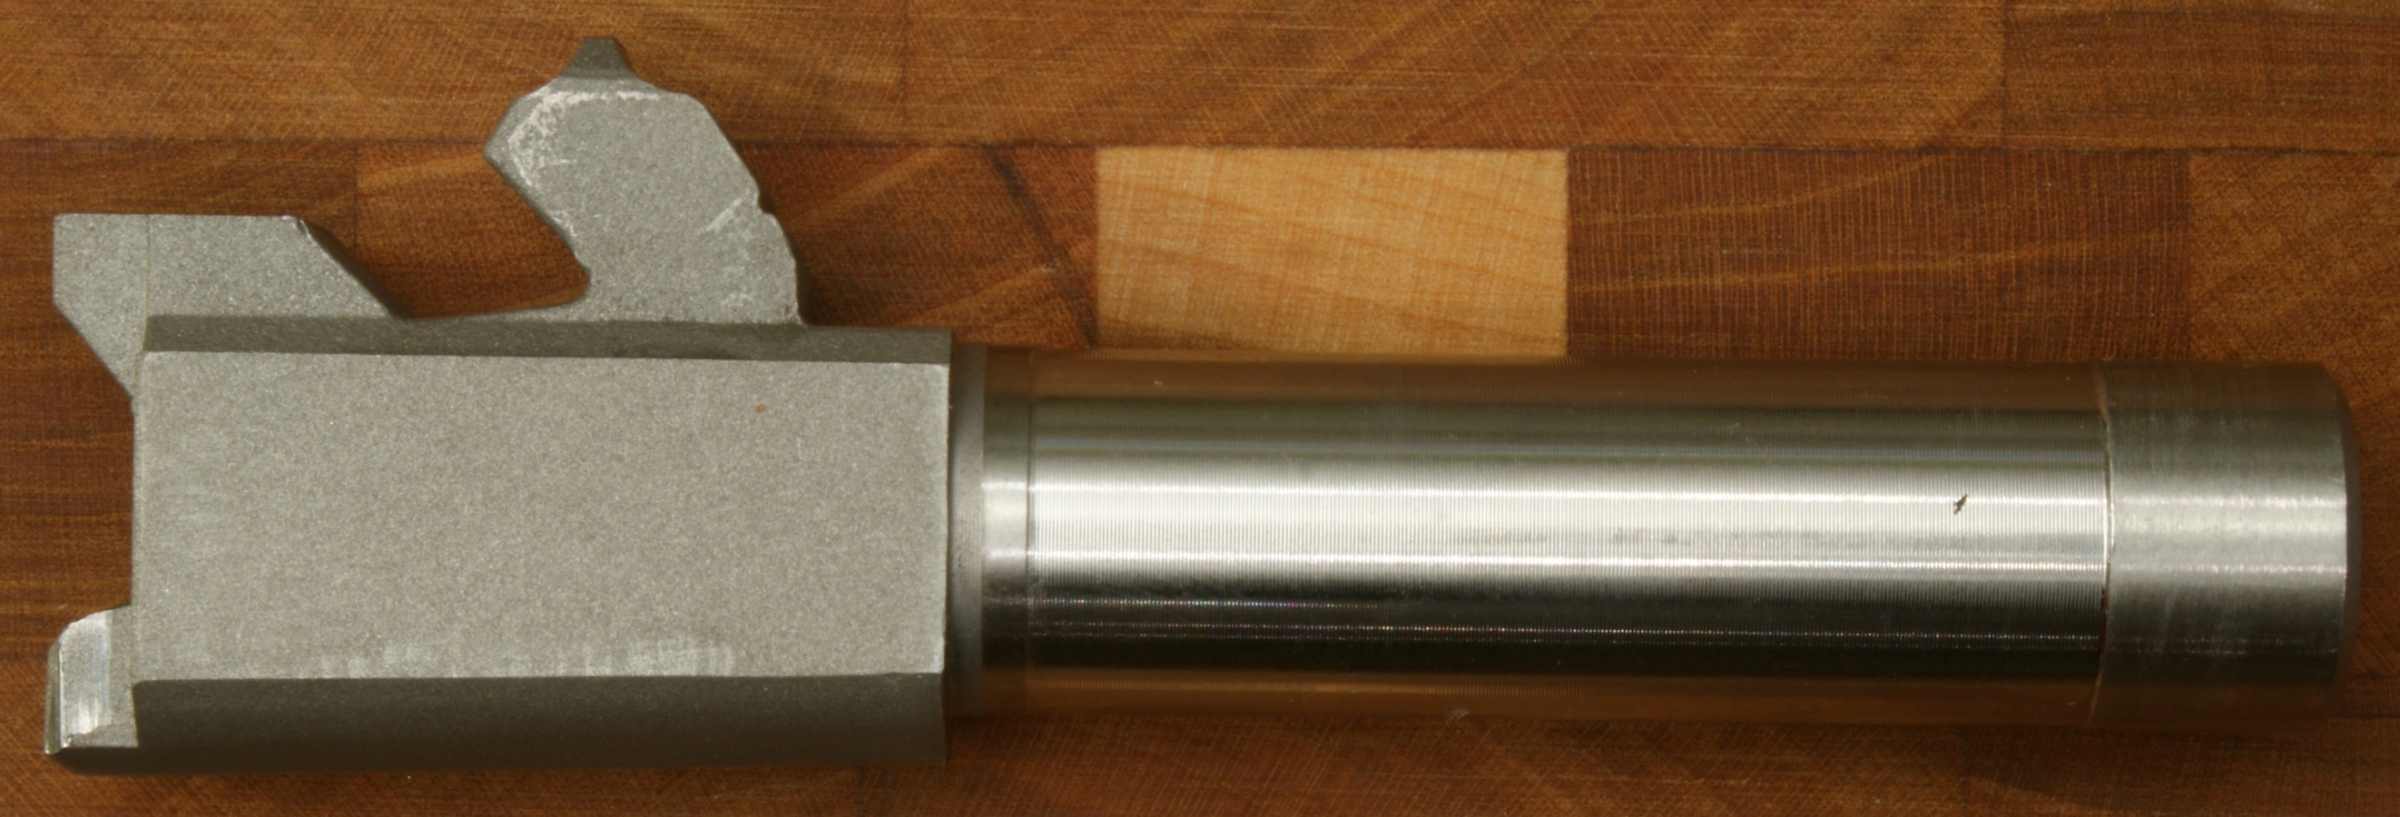
Figure 30
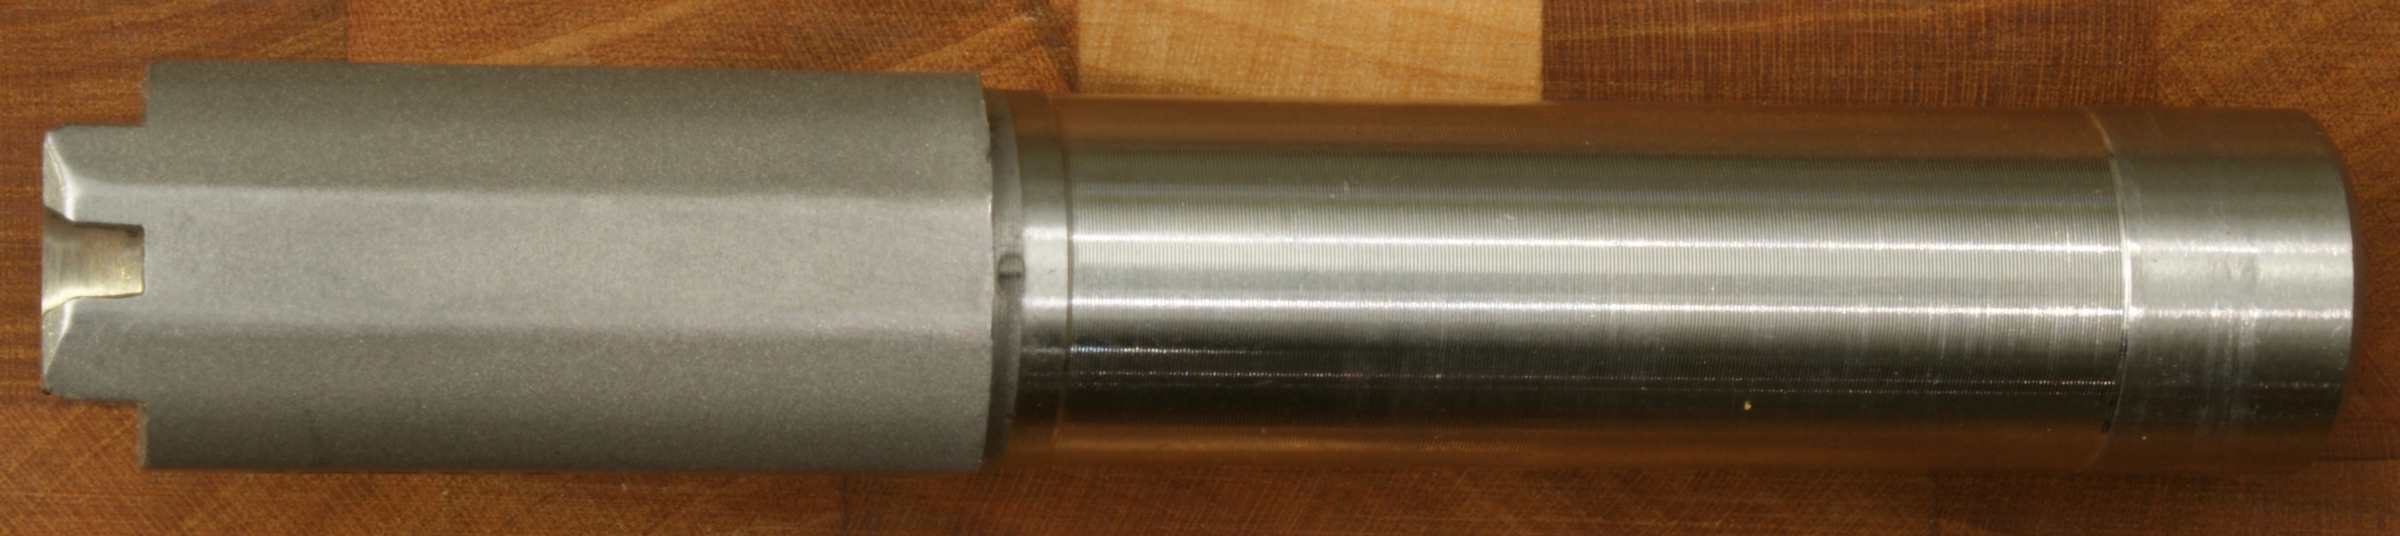
Figure 31
Figure 32
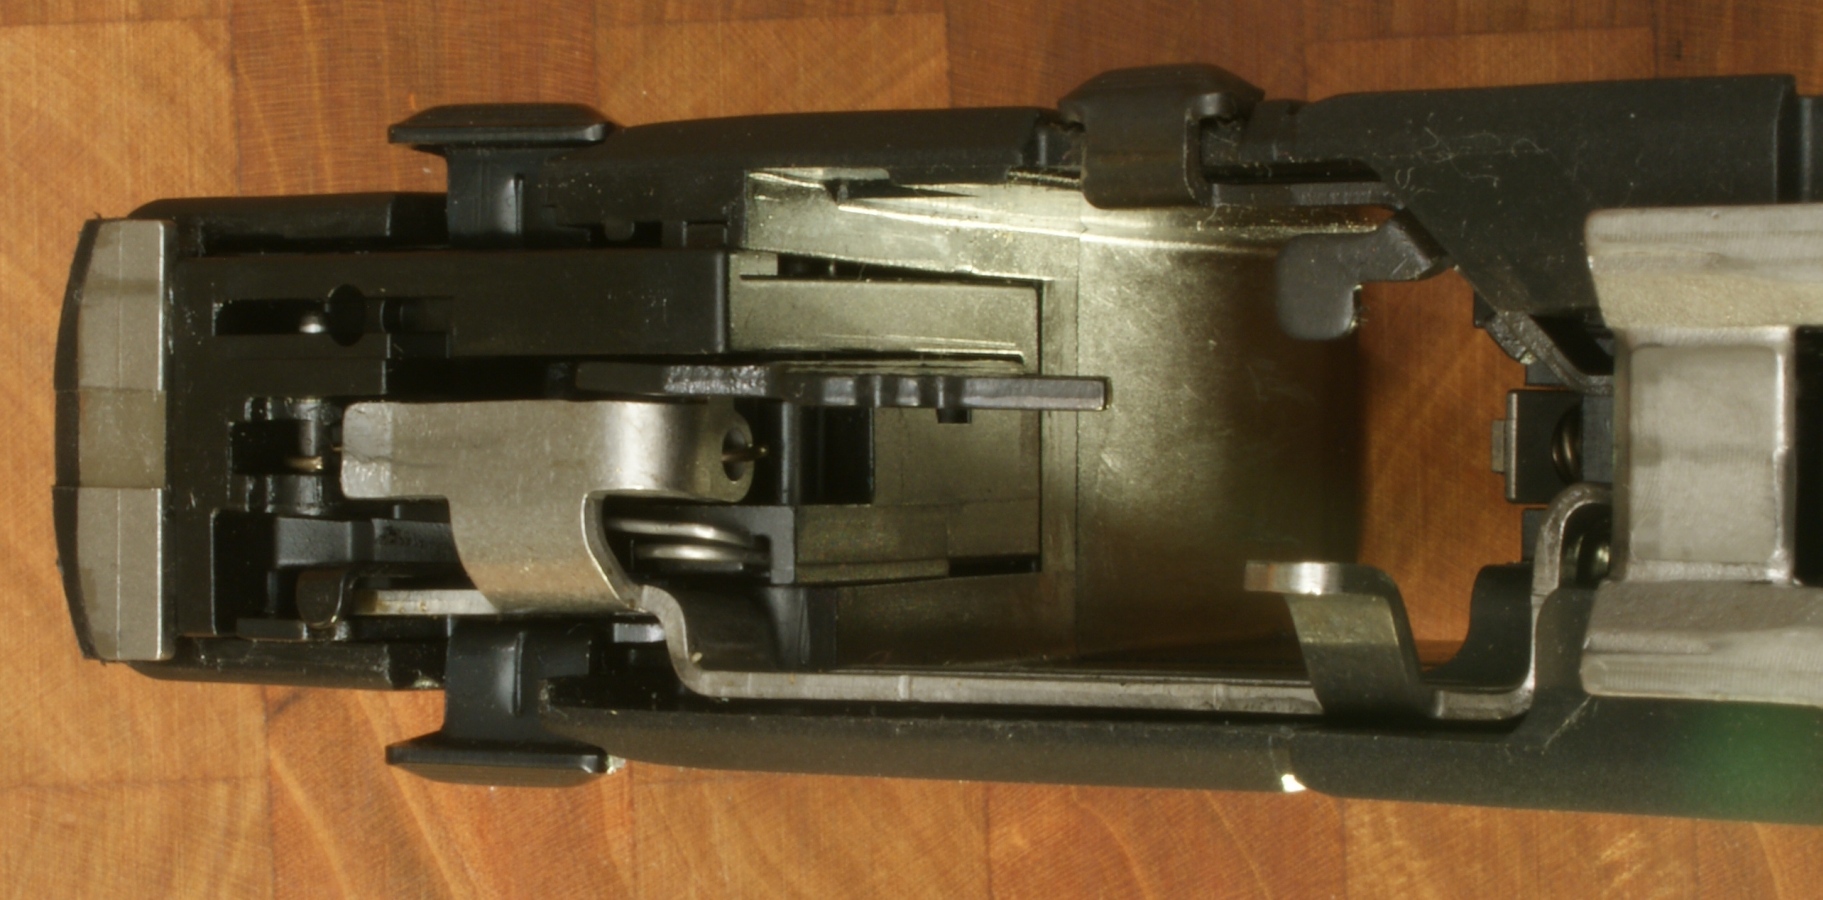
Slide Assembly
Just like the barrel, the slide is an investment casting (see above for the reasons not to worry) and is made from 415 stainless steel which is a special proprietary blend that is somewhere between 410 and 420 stainless steel. The exterior had a very nice look and finish. In certain areas on the interior, you could tell there was a certain roughness associated with a casting, but nothing I would consider to be negative on the quality of this pistol. Also, I could tell that critical areas were final machined to maintain critical interface features (i.e. slide slots, barrel contact areas, breech face, and I'm sure more). You can see for yourself by looking at the photos below. Also note that I didn't clean the lubricant off the interior surface of the pistol before taking the photos. This may cause it to look rougher that it actually was in some areas.
Figure 33
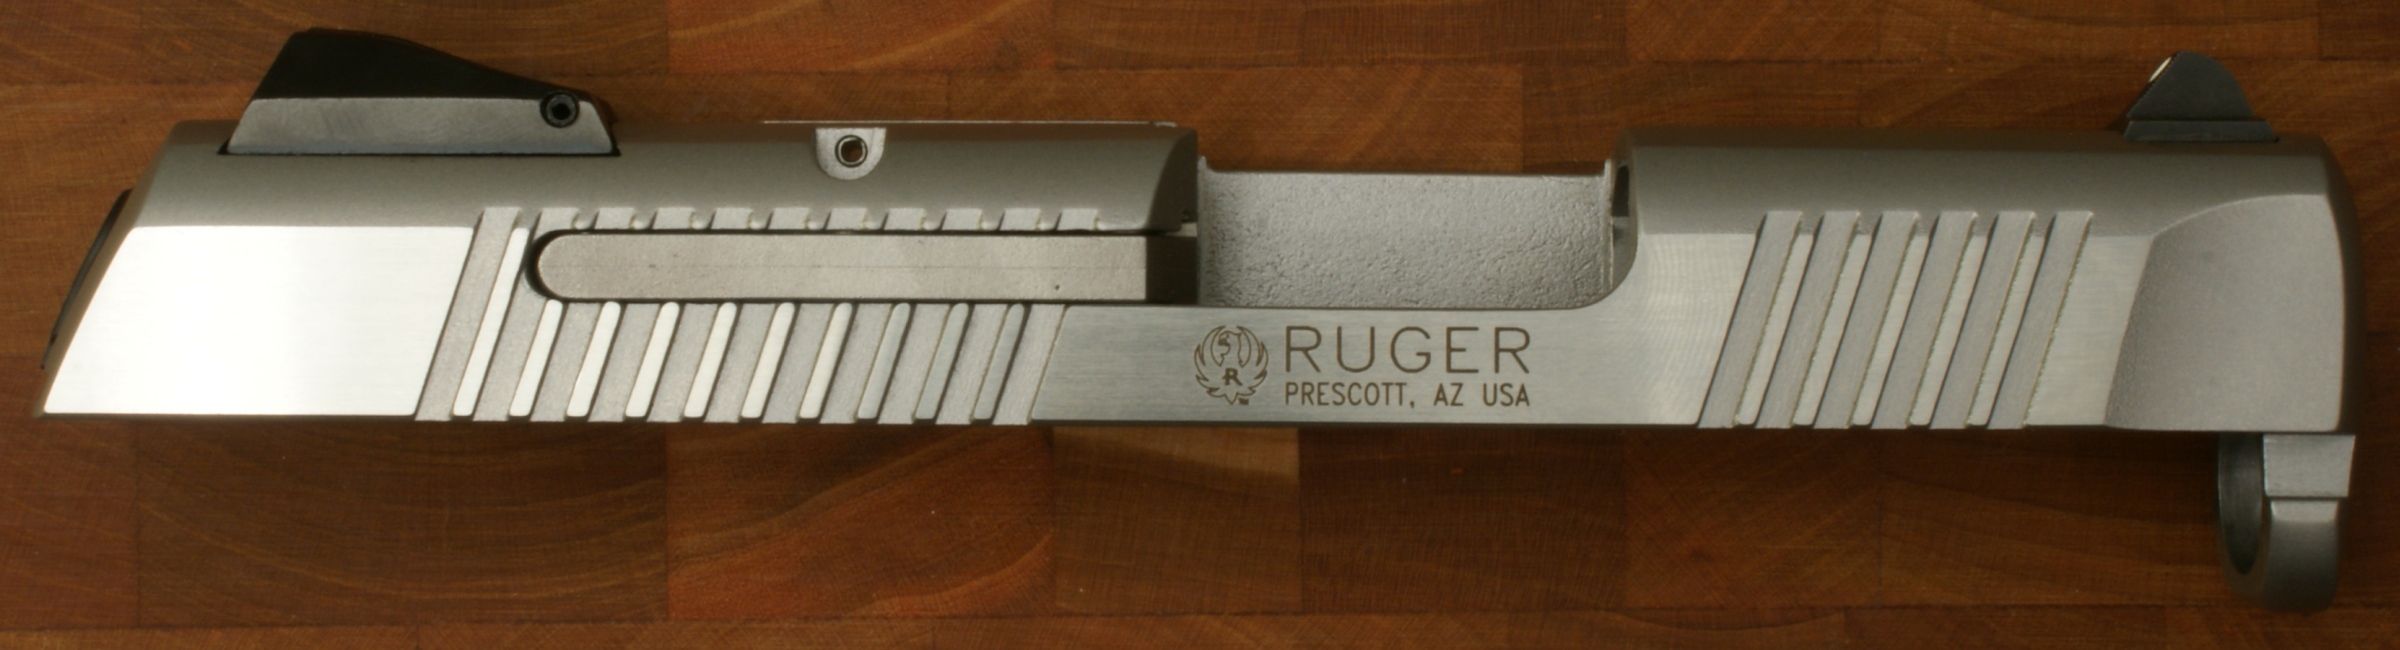
Figure 34

Figure 35

Figure 36

Figure 37

Figure 38
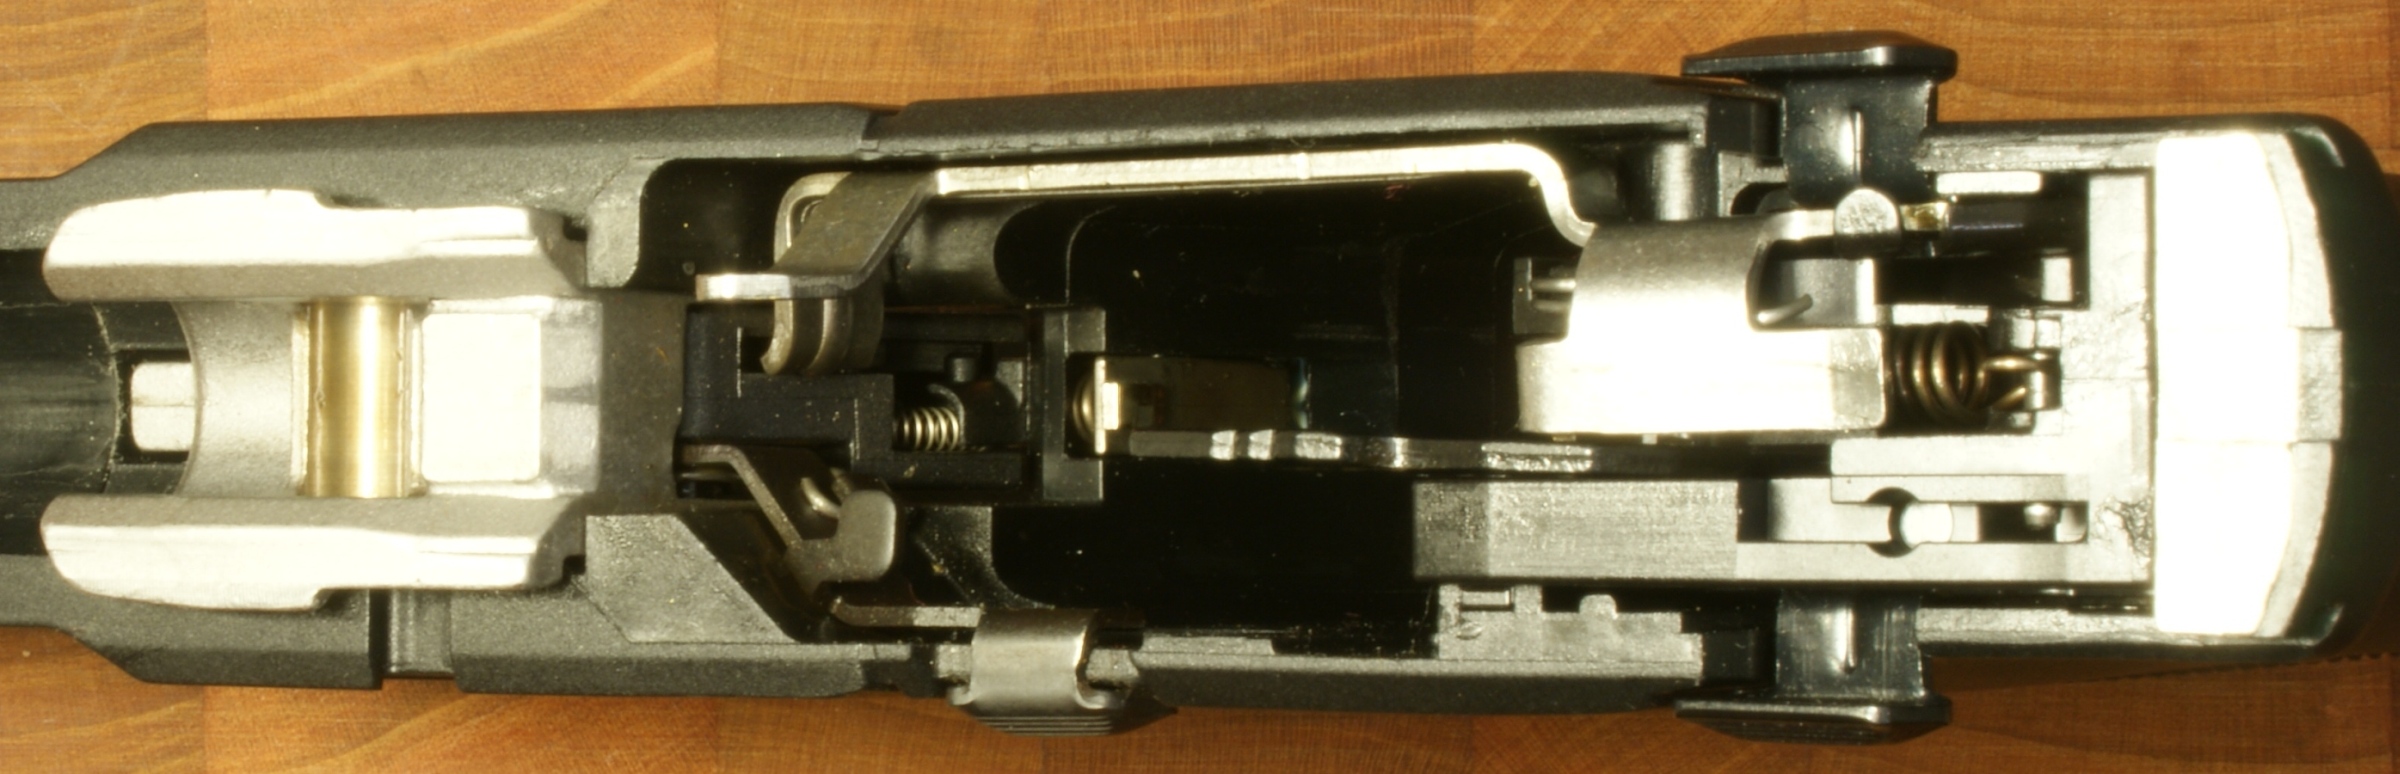
Frame Assembly
The pistol frame is manufactured from glass-filled nylon. Glass-filled is a good thing because this increases structural and impact strength along with rigidity of the frame. There are lots of photos below to show the details of this assembly. If I were you, I would take Ruger's recommendation and not do any more disassembly. After you study the interior mechanism, they are actually very simple, but again I don't recommend any further disassembly. I'm not going to talk about every detailed feature of this assembly, but I will cover some items I think are significant.
Figure 39
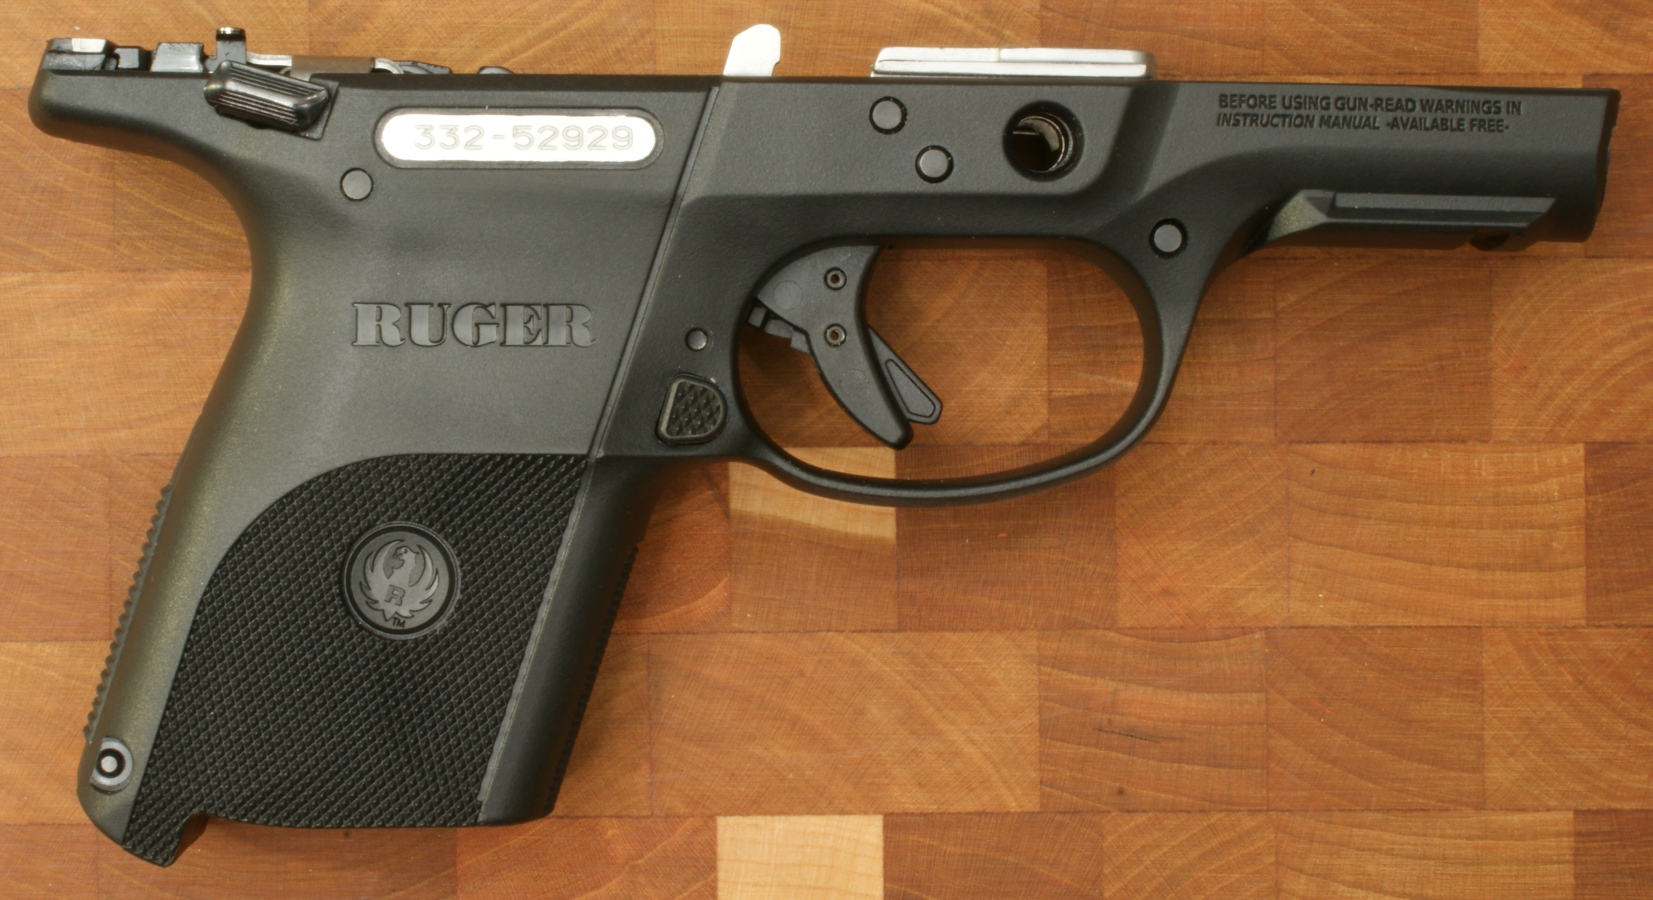
Figure 40
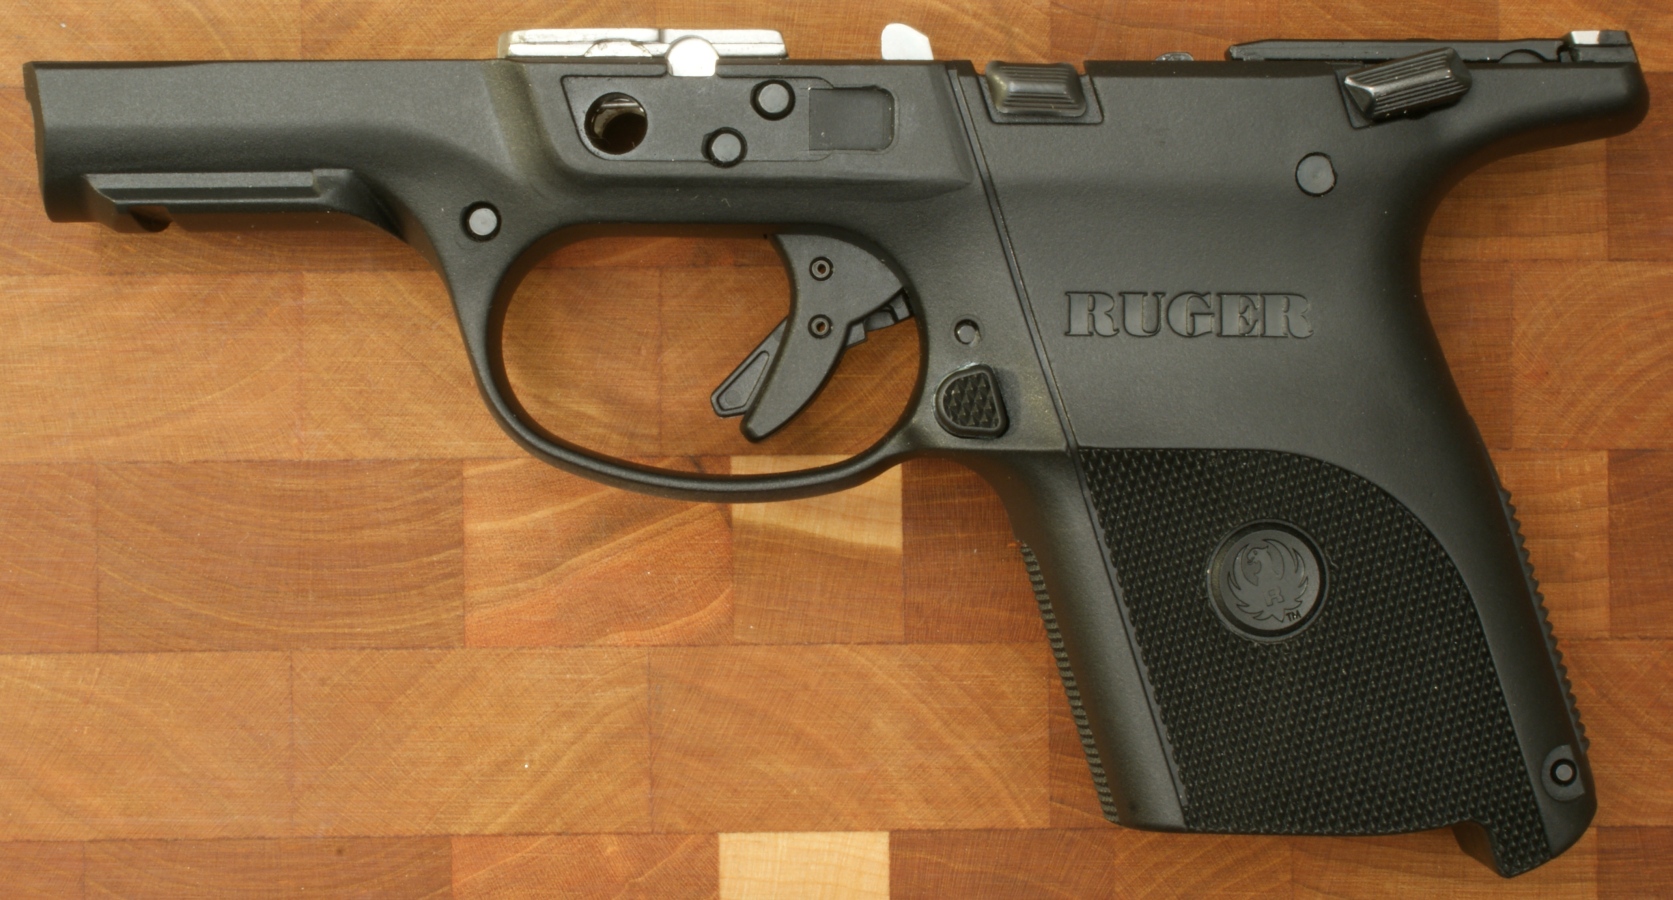
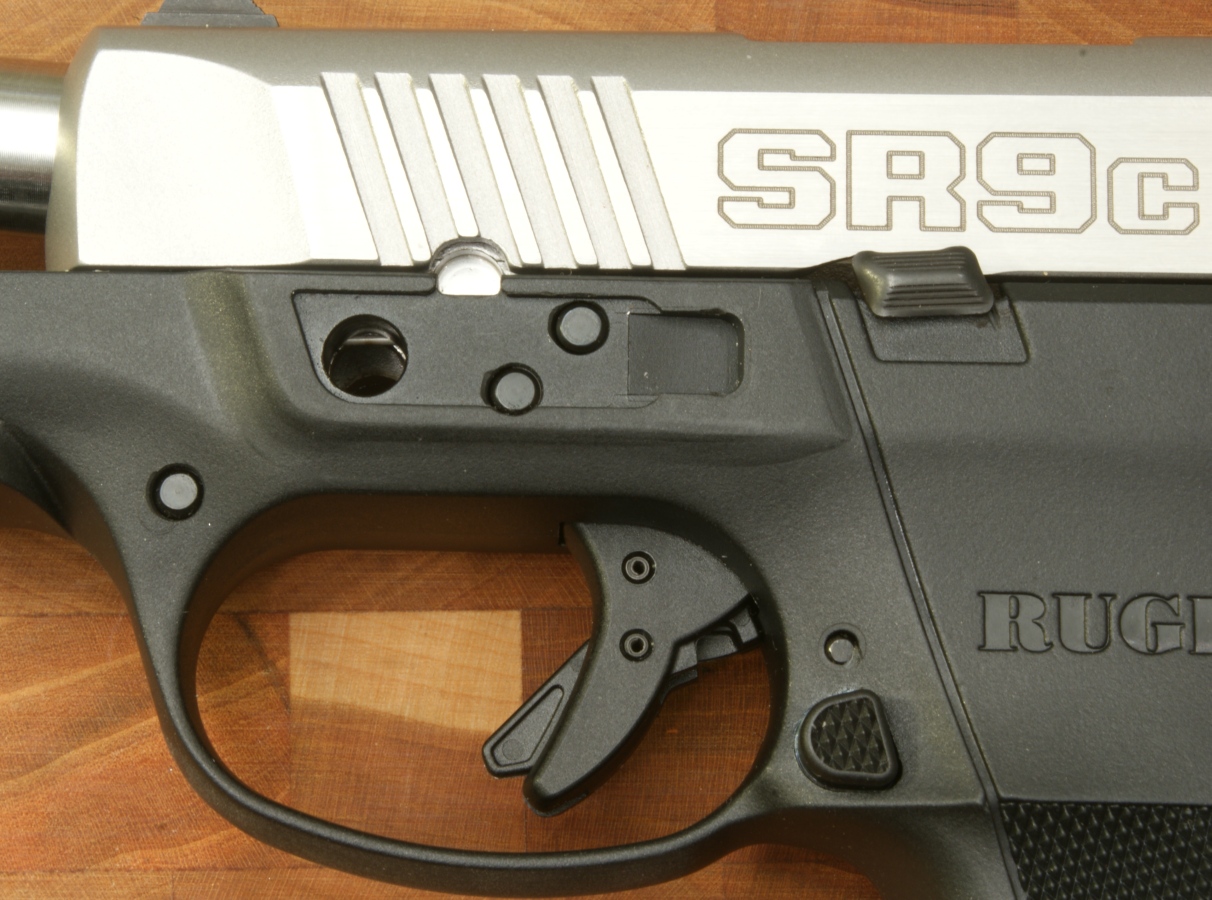
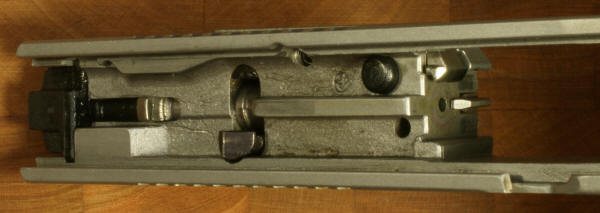
In the photo below, you can see that Ruger has a metallic Camblock (1). This is a high stress and high wear area so the metallic part will be more durable than just the nylon frame. This block is also pinned in place by three different pins spread apart which gives it an even stronger attachment footprint to the frame.
Figure 41
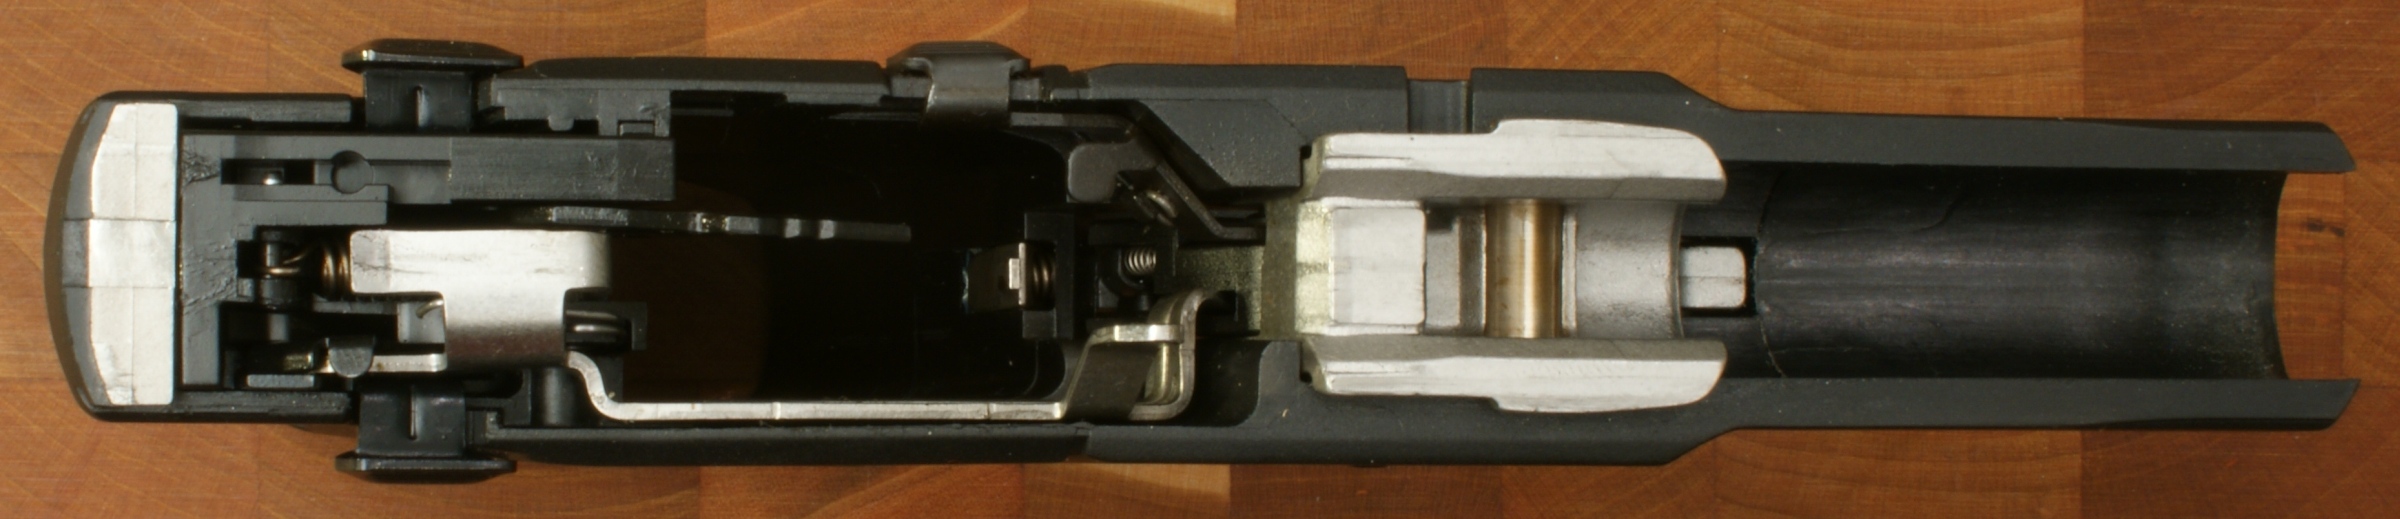
Figure 42
In the photo below you can see the Slide Stop (2). By inserting a magazine, you will see how the slide stop moves up when the magazine follower comes in contact with the stop. The Ejector (3) is shown in the down position and you can also see the Trigger Bar (4). If you look closely, you can see how the manual safety blocks the Trigger Bar from moving back when the safety is engaged.
Figure 43
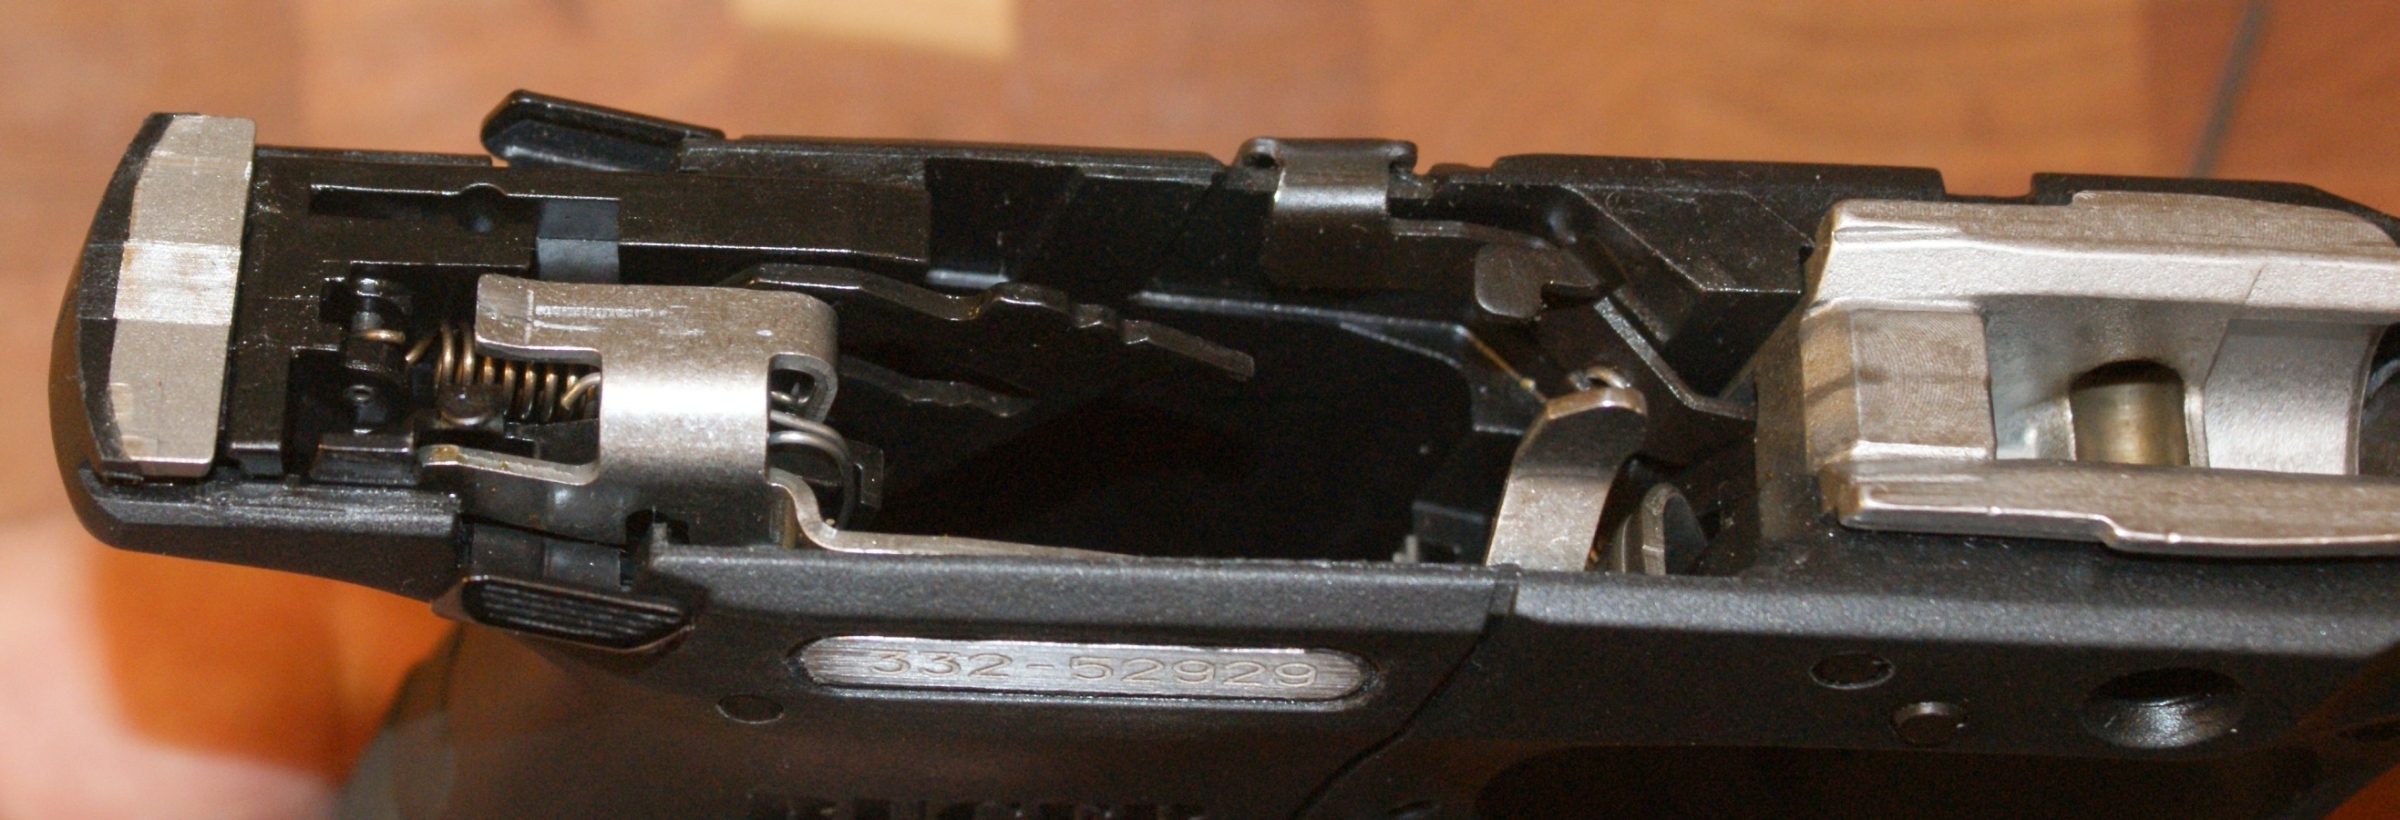
Figure 44
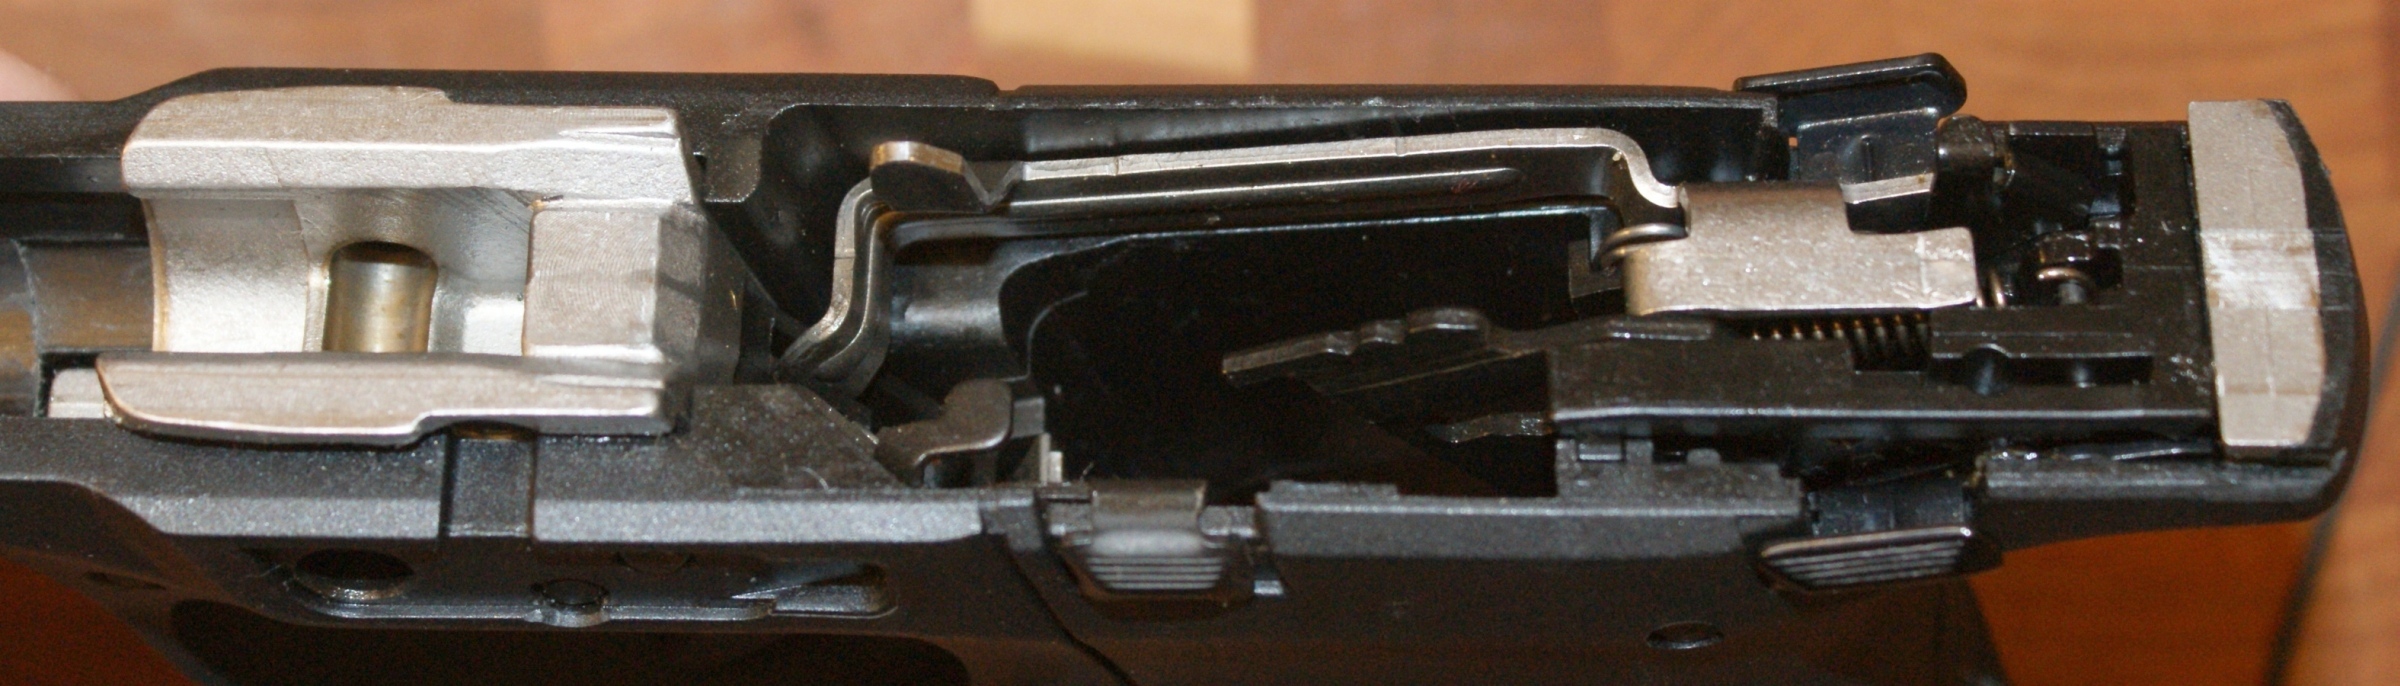
If you hold the trigger in the forward position and pull back on the Inner Trigger (5) (trigger safety), by looking at this frame from the view below, you can see how the Inner Trigger blocks the Outer Trigger (normal trigger) from being pulled by contacting the frame unless the Inner Trigger is pulled. You can also press the Magazine Latch Button and watch how the Magazine Latch (6) moves to the latch and unlatched positions.
Figure 45
Overall, disassembly is relative simple and if you take the time to study the trigger and safety mechanisms, you will find they are simple also. I still wouldn't recommend you disassemble the frame assembly unless you are an expert with working on guns. At this point, I still have not shot the pistol at the range, but have dry fired it (magazine in per instruction manual) many times and have disassembled/reassembled it over a dozen times. It seems very tight and stiff like a new gun, but it also seems to be loosening up a little.
You can navigate to other parts of this review using the links below.
- Ruger SR9c Review: Part 1 - Introduction, Specifications and Summary
- Ruger SR9c Review: Part 2 - What's in the Box
- Ruger SR9c Review: Part 3 - External Features
- Ruger SR9c Review: Part 4 - Disassembly and Internal Features (this page)
- Ruger SR9c Review: Part 5 - Range Test
Or
If you would like to be notified about future Gunsumer Reports reviews via Facebook, make sure "You Like This" by clicking the Facebook "Like" button at the bottom or top of this page. If it already says "You Like This" beside the button, clicking it again will uncheck the "Like" status and you will not be notified.
| Share on Facebook | |
© 2010, 2011, 2012, 2013, 2014, 2015, 2016, 2017, 2018, 2019, 2020, 2021, 2022, 2023 & 2024 Gunsumer Reports™, All rights reserved.
FTC Disclosure