|
|
Gunsumer Reports TM Providing Detailed Objective Reviews for Firearms and Firearm Accessories |
Ruger SR-22 Review
Part 4 -
Disassembly and Internal Features
In this part of the Ruger SR-22 review, I cover disassembly of the rifle along with showing the internal features of the rifle. Since a good portion of the rifle is built on the Ruger 10/22 platform, this review focuses more on the features that are SR-22 specific. Ruger provides disassembly instructions in the Instruction Manual provided with the rifle.
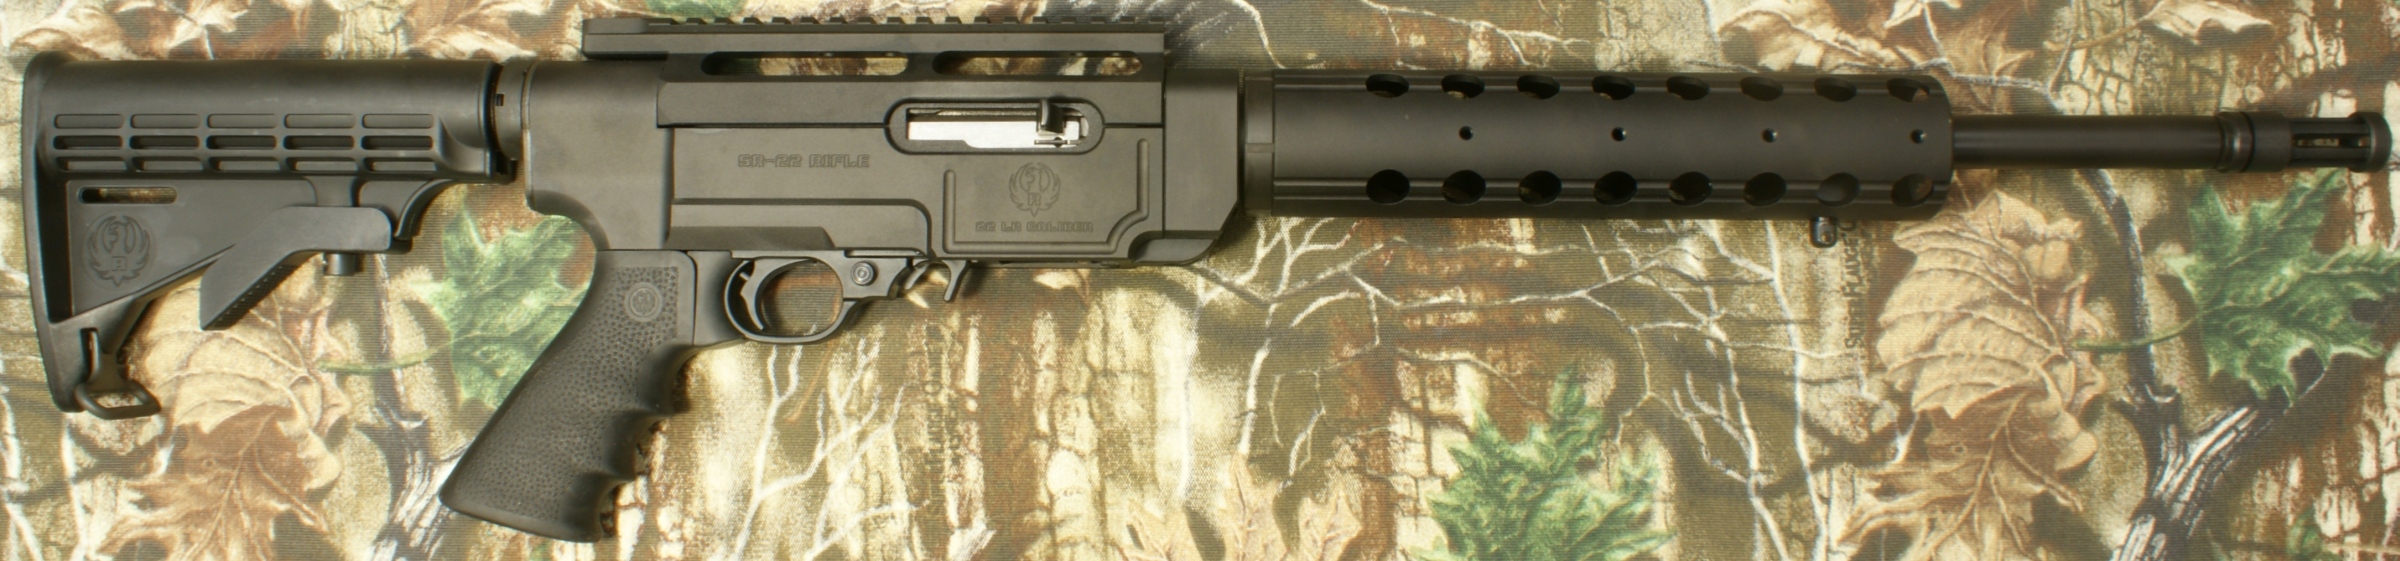
Step 1: Make sure the rifle is unloaded, the bolt is down and the hammer is cocked.
Figure 1
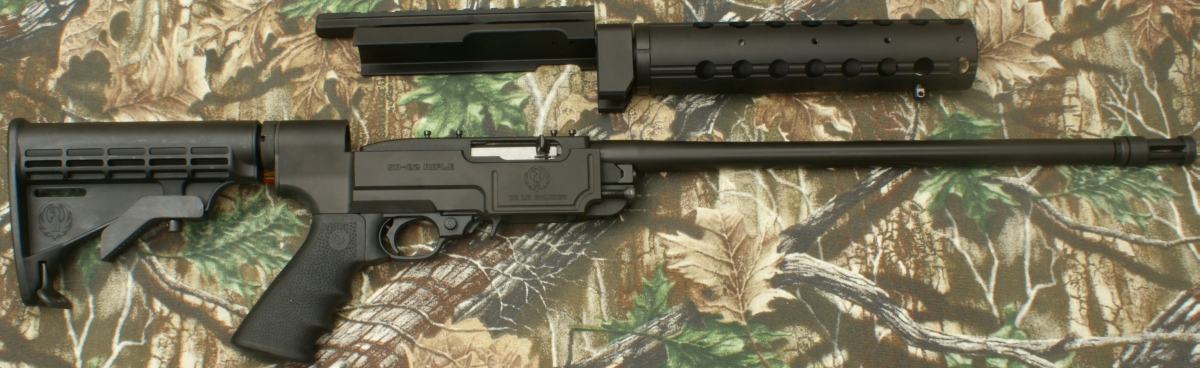
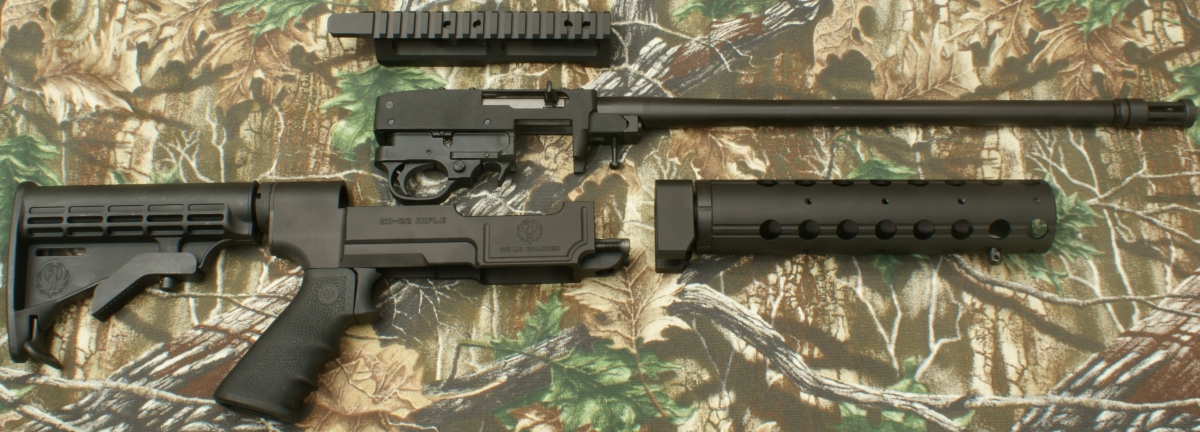
Step 2: You will need a 3/16" hex key (Allen wrench) to remove the two hand guard adapter screws. After the screws are removed, you pull the hand guard assembly forward off the barrel. You should try to avoid the hand guard from contacting the barrel to keep from scratching the finish on the barrel. When removing these screws, I found them to be only snug tight. If you purchase a new rifle, I suggest checking these screws to make sure they are sufficiently tight.
Figure 2
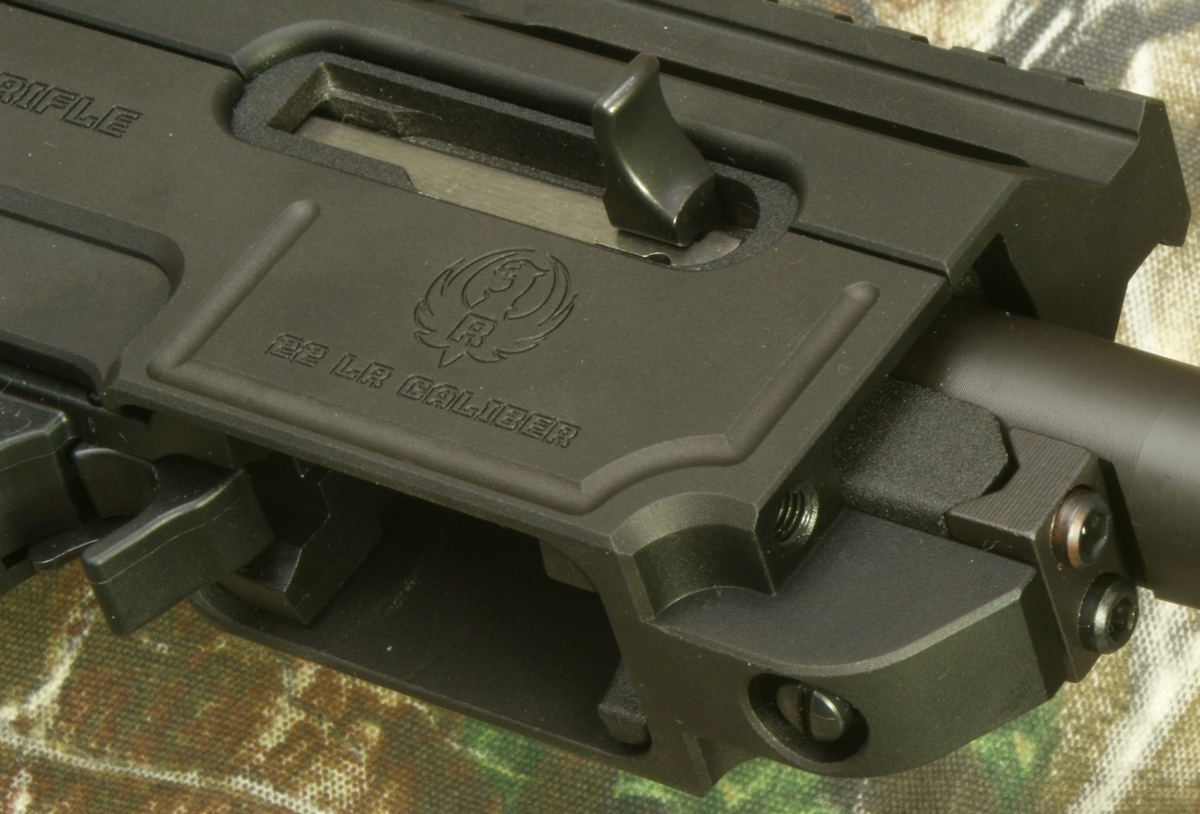
When the hand guard is removed, you can see how the barrel attaches to the receiver. This is the same as the Ruger 10/22. You can see these details in the next three photos.
Figure 3
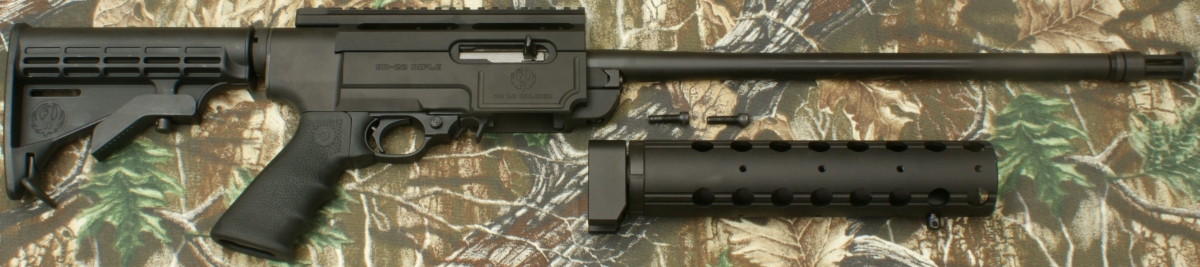
Figure 4
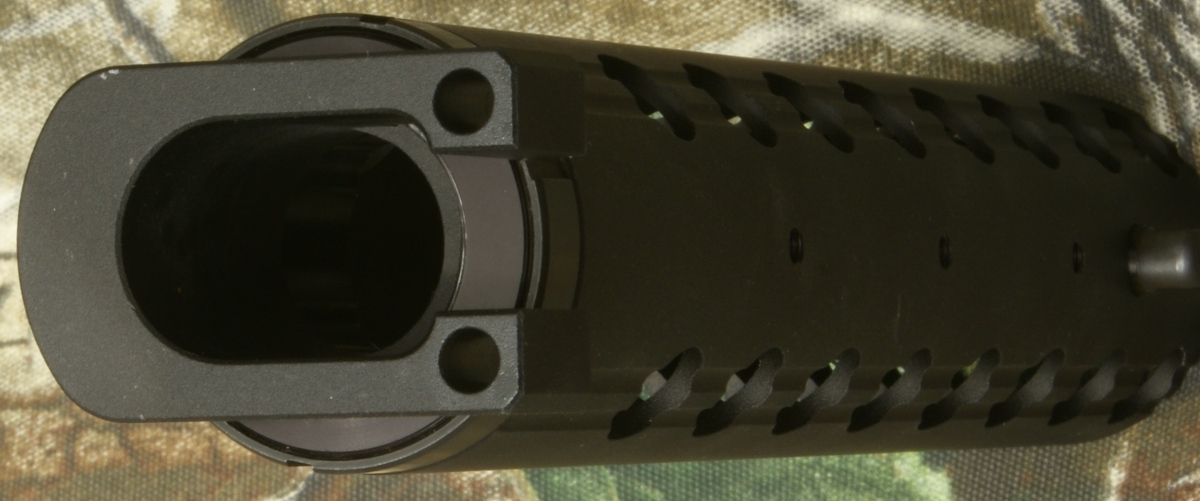
Figure 5
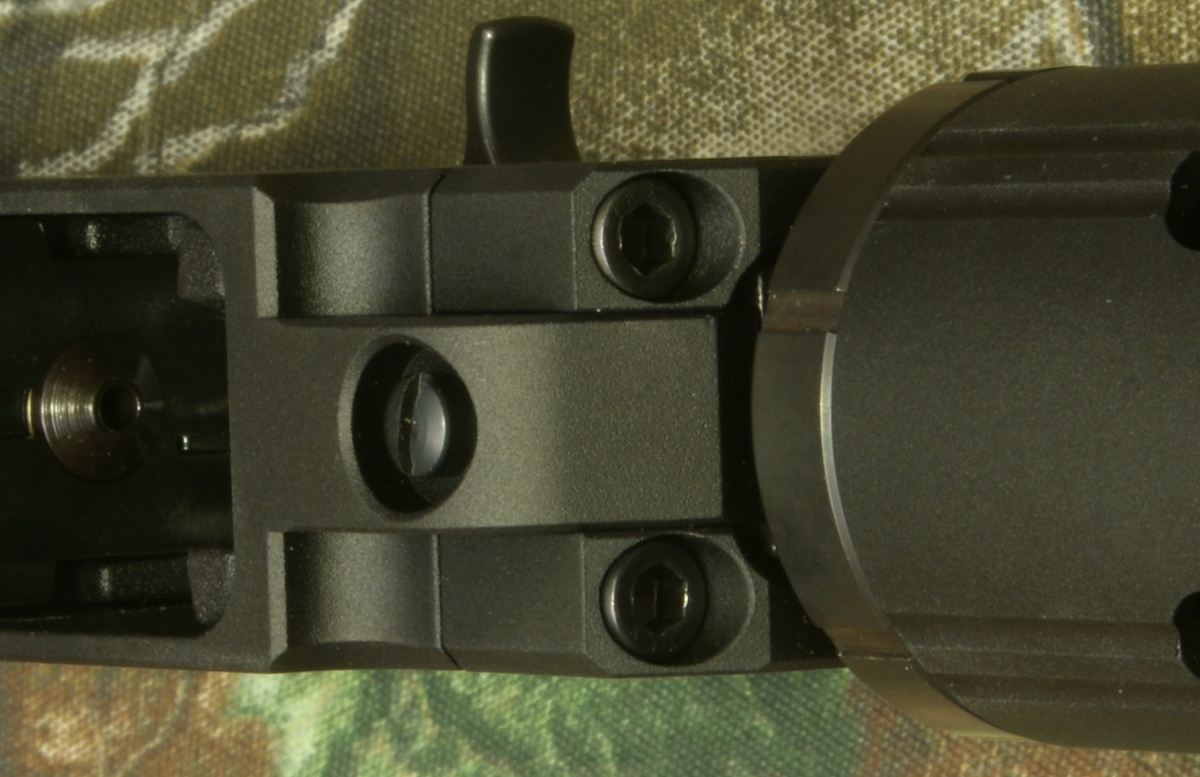
Step 3: On the early rifles, the tolerance stack up of parts required removal of the top rail, but the Nordic components were updated and the latest versions of this rifle do not require removal of the top rail to remove the 10/22 receiver from inside the Nordic housing. If removal of the top rail is require on your rifle, using a T15 Torx wrench or torx screwdriver, remove the four scope mount (top rail) screws and then remove the scope mount. Again I found these screws to be only snug tight and before you mount any optics, I suggest you making sure these screws are tight on your rifle.
Figure 6
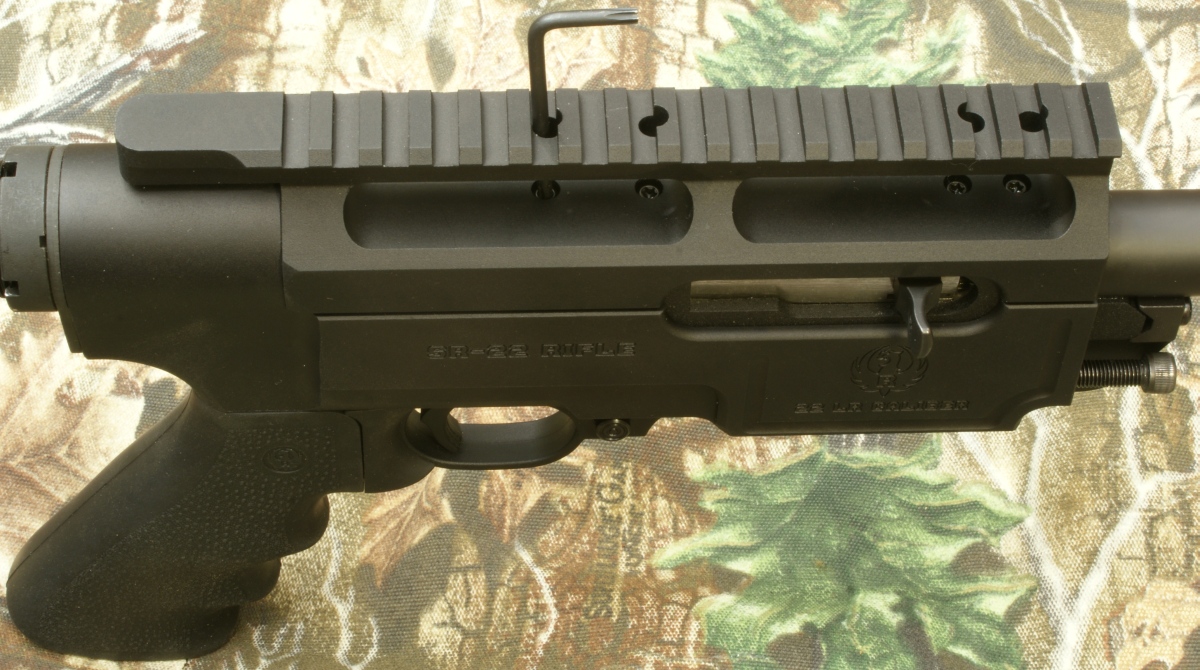
Figure 7
With the scope mount (top rail) removed, you can see the actual 10/22 style receiver that is inside the Nordic shell. You can see that I put the scope mount screws back in the receiver to prevent misplacing any.
Figure 8
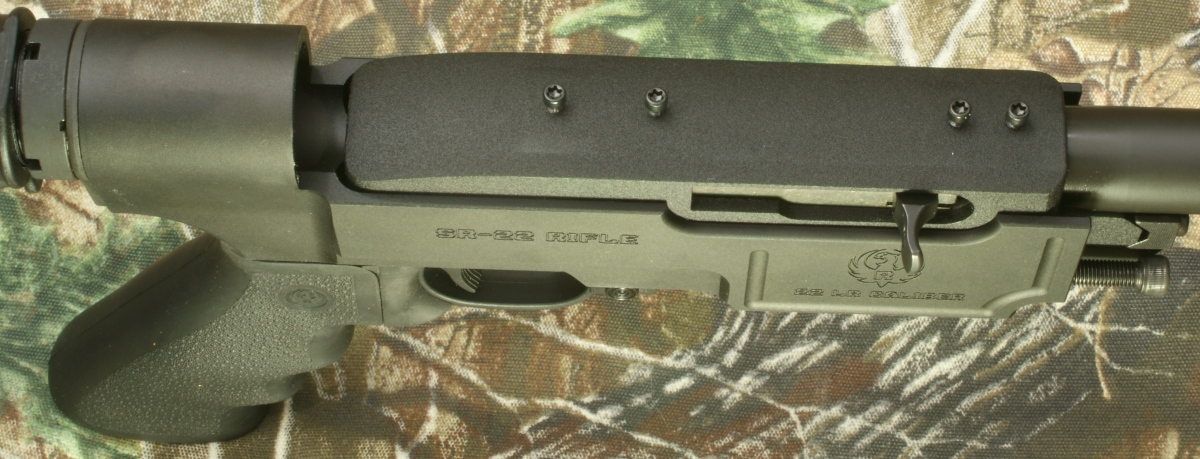
Figure 9
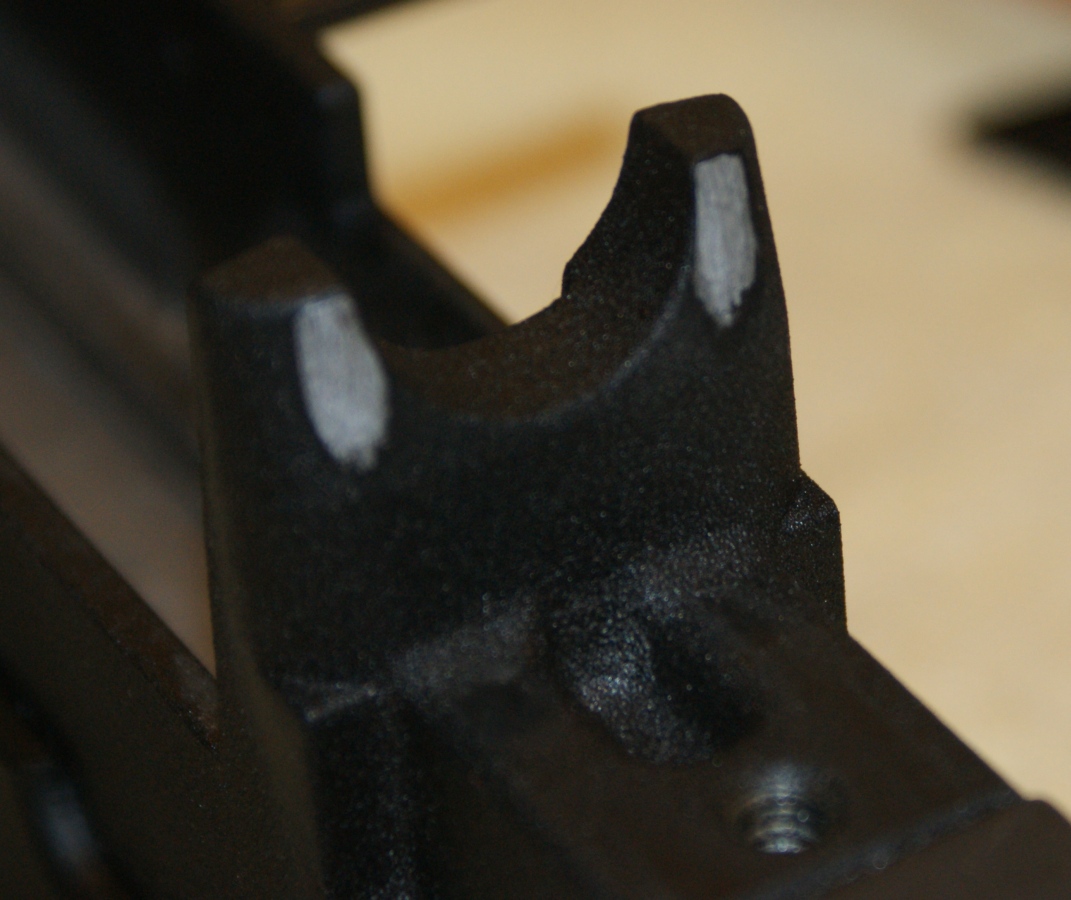
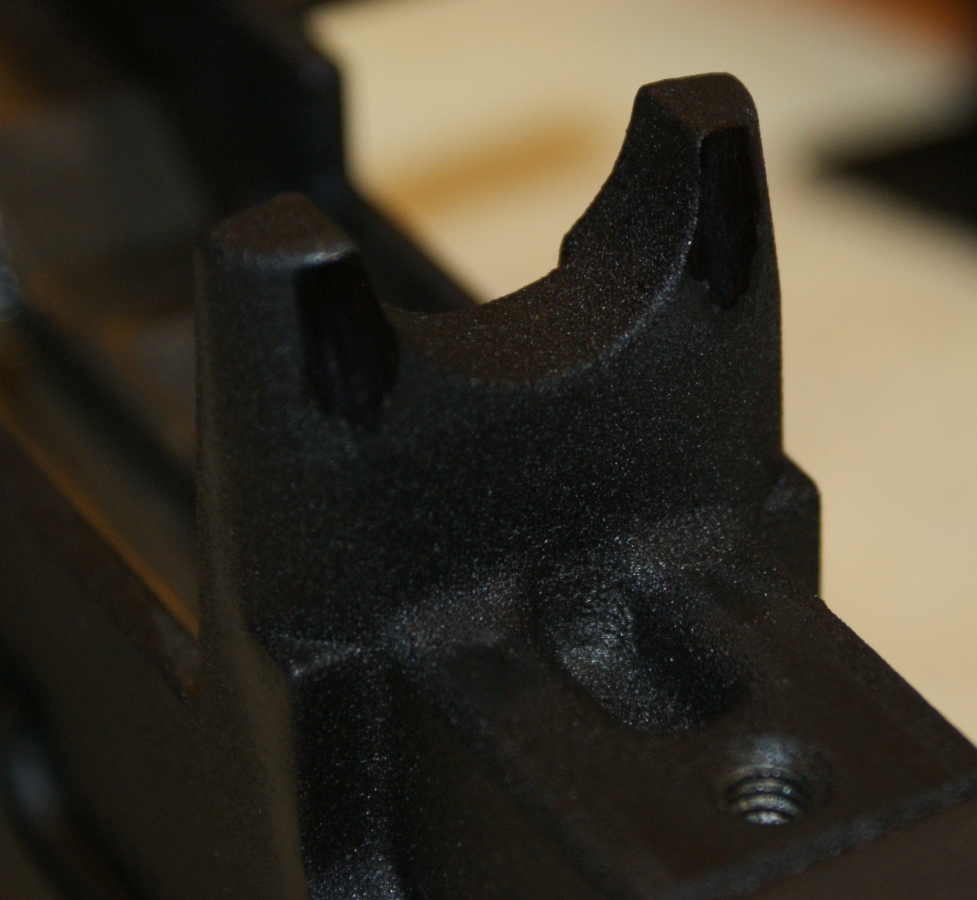
Because my rifle was one that needed removal of the top rail to allow the 10/22 receiver to be removed from the Nordic housing, I modified my receiver to keep from having to remove the top rail in the future by grinding a very small mount of material off the receiver in the area shown below. After grinding, I took a black permanent marker and colored over the exposed aluminum areas. When the rifle is fully assembled, you can not tell that any modification was made.
Figure 10
Figure 11
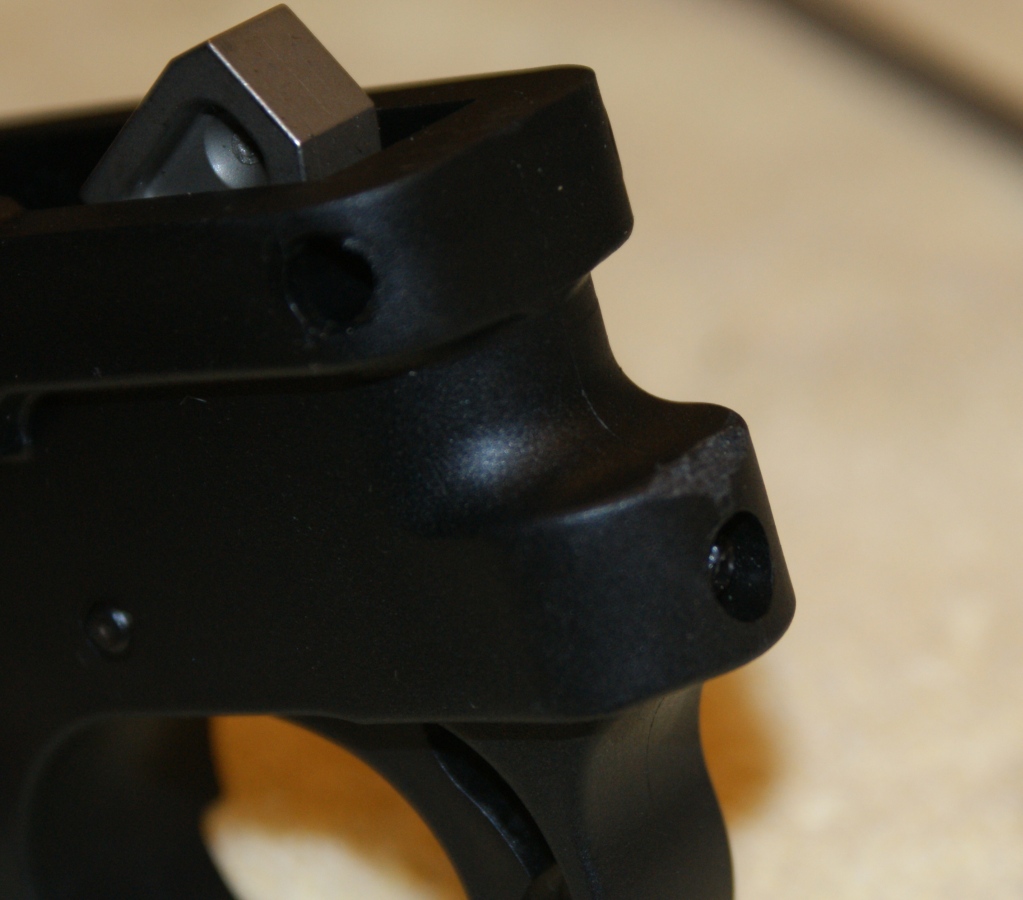
Also, during the process of fitting the receiver into the Nordic housing to determine where and how much I should grind, I wore a chamfer in the back of the trigger housing as shown below. The combination of the grinding on the receiver and this chamfer allowed me to be able to get the 10/22 receiver out of the Nordic housing without removing the top rail. It was a very simple and quick fix.
Figure 12
I have one more comment on the top rail. When you consider that the top rail on the SR-22 sits about ¾" above the traditional 10/22 rail, this extra height has a greater potential to loosen the four attachment screws. I recommend that once you have confirmed you can disassemble the SR-22 without removal of the top rail, or once you have modified the receiver and trigger housing, you should install these four screws with some type of Loctite compound. Also you should be very careful on how tight you tighten these screws because they are very small and they are threaded into an aluminum receiver. Too much torque could strip out the threads in the receiver.
Step 4: Using a regular screwdriver, remove the take-down screw just like you would on any other Ruger 10/22. Then position the safety so that the same amount of the button is exposed on each side. Next you swing the barrel-receiver assembly upward out of the stock. All these steps are covered in the instruction manual.
Figure 13
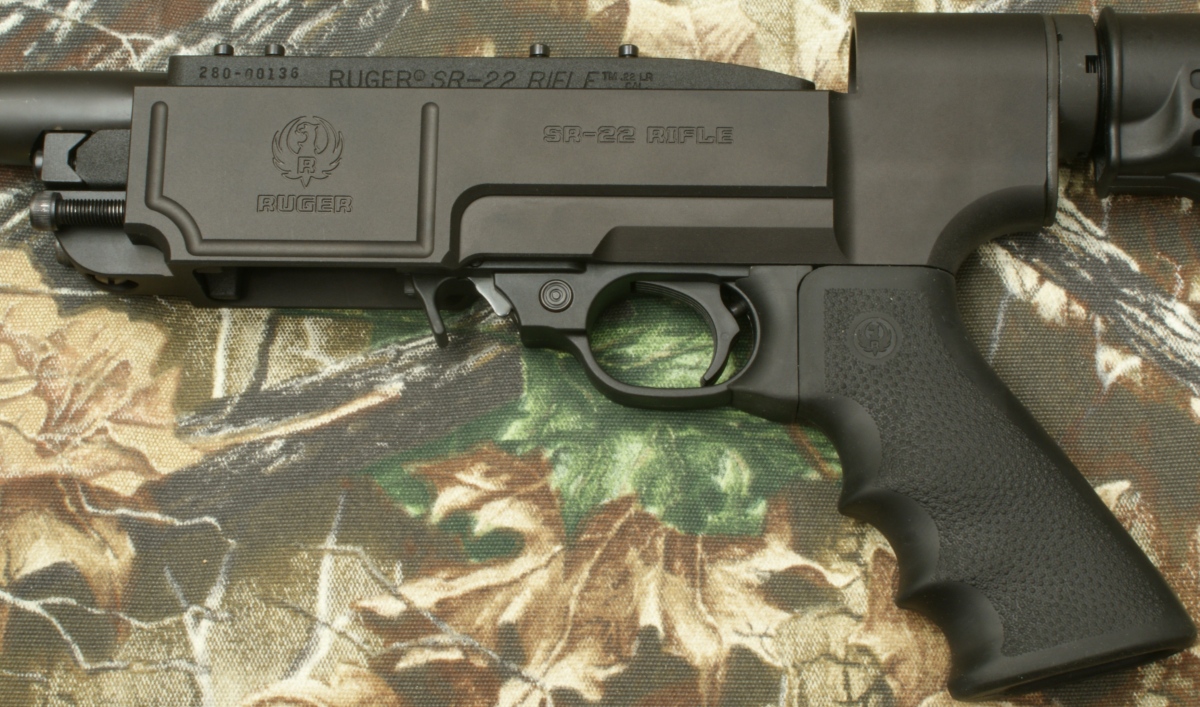
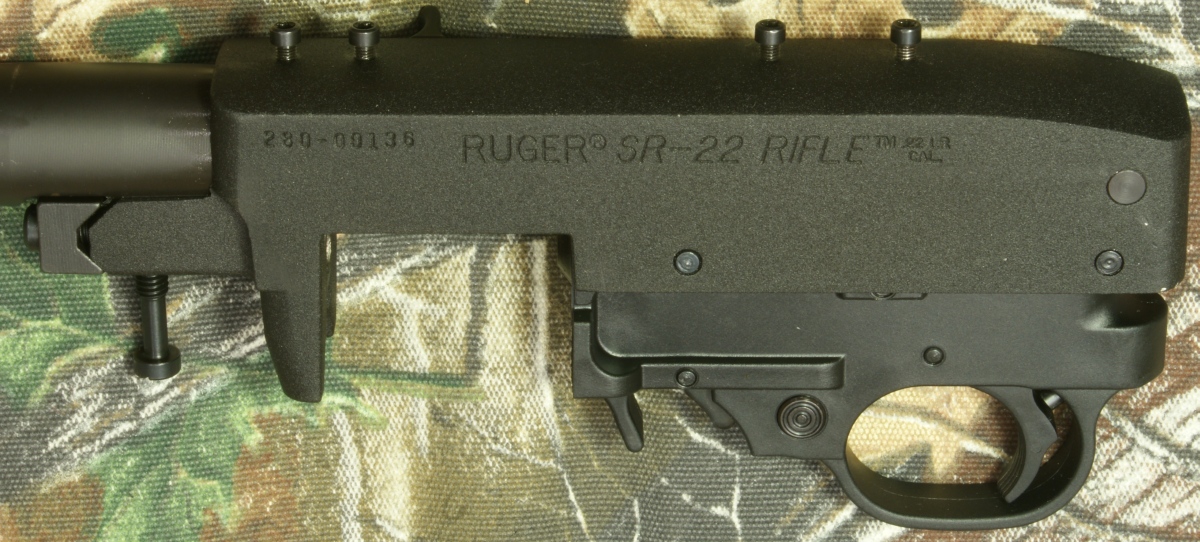
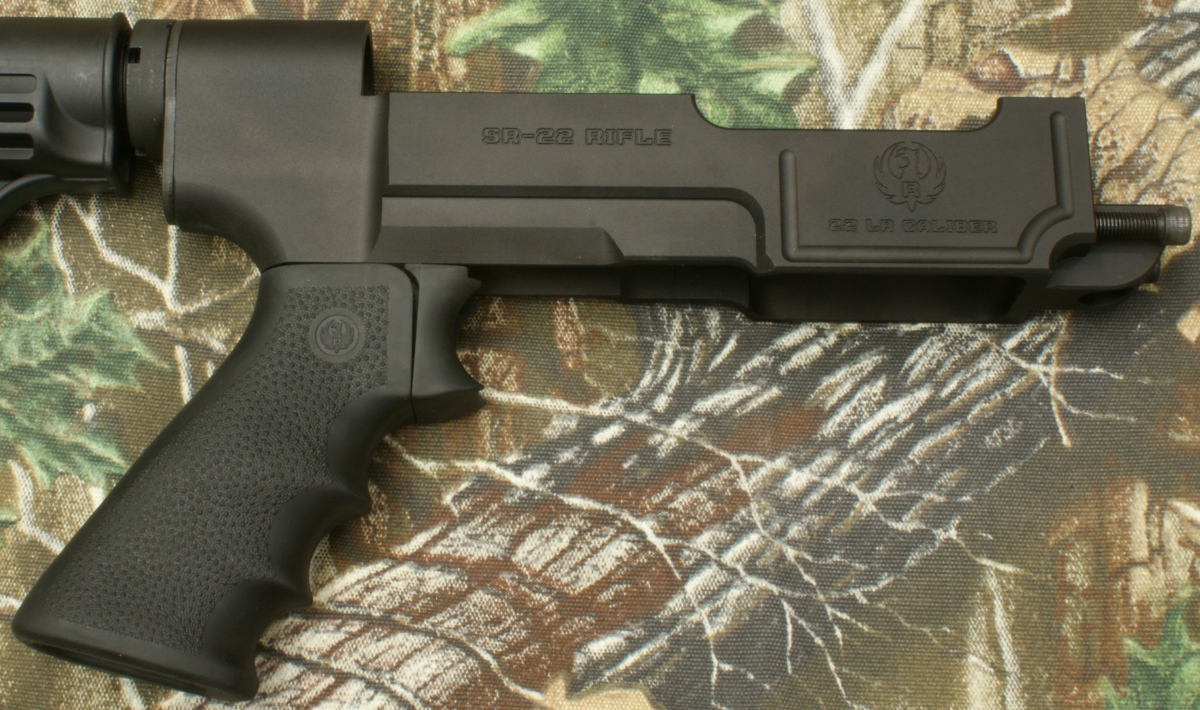
With the barrel-receiver assembly removed, you can see that these are the same Ruger 10/22 parts except that Ruger has marked the upper receiver with "SR-22 Rifle".
Figure 14
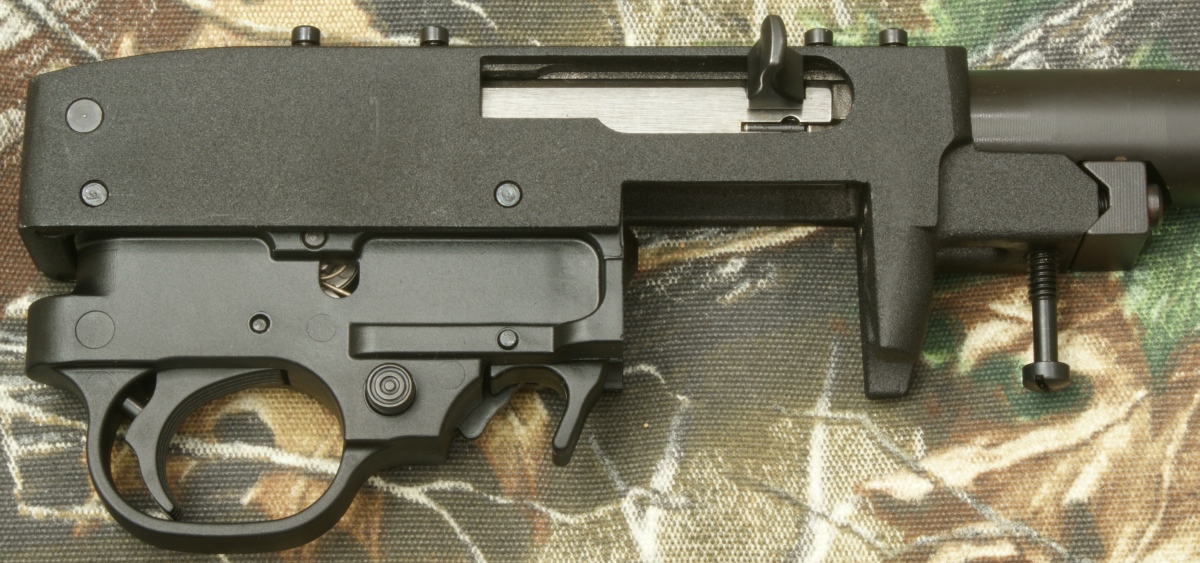
Figure 15
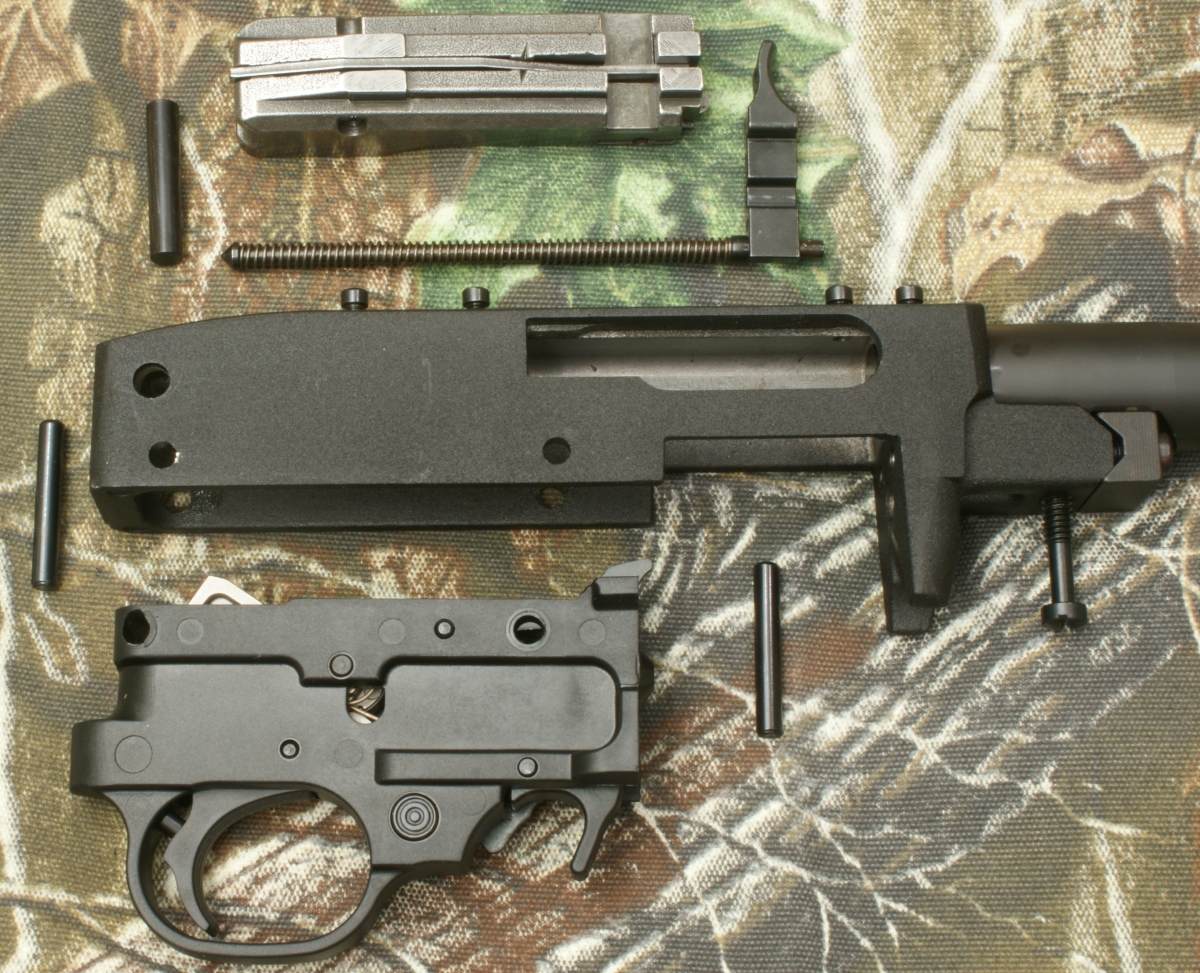
Step 5: Remove the trigger assembly and bolt. I decided to continue with the disassembly of the receiver components as shown below but I did not go through these disassembly details in this review because I cover them in my Ruger 22 Charger Review, which is basically the same components.
Figure 16
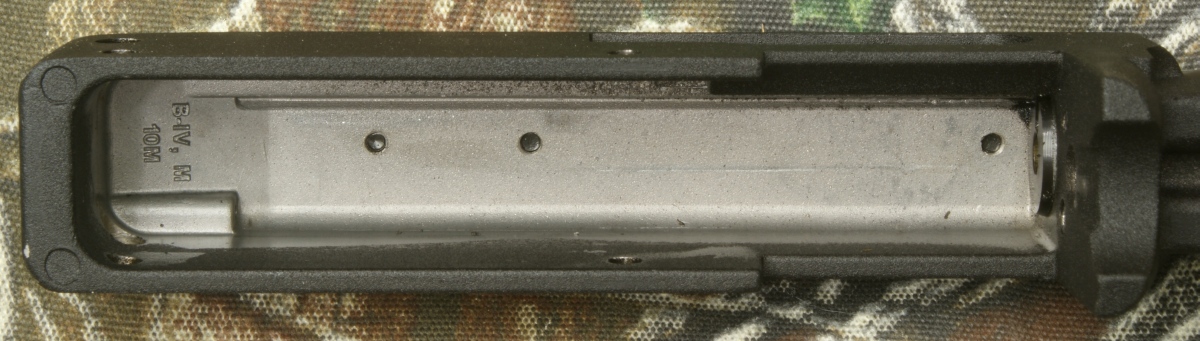
One difference I found between this receiver and that of my Ruger 22 Charger Pistol is that Ruger decided not to coat the inside upper portion of the receiver. I believe this was a good idea because in time the upper coating will start to wear off as I found with my Charger.
Figure 17
The next two photos show the Nordic housing that holds the receiver. The Ruger receiver had a good fit into this housing with no extra free play.
Figure 18
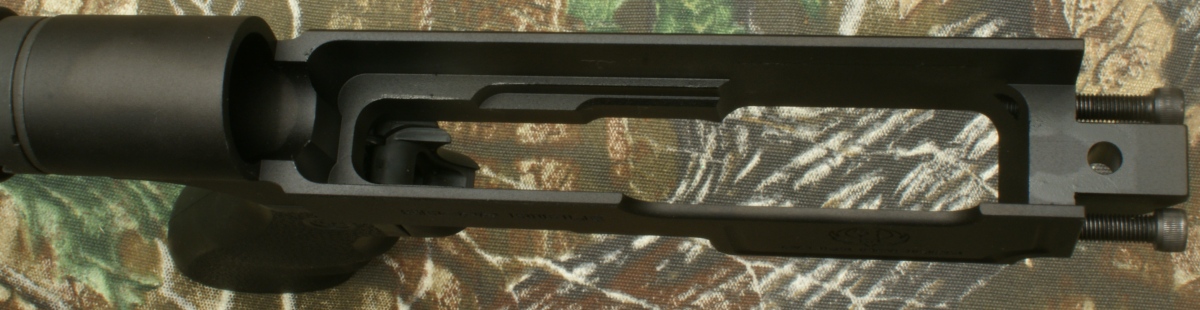
Figure 19
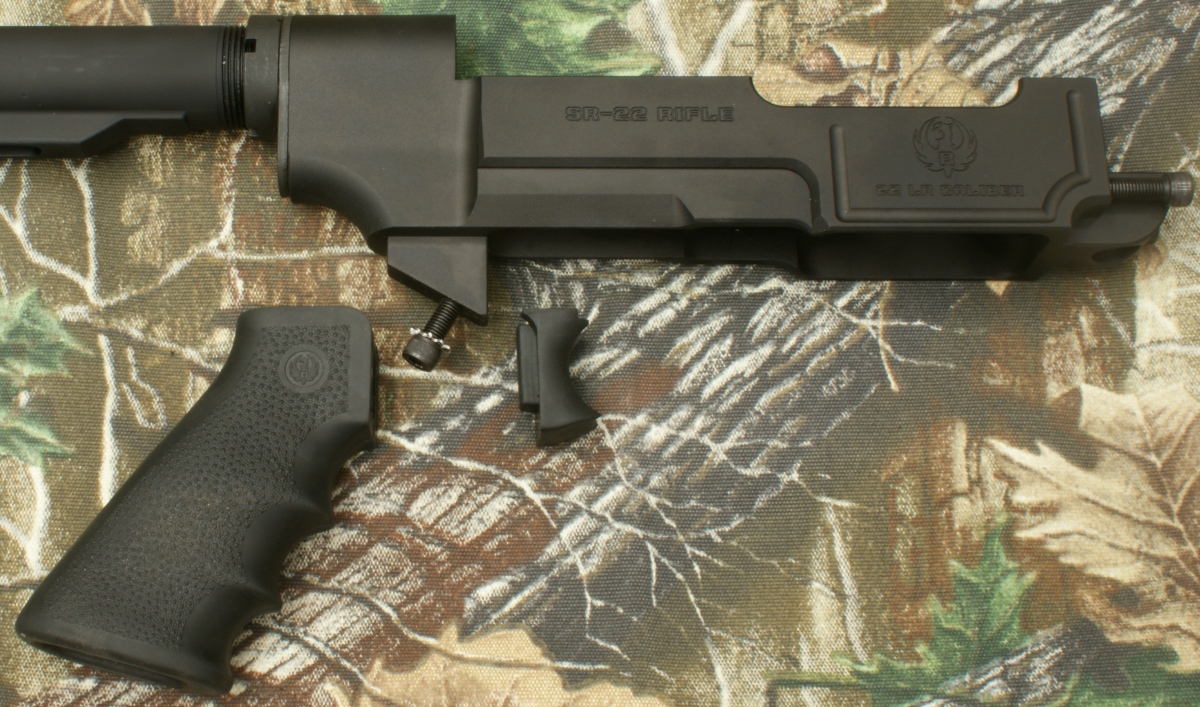
Since Ruger added a rubber spacer between the trigger guard and pistol grip, I decided to go ahead and remove the grip to show these components. The rugger spacer does not require any screws to hold it in place since it is trapped between the trigger guard and pistol grip when the rifle is fully assembled.
Figure 20
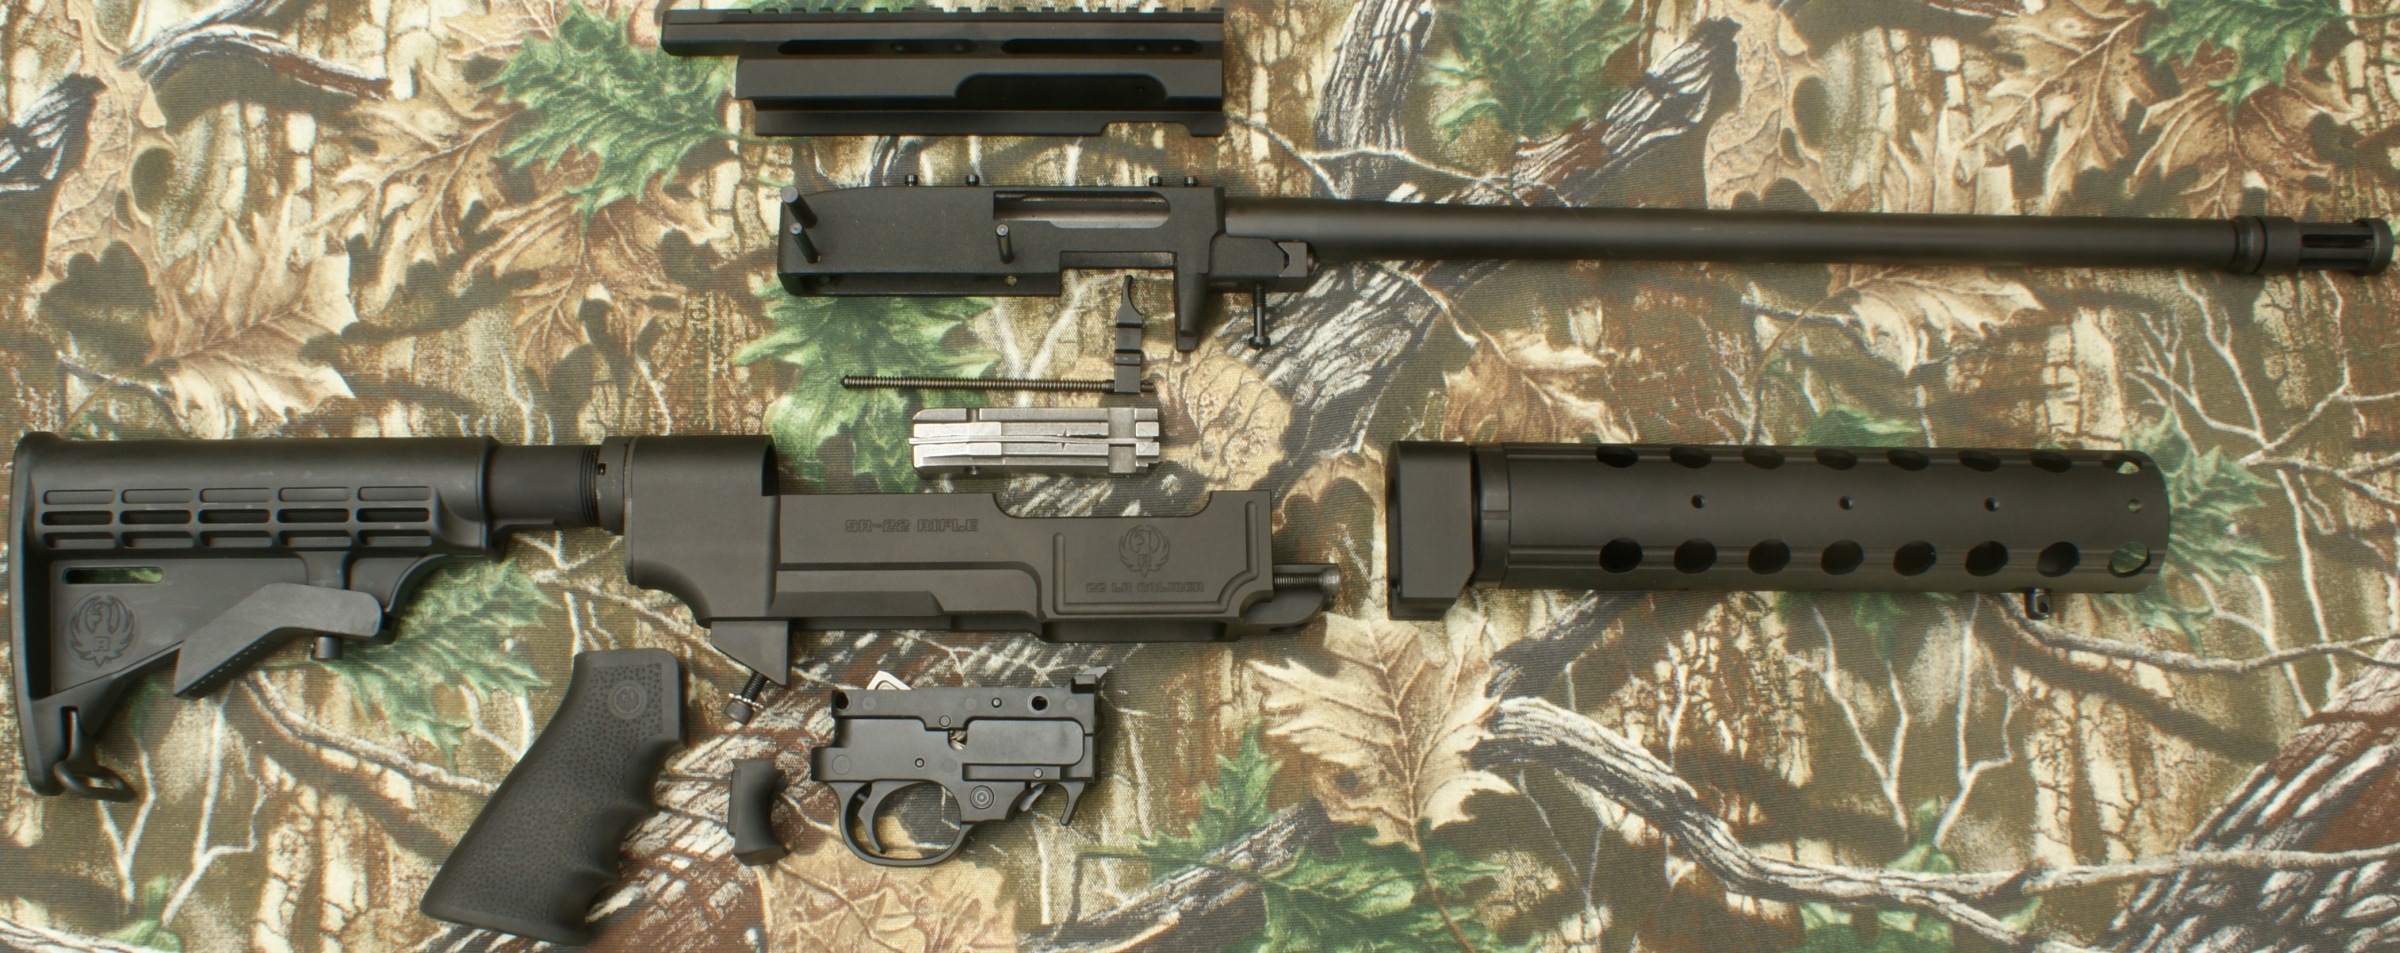
This last photo shows all parts disassembled. There are more parts that could be disassembled, but I believe that this level of disassembly is the greatest anyone would need to go to for cleaning the rifle.
Figure 20
Overall, I think the disassembly of the Ruger SR-22 rifle is simple and can be easily performed by anyone who can use a screwdriver and Allen/Torx wrench. One thing I must note is the optics/scope may require removal on some early rifles so that you can remove the scope mount (top rail). Without removal of the scope mount, the upper receiver will not come out of the Nordic housing on some of the early rifles. This means that you may need to check zero and/or re-zero your scope after you disassemble to this level. This is not an issue on the newer rifles.
You can find links to all parts of this review by going to the Review Summary page.
Update 1/4/11: Added clarification that only early rifles require removal of the scope mount (top rail) for full disassembly.
Update 1/16/11: Added description of mod made to upper receiver in Step 3 and added comment on using Loctite to top rail screws.
Or
If you would like to be notified about future Gunsumer Reports reviews via Facebook, make sure "You Like This" by clicking the Facebook "Like" button at the bottom or top of this page. If it already says "You Like This" beside the button, clicking it again will uncheck the "Like" status and you will not be notified.
| Share on Facebook | |
© 2010, 2011, 2012, 2013, 2014, 2015, 2016, 2017, 2018, 2019, 2020, 2021, 2022, 2023 & 2024 Gunsumer Reports™, All rights reserved.
FTC Disclosure