|
|
Gunsumer Reports TM Providing Detailed Objective Reviews for Firearms and Firearm Accessories |
Ruger LC9 Review With LaserMax
Part 3 - External and Operational Features
March 3, 2012
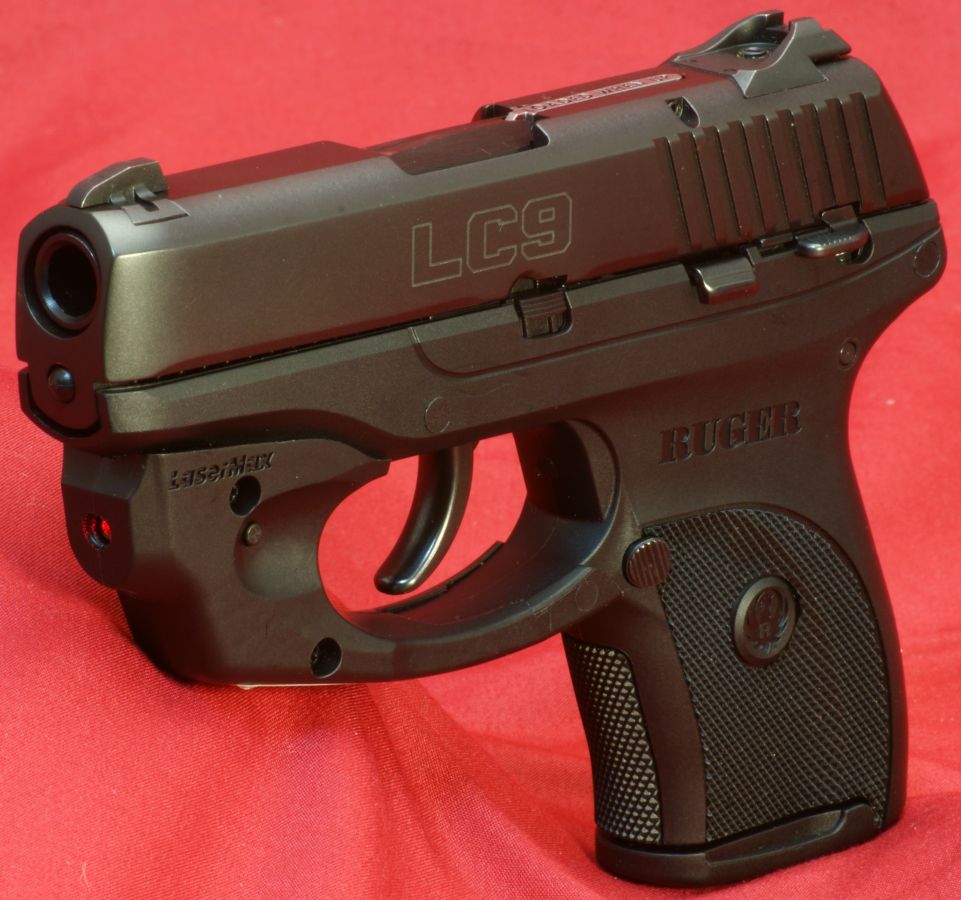
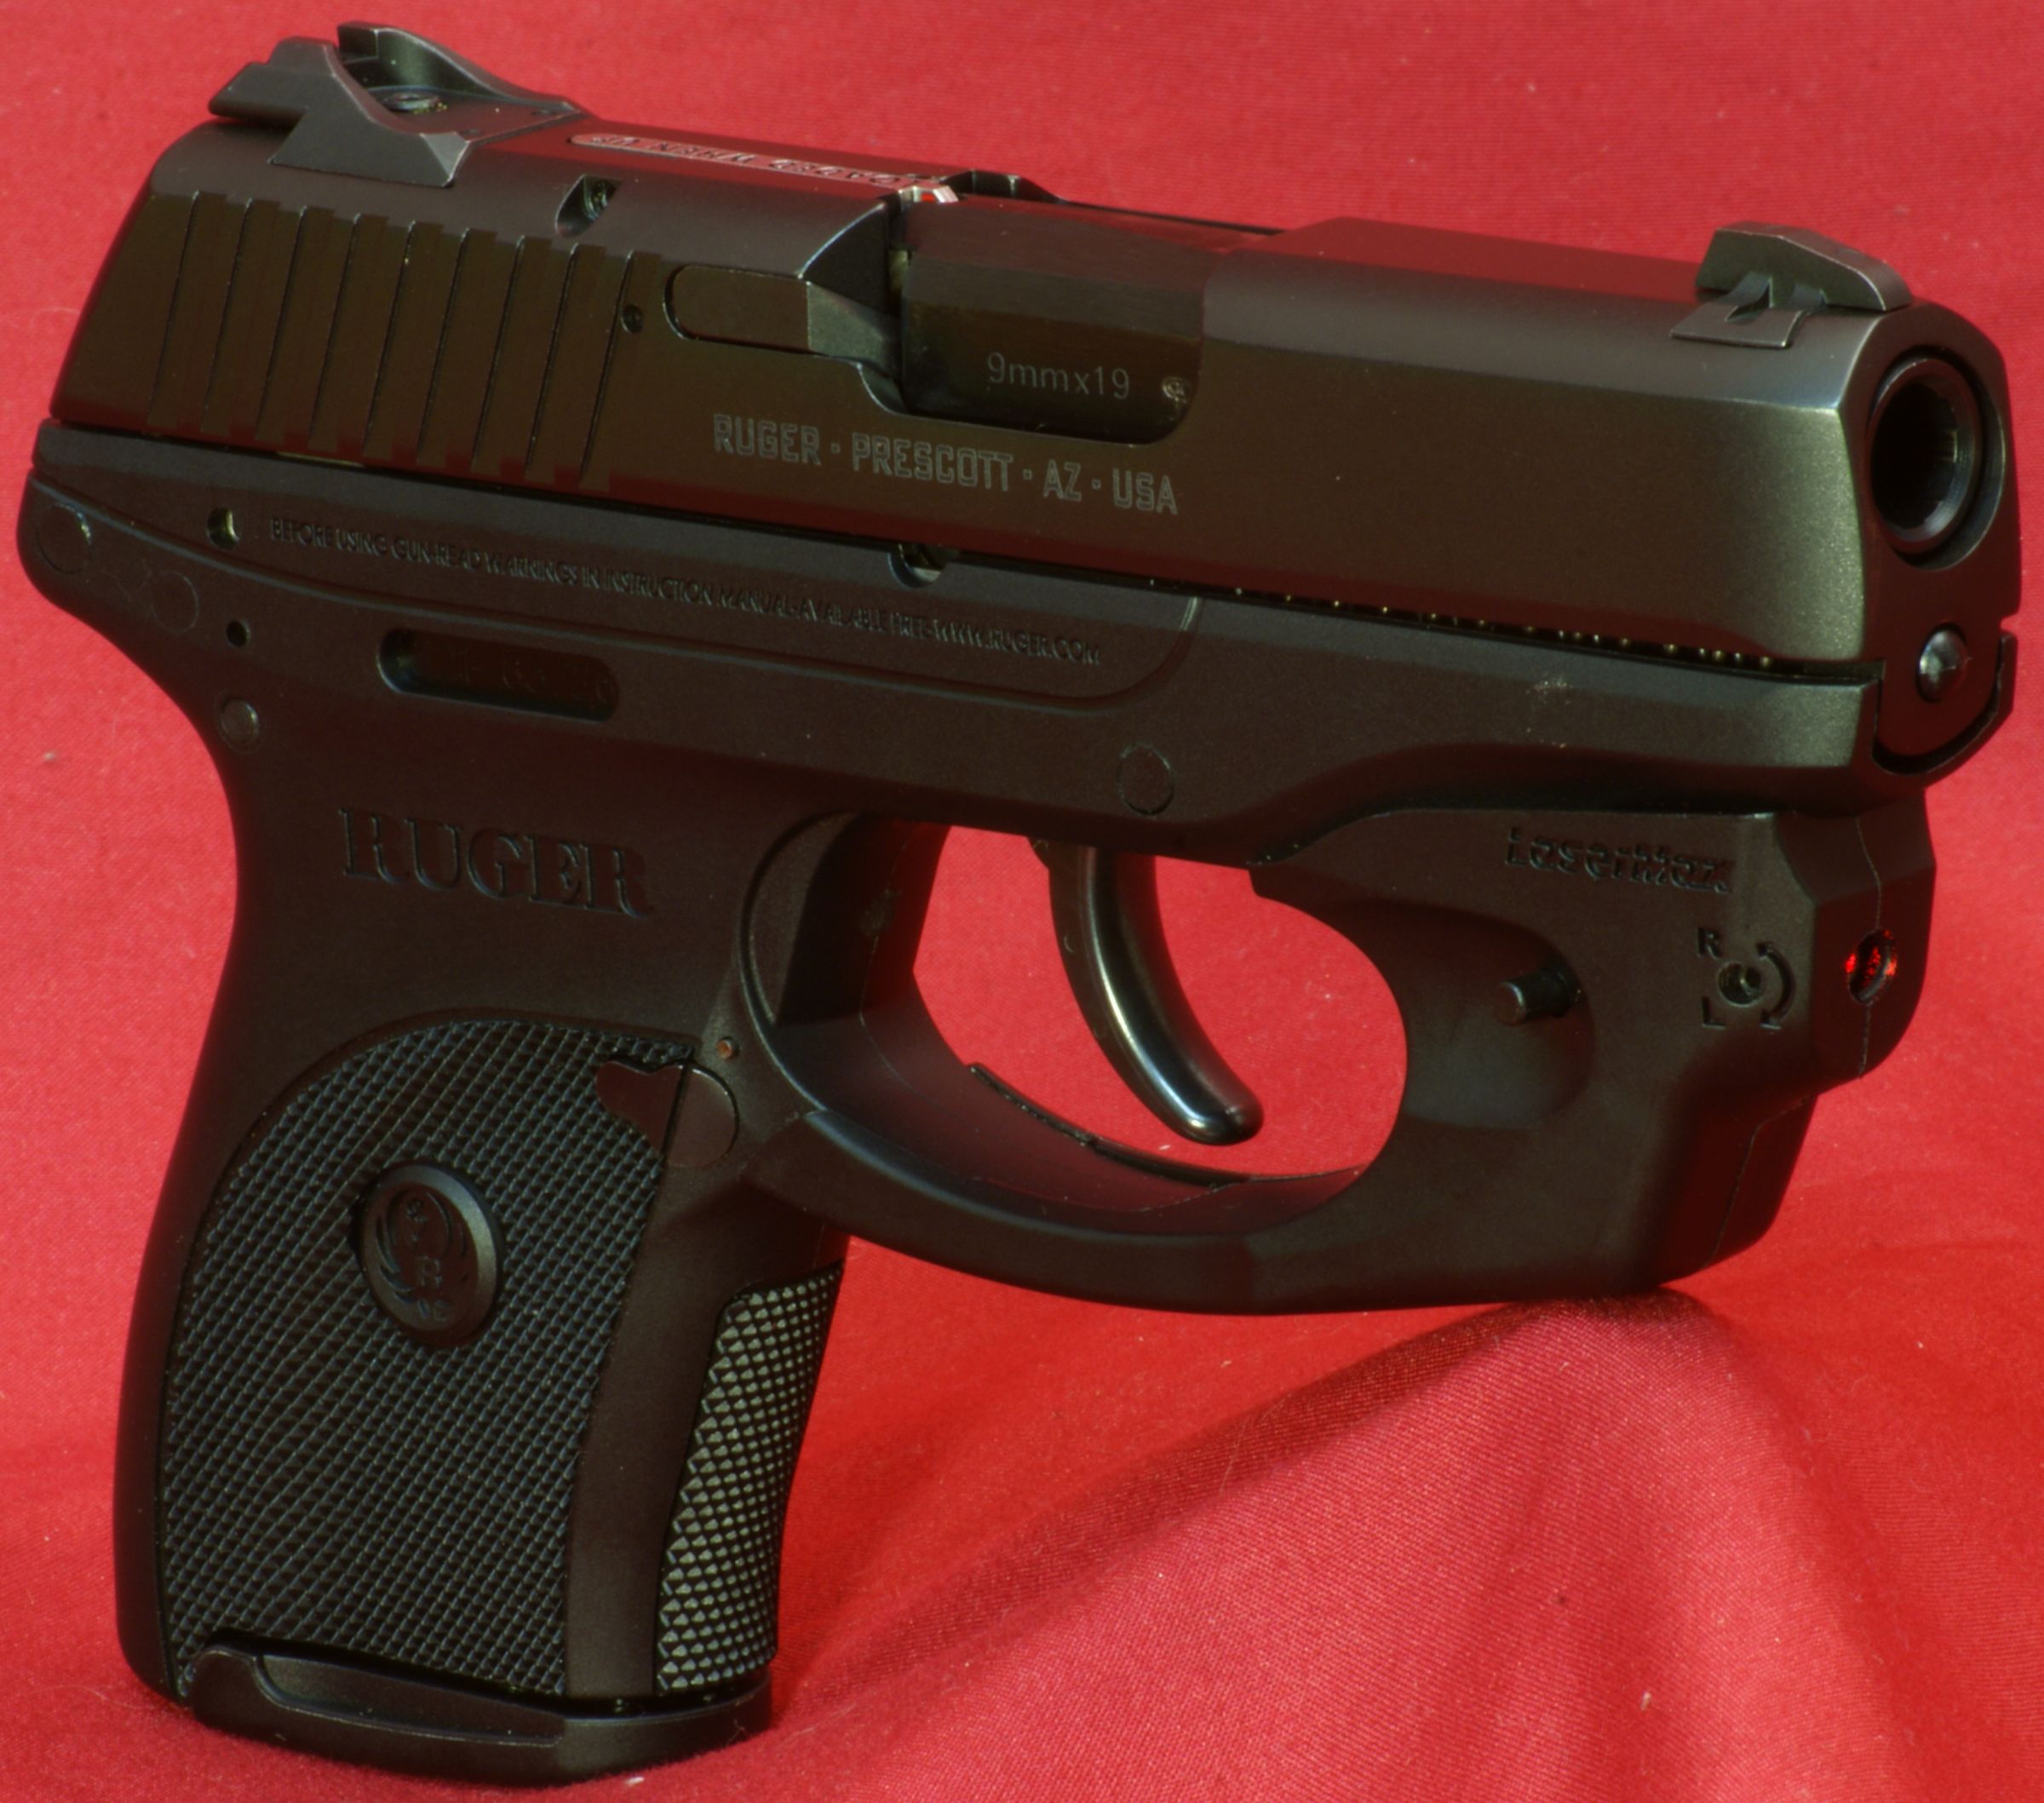
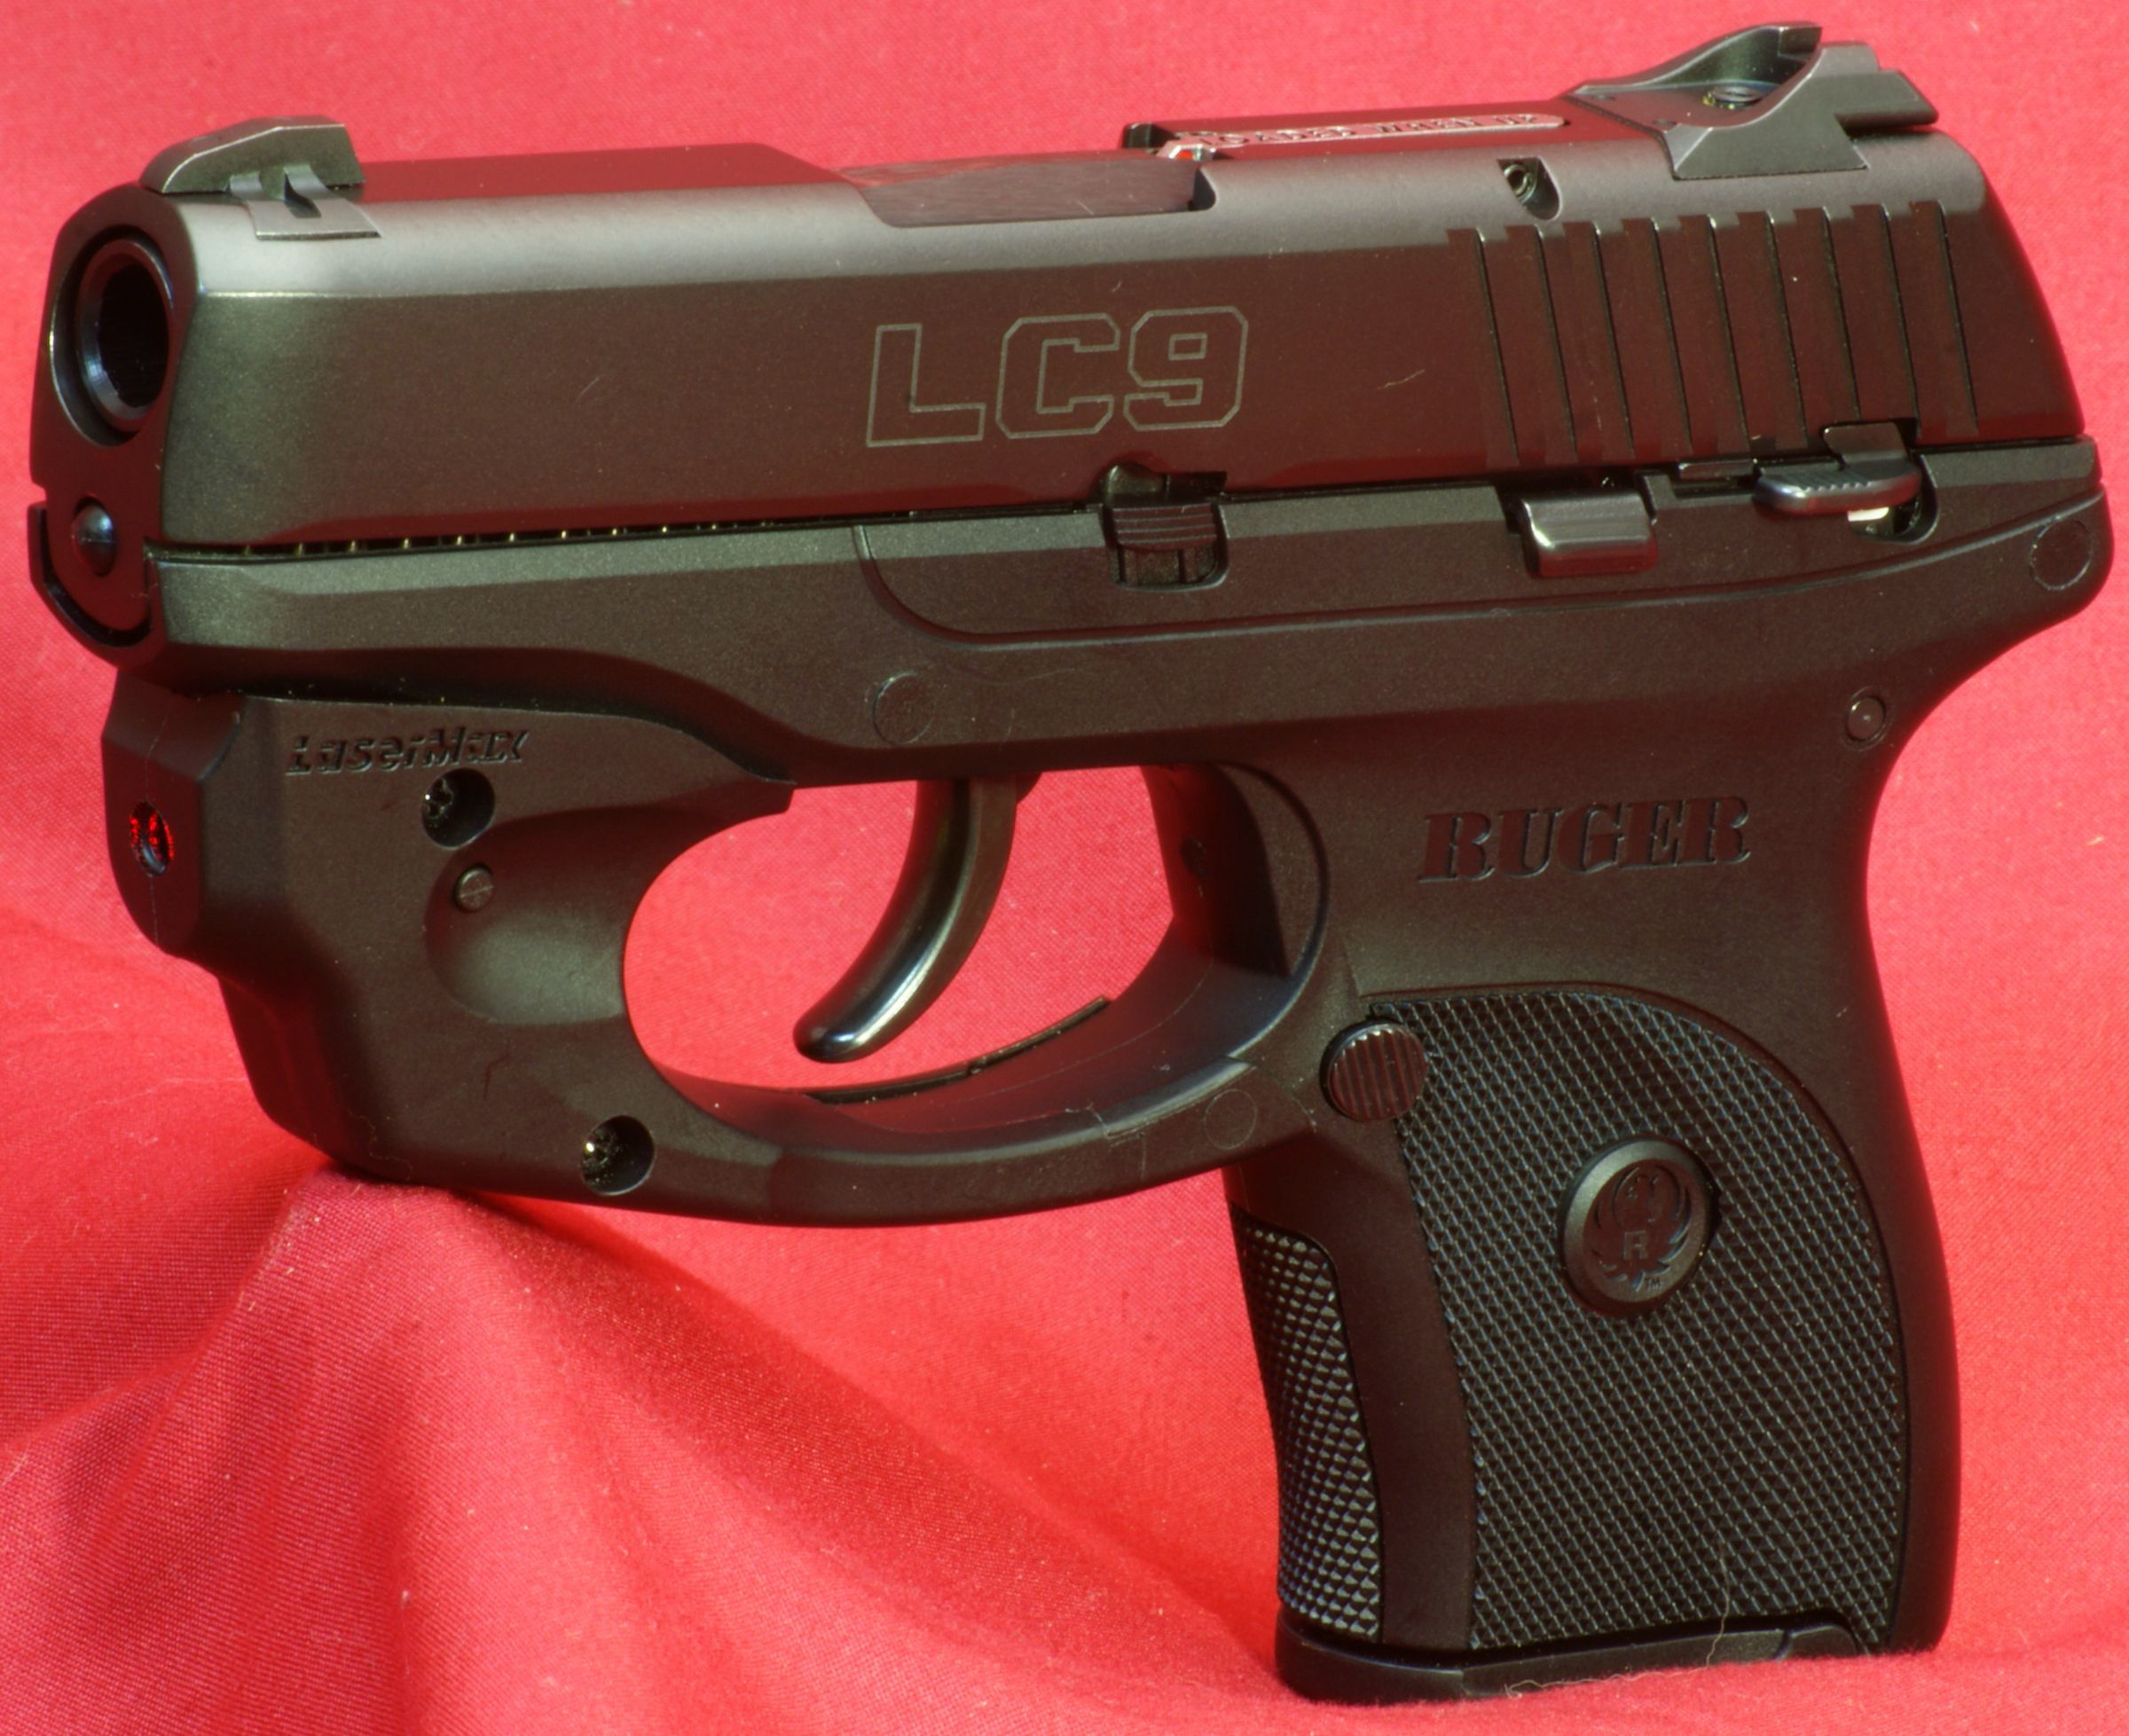
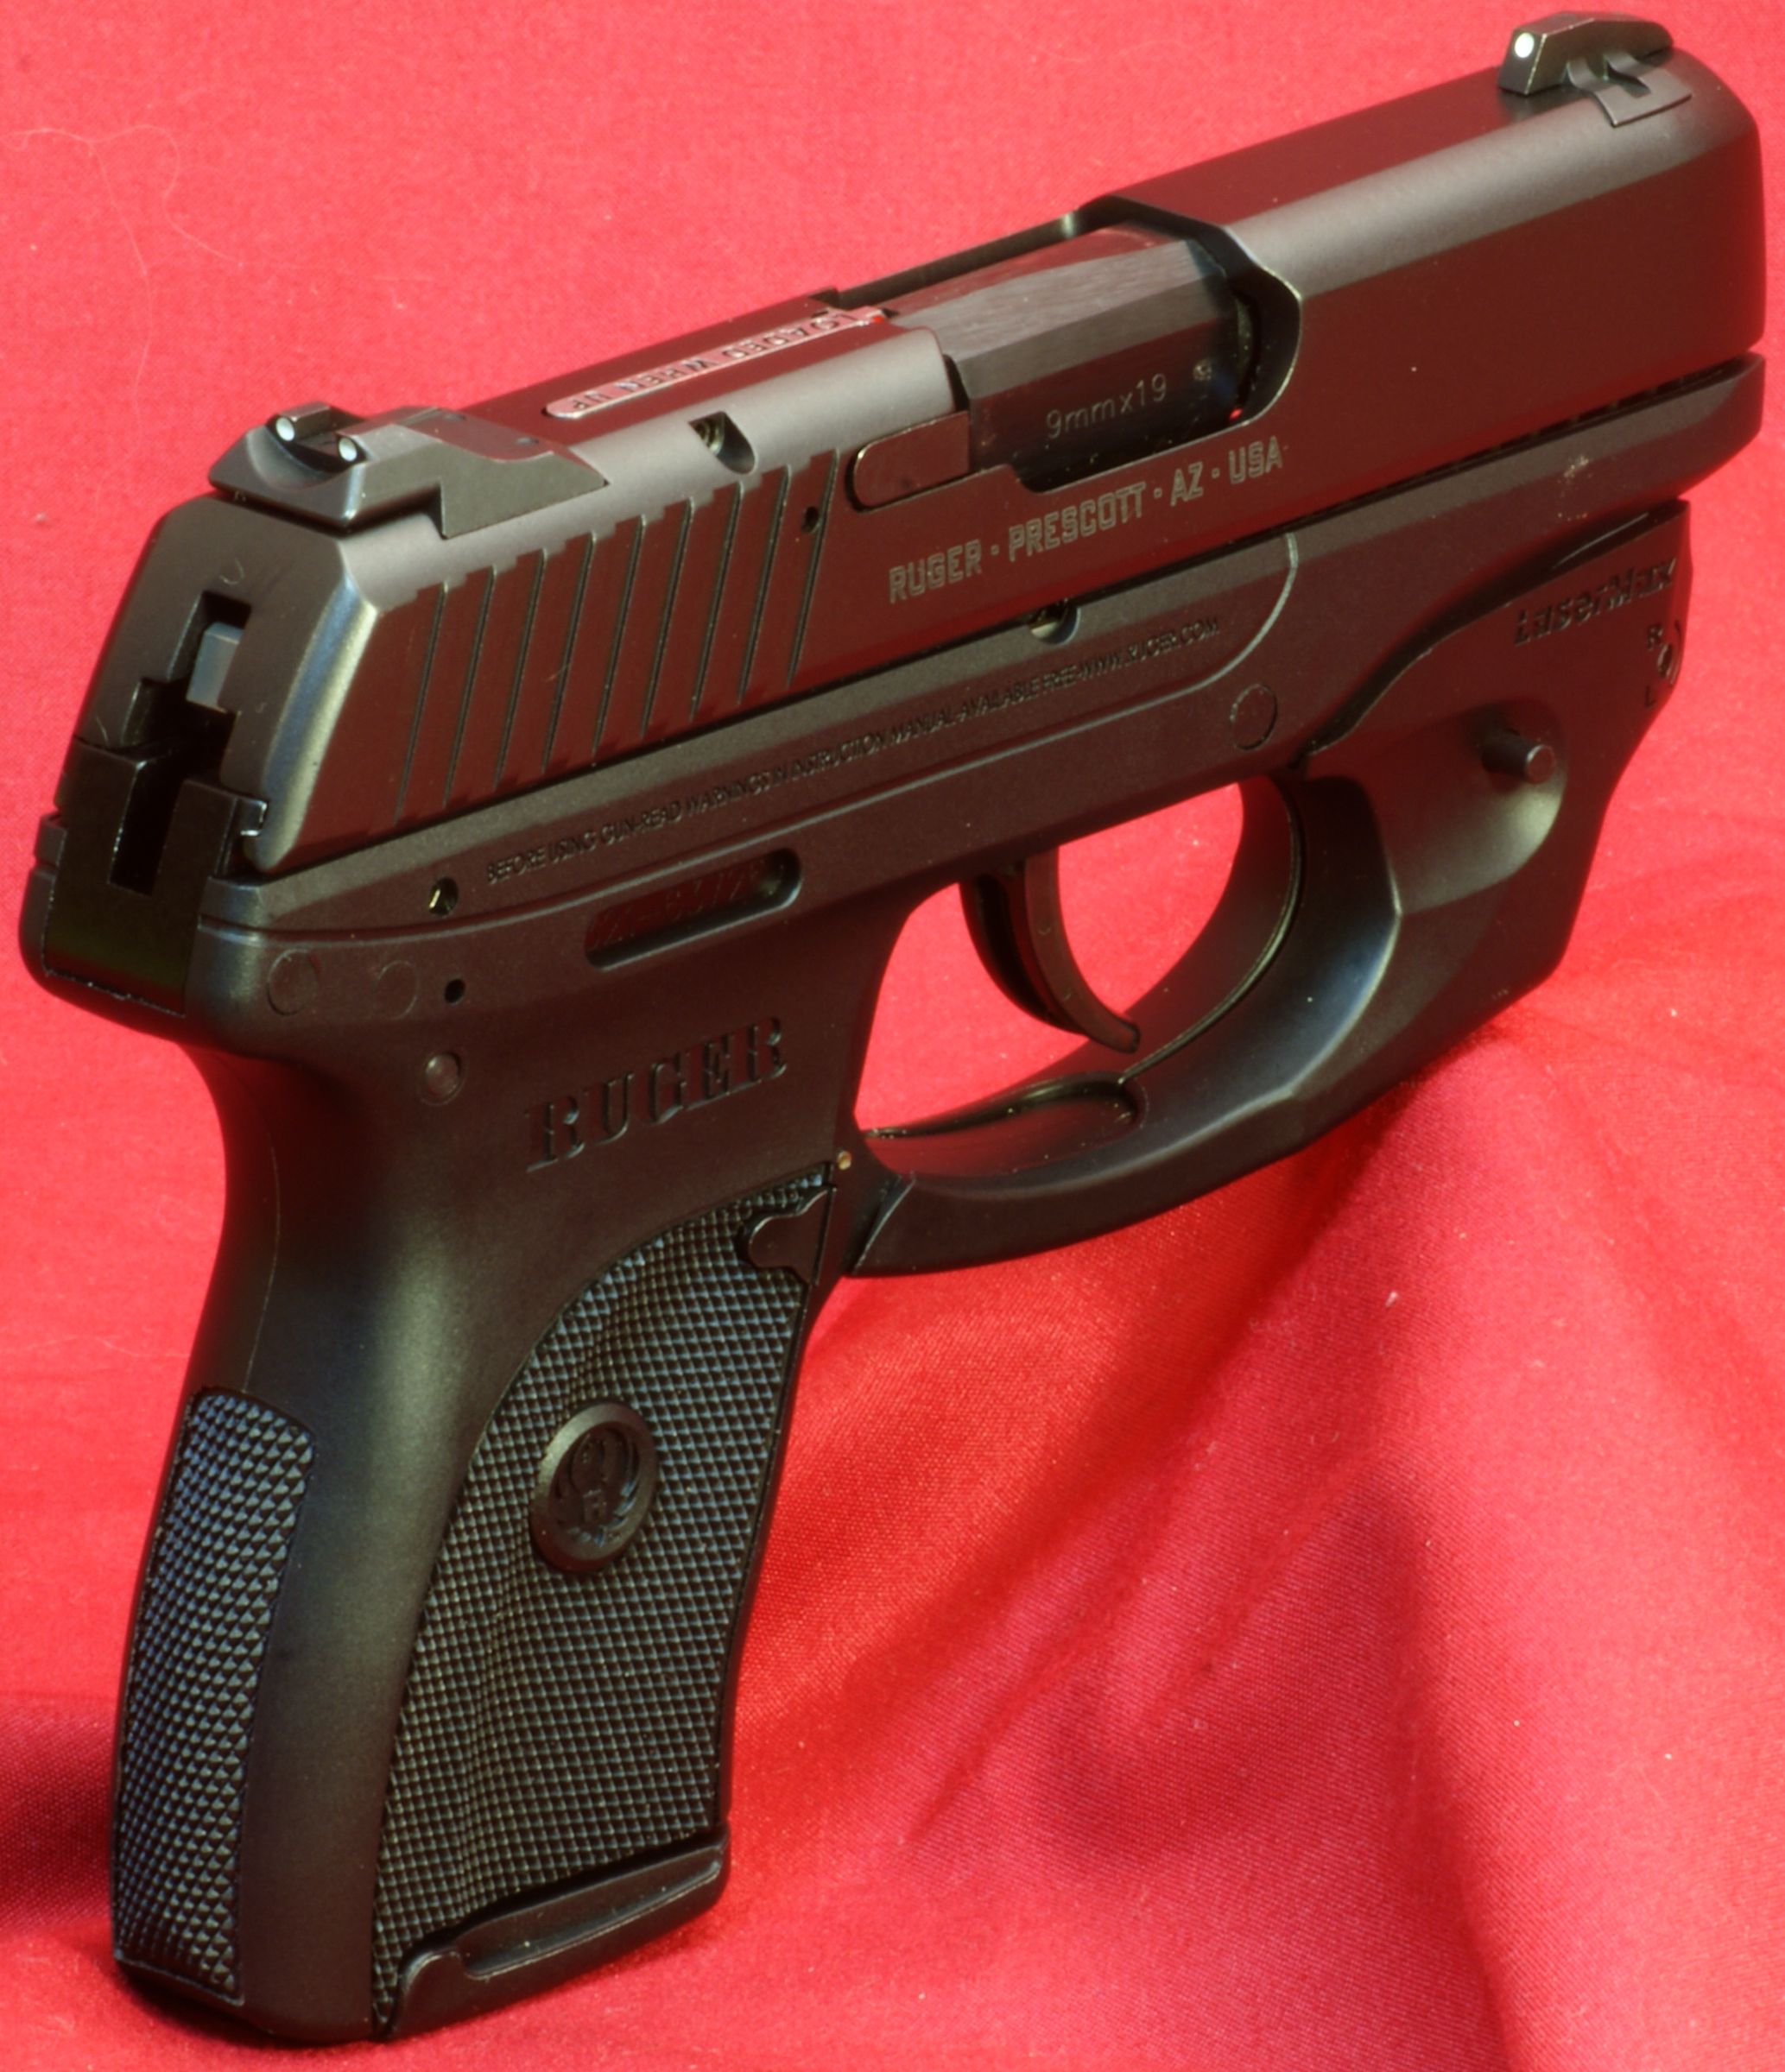
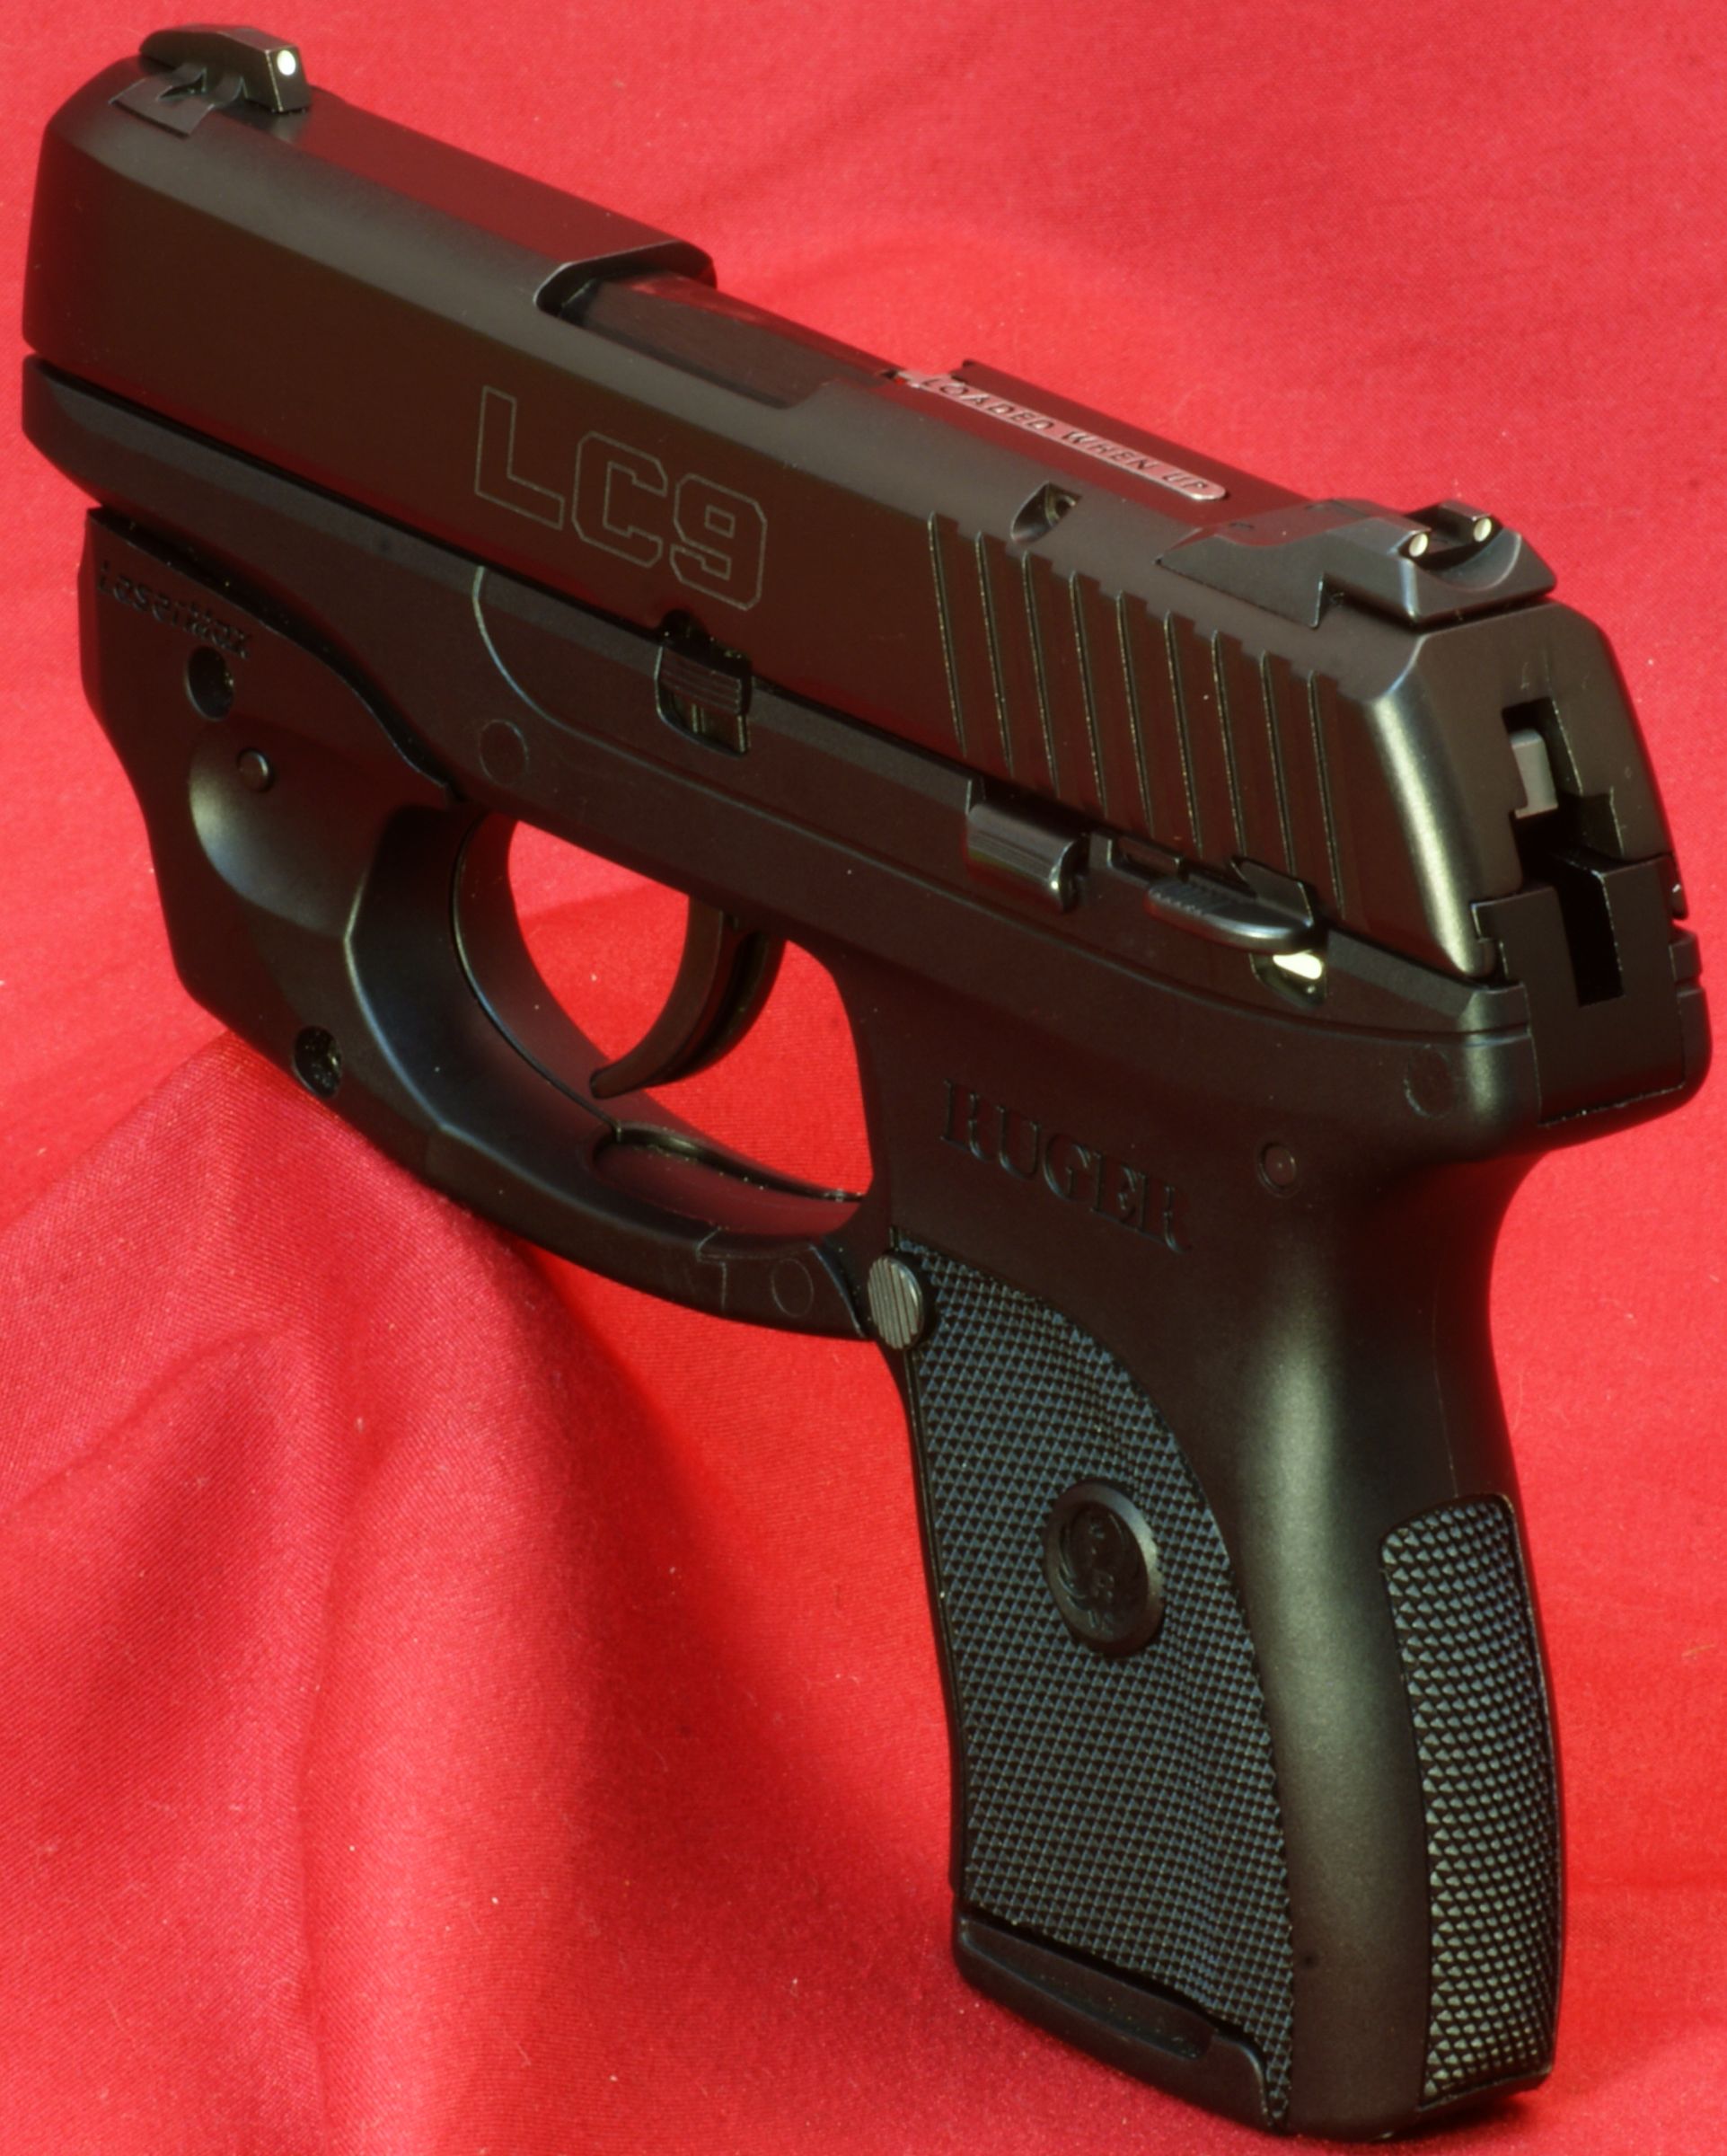
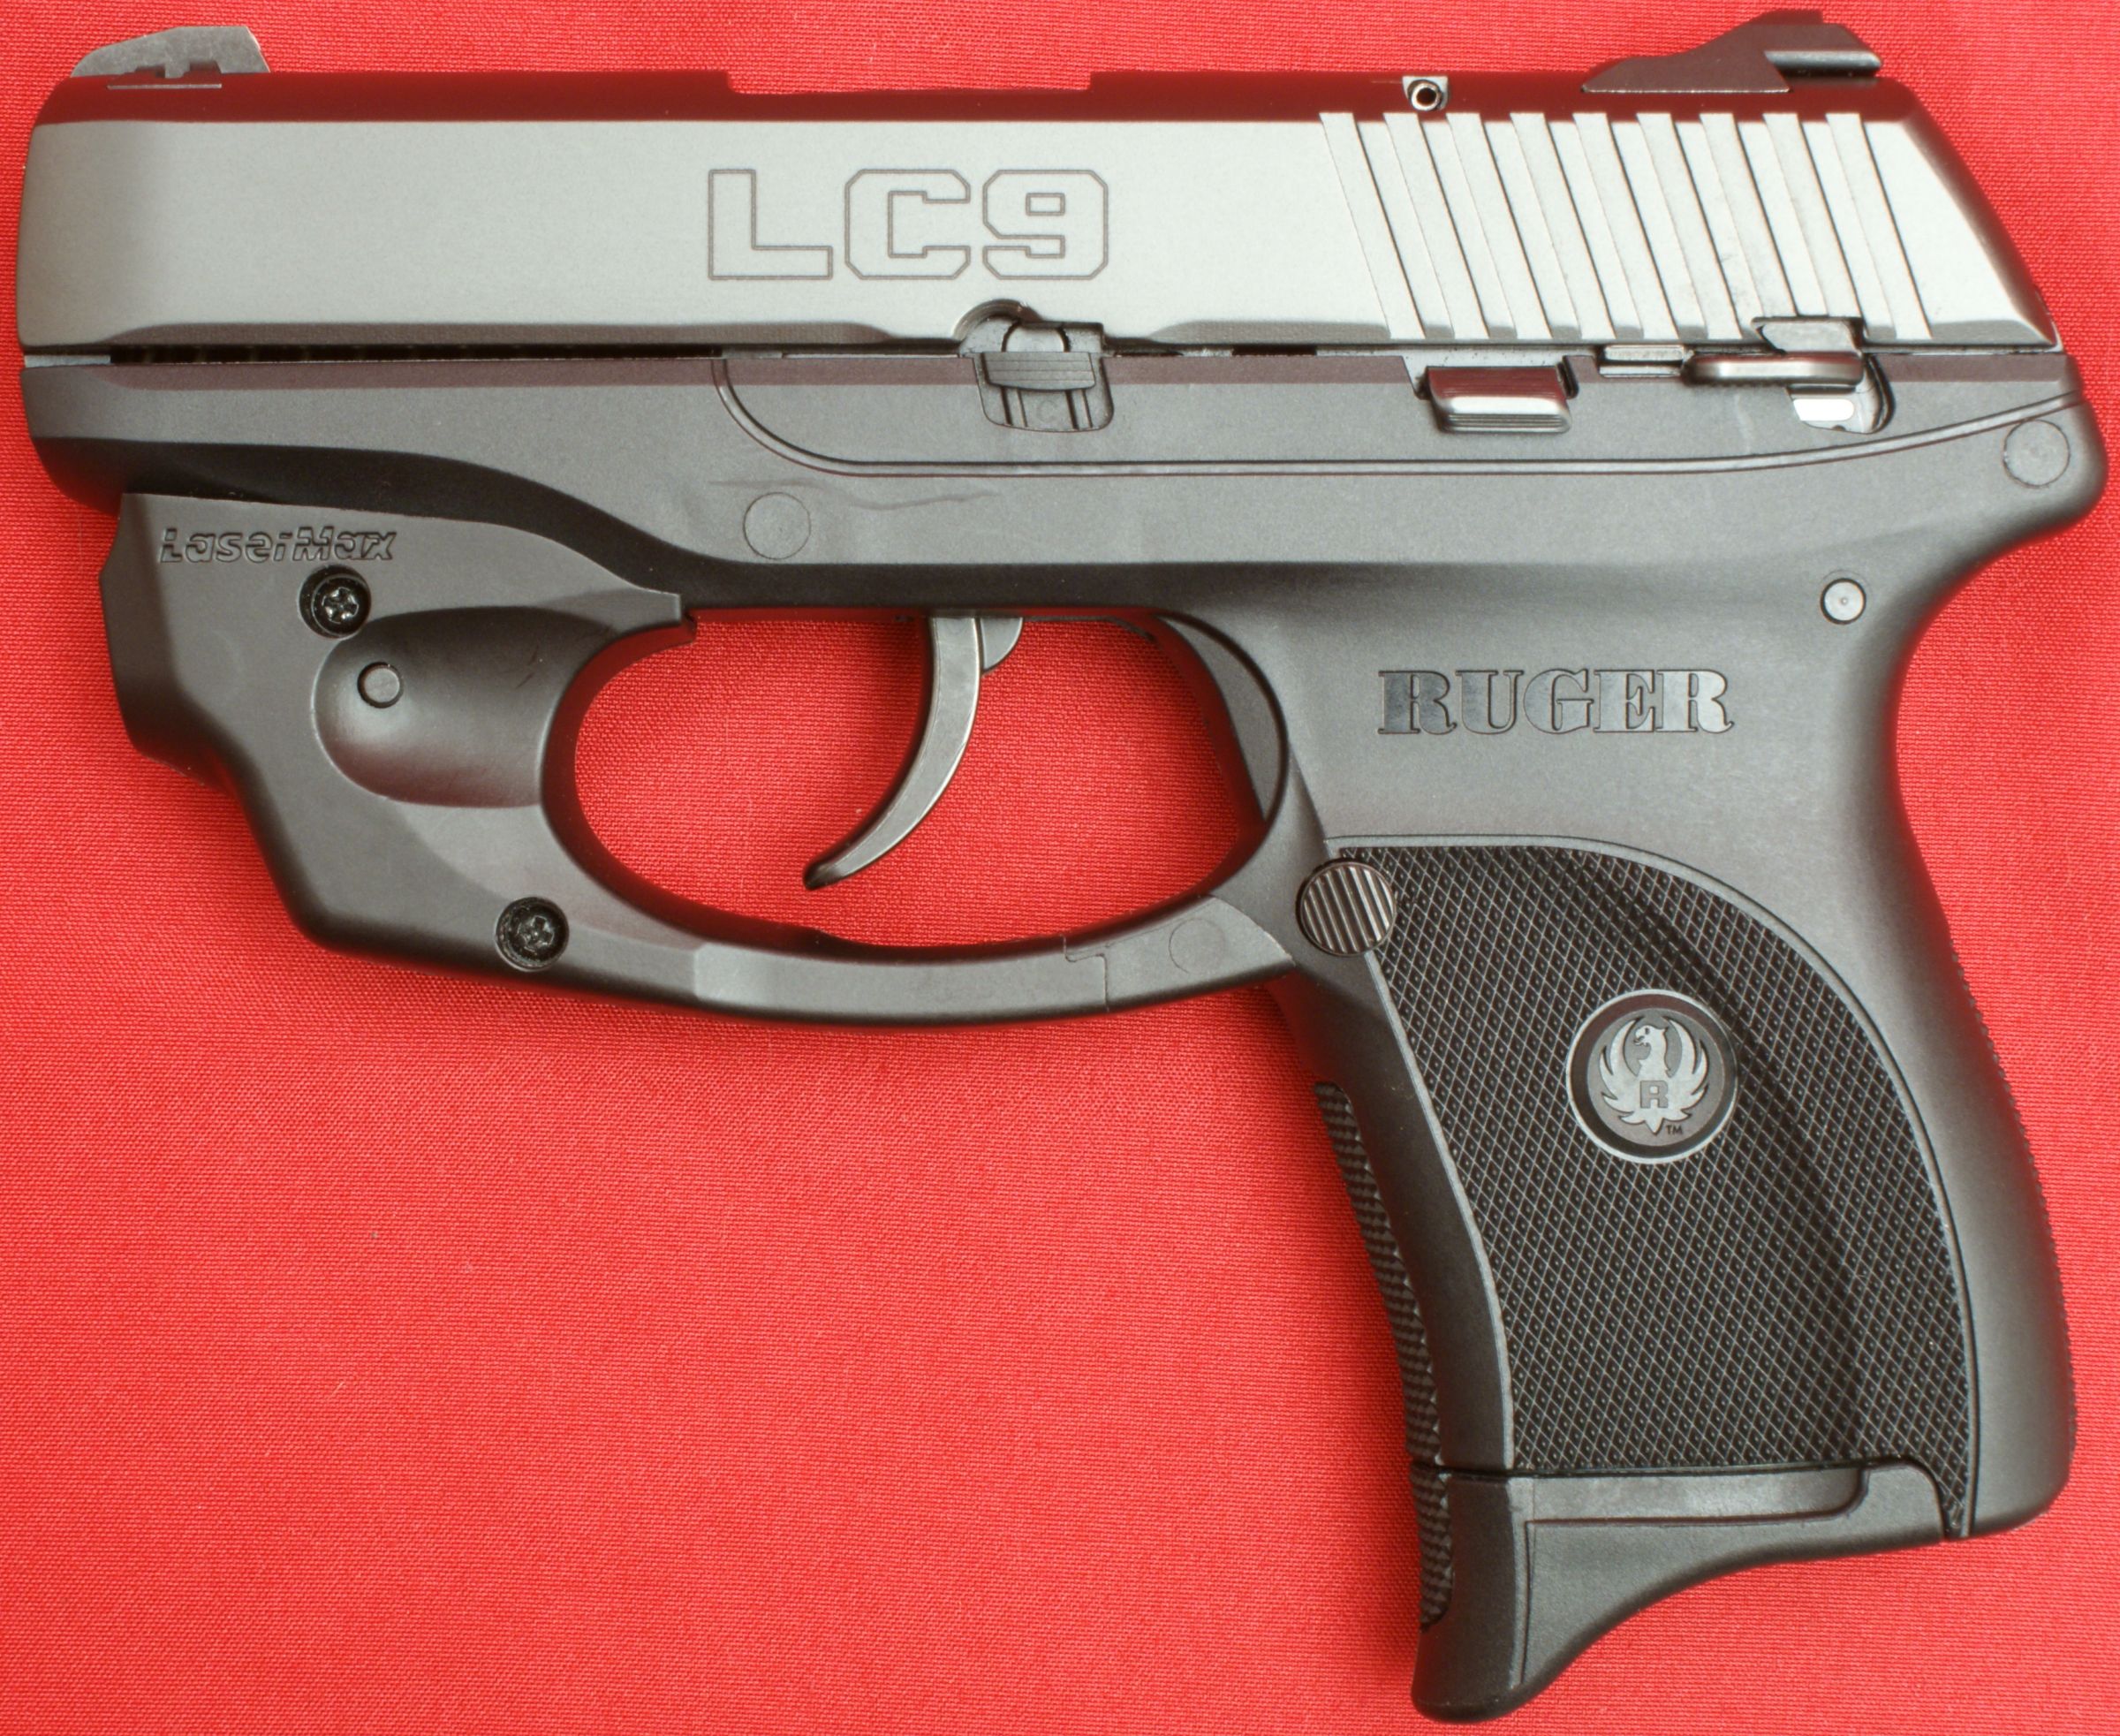
In this part of my Ruger LC9 Pistol with LaserMax Review I cover all the externally visible and operational features of LC9. Throughout this review you can click on any photos to bring up higher resolution photos showing finer detail. To start out, I have include the four isometric views of the LC9 Pistol.
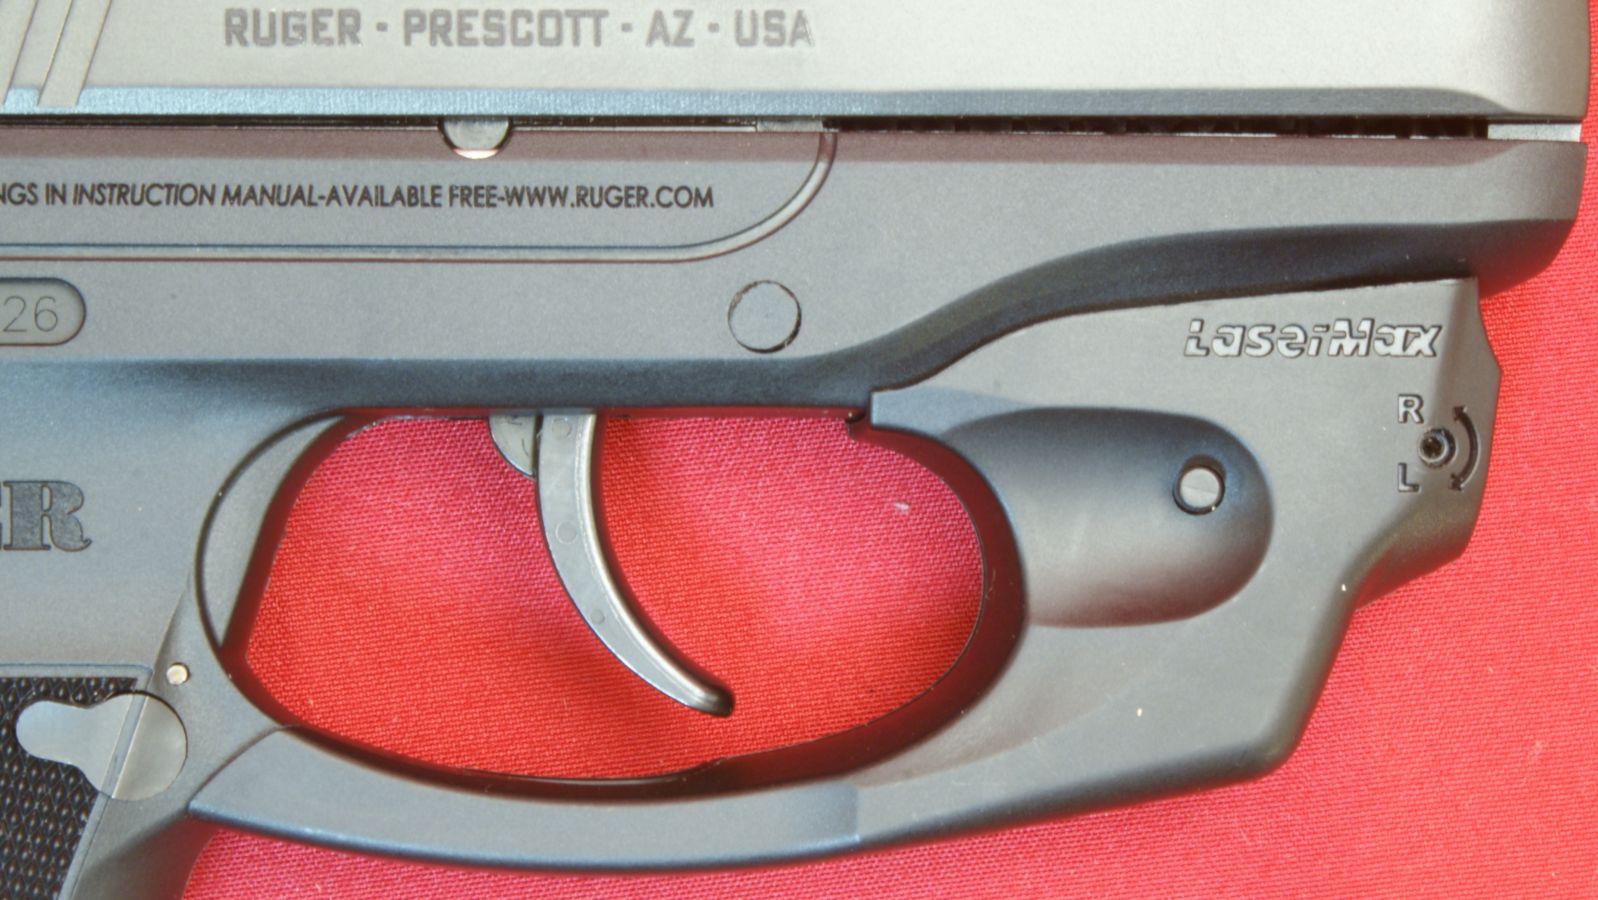
At first glance you see that the LC9 w/LaserMax has a black polymer (glass filled nylon) grip frame and a blued alloy steel slide. Next you notice the molded polymer LaserMax CenterFire Laser that mounts to the trigger guard. I think Ruger & LaserMax did a nice job keeping the "melted" lines/curves of the LaserMax body similar to that of the LC9 Pistol.
Figure 1
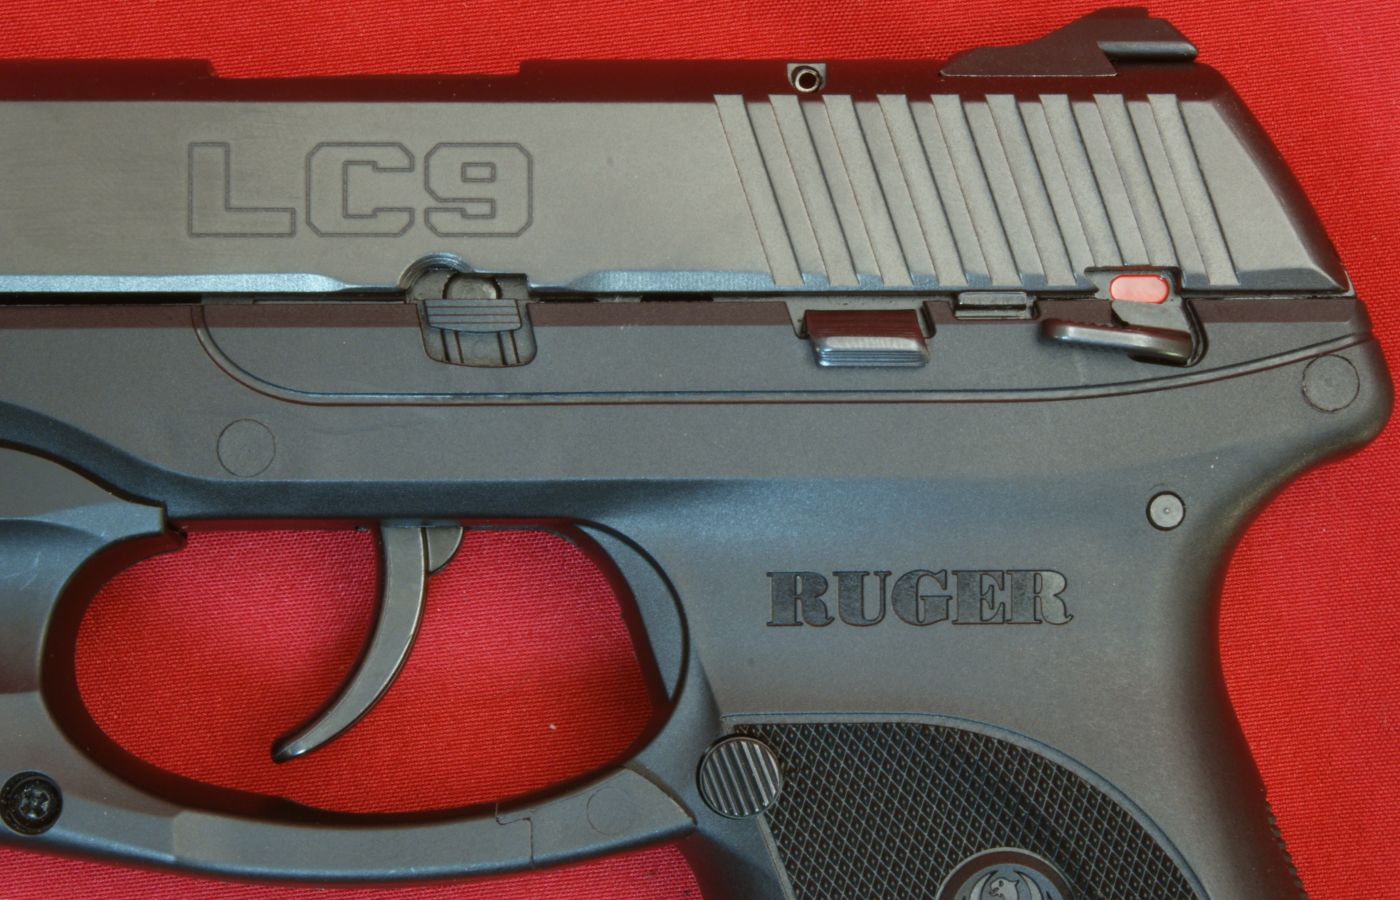
The laser etching on both sides of the slide gives the Ruger LC9 a nice look. The rear of the slide has 9 serrations on each side for griping the slide to manually actuate the slide.
Figure 2
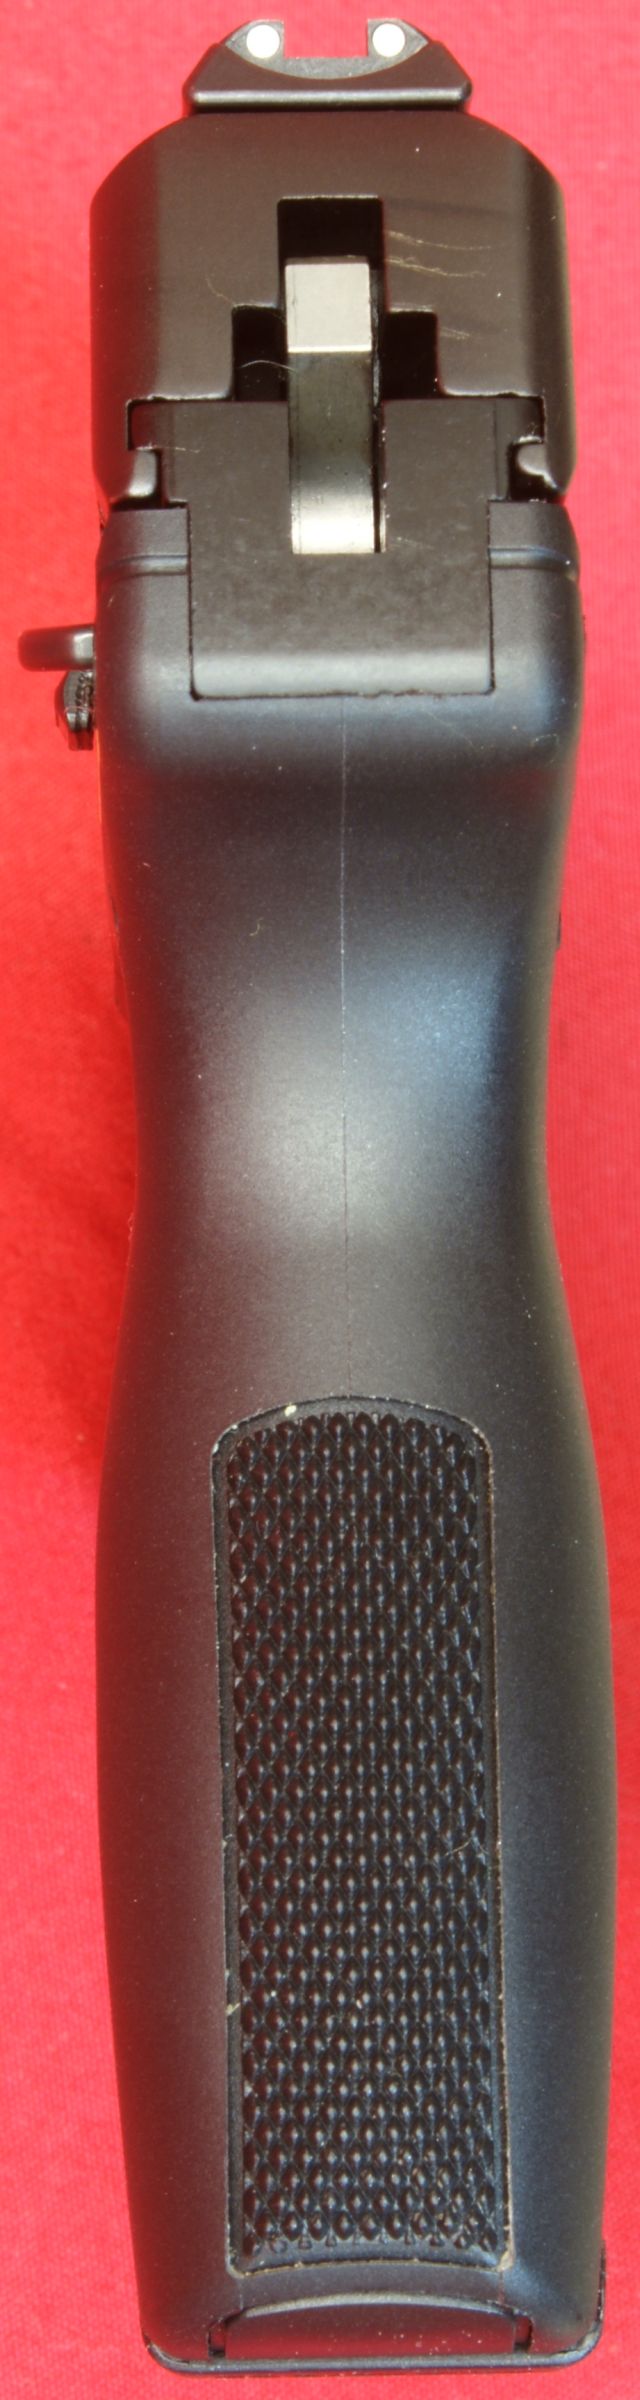
Within this group of photos I want to point out the grip of the LC9. The LC9 grip includes a checkering pattern on all four sides of the grip and the combination of the checkering on the front and rear of the grip provide the best surfaces for keeping control over the LC9 when firing the pistol.
Figure 3
Also notice in these photos the scooped out area on the sides of the grip. For my hand size (medium palm, long fingers), I'm not sure if these scooped areas are of any real benefit other than styling. Perhaps a smaller hand would be able to make the side surfaces have better contact with your hand and finger tips.
Figure 4
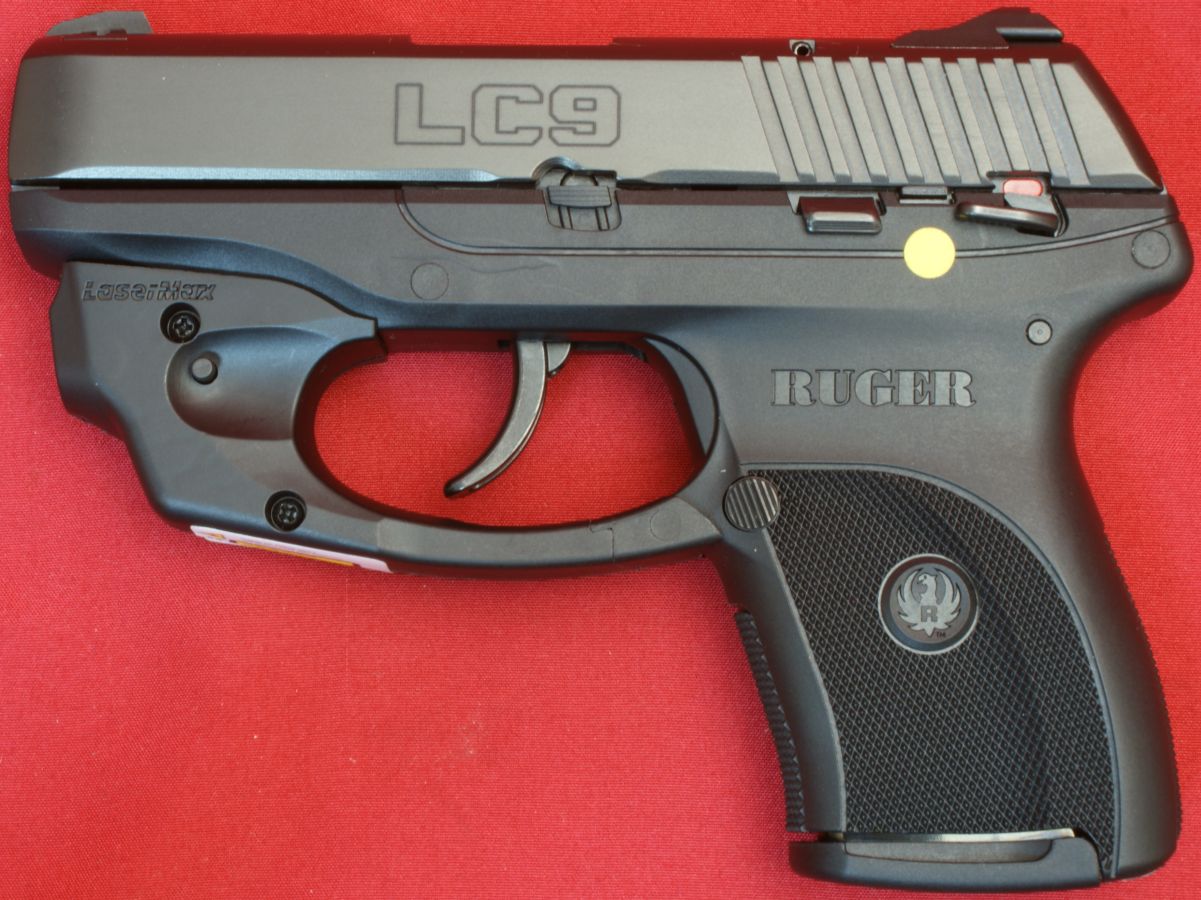
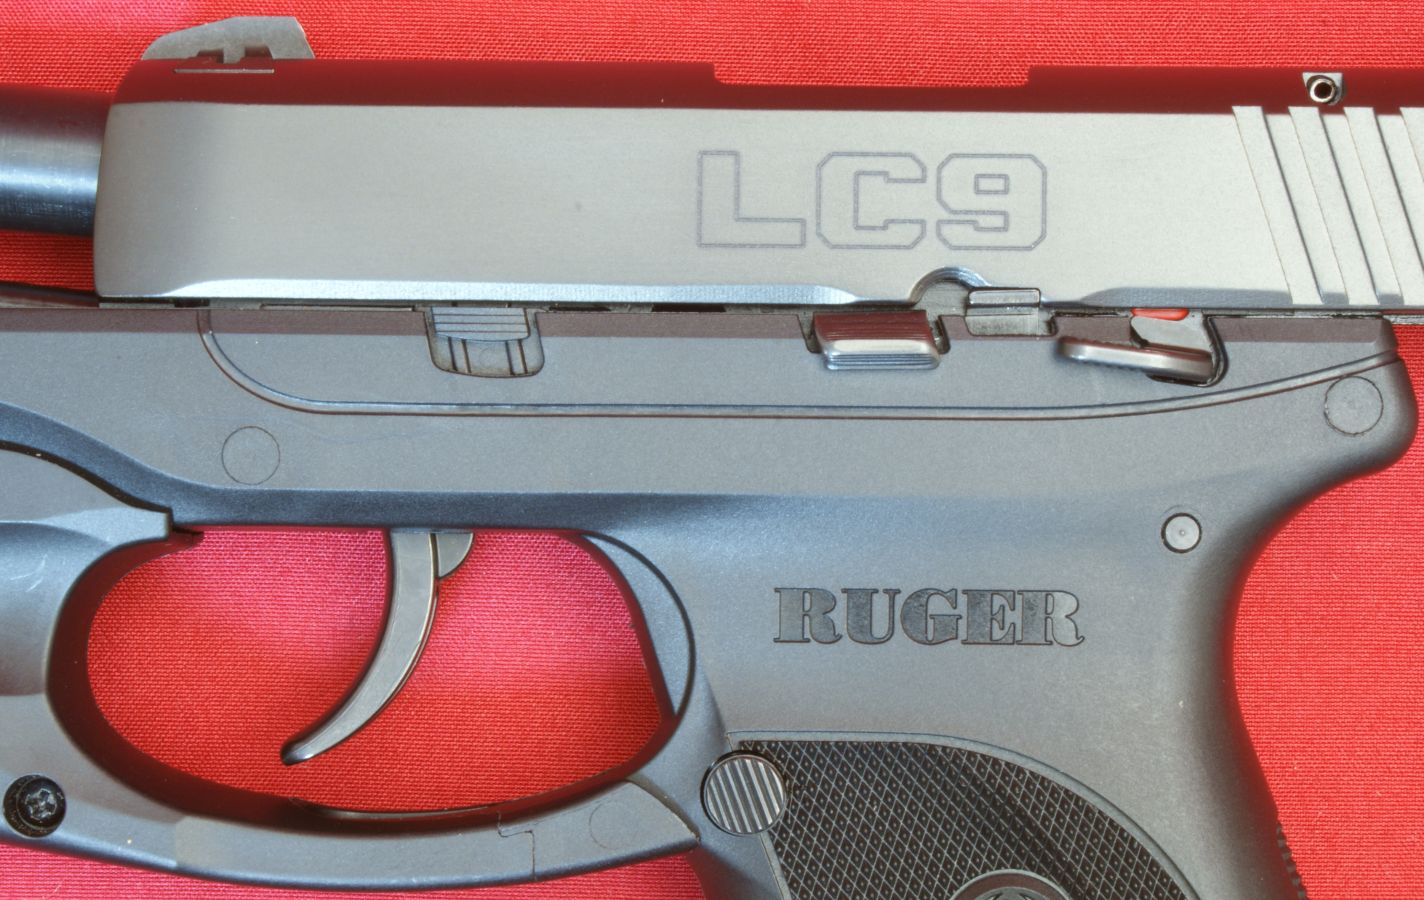
This next set of photos are the same from Part 2 and provide good views of each side of the Ruger LC9. The LC9 measures 1.05" in width at it's widest point which is across the manual safety. The width across the frame/slide measured 0.90" which matched the specification and the width across the widest point of the grip measured 0.97".
Figure 5

The LC9 measured 6.00" in length which matched the specification. The LC9 measured 4.46" in height with the flat floor plate as shown below and 4.91" with the finger extension floor plate. Since the specification states a height of 4.50", Ruger must be referring to the flat floor plate configuration. For the barrel length, I measured from the breech face to the end of the barrel and this matched the specification length of 3.12".
Figure 6
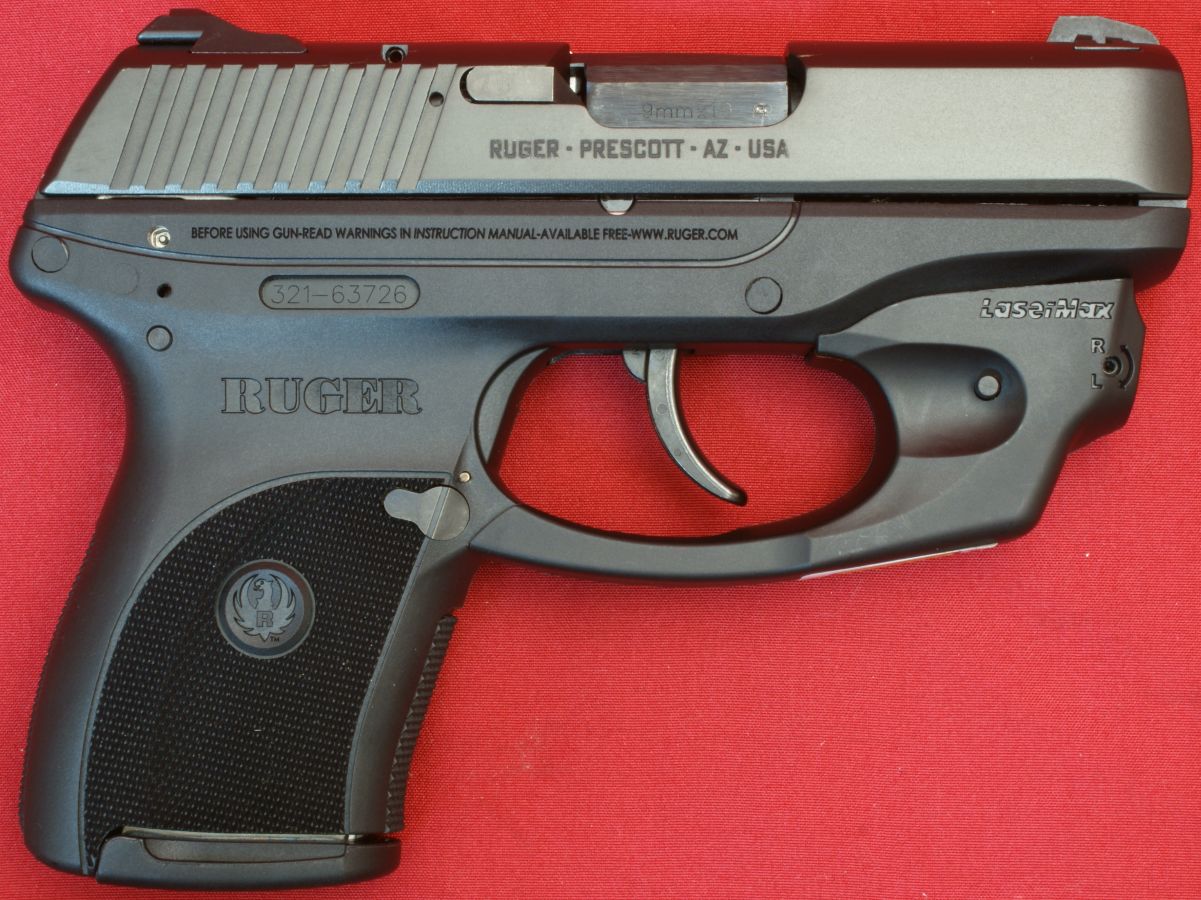
Figure 7

Figure 8
Figure 9
Figure 10
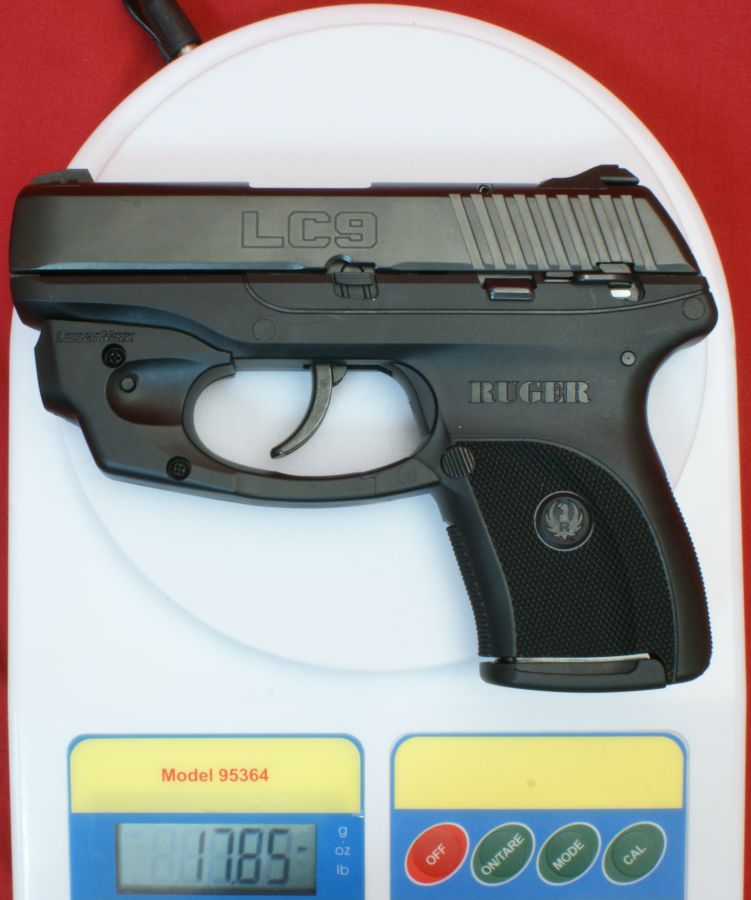
The Ruger LC9 weighed in empty at 17.85 ounces with the flat magazine floor plate installed and this is close enough to their specification weight of 17.60 ounces.
Figure 11
The Ruger LC9 w/LaserMax comes with two sighting methods. The first method is the traditional style which are steel white three dot dovetailed front and rear sights. The other method is using the LaserMax CenterFire red laser.
Figure 12
Figure 13

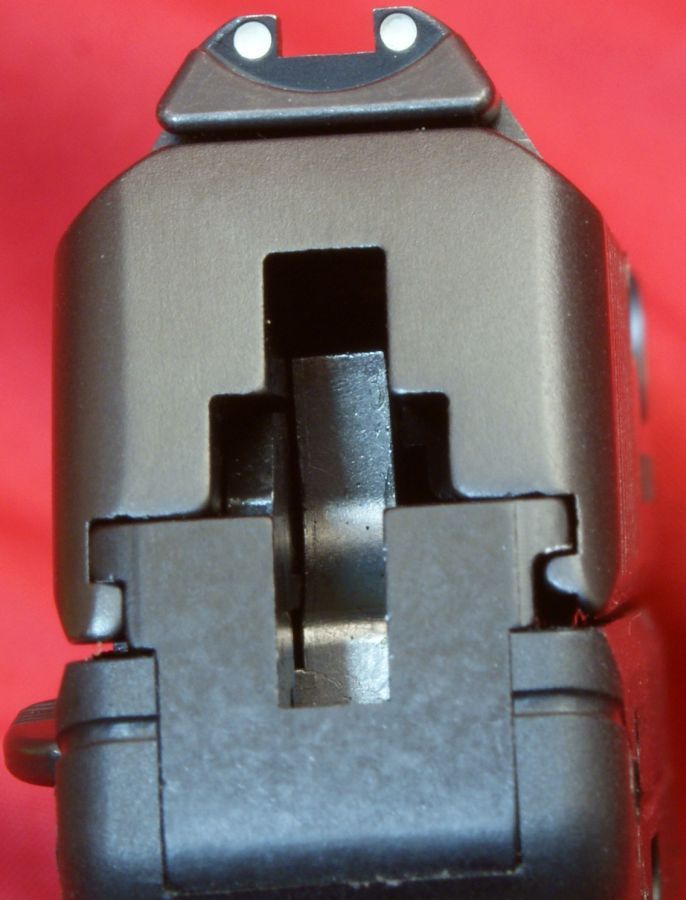
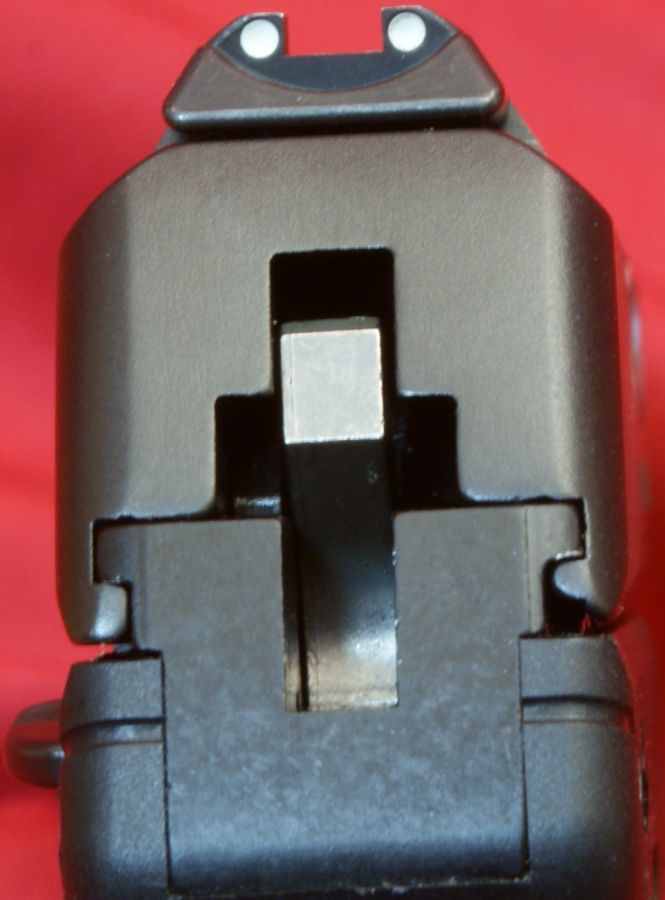
The rear sight is adjustable in windage only by loosening the set screw and drifting the sight sideways as needed. I loosened the screw and the sight would not budge, so moving it would take a small punch and hammer. There are no elevation adjustments for these sights.
Figure 14
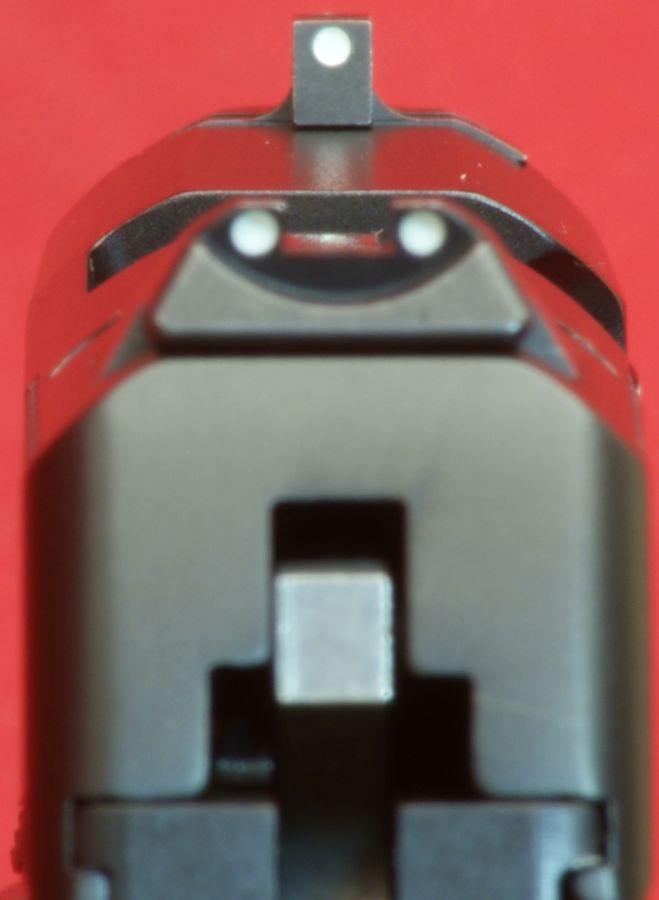
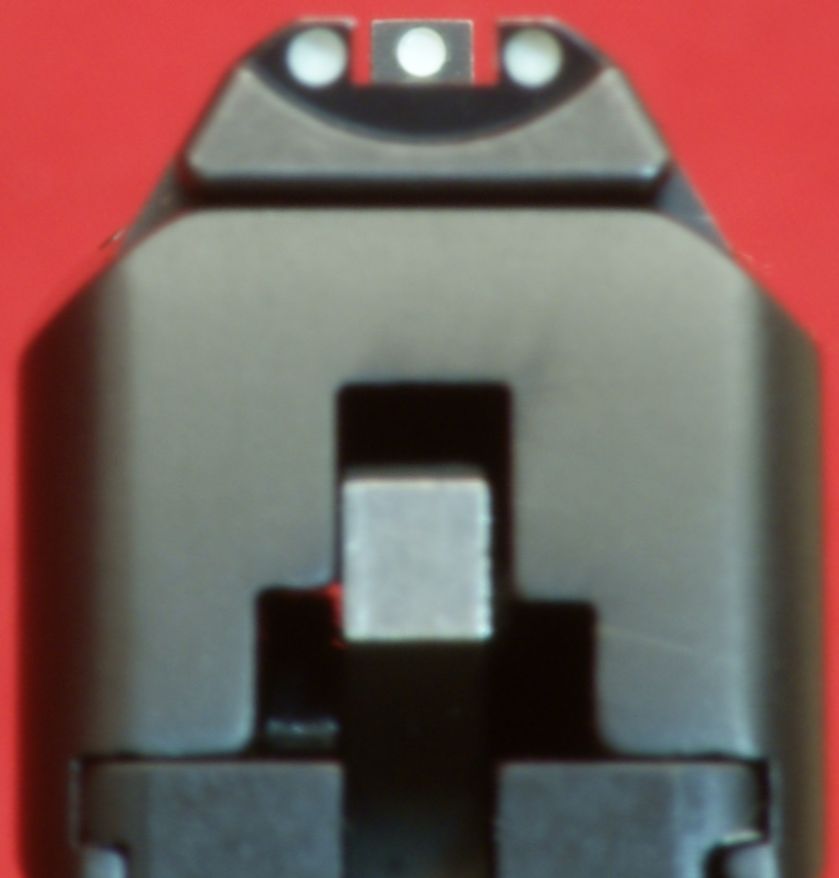
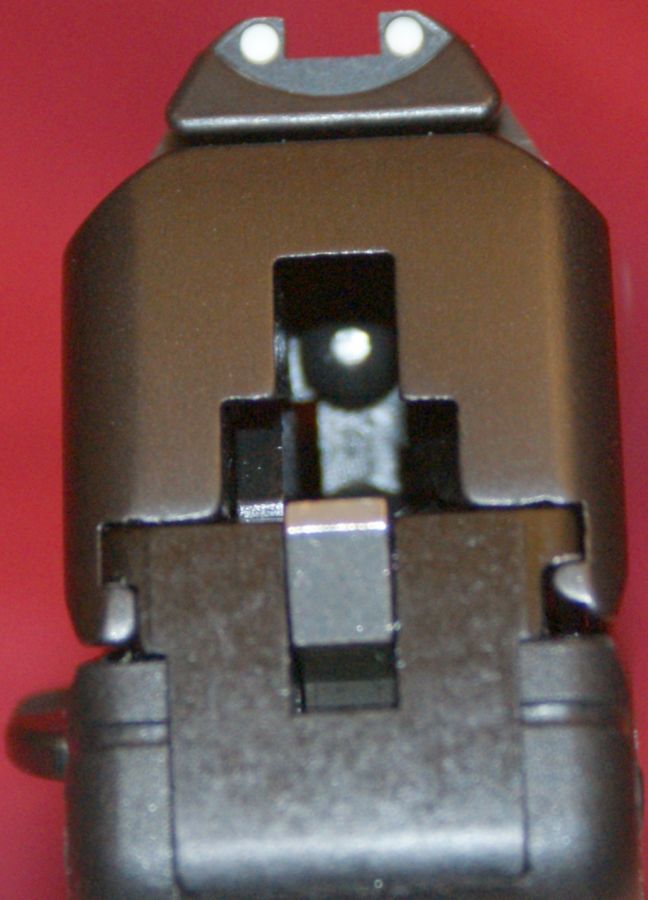
I was pleased with the three dot sight picture. There is some gap on each side of the front sight when in the notch of the rear sight as shown below. For me, these gaps help to center the front sight when I'm trying to shoot as accurate as possible.
Figure 15
Figure 16
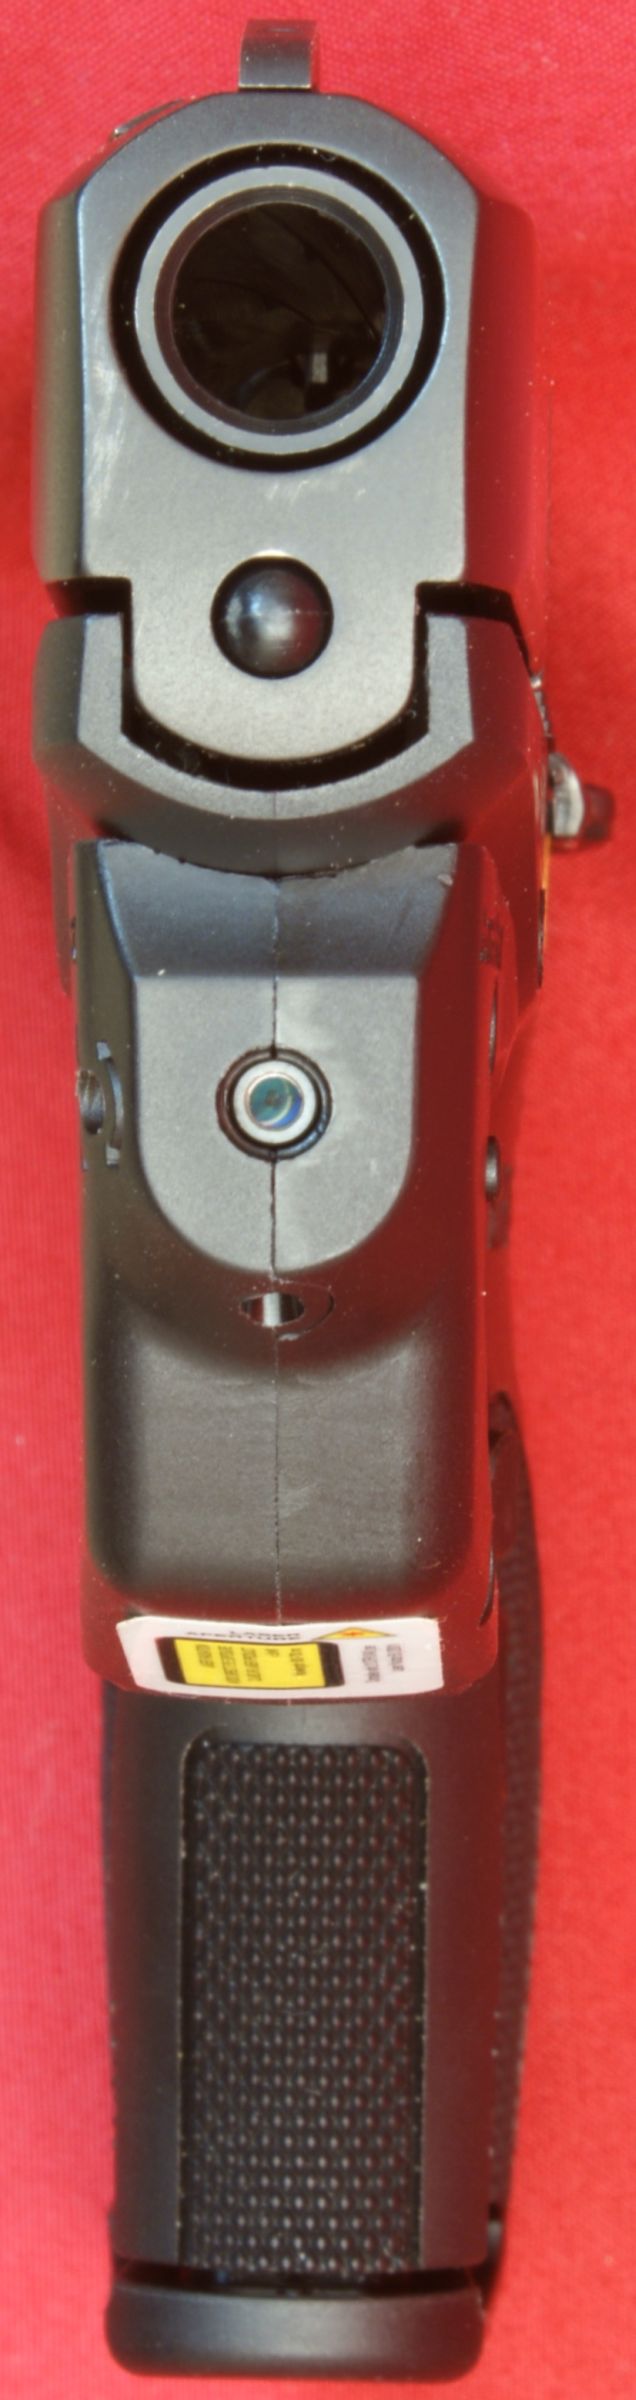
As I mentioned earlier, the other sight method is the LaserMax CenterFire Laser which mounts on the front of the trigger guard below the centerline of the barrel. The LaserMax sight mounts by clam-shelling around the trigger guard. I was not able to detect any looseness between the LaserMax and LC9. The specifications below for the LaserMax were taken from the LaserMax website on 3/2/12.
- Red laser with constant beam
-
Custom designed to fit the Ruger LC9™

-
Mounts to the frame without changing out
parts or altering your weapon
-
Sits just under the bore for highest
accuracy and prevents your finger from blocking the beam
-
Ambidextrous activation for right or left-handed shooters
-
Distinct On/Off switch turns the laser on only when you need it
-
User installed in minutes
- Model: CF-LC9
- Weight: 0.5 oz.
- Wavelength: 650 nm (Red)
-
Power output: 5mW
-
Battery:
1/3 N Lithium (1) included
-
Battery Life: Over 5 hours
-
Adjustment: Factory aligned at 10 yards, user adjustable for
windage and elevation
- Warranty: 1 year
- MSRP: $129
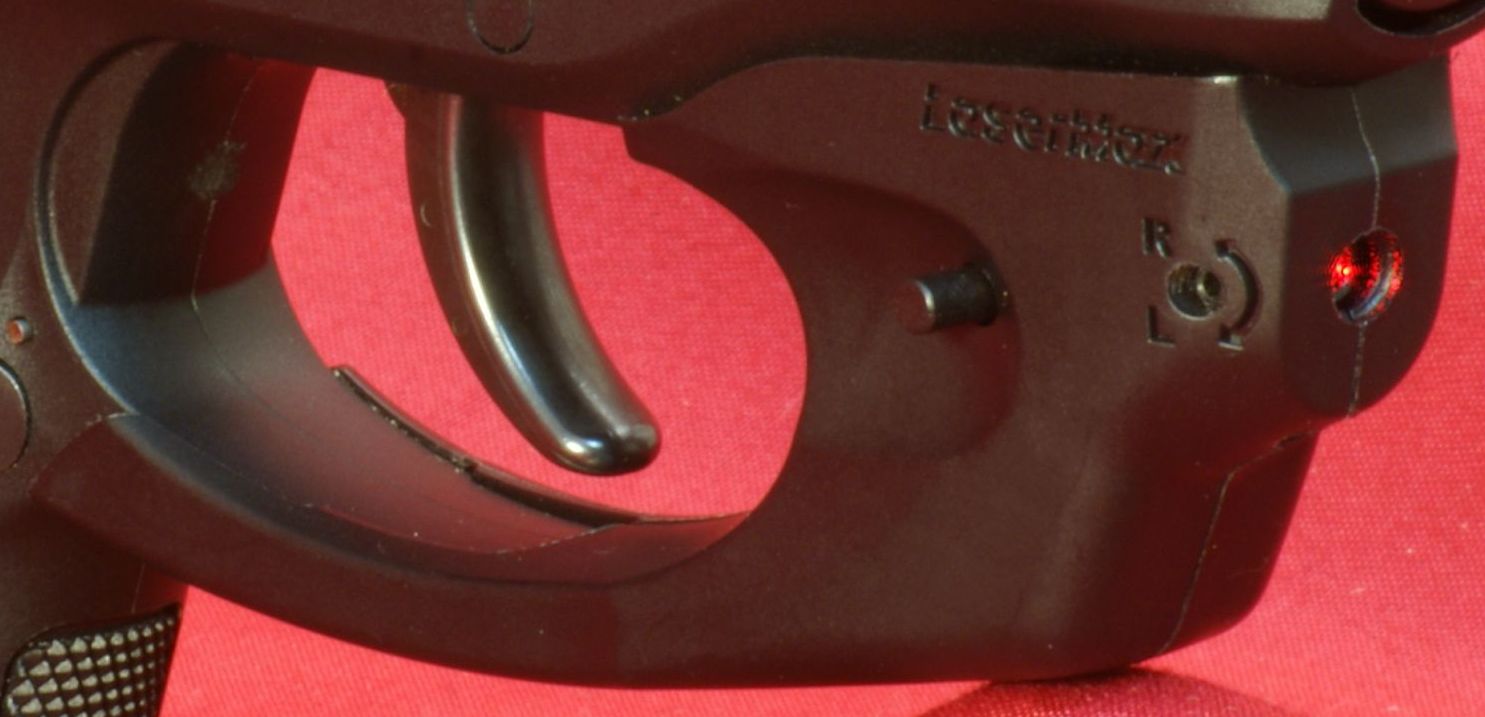
The LaserMax has an ambidextrous button that you can press in with the tip of your trigger finger as you bring the pistol up to fire. The laser is adjustable for both windage and elevation by the use of a 0.050" Allen wrench provided with the pistol. The adjustment screws gave good resistance which should ensure the zero should not shift. They were also extremely sensitive when making an adjustment. It doesn't take much of a turn to shift the laser. The specs state that the laser is factory aligned at 10 yards. I believe this must be with regard to the body of the LaserMax, not the sights on the pistol because I had to make some small adjustments to the laser so that it matched the other sights.
Figure 17
The red laser is a 5mW laser and the battery life is stated at over 5 hours.
Figure 18
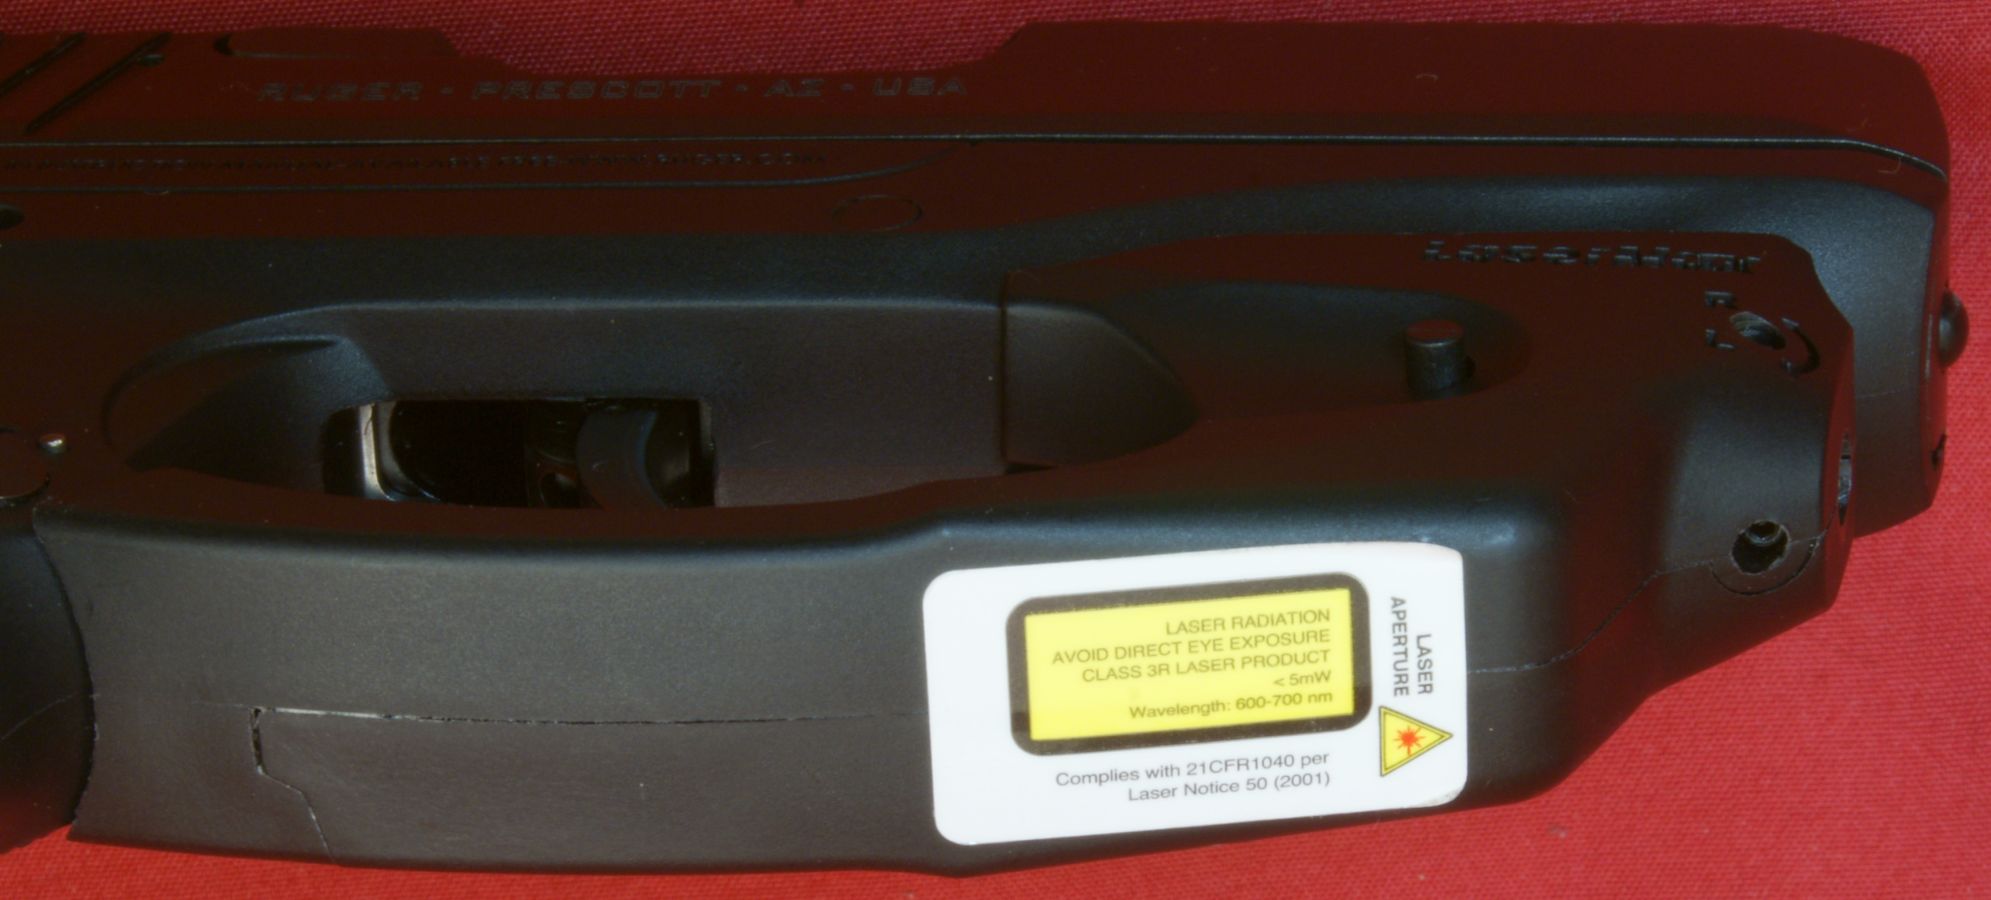
Figure 19
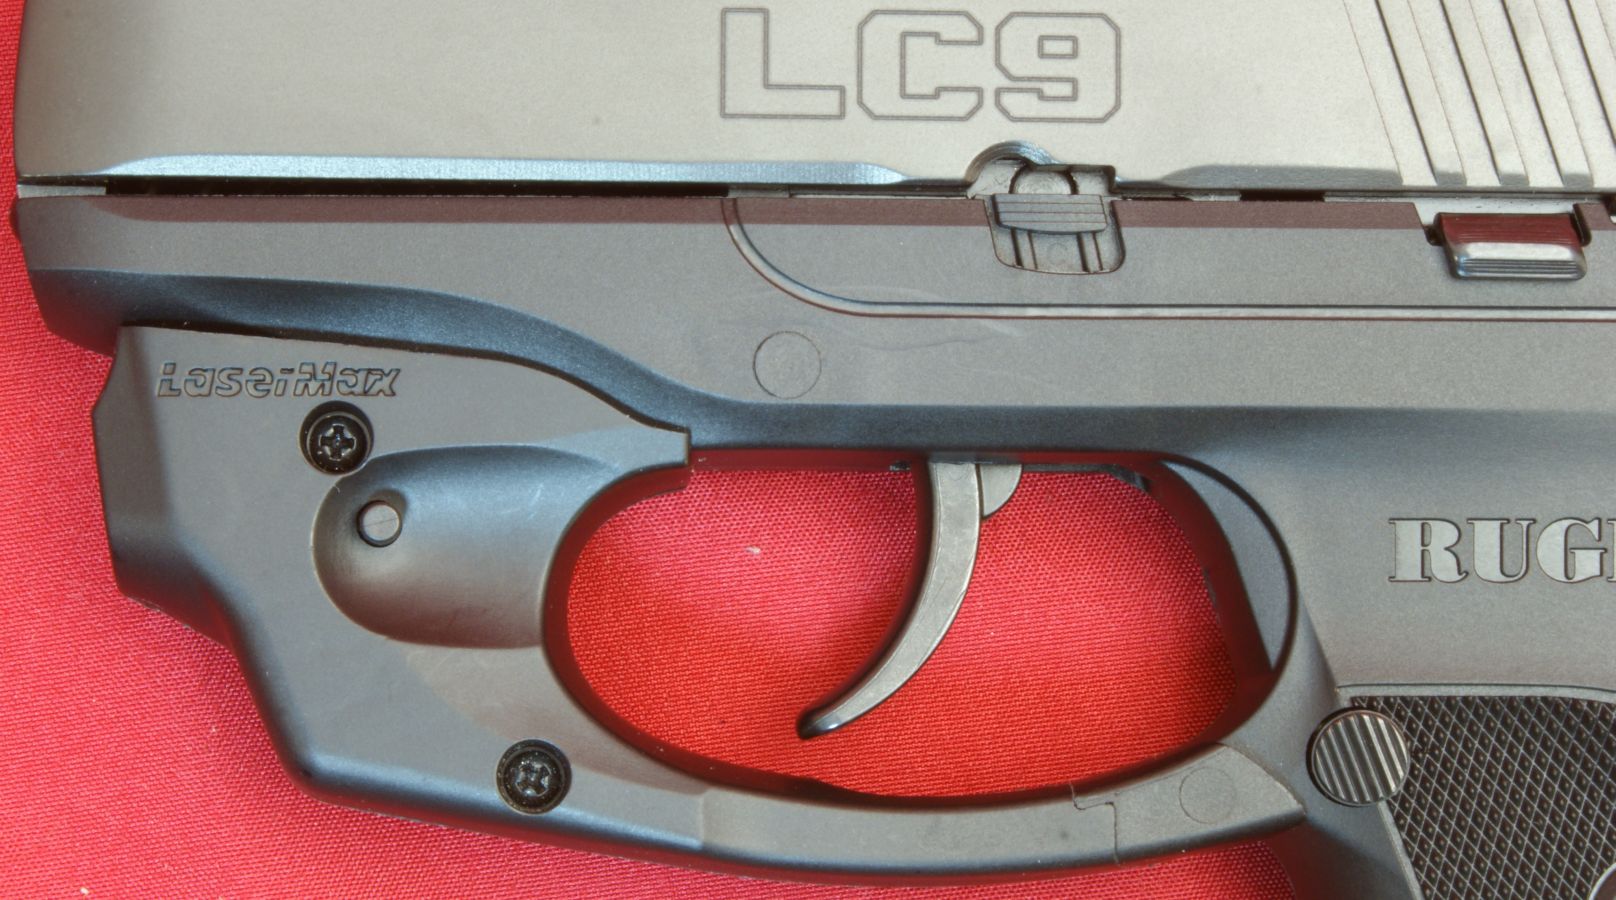
You can remove the LaserMax by removing the two screws shown below. The left side can be pull off by applying separating pressure at the front of the sight. There is a portion of the right half of the sight that wraps around the trigger guard at the rear. To remove the right half, you must press down on the rear area to get it to go over the trigger guard. The right half can then be removed. I show detailed removal in the next part of the review where I talk about disassembly of the Ruger LC9.
Figure 20
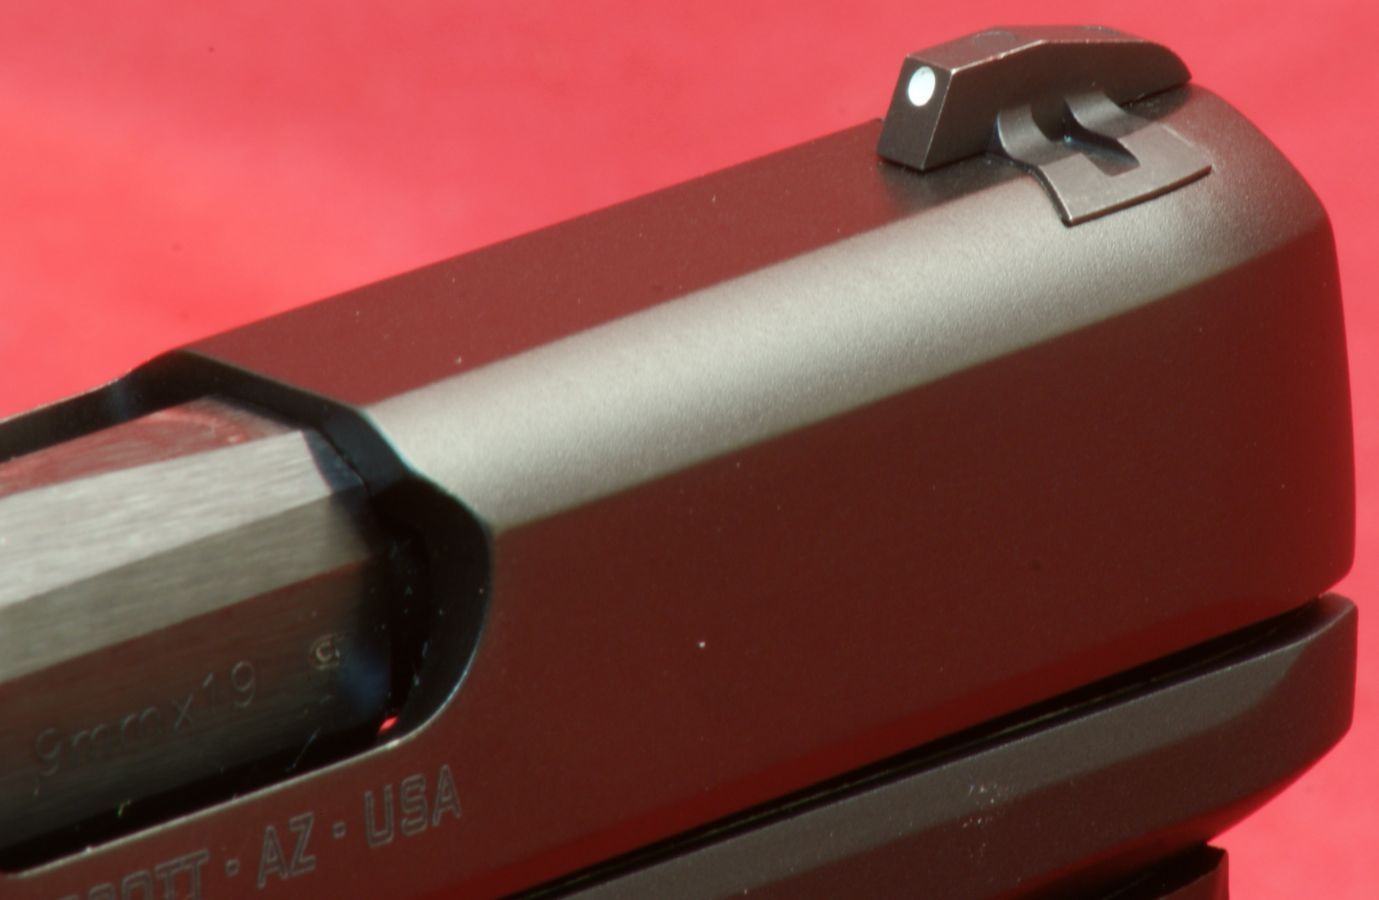
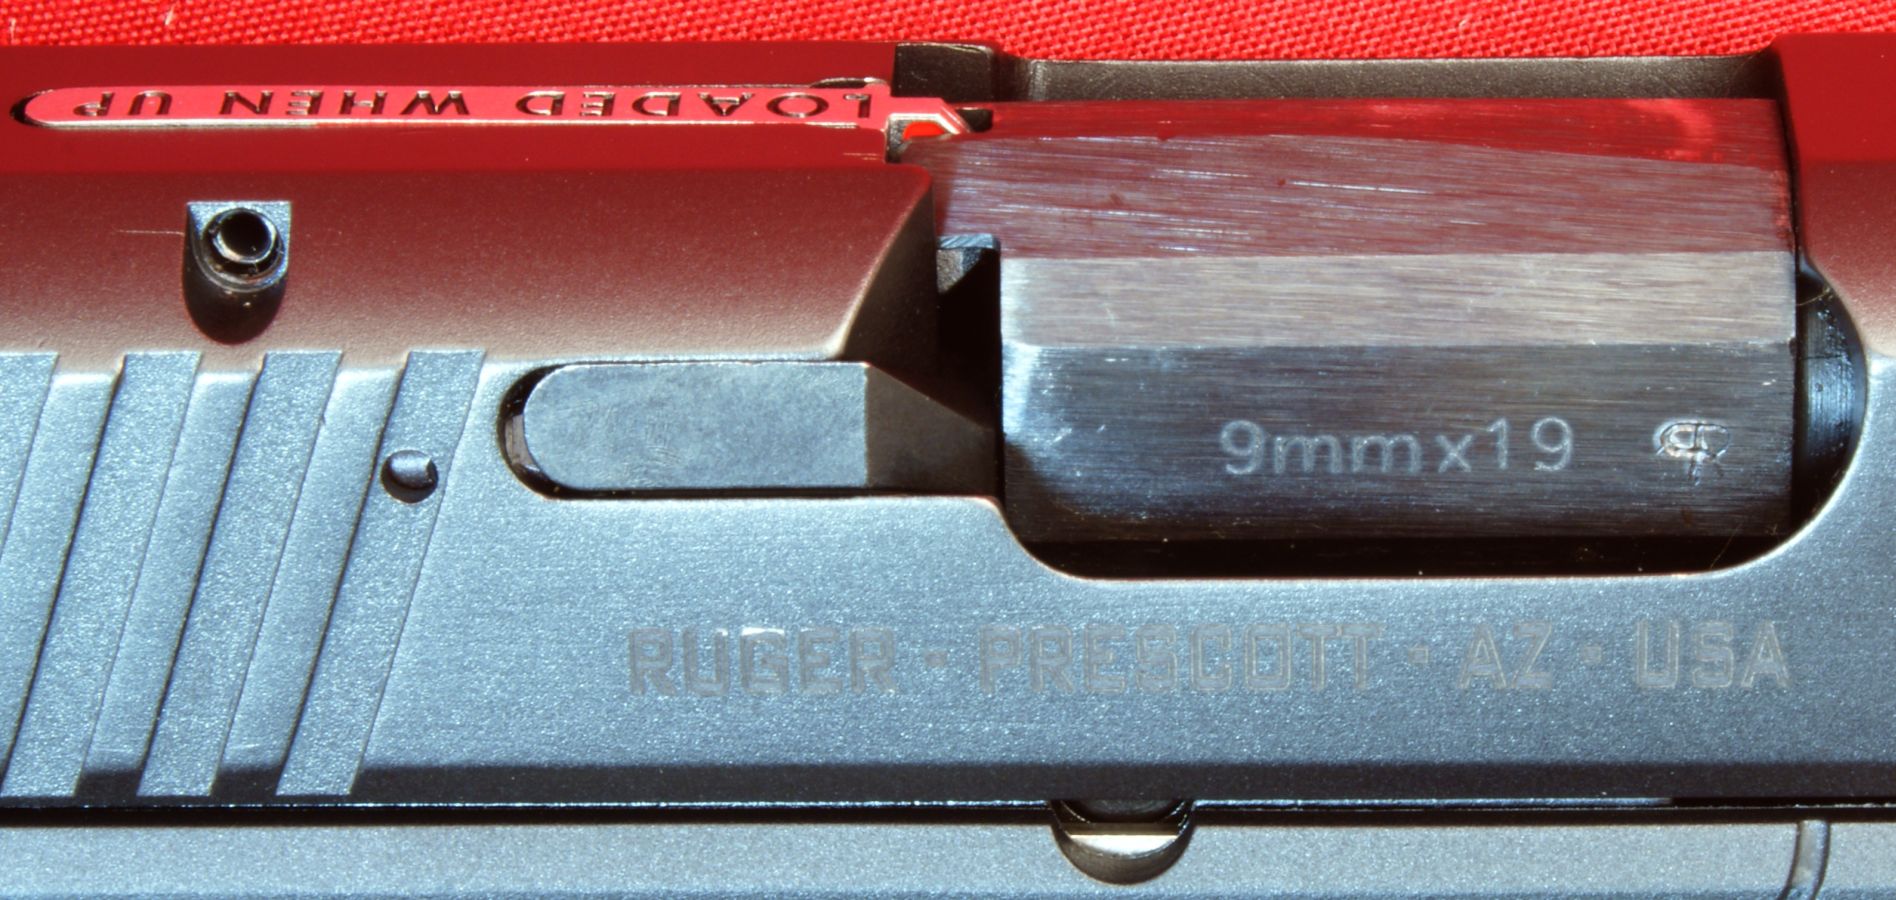
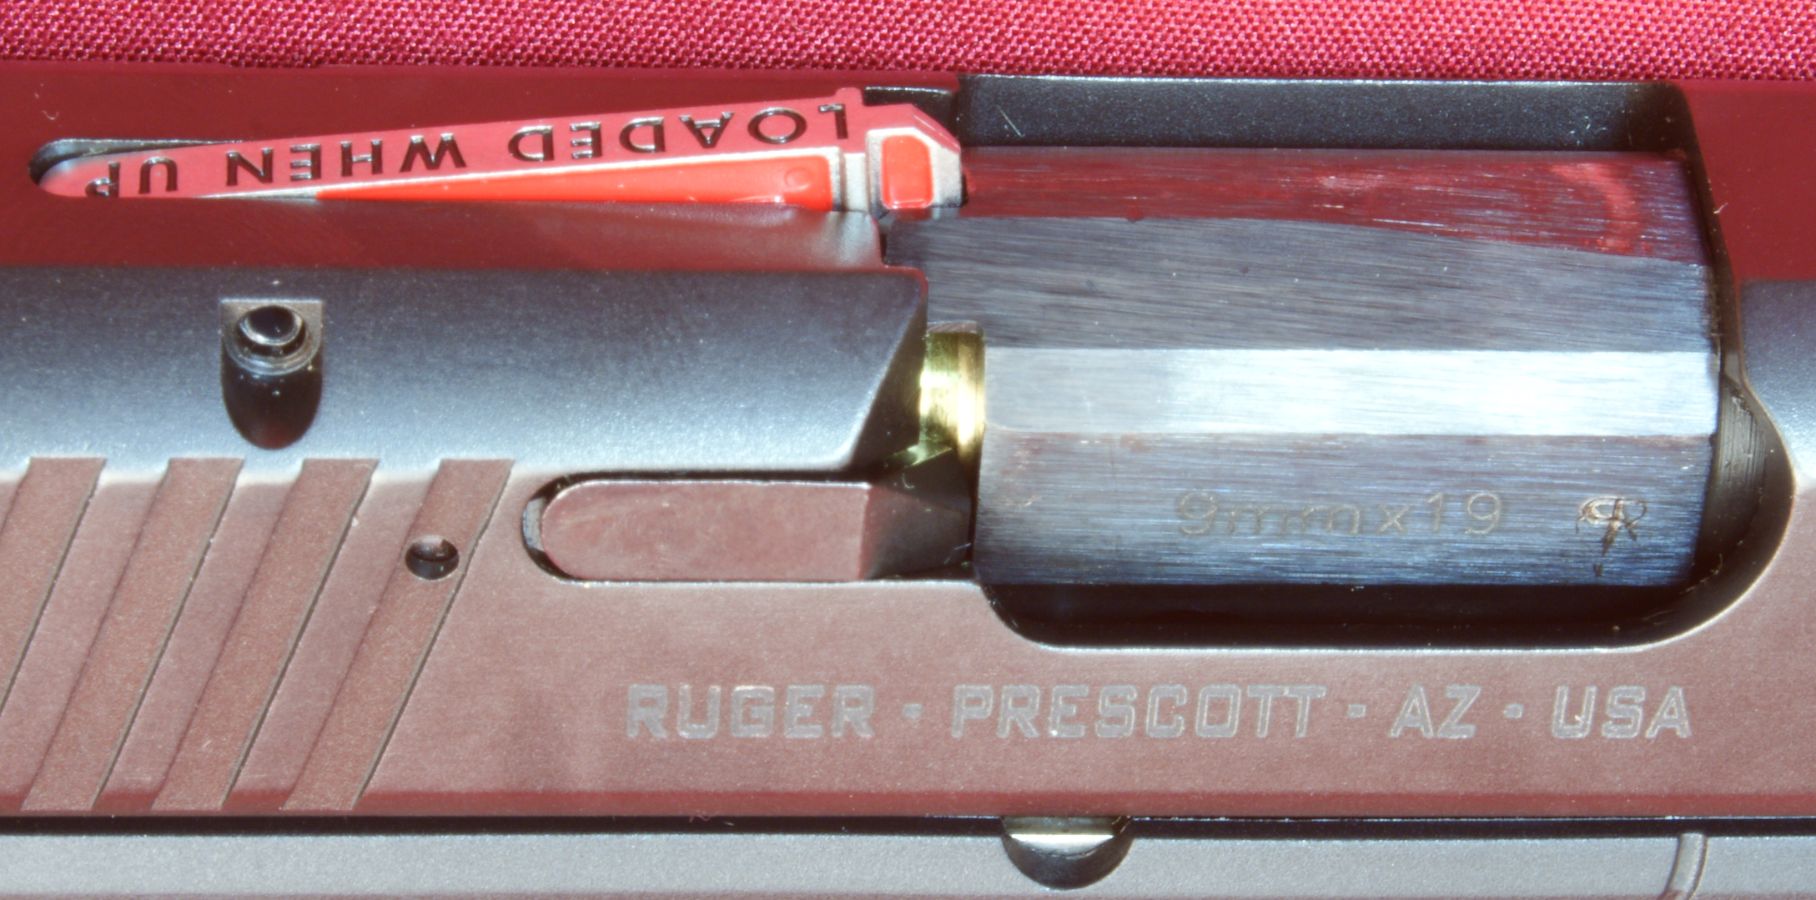
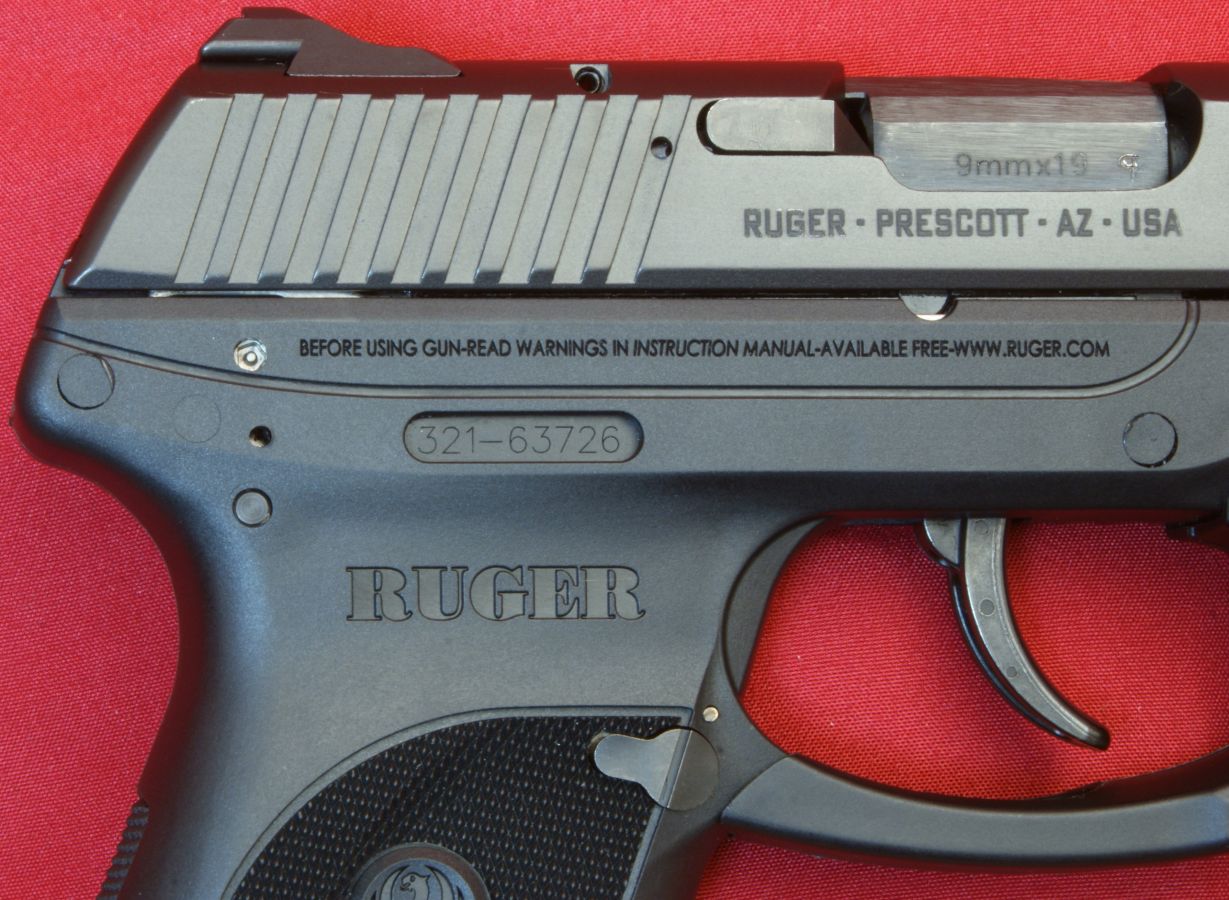
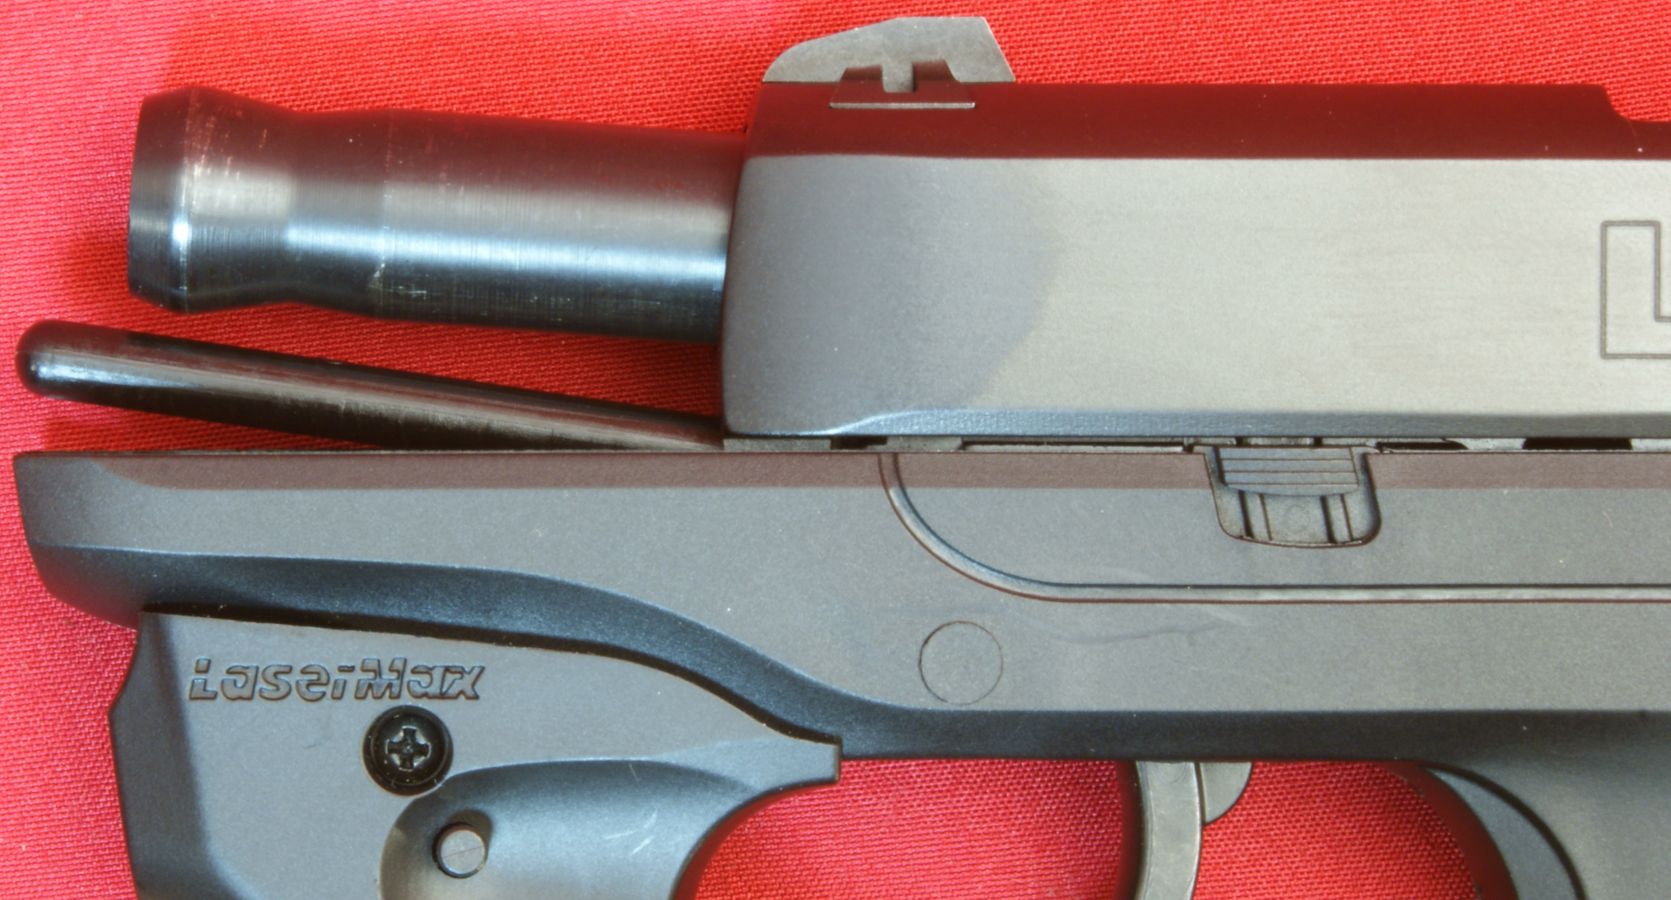
The barrel has a blued finish (even though it looks stainless in the photo below) and is marked with the caliber "9mm x 19" and also has a proof mark as shown below. The Ruger's Instruction Manual states "Although the Ruger LC9 is capable of functioning with 9mm +P ammunition, a steady diet of +P ammunition will shorten the endurance life of the Ruger LC9." They also state "Do not use +P+ ammunition".
Figure 21
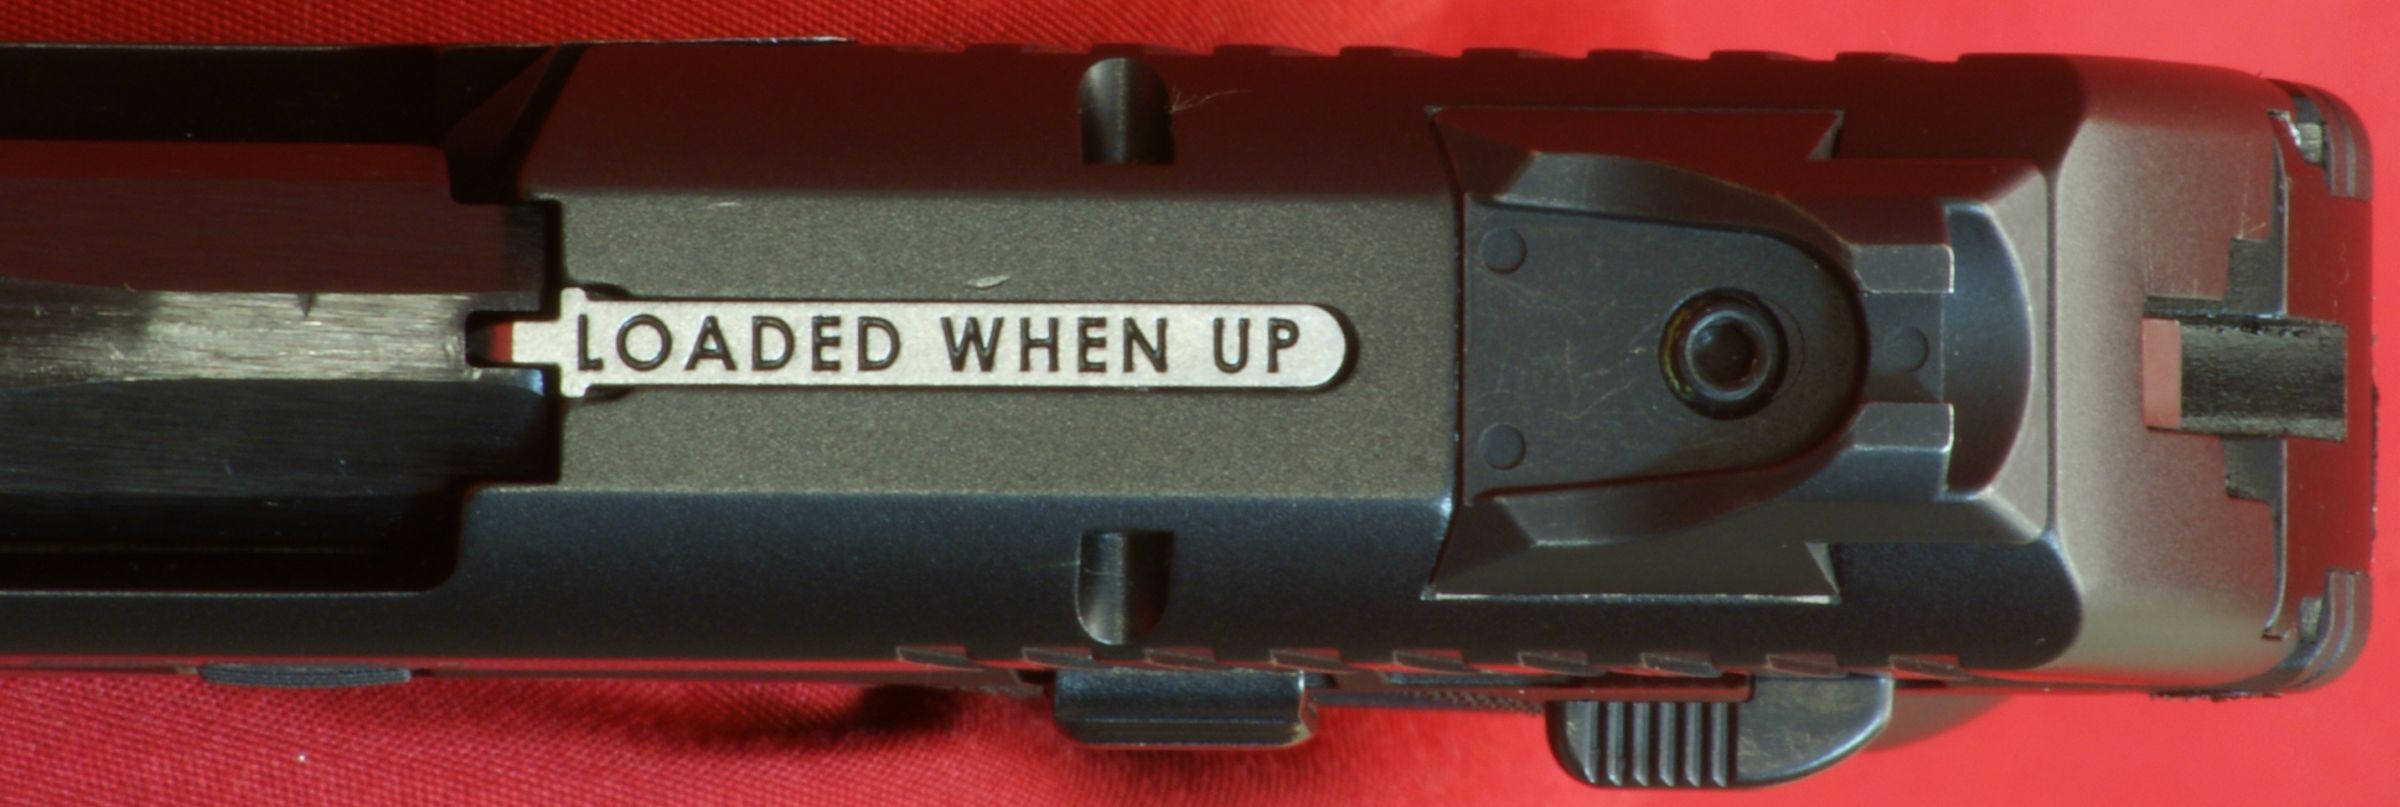
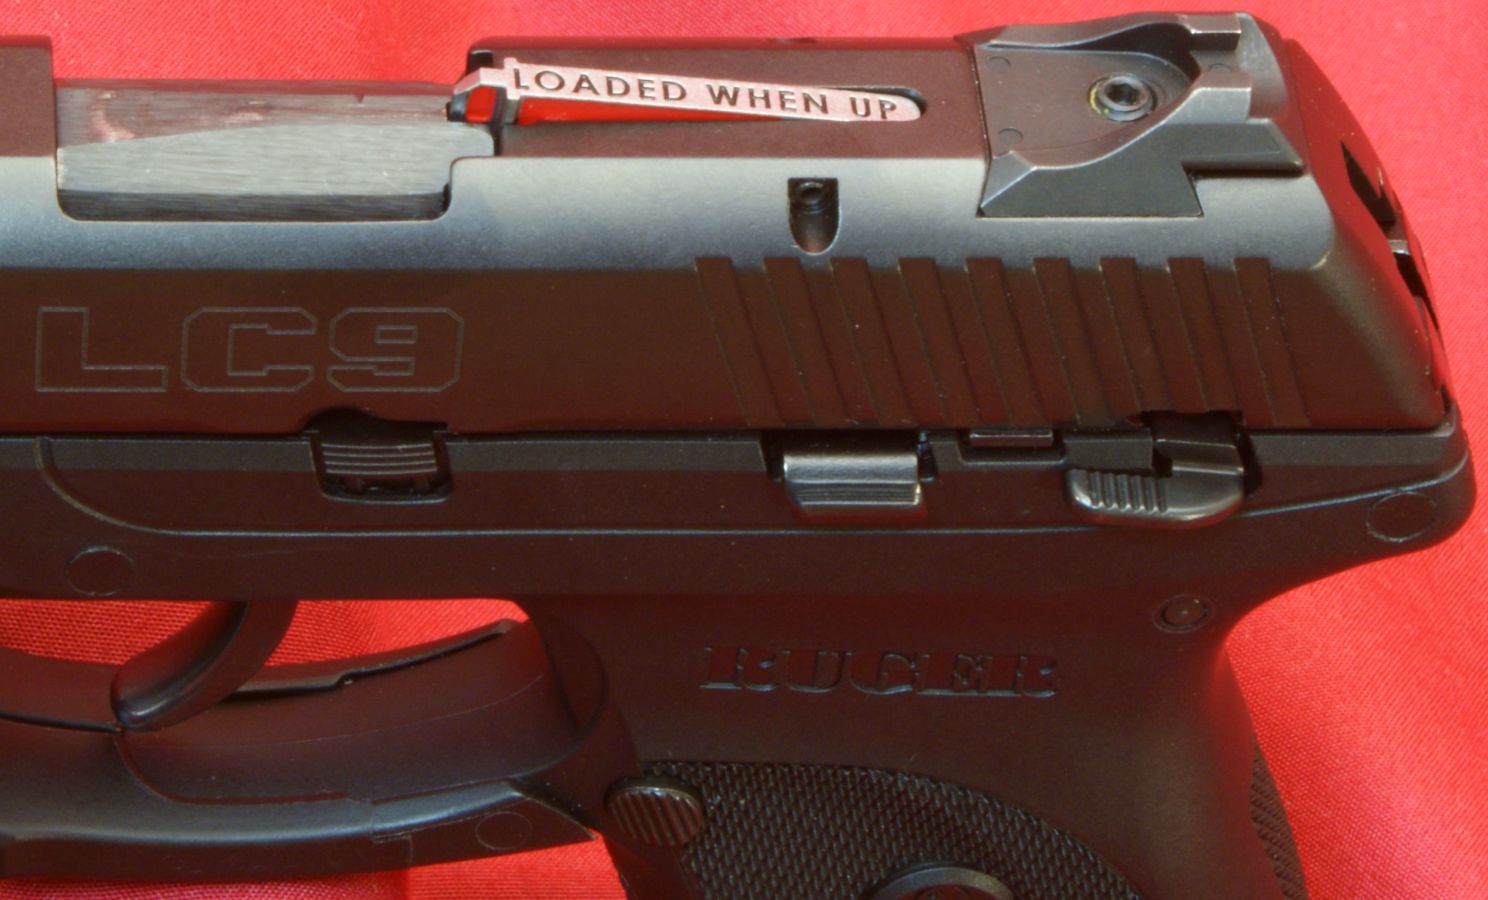
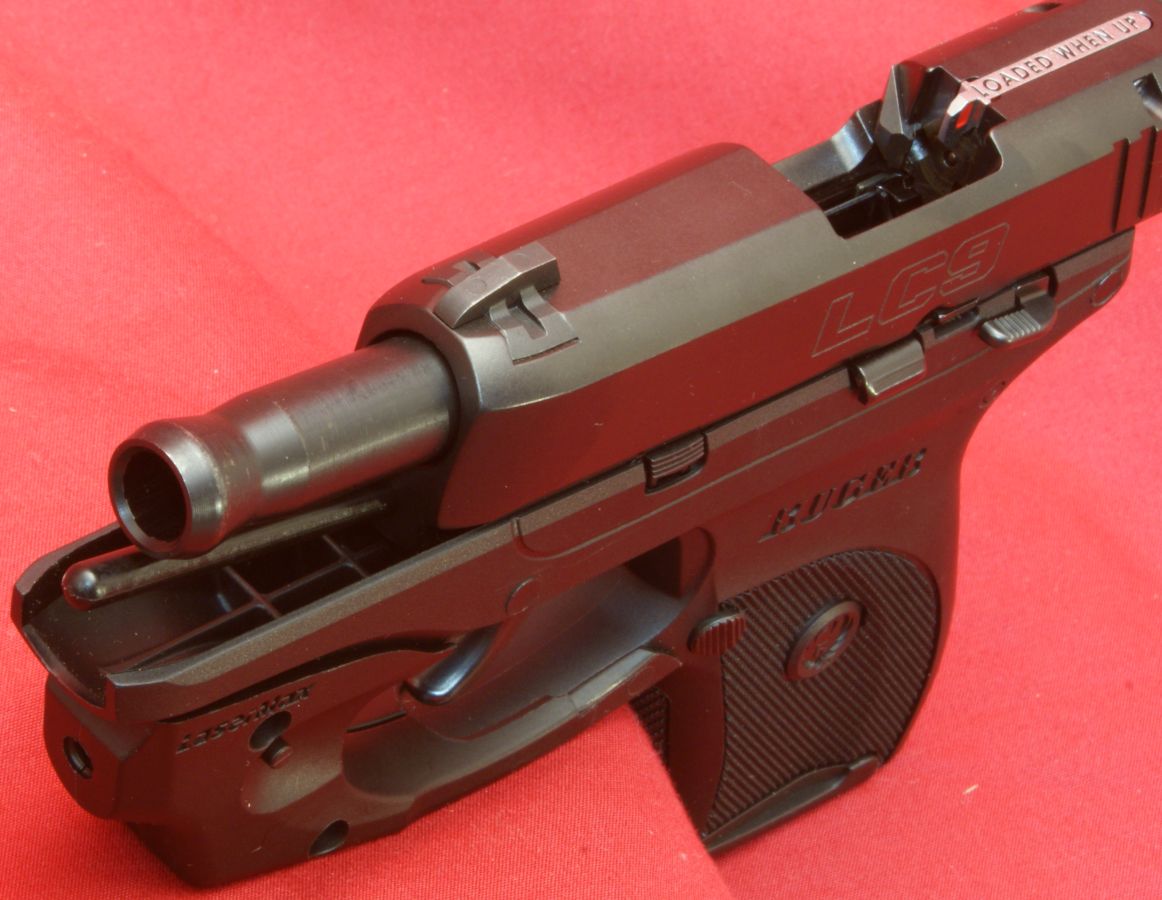
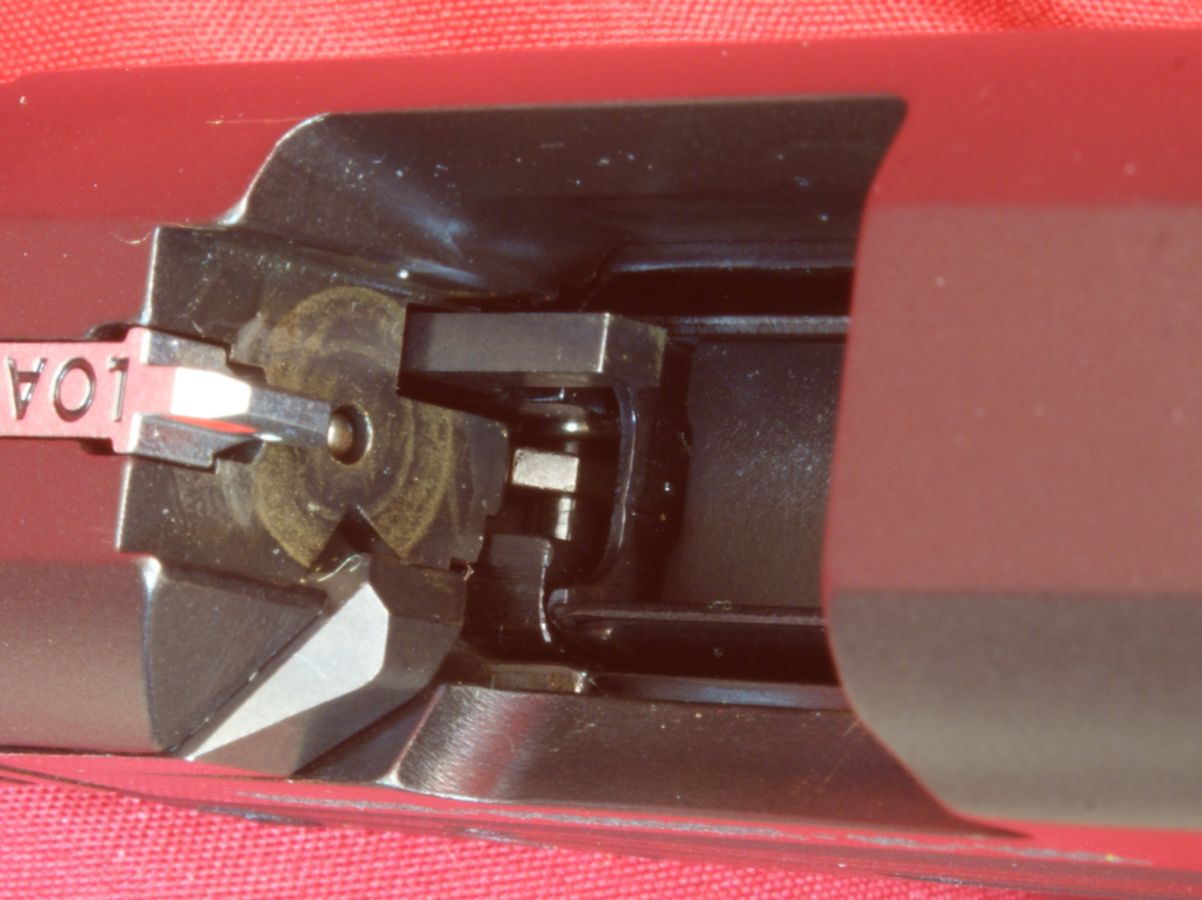
Ruger included it's "LOADED WHEN UP" chamber indicator on the LC9. The combination of the raised bar and red on each side of the bar make it clearly obvious that a round is in the chamber. The raised bar lets you know when a round is in the chamber when in a dark room or when not looking at the pistol.
Figure 22
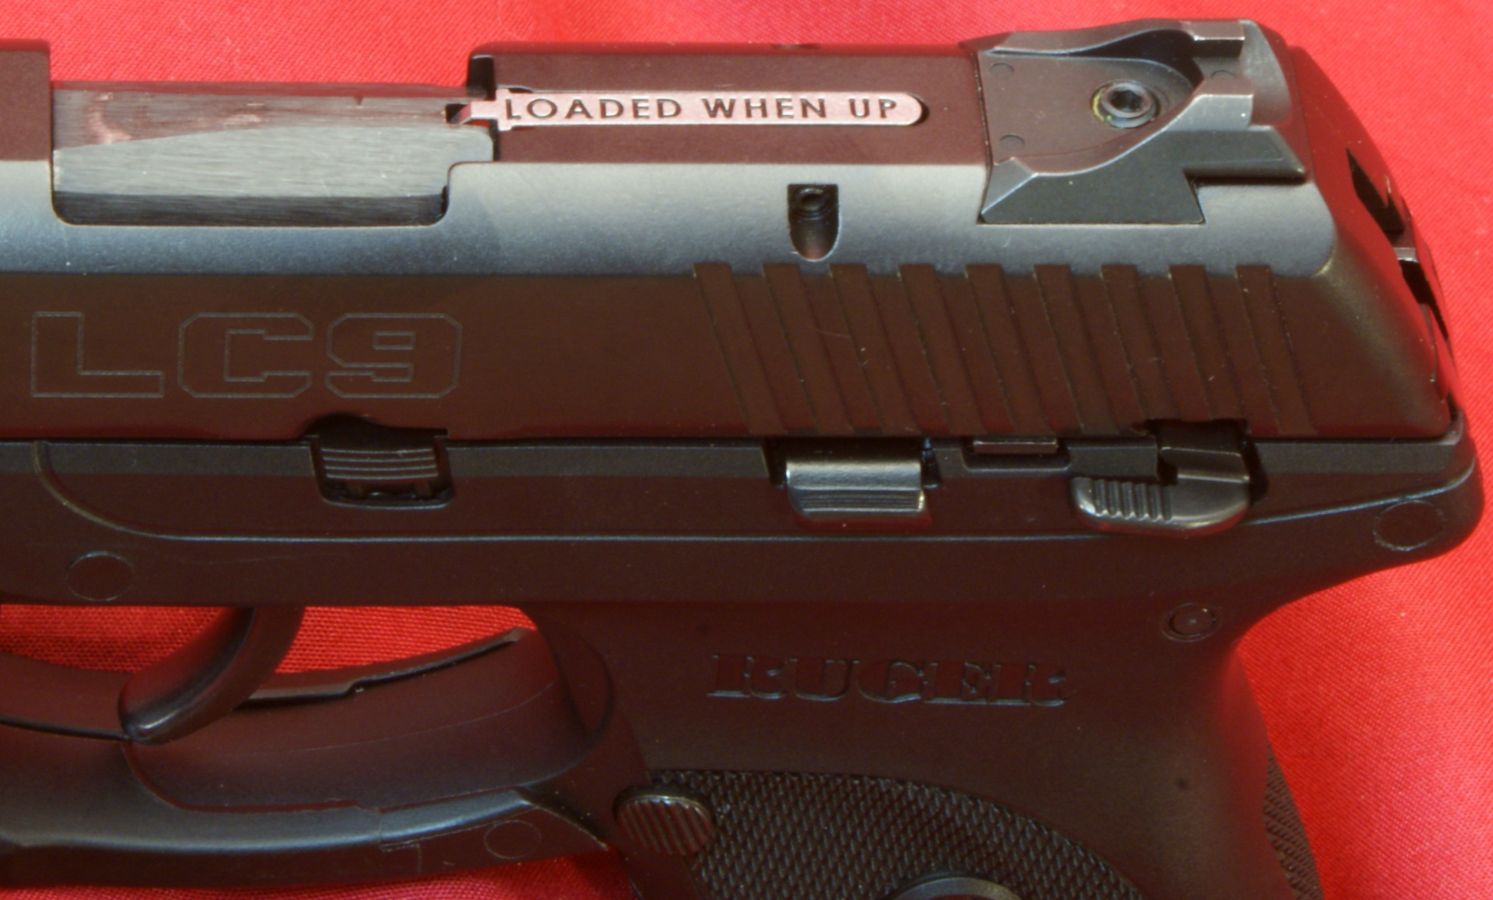
Figure 23
Another visual indication of a loaded round (not that it is needed) is that you can see the cartridge case above the extractor as shown below.
Figure 24
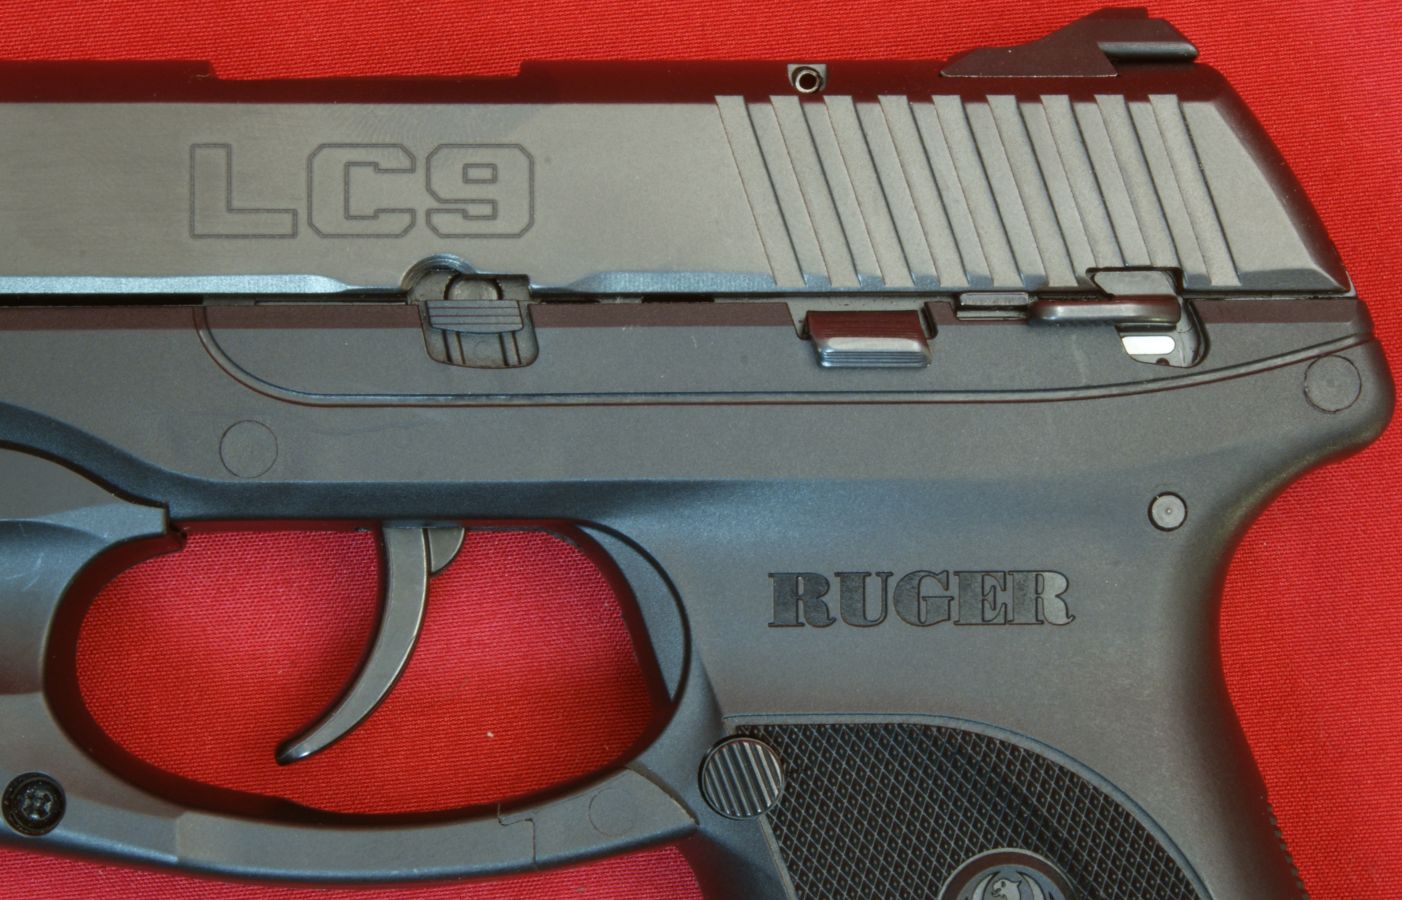
The magazine latch, manual safety and slide stop are located on the left side of the pistol only. The photo below shows the manual safety in the up/safe position. When the safety is in this position, the slide is locked and you can not pull the trigger. You can only put this safety in the safe position when the hammer is semi-cocked. The LC9 also includes a firing pin block safety that will not allow the firing pin to move forward unless the trigger is pulled while the manual safety in the down/fire position.
Figure 25
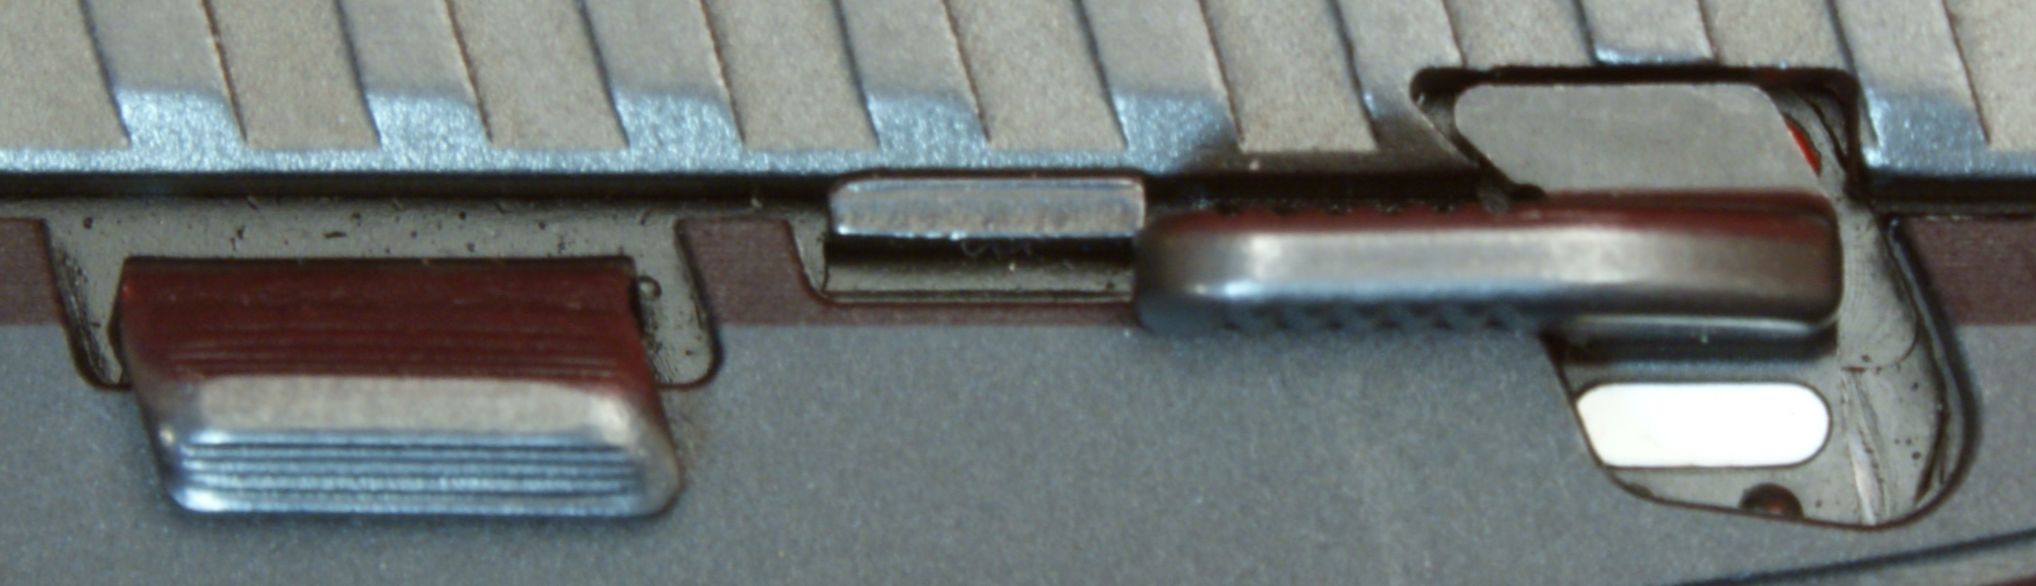
You can see in the photo below how the manual safety locks the slide when the safety is engaged.
Figure 26
The photo below shows the manual safety in the down/fire position.
Figure 27
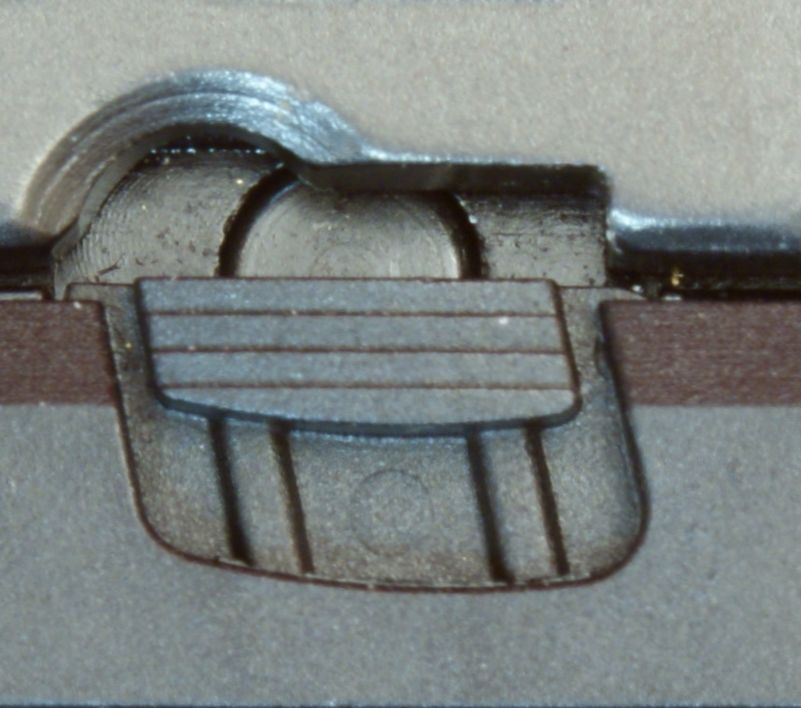
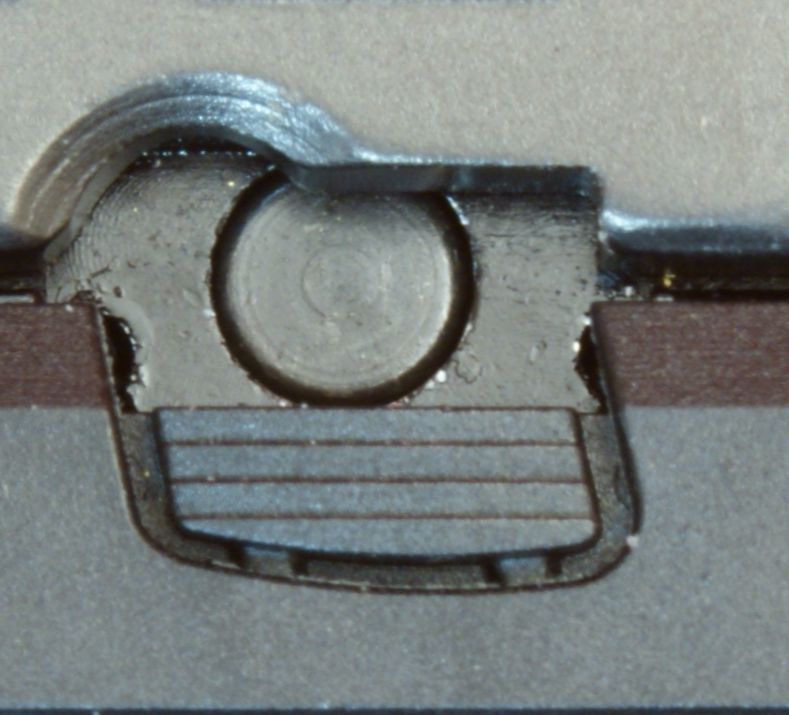
Forward of the slide stop is the takedown plate. The photos below show the plate in the normal up position and in the takedown down position. During takedown, you can push the takedown pin out by moving the takedown plate to the down position and sliding the slide back to allow the pin to line up with the curve in the slide. The takedown plate clicks up and down with a very firm click.
Figure 28
Figure 29
The Ruger LC9 will lock the slide open after the last shot. The photo below shows the slide locked open. Like the other new Ruger pistols, it is extremely difficult to push down on the slide stop to release the slide. The Ruger instruction manual states you should pull the slide rearward and release to close the slide and chamber a round. If this pistol is like my other Ruger pistols, the slide stop will eventually become easier to push down with your thumb to release the slide.
Figure 30
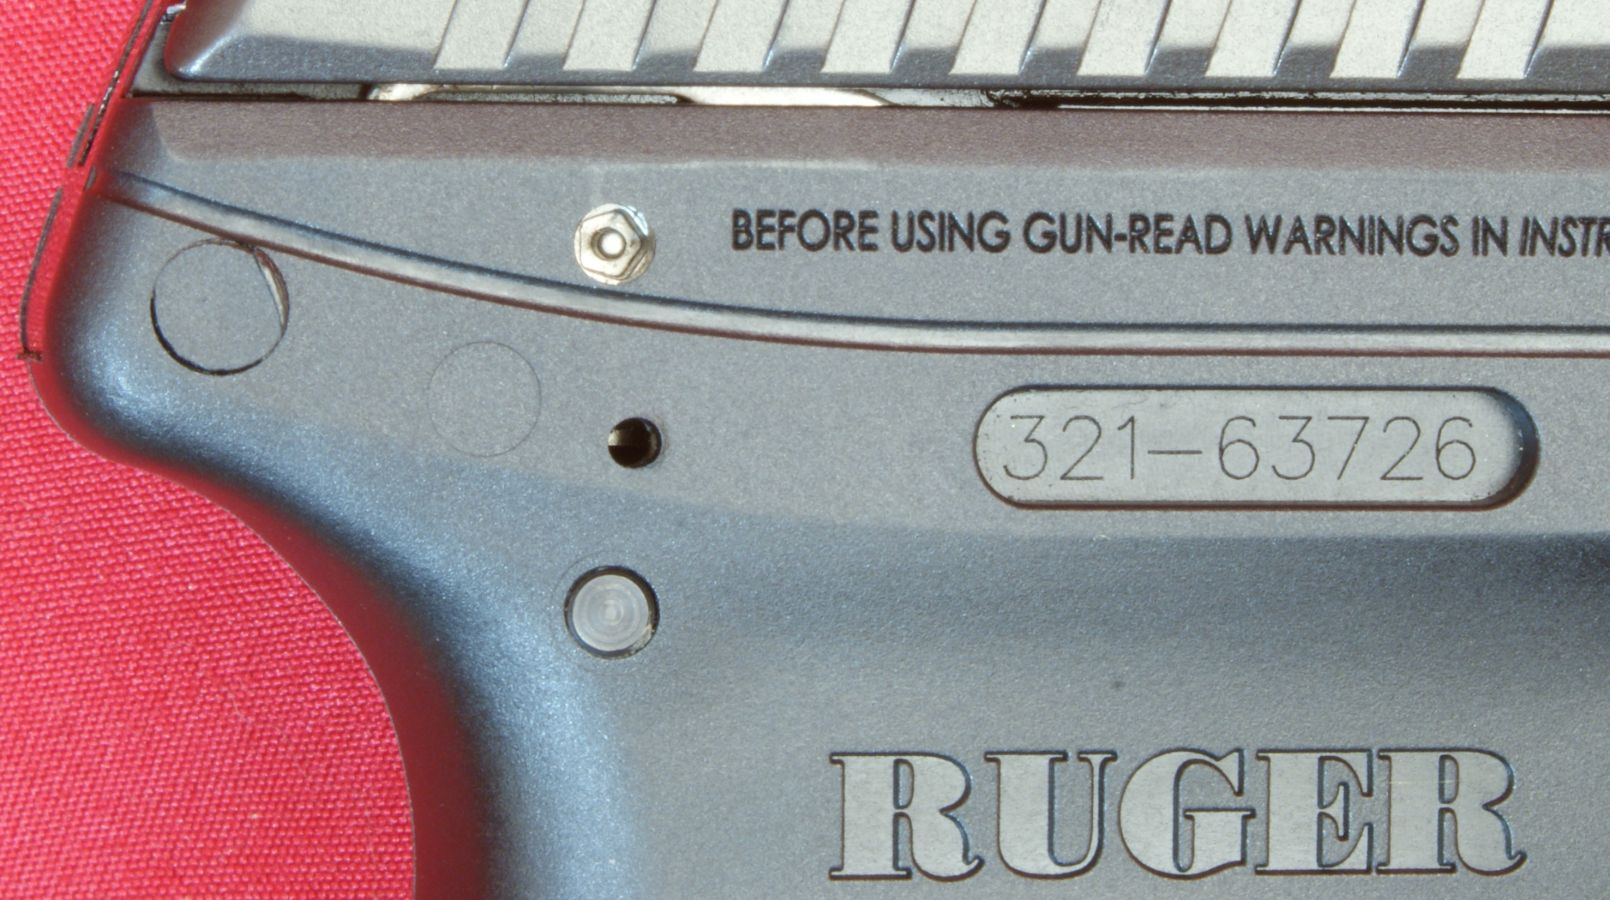
The only operational feature on the right side of the pistol other than the LaserMax button is the internal lock. The serial number is stamped into the metallic frame insert and can be seen through the cutout in the polymer grip frame.
Figure 31
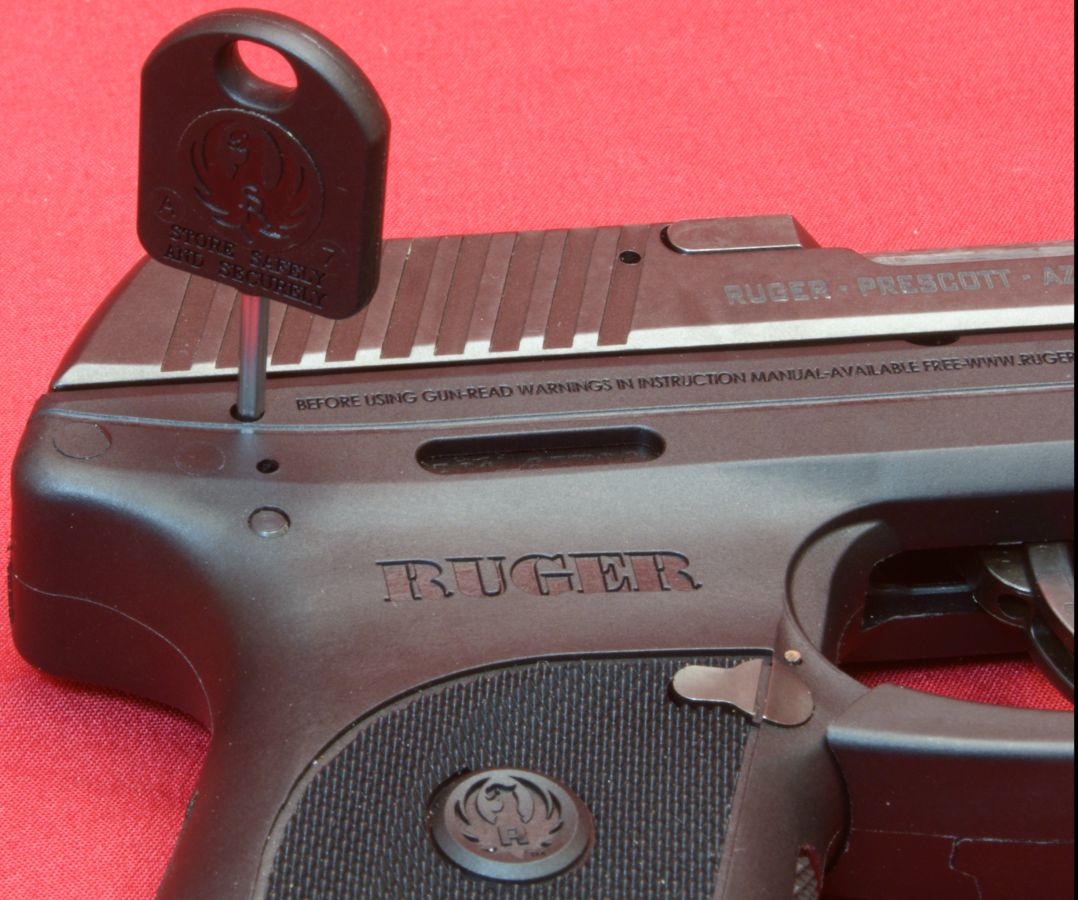
Ruger provides two matching keys that engage in the internal lock keyway. The keyway is a pentagon shape with a center safety pin.
Figure 32
To engage the internal lock, you insert the key and rotate the key clockwise about 1/4 turn. The Ruger instruction manual states that "When actuated, this internal lock will secure the pistol's manual safety in the "on" or "safe" position." It also states that "If the internal lock is engaged, the trigger will move freely and will not function." On this pistol, the lock had no effect on the manual safety, but it did allow the trigger to move freely and not function.
Figure 33
I measured the trigger pull using a Lyman Digital Trigger Pull Scale and found it to be an average of 6 pounds 14.5 ounces (6.91 pounds) based on ten pulls using this scale.
Figure 34

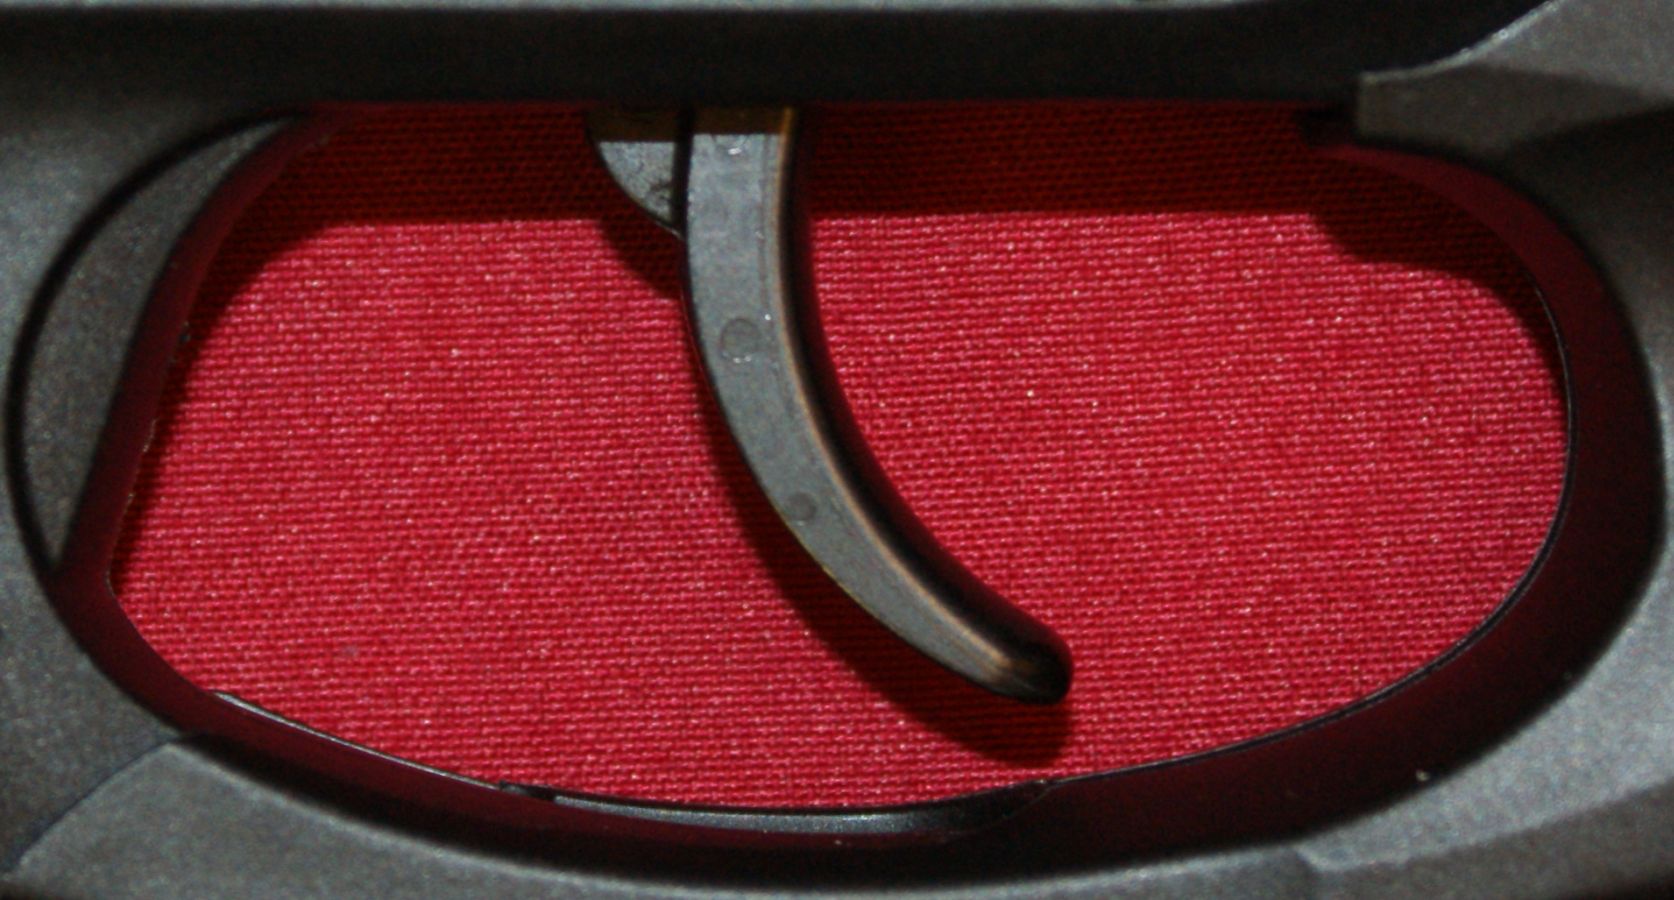
This next series of photos show the different stages of the trigger. Overall, I would say the trigger on this pistol was smooth, but it does have a long travel like you would expect from a double action pistol. Position A shows the trigger in it's zero (un pulled) position.
Figure 35 - Position A - 0.00"
Position B shows the trigger after 0.22" of initial take up which is just before you start feeling any real pressure.
Figure 36 - Position B - 0.22"
Position C is the point where the pistol will fire and is 0.73" from the zero (un pulled position).
Figure 37 - Position C - 0.73"
Position D is the point where you hear a distinctive click when releasing the trigger, but the trigger mechanisms have not fully reset and you can not fire the pistol again from this position. This position is 0.38" from zero or 0.35" forward of the fire position.
Figure 38 - Position D - 0.38"
Position E is the point where you hear another distinctive click and all the mechanisms have reset and you can fire the pistol again. This position is 0.15" from zero or 0.58" forward of the fire position.
Figure 39 - Position E - 0.15"
The Ruger LC9 hammer has three distinct positions. The first is when the hammer is down against the firing pin. It will be in this position after you dry fire the pistol or if you have had a failure to fire. The next position is in the "semi-cocked" mode. This is the mode that you will see the pistol in the majority of the time. The last hammer position is achieved only when you pull the trigger since this is a double action only pistol. The hammer never locks in the position, but this is where the hammer will be just prior to firing. You can use this to give you a visual indication of trigger pull versus hammer position just prior to firing.
Figure 40
Figure 41
Figure 42
With the slide open, there are a few more features worth pointing out. The first is you can clearly see the blued alloy steel barrel and polymer guide rod. The bore of the LC9 barrel has a 6-groove 1:10" RH twist.
Figure 43
Based on the tilted barrel, you can see that the Ruger LC9 uses a locked breech tilting barrel action design. I liked Ruger's description of this action in the instruction manual so I included it below.
The strong locked breech action of the Ruger LC9 utilizes a tilting barrel design in which the barrel and slide are locked together at the moment of firing. After firing, the barrel and slide recoil to the rear a short distance while securely locked together. After this initial movement, the barrel is cammed downward from its locked position, permitting full recoil of the slide and the extraction and ejection of the spent cartridge case. Upon return of the slide to its forward position by the recoil spring, the barrel is cammed back upward into its locked position in the slide.
Figure 44
In the photo below you can see the slide breech face, extractor, ejector and forward end of the firing pin.
Figure 45
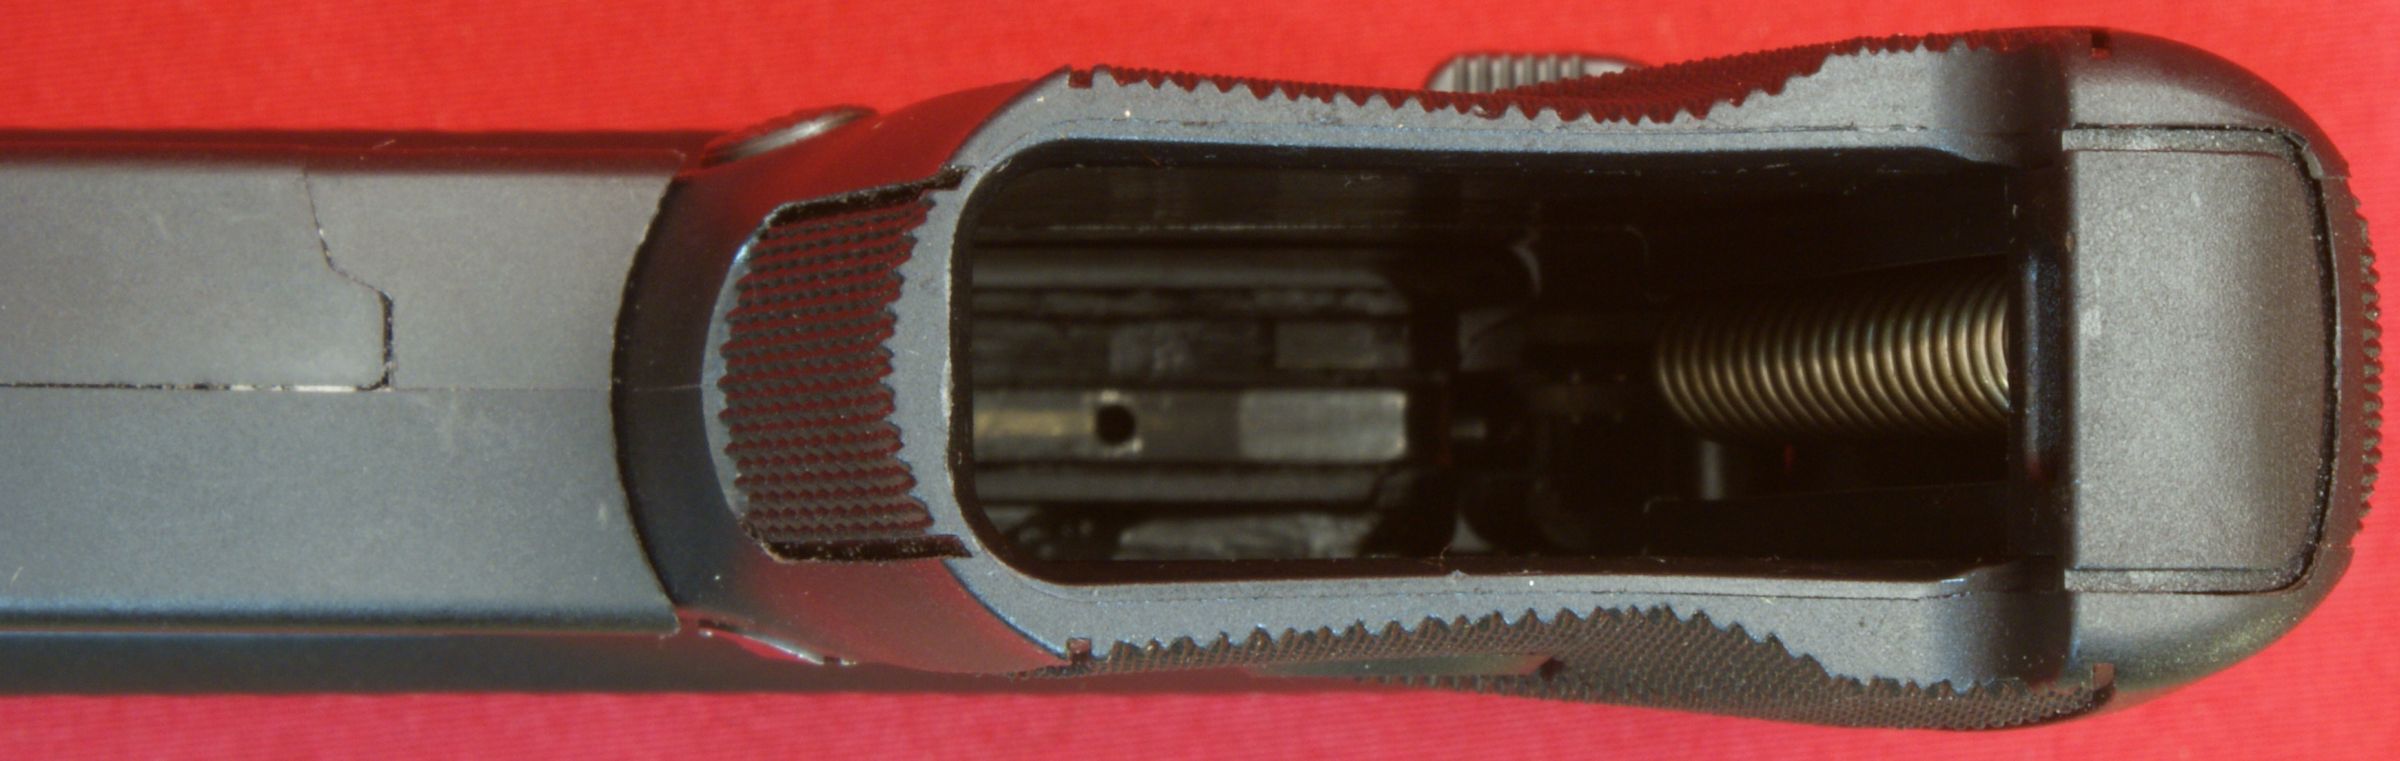
With the magazine inserted, you can see the polymer follower. Looking forward, you can see the feed ramp on the end barrel. Also, you can see the tab that is pressed up by the magazine follower to hold the slide open after the last shot. The tab is identified by "Here" in the photo.
Figure 46
Figure 47
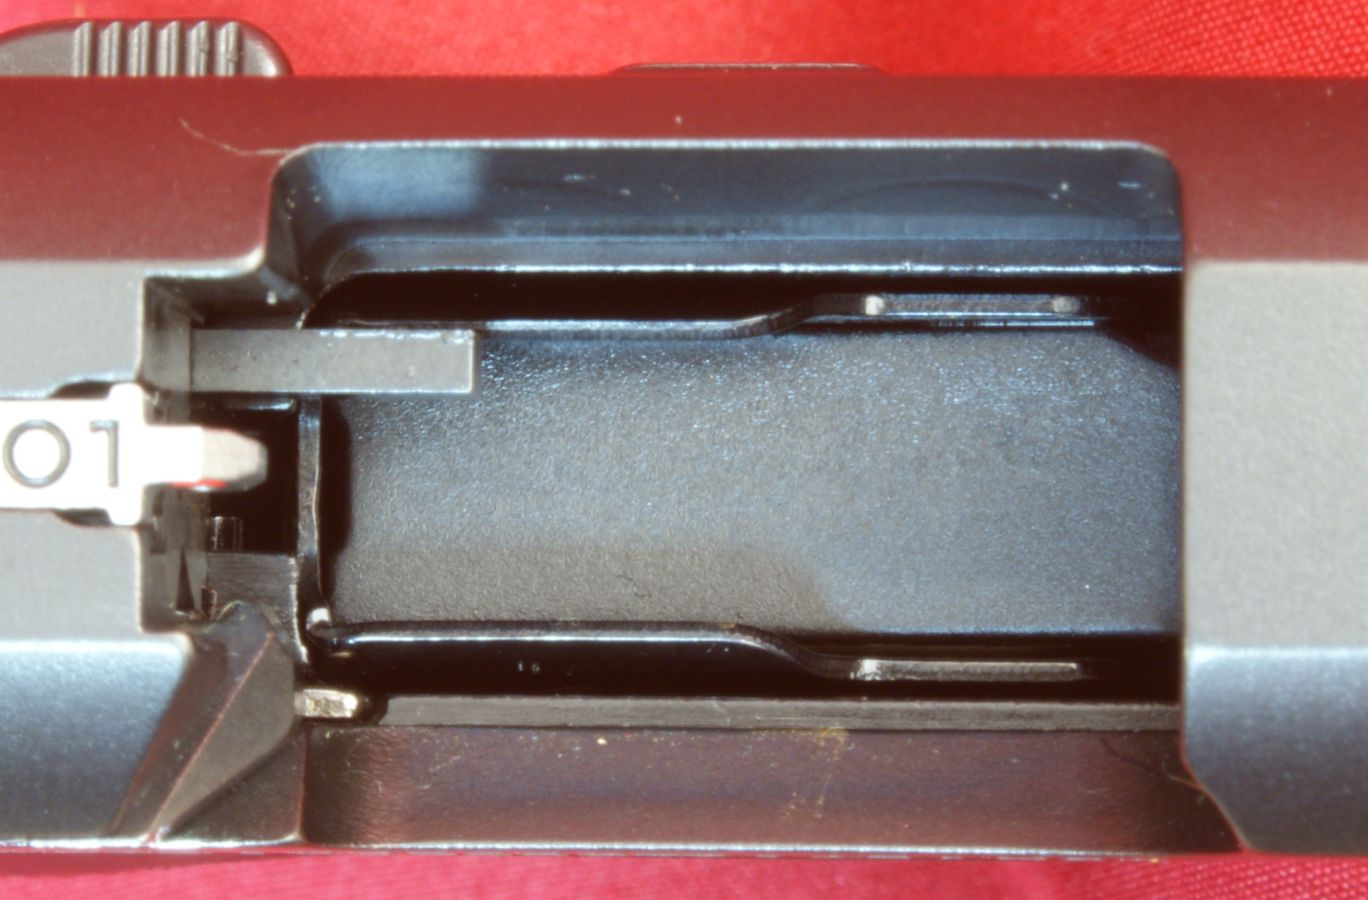
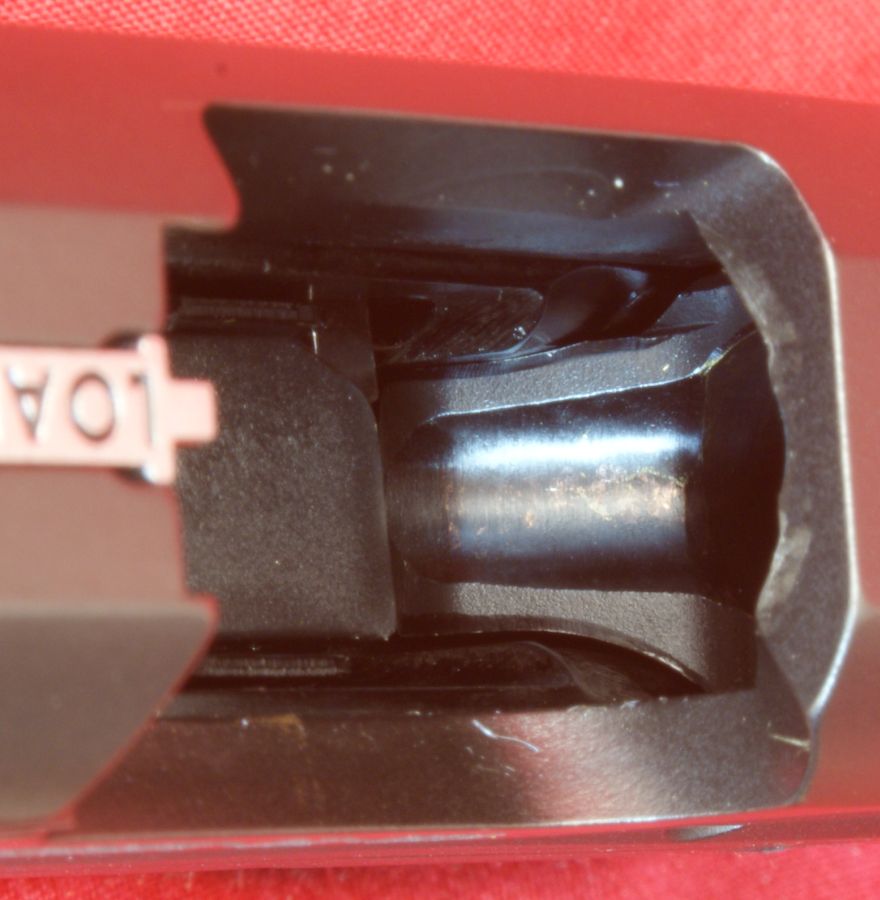
Figure 48

With the slide open, you can flip the pistol over and see the rear end of the firing pin and the firing pin blocker button. Also, you will notice that the Ruger LR9 will come well greased. I recommend you thoroughly clean your pistol and then apply a small amount of oil on the sliding/moving parts.
Figure 49
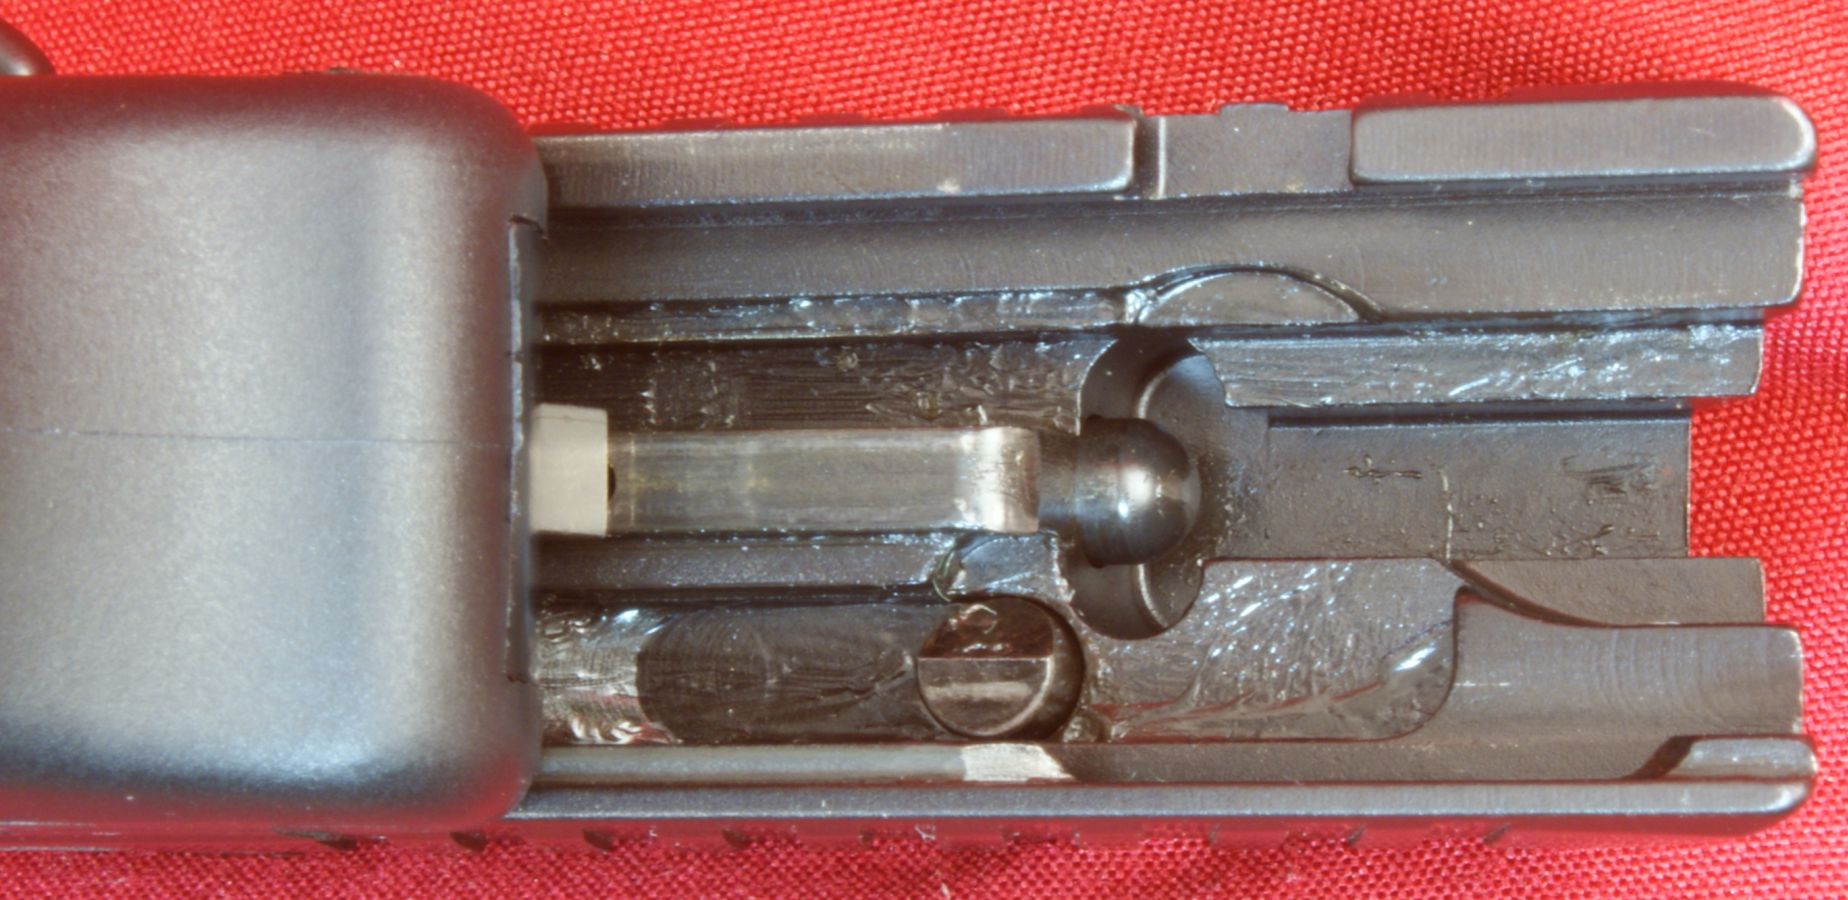
The grip has a very slight chamfer on the inside of the magazine well to aide in inserting a magazine. The LC9 comes with a magazine safety which will prevent the trigger from being pulled when the magazine is removed from the pistol.
Figure 50
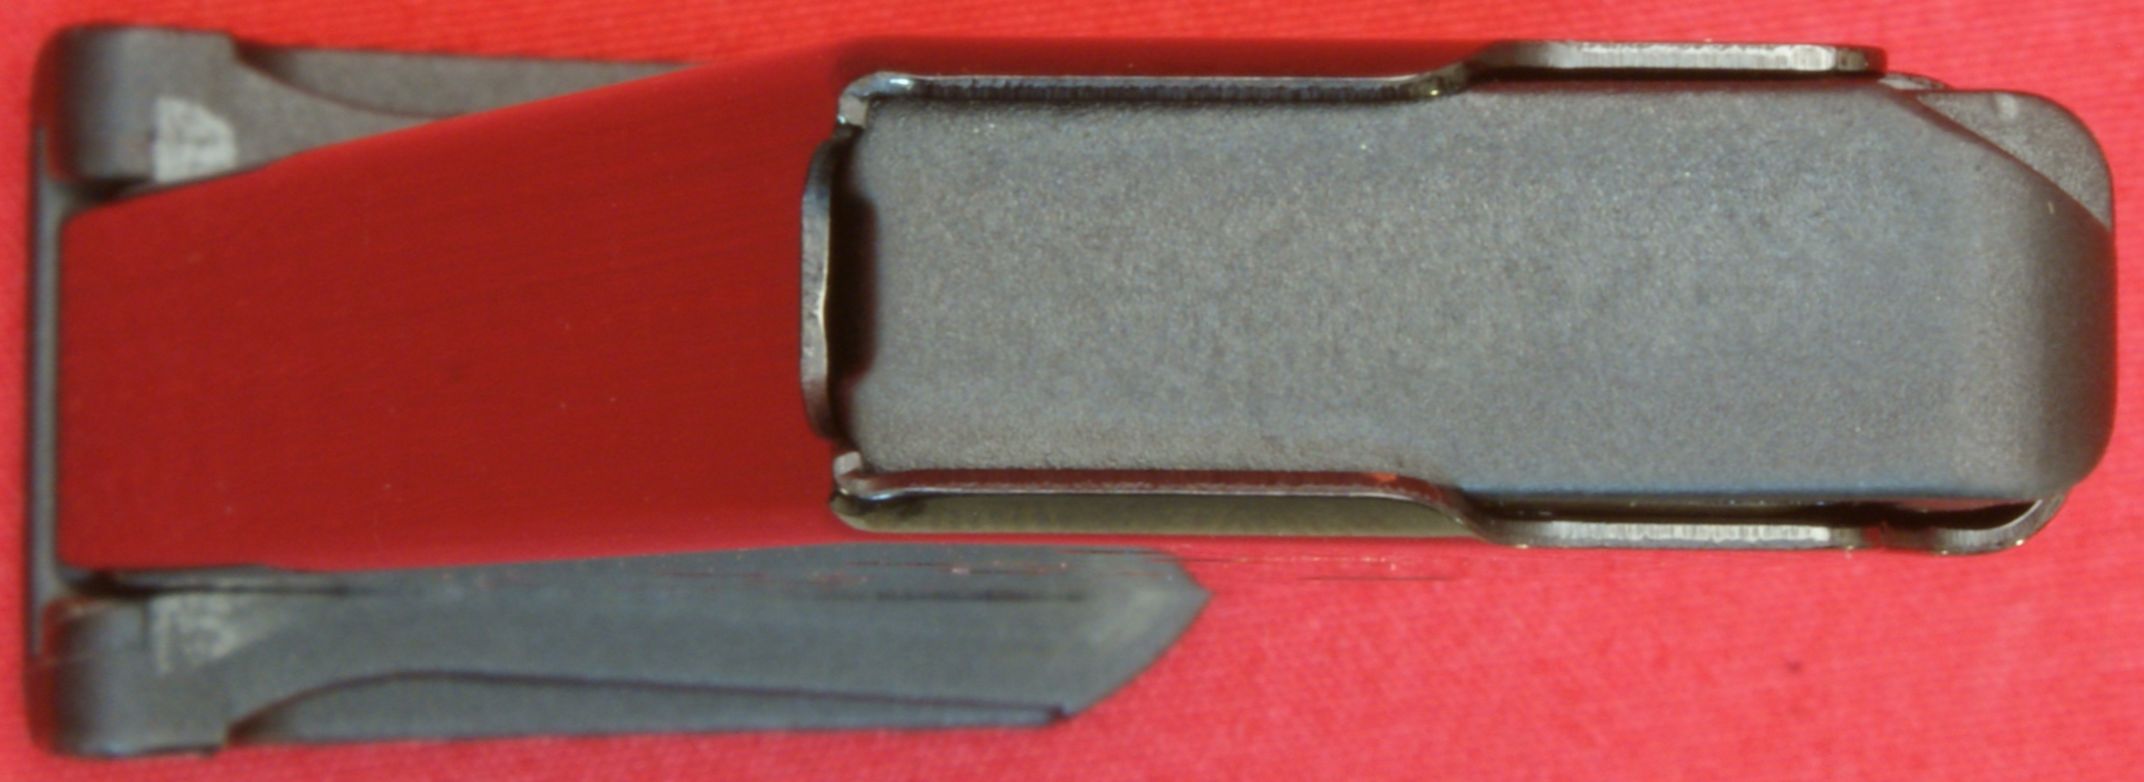
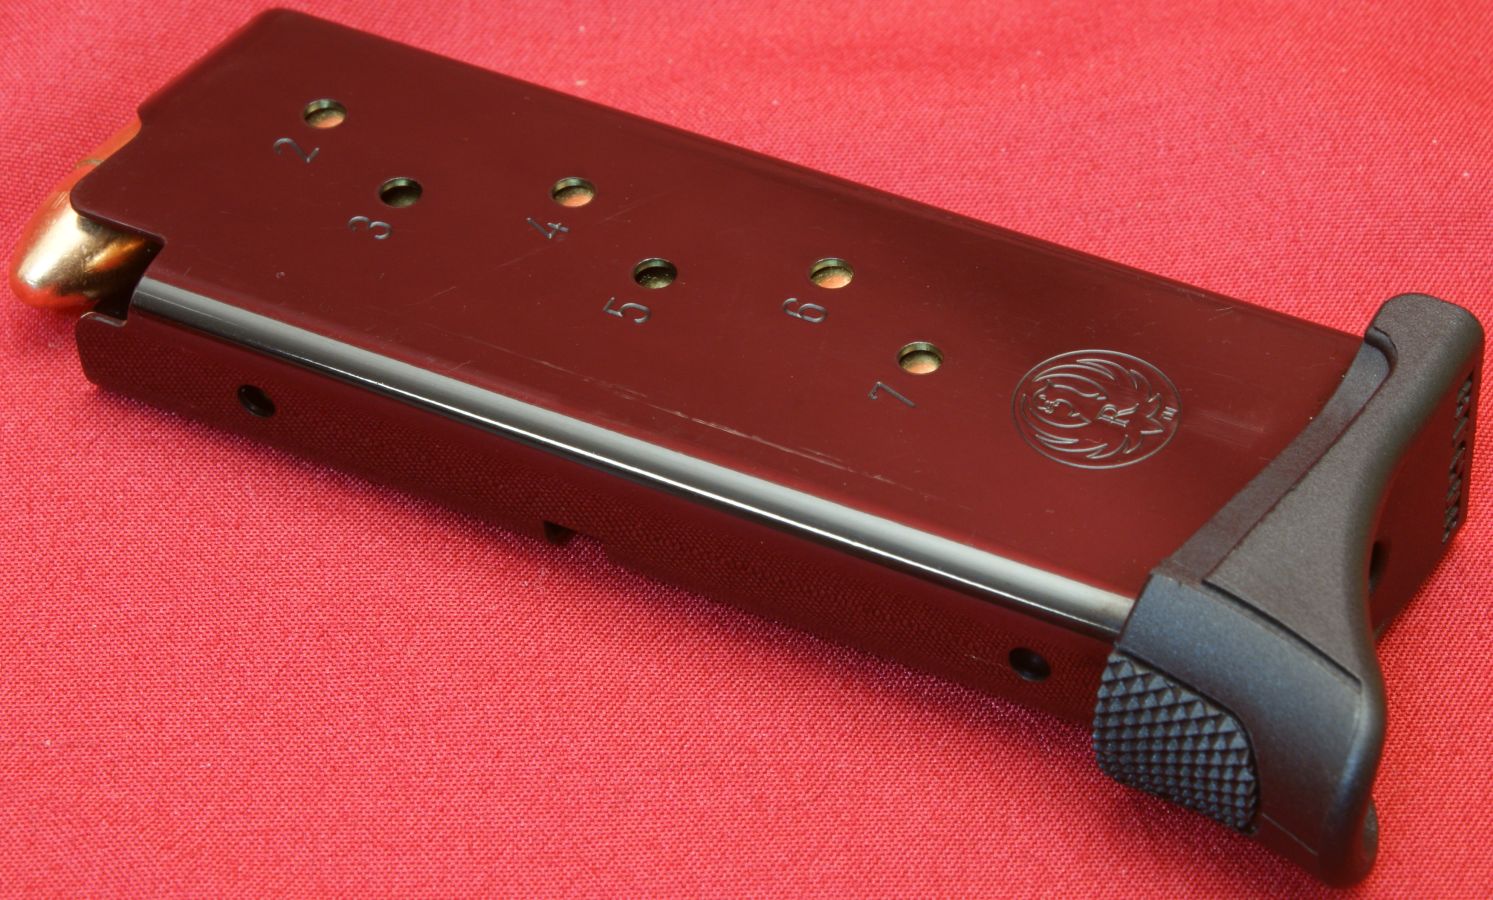
The Ruger LC9 comes with a single 7-round magazine. The magazine body is steel and has some type of low friction coating/finish.
Figure 51
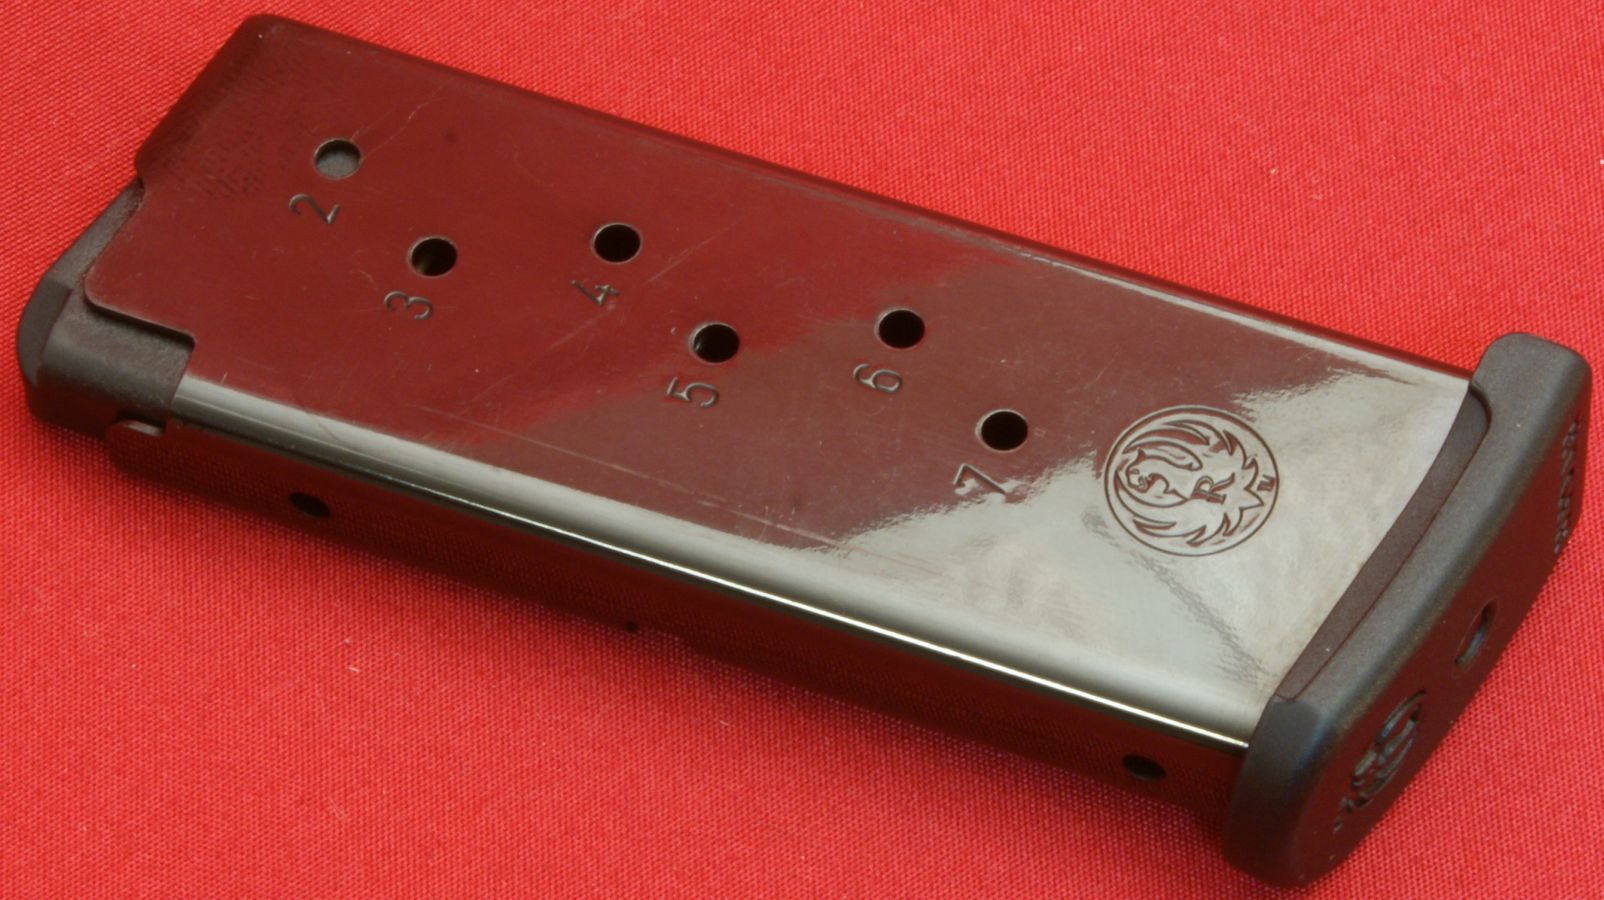
The magazine for the LC9 is specific to the LC9 only and I believe they are made by Mec-Gar in Italy.
Figure 52
Figure 53
Figure 54
Figure 55
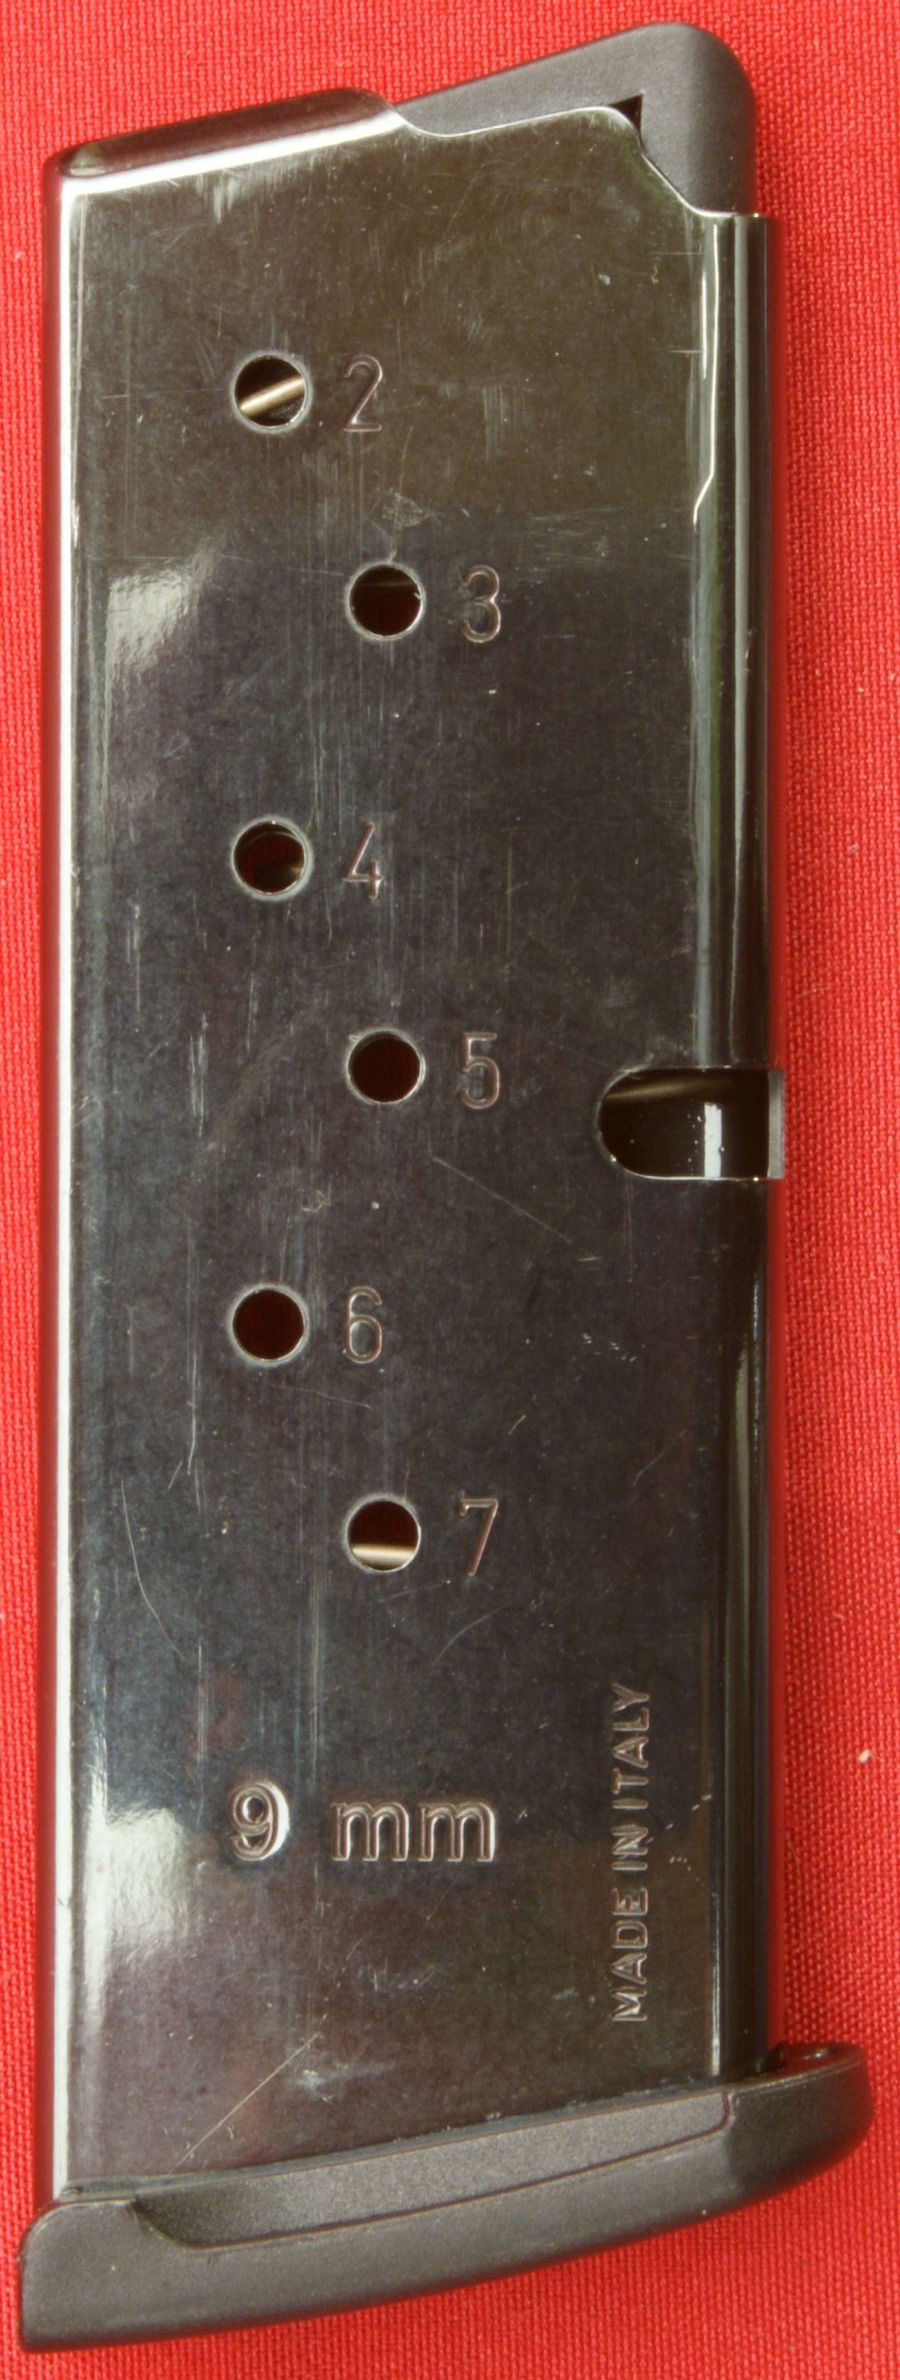
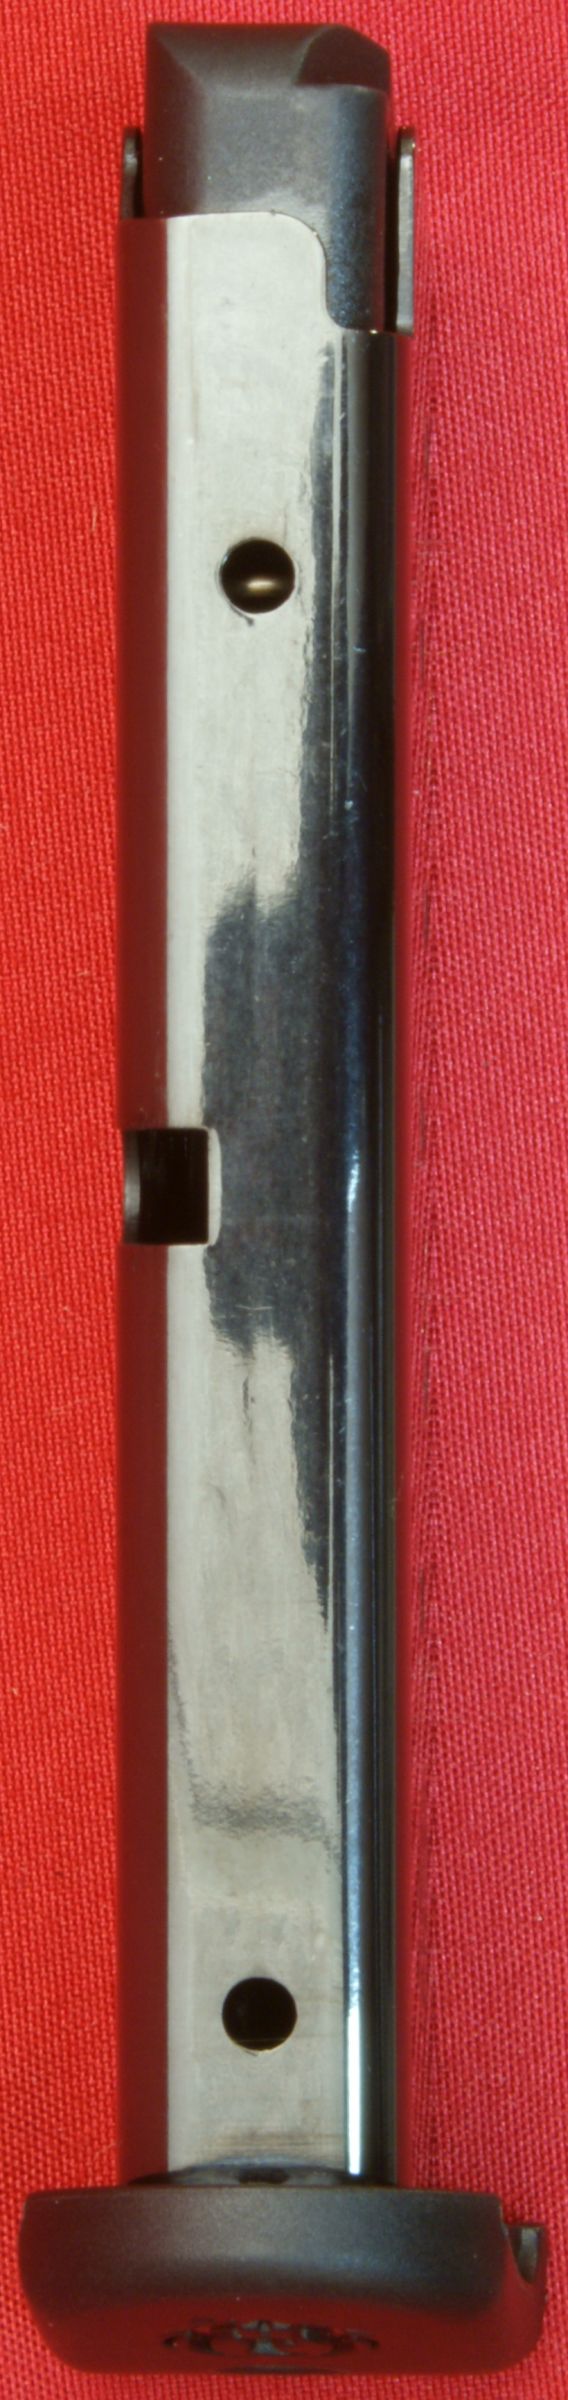
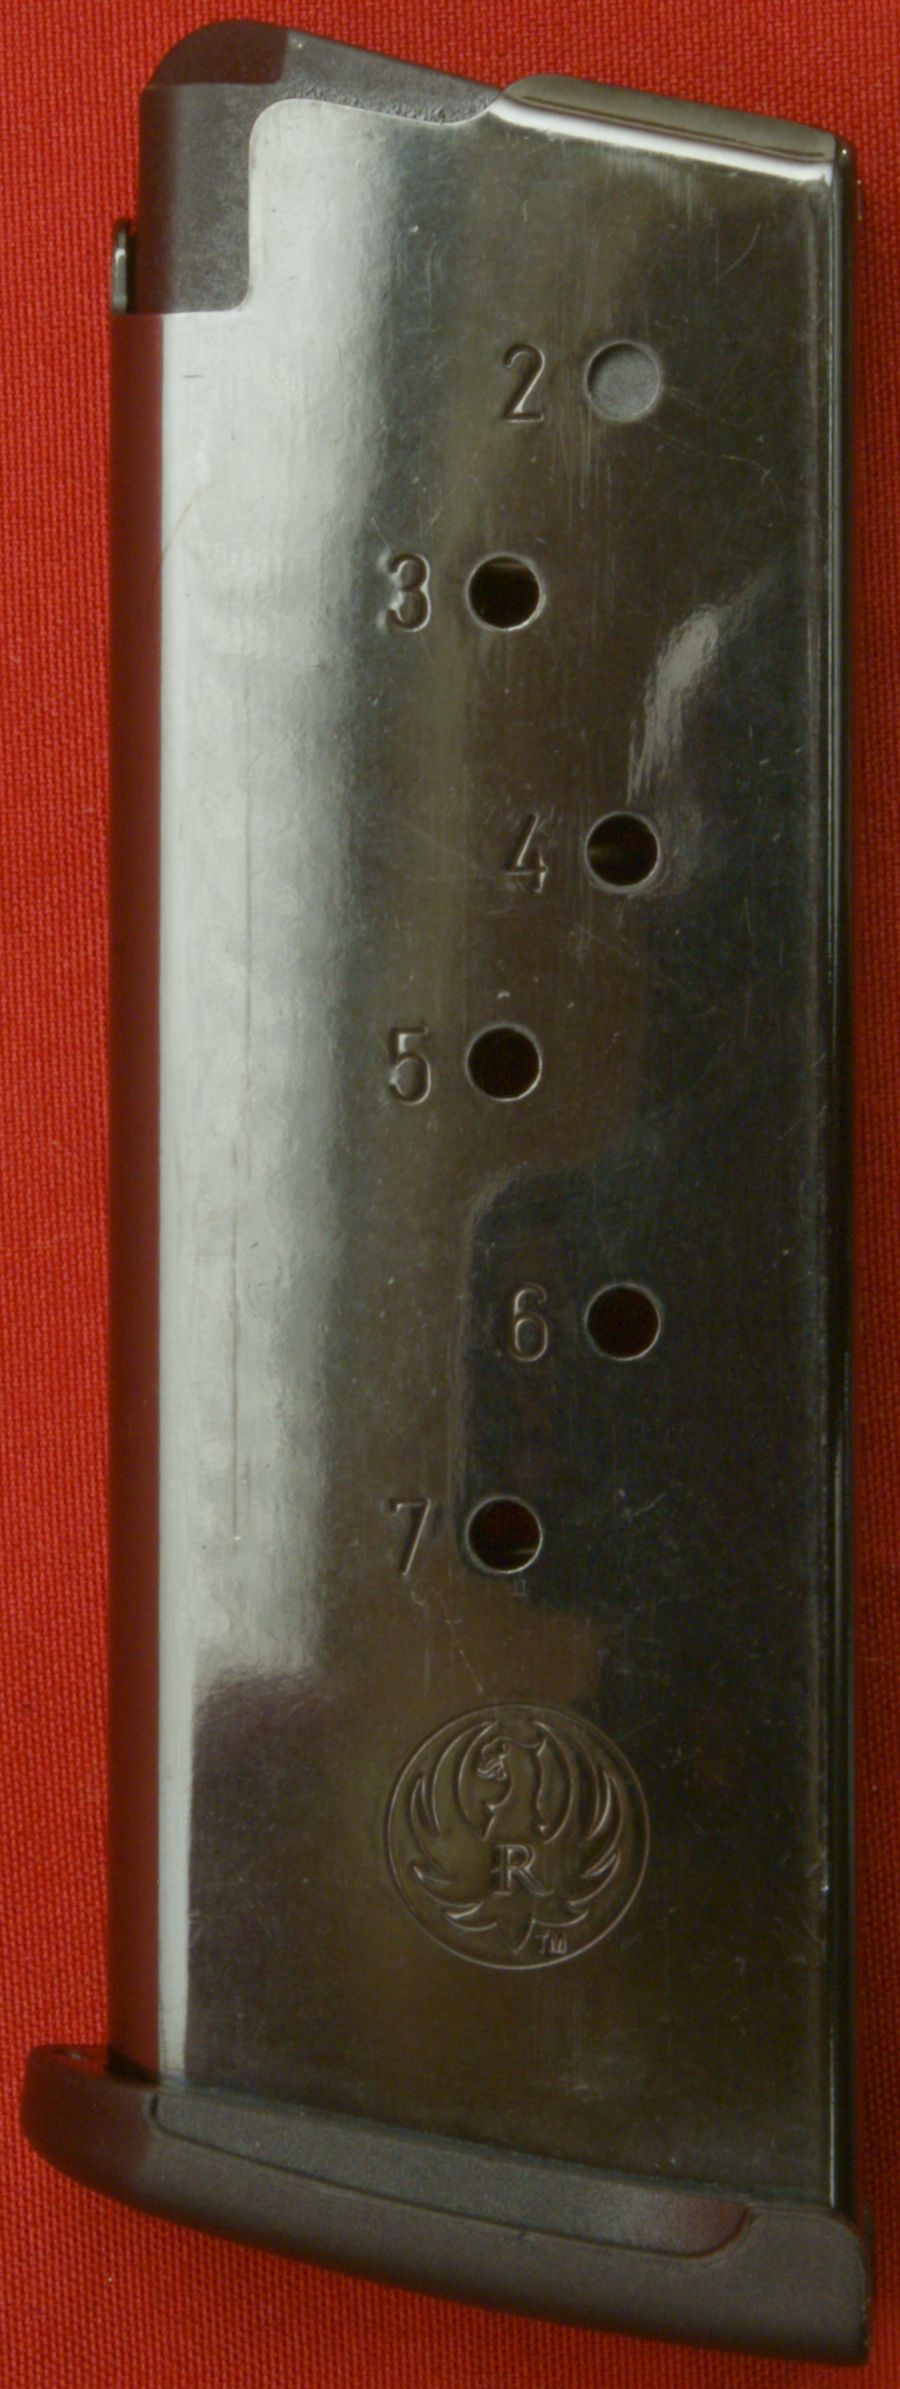
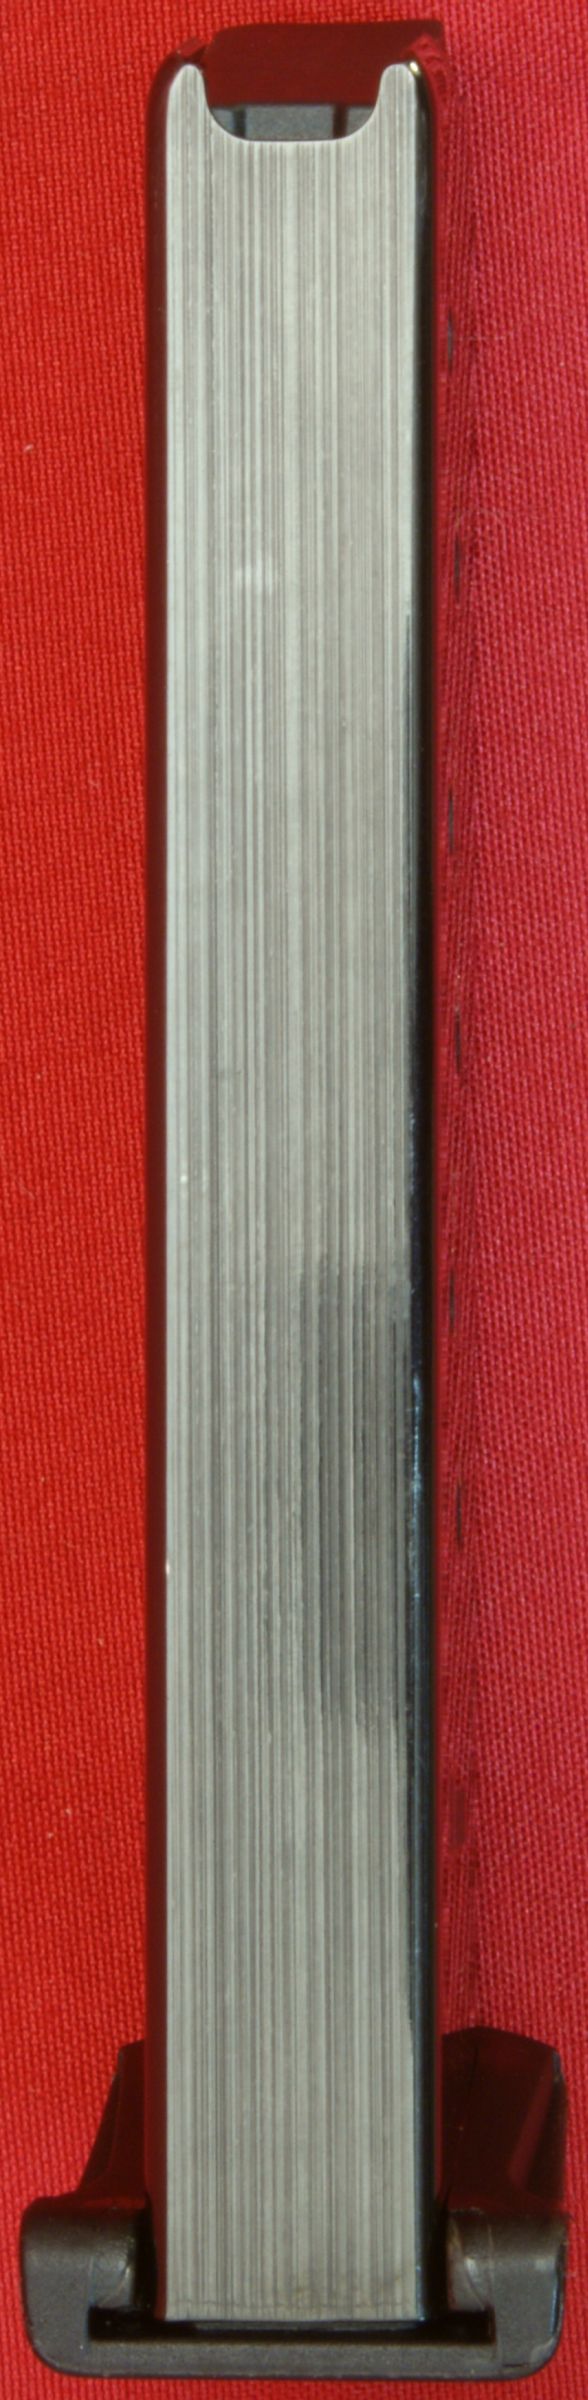
Figure 56
Figure 57
The photo shows the magazine loaded and with the finger grip extension floor plate installed.
Figure 58
This last photo shows the Ruger LC9 w/LaserMax Pistol with the magazine finger extension floor plate installed. This is my preferred magazine configuration because it allows me to also use my little finger when gripping the pistol.
Figure 59
Thoughts
- After spending hours studying, photographing and writing up this part of the review, the only thing I don't like about the Ruger LC9 with Laser Max pistol is that it only comes with a single magazine.
- Each person has their own preferences with safety mechanisms and mine tend to be on the conservative side so I consider all the safety features in the LC9 to be either good or of no negative consequence.
- The LC9 seems to be well made and has a good feel in my hand for a compact pistol.
- The double action only trigger pull was smooth but seems a little long for what I would expect on a compact pistol. It was about 0.15" longer than my S&W Airweight but still manageable.
- Reset of the trigger must go through two audible clicks before you can fire again and this may require a little getting used to for some shooters.
For more detailed photos and commentary, make sure you check out the other parts of this review and feel free to leave comments on my Reader's Comments page. The following links are provided to help you see other parts of this review.
- Ruger LC9 Review: Part 1 - Introduction, Specifications and Summary
- Ruger LC9 Review: Part 2 - What's in the Box
- Ruger LC9 Review: Part 3 - External Features (this page)
- Ruger LC9 Review: Part 4 - Disassembly
- Ruger LC9 Review: Part 5 - Internal Features
- Ruger LC9 Review: Part 6 - Range Test
Or
If you would like to be notified about future Gunsumer Reports reviews via Facebook, make sure "You Like This" by clicking the Facebook "Like" button at the bottom or top of this page. If it already says "You Like This" beside the button, clicking it again will uncheck the "Like" status and you will not be notified.
| Share on Facebook | |
© 2010, 2011, 2012, 2013, 2014, 2015, 2016, 2017, 2018, 2019, 2020, 2021, 2022, 2023 & 2024 Gunsumer Reports™, All rights reserved.
FTC Disclosure