|
|
Gunsumer Reports TM Providing Detailed Objective Reviews for Firearms and Firearm Accessories |
Ruger American Rimfire™ Review
Part 4 - Disassembly
August 29, 2013

In this part of the review I cover the disassembly of the Ruger American Rimfire™ bolt-action rifle. Since disassembly of any bolt action rifle is extremely simple, Ruger covers this in four simple steps. Although I show these steps, you should always consider the manufacturer's instruction manual as the official source when disassembling any firearm.
Step 1 - Safety
Put the safety in the safe position.
Step 2 - Safety Again
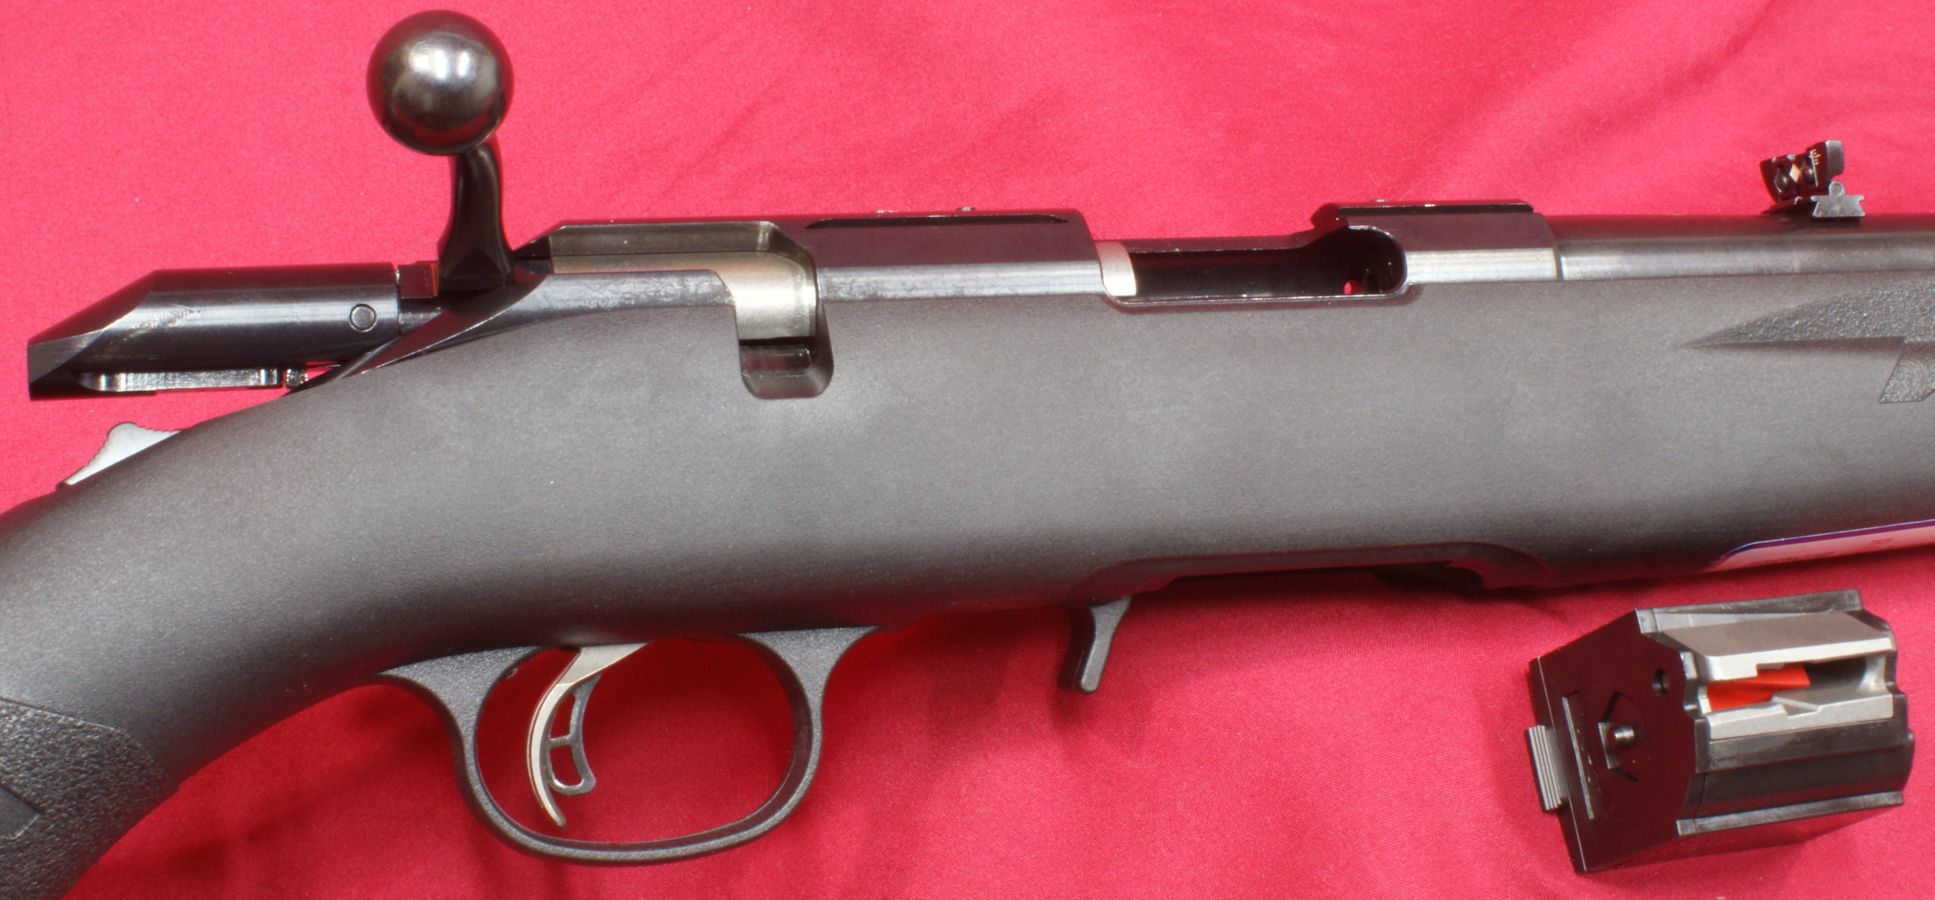
Remove the magazine and make sure the rifle is unloaded.
Figure 1
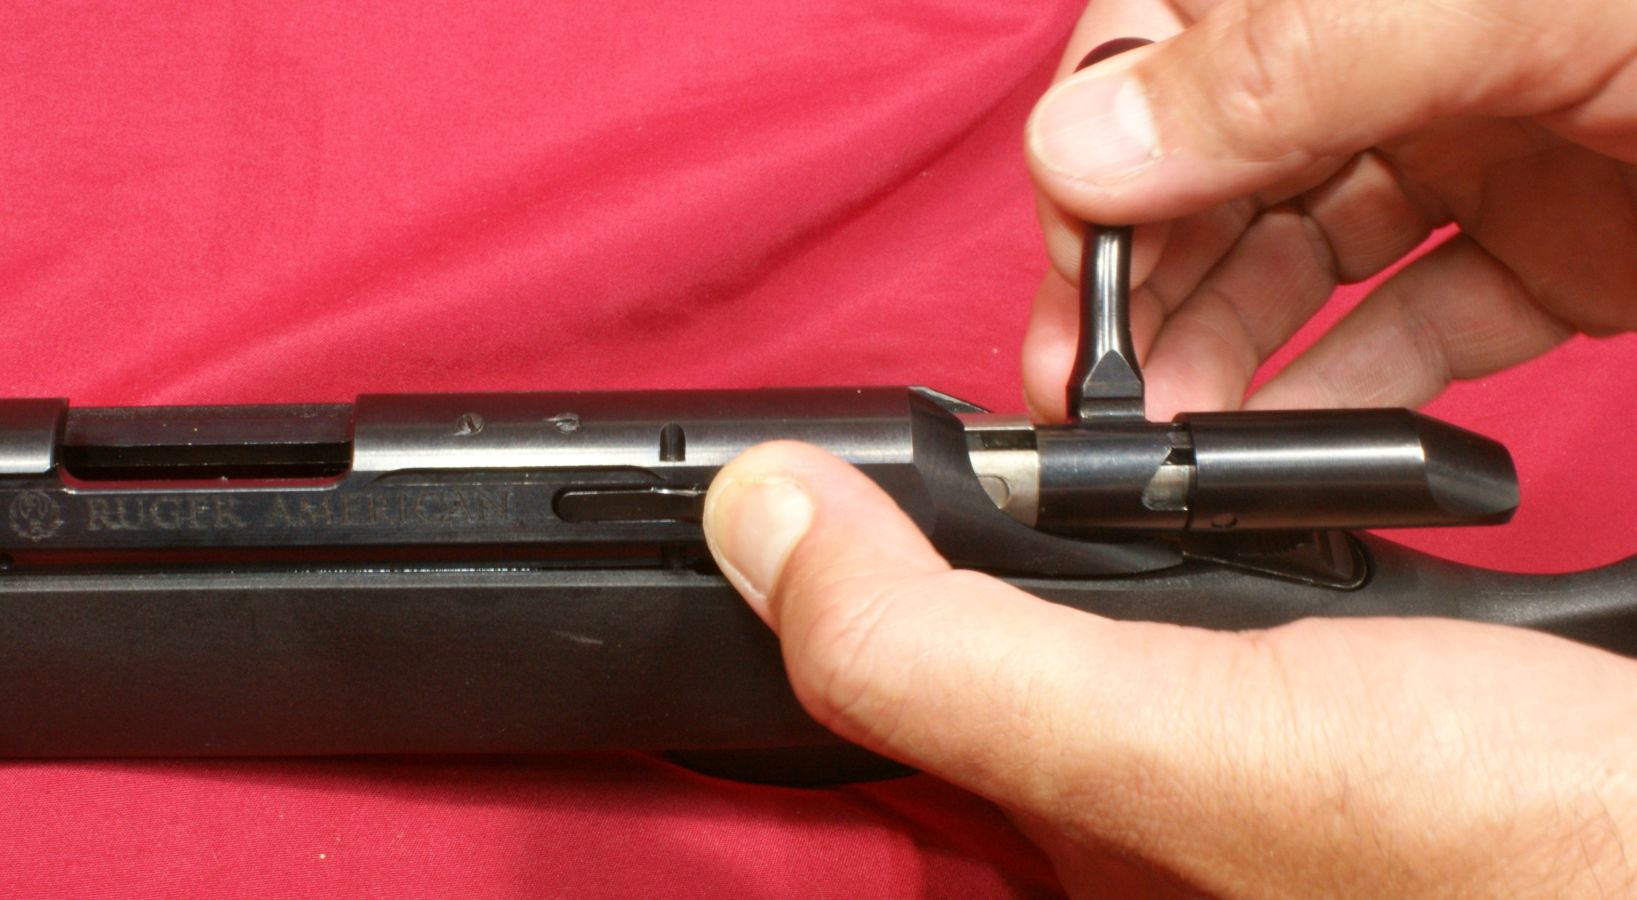
Step 3 - Remove Bolt
Open the bolt and pull it to the rear while pressing down on the rear of the bolt stop located on the left side of the receiver (on a right handed rifle). You will be able to pull the bolt out of the receiver.
Figure 3
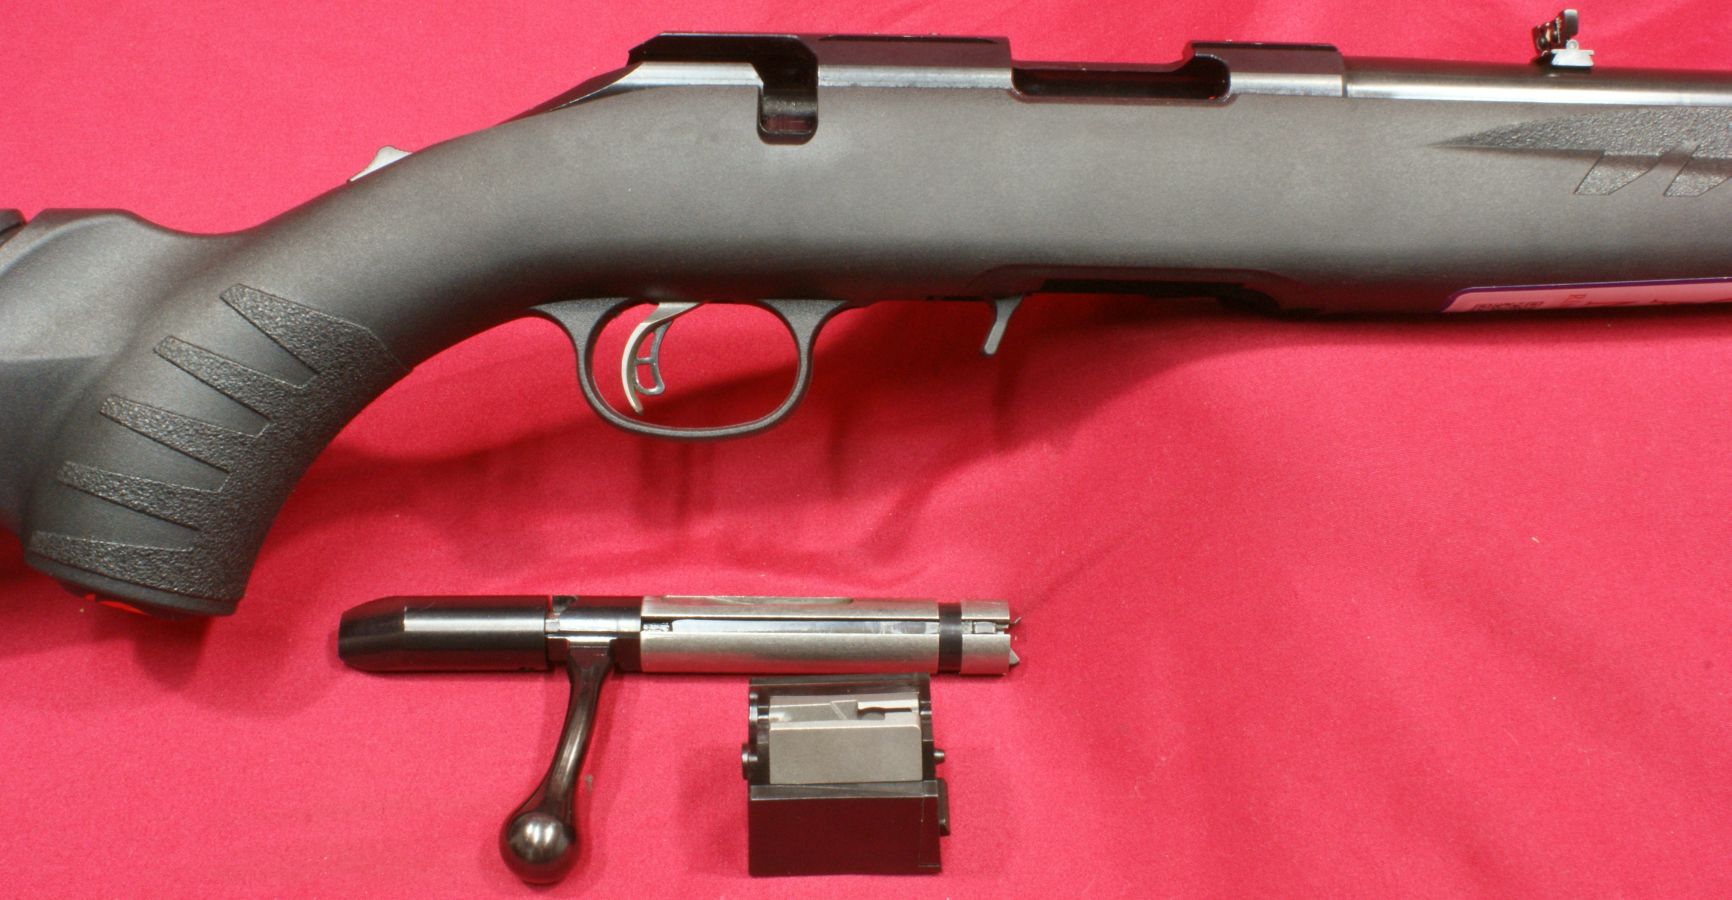
Ruger states that this is as far as you need to disassemble your rifle for routine cleaning and I agree.
Figure 4
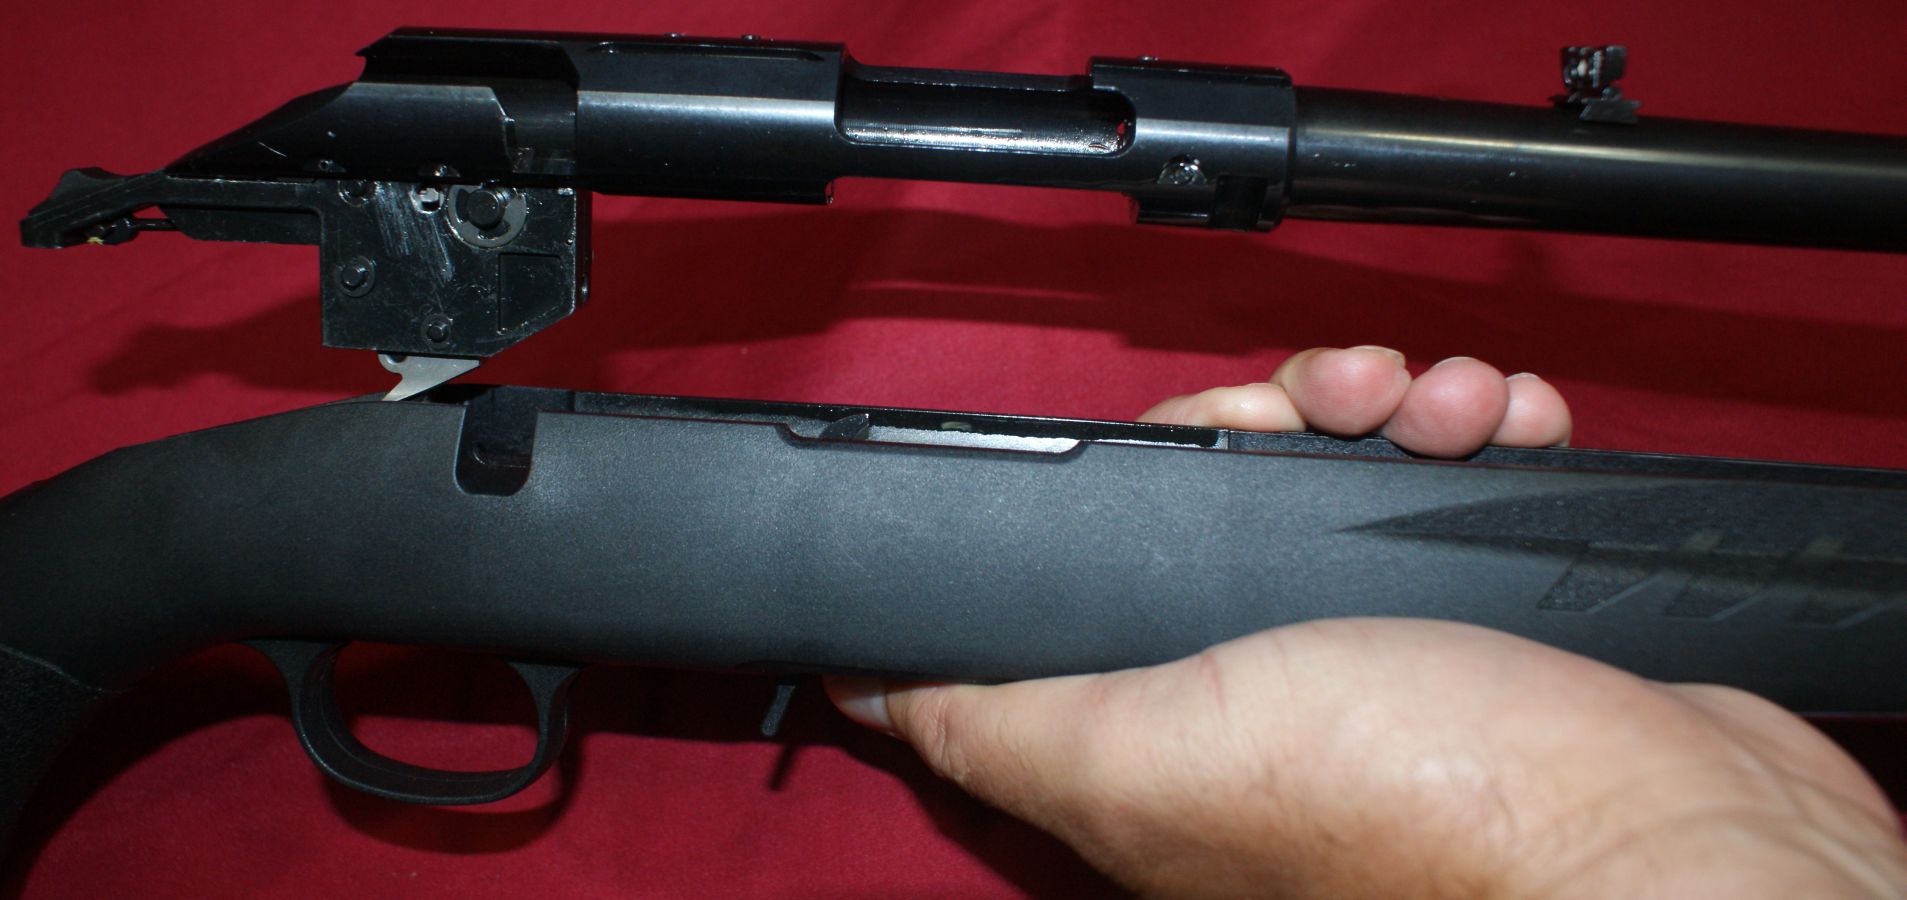
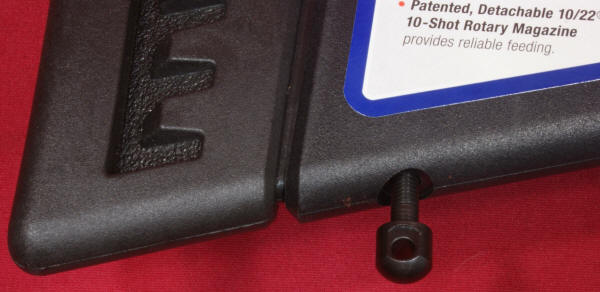
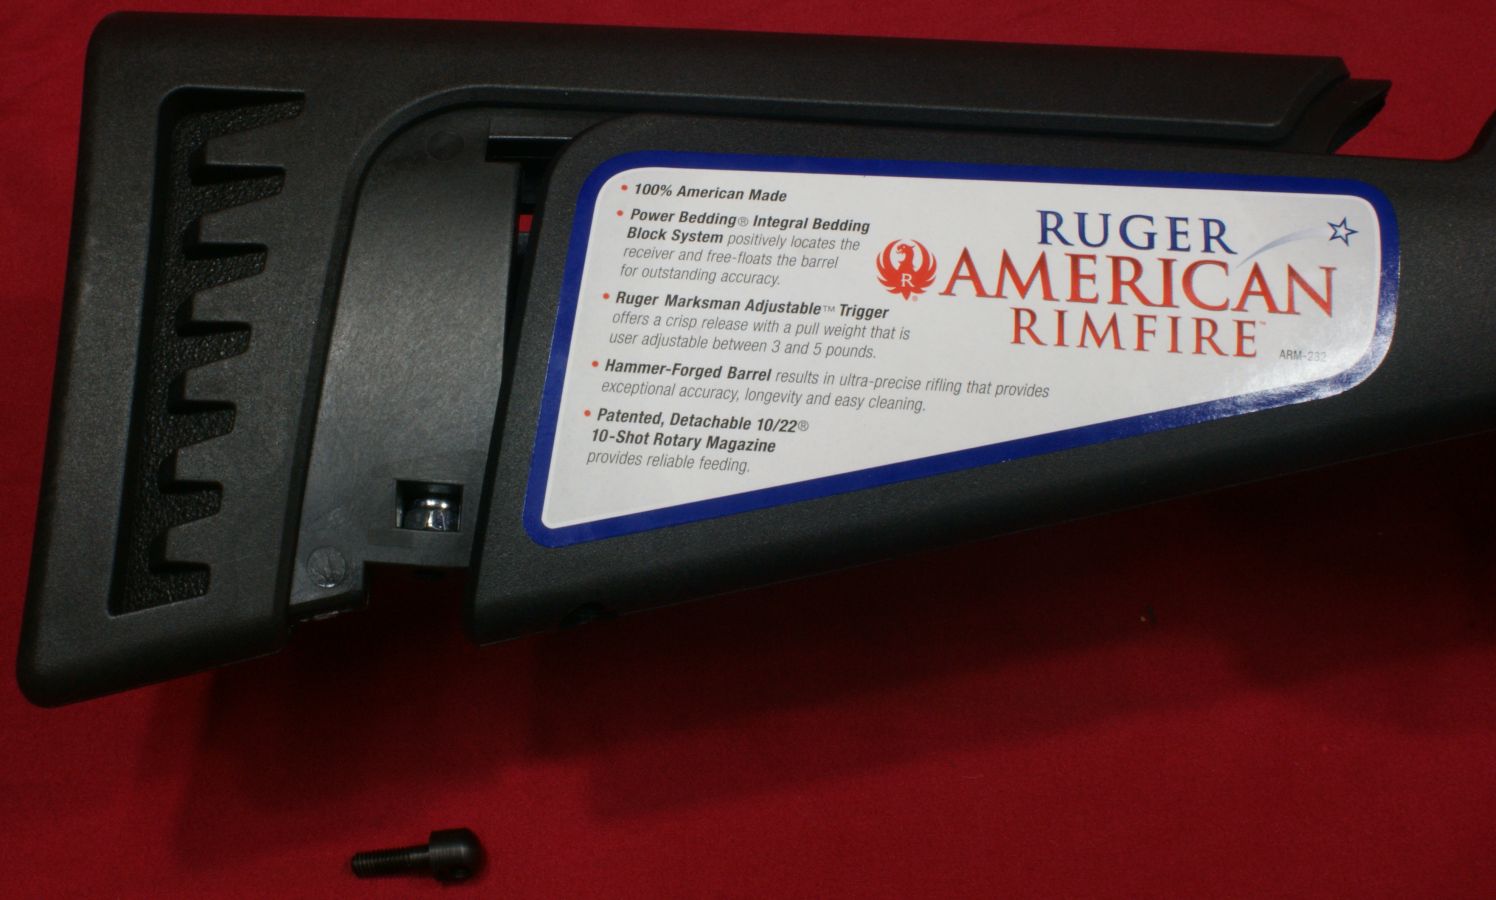
Step 4 - Remove Barreled Action
If you want to do a more thorough cleaning or adjust the trigger pull, you will need to remove the barreled action from the stock. To do this all you need to do is loosen and remove the two hex-head screws and slide the barreled action out of the stock.
Figure 5
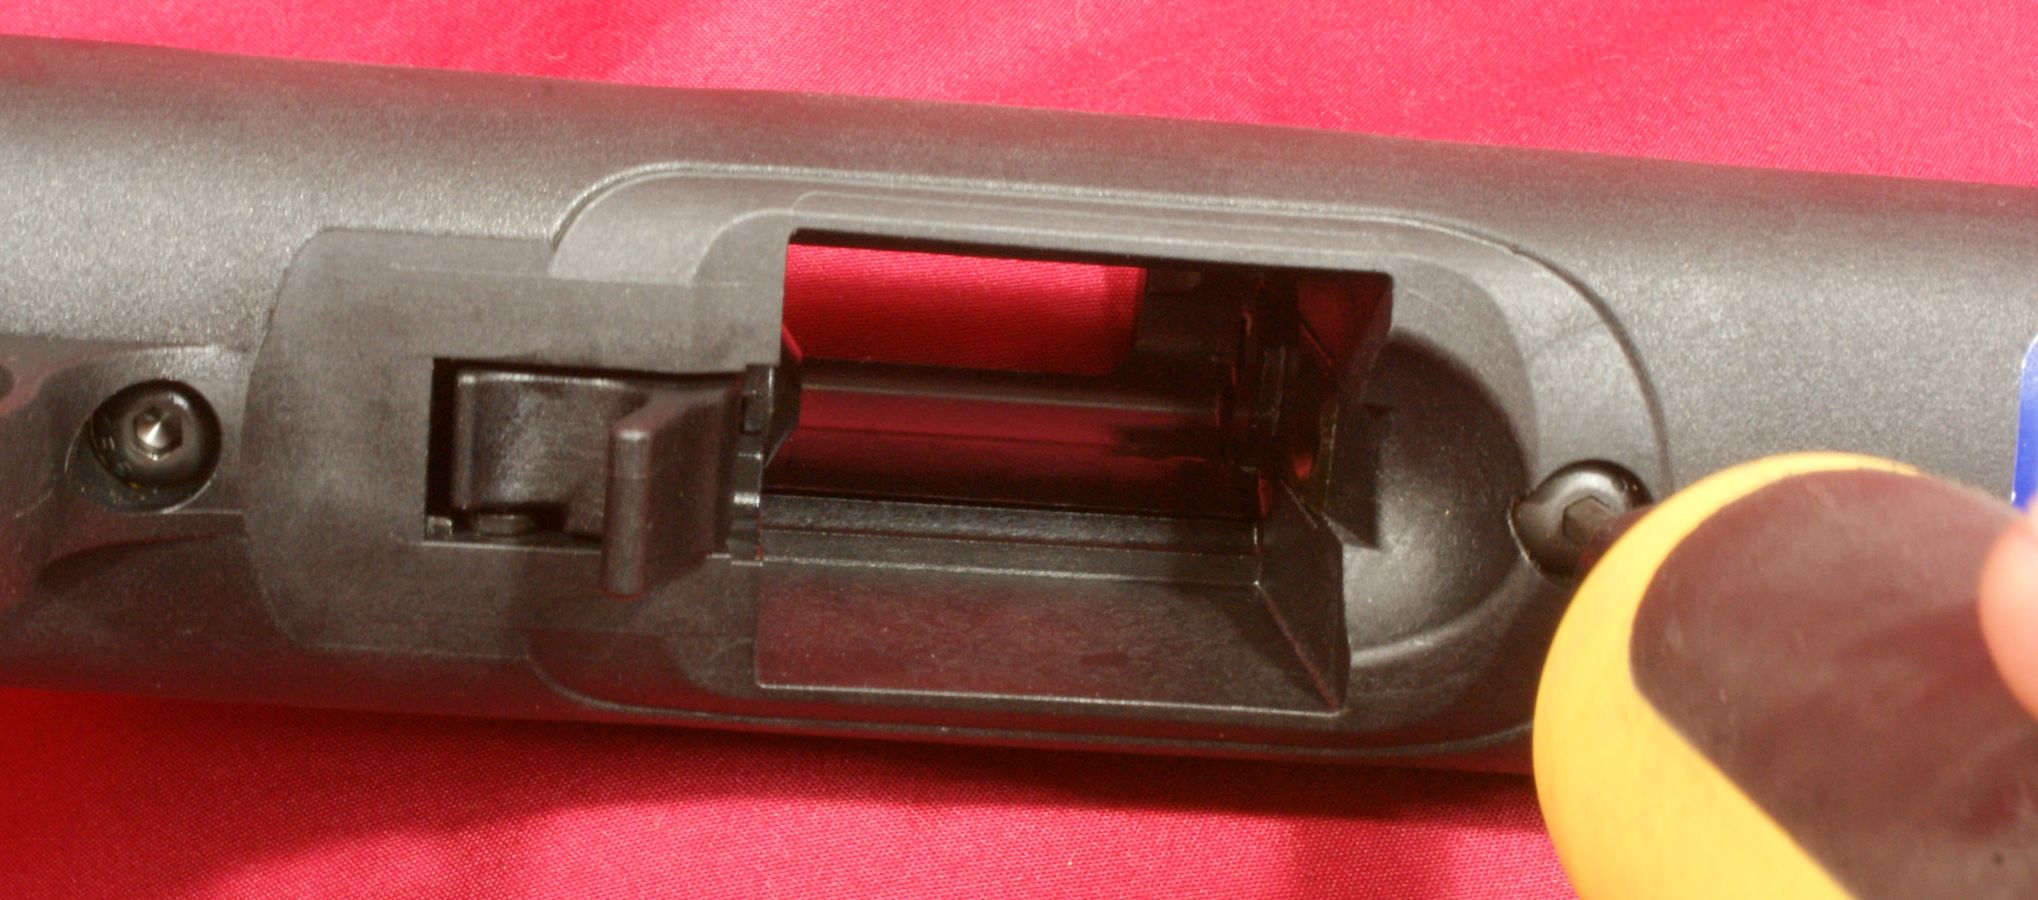
Figure 6
Removing Recoil Pad
To remove the recoil pad, you must remove the rear sling swivel stud.
Figure 7
Using a firm grip, you should be able to pull the recoil pad off the rear of the stock. I was able to on this rifle.
Figure 8
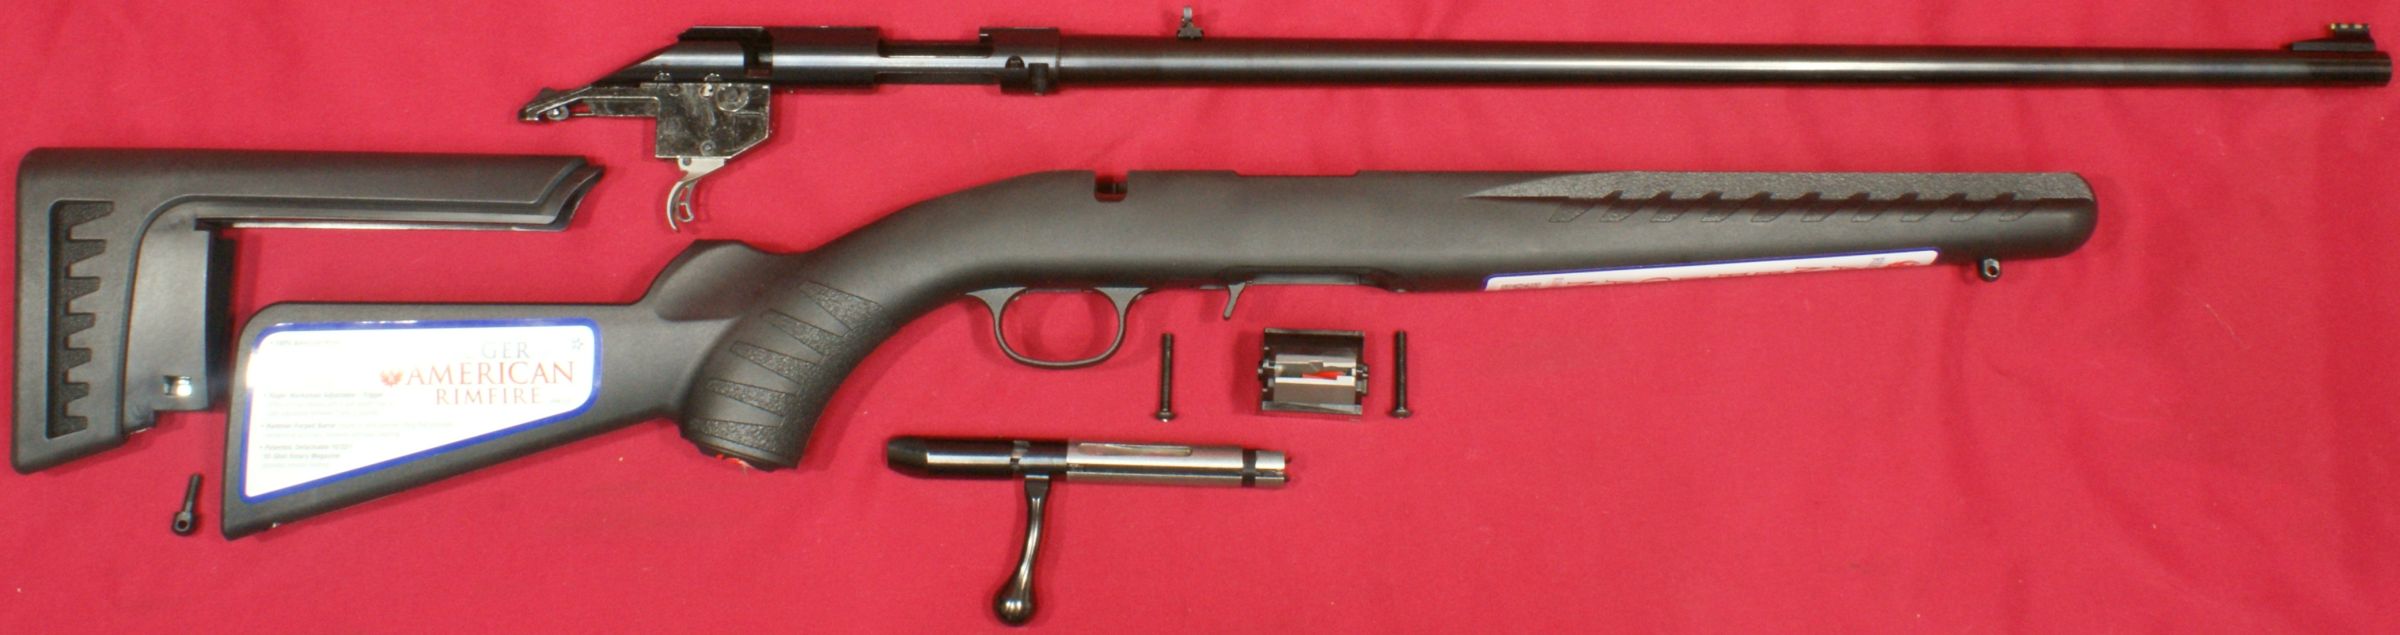
Complete Disassembly Per Instruction Manual
It was only four simple steps to fully disassemble the rifle per the instructions and two of the steps had to do with safety. It doesn't get much simpler than that.
Figure 9
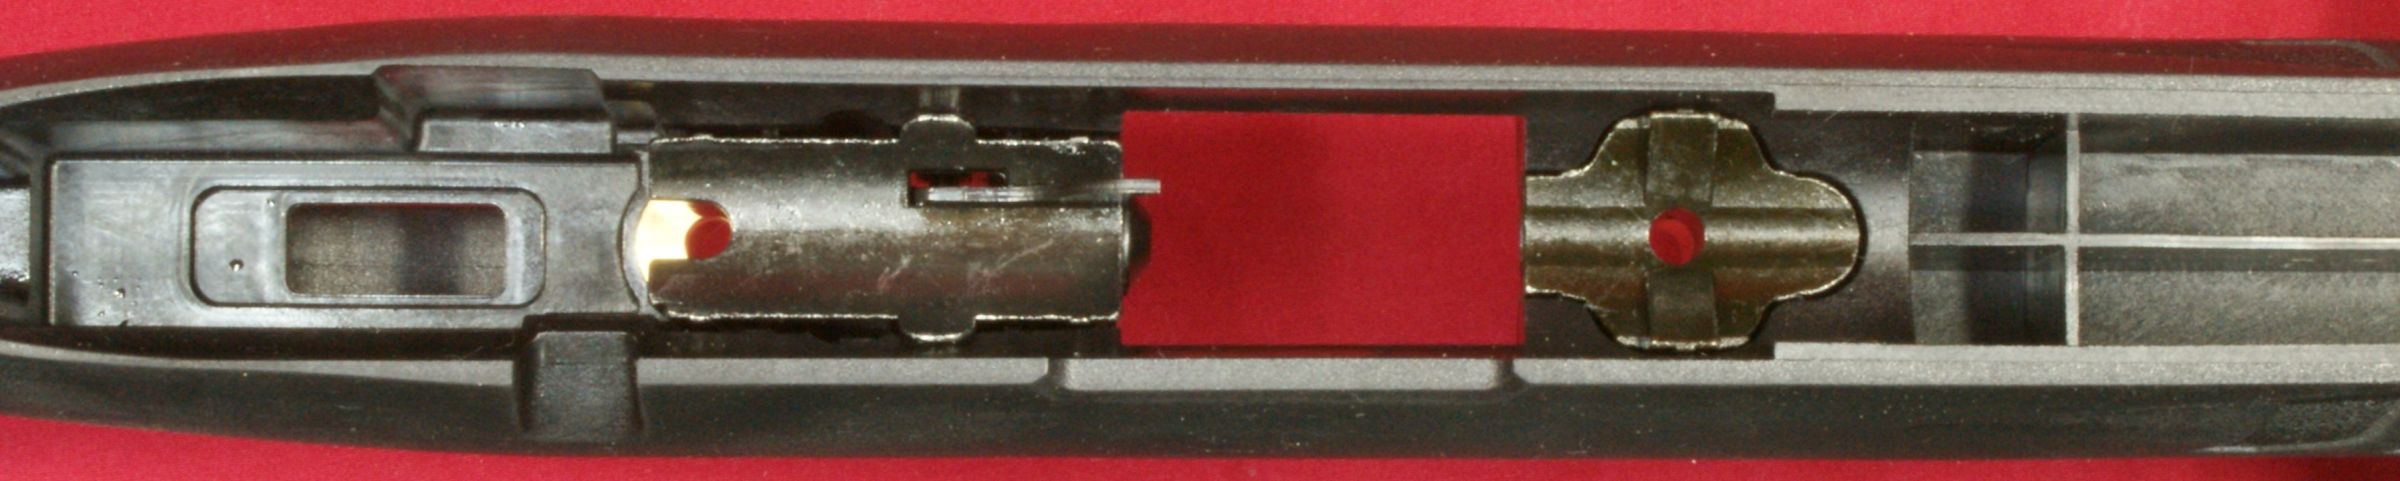
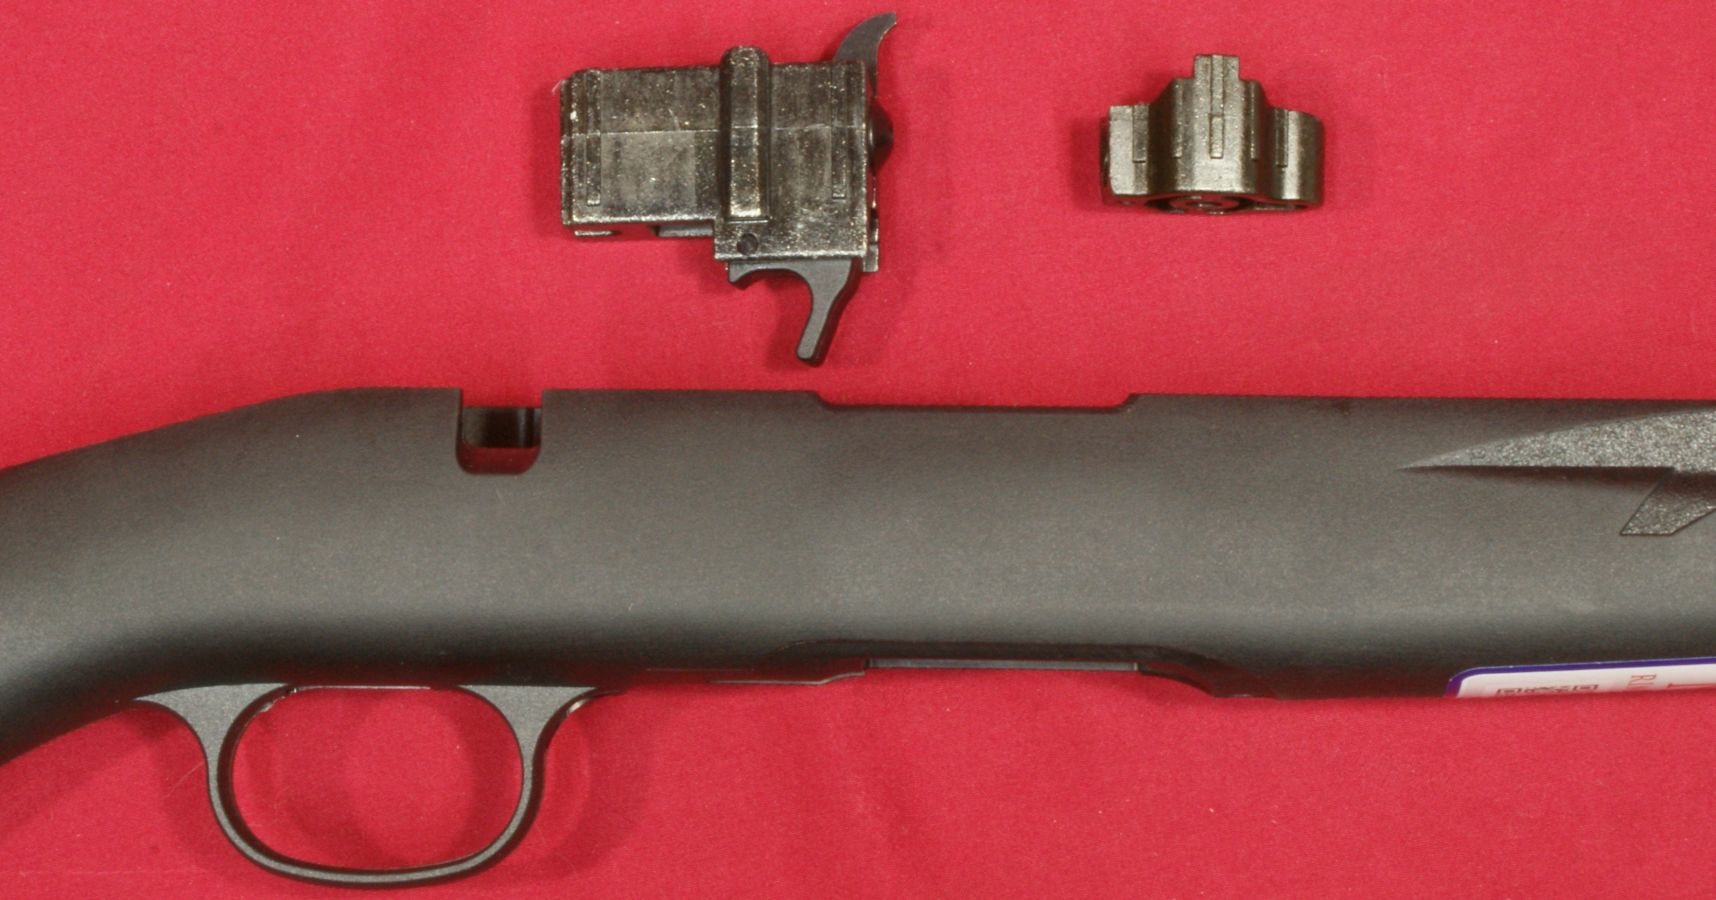
Removing Bedding Block and Magazine Latch Housing
With the stock removed, you can see the two die cast metallic blocks inside the stock. The forward block is the bedding block and the rear block is the magazine latch housing.
Figure 10
I was able to easily pull the magazine latch housing out of the stock. It took me a little coaxing (a good thing) to pull the bedding block from the stock and I would not recommend you doing this on your rifle. You want the bedding block to stock to be the tightest fit possible and each time you remove the block, you could potentially be reducing the tightness of the fit. After taking these photos, I don't plan on removing it again in the future unless it is to epoxy the bedding block to the stock.
Figure 11
Thoughts
Like most bolt action rifles, disassembly is quick and easy and there is no good reason why you shouldn't be able to keep this rifle in excellent condition.
For more detailed photos and commentary, make sure you check out the other parts of this review and feel free to leave comments on my Reader's Comments page. The following links are provided to help you see other parts of this review.
- Ruger American Rimfire Rifle Review: Part 1 - Introduction, Specifications and Summary
- Ruger American Rimfire Rifle Review: Part 2 - What's in the Box
- Ruger American Rimfire Rifle Review: Part 3 - External and Operational Features
- Ruger American Rimfire Rifle Review: Part 4 - Disassembly (this page)
- Ruger American Rimfire Rifle Review: Part 5 - Internal Features
- Ruger American Rimfire Rifle Review: Part 6 - Range Test
Or
If you would like to be notified about future Gunsumer Reports reviews via Facebook, make sure "You Like This" by clicking the Facebook "Like" button at the bottom or top of this page. If it already says "You Like This" beside the button, clicking it again will uncheck the "Like" status and you will not be notified.
| Share on Facebook | |
© 2010, 2011, 2012, 2013, 2014, 2015, 2016, 2017, 2018, 2019, 2020, 2021, 2022, 2023 & 2024 Gunsumer Reports™, All rights reserved.
FTC Disclosure