|
|
Gunsumer Reports TM Providing Detailed Objective Reviews for Firearms and Firearm Accessories |
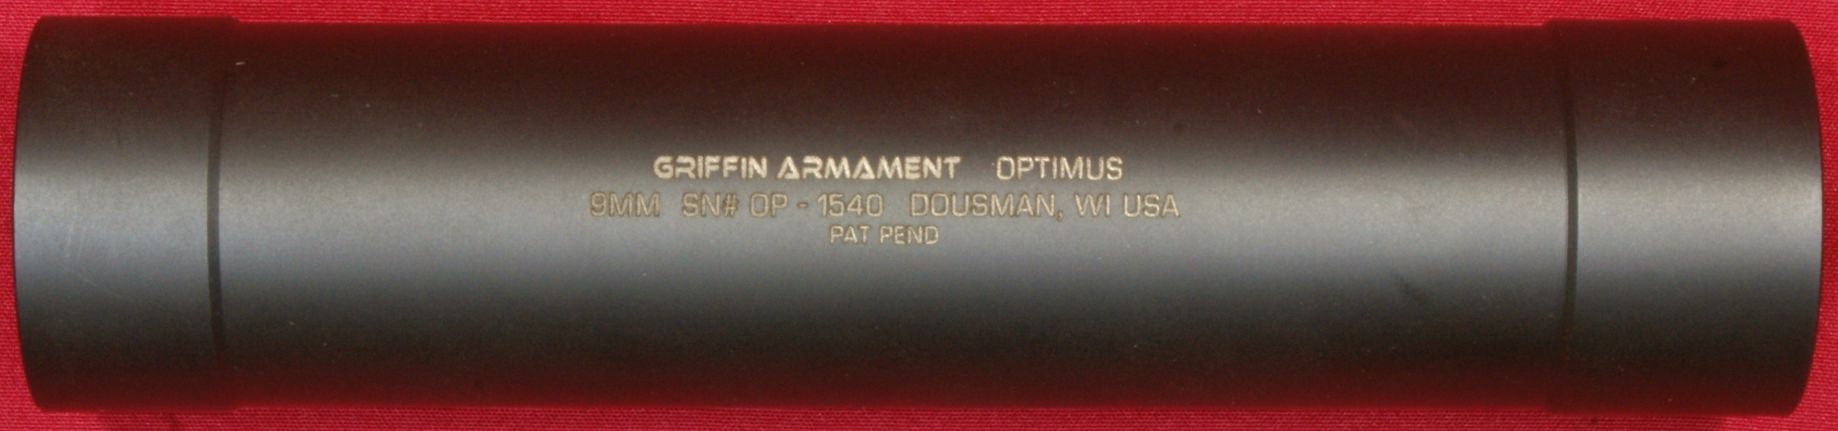
Griffin Armament Optimus Suppressor Review
August 6, 2017
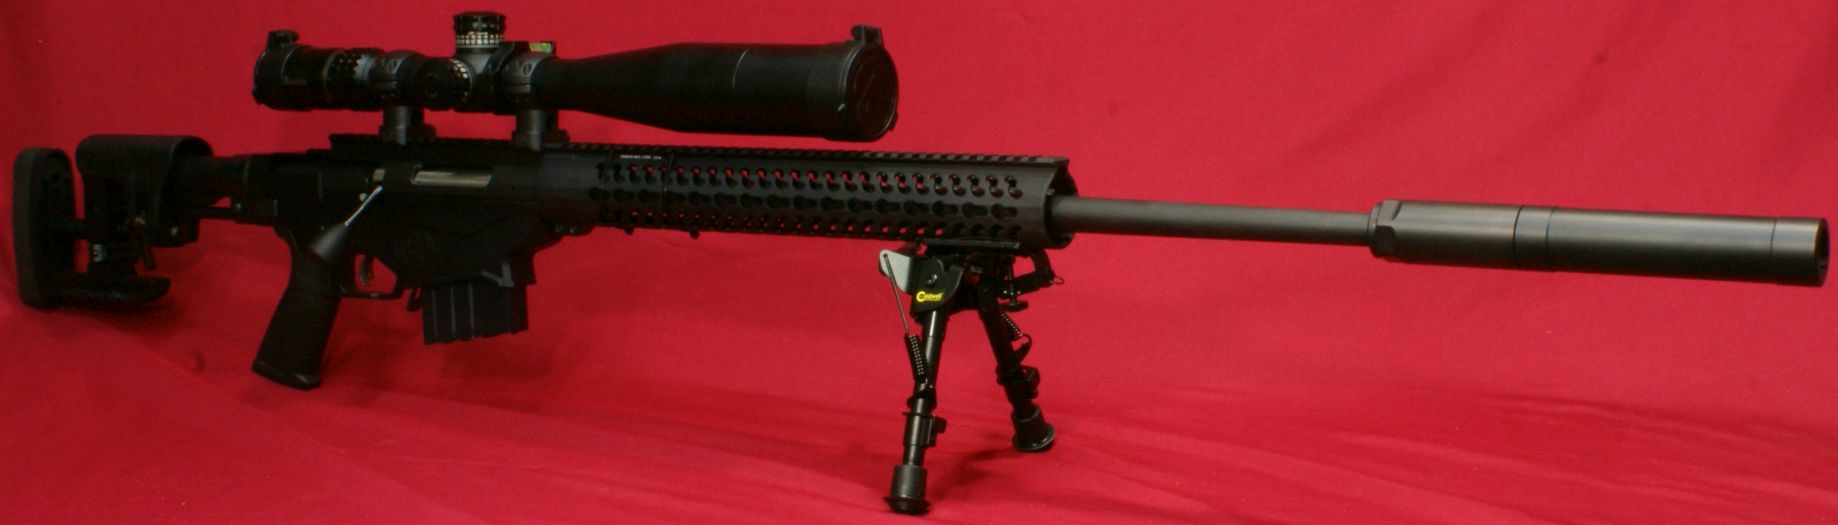
Over the past several years, it seems that there has been a surge in the number of suppressor manufacturers which has helped raise the bar in both quality, options and effectiveness in today's suppressors. Last year I decided to add another few items to my NFA Gun Trust with an intent to add one fully rated .30 caliber suppressor. That started me down a path of doing my research and there were some great choices to consider. I eventually stumbled on the Griffin Armament Optimus Suppressor which was on sale at my local gun store. The key features of the Griffin Optimus were its ability to handle the 300 Win. Mag. caliber while at the same time be easily reconfigured to other calibers and also be fully serviceable. Since I review firearms as a hobby, the versatility of the Optimus was a big selling point for me when making a decision on this $1100 investment ($900 for the suppressor and $200 for the tax stamp). At the time of this review, the Optimus is listed at an MSRP of $1095, but it seems you can purchase it at several locations for about $986 plus tax stamp.
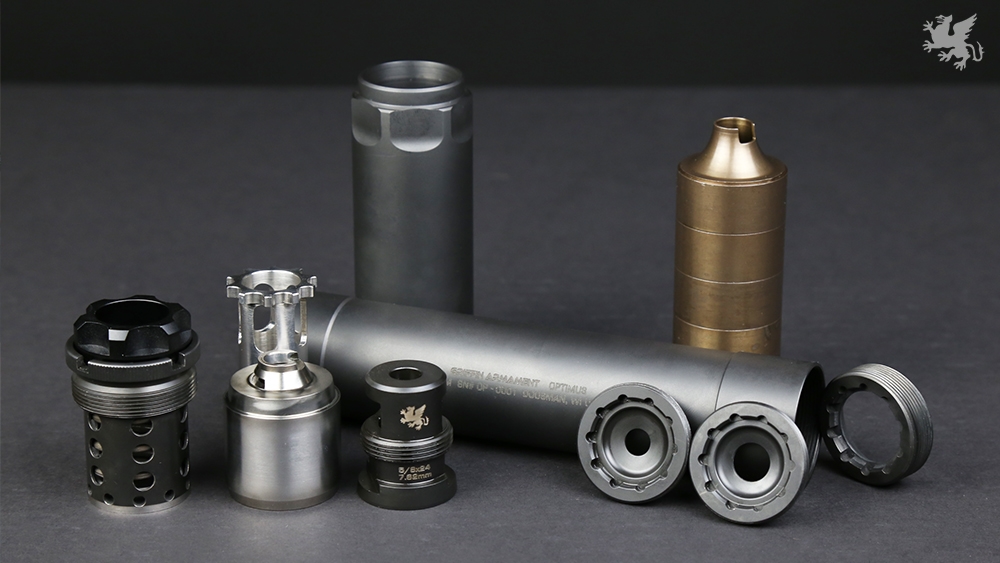
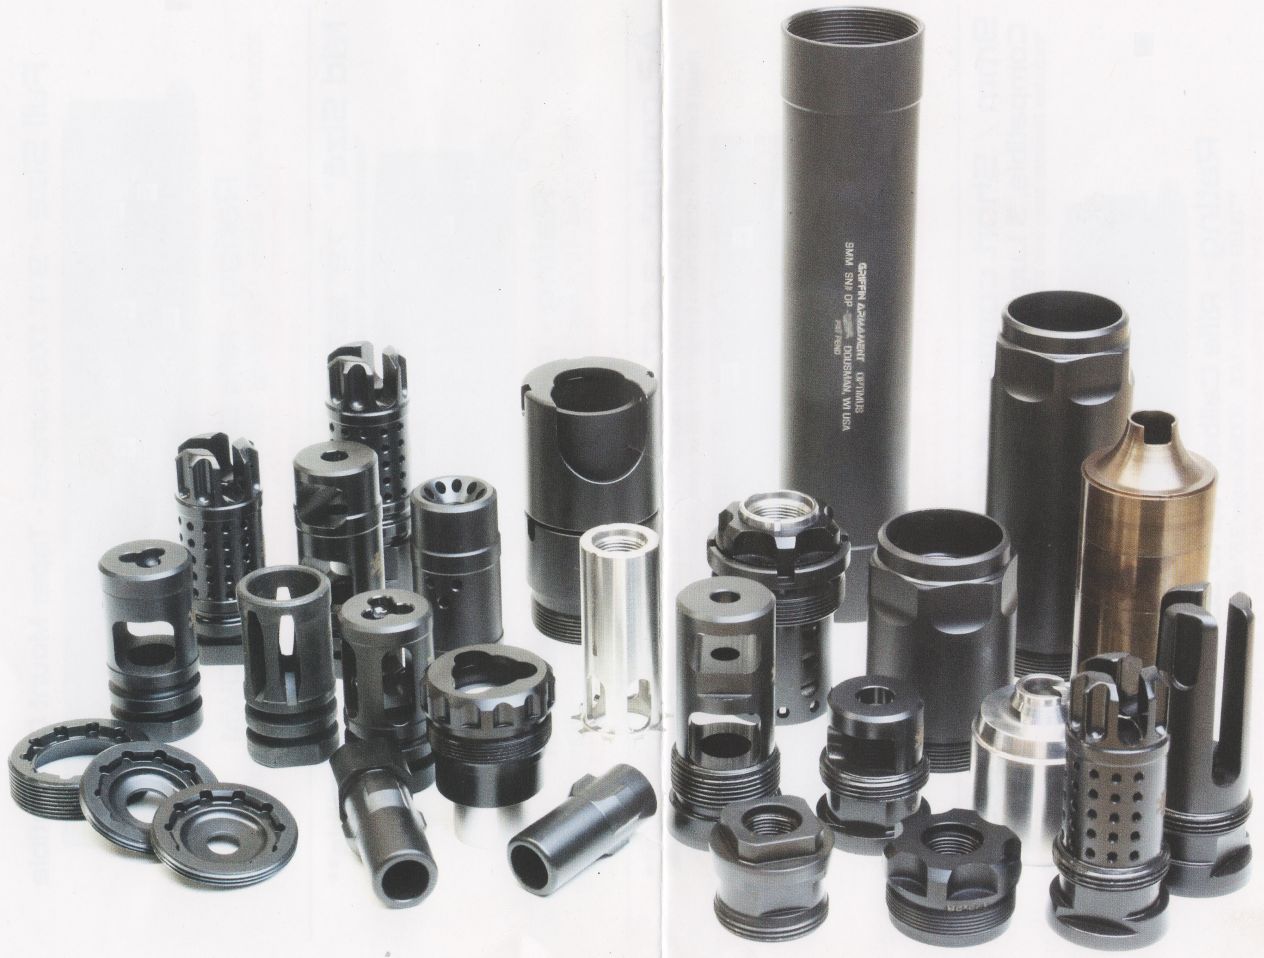
To better explain the versatility of the Optimus Suppressor, this suppressor comes out of the box (more later on this) with the ability to shoot it in a full sized .30 caliber rifle configuration, a short 9mm tilt barrel configuration and includes a second end cap to allow greater silencing efficiency for 22LR in the 9mm tilt barrel configuration or 5.56/.223 in the full size configuration. Griffin also sells other options to allow you a mid size configuration as well as an A2 configuration. Additionally Griffin offers a full range of muzzle devices such as flash suppressors, breaks and compensators that will adapt directly to the suppressor in a pseudo quick detach method. Actually, it can be a little confusing trying to figure out all the different options that are possible with this suppressor platform. To get my point across, I scanned the photo on the back of the brochure that came with the suppressor which shows the many different parts that can be used with the Optimus. If you are considering the Optimus then I highly suggest studying the Griffin website.
Some of the key features that stood out for me with the Optimus Suppressor platform were:
- Multi-Caliber: 300 Win Mag, 308 Win/7.62x51, 300 BLK, 6.5 Creedmoor, 6.8 SPC, 7.62x39, 5.56/223, 22LR, 9mm and basically anything less than .30 caliber
- 9mm Tilt Barrel Capable (1/2-28 thread)
- 22LR capable in the 9mm Tilt Barrel Configuration
- User Serviceable
- Stainless Steel Construction
- Small 1.375" Diameter
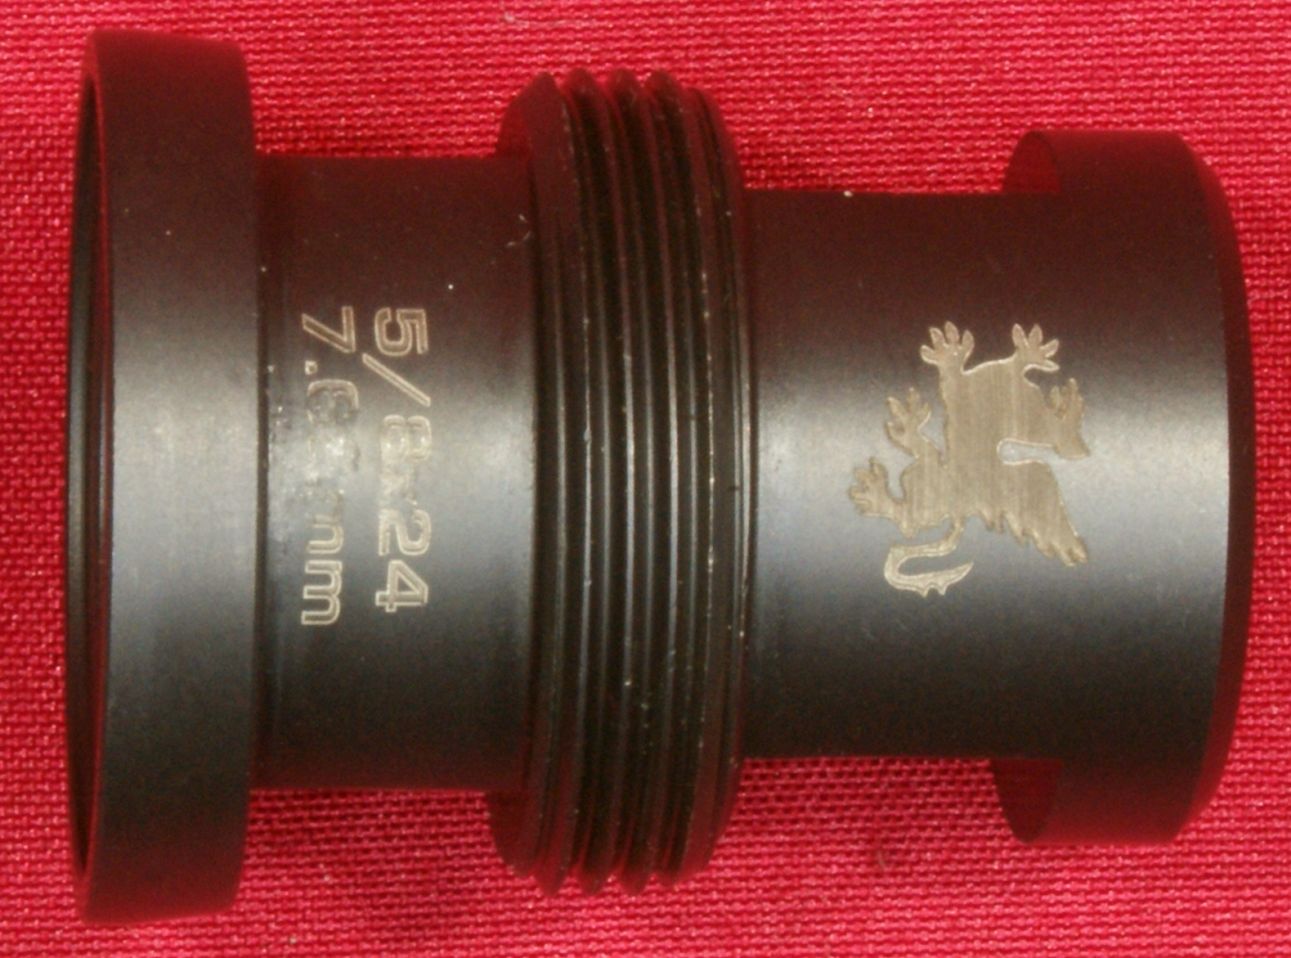
- Included muzzle device for one rifle (5/8-24 thread)
The Griffin website states the following about noise reductions for some standard configurations. I wish they would have included some details on the ammunition actually being used during their tests.
-
Full Size Configuration (9.4" long and 17.6
ounces)
shooting supersonic ammunition
- 308 Win. with a 20" barrel: 137 dB
- 300 BLK with 12" barrel: 126 dB
- 5.56 NATO with 14.5" barrel: 134 dB
- Short Configuration (6.6" long and 13.5 ounces)
- 9mm (Glock 17); 132 dB
- 300 BLK with 12" barrel: 137 dB
- .22LR Pistol: 123 dB
- .22LR Rifle: 117 dB
The Griffin website also gives data on minimum barrel length rating for the various configurations and I suggest you review that data at their website. Later in this review I make an effort at tabulating the data, but again I suggest you review their website.
Now a for a couple of warnings that you need to understand with this multi-caliber suppressor.
- You cannot shoot 9mm in the full size configuration (the bullet cannot pass through the Taper Lock Baffle)
- You need to always check to ensure the correct diameter end cap is installed (don't try to send a 9mm or .30 caliber bullet thorough the .22 caliber end cap)
- You should never shoot the piston booster assembly on a fixed barrel firearm other than one chambered in 22LR unless you have replaced the spring with the fixed barrel spacer
- You need to make sure you are following the Griffin guidelines on minimum barrel length for your desired configuration (pressures inside a suppressor increase as barrel lengths are shortened)
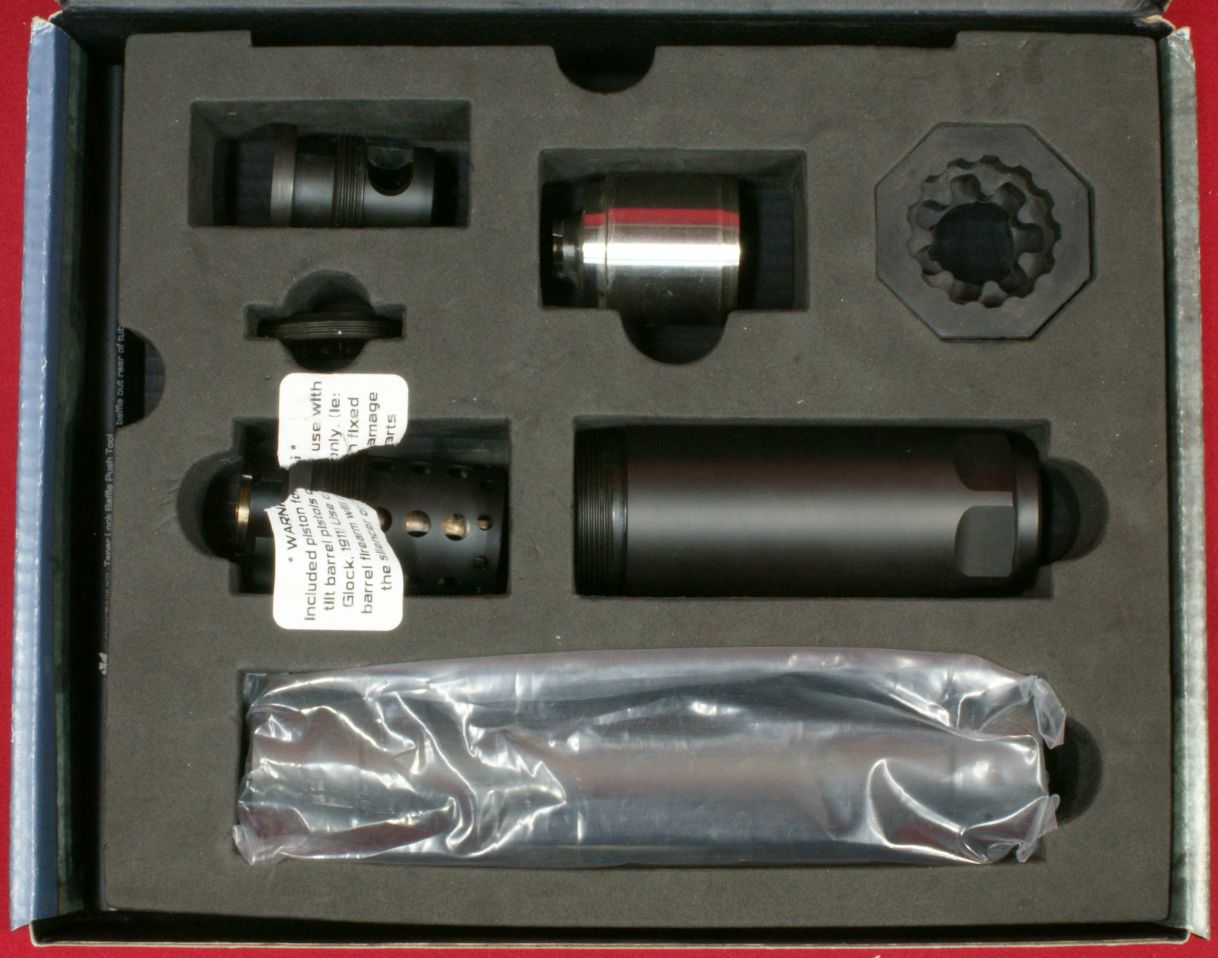
When you purchase the Optimus Suppressor, it will come boxed as shown below.
Figure 1

The items are packaged as shown inside the box and are separated by a foam rubber divider.
Figure 2
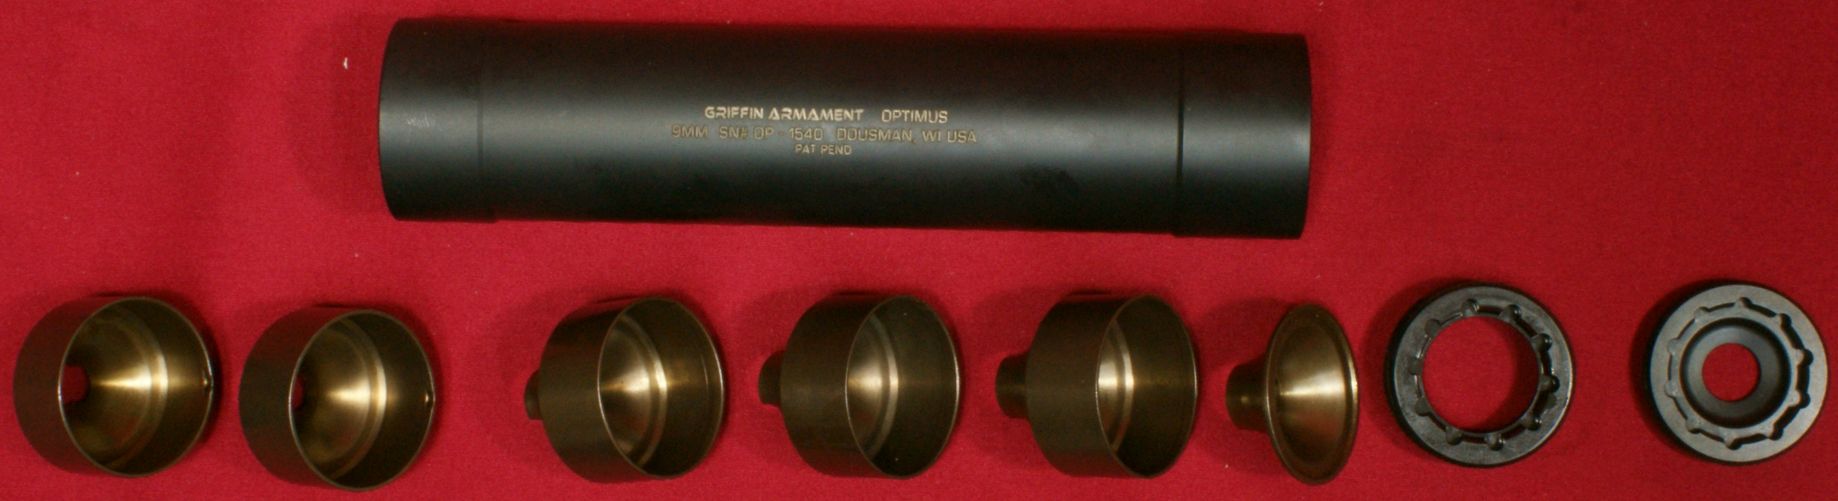
This next photo shows the items and assemblies that come with the Optimum Suppressor. The items listed with hyperlinks can be purchased separately from the Griffin Armament website and don't require tax stamps since they are not the serialized part of the suppressor.
- Main Suppressor Body Assembly
- Taper Mount Interface
- Taper Lock Baffle (also called Rifle Blast Baffle)
- Pistol Booster Assembly
- .22 Caliber End Cap
- Taper Mount Minimalist Break
- 5/8-24 Griffin Shim Set
- Hex Tool
- Griffin Armorers Wrench
- Taper Lock Baffle Push Tool
Figure 3

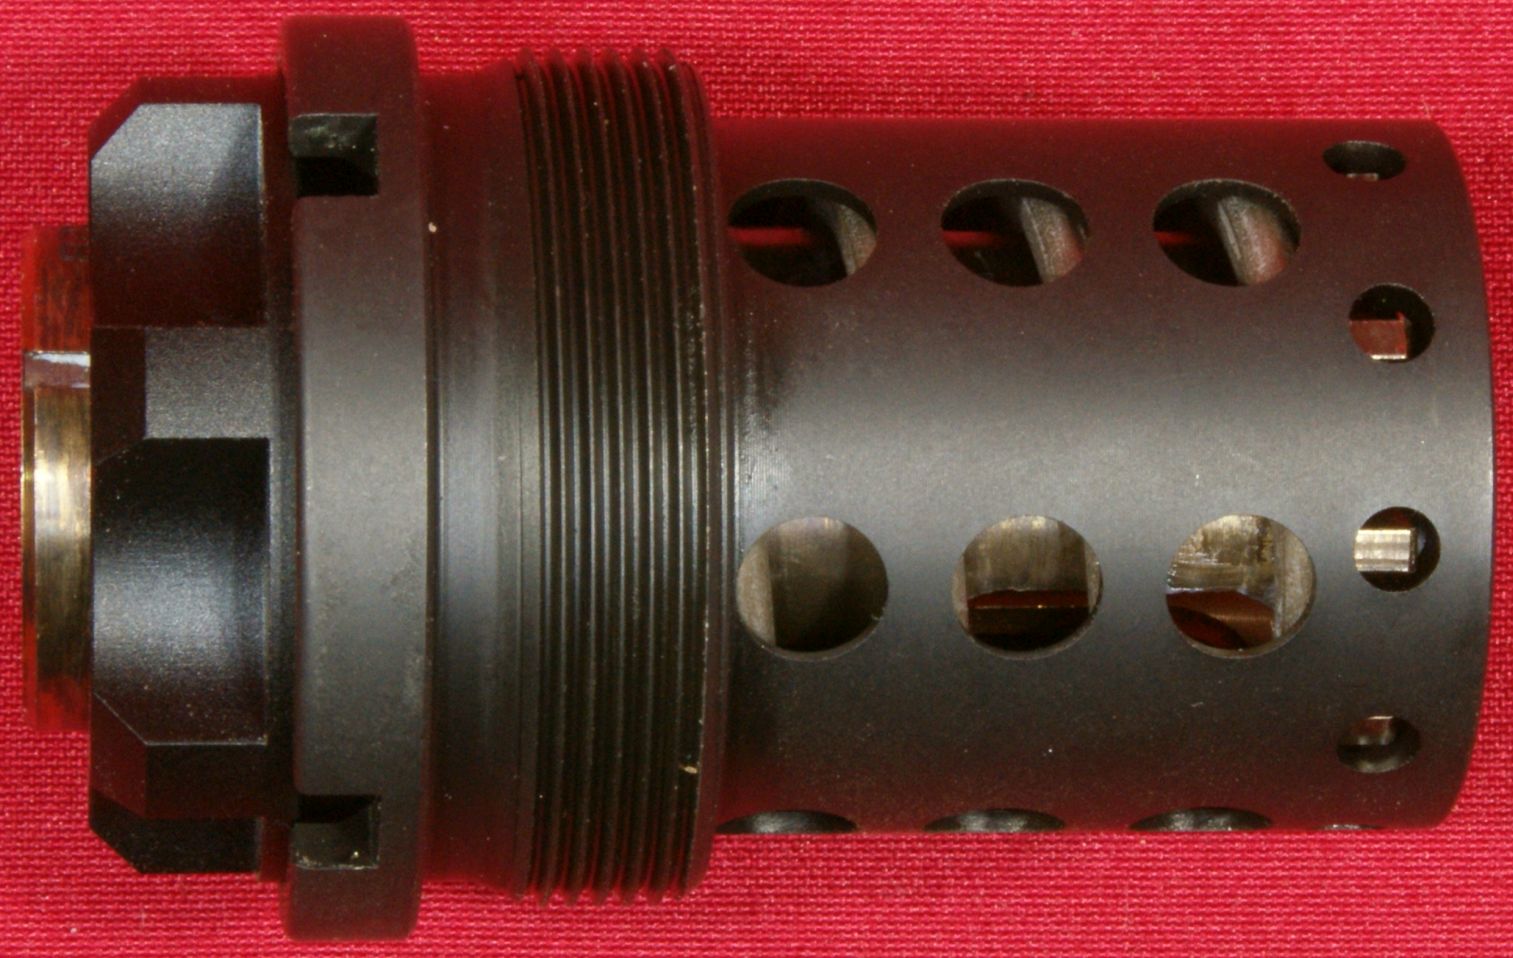
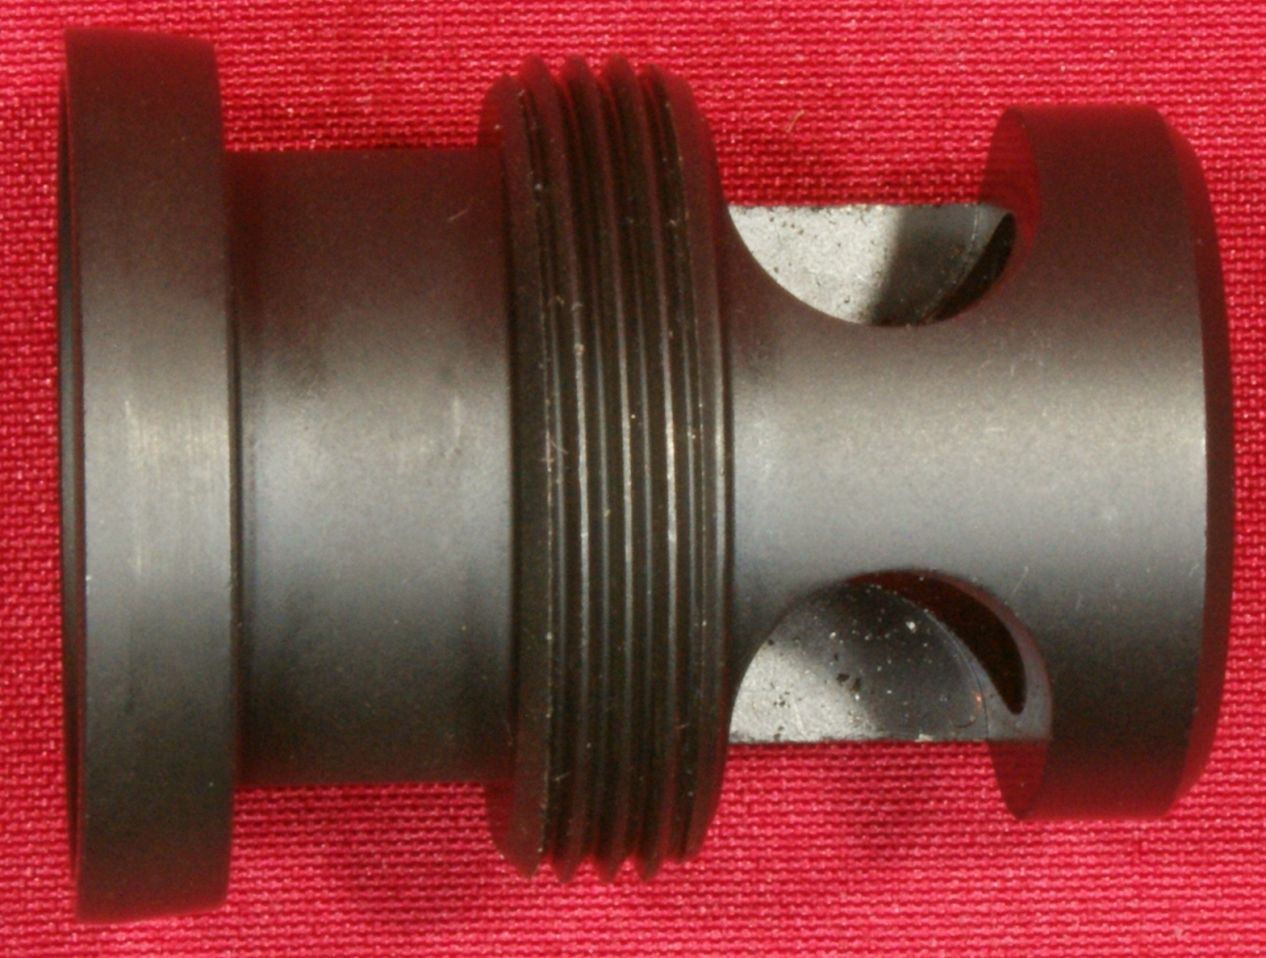
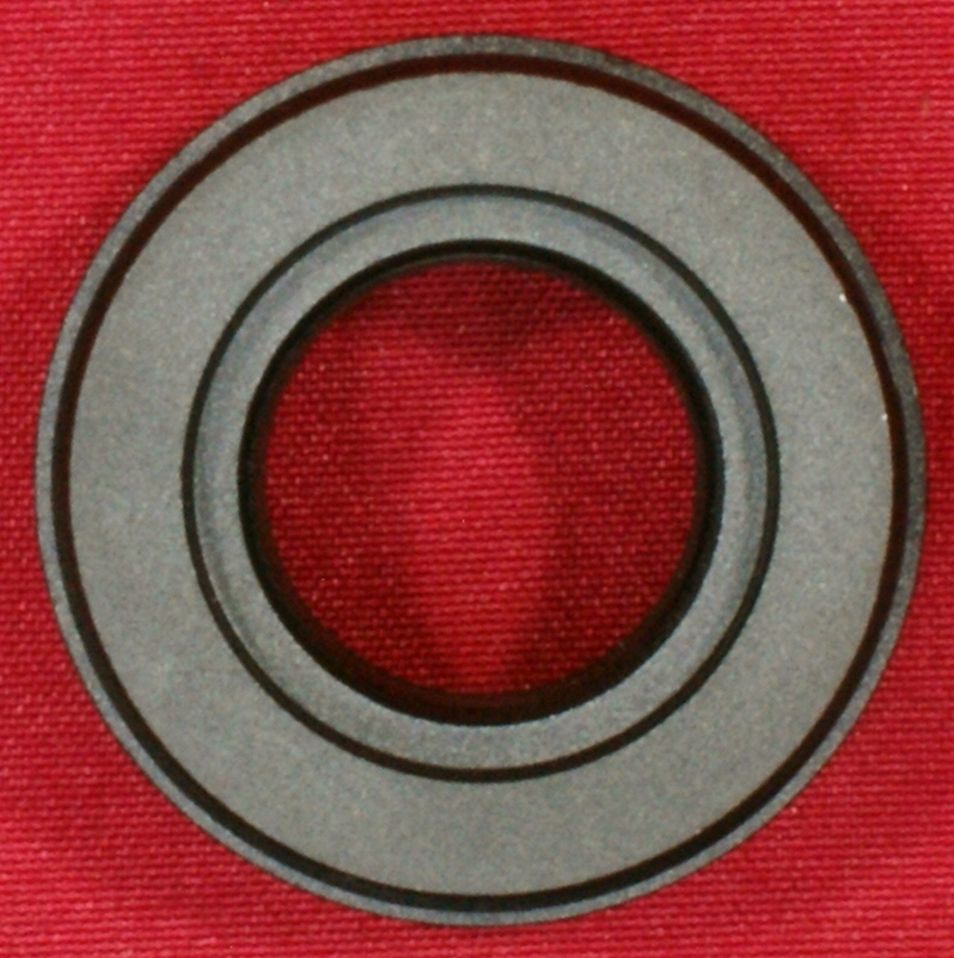
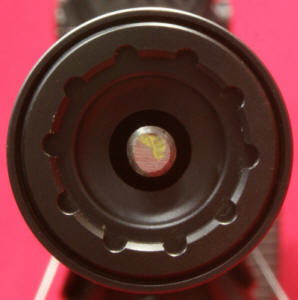
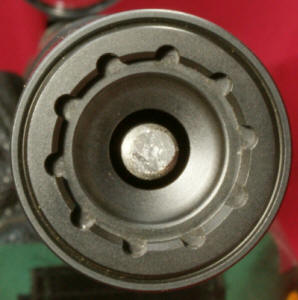
These next photos show the Main Suppressor Body Assembly with the end cap removed.
Figure 4
Figure 5
Figure 6
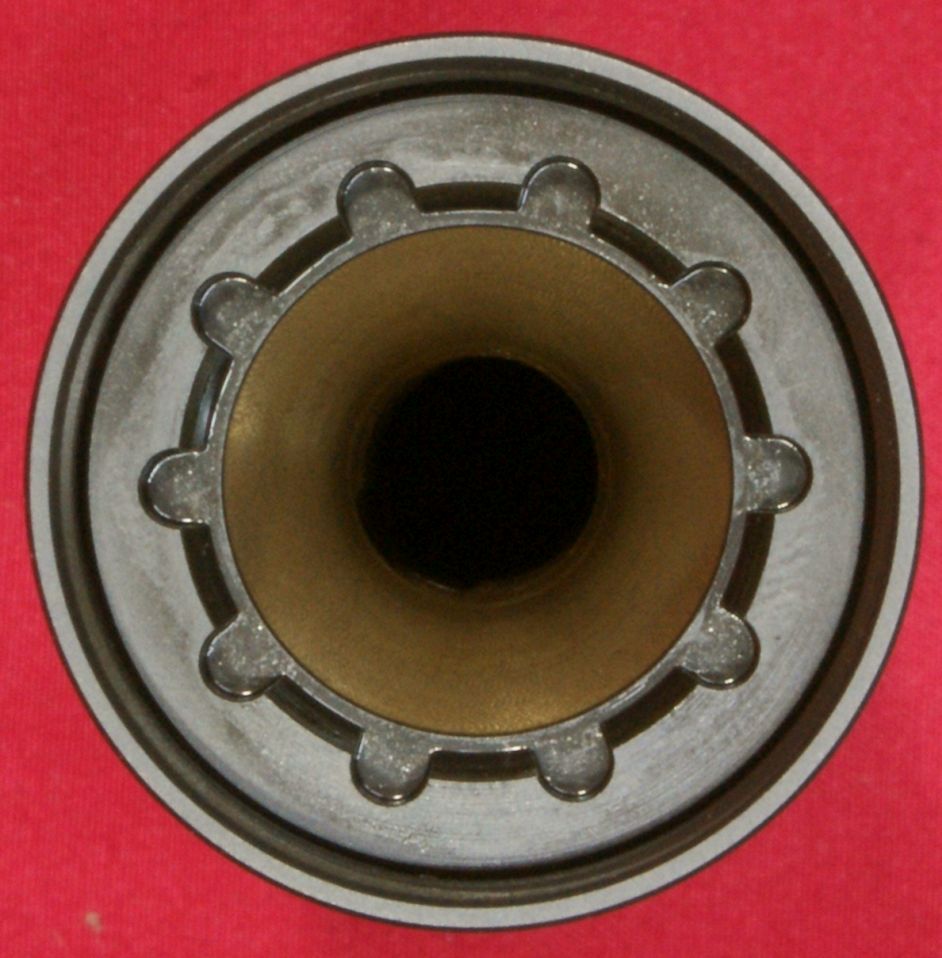
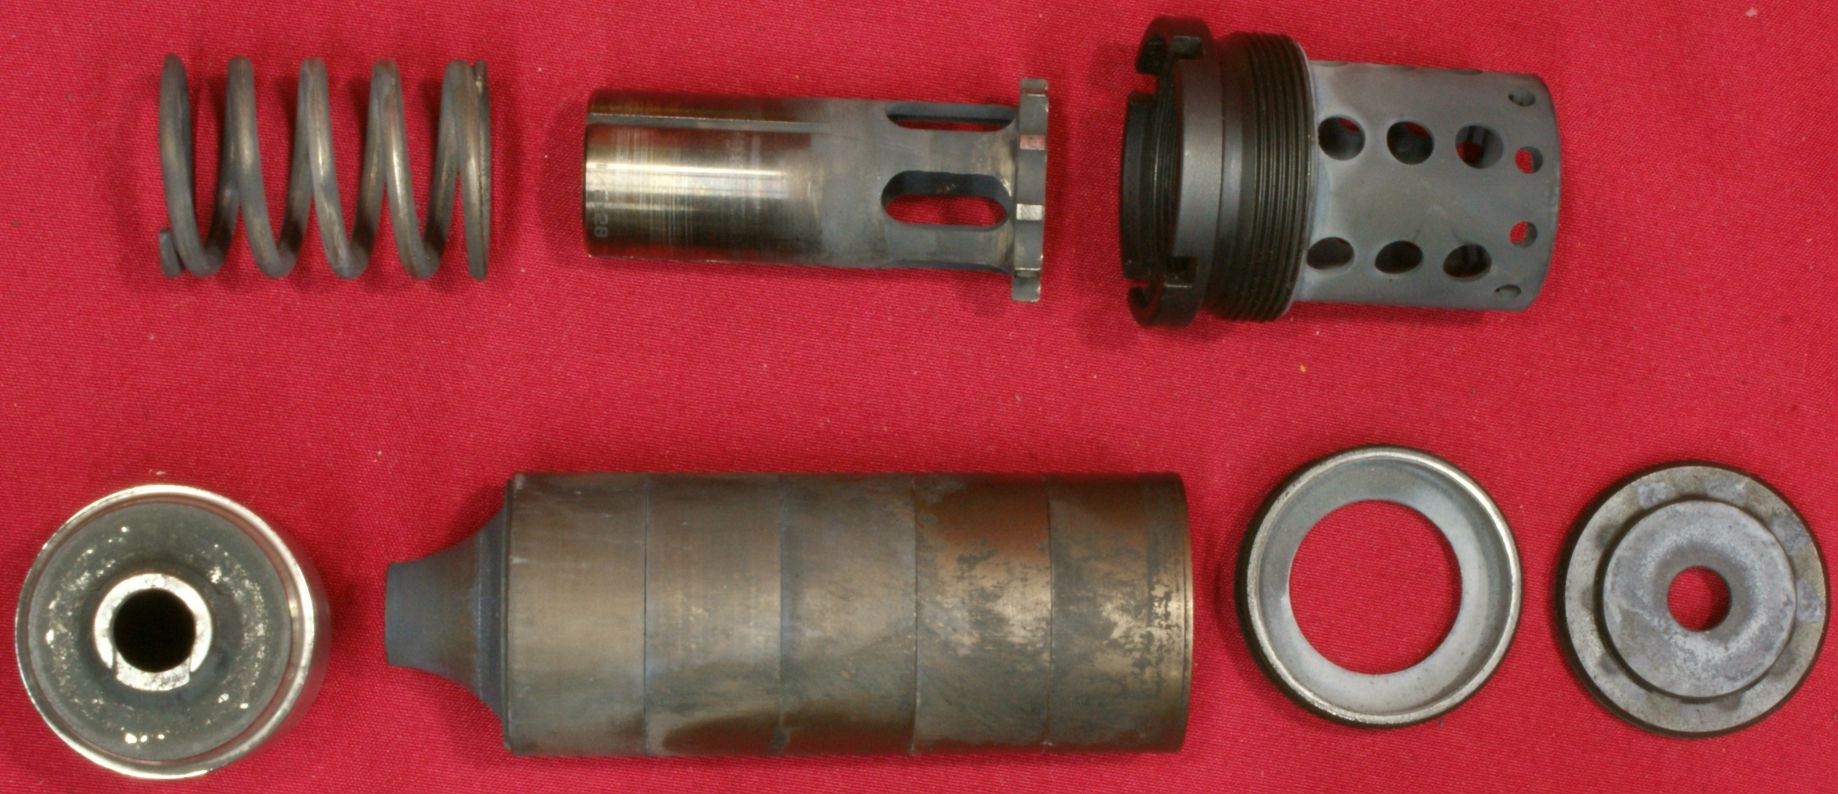
The Main Suppressor Body Assembly is made up of these components:
- Main Suppressor Body Tube
- Five Cup Styled Baffles
- Short Baffle
- Baffle Retaining Ring
- End Cap is also shown but really shouldn't be considered as part of the main body since it is configurable based on the caliber
Figure 7
This next photo shows the Piston Booster Assembly.
Figure 8
Figure 9
Figure 10
The Piston Booster Assembly is made up of:
Figure 11
With the Piston Booster Assembly, Main Body Assembly and 9mm End Cap, it is possible to put the suppressor in a configuration capable of shooting a 9mm tilt barrel pistol. You can also shoot any fixed barrel .22LR pistols or rifles and swapping to the .22 caliber end cap will give increased noise reduction.
Figure 12

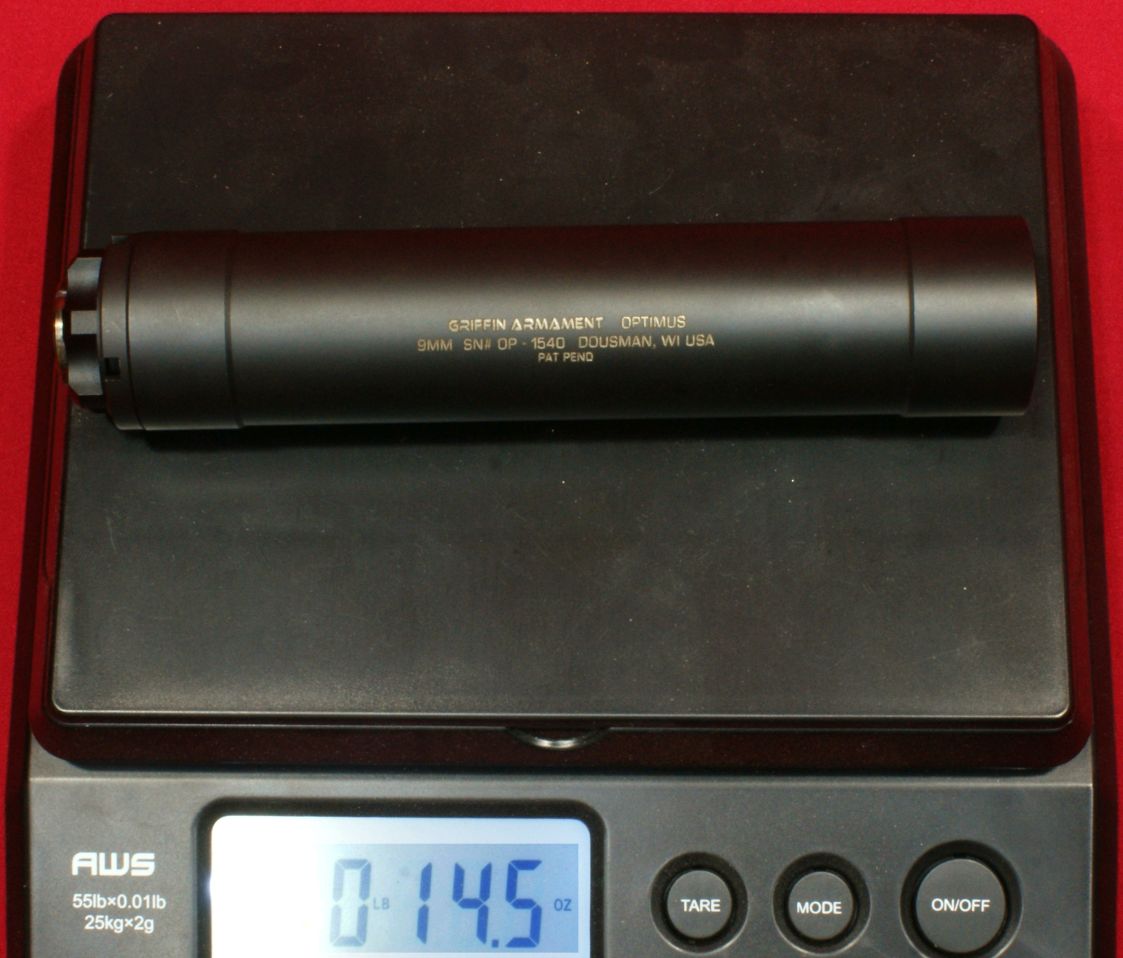
The assembled suppressor in this 9mm / Short Configuration is shown below and weighed in at 14.5 ounces. This configuration will screw on to any 1/2-28 threaded barrel. Remember that in this configuration, you should not shoot any fixed barrel firearms except for .22LR.
Figure 13
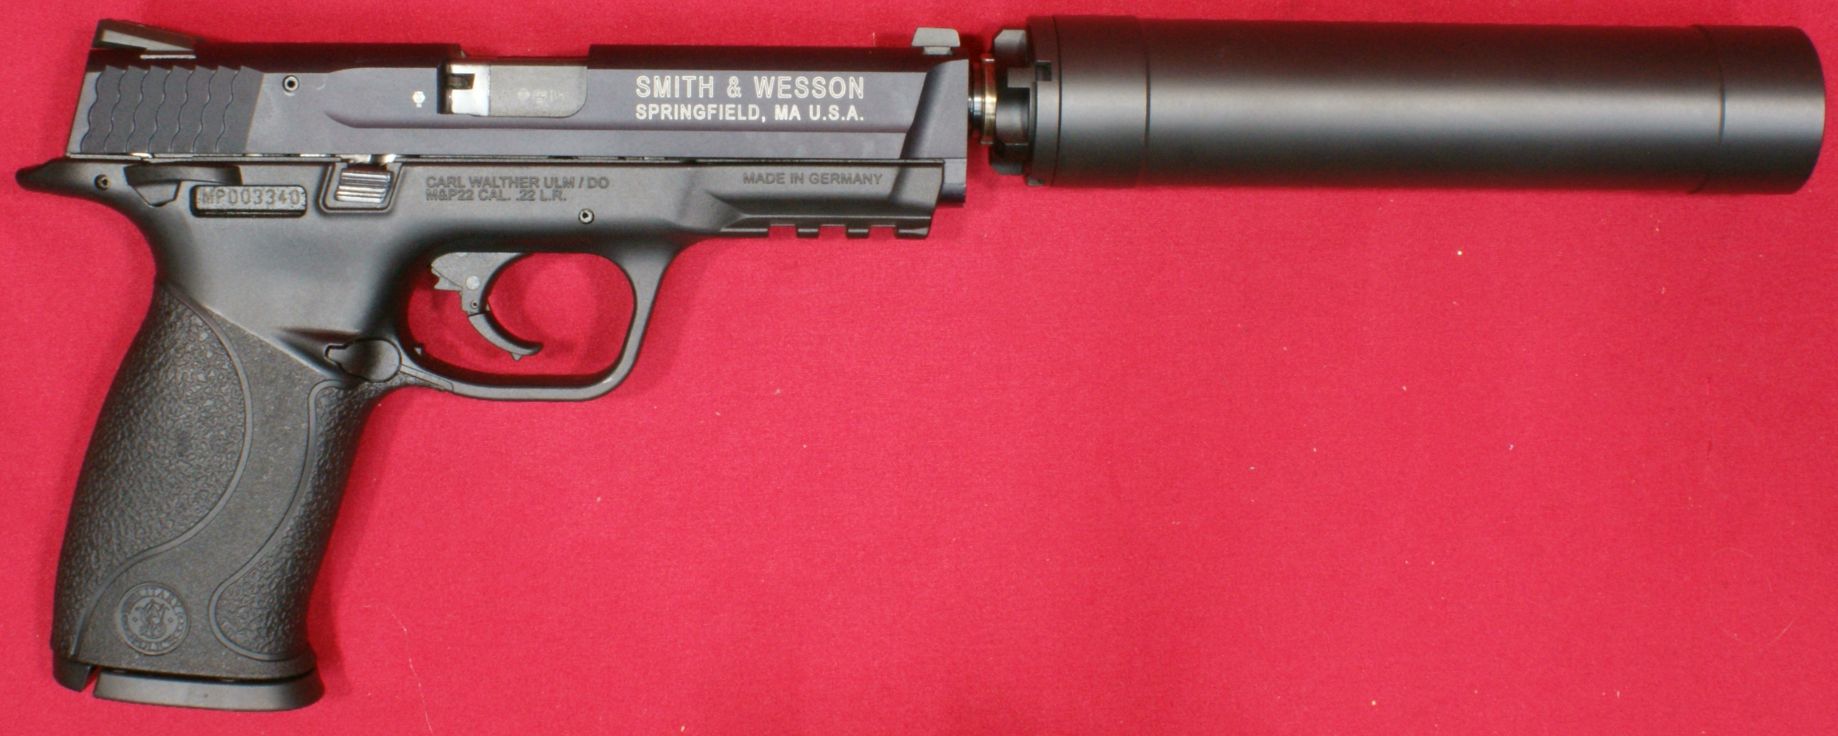
I show the suppressor installed on my S&W M&P22 Pistol. Even though the main body of the suppressor has a slim 1.375" diameter, the sights on this pistol are just below the outside surface of the body. In this case, since they are just below the body line of sight, they are still very usable.
Figure 14
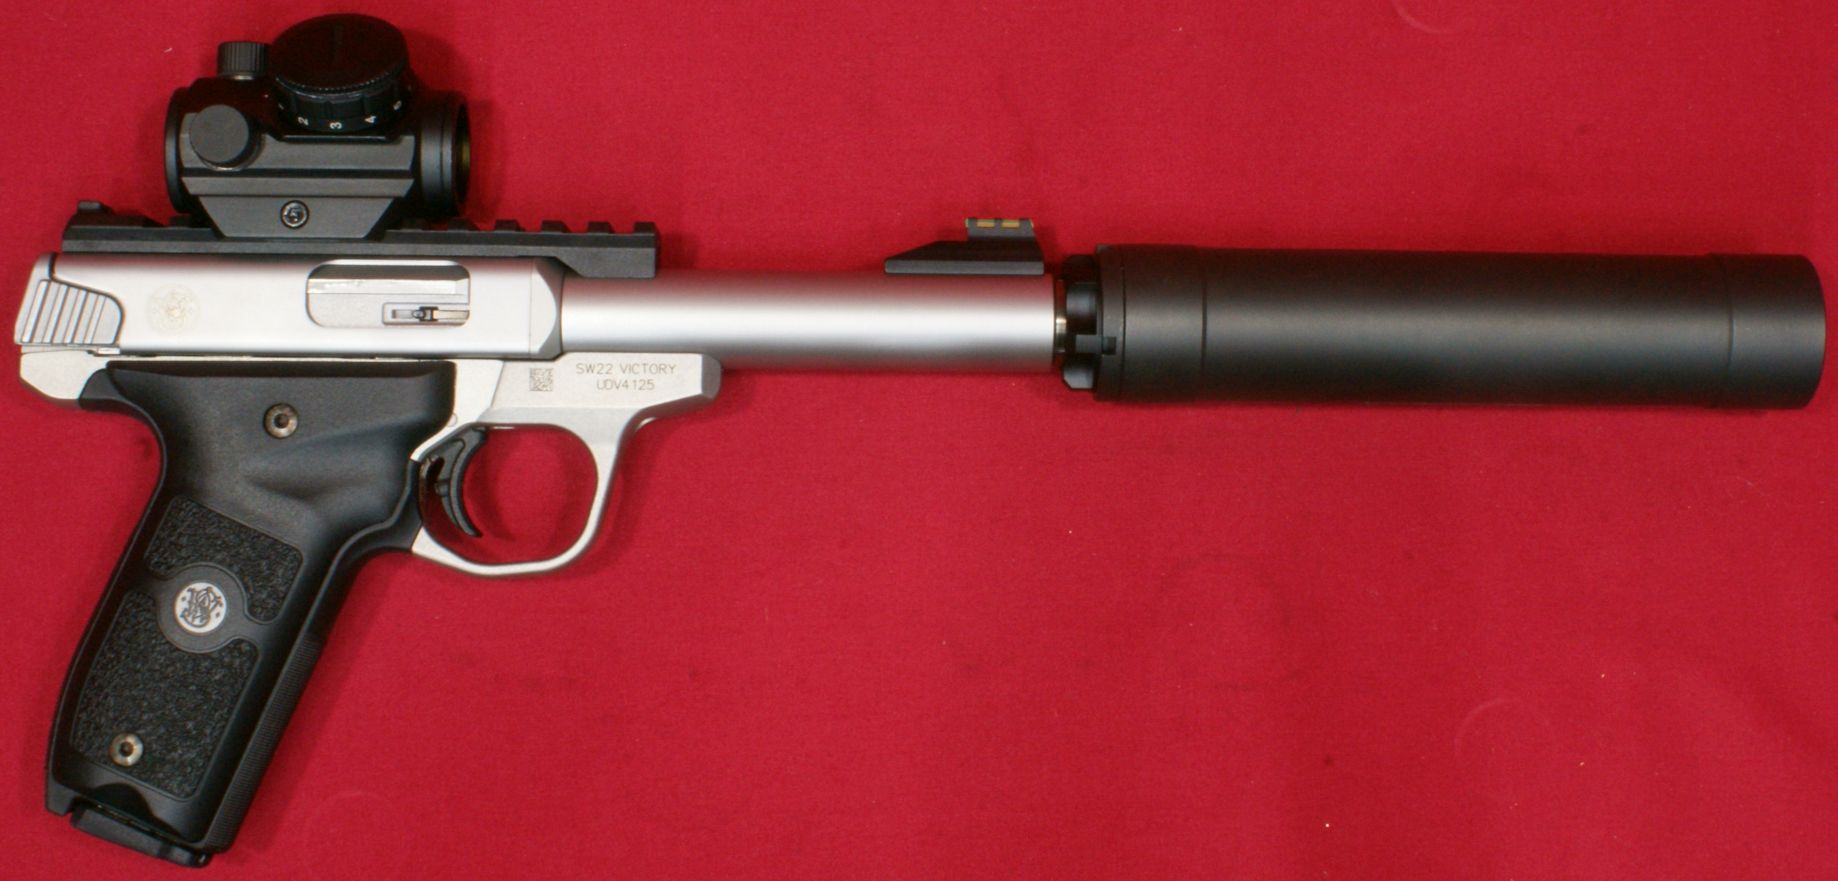
This next photo shows the Optimus installed on my S&W SW22 Victory Pistol. In this case, the higher sights easily see over the body of the suppressor.
Figure 15
These next components are needed to configure the suppressor into a fully rated .30 caliber configuration. The muzzle device shown would be installed on your rifle. Then the taper mount adapter, taper lock baffle, main body and 9mm end cap would be assembled for this configuration.
Figure 16

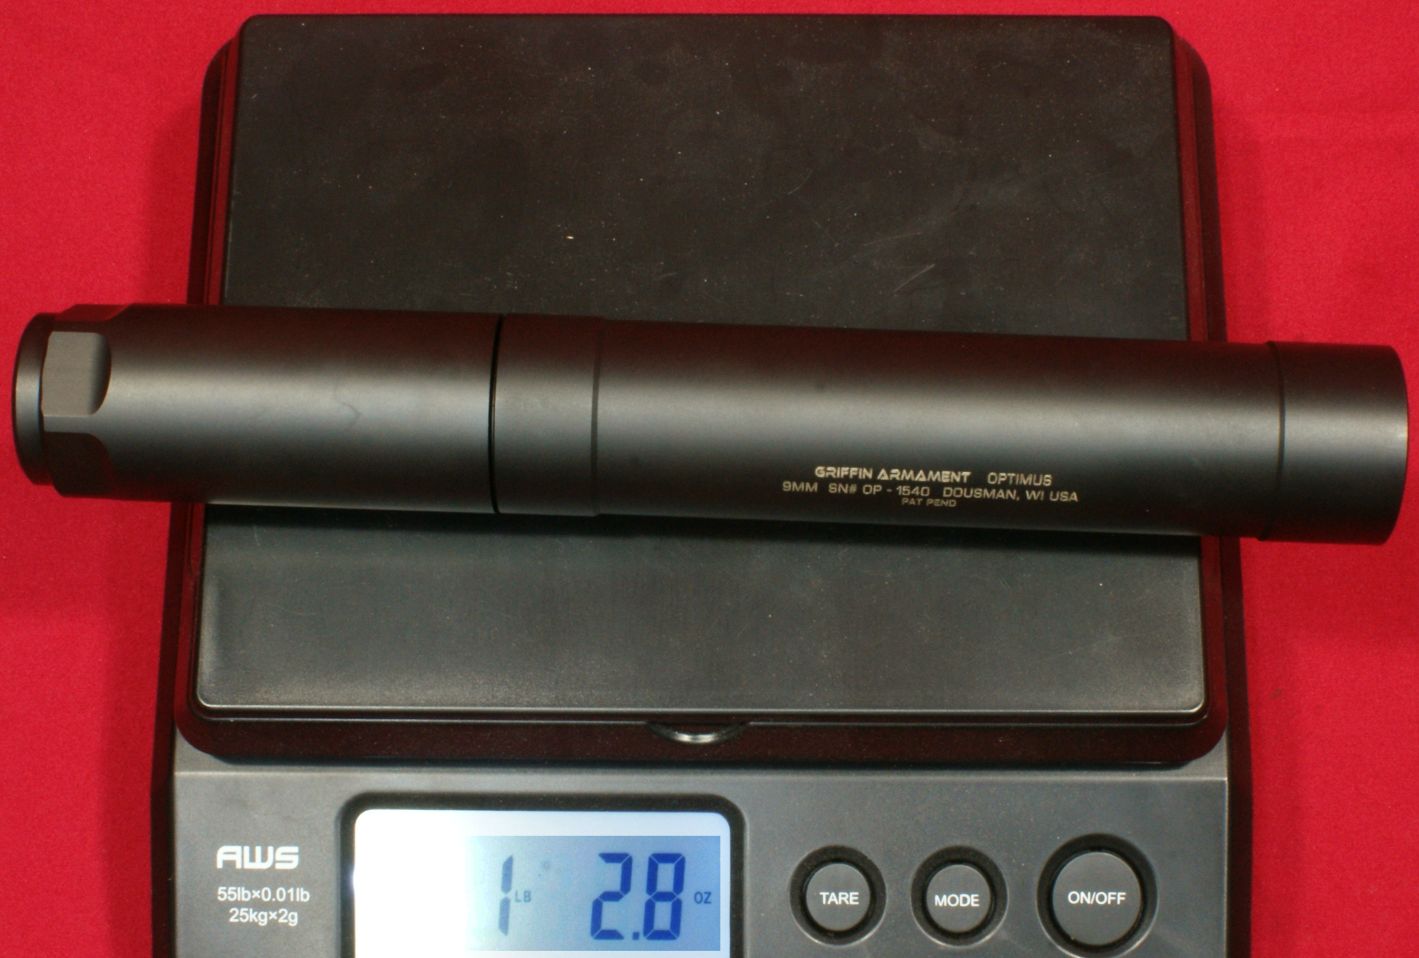
In this configuration the suppressor measures about 9.4" long as shown.
Figure 17

This configuration also weighed in at 1 pound 2.8 ounces (18.8 ounces) which is about 1.2 ounces greater than advertised.
Figure 18
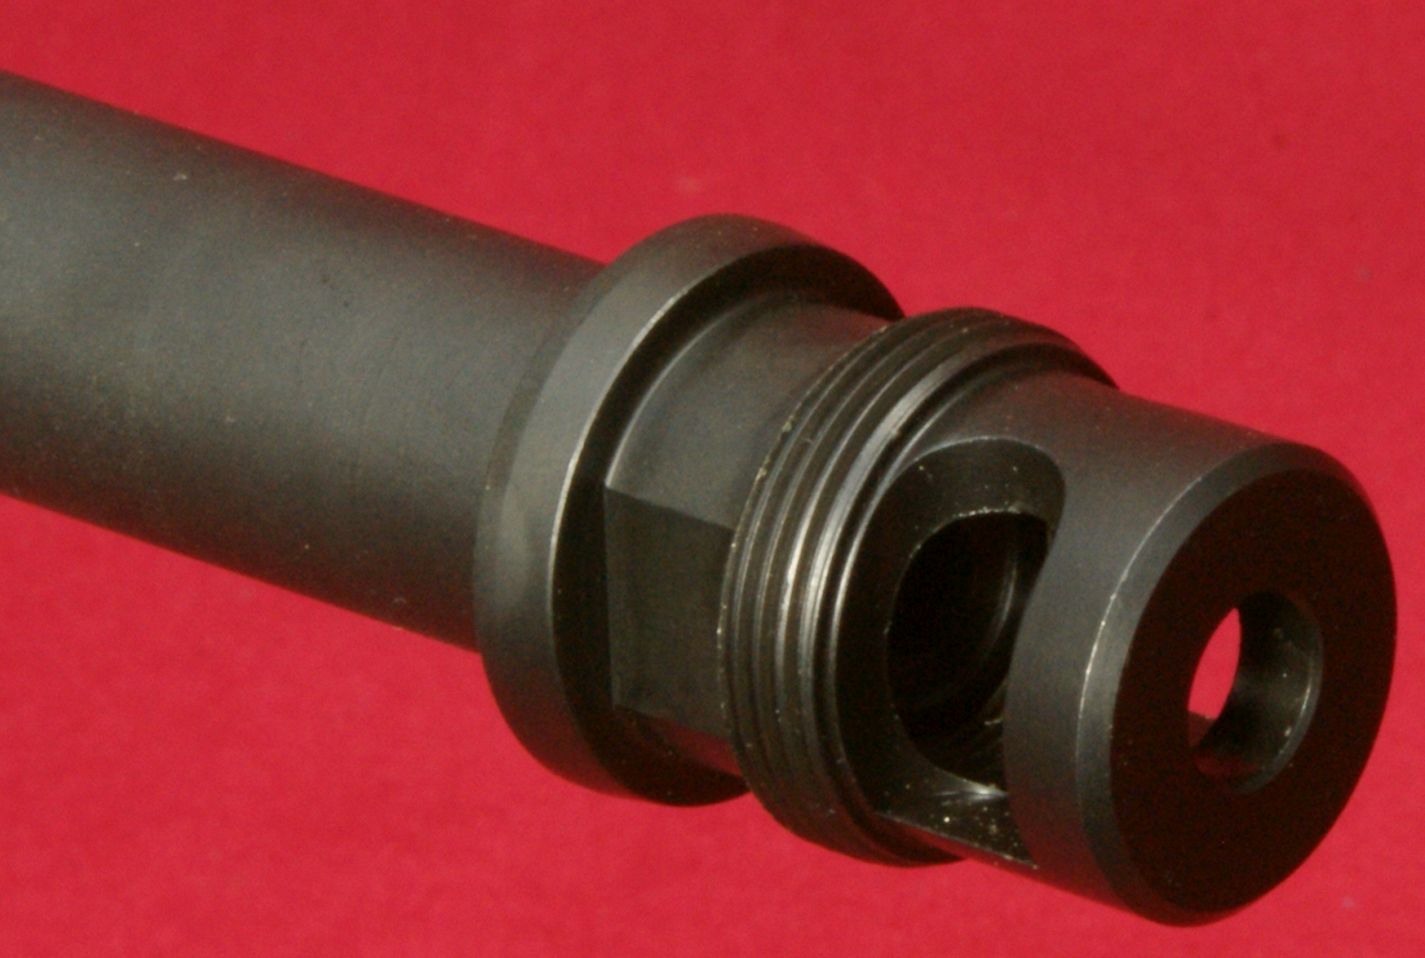
In this full length rifle configuration you will probably use some type of muzzle device to install the suppressor on your rifles. It is possible to purchase a Taper Mount Direct Thread Adapter from Griffin for $95 and this will most likely be an accessory I purchase in the future to keep from having to swap around muzzle devices. Since it is a very valid comment from Griffin you should remember While it is convenient to have direct thread suppressor capability that can move from host to host without the need for additional muzzle devices, it is important to remember that each host firearm must be checked for baffle alignment via visual inspection before firing.
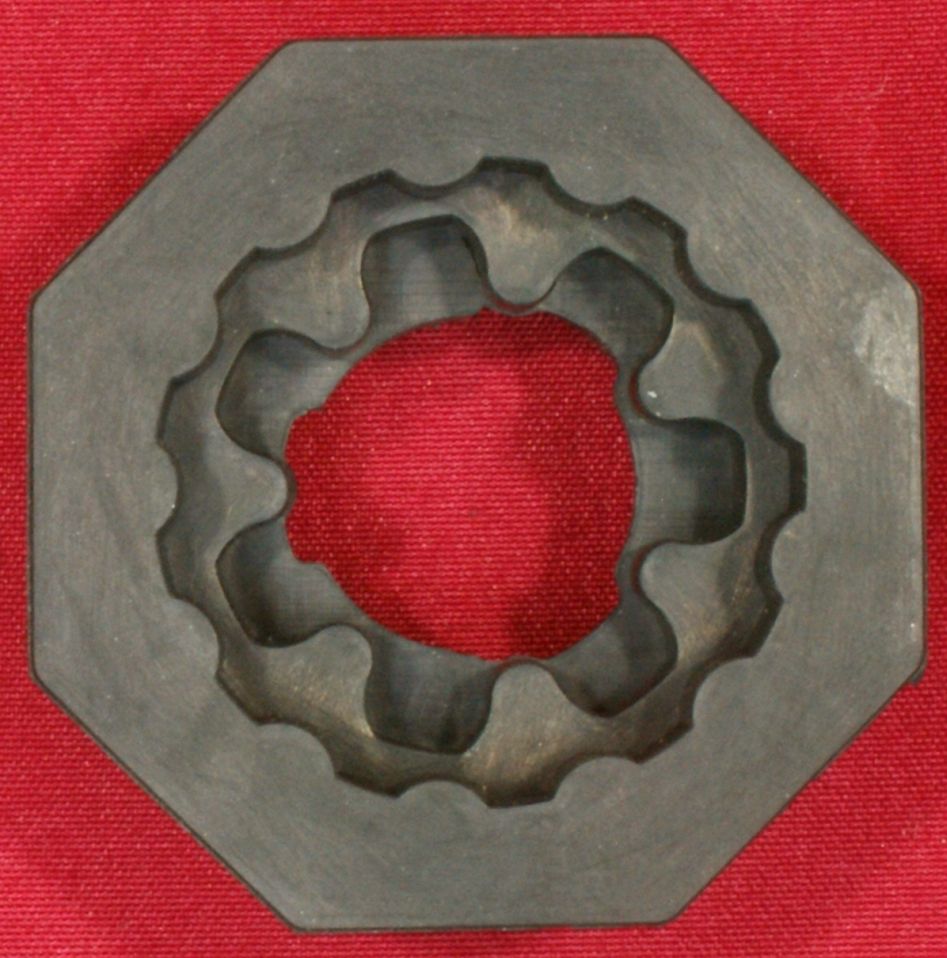
The Optimus comes with the 5/8-24 Taper Mount Minimalist Break for 7.62mm/.30 caliber or smaller firearms which is a good choice for your first muzzle device. The geometry of the break is shown below and it is made from 17-4PH stainless steel and weighs in at about 1.8 ounces. The break is designed to also give some control against muzzle rise.
Figure 19
Figure 20
Figure 21
The bottom of the break is marked with the thread size, caliber and the Griffin Armament logo. Also this a good photo to see how the short threaded portion provides one interface to the suppressor and the tapered portion provides a second interface and a way to get rid of all freeplay and maintain the maximum possible alignment of the suppressor with the muzzle device.
Figure 22
Using the shim set provided with the suppressor, you can install and clock the Taper Mount Minimalist Break on your barrel. Griffin states, To install Taper Mount Minimalist Break on host firearm start by cleaning and degreasing threads. Use provided shims to bring the muzzle device into proper timing. Device is installed correctly when 40-50 ft-lbs of torque is applied and logo is centered at the bottom...
Figure 23
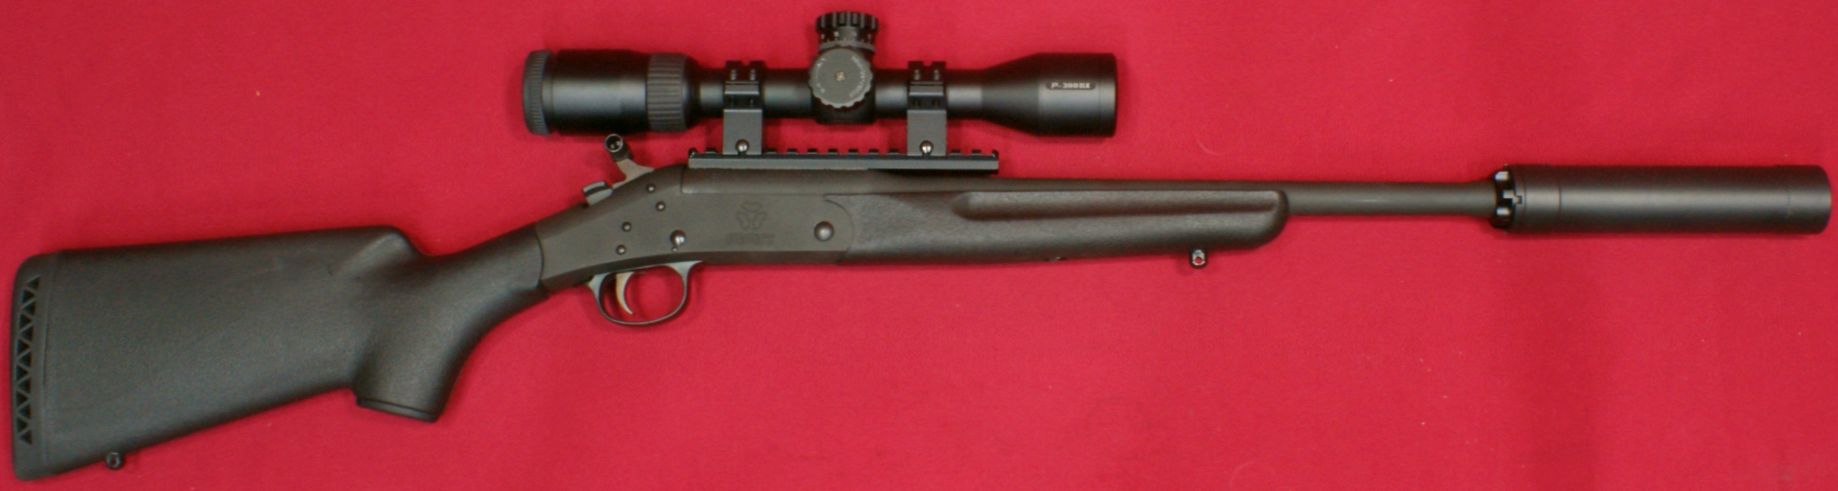
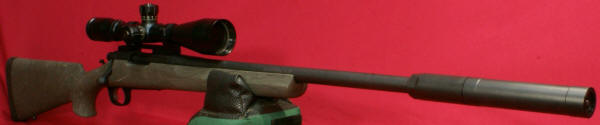
I have the Optimus in the full length 9.4" configuration shown on my Ruger Precision Rifle chambered in 6.5 Creedmoor and the suppressor makes the rifle look extremely long which the rifle is considering it has a 24" barrel. If you were willing to purchase the Taper Mount Minimalist Blast Shield, it would be possible to reduce some of this length by putting the suppressor in the mid-length 7.9" configuration.
Figure 24
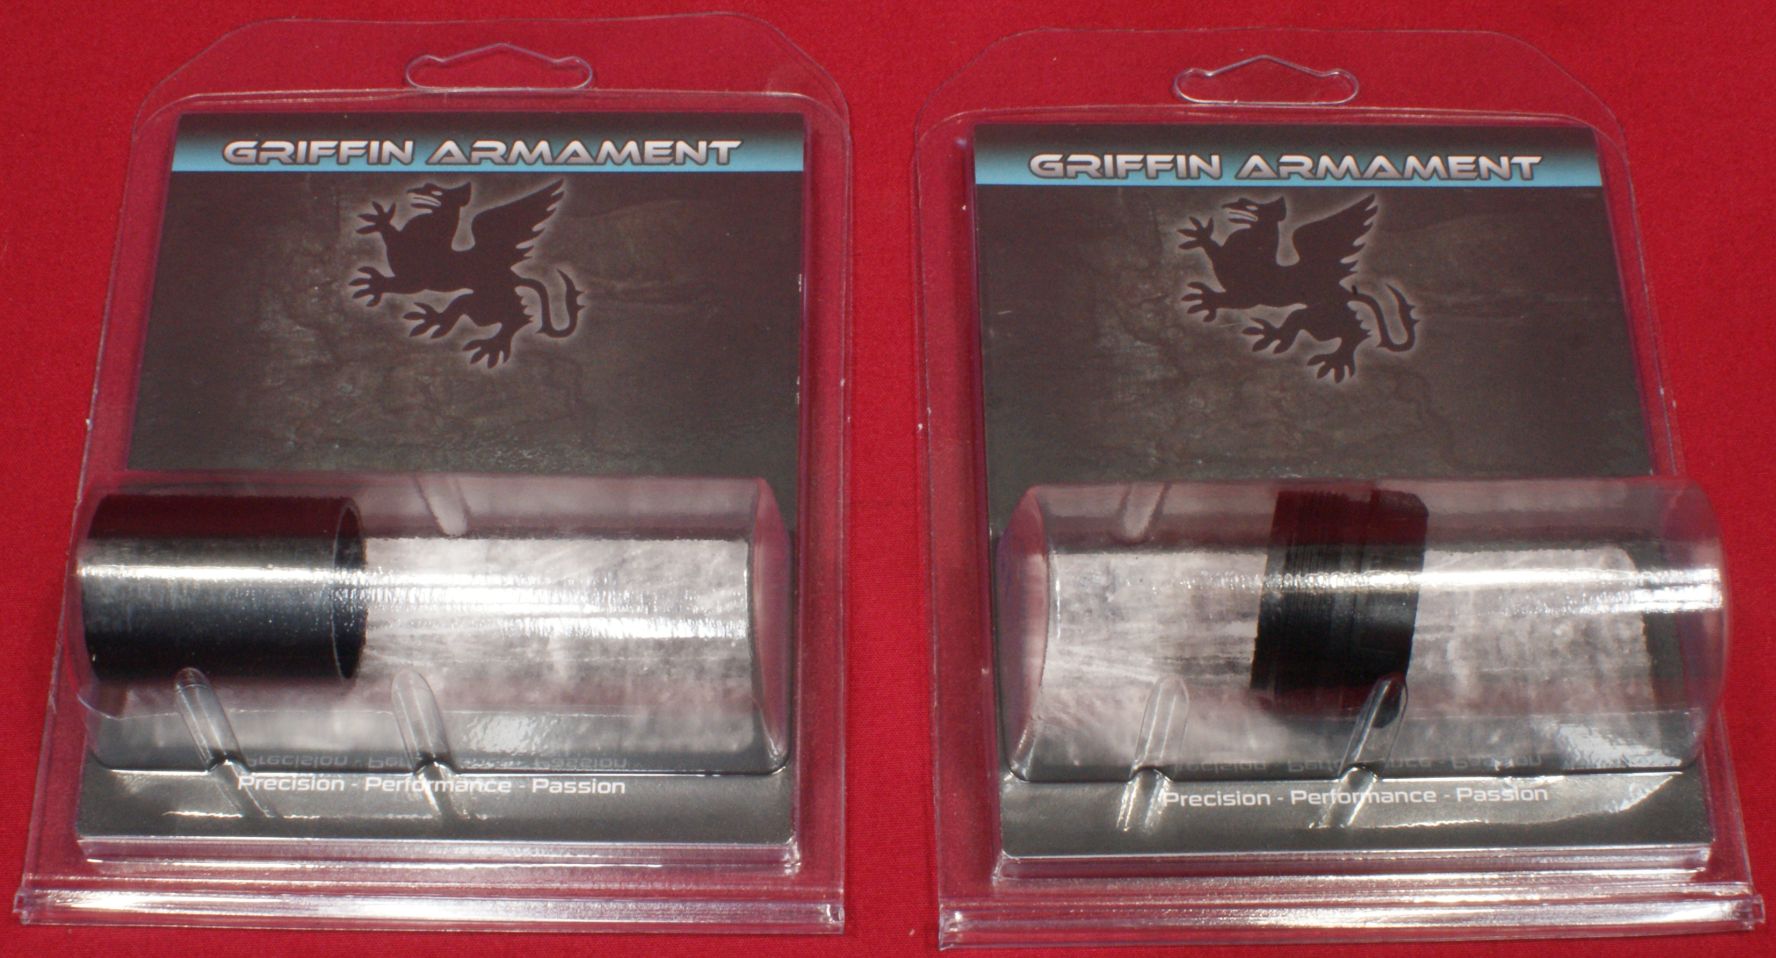
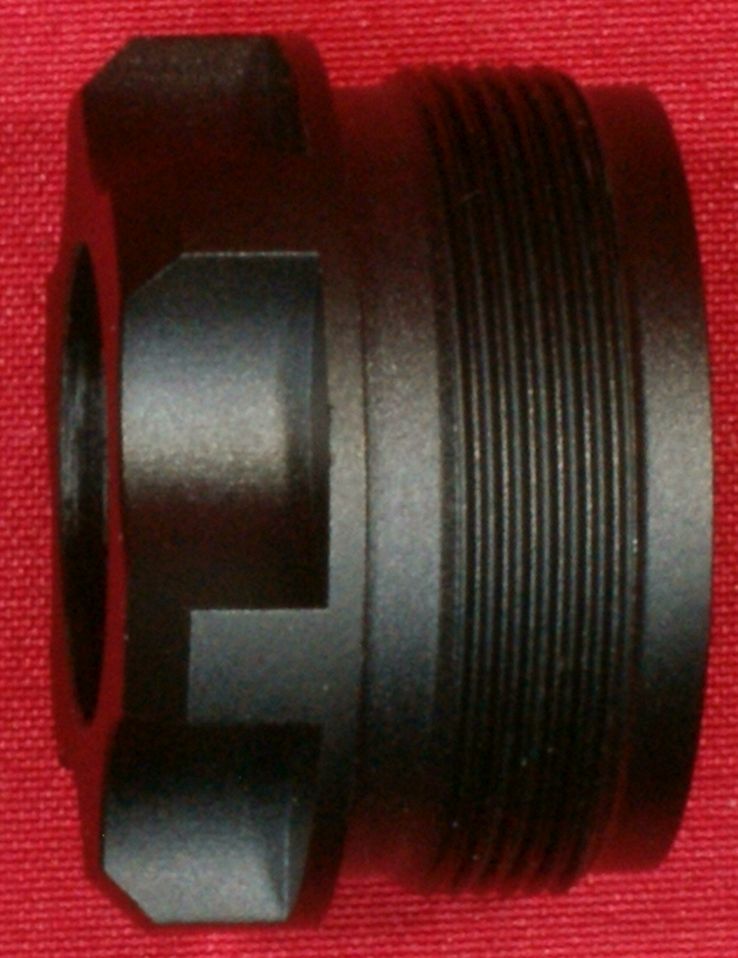
After purchasing the Optimus and looking at the various accessories at the Griffin website, I decided to go ahead and purchase a couple of items to increase the versatility of the suppressor at a minimum cost. These accessories were the Fixed Barrel Spacer ($30) and the 5/8-24 Fixed Mount ($85).
Figure 25
The Fixed Barrel Spacer replaces the spring in the Piston Booster Assembly making the booster assembly basically function as a thread adapter which goes from the 1/2-28 thread on the piston to the thread size going into the suppressor main body. The advantage to doing this is that you can now shoot other fixed barrel firearms with the 1/2-28 thread size on the muzzle through the suppressor provided you are staying within the pressure limits of the suppressor in this configuration. The Griffin website says that in this configuration the suppressor is capable of full auto 9mm. My suggestion is that if you are firing anything other than a fixed barrel 9mm (or smaller calibers) or 22LR, then send Griffin an email to confirm you are within pressure limits because they don't go into much detail for this configurations ratings. The spacer is simple and made of 6061-T6 aluminum. My personal preference would for it to be made from stainless steel, but I will just have to see how well it holds up over time.
Figure 26
Figure 27

The direct thread Fixed Mount I selected was the 5/8-24 version because I want the option to thread the short configuration on some 300 BLK firearms. The adapter is made from 7075-T6 aluminum which is great for weight savings, but I personally would have liked to see stainless steel for improved thread life. This adapter is screwed into the pistol housing with the spring and piston removed.
Figure 28
Figure 29
Figure 30

Griffin states that in this direct thread configuration the suppressor is capable of 300 BLK subsonic and 9mm full auto rated, Rimfire full auto and 5.7 full auto. Again, if you want to shoot something else, send Griffin an email for guidance. I have this configuration shown on my 300 BLK pistol with a 8" barrel and my H&R AAC 300 BLK Handi-rifle with a 16.25" barrel.
Figure 31
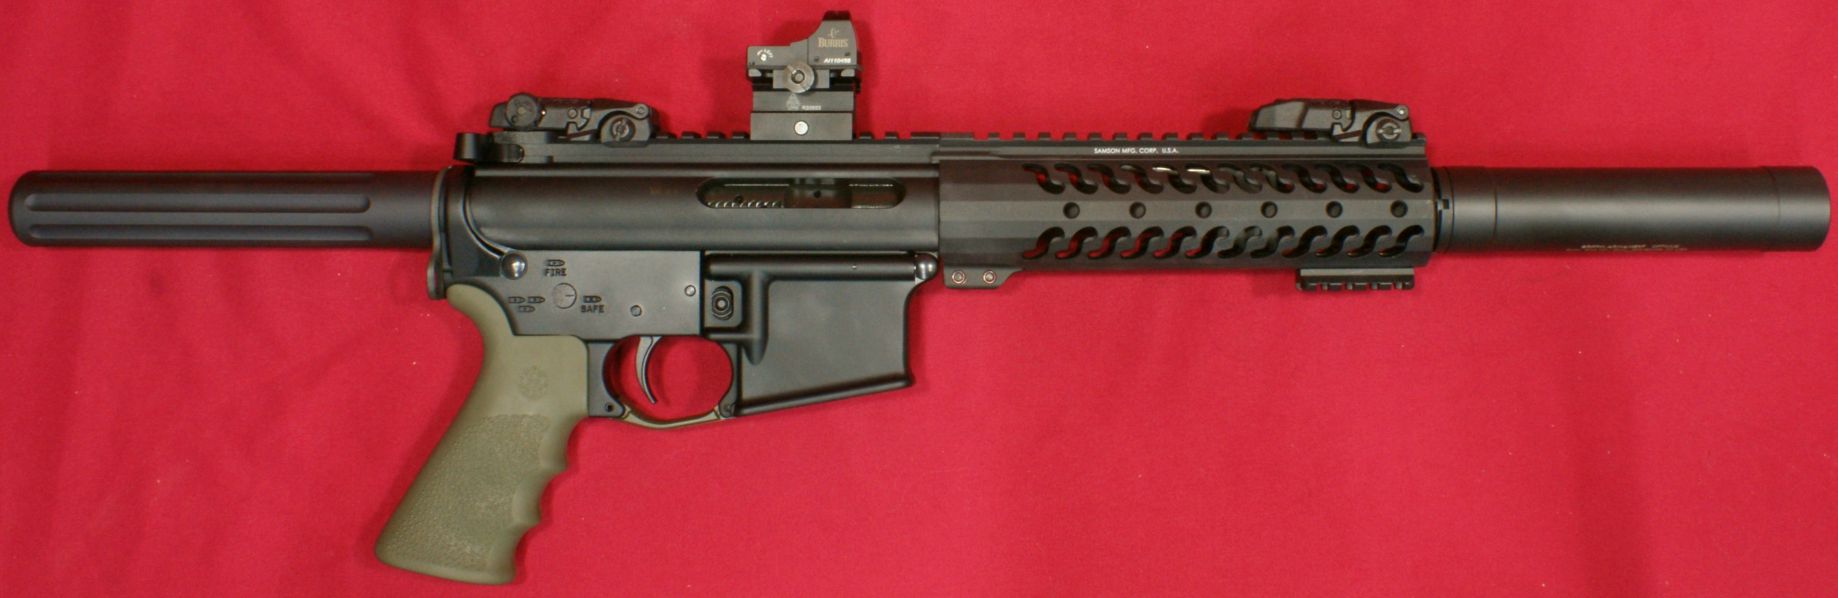
Figure 32
In an effort to keep up with the configurations and the possible calibers capable per configuration I have tried to tabulate the information below. These values were taken from the Optimus literature received with the suppressor and the Griffin website on 6/2/17 or are based on emails I have received from Griffin. The lengths shown represent minimum barrel lengths for the caliber, velocity or rate of fire. My impression is that this data is what Griffin confirmed works based on range testing and there seems to be many holes in the data that would have to be filled in with either questions back to Griffin or your own judgment. If you shoot anything that Griffin has not recommended, you shoot it at your own risk. Griffin clearly states "The individual barrel lengths and calibers warranted are listed in the manual you receive with your product...", so make sure you pay attention to these details.
| Figure 33 | ||||||||||||
| Configuration | 300 Win Mag BA |
.308 Win 6.5 Cm |
6.8spc | 7.62 x39 |
300 BLK Sup. |
300 BLK Sub. |
5.56x45 | 5.7mm Full Auto |
Up to .357 Mag |
9mm Full Auto |
22LR Full Auto |
22LR |
| Full Size Taper Mount (TM) |
24" | 14.5" | 12.5 | 8" | 8" | 8" | 10.5" | - | - | |||
| Mid Size (TM Minimalist Devices Only) |
- | 16" | 12.5" | 8" | 8" | 8" | 10.5" | - | - | |||
| A2 Configuration | - | 16" | 12.5" | 8" | 8" | 8" | 10.5" | - | - | |||
| Short Size complete booster and piston |
- | - | - | - | - | - | - | TB Only |
Yes | |||
| Short Size fixed barrel spacer |
- | - | - | - | Yes | Yes | Yes | |||||
| Short Size direct thread adapter |
- | - | - | - | Yes | Yes | Yes | Yes | Yes | Yes | ||
| Short Size 3-Lug Configuration |
- | - | - | - | LFA 9.5" |
FA 8" |
LFA 16" SA 14.5" |
Yes | Yes | |||
| BA - Bolt Action, FA - Full Auto, LFA -
Limited Full Auto, SA - Semi Auto, TB - Tilt Barrel Empty cells are where no information existed to put any type of rating and dash marks indicate that this caliber, velocity or rate of fire cannot be used with the configuration shown. |
||||||||||||
The Optimus also comes with three tools; Hex Tool, Griffin Armorers Wrench, and Taper Lock Baffle Push Tool. The Hex Tool is made of some type of hard rubber and fits several different patterns as seen below. The only pattern used on the Optimus is that shown on the left which interfaces with the end cap on the pistol booster assembly.
Figure 34
Figure 35
Figure 36


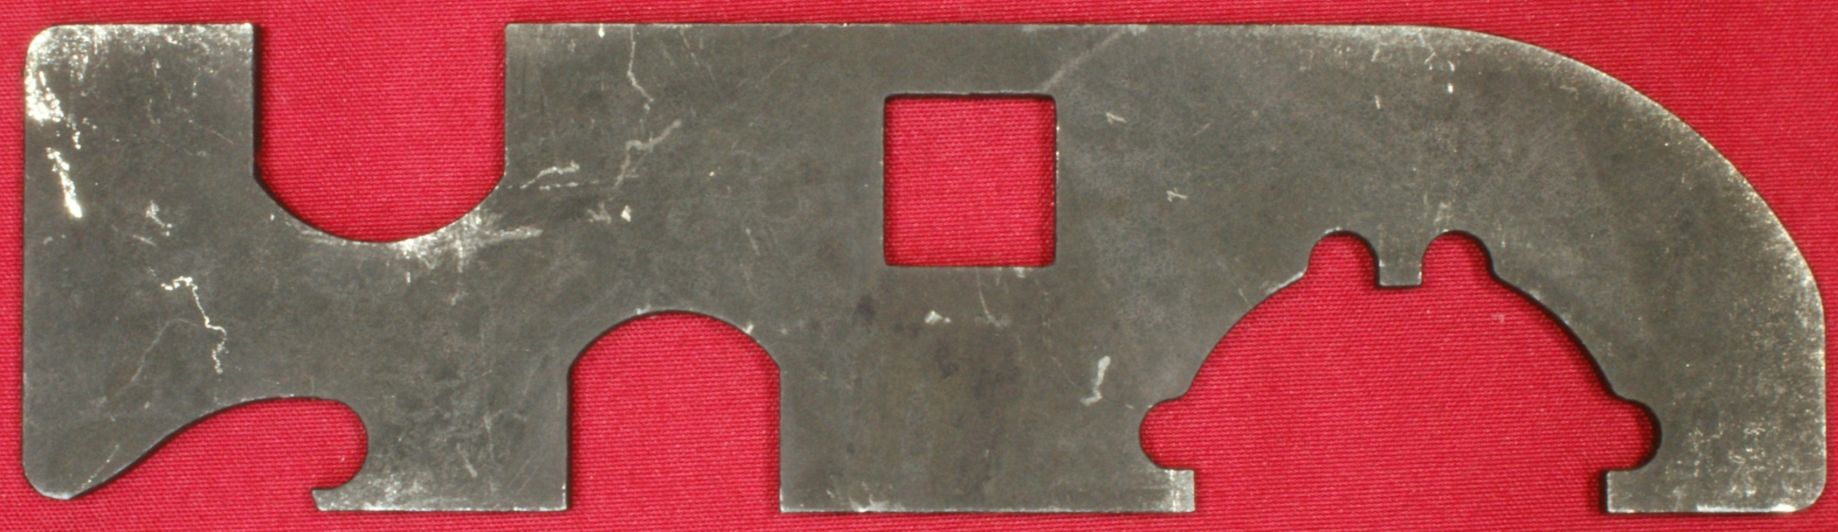
The Griffin Armorers Wrench is similar to other Armorers wrenches, except it looks like this one has a bottle opener. The wrench is used on the piston booster housing on the Optimus and can also be used to install your muzzle devices.
Figure 37
The Taper Lock Baffle Push Tool is used to slide through the normal baffles which have a greater diameter hole in the center to accommodate a 9mm bullet. Sliding it through these baffles allows you to push on the Taper Lock Baffle which is sized for a .30 caliber bullet and push this baffle out of the suppressor body.
Figure 38
![]()
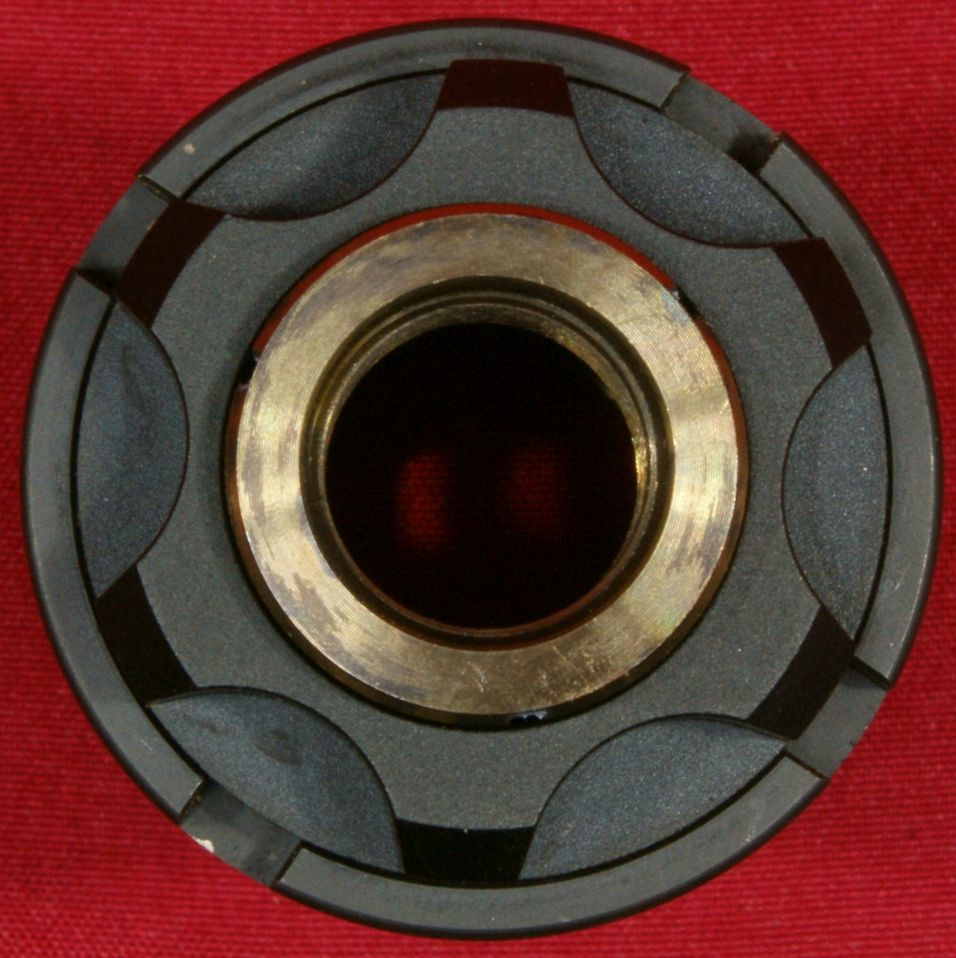
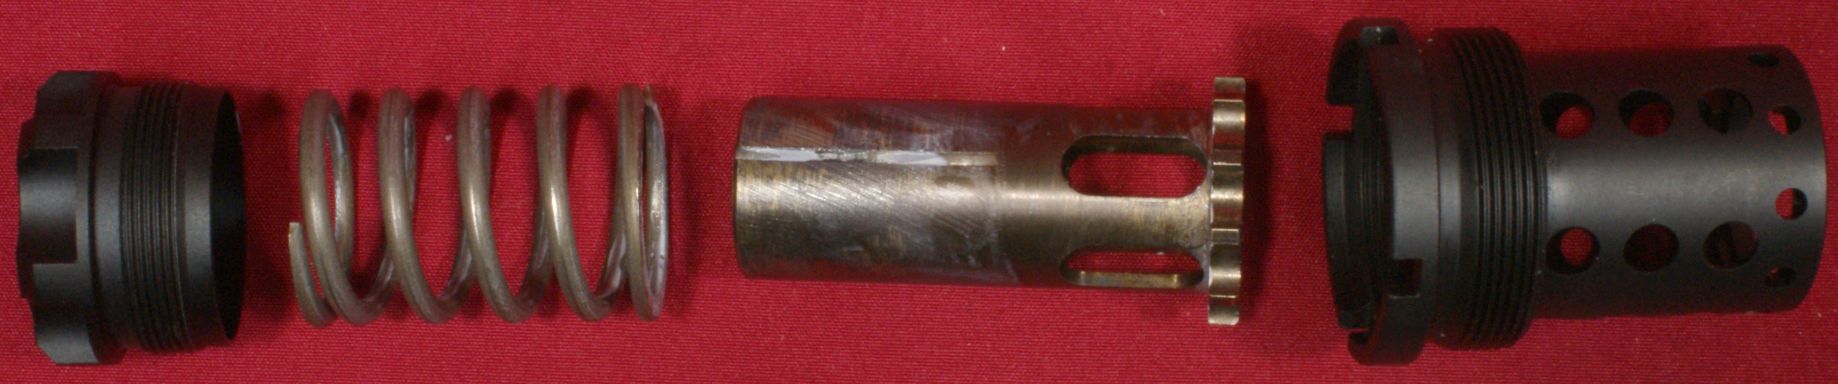
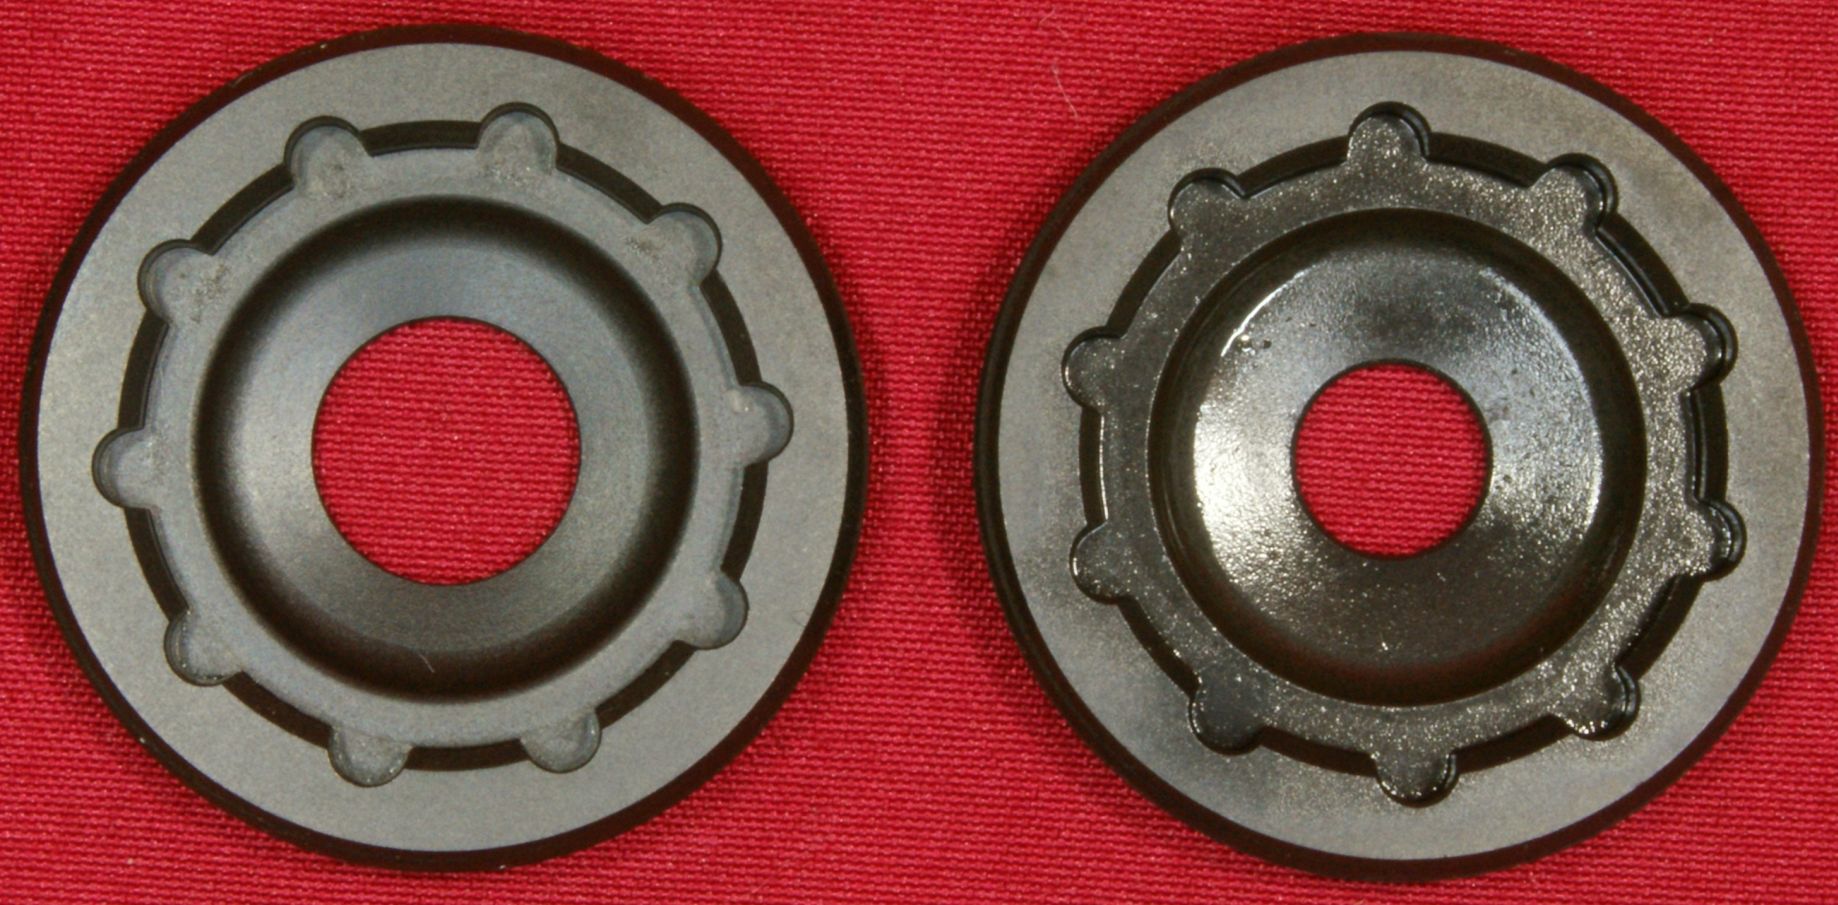
For disassembly and cleaning of the suppressor, you will also use the booster piston as a tool. The end that has the gear looking teeth will mate up with the slots in the end caps and baffle retaining ring to loosen or tighten these items. You can insert a screwdriver through the oval slots in the sides of the piston to use for more leverage.
Figure 39 - Booster Piston
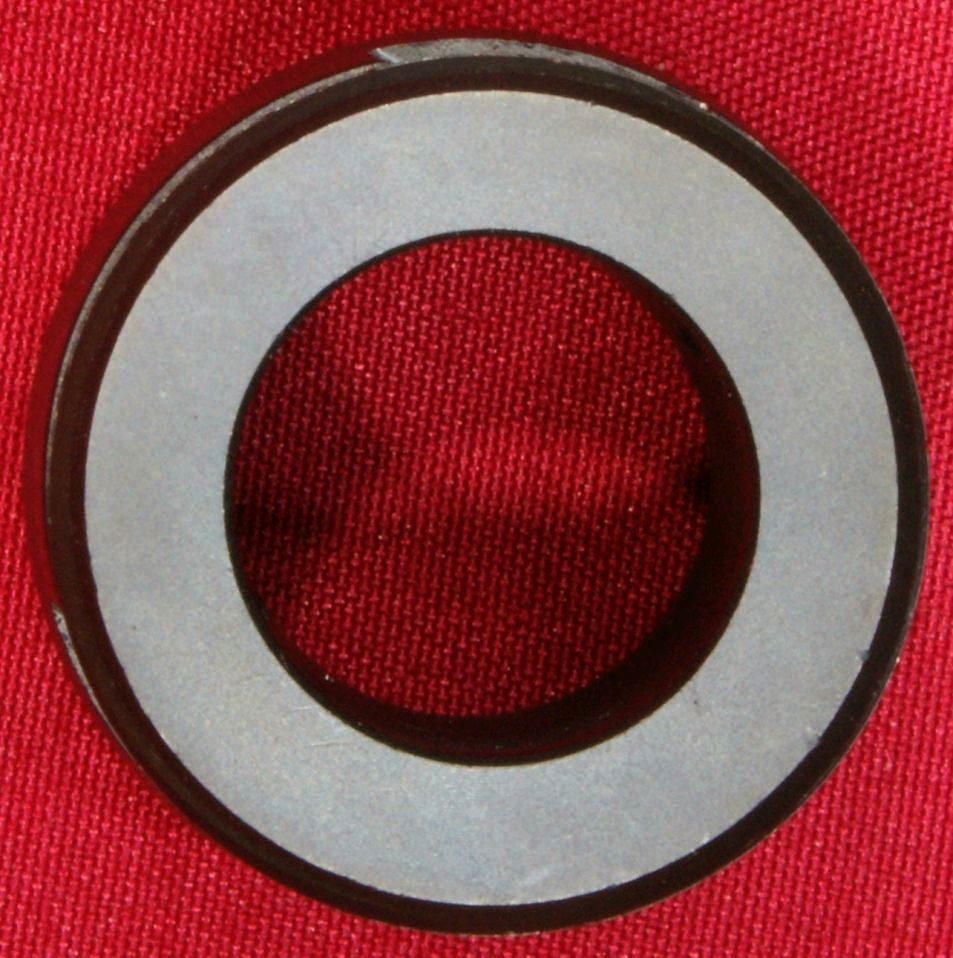
Figure 40 - Baffle Retaining Ring
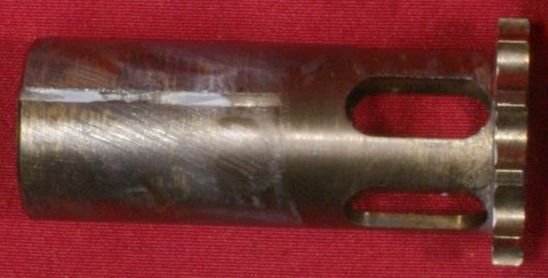
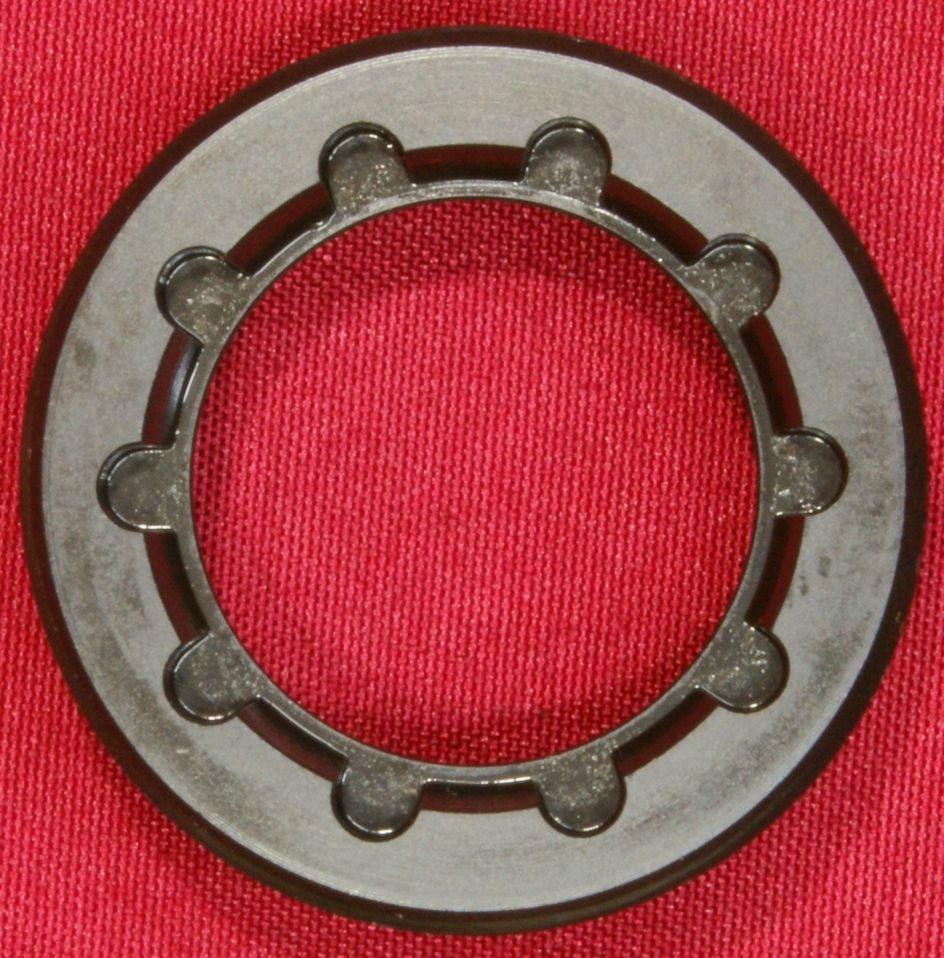
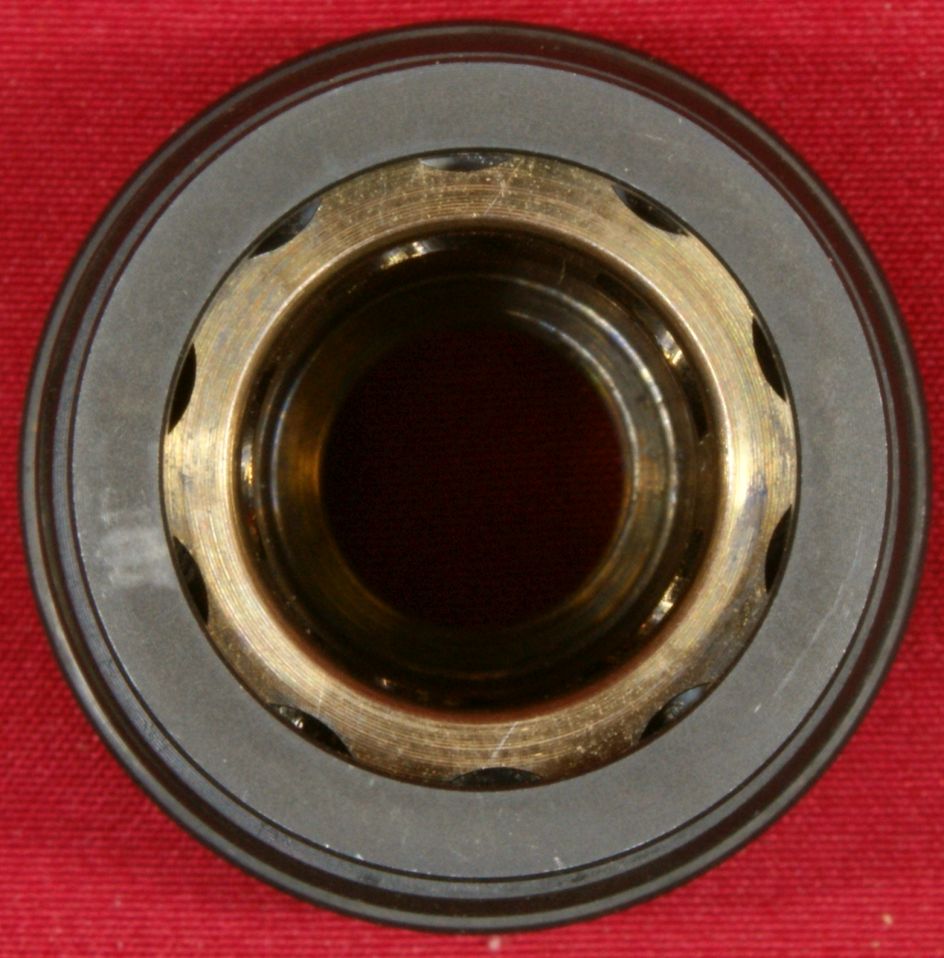
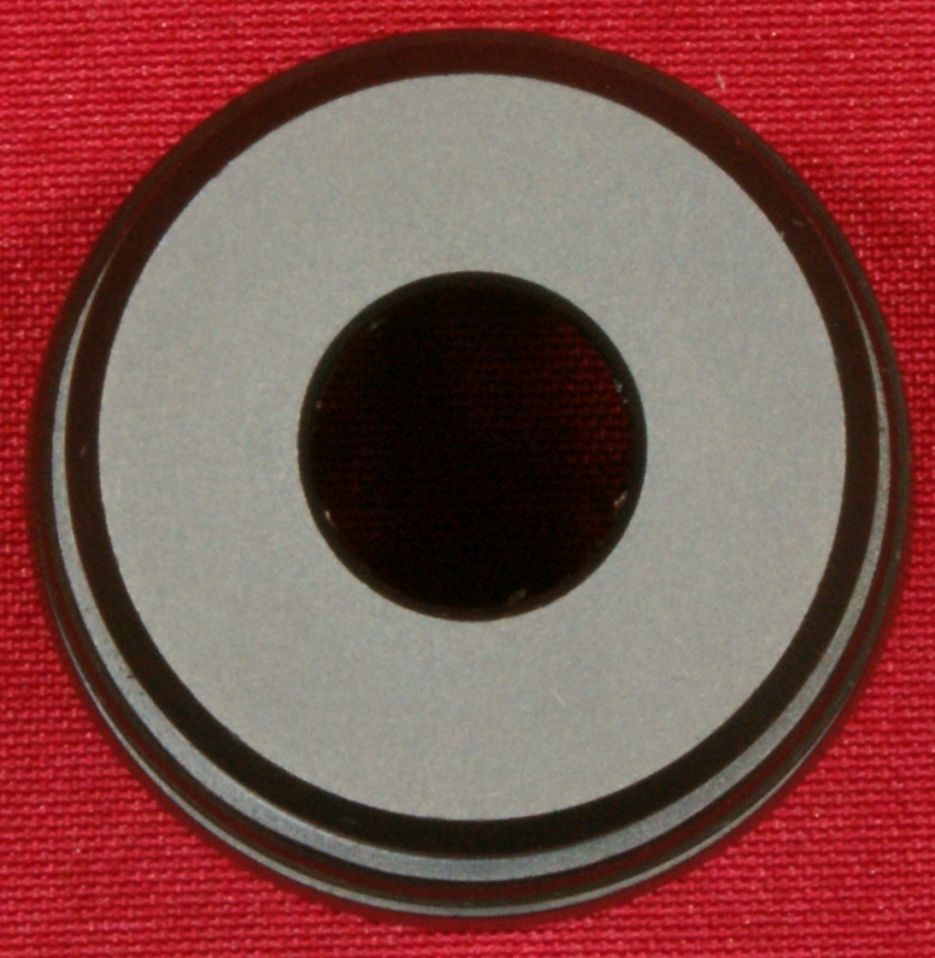
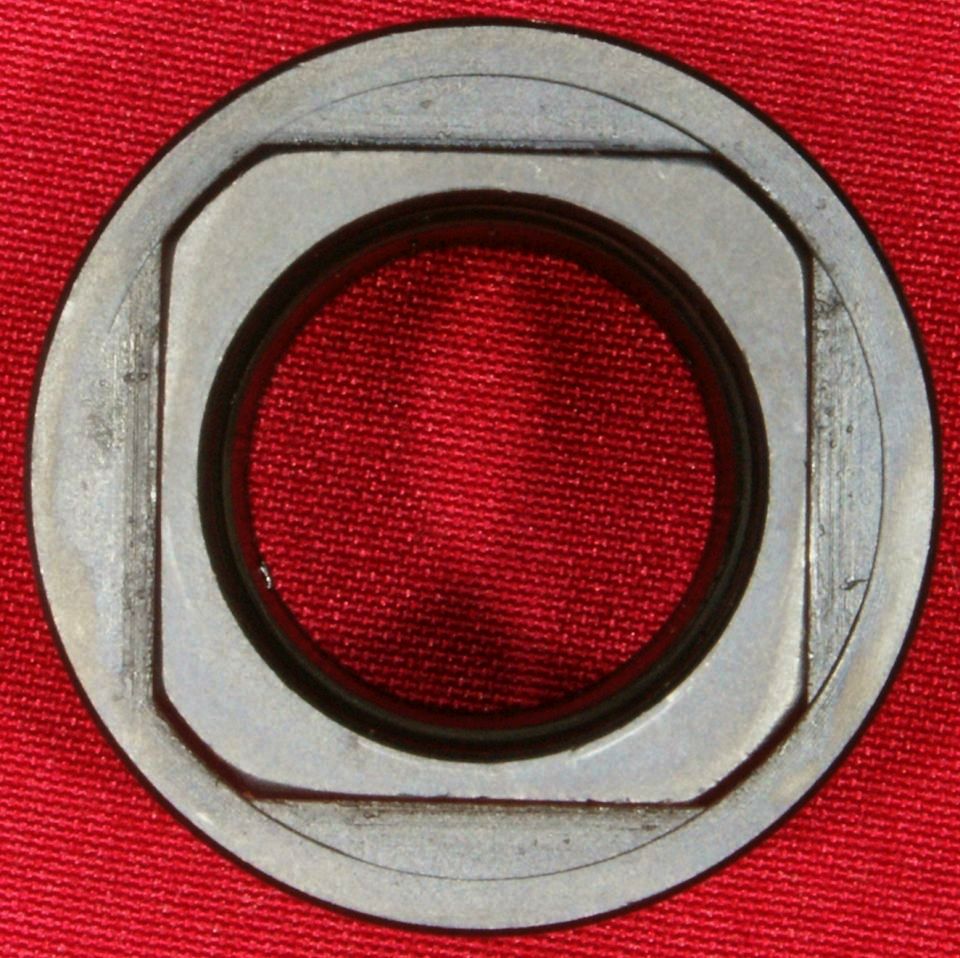
Figure 41 - 9mm and .22 Caliber End Caps
My overall thoughts so far on the Griffin Armament Optimus Suppressor are positive and I'm pleased with the quality of the components. Because of the versatility of this suppressor, it does require the user to pay attention to the configuration of the suppressor and attention to the type of firearm and ammunition being used.
This next YouTube video covers in detail much of what was already stated above but in a video format.
Figure 42
After further consideration and while waiting for my Interstate Transport form to be approved, I decided that I really needed to invest a couple of more dollars into Griffin accessories and also take a closer look at improving my ability to ensure suppressor alignment for different firearms. The additional accessories idea started as I was thinking about range testing. I realized that I needed a way to easily move the suppressor from one rifle to another while the suppressor is in the full length taper mount configuration. It is possible to do this using the Minimalist Muzzle Break that is provided with the suppressor, but that would mean I would have to remove and reinstall the muzzle break on each rifle. For range testing, clocking the muzzle break wouldn't be too much of an issue since I wouldn't have to worry about getting the break clocked perfectly each time for a temporary installation, but applying 40 ft-lbs of torque to a rifle to install and remove the break multiple times while at the range would be a pain. To solve the problem, I purchased the Griffin Taper Mount Direct Thread Adapter. This adapter comes in both 1/2x28 or 5/8x24 thread sizes. I purchased the 5/8x24 because at this time I'm more interested in using the suppressor on my 6.5 Creedmoor and .30 caliber firearms. These adapters cost $95 each from Griffin and you can see the adapter below.
Figure 43
Figure 44
Figure 45

The photo below shows the Taper Mount Direct Thread Adapter threaded into the taper mount adapter on the main body of the suppressor. In this configuration, the suppressor acts just like any other direct thread suppressor and will fit any 5/8x24 threaded barrel so you can easily move it from one firearm to another that utilizes a thread protector only on the muzzle.
Figure 46

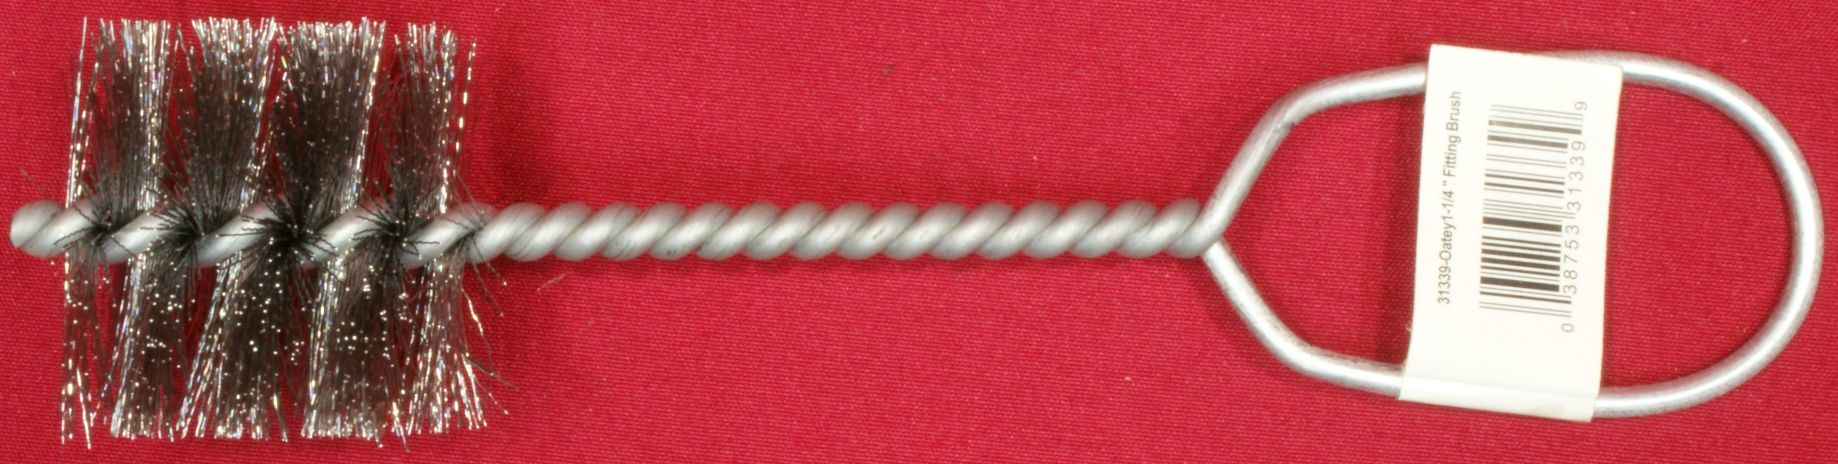
I also purchased two of the suppressor cleaning brushes from Griffin. These brushes are actually manufactured by Oatey and you can find them on Amazon.com (if you want to potentially save a couple of bucks). I show the Oatey part number for your reference when ordering. These two brushes can be used to clean the taper mount threaded area (1" brush) and the inside threaded portion of the main body (1.25" brush). Each of these brushes cost $9 at the Griffin website and I think Amazon has them for a few bucks less.
Figure 47
Figure 48
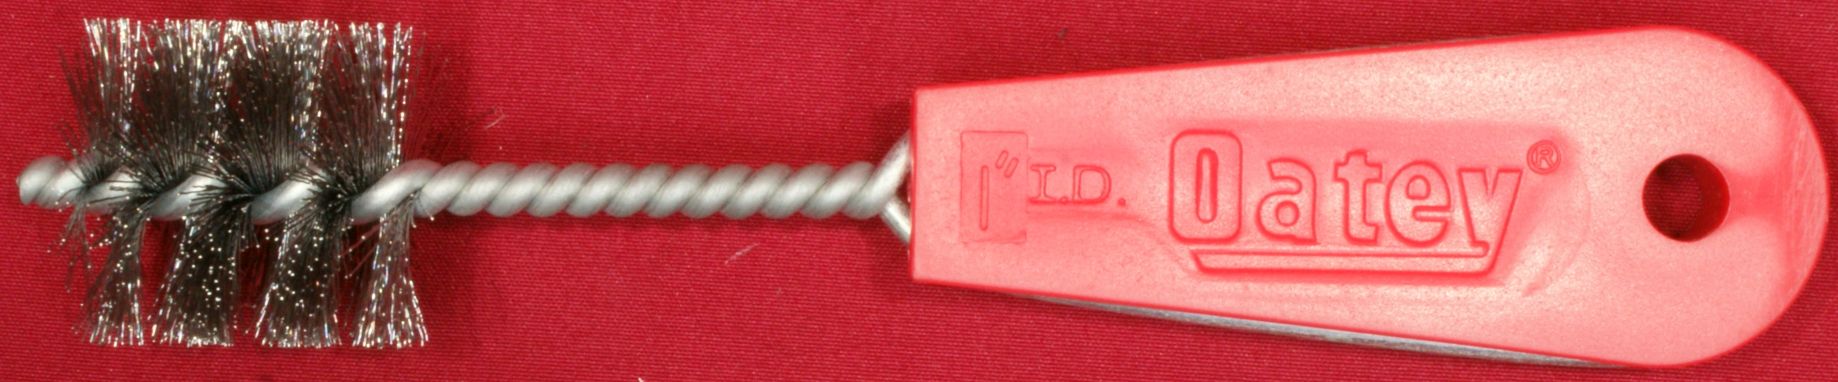

Figure 49
Figure 50
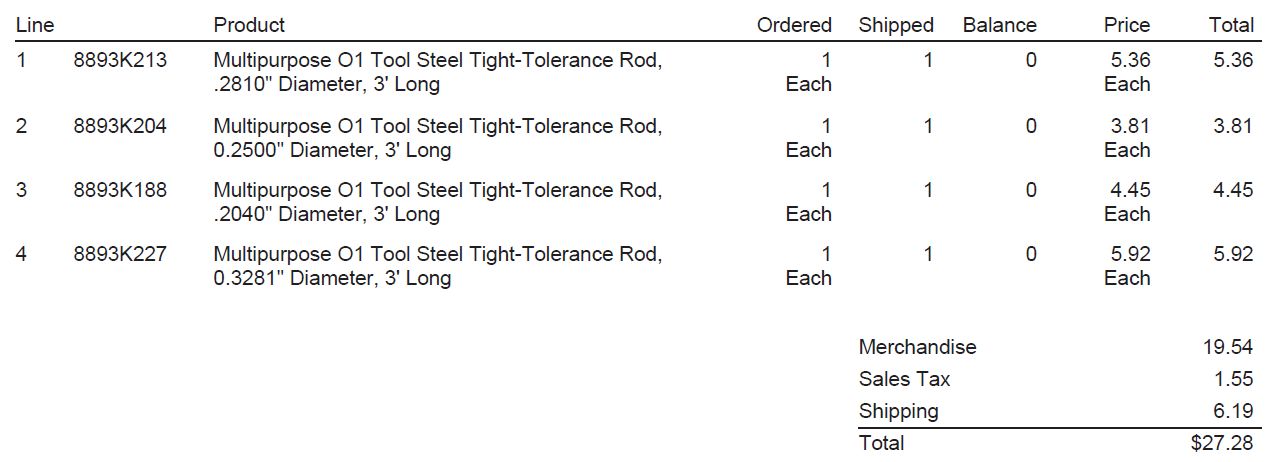
For checking suppressor alignment, I did some research and found that you can purchase suppressor alignment gages (rods) from Geissele and SureFire. The gages cost $75 and $79 dollars respectively for each caliber, which is not cheap. They are extremely straight (0.001" over the length) and just under the bore diameter (0.002" under) which fits inside the barrel bore and shows the projected path of the bullet through the suppressor. Due to cost, I decided to go a slightly different route and try some precision ground rods that I ordered from McMaster.com. I selected four different size rods to be able to verify alignment for the .30, 6.5mm, .223 and 9mm caliber firearms. The rods I ordered are shown below with the McMaster part numbers. Also, note that when you check out at the McMaster website, they don't show shipping costs which may be concerning to some people. In my case I live north of Atlanta and the shipping costs were only $6.19 which is very reasonable. Basically I got four alignment rods for under $28 instead of potentially $300.
Figure 51
Three of the four rods are shown below. I cut them in half to make an 18" rod and then I coated one side with clear tape until I had the right fit inside the barrel bore because these rods were not as good of a fit as the Geissele and SureFire. Getting the right number of wraps of tape or thickness of tape was trial and error, but I figured it out quickly and how many you may need will be a function of the thickness of the tape you use.
Figure 52
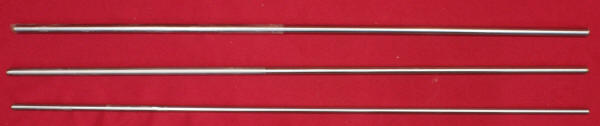
It only took one wrap of some thin tape like you would use on a Christmas present and the 0.2500" rod fit very nicely inside the barrel of my 6.5 Creedmoor rifle. I consider the tape to do two things. First to give these undersized rods a better fit in the barrel and second to add a soft bushing between the barrel and rod for those who might be concerned with sticking a steel rod down the barrel.
Figure 53
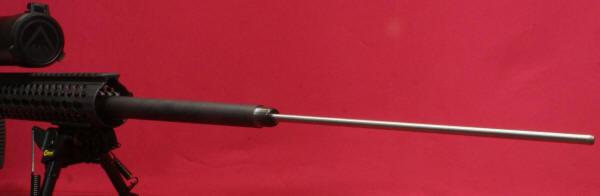
After installing the suppressor and looking at the overall alignment on this rifle I was very happy with the results as you can see below. The center of the rod was nearly perfectly centered inside the end cap and any type of baffle strike or end cap strike would not be possible. I know that you can try to look down the barrel to ensure the same thing, but using this type of gage (rod) gives me a greater sense of alignment instead of just a go/no-go visual check.
Figure 54
I then installed the Griffin Minimalist Taper Mount Muzzle Break on my Remington 700 SPS Tactical AAC-SD rifle chambered in .308 Winchester. I used the shims provided with the suppressor kit and clocked the suppressor accordingly with a torque of 40 ft-lbs. This was actually a pain in the butt because I struggled getting the right combination of shims and torque to get it clocked exactly like I wanted. This difficulty has nothing to do with the Griffin muzzle device and is just a function of how the threads were cut on my rifle and muzzle device.
Figure 55

This next photo shows the suppressor installed on my rifle using the Minimalist Taper Mount Break.
Figure 56
The 0.2810" diameter rod required about two wraps of thick box tape to get a good fit and the photo below shows the results of my alignment check. Alignment was not as good as my 6.5 Creedmoor rifle, but there should be no issue. Keep in mind that overall alignment is a function of many tolerance stack-ups. The first and potentially most critical is going to be how well your barrel threads are truly centered on your barrel bore. I also checked the 0.2040" diameter rod with one wrap of box tape on several .22LR firearms and all looked good. From these checks, I feel confident that the Griffin Armament Optimus Suppressor that I purchased has good alignment and future checks will mainly be on other firearms to ensure the barrel threads were cut properly.
Figure 57
You can see the review in the video version of these additional accessories and suppressor alignment at the YouTube video below.
Figure 58
Range Testing
One of my goals for range testing was to give you some comparative audio data shooting the Griffin Optimus on various firearms. I need to say up front that to properly test suppressors and give real sound pressure values in decibels (dB), then you need some real equipment that is not cheap. Unfortunately I don't have this equipment yet, so I stayed with a traditional subjective comparison where my opinion along with the audio in the videos is my data. The quick summary is that based on my range tests and other studies I have done, I can believe the data Griffin states on dB levels with different firearms.
Another key goal for my range testing was to start gathering data on zero shifts and potential changes in group size on various rifles. I show this in these various videos below. One thing I show are point of impact shifts between unsuppressed and suppressed groups which are probably due to changes in the harmonics of the barrel with the added weight of the suppressor at the muzzle. Another is there may be influences on group sizes, although I need to study this further myself and whatever I show is mainly a function of my rifle configuration and ammunition used; your experiences may differ.
In this next video I shoot my Remington 700 AAC-SD chambered in .308 Winchester. This rifle has proven to be a tack driver and during range testing I observed that you need to make sure the entire suppressor body is tight on the barrel. I also show that I did have some point of impact shift with the suppressor installed. This shift was minimal probably due to the heavy profile of the barrel on this rifle. I also shot some subsonic rounds and the suppressors full length configuration made shooting these rounds "crazy quiet." I have much more bench testing to do before I reach my final zero shifts, but so far I'm happy with the Optimus on this rifle. This also happens to be the rifle I installed the Minimalist Muzzle Break and I saw no change in accuracy potential with the break installed and without the suppressor.
Figure 59
This next video shows me shooting my H&R AAC 300 Blackout Handi-Rifle. When it comes to shooting quiet 300 BLK subsonic ammunition, a single shot or bolt action cannot be beat. I shot both the long and short suppressor configurations and clearly the longer configuration gave more sound reducing ability, but it also had more weight and caused a significant shift in point of impact due to changes in the barrel harmonics. Although, the short configuration was still good at reducing sound levels on this rifle.
Figure 60
For testing the suppressor on a 9mm pistol, I used my Beretta Vertec with an aftermarket threaded barrel. Since the Beretta is not a true tilt barrel, I decided to try the suppressor using the pistol configuration with the fixed spacer installed inside the piston booster assembly instead of the spring. In this configuration, the suppressor would not allow the slide to fully cycle and eject the case. When I switched from the fixed spacer back to the spring and shot the suppressor in the true tilt barrel configuration, the pistol cycled without issue. I shot both subsonic and supersonic ammunition through the suppressor and clearly the subsonic 147 gr ammunition produced the least noise. One thing I noted was that a good portion of the sound comes from the action (slide) on the pistol cycling. I have found this to be true when shooting any suppressor on a semi-auto firearm.
Figure 61
This next video shows using the suppressor on my S&W SW22 Victory Pistol and also some footage on my Ruger SR-22 Rifle. It should be very obvious that using a suppressor on a 22LR caliber firearm while shooting subsonic ammunition will give you the greatest levels of sound reduction. I shot the suppressor in the pistol (tilt barrel) configuration with the spring installed and also with the .22 caliber end cap. Since this is my first fully serviceable .22LR suppressor, I'm sure I will be shooting suppressed .22LR much more in the future because I don't have to worry about excessive buildup of stuff inside the body of the suppressor since I can disassemble and clean it myself.
Figure 62
All the range testing videos above were taken over two days and three different sessions of shooting. Throughout that time, I decided not to clean the suppressor to see what type of buildup I might have on the inside. Realistically, I only put around 200-ish rounds of ammunition through the suppressor of various types because jacking around with video recorders, chronographs and multiple firearms just takes time. The photo below shows how the internal components looked after taking the suppressor apart for cleaning. A few things come to mind; the push rod was needed to remove the taper mount baffle, I had no real issues unscrewing components, and I feel that some type of high temp conditioner on these internal components might help in reducing the difficulty of removing the burnt powder residue. I used Hoppe's No. 9 and was successful in cleaning the components, but it did take some effort. I was also glad I purchased the brushes shown above in this review because they were very helpful in cleaning the inside of the suppressor body and taper mount adapter.
Figure 63
One tool that I wish Griffin would add to their inventory is something that matches the sprocket looking portion of the piston so that you can unscrew the end caps without having to disassemble the piston booster. Also after range testing I can see that getting the 1/2x28 taper mount direct thread adapter will be a must for maximum versatility to allow economical installation of the long configuration on various .223 caliber rifles for maximum sound reduction.
Bottom Line:
So what do I think about the Optimus? It is like this... with great versatility comes great responsibility. This suppressor has the ability to be adapted to many different firearms, but that doesn't mean just because the suppressor will fit on your barrel shooting with it will be safe. Things that must be considered are caliber, barrel length, type of ammunition and end cap diameter to ensure you don't damage your suppressor or even worse injure yourself. As long as your are paying attention to these details, the Griffin Optimus Suppressor will give you a very competitive sound reduction with maximum versatility. I'm not able to provide objective test data to say what the sound level reductions were, but I was pleased with the suppressor's overall performance and the videos above should give you an idea of what to expect. I was also pleased with the quality of construction and believe that the suppressors contribution to alignment was good on my firearms. When you purchase the Optimus, be ready to purchase other muzzle devices or direct thread adapters to allow you to utilize the suppressor on multiple rifles or calibers. Personally I will/did lean more towards the direct thread adapters for maximum versatility at a minimum cost. I'm sure over the years I will be shooting the Optimus much more and on other rifles and will try to update this review if I come across any new findings or good information to share.
Or
If you would like to be notified about future Gunsumer Reports reviews via Facebook, make sure "You Like This" by clicking the Facebook "Like" button at the bottom or top of this page. If it already says "You Like This" beside the button, clicking it again will uncheck the "Like" status and you will not be notified.
| Share on Facebook | |
© 2010, 2011, 2012, 2013, 2014, 2015, 2016, 2017, 2018, 2019, 2020, 2021, 2022, 2023 & 2024 Gunsumer Reports™, All rights reserved.
FTC Disclosure