|
|
Gunsumer Reports TM Providing Detailed Objective Reviews for Firearms and Firearm Accessories |
Burris AR-FFL Laser Sight Review
March 15, 2014
Believe me when I say that I have had my share of "value" laser sights and I have reached the point where I'm ready to pay for reliability, durability and quality. This is why I was extremely excited to see that Burris Optics has introduced a new line of laser sight systems. Burris already makes quality optics and them expanding their sight systems into the laser category should deliver some premium products. Burris kicked off their line of laser systems with four basic models which include various features such as red, green and IR (infrared red) lasers along with a laser that includes one of their FastFire III Red Dot Reflex sights. You can see the four configurations of these laser systems below. For the AR-FFL and AR-LASER systems, you can choose the option to have your laser mounted either directly above the rail or offset to allow use with a fixed front post (A2) sight like those on many AR style rifles.
AR-DBAL (Dual Beam Aiming Laser)
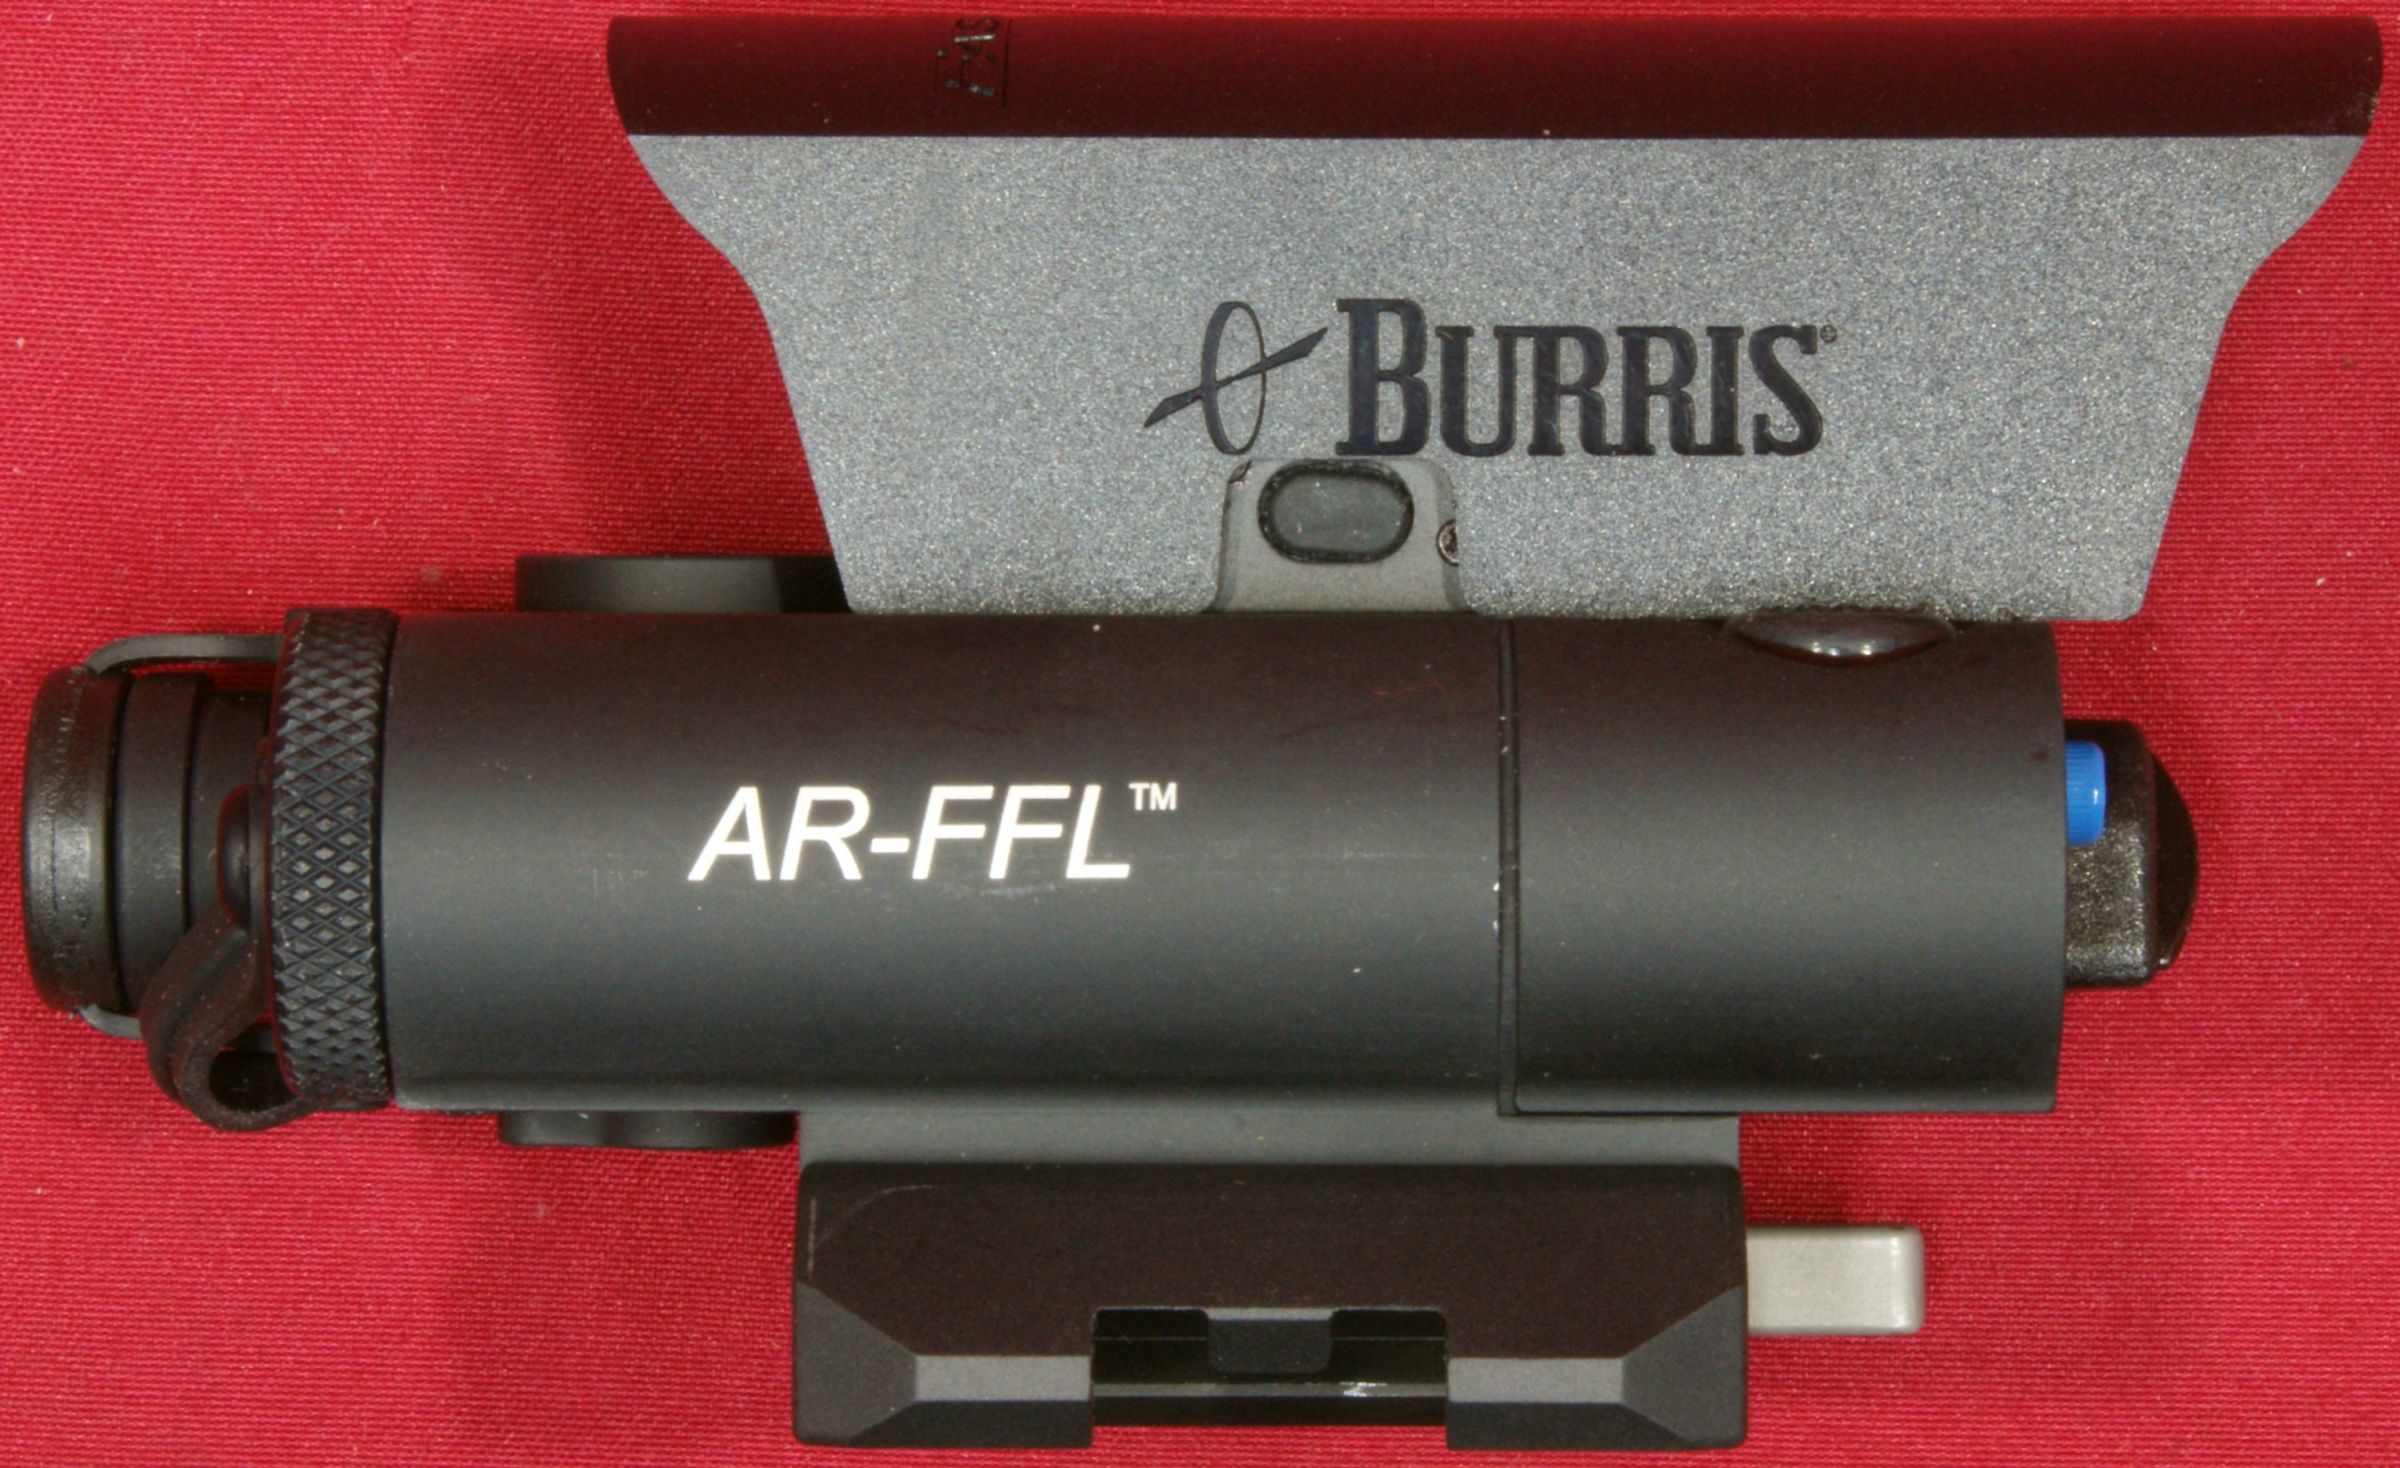
AR-FFL (FastFire III with Laser)

AR-LASER
AR-SPIR (Special Purpose Infrared)
For this review, I decided to take a close look at the AR-FFL sight with the visible red laser, FastFire III red dot reflex sight and in the "offset" configuration. I feel the combination of the FastFire III and red laser would be an attractive package to many AR owners and reviewing the offset configuration provides details on what to expect from this geometry.
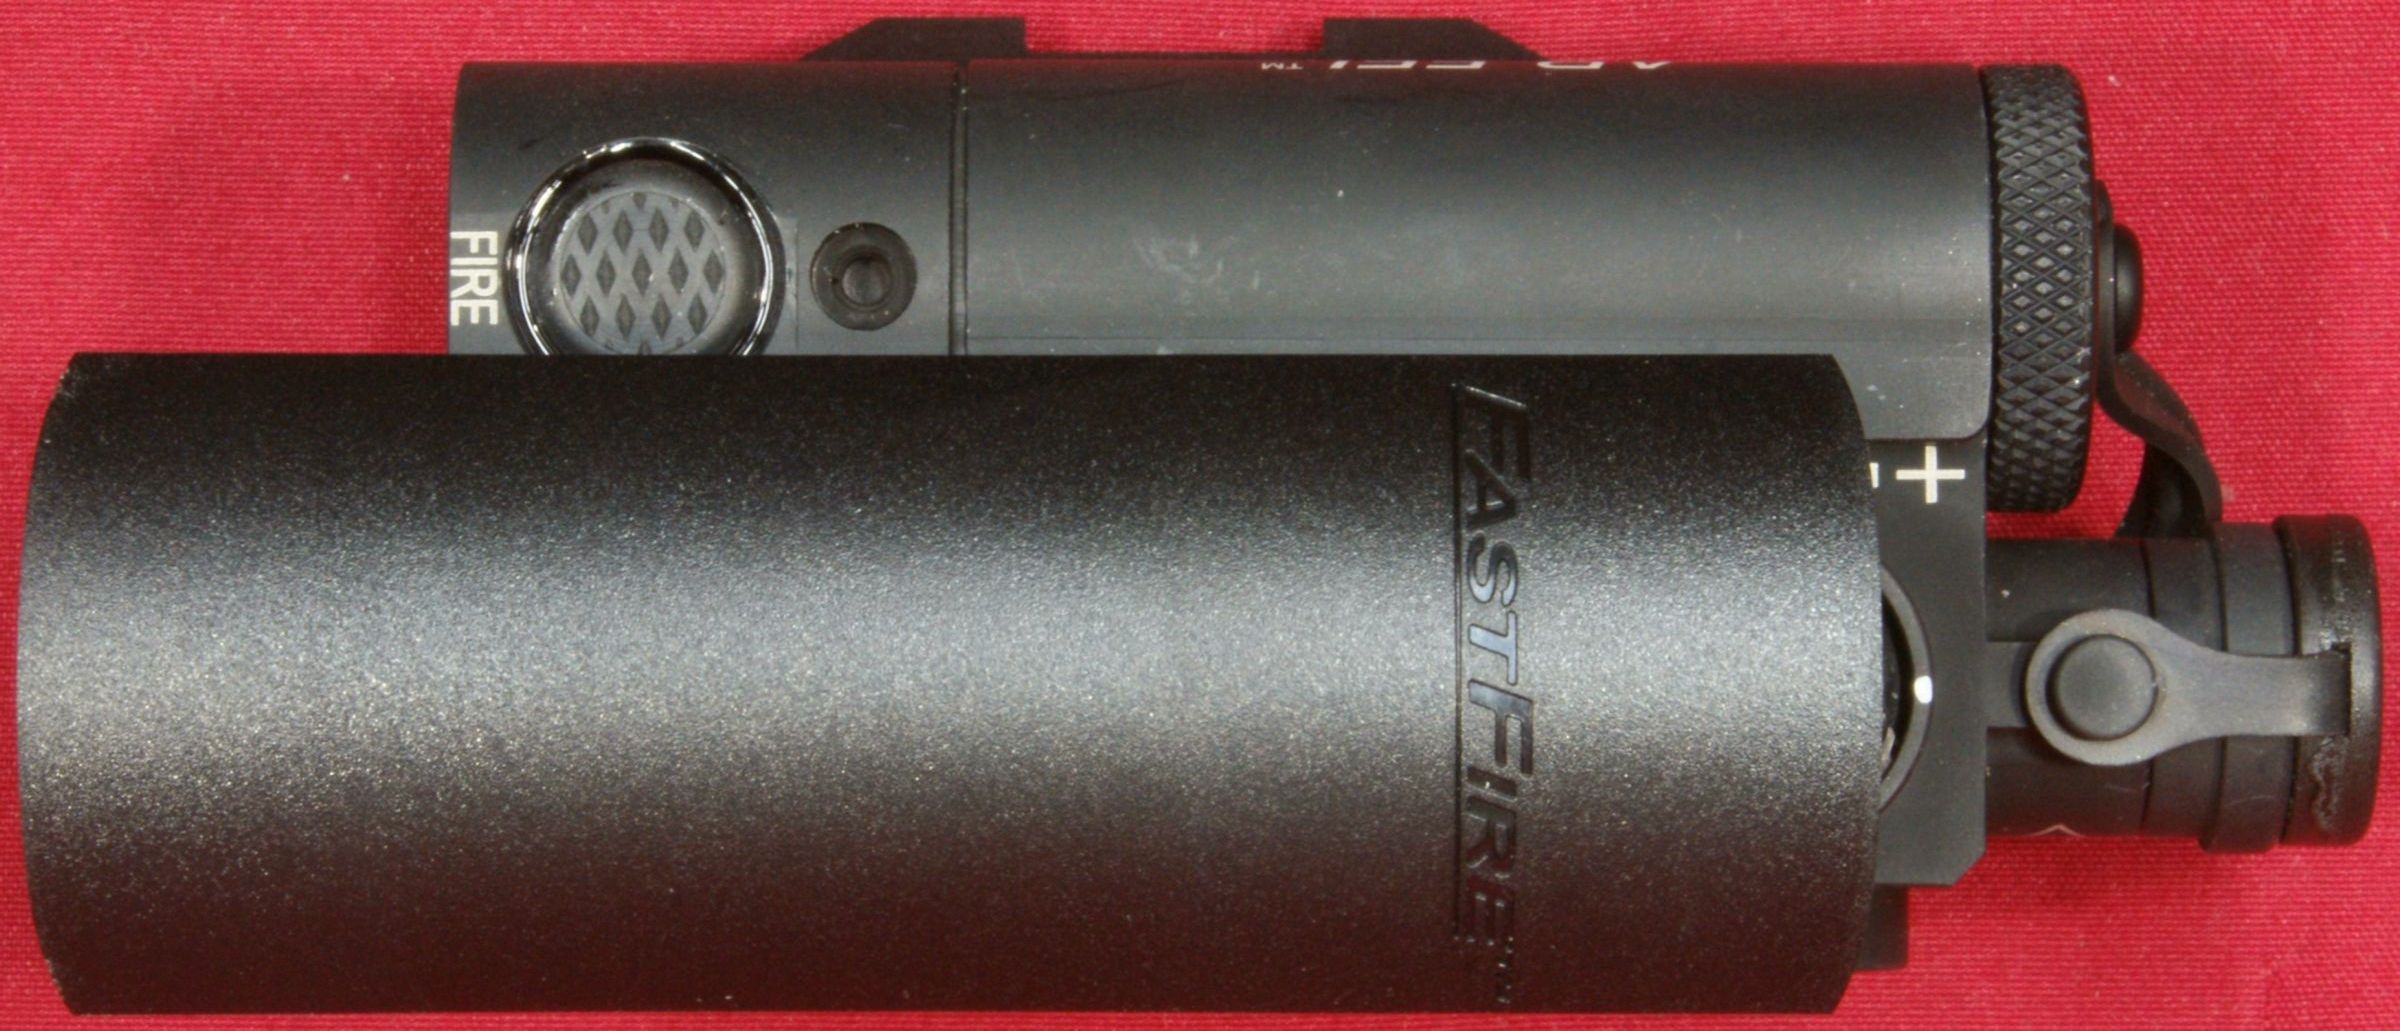
Like most quality sight systems, they don't come cheap. An online price from OpticsPlanet.com for the AR-FFL seems to be around $750. When you consider that an online price for a FastFire III sight is around $240, the price you are paying for the laser capability alone is around $510. In my mind, this price sets a pretty high expectation on the quality of the laser system. According to Burris, these laser products are produced to military specifications which means they should have outstanding performance, reliability and durability.
Since I don't always take the manufacturer's word as gospel, I did some further research and found that the lasers are actually produced by Laser Devices, Inc. which has been manufacturing laser sight systems since 1979. The laser on the Burris AR-FFL sight matches Laser Devices' ITAL-A & OTAL-A configurations and these configurations have an OpticsPlanet.com price of $689 at the time of this review (not including the red dot reflex sight). Based on this, it seems that purchasing the Burris product may be a much better value. After studying the Laser Devices' website, I have come to the conclusion that Laser Devices does produce true Mil-Spec military grade laser sights. Laser Devices is an approved Government Contractor for multiple agencies within the US Department of Defense and also serves Law Enforcement Agencies, Special Operations Command and NATO Forces. You can take a look at some of their government contracts at this link. My key point here is that these laser units appear to be manufactured by a reputable source who has a history of providing products to our military, so the chances are you will be getting the additional quality, reliability and durability associated with the cost of these lasers.
During my reviews I like to compare my results
to the manufacturer's claims where possible so the following text in
colored italics was taken directly from the
Burris website
on 2/9/14 and gives the Key Features and Specifications for the
Burris AR-FFL Sight. The
![]() ,
,
![]() and
and
![]() are my way to keep up with details that I have covered in this
review with either photos, commentary or both.
are my way to keep up with details that I have covered in this
review with either photos, commentary or both.
Key Features
-
Take your rifle seamlessly from day to
night with the AR-FFL (FastFire with Laser). Combining a
Mil-Spec aiming laser and FastFire III optic, this combination
is the ideal configuration for AR-15-style tactical carbines
 ,
allowing the FastFire III red dot reflex sight to co-witness
with A-Frame and flip-up iron sights for highly versatile use.
,
allowing the FastFire III red dot reflex sight to co-witness
with A-Frame and flip-up iron sights for highly versatile use.
 I don't believe it will cowitness with
standard flip-up sights (see Figure 46)
I don't believe it will cowitness with
standard flip-up sights (see Figure 46)
-
Choose from eye-safe laser models with
Infrared (IR) or Visible Red laser beams that are either Offset
for A-Frame front sights or Inline for flattop rifles.
-
The
FastFire III attaches low and flush to the top of the laser, but
is removable if preferred.
-
With a 3 MOA red dot and three
brightness settings plus an automatic brightness setting,
daytime shooting is possible in even the brightest conditions.
-
Additional Features:
- High and Low intensity settings;
- activation/low battery indicator light;
- adjustable windage and
elevation for exact aiming;
- 7” remote cable pressure pad switch
with integrated momentary activation;
- integrated momentary
activation on the unit “Fire” switch.
- High and Low intensity settings;
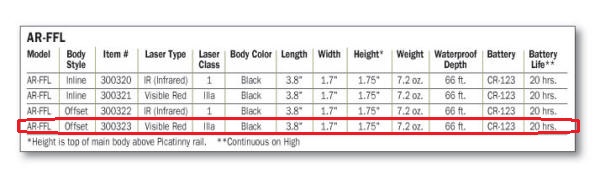
Specifications
-
Model: AR-FFL
-
Body Style: Inline or Offset
- Laser Type: Visible Red or IR (Infrared)
- Body Color: Black
- Length: 3.8"
review laser measured 3.72" with the hood
and lens cap removed
- Width: 1.7"
review laser measured 1.73" across laser
body
- Height (top of main body above Picatinny Rail): 1.75"
 measured 2.20 from top of rail to top of
FastFire
measured 2.20 from top of rail to top of
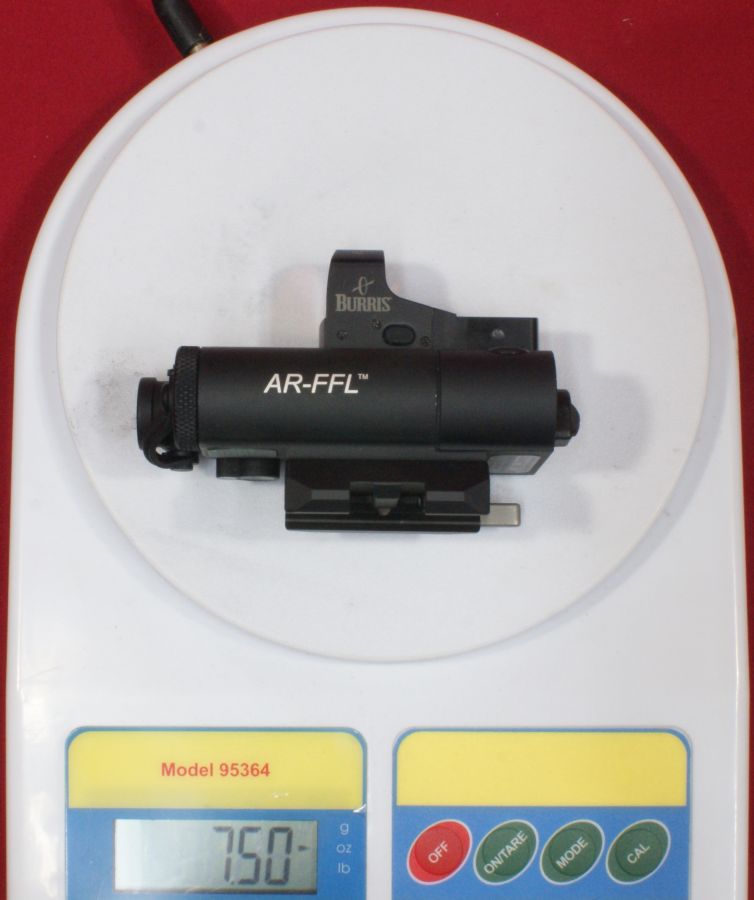
FastFire - Weight: 7.2 oz.
review item weighed in at 7.5 ounces with
batteries and 8.45 including remote and hood
- Waterproof Depth: 66 ft.
- Laser Battery: CR-123
- Battery Life: 20 hours continuous on high setting
Detailed Specifications from the Technical Manual
- Laser Class: Class IIIa in Hi power and Class II in Low power
- Power Output (Hi / Lo): <5mW / <1mW
- Laser Battery Life: Up to 5 hours
- Wavelength: 635nm
- Beam Divergence: 0.3 mrad
- Laser Range (Hi / Lo): 500m / 10m
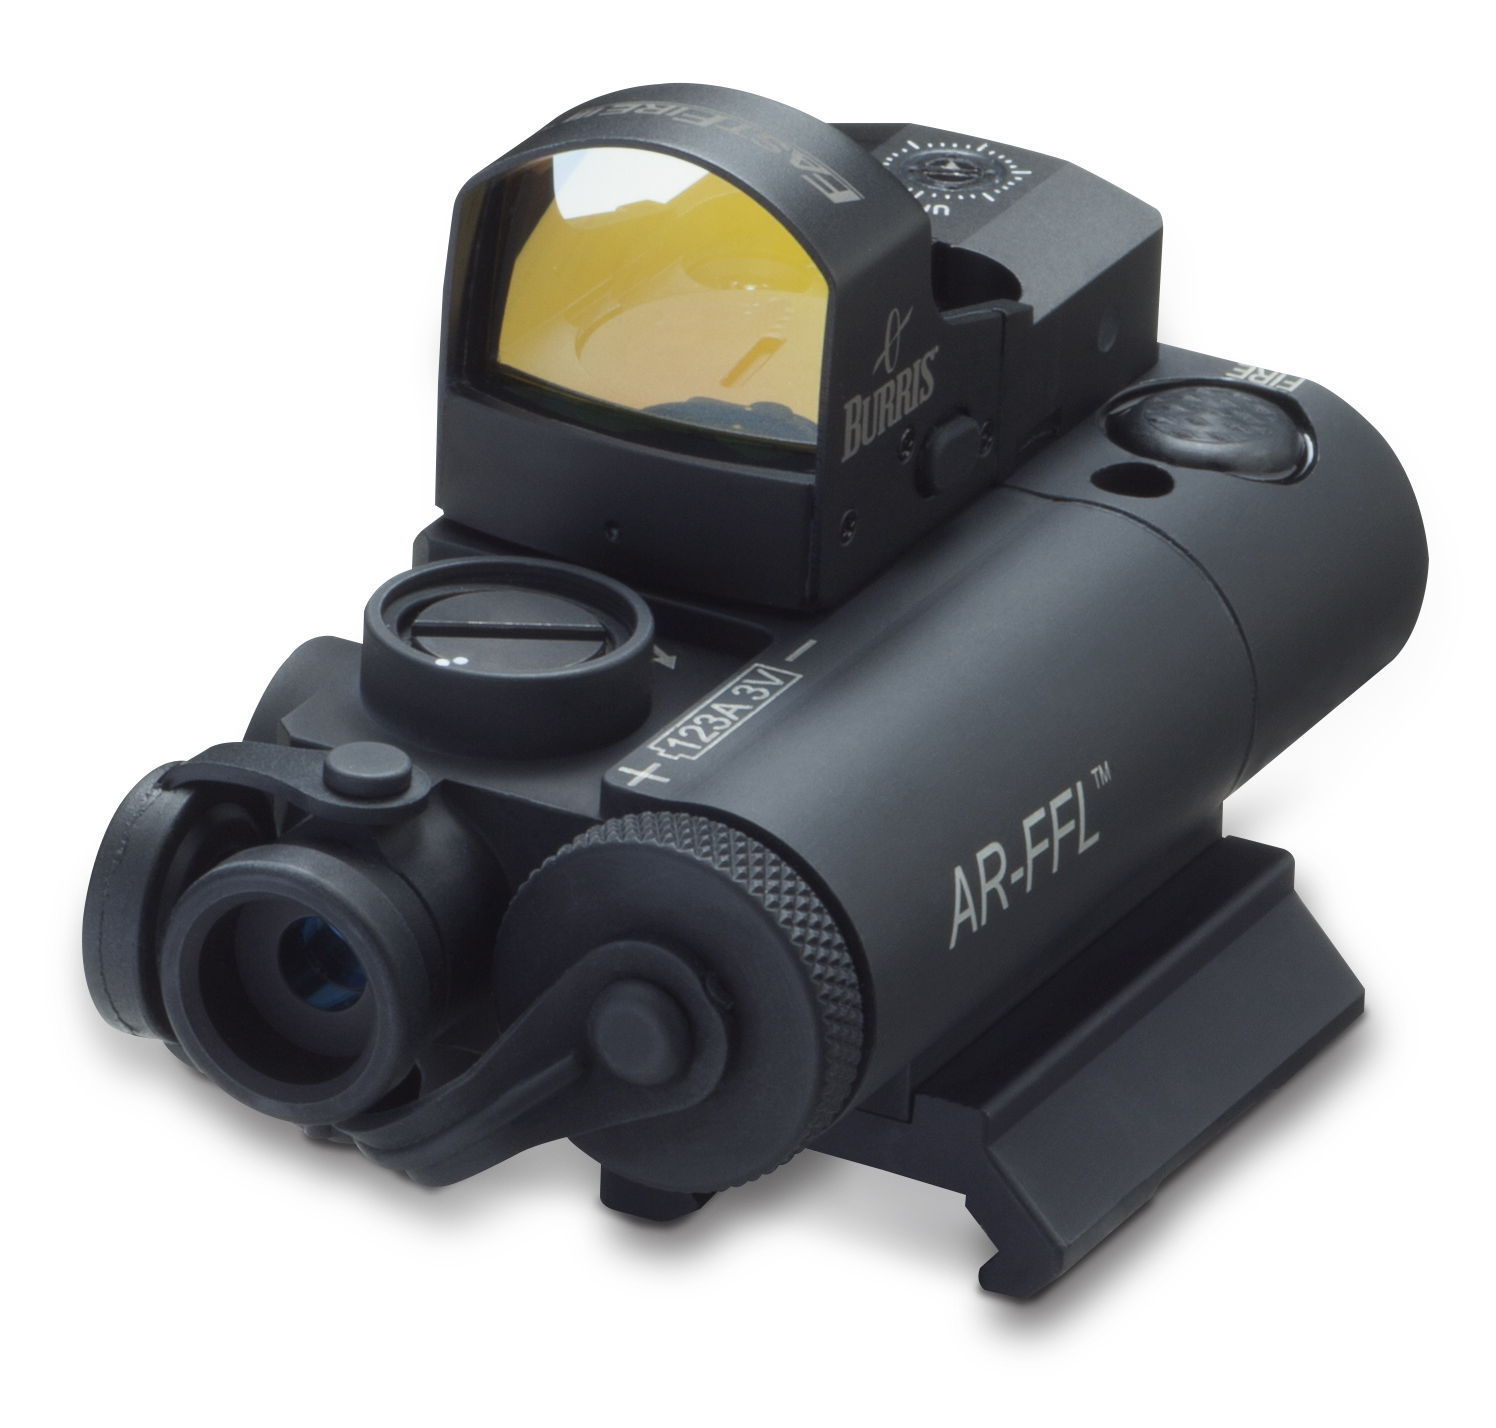
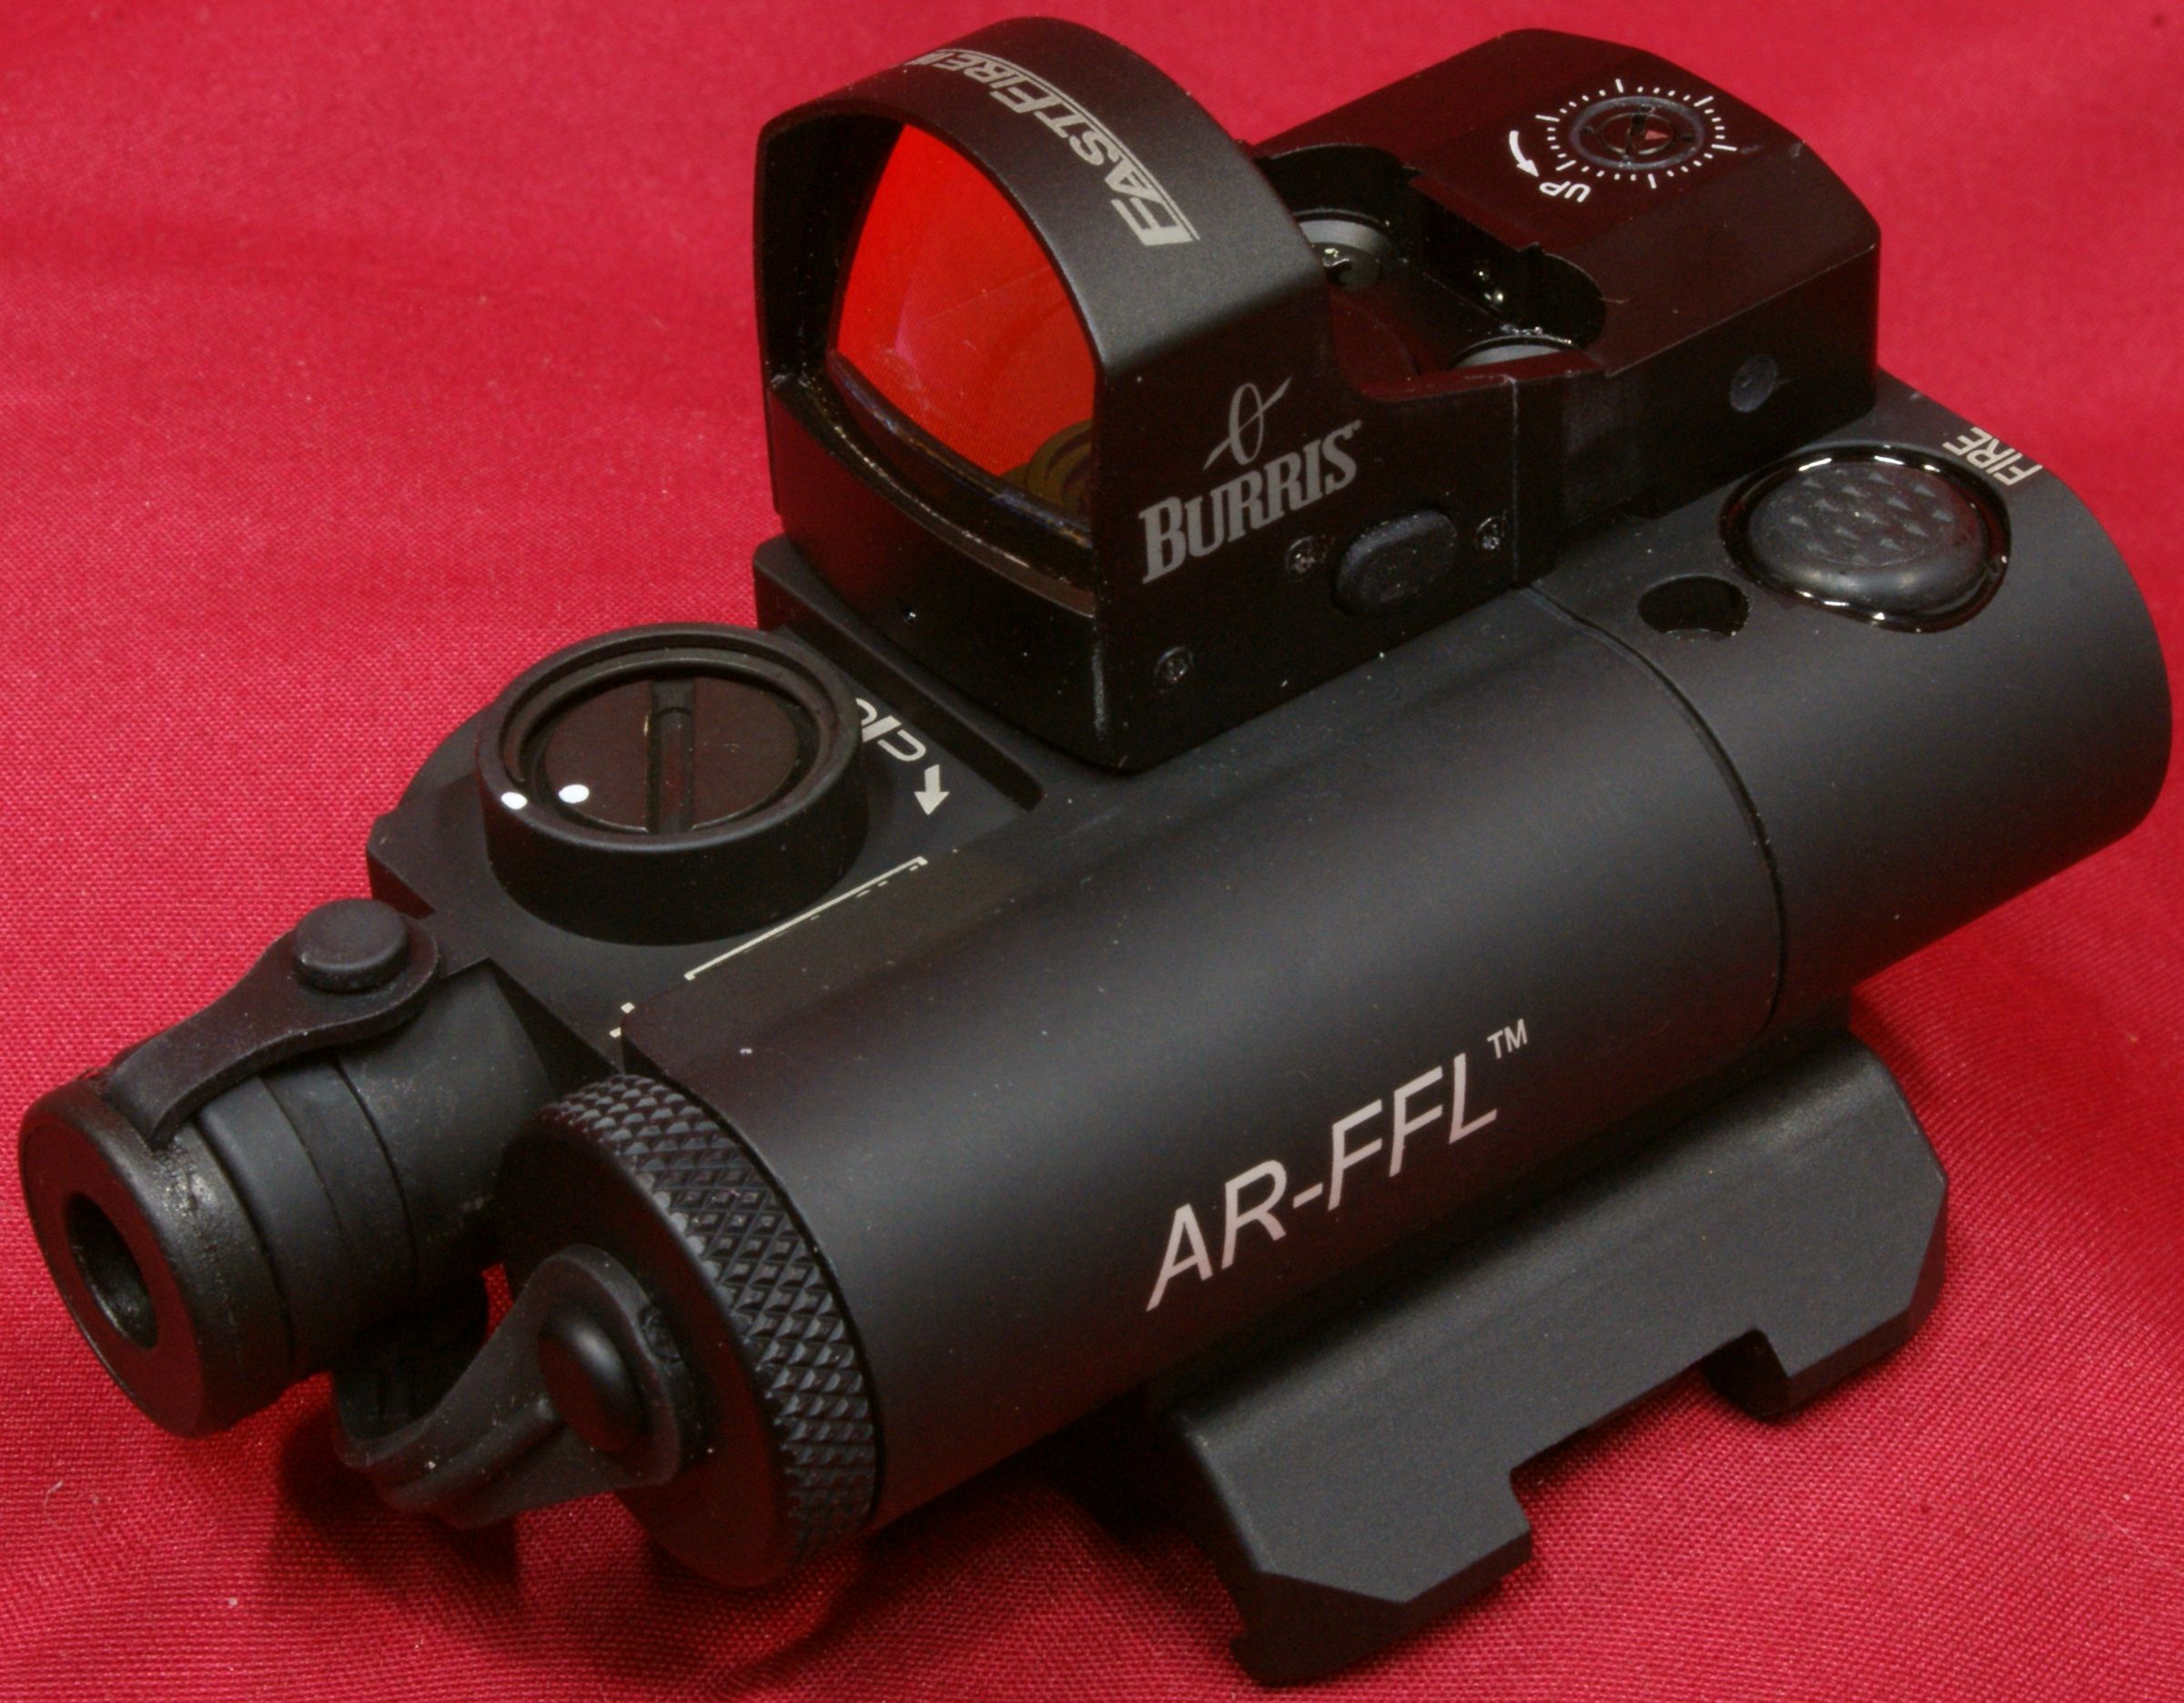
The AR-FFL laser system comes in four models shown below. You can have your choice of an infrared or visible red laser and your choice of an inline or offset body style. The model shown in this review is the offset visible red laser (item # 300323).
Figure 1
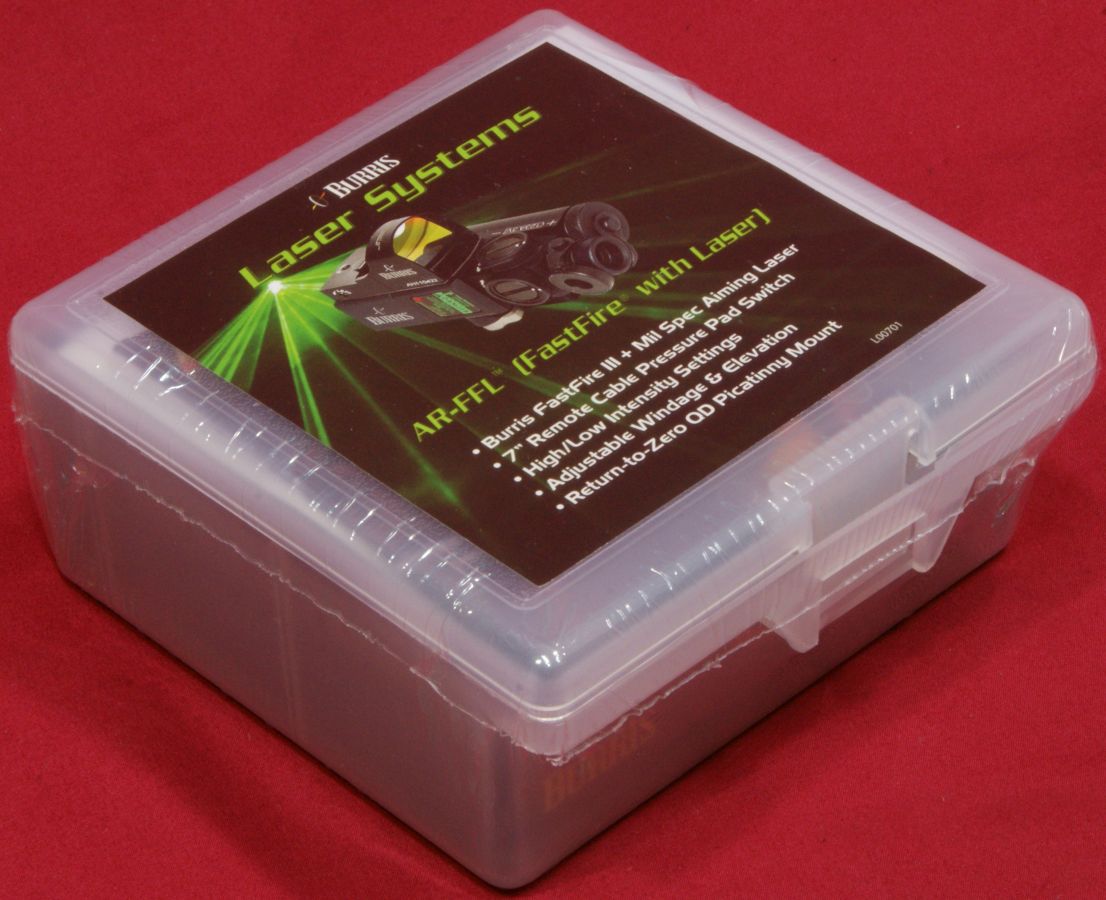
The AR-FFL laser system comes boxed in a hard case as shown below. Since the sight comes with a "Return-to-Zero" quick release mount, there is a good chance that removing the sight may be done frequently and having a durable protected storage case is the best way to protect your investment. Another way to look at using this laser system is to use it on multiple rifles (not dedicated) that already have some type of sight system. Having an existing sight allows you the ability to quickly zero the laser and FastFire to the existing sight.
Figure 2
When you open the top of the case, you see that all items are packed inside as shown below.
Figure 3
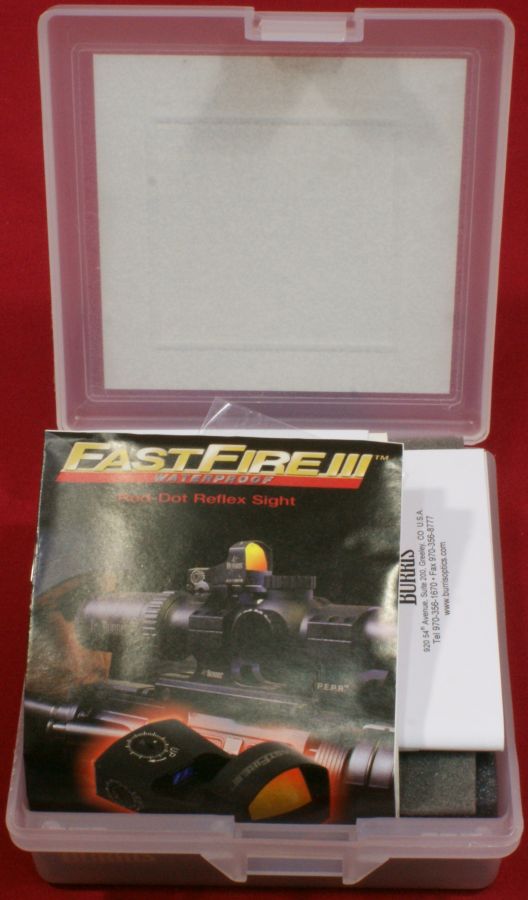
The sight was well protected inside soft foam packaging and the system comes with:
- Burris Lens Cloth
- AR-FFL Laser Operator and Maintenance Manual
- FastFire III Operator Manual
- Warranty Card
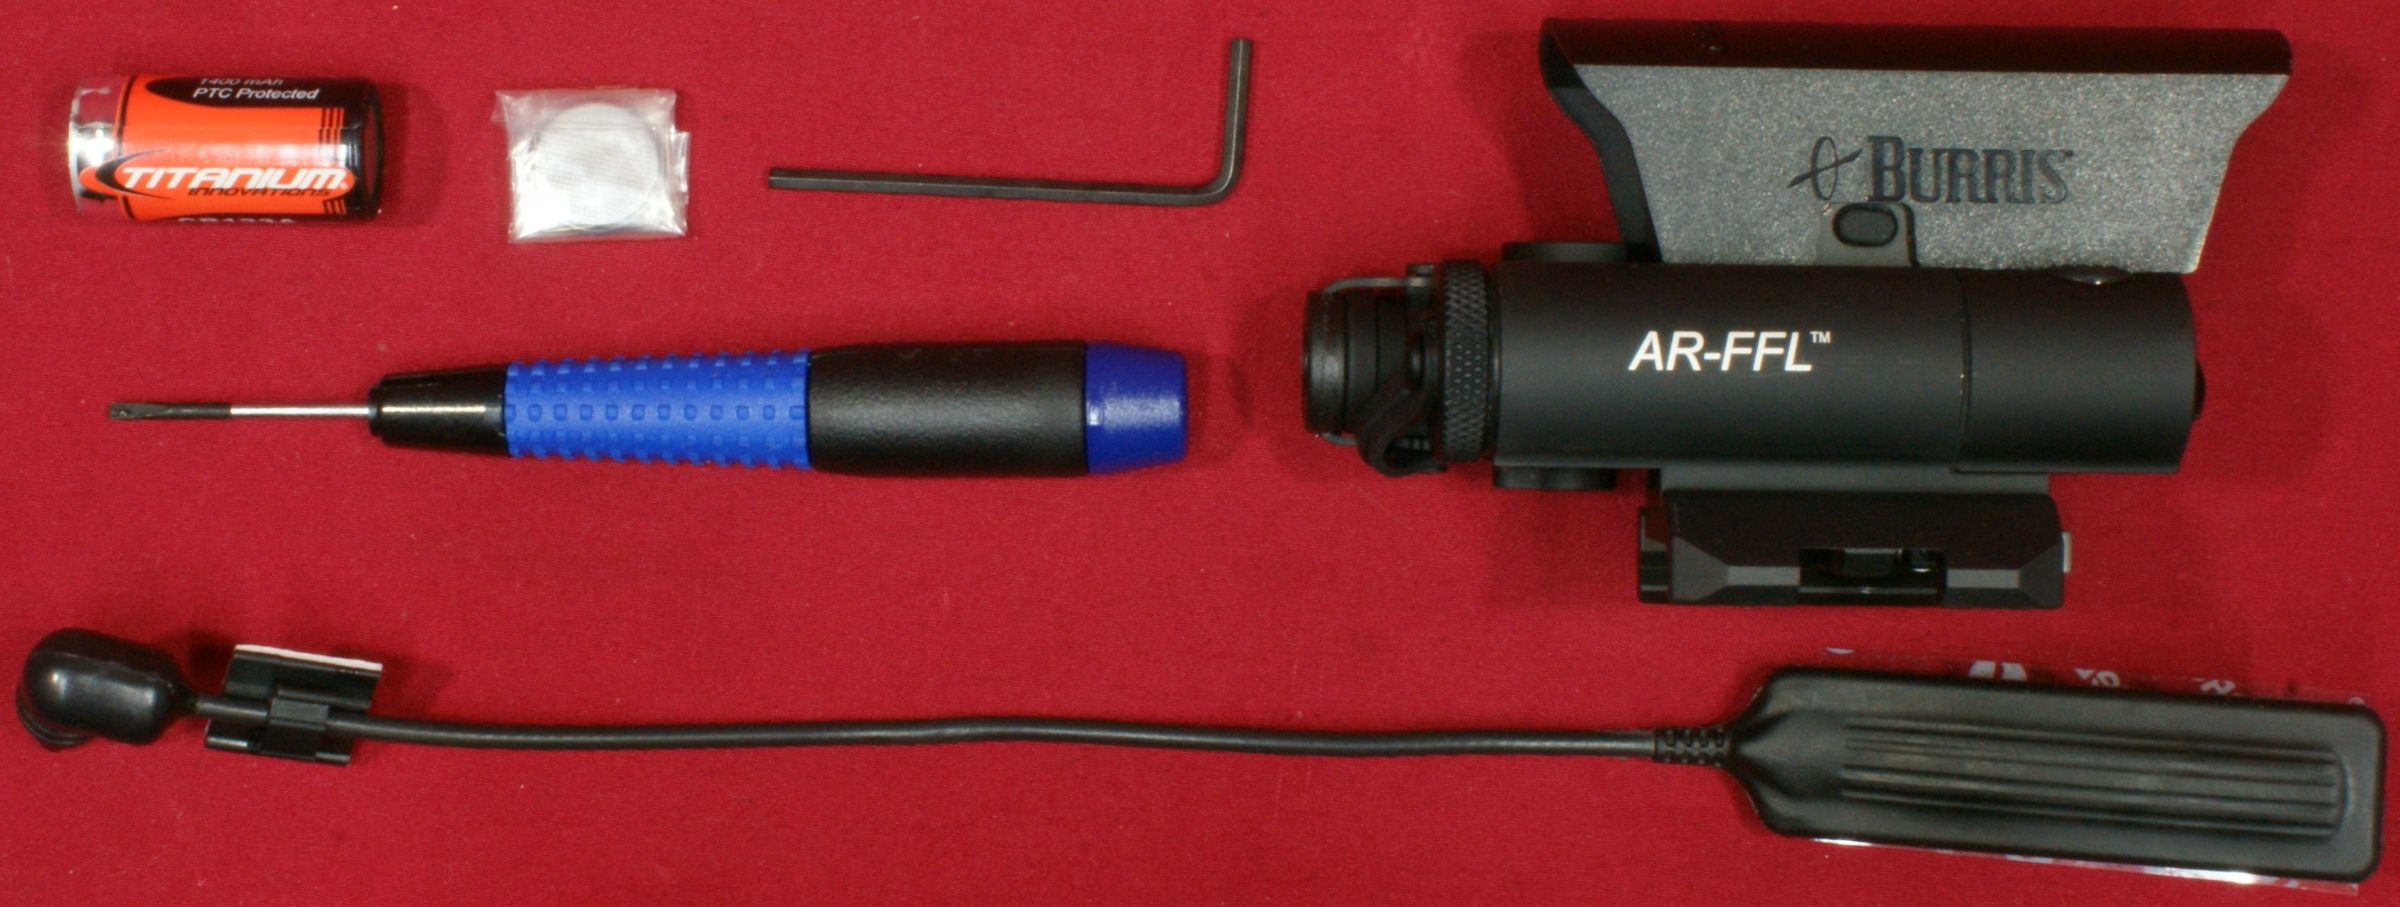
Figure 4

- AR-FFL Laser Assembly
- Laser CR-123 Battery
- FastFire III Red Dot Sight (shown on laser assembly)
- FastFire III See Through Dust Cover (shown on FastFire III)
- Right Angle Remote Cable Switch
- Remote Cable Tape 1/2" Hook & 5/8" Loop
- FastFire III Screwdriver
- FastFire III 1632 Battery
- Allen Wrench
Figure 5
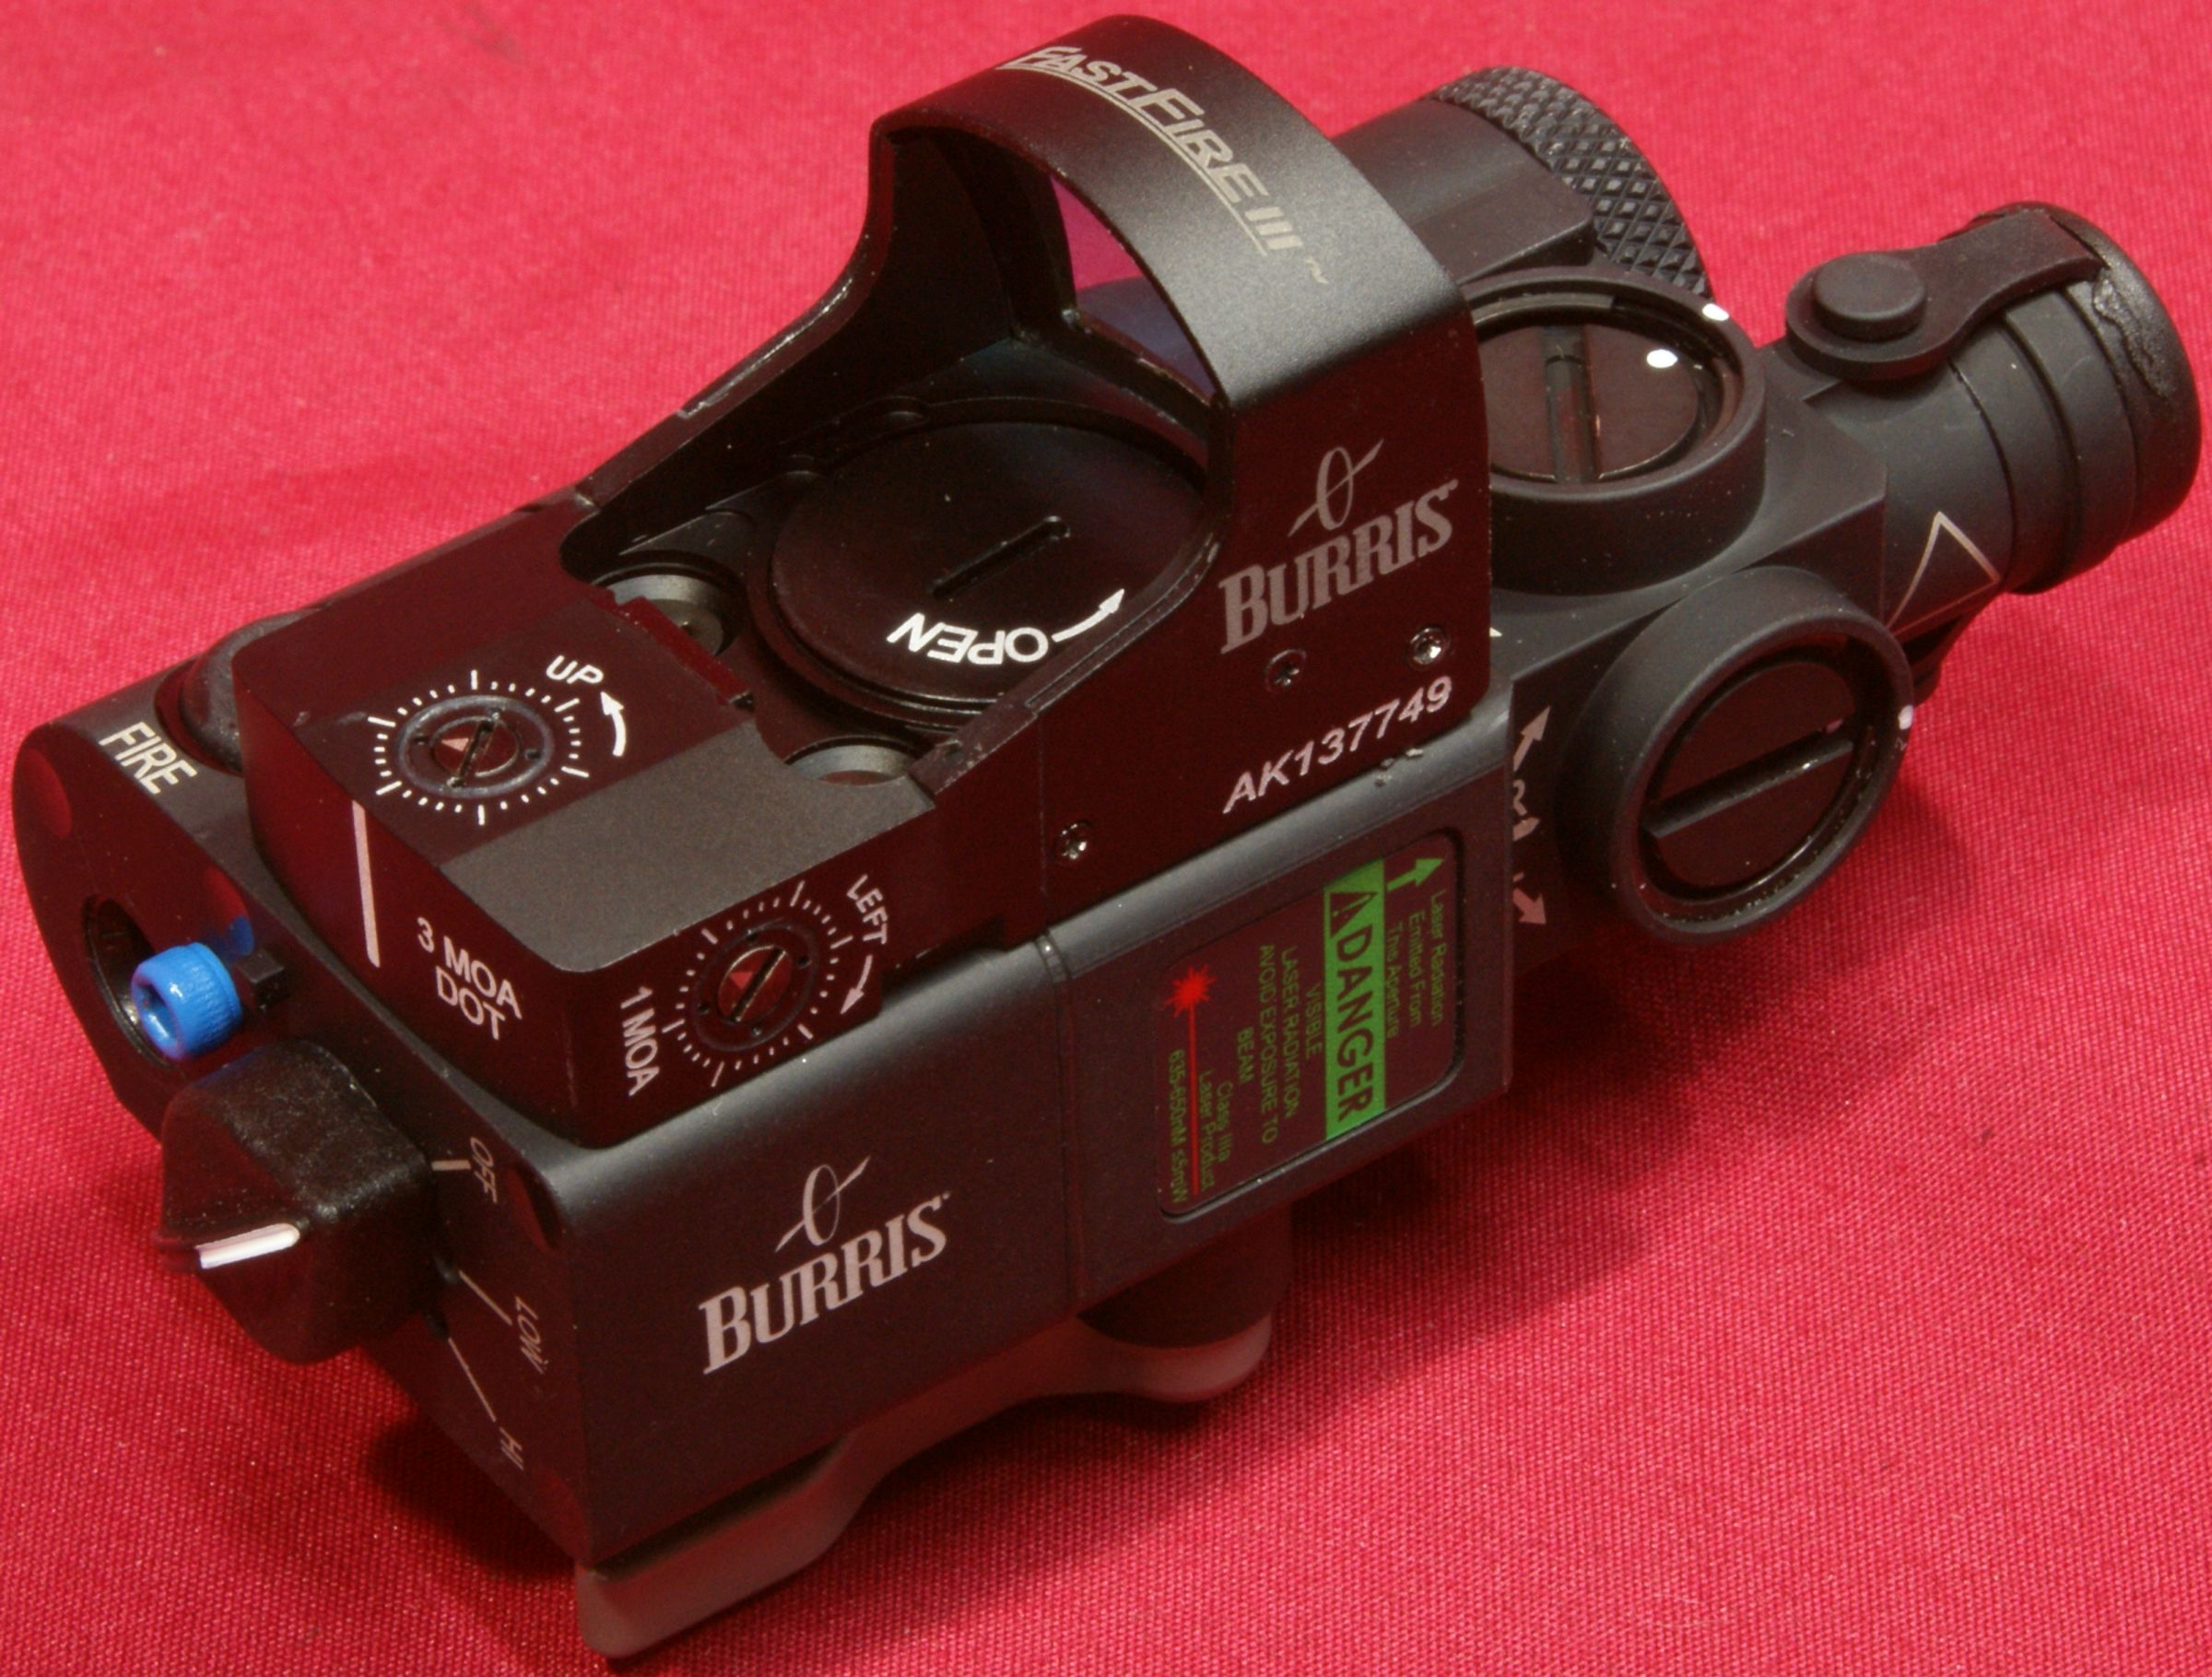
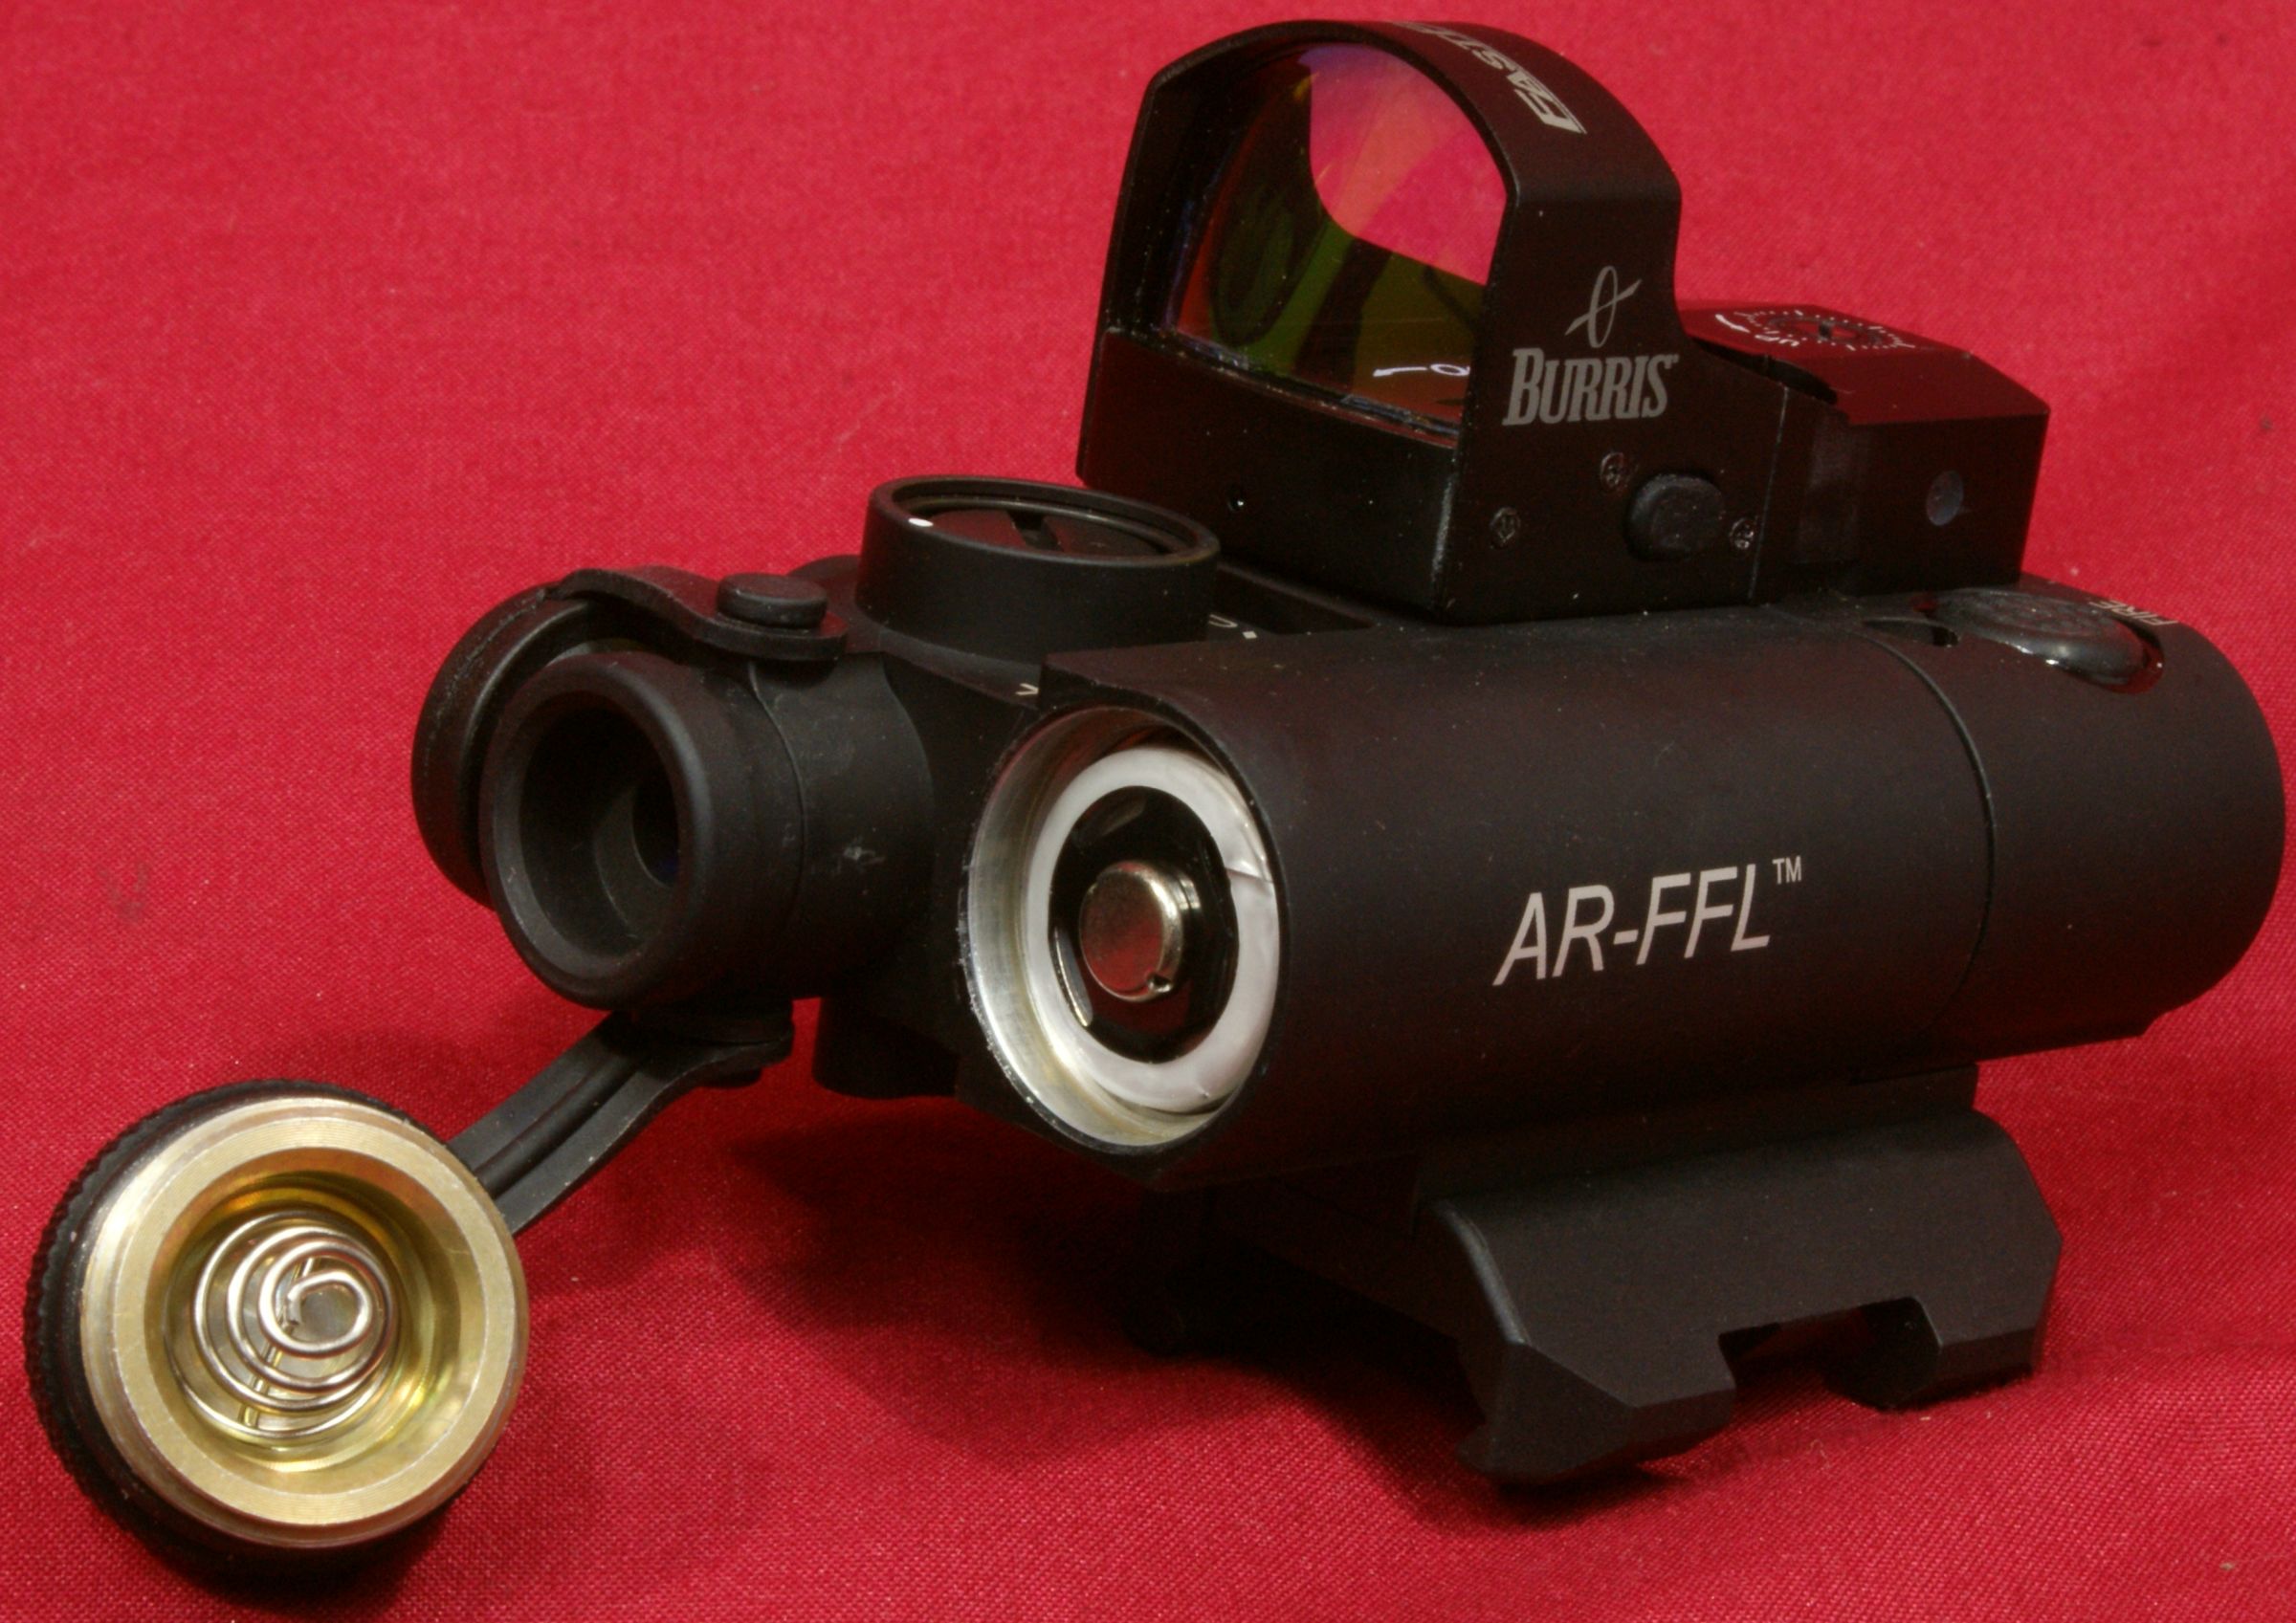
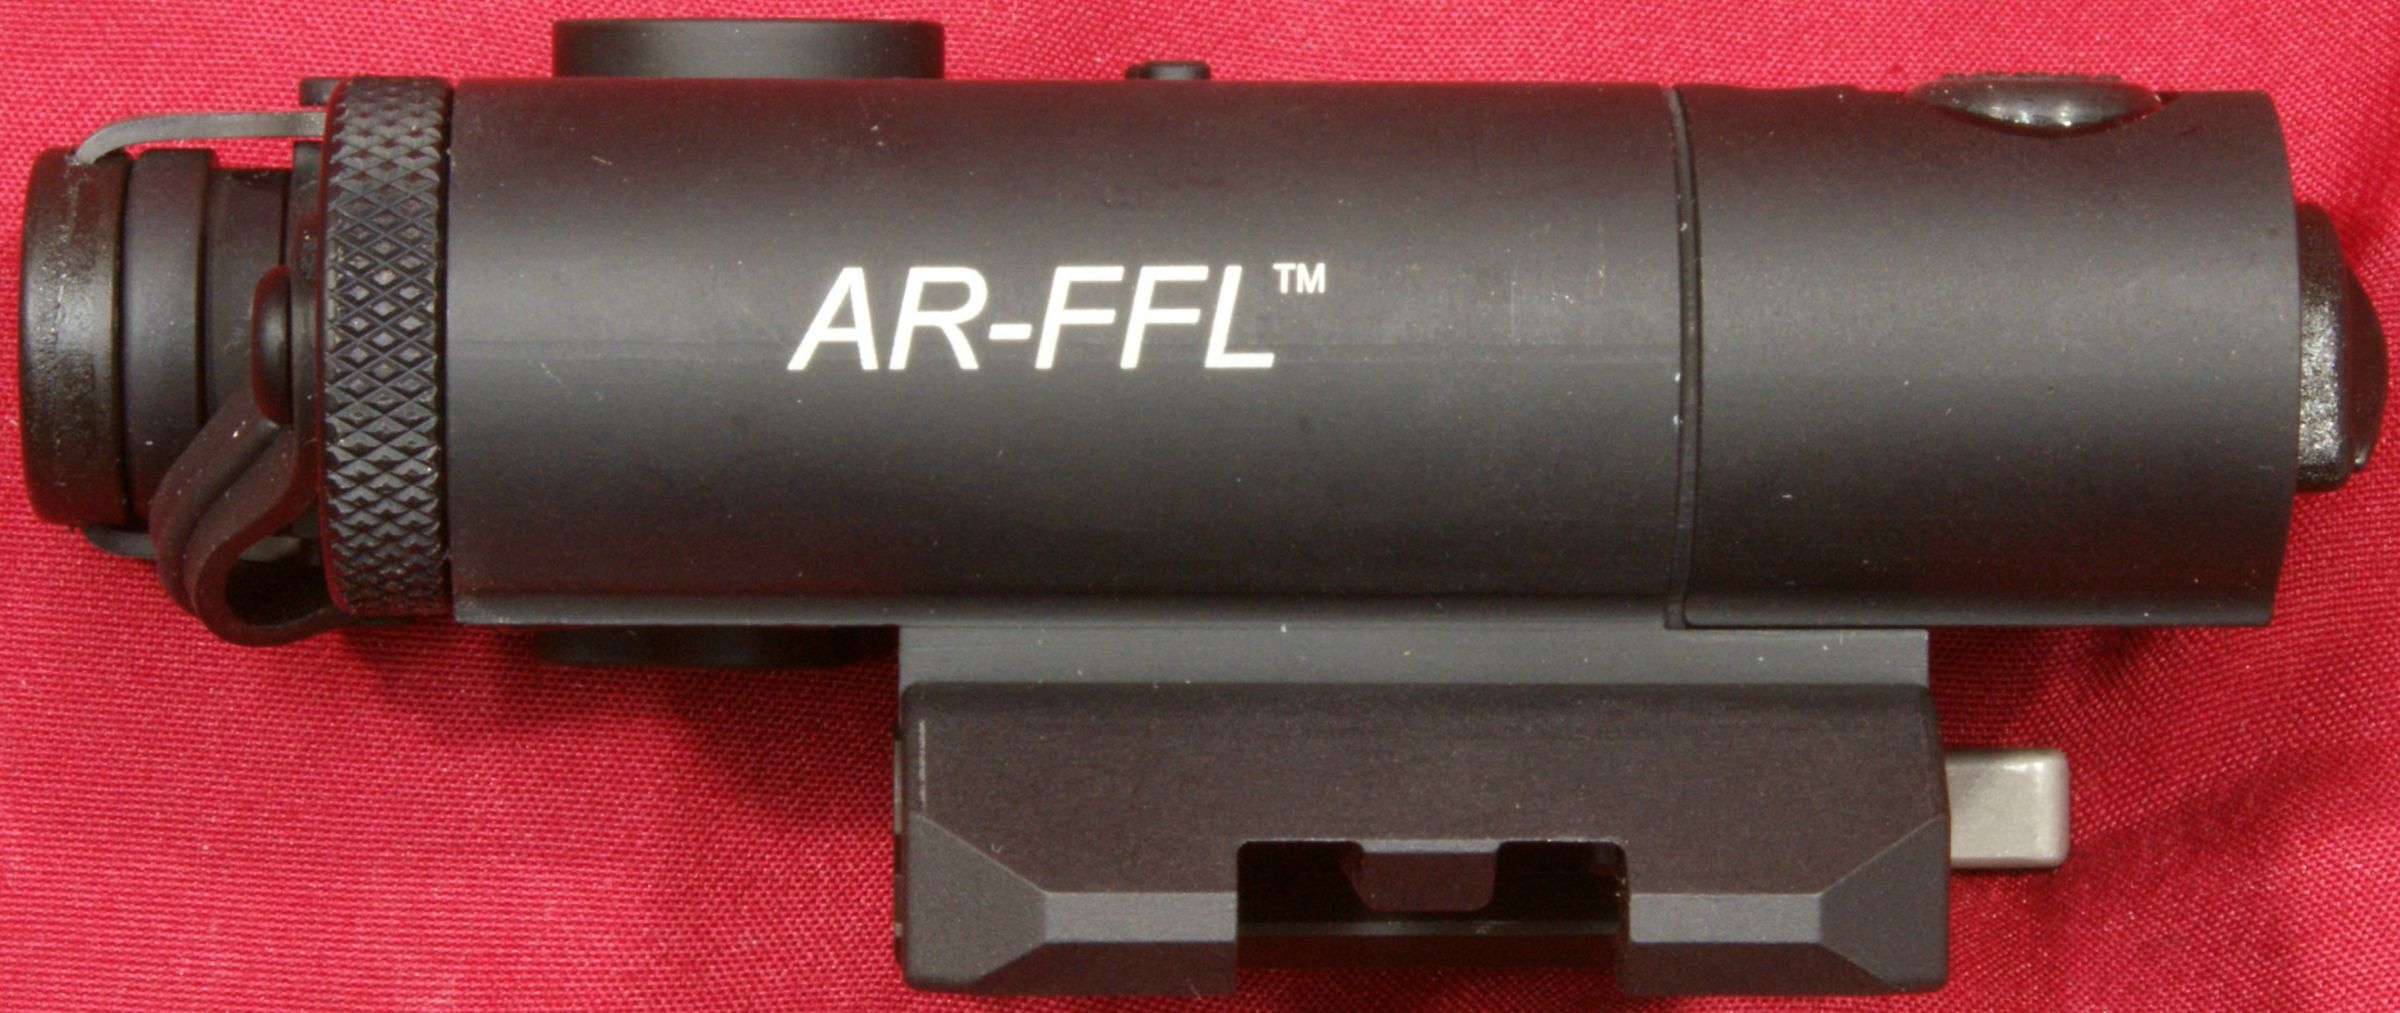
One of my first impressions of this AR-FFL FastFire III & laser combination was that it seems to be well built and solid. The total length of the unit measured 4.16" including the FastFire III hood and laser cap. The unit measured 3.72" in length with the hood and cap removed. The laser body is made from 6061-T6 aluminum alloy and comes Type III Hardcoat Anodized.
Figure 6
The laser and FastFire III weighed in at 7.5 ounces with batteries installed. If you include the weight of the hood and remote cable, the system combined weight is 8.45 ounces.
Figure 7
Figure 8
Figure 9
The unit measured 1.89" in total width when you include the rail mount and 1.73" just across the body of the laser. The centerline of the laser and FastFire III measures to be offset ~0.75" from the center of the rail.
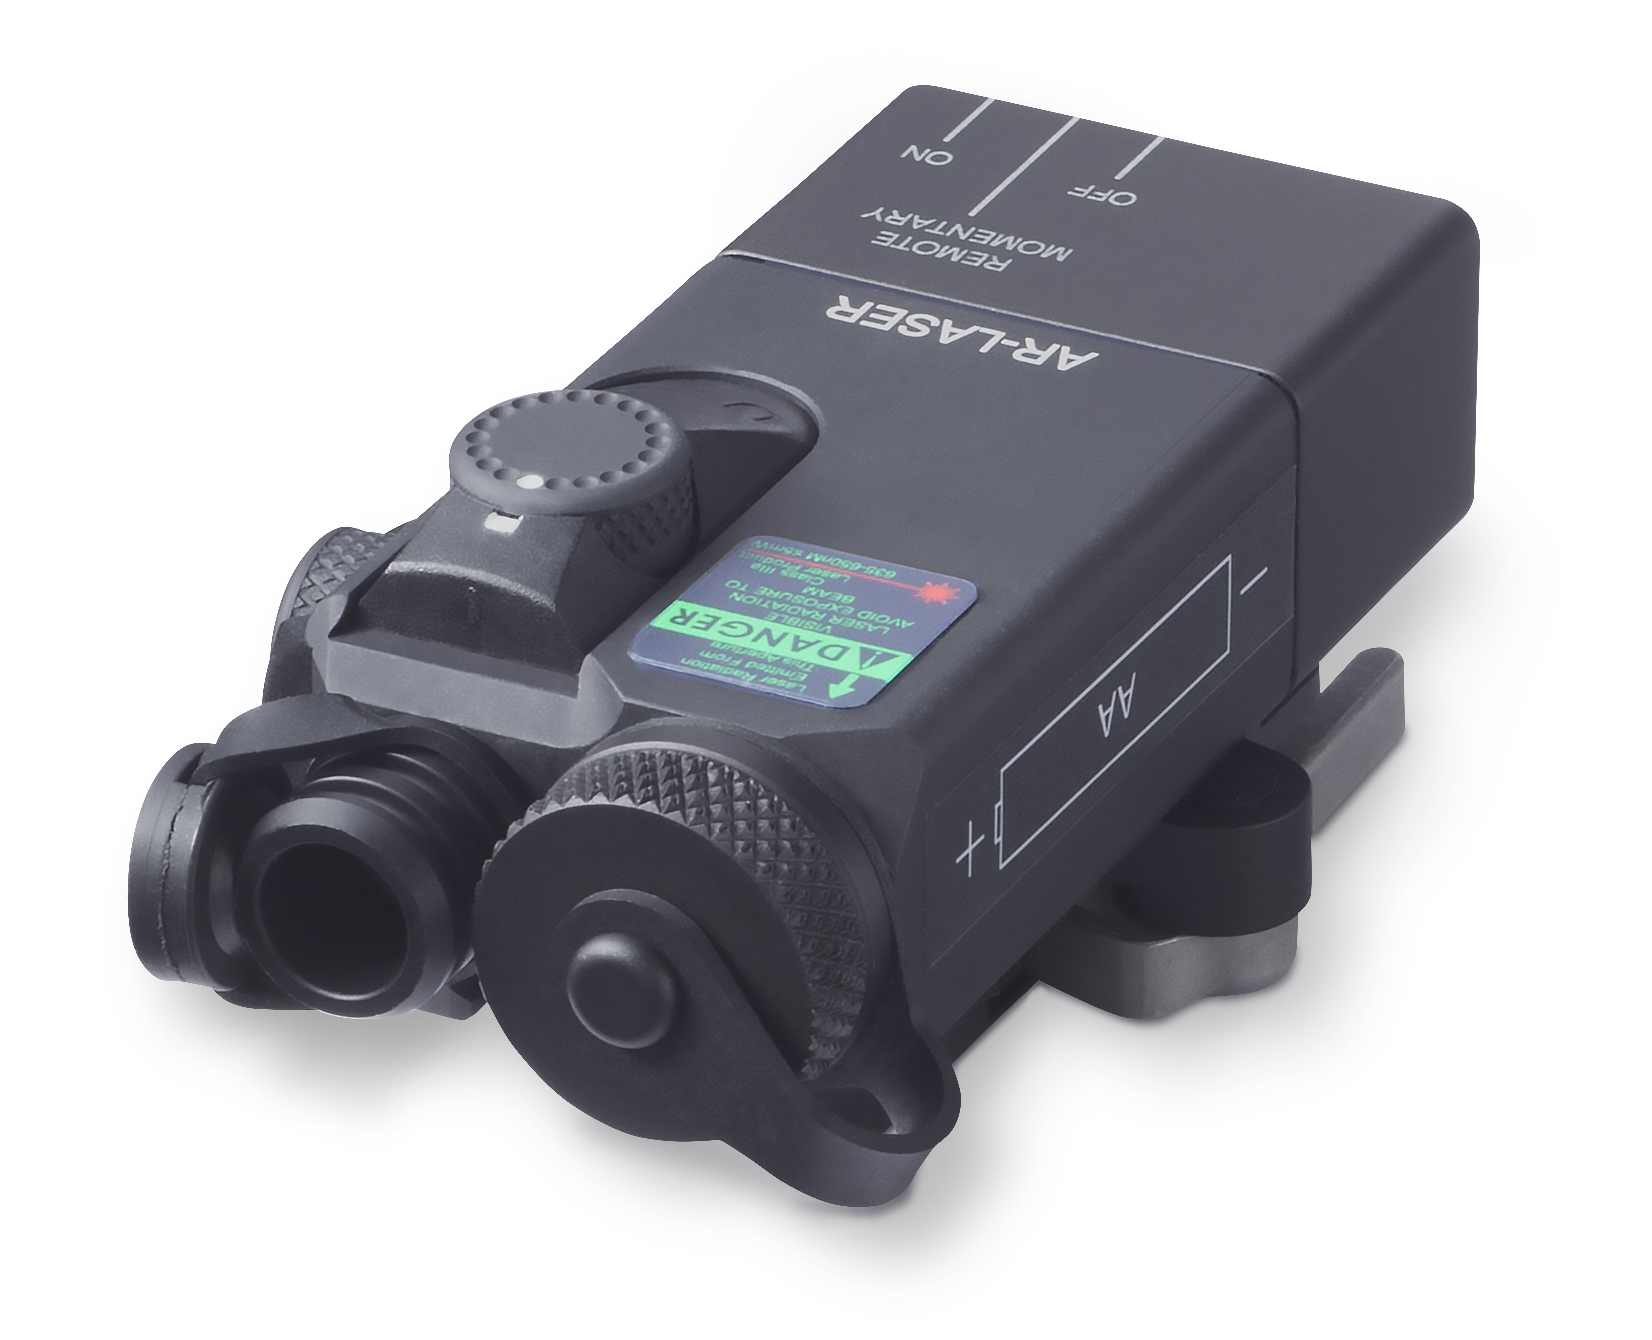
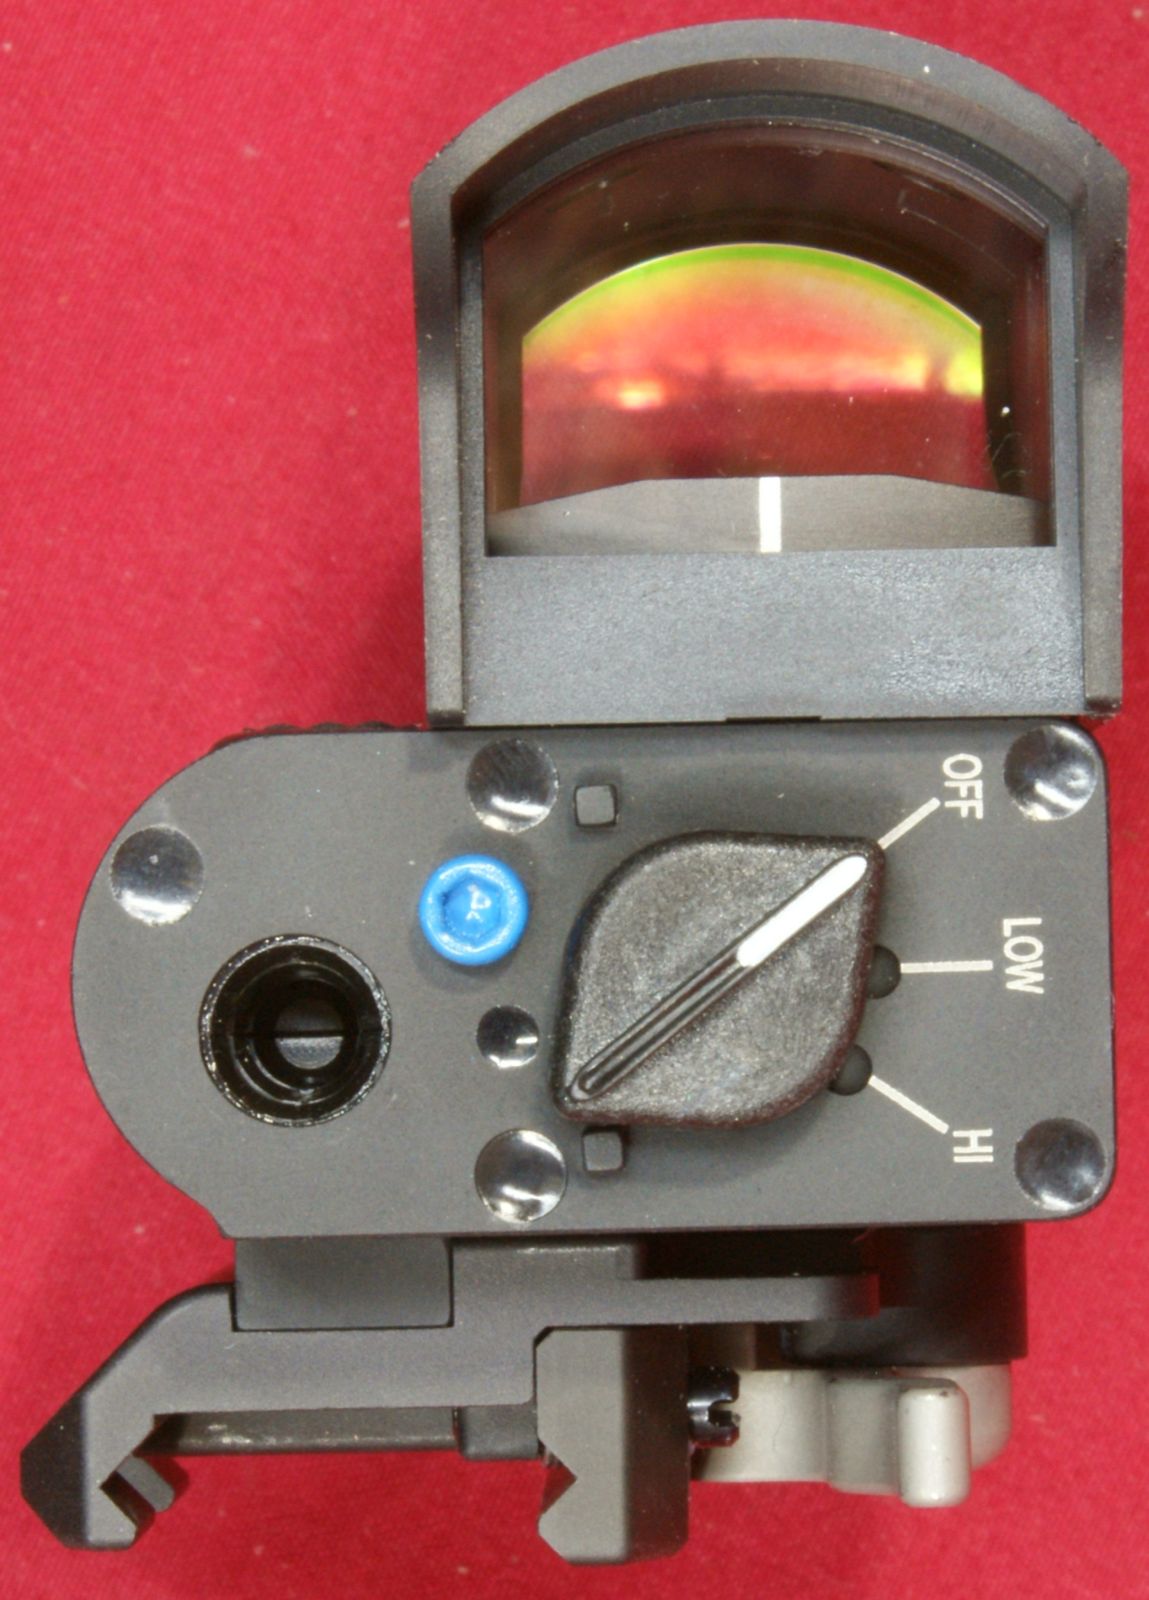
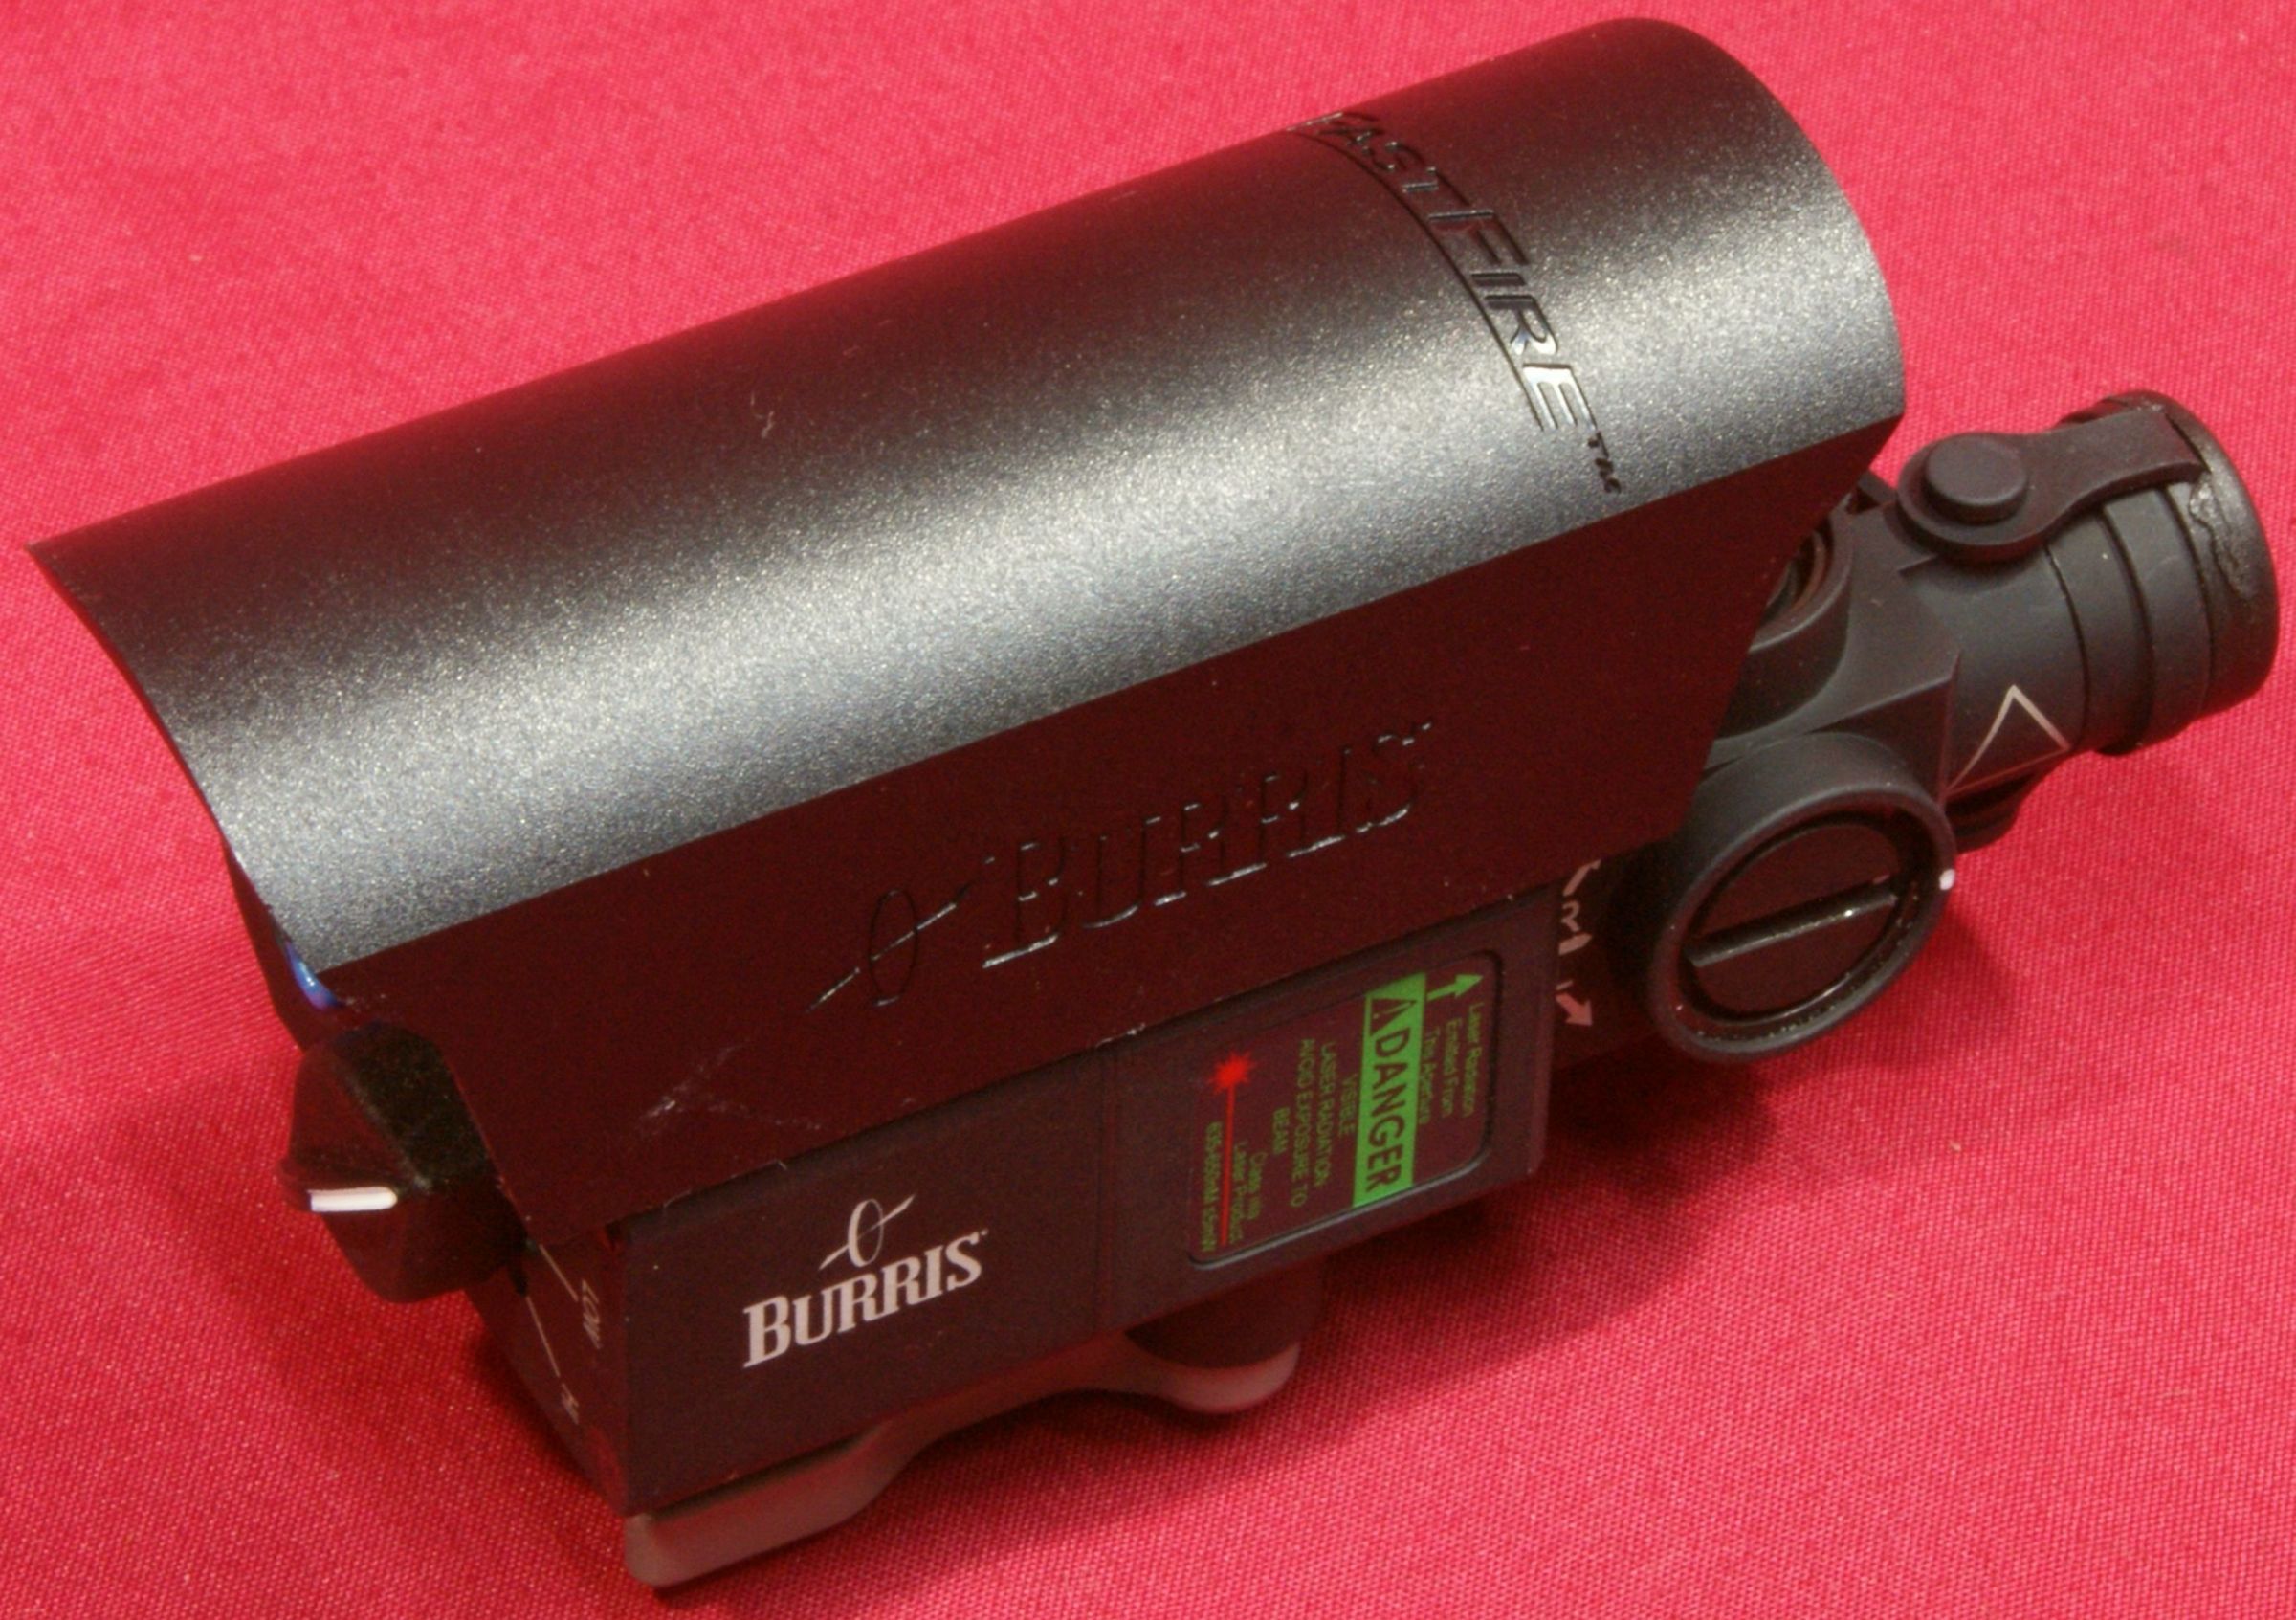
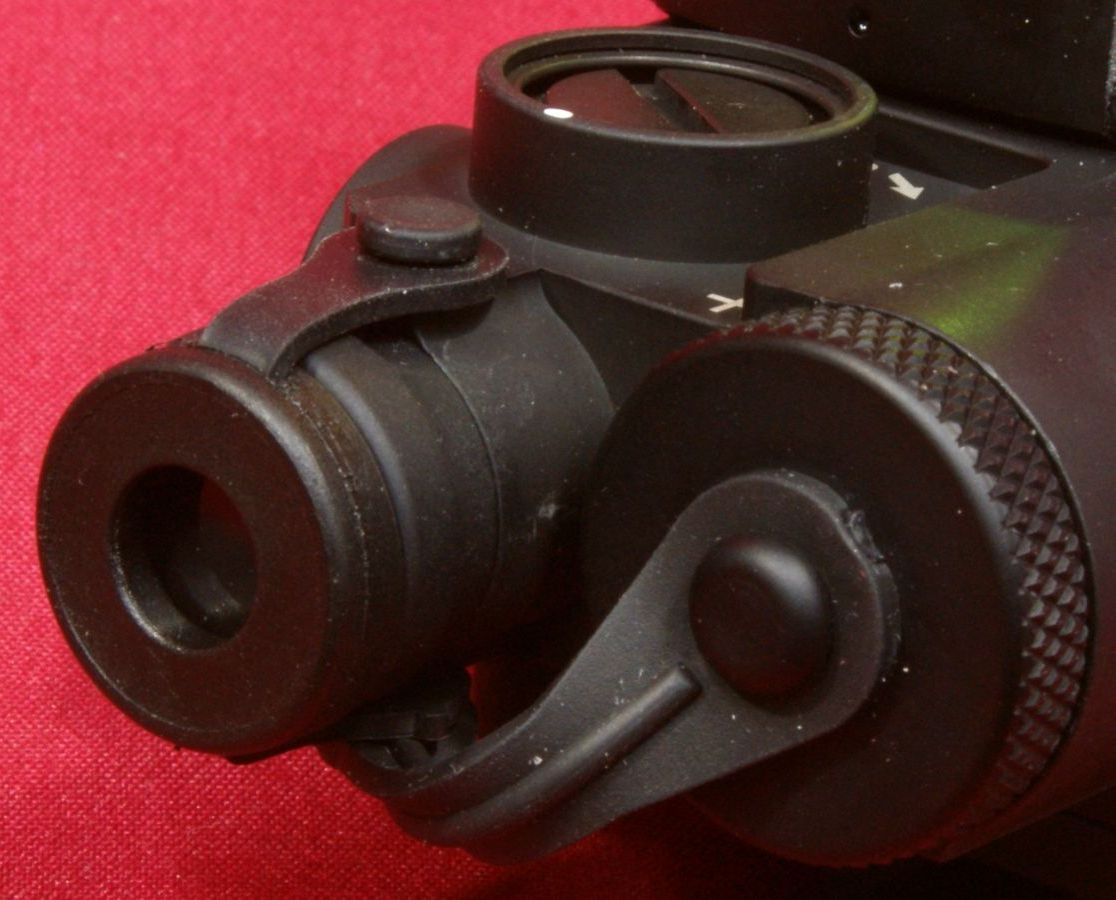
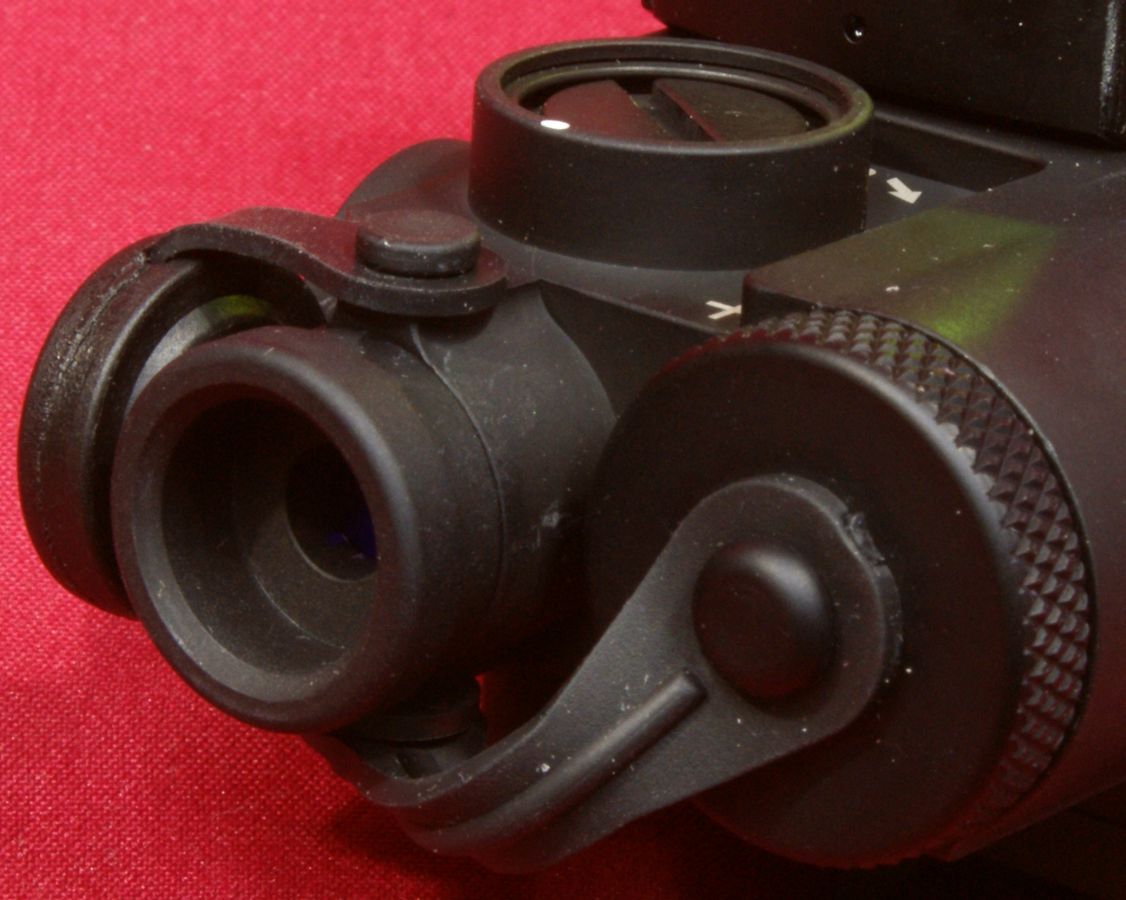
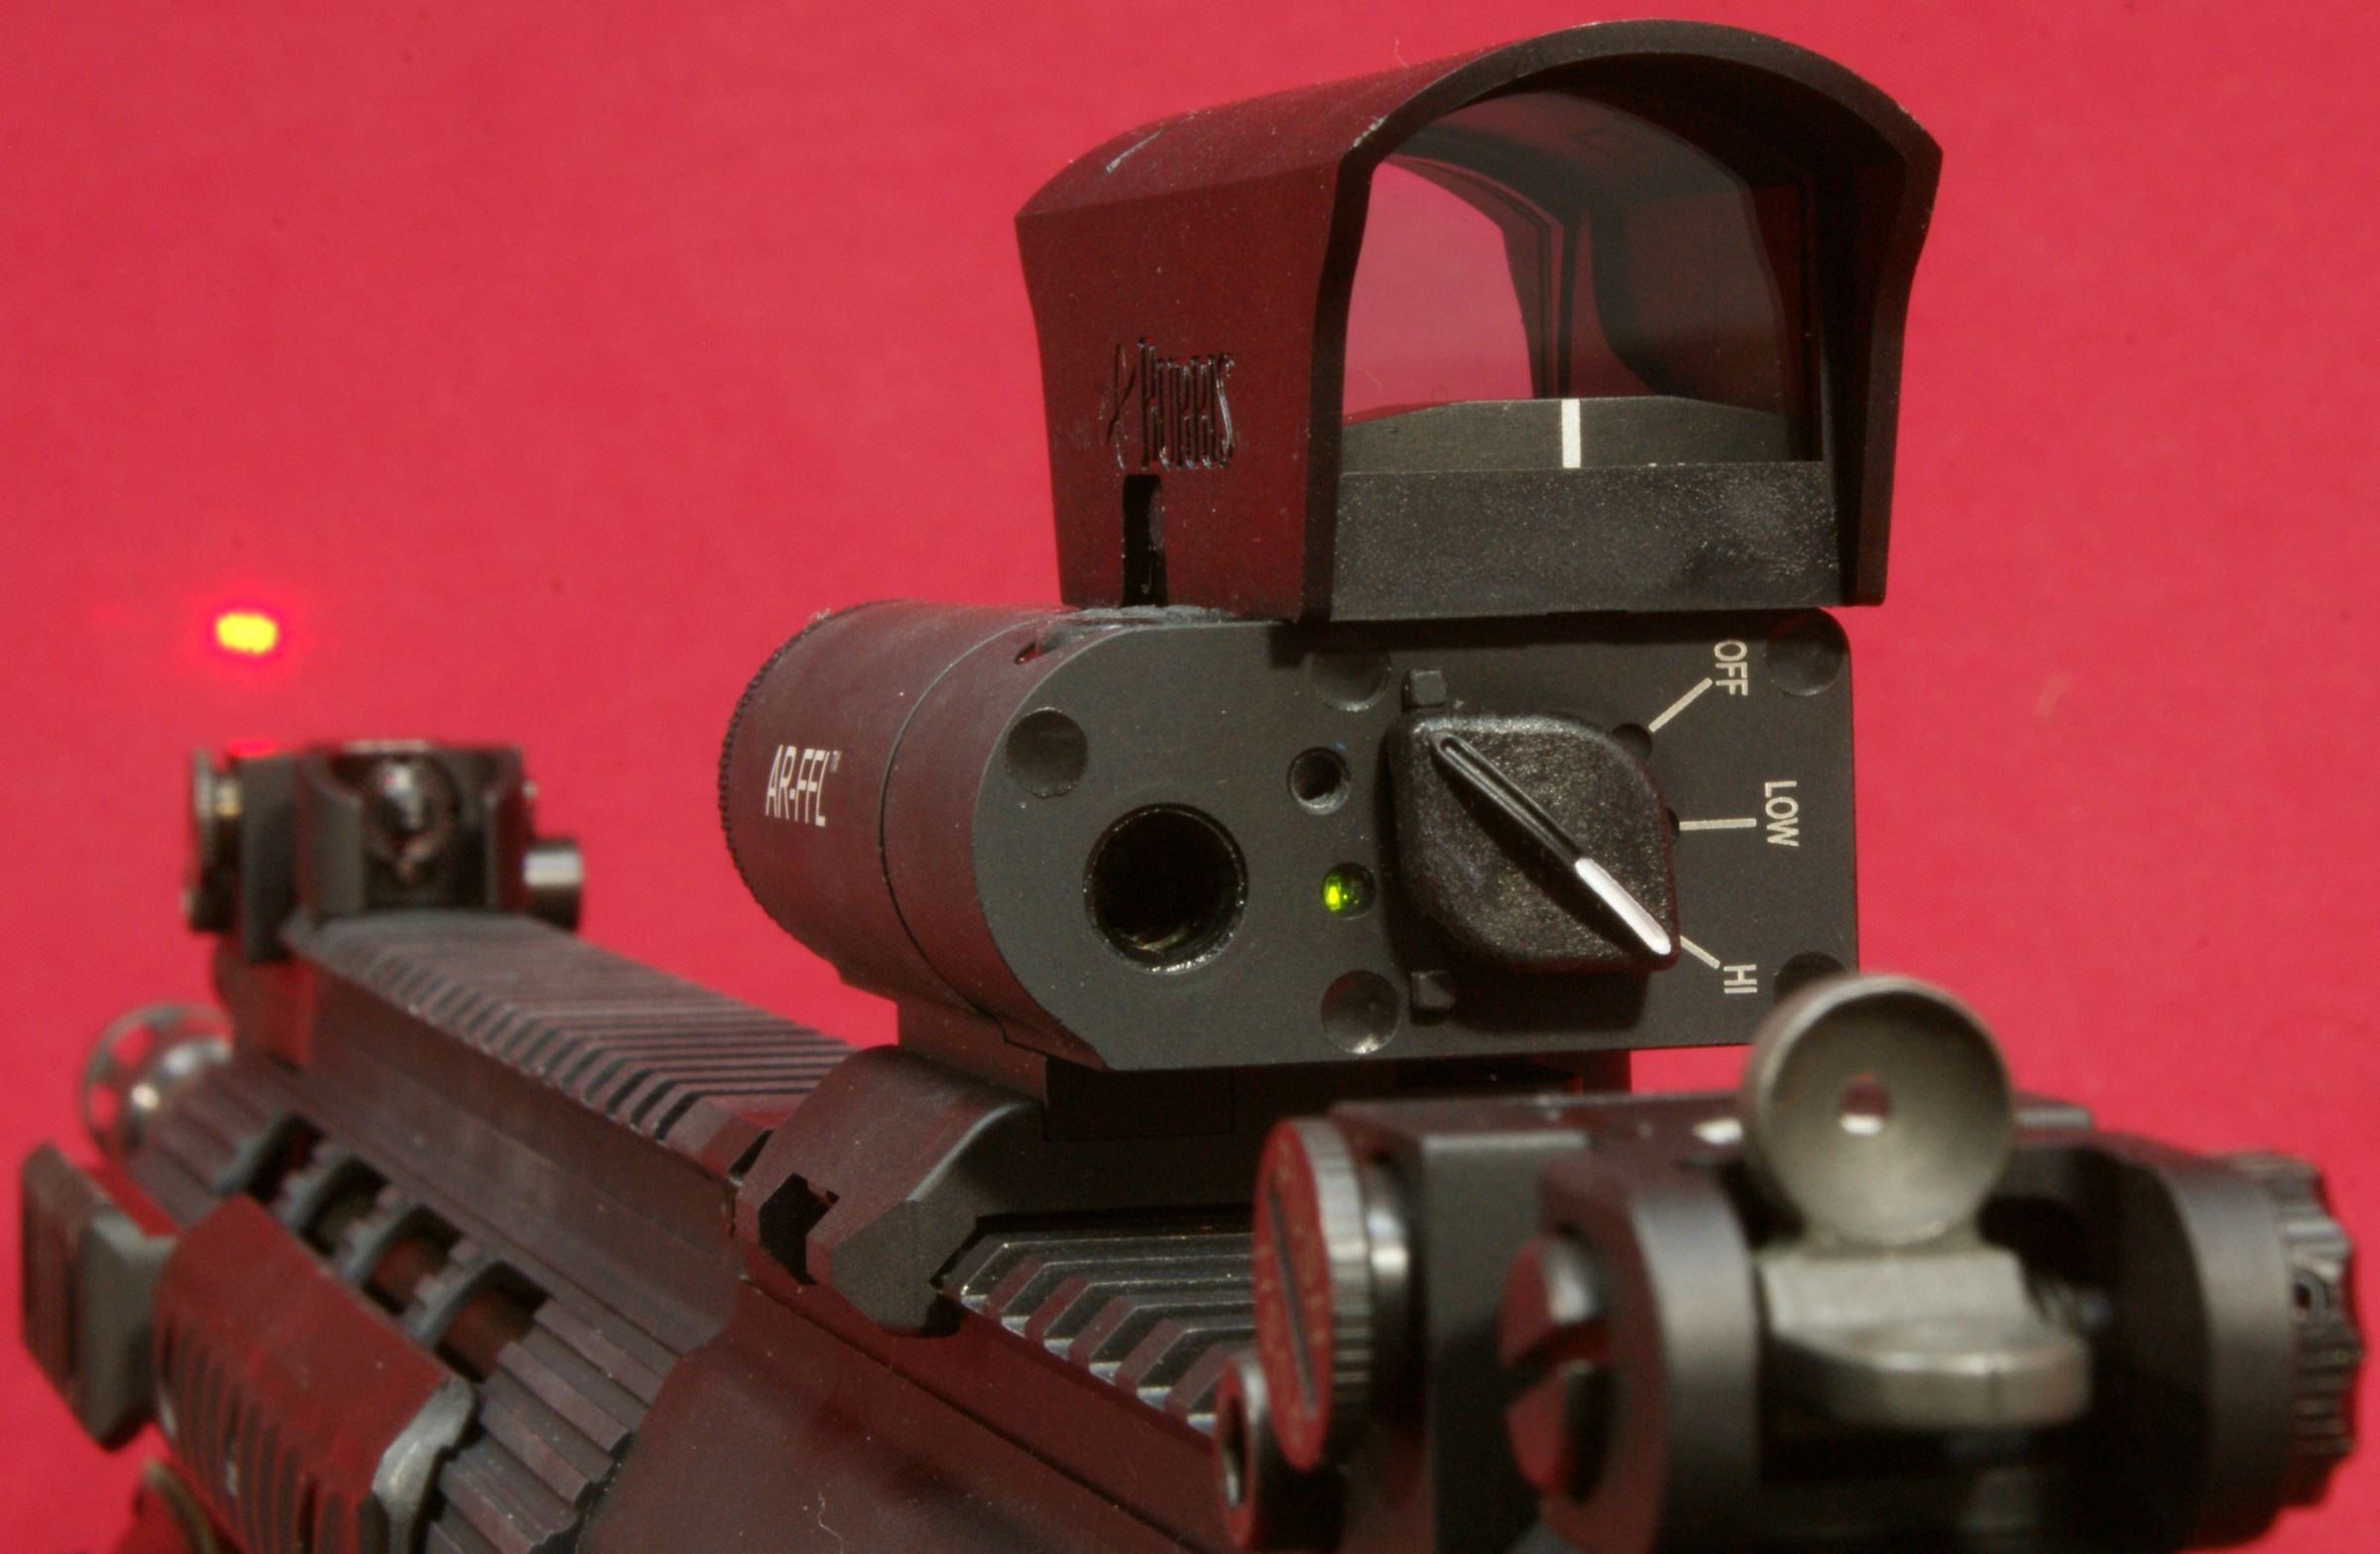
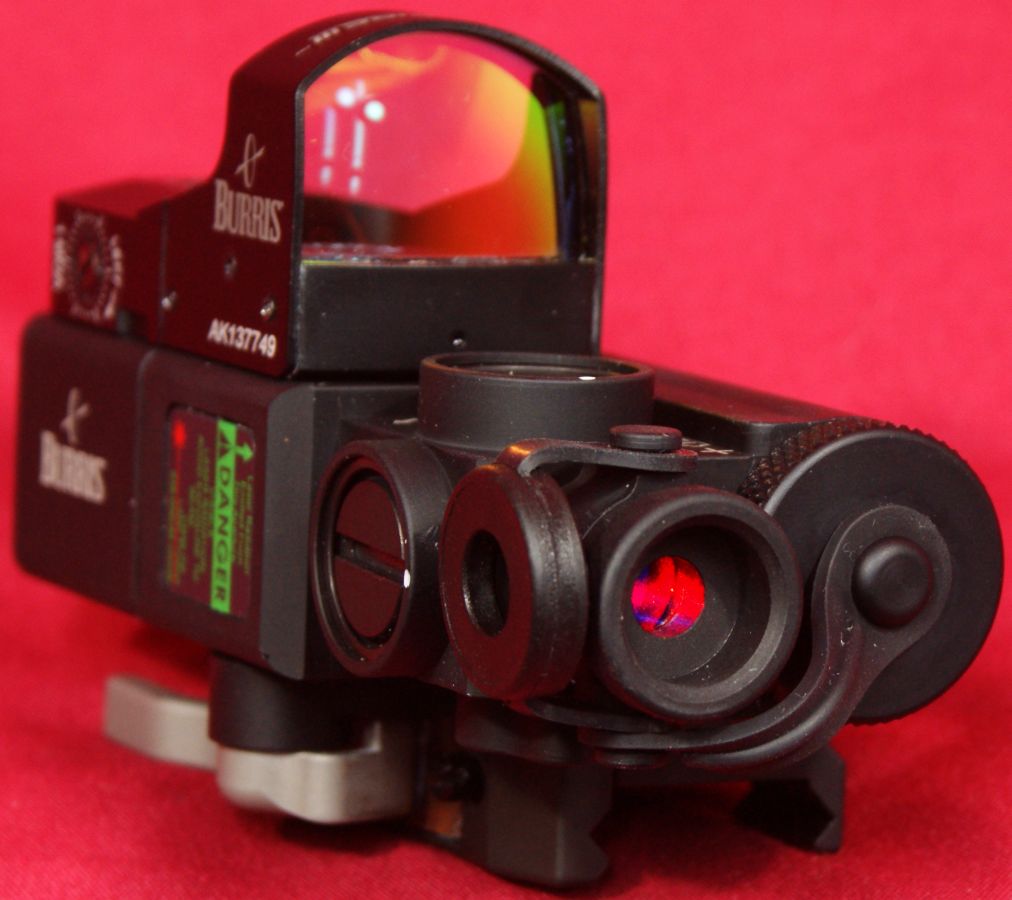
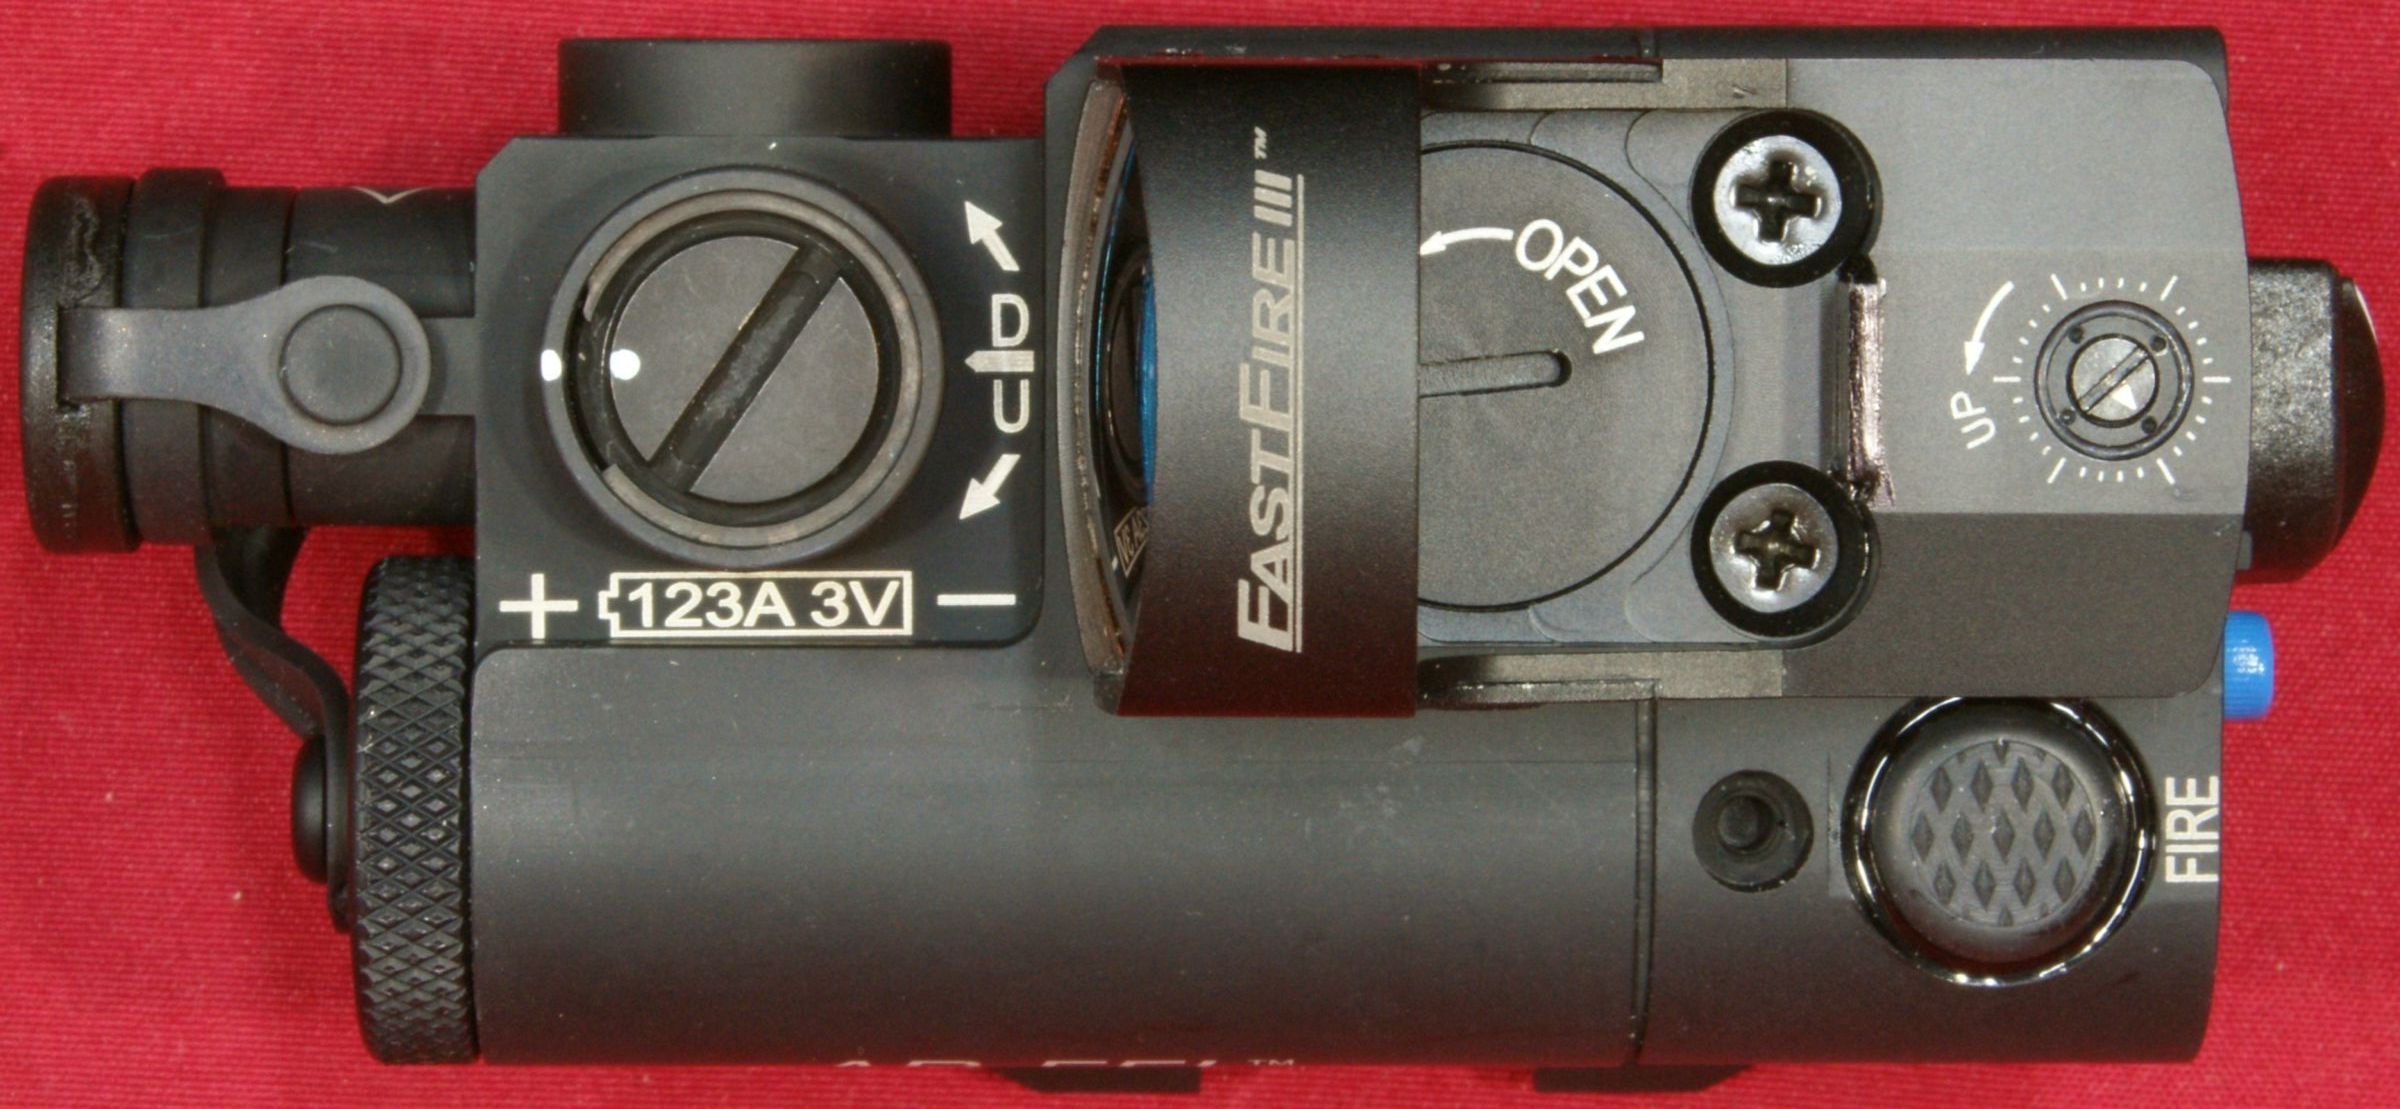
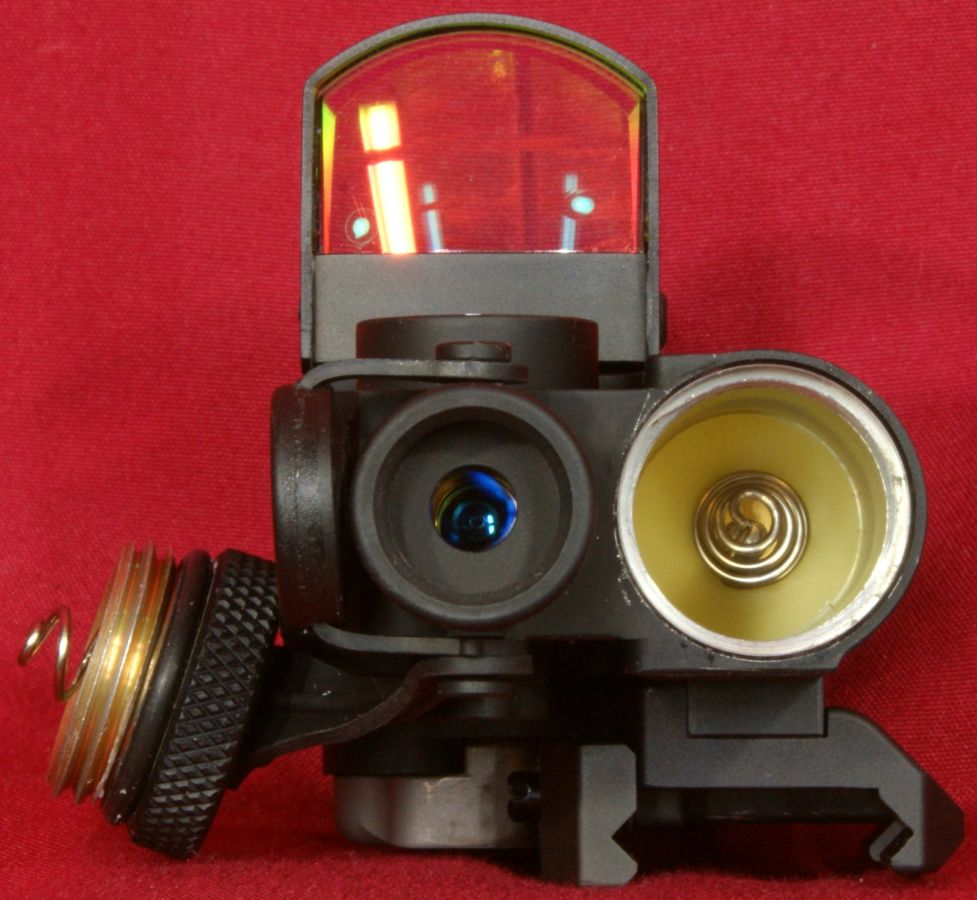
The laser Activation Mode Selector Switch (AMSS) has three positions; OFF, LOW and HI. In the "LOW" position, the laser is activated in low power when the remote cable switch or integrated momentary activation (FIRE) switch is depressed. The photo below shows a blue screw in place that acts as a safety to prevent the AMSS from switching to the "HI" position. This screw must be removed to operate on "HI". The laser power is specified to be <1mW on the "LOW" setting and <5mW on the "HI" setting. Below the blue screw is a green LED indicator light. This light will be on whenever the laser is in operation (actually projecting a beam). When the LED blinks, this indicates an extremely low battery condition and the laser will continue to operate for only approximately 20 minutes, so the battery needs to be changed immediately. The hole in the rear of the laser body located on the left side is for the remote operation switch.
The front of the laser has an Exit Port Cover (lens cap) which protects the laser lens and blocks the emission of laser energy from being emitted from an operating unit.
Figure 10 - Rear
Figure 11 - Front
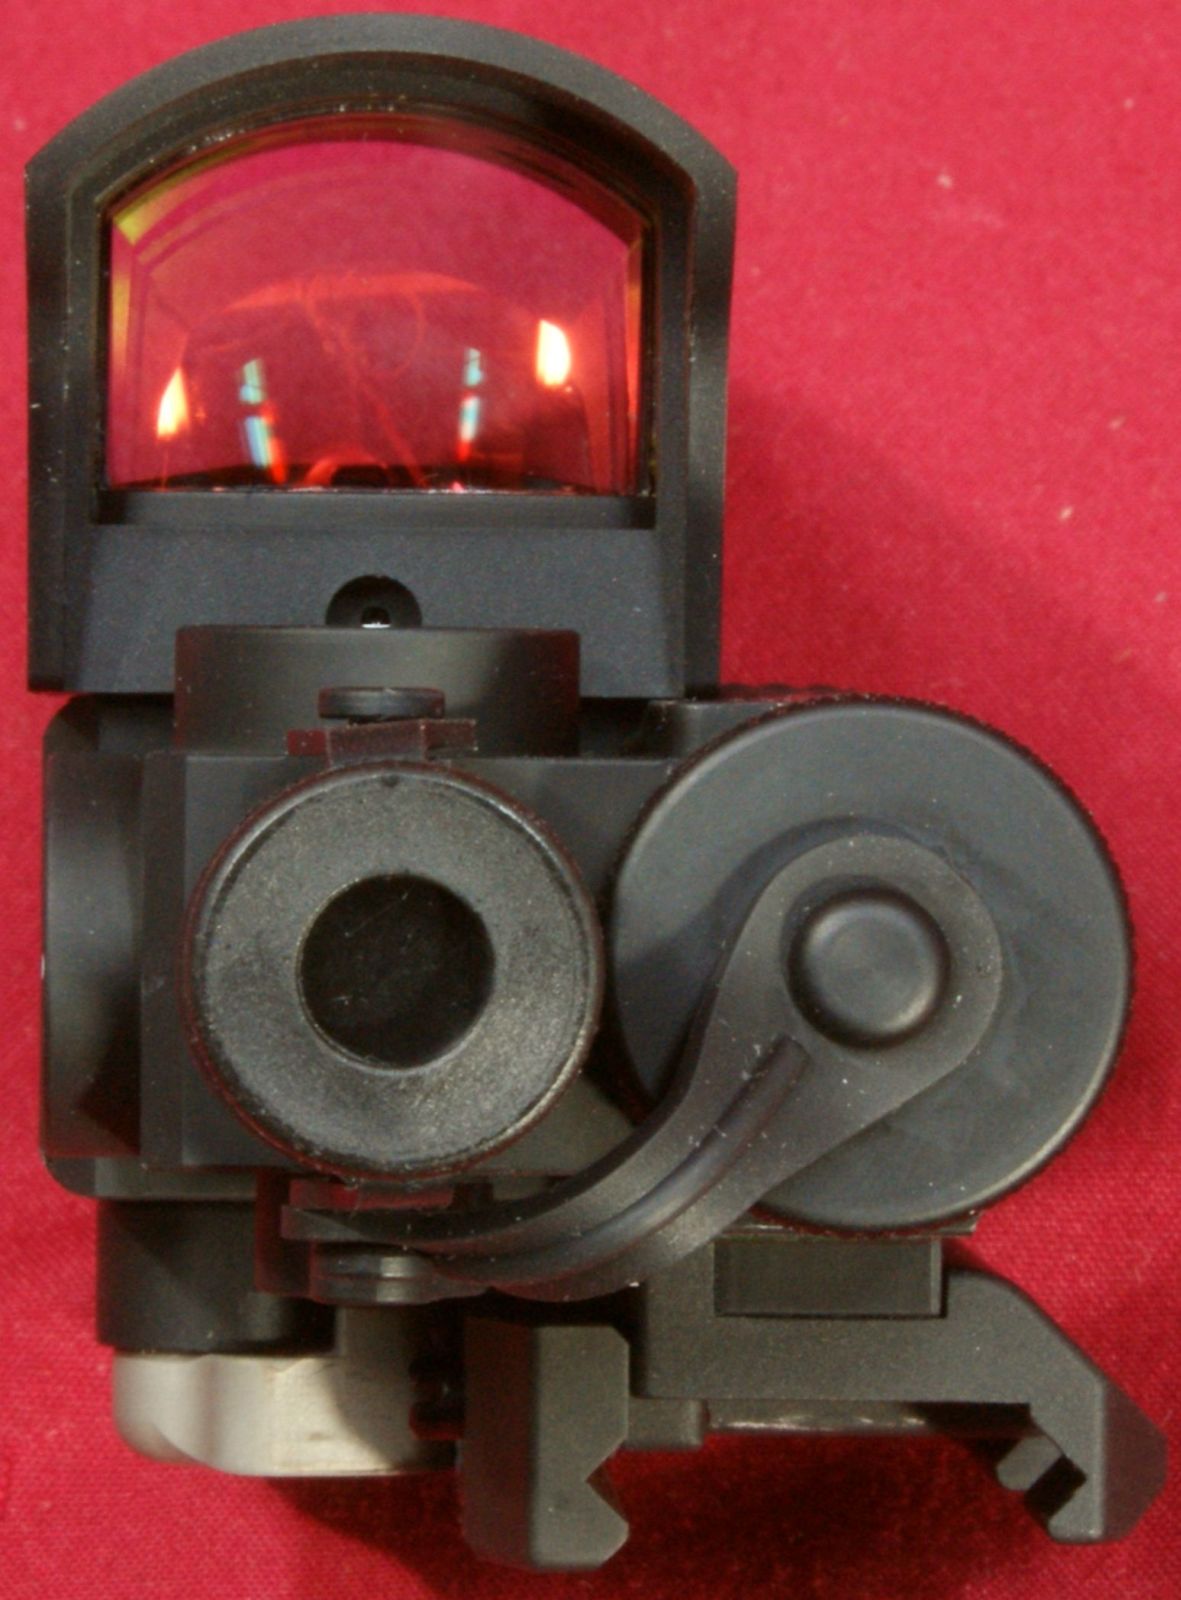
The push button switch shown on the laser body near the word "FIRE" is the Integrated Momentary Activation Switch (IMAS). Pressing this switch activates the lasers two operating states; momentary and continuous. Pressing this switch turns the laser momentarily on as long as the switch is depressed. Pressing this switch twice in rapid succession will activate the laser in a continuous mode for 5 minutes. Pressing the switch again during the 5 minutes will return the switch to momentary operation. Note that the Activation Mode Selector Switch (AMSS) must be in either the LOW or HI position for the laser to operate.
Figure 12
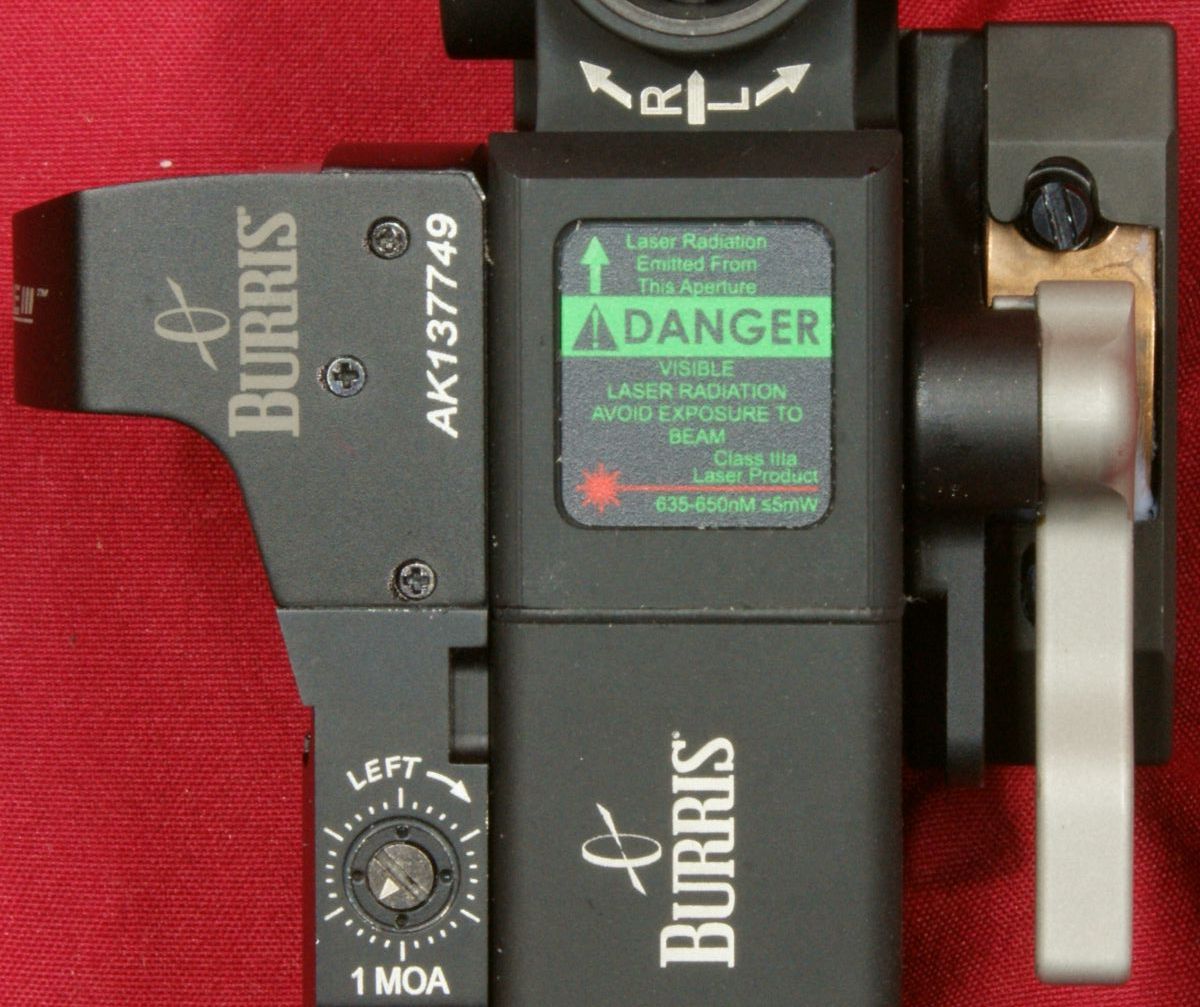
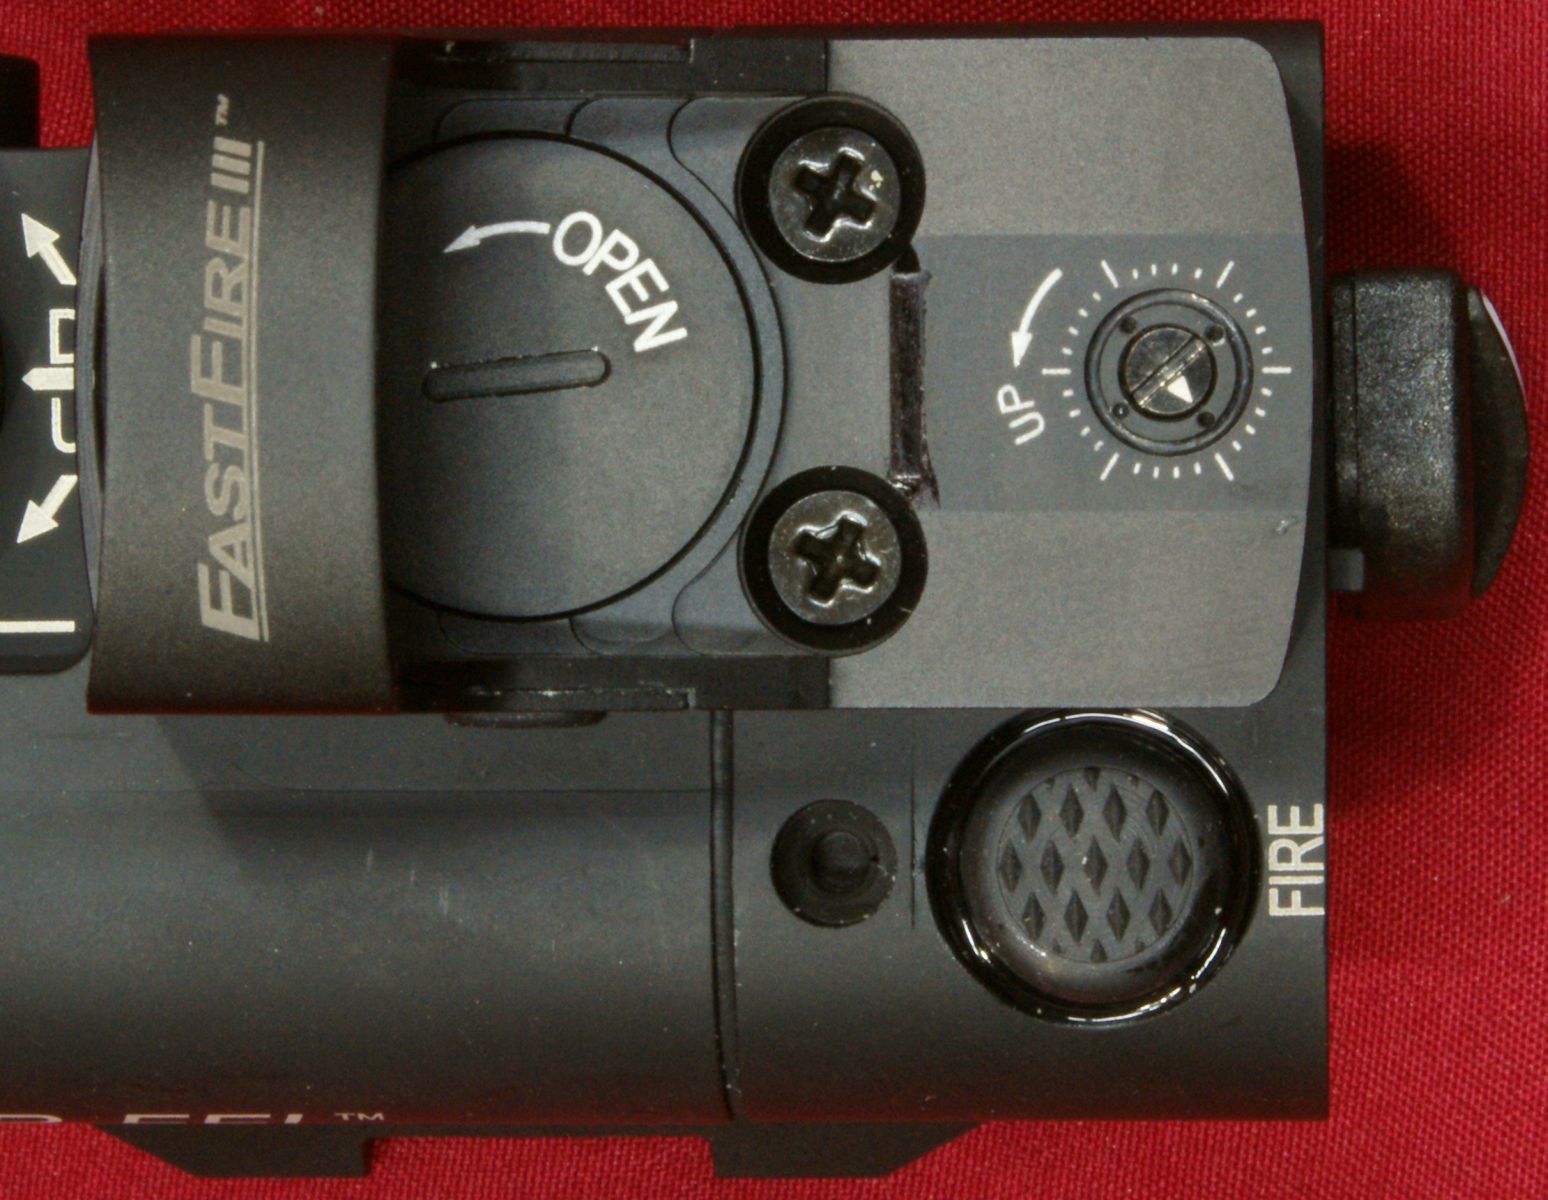
The laser includes elevation and windage (azimuth) adjusters. The adjusters come preset in a neutral position which is marked on the laser body by a white dot. Each adjuster is marked with the direction to turn (U/D or L/R) along with an arrow which indicates the direction to turn to move a shot group in that direction. Each adjuster click will move the beam approximately 1 cm (0.39") at 25 yards. The adjusters rotated easily and have distinct audible clicks.
Figure 13

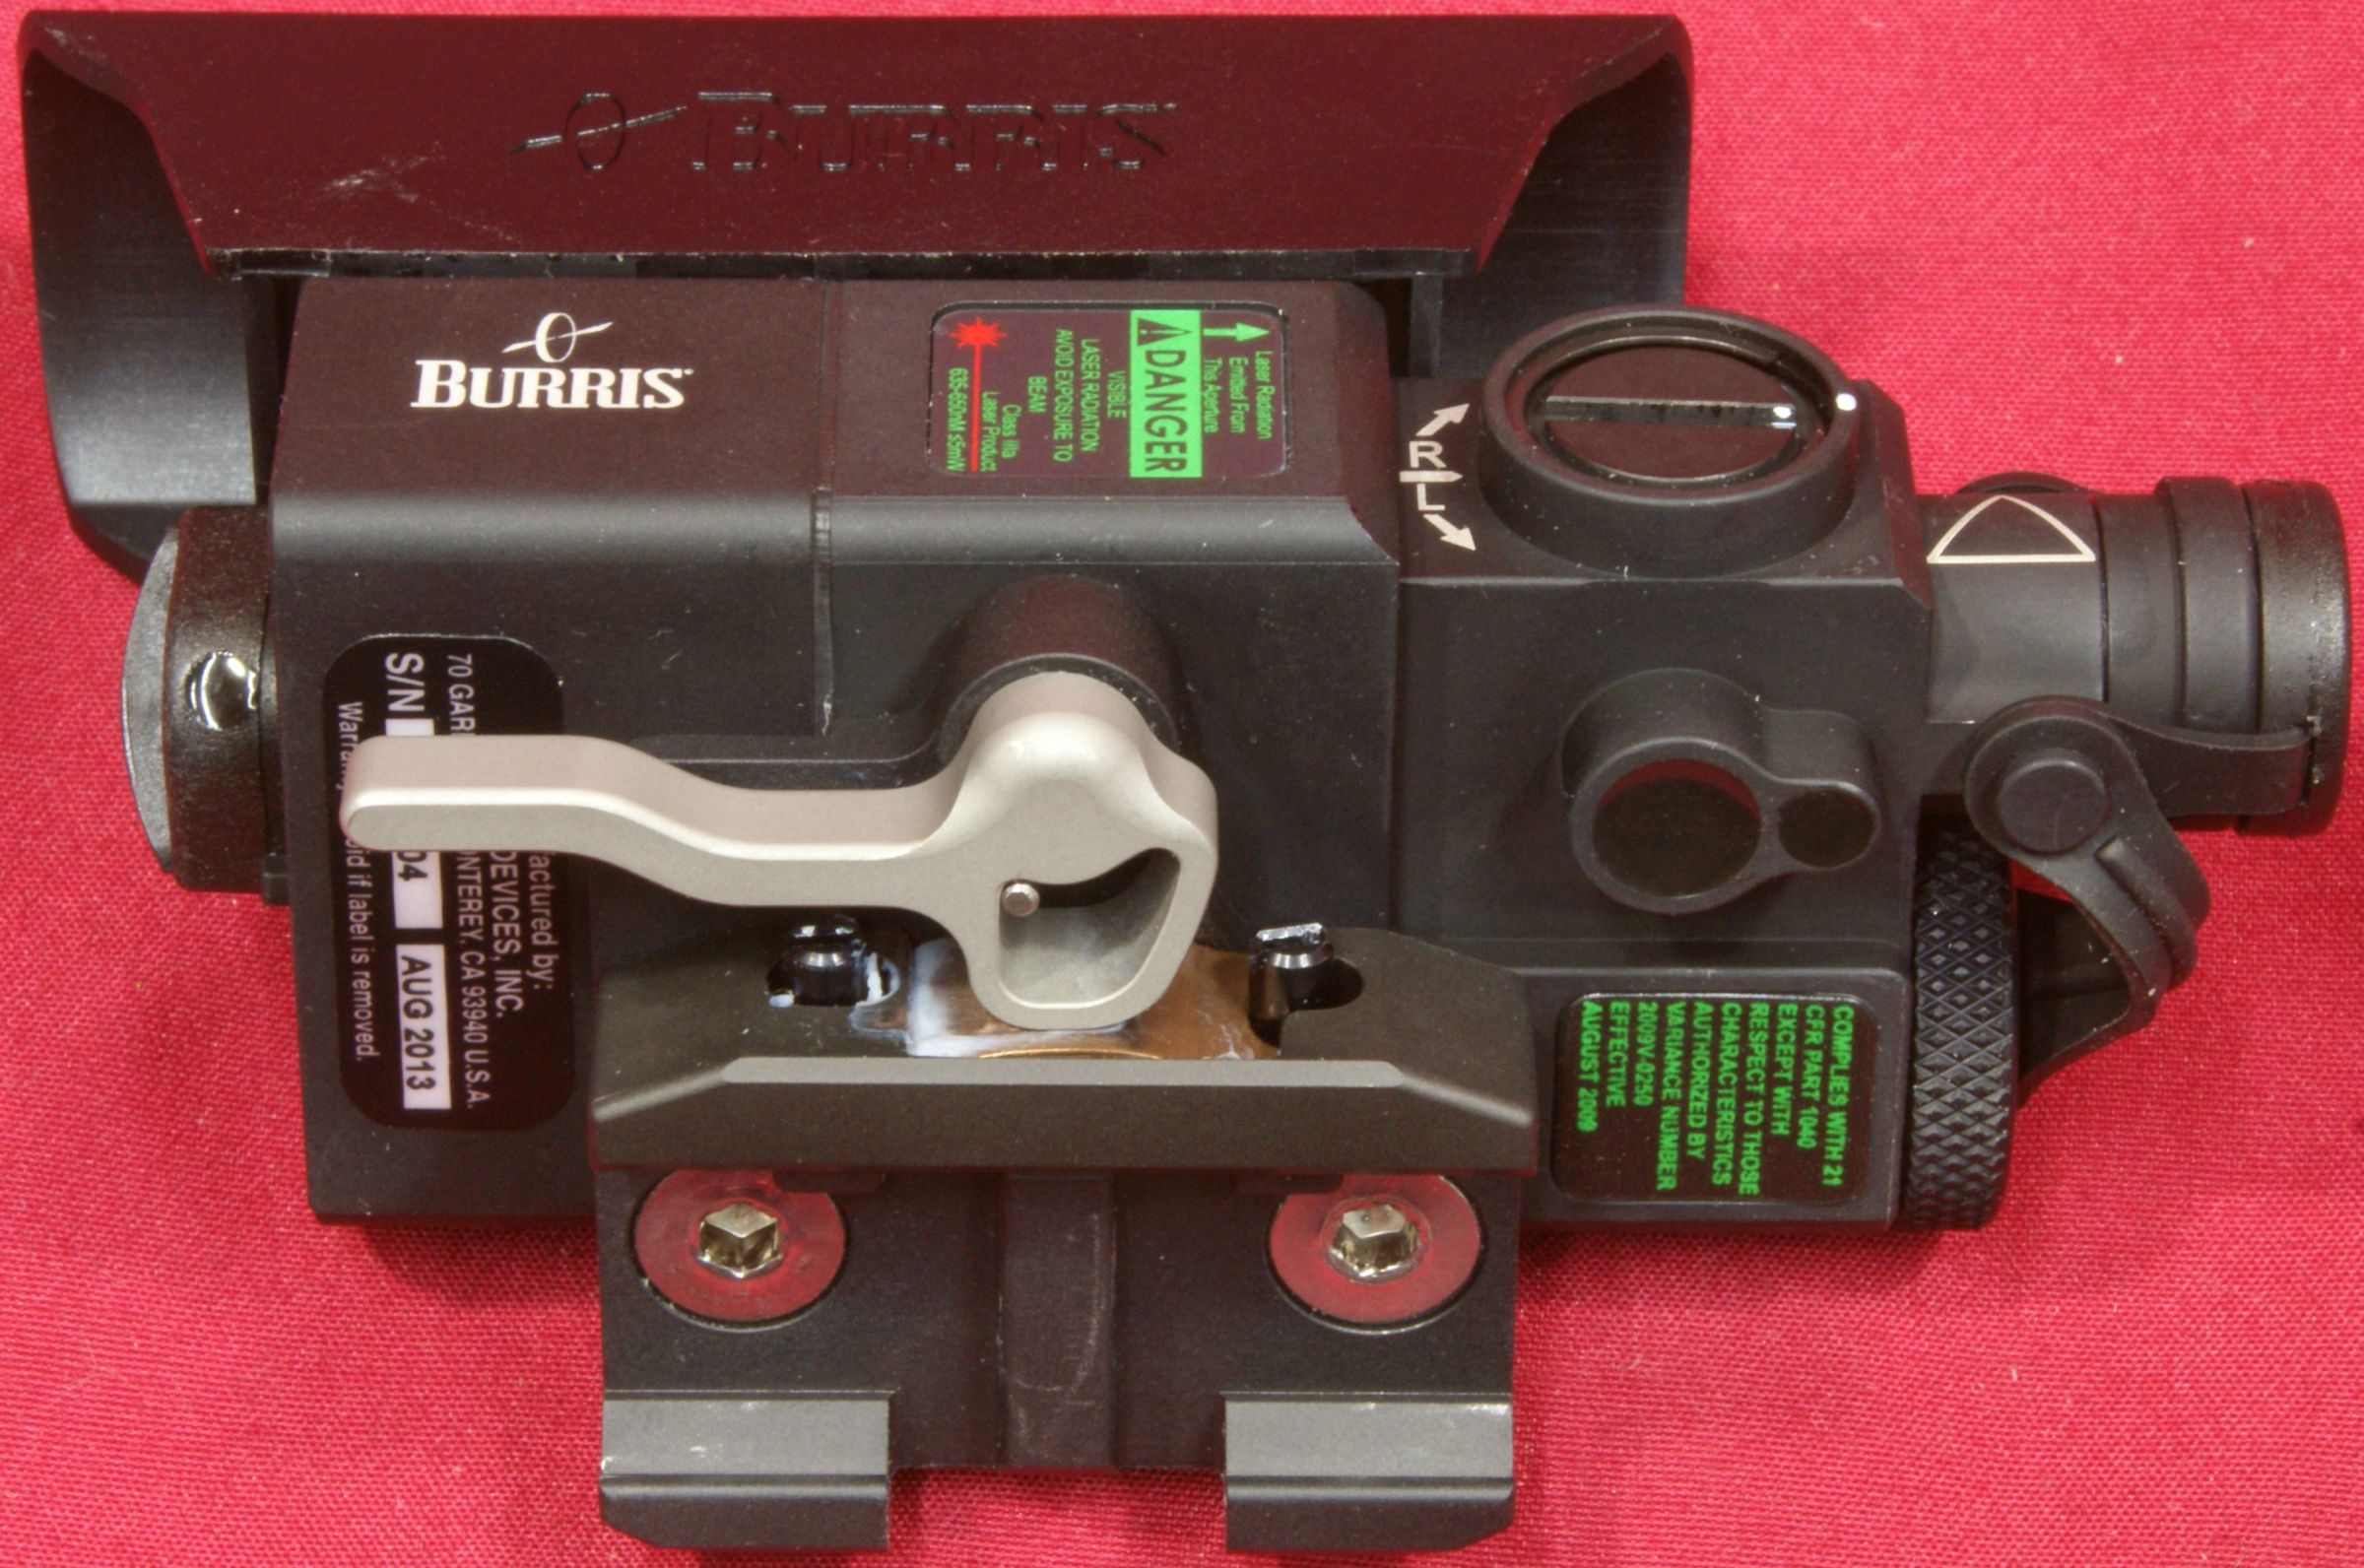
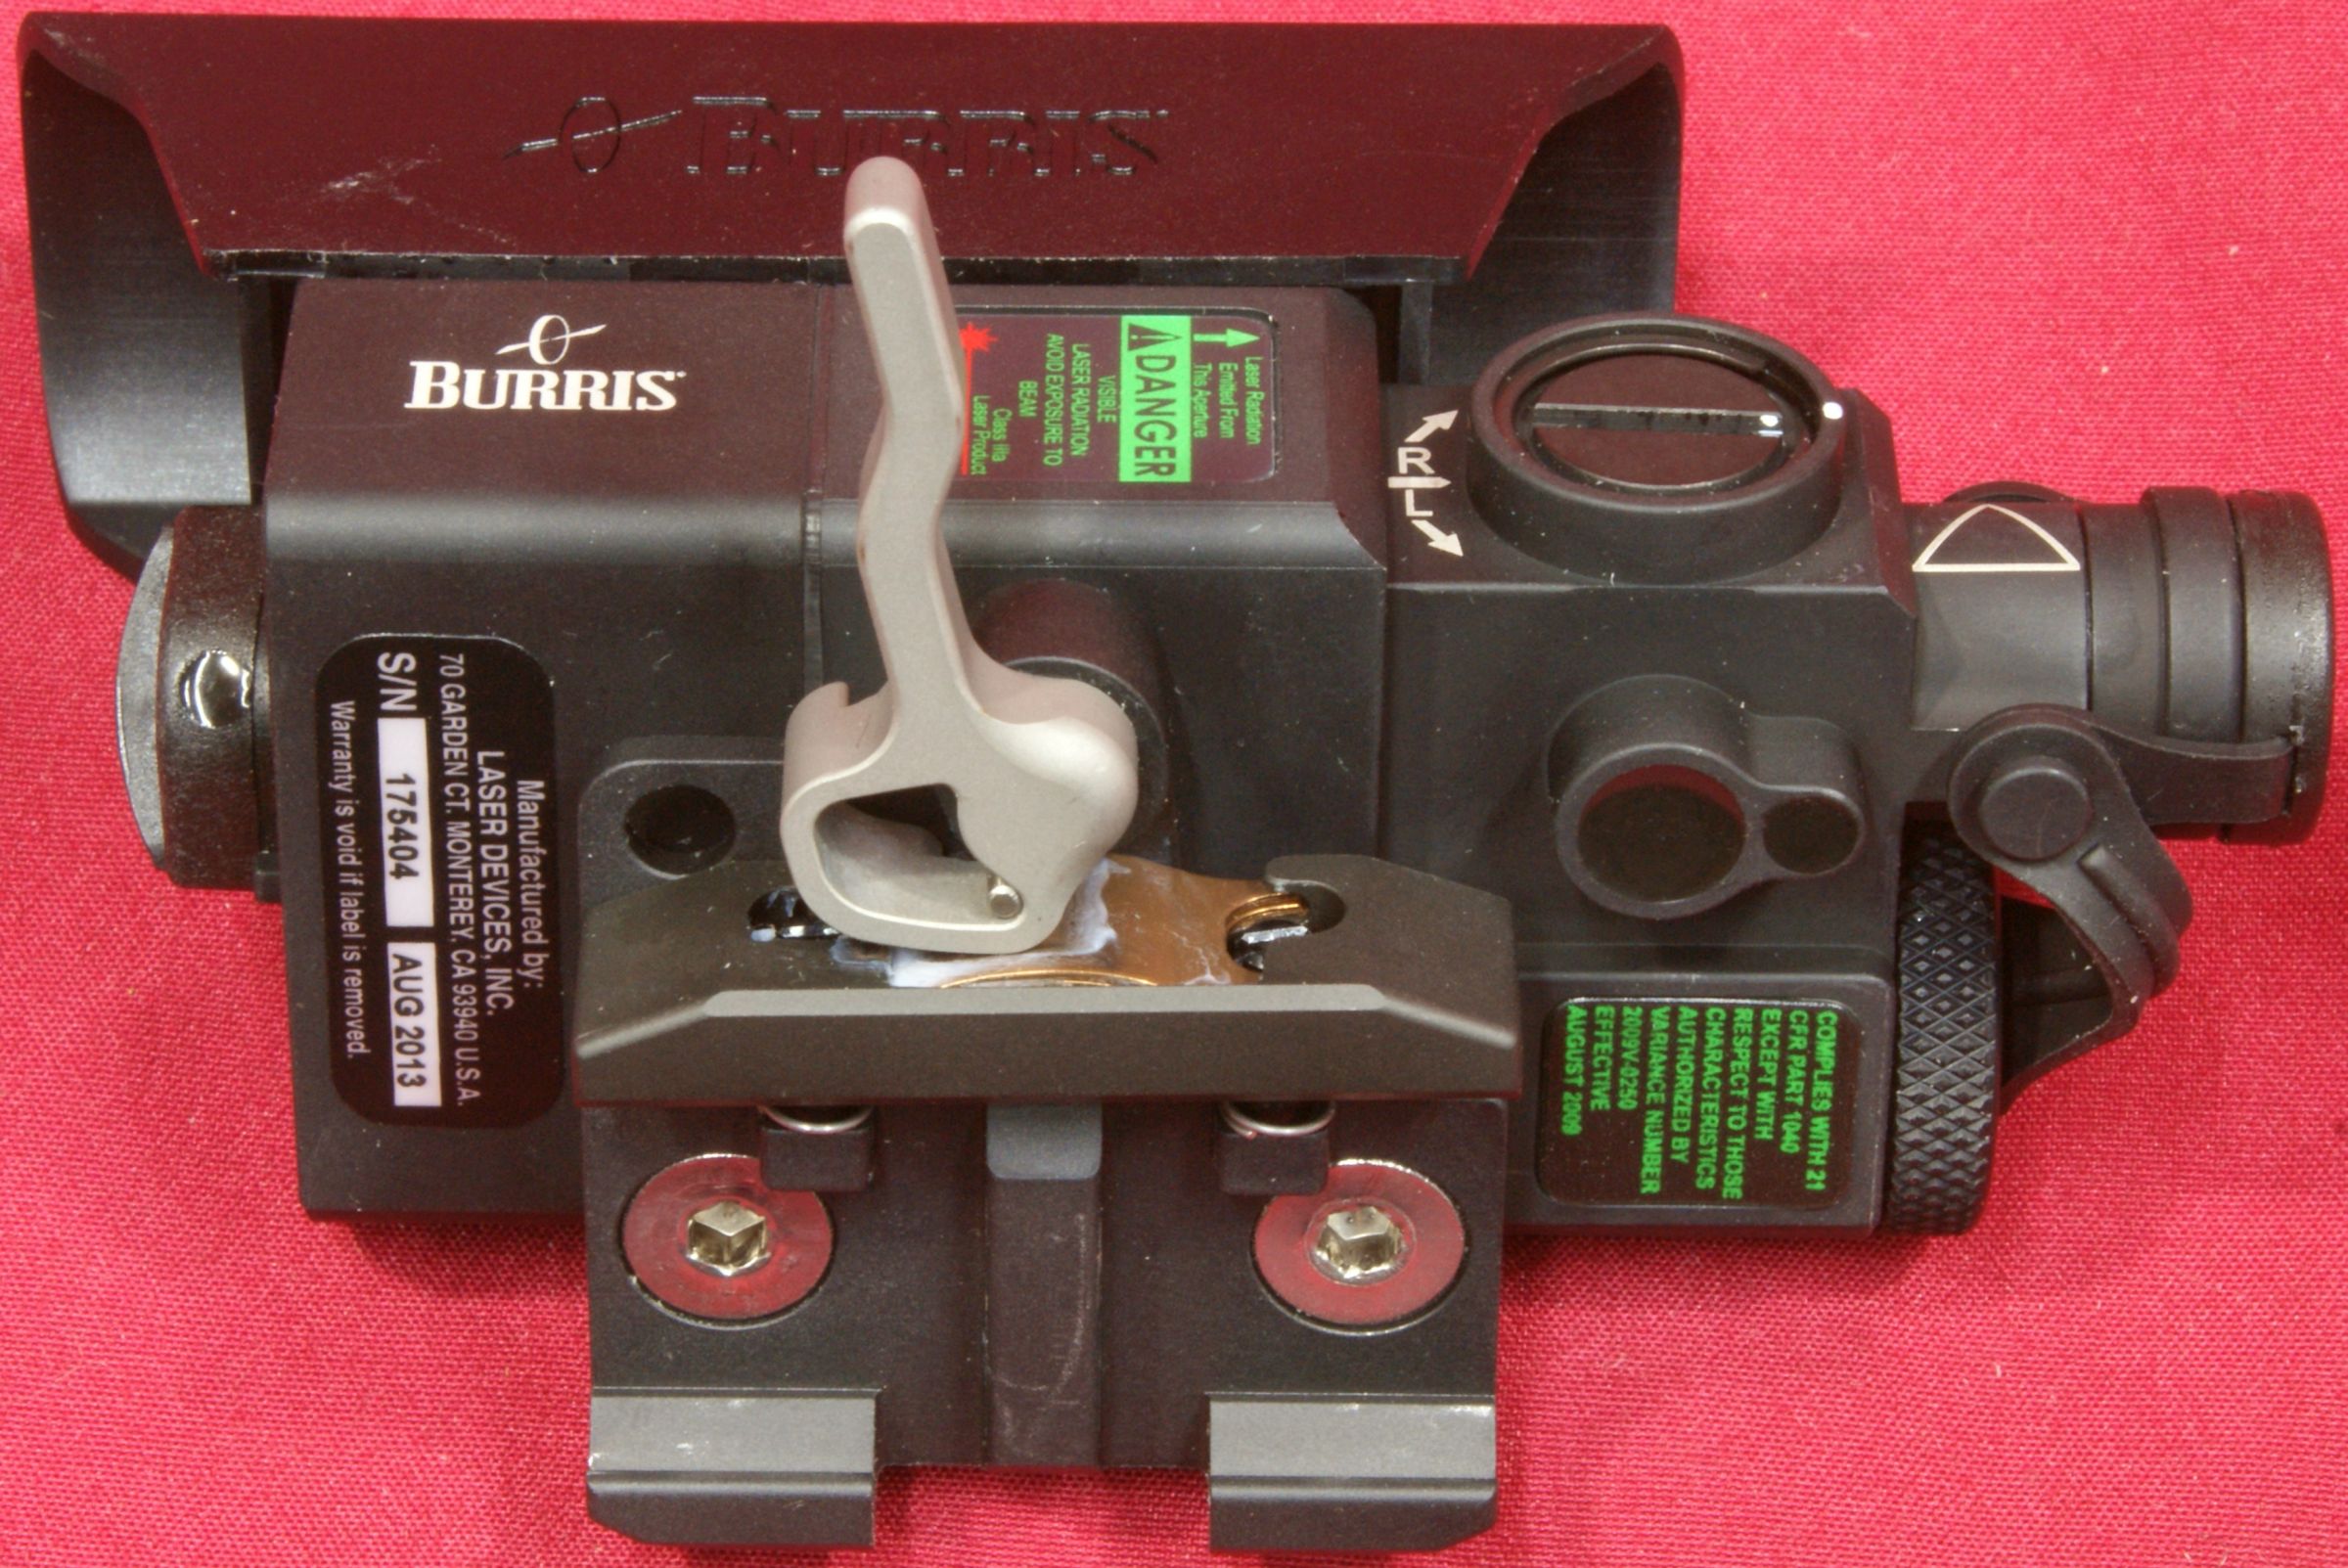
The unit comes with a quick release "Return-to-Zero" mount as shown below. Keep in mind that your are looking at the offset configuration of this laser system and that the mount for the inline version would be rotated 180 degrees, although I don't believe this offset laser can be reconfigured to an inline version. I also checked the torque on the mount screws and was not able to loosen the screws. Seeing the deformation on the heads of the screws is an indication that they were torqued and my guess is that the screws were installed with some type of thread locking compound and the mount was never intended to be removed.
Figure 14
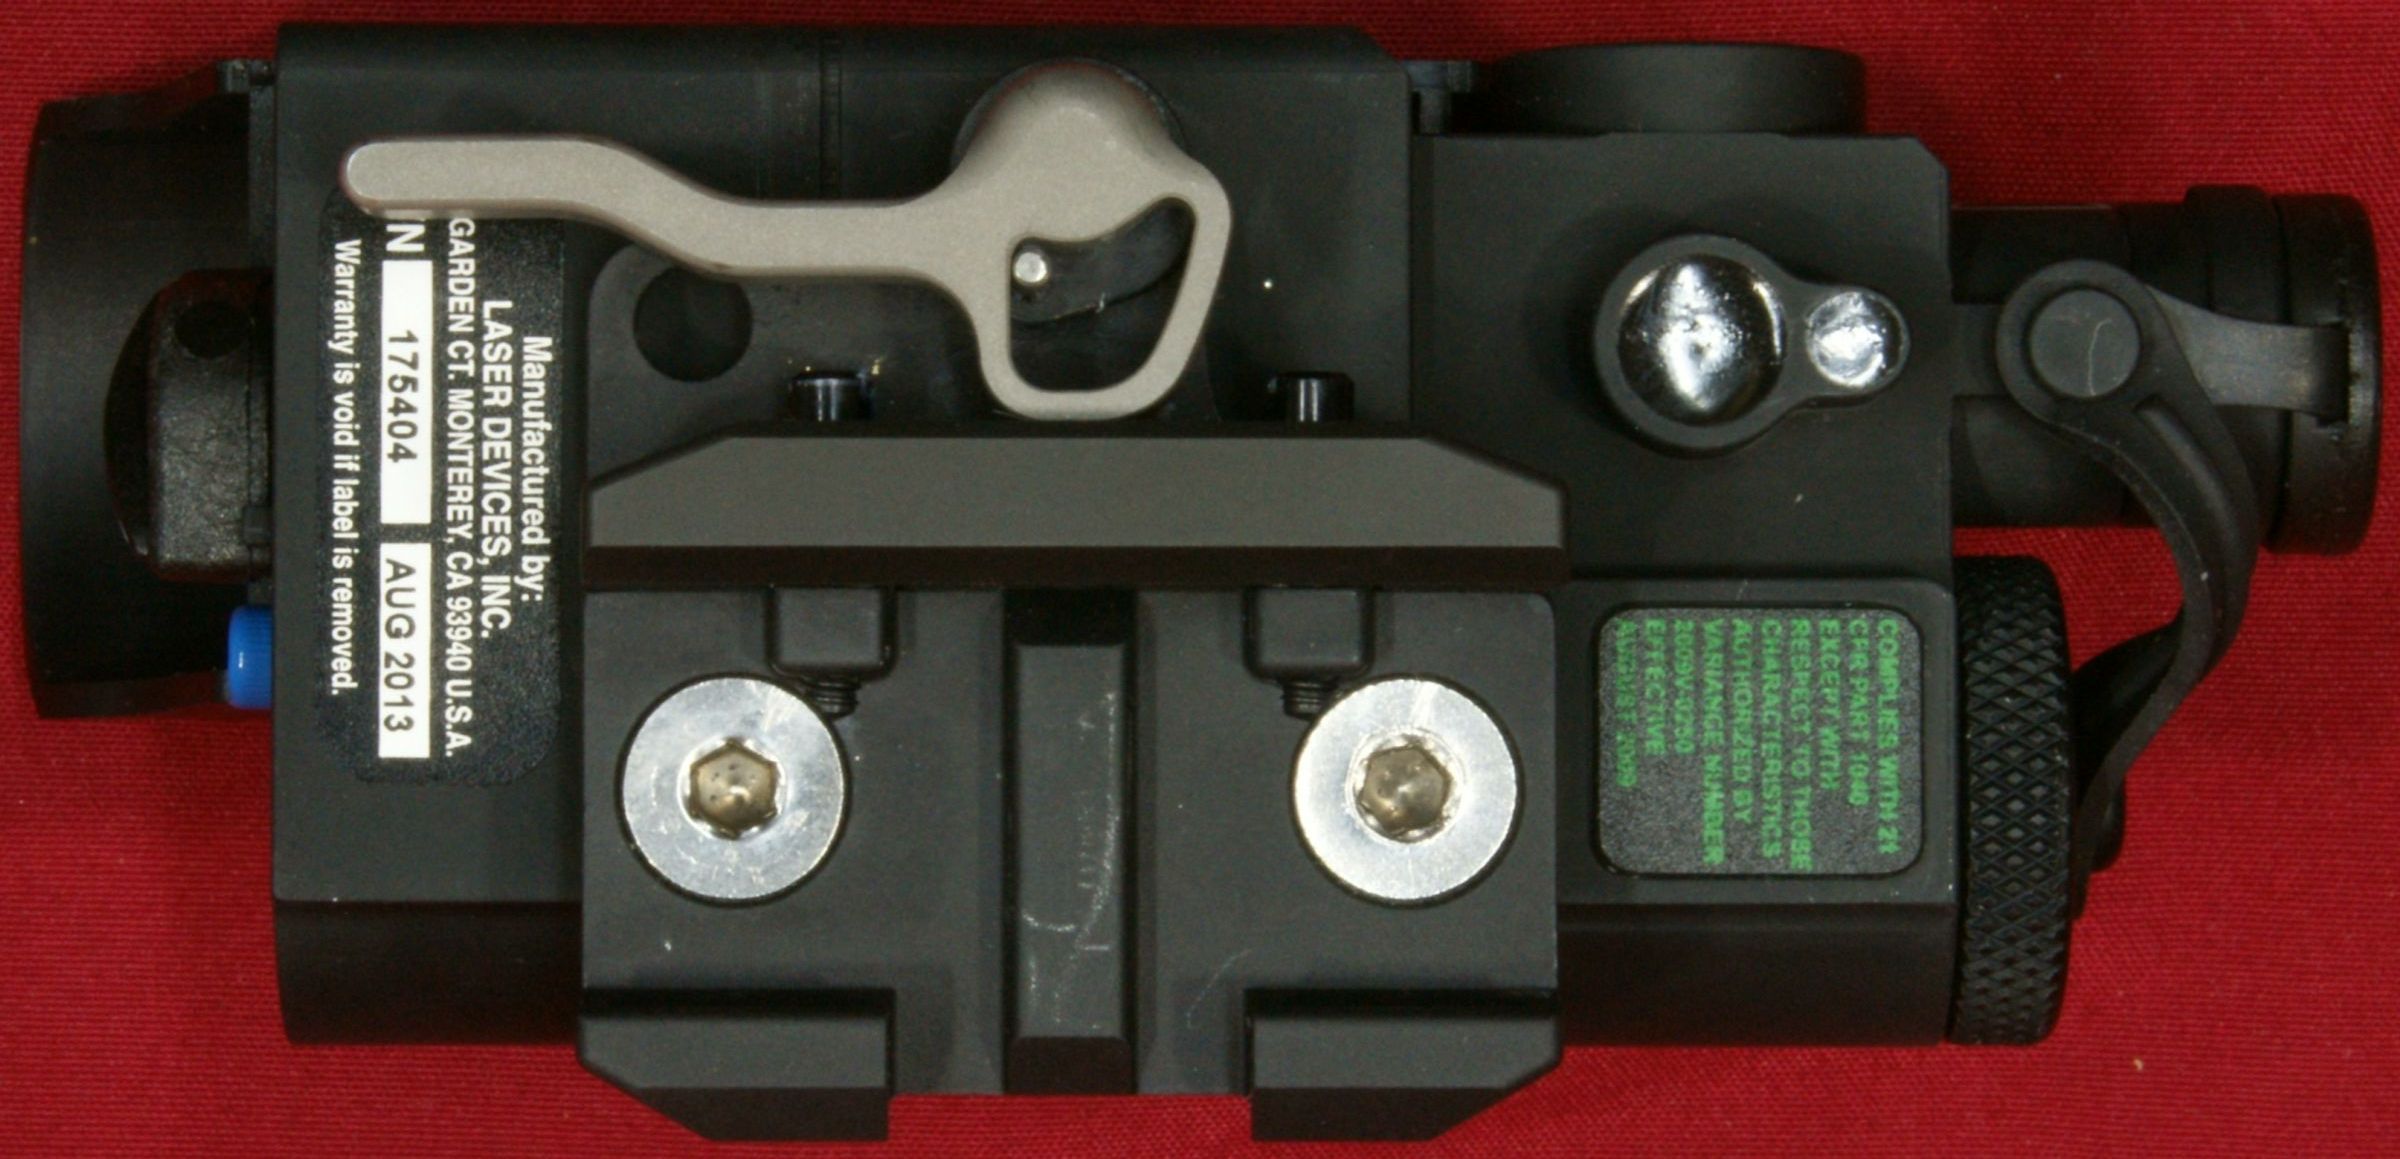
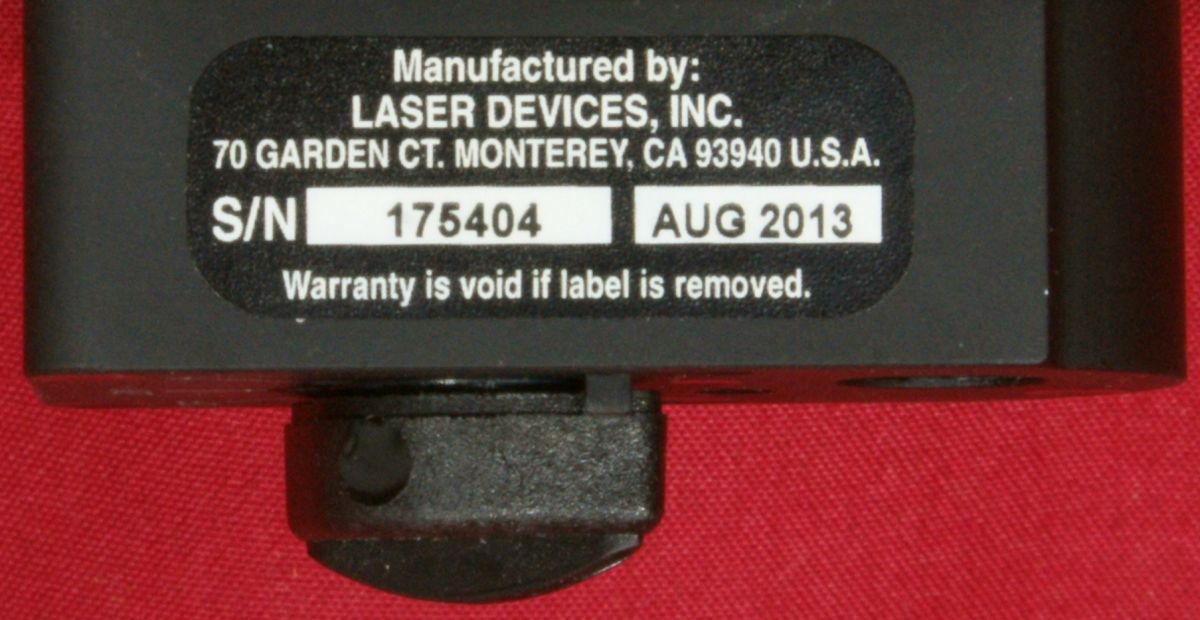
On the bottom of the laser is the serial number, date of manufacture and manufacturer (Laser Devices, Inc.).
Figure 15
The bottom of the laser also had a label stating "Complies with 21 CFR Part 1040 except with respect to those characteristics authorized by variance number 2009V-0250 effective August 2009." The document Part 1040 is titled "Performance Standards for Light-Emitting Products" and is a subsection within the CFR (Code of Federal Regulations) Title 21 - "Food and Drugs." To try and keep things simple, the laser must meet certain regulations due to the potential hazards associated with a laser device.
Figure 16
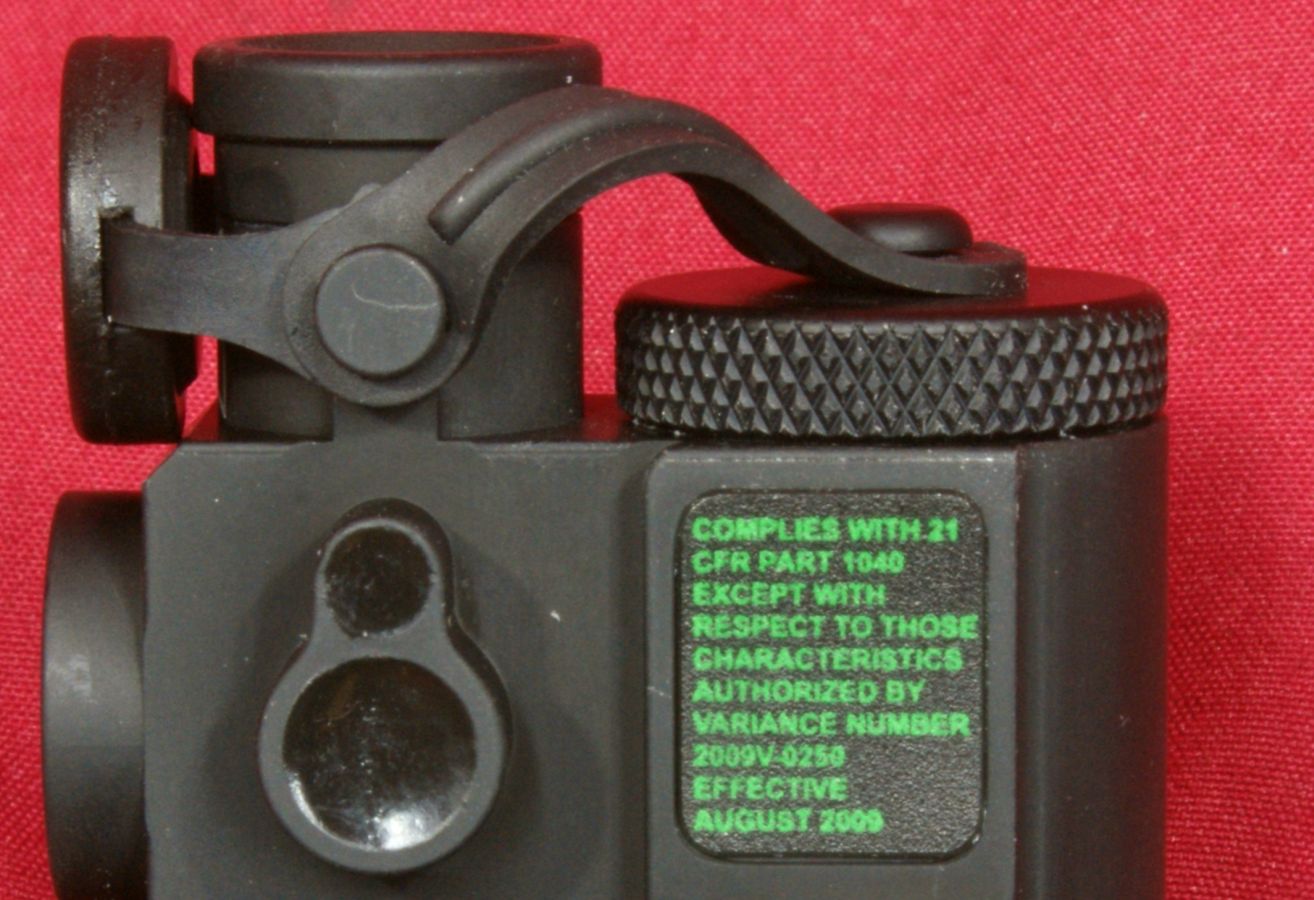
The DANGER label on the right side shows that the laser is a Class IIIa laser. This classification is for when the laser is operating in the Hi power mode. When in the low power mode, it is considered as a Class II laser. The laser wavelength is 635-650nM and the maximum power is ≤5mW in the Hi power mode.
Figure 17
The quick release mount appears to also be manufactured by Laser Devices and as their HT Mount. This mount is made from 6061-T6 aluminum with a black anodized finish and has an integral recoil lug. The key features of this mount described below were taken from the Laser Devices website.
- Adapts to any weapon accessory equipped with a standard throw lever hole pattern
- Meets MIL-STD-810G requirements
- Lighter and stronger than current alternatives
- Self-centering—Mount remains stationary and stays fully open until manually locked into place on the rail
- Full floating clamp provides automatic adjustment to fit oversized and undersized rails
- Easy on-and-off for quick adjustments and repeatable zero
- Made in the U.S.A.
I was pleased with the smooth action of the throw lever when removing and reinstalling the mount on various rails. The photos below show the mount in both the locked and open positions. You can also see that the cam portion of the lever came well lubricated with a white grease.
Figure 18
Figure 19
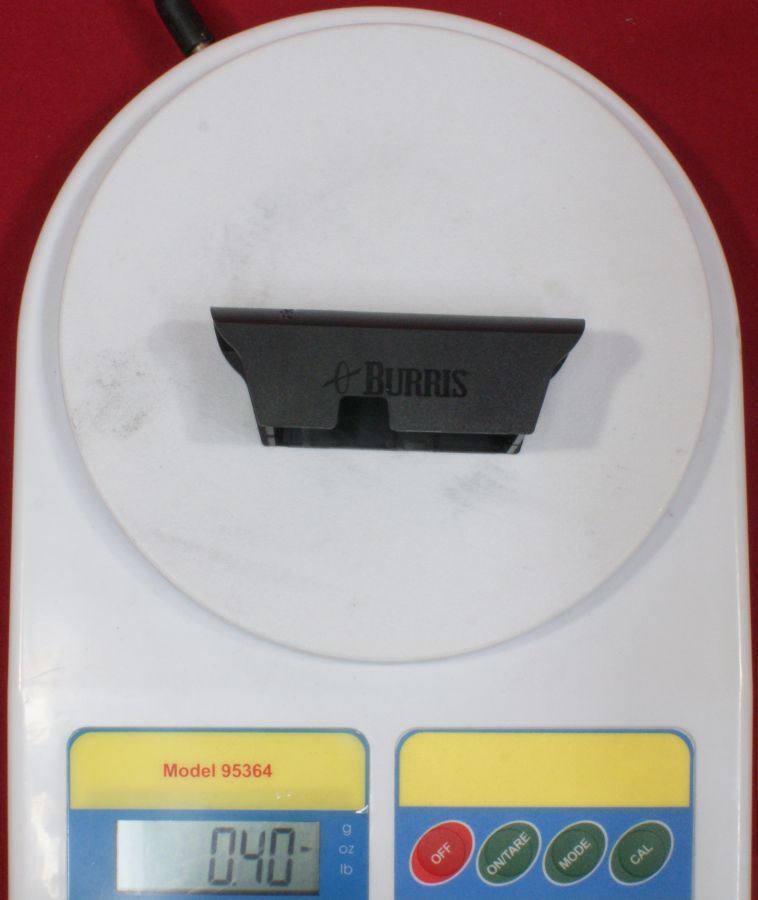
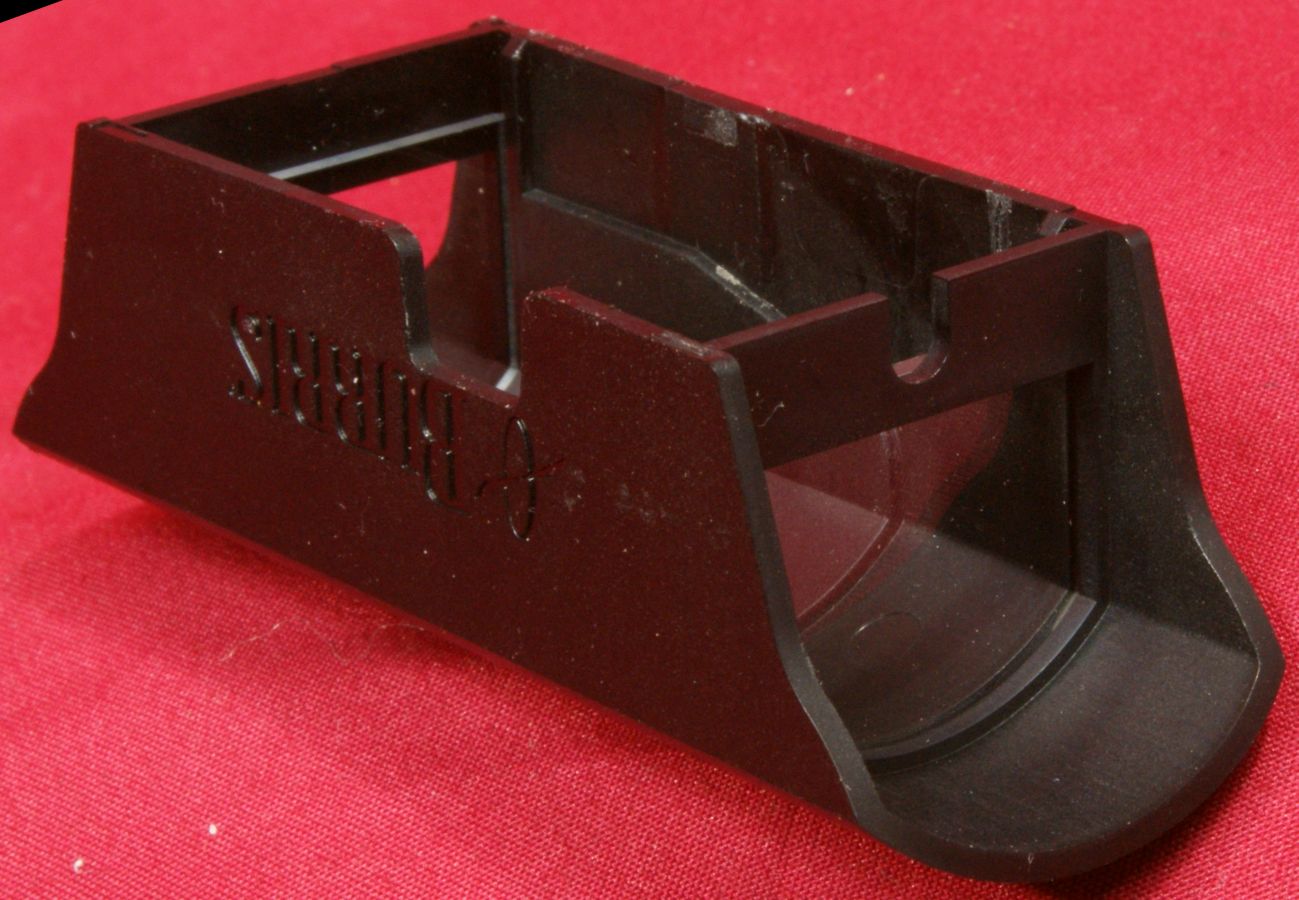
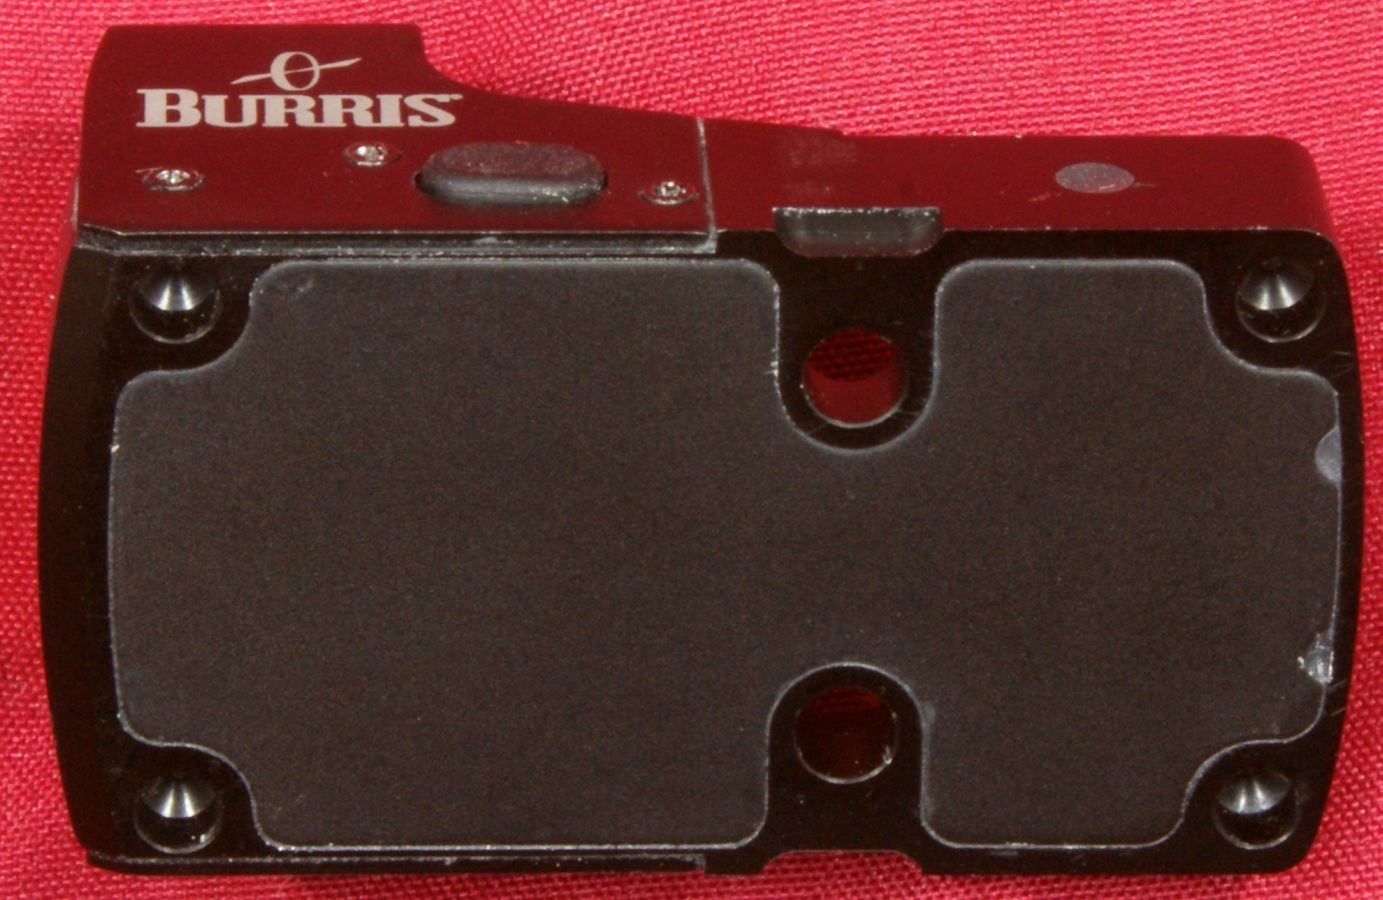
The FastFire III comes with a hood to reduce glare and promote eye alignments. The hood gives the sight a less complex look by covering the white lettering on the unit.
Figure 20
Figure 21
The hood is made from a polymer material and has a lens on each end which will also help to ensure the FastFire III sight remains fairly protected from the elements. The FastFire III is "100% sealed against water and is submersible" so the biggest protection the hood provides is to keep your unit relatively clean. The hood makes a firm friction fit with the body of the FastFire III and I doubt it would be easily knocked off during use.
Figure 22
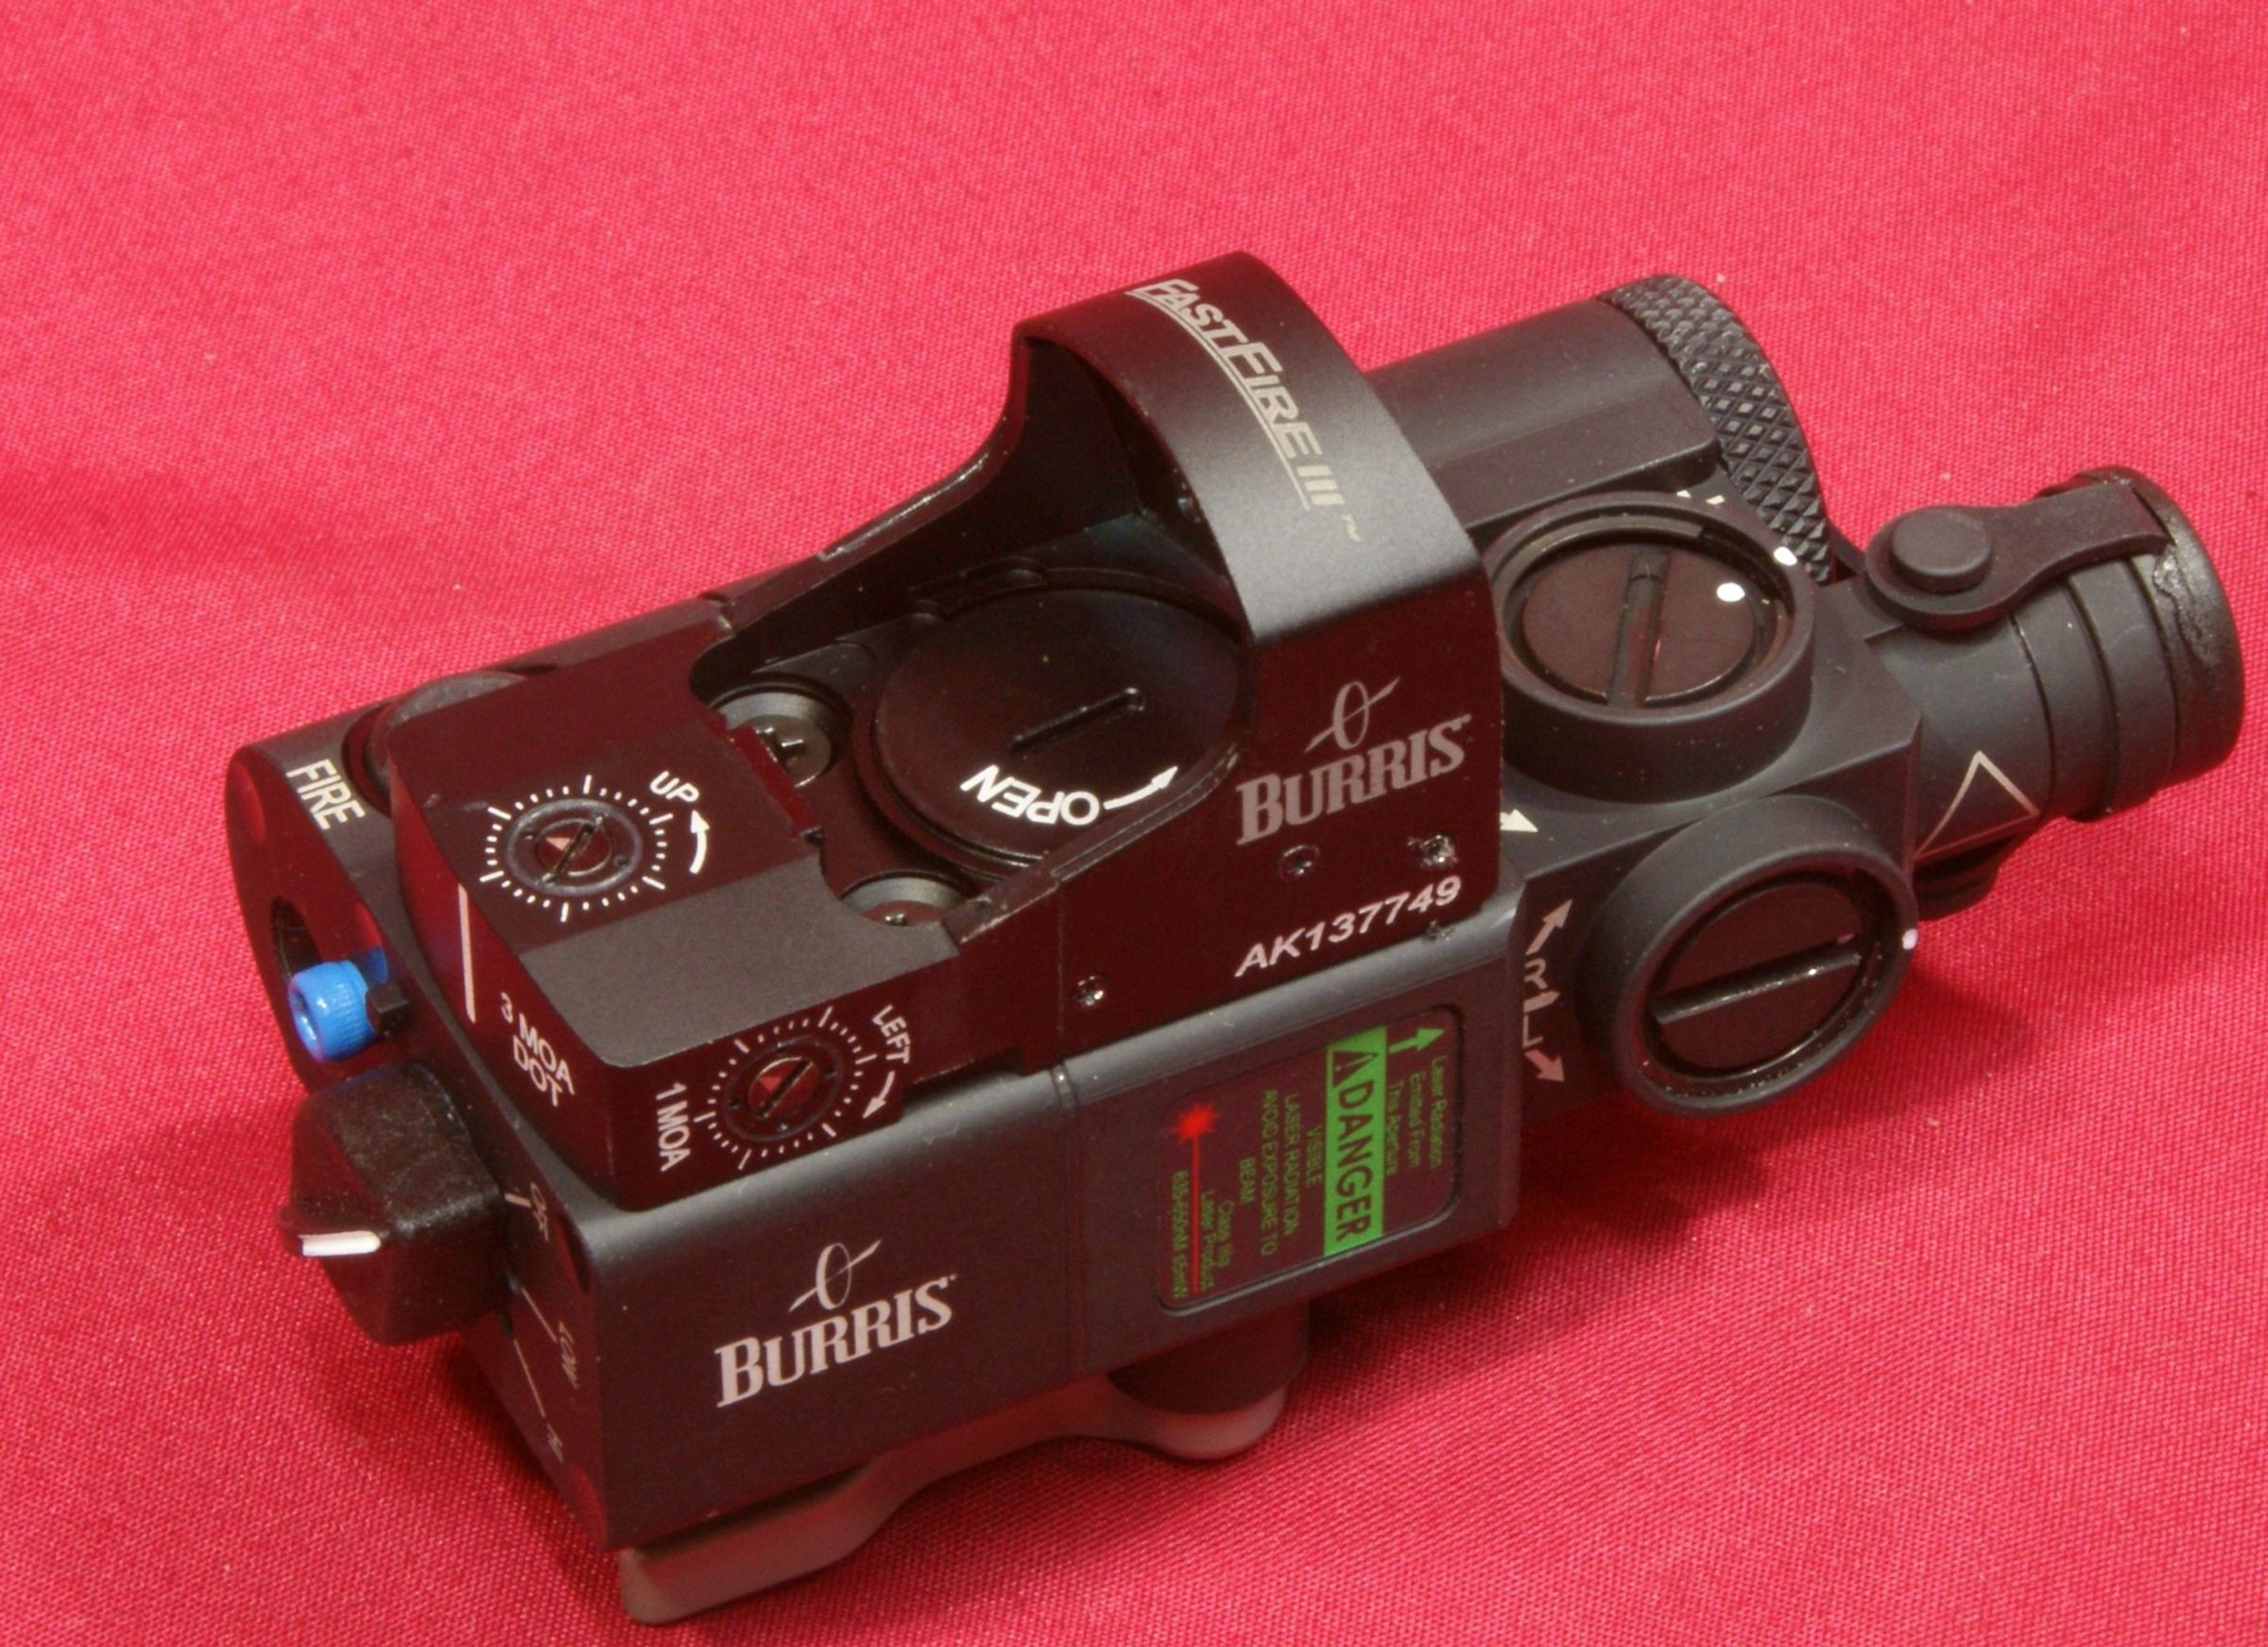
With the hood removed, you can see the features of the Burris FastFire III Sight. Back in 2011, I reviewed the FastFire II and have really enjoyed that sight. A couple of the main features on the new FastFire III that I consider as major improvements are the top-side battery compartment and the elevation/windage adjustment knobs. The new location of the battery compartment allows you to swap batteries without having to remove the sight. The new style of adjustment knobs can be adjusted with a screwdriver and are now click adjustable. The click adjustments are "1 MOA or 1 inch at 100 yards" and there are 30 clicks per revolution. The instruction manual states that there are 3 degrees or 190 inches at 100 yards of total adjustment range.
Figure 23
The power button for the FastFire III is located on the left side of the unit. The style of this switch is also a deviation from the FastFire II where the FastFire II had a sliding On/Off switch. In the front of the unit is a small brightness sensor (shown circled in yellow in the photo below).
Figure 24
The FastFire III power button has four settings. When you first turn on the power, the settings toggle in the order below.
- Automatic - light sensor adjusts brightness based on surrounding light conditions
- High
- Medium
- Low
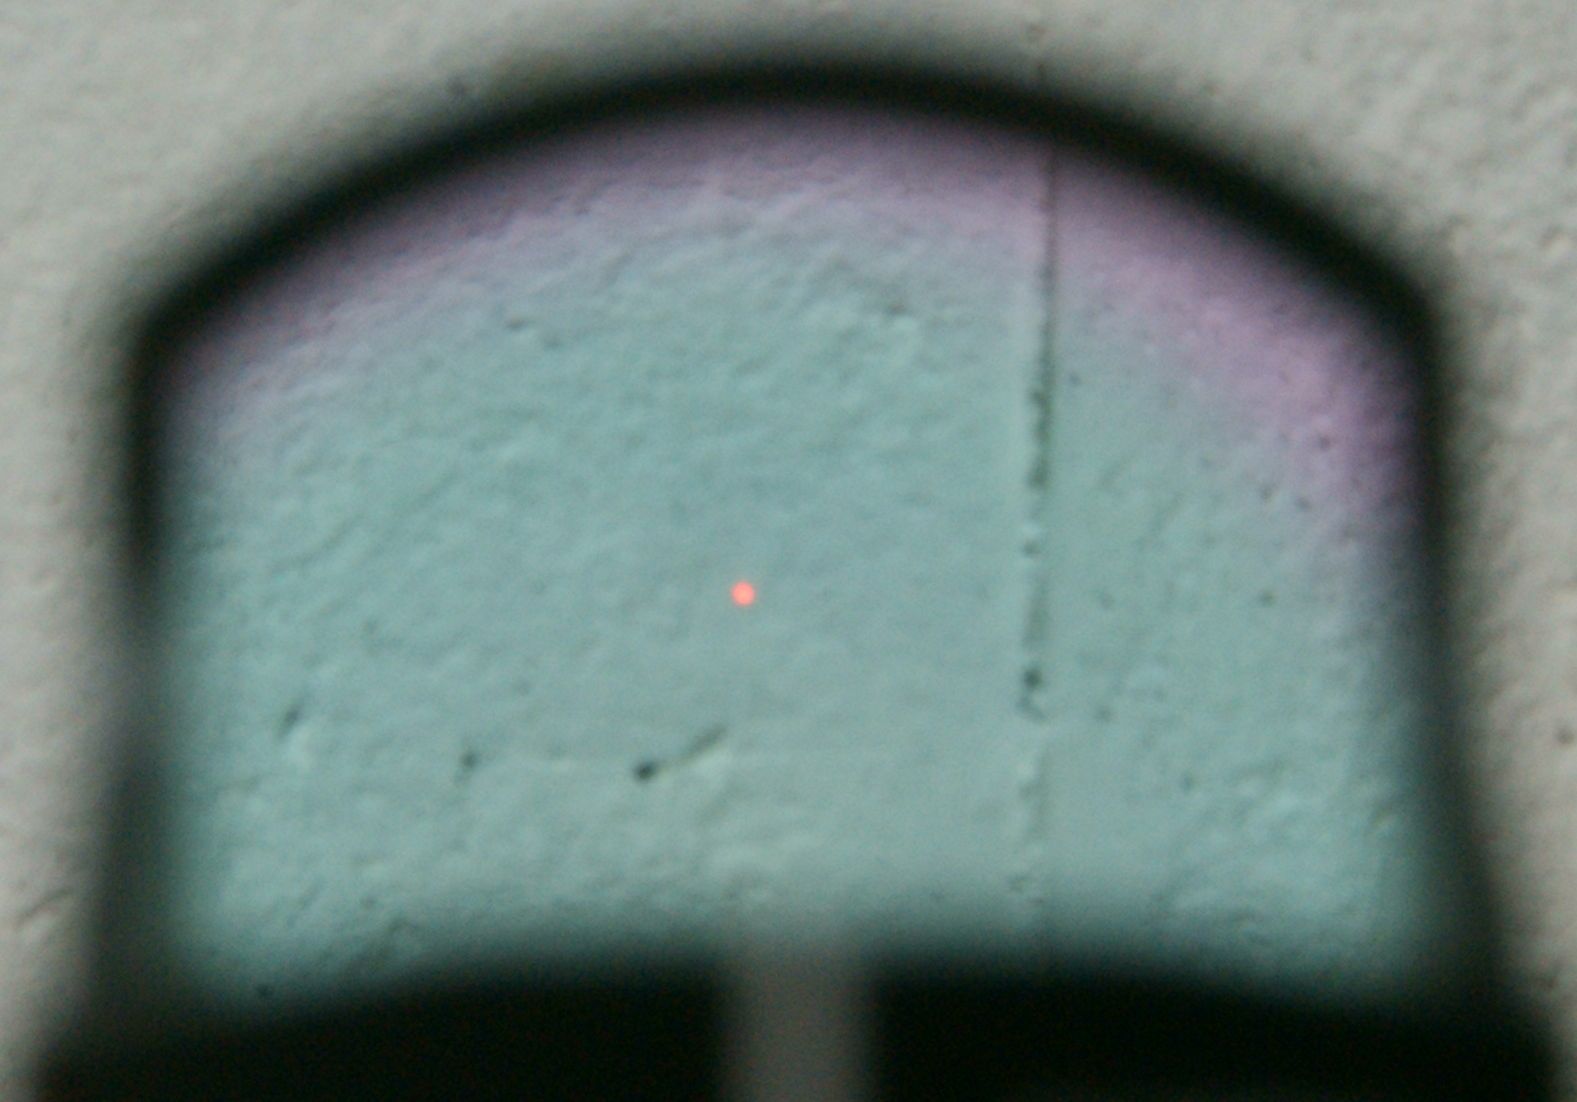
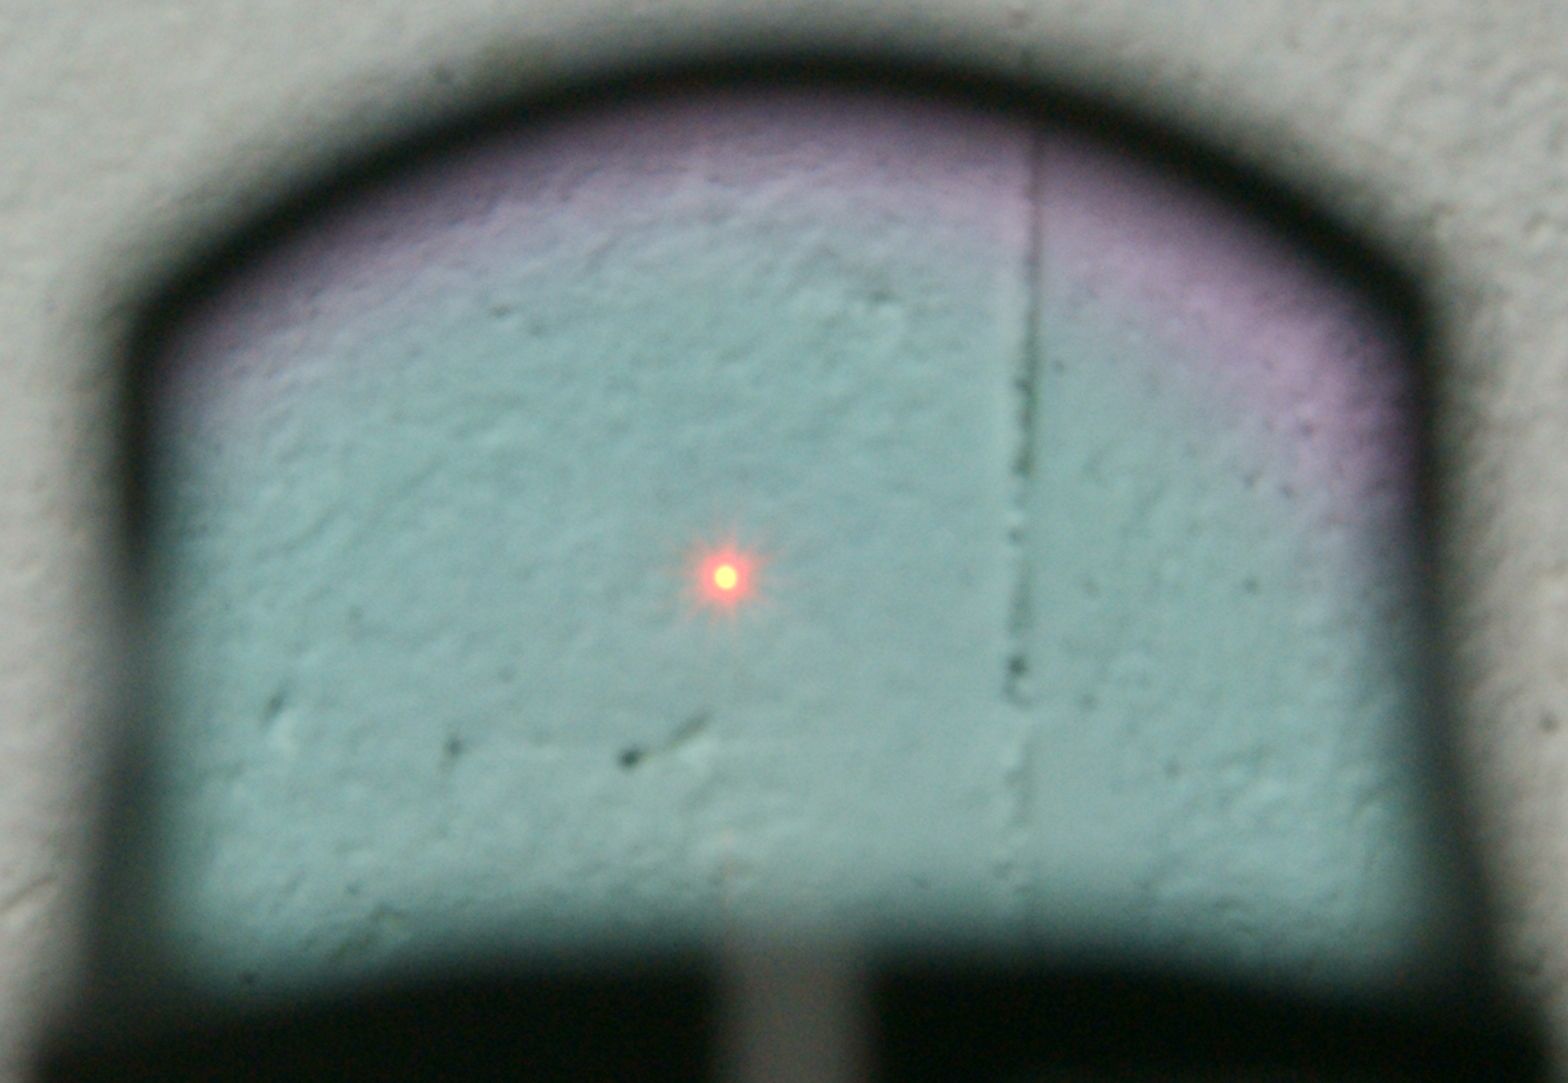
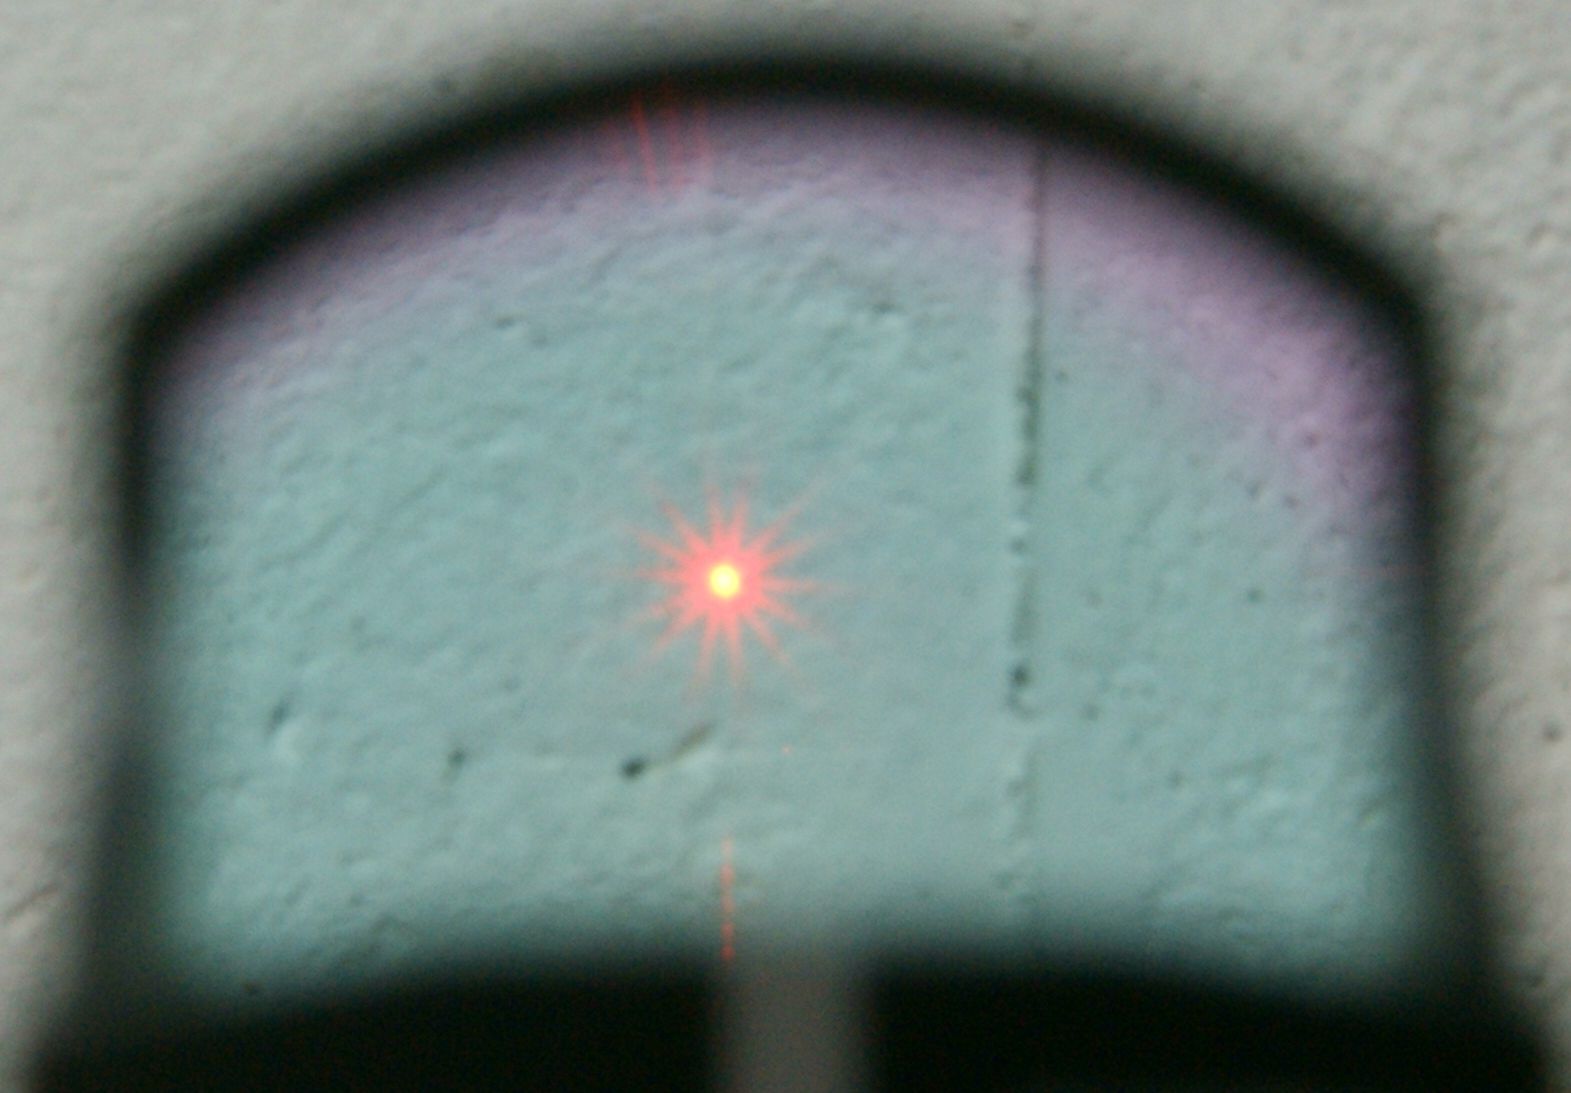
These next three photos show the intensity of the red dot on the different manual settings. I set my camera in manual mode so that the exposure and aperture settings were the same for all the photos to give you a good idea on the differences in intensity between each mode. The subtension of the aiming dot is 3 MOA, but this subtension size seems to increase/decrease with intensity level. In the automatic mode, I could clearly tell a difference in the dot intensity as I changed the surrounding lighting.
Figure 25
Figure 26
Figure 27
The laser comes with a lens cover that is attached to the body of the laser. The cover slides to the right and stays snuggly against the body of the laser.
Figure 28
Figure 29
As mentioned earlier, there is a green LED light beside the laser power switch that will illuminate when the laser is in operation.
Figure 30
The photo below gives you another look at the lens cover and you can also see the glow of the red laser and the light sensor on the front of the FastFire III.
Figure 31
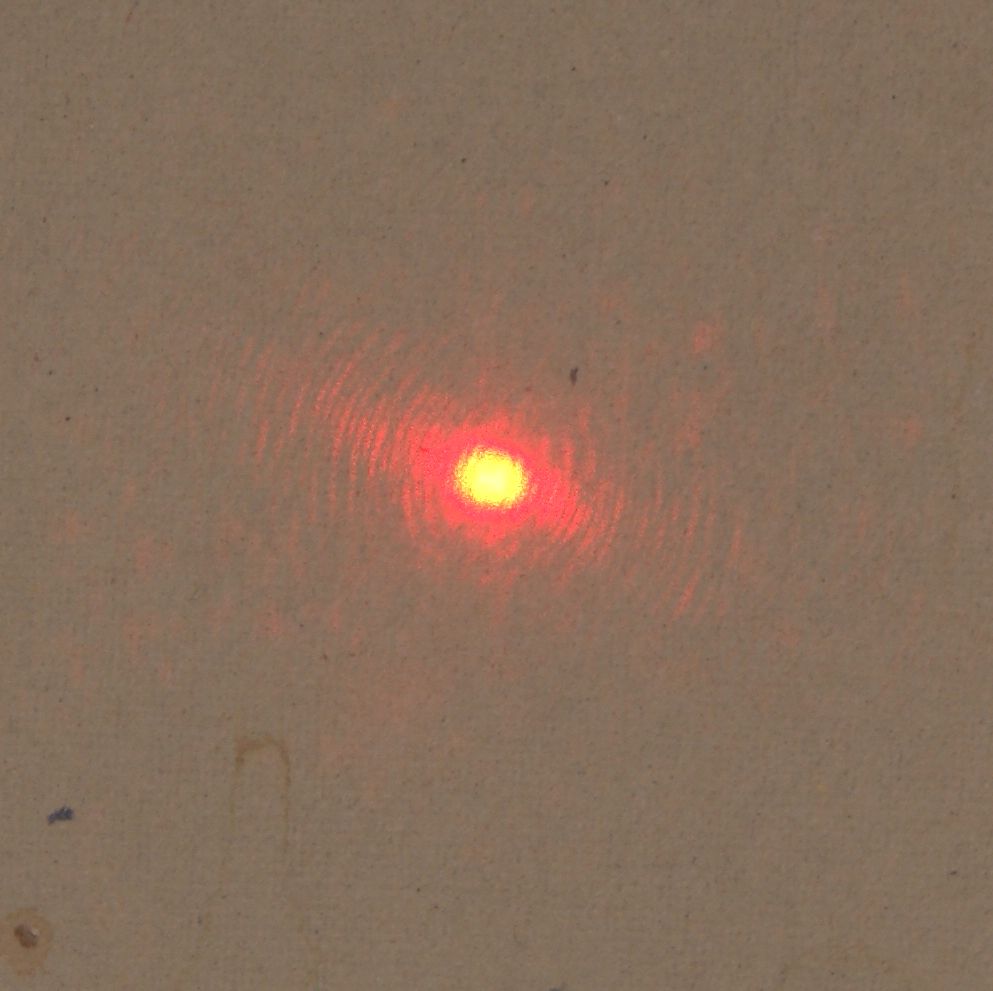
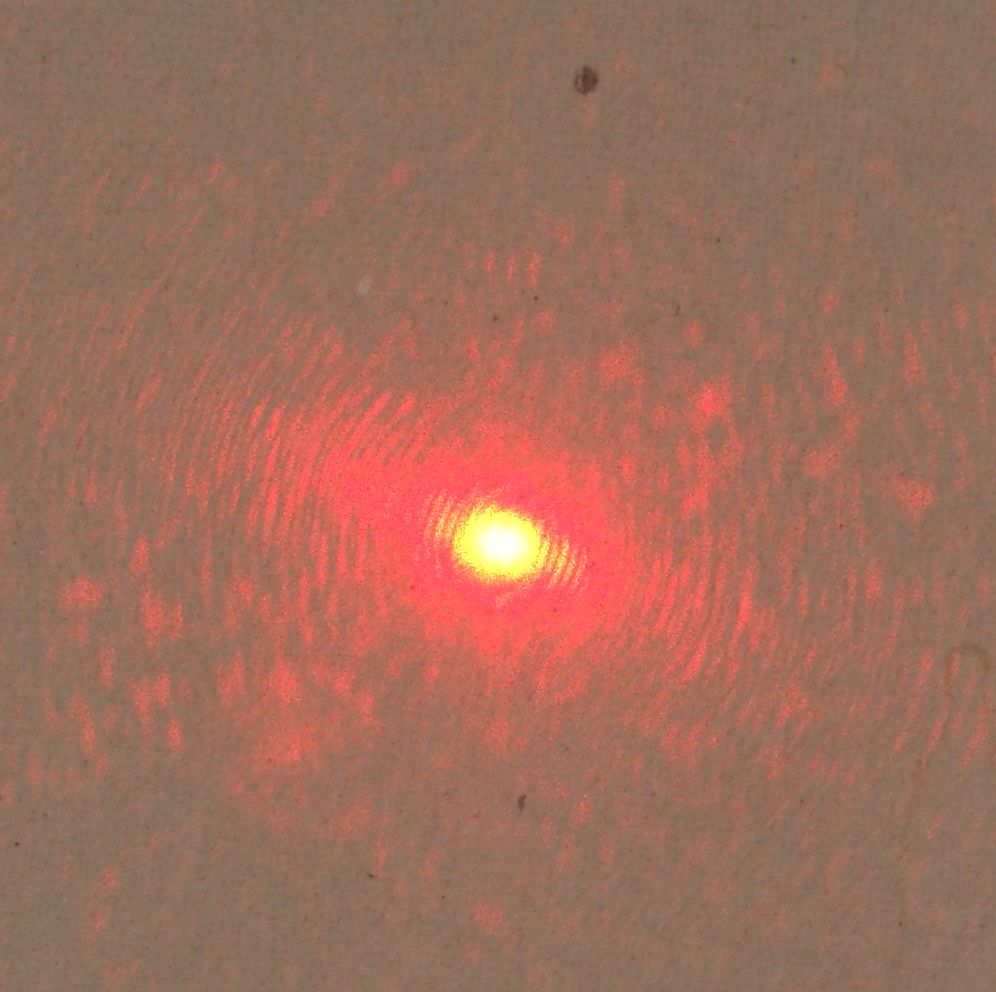
These next two photos show the laser projecting onto some drywall. Both photos were taken with the same settings on my camera and give you an idea of the relative brightness between these two modes. If you consider low is <1mW and high is <5mW, then high should be approximately 5 times brighter. The hue around the red dots in the photos appears to be a function of glare on my camera lens and not how it looks on the wall.
Figure 33 - Low Figure 34
- High
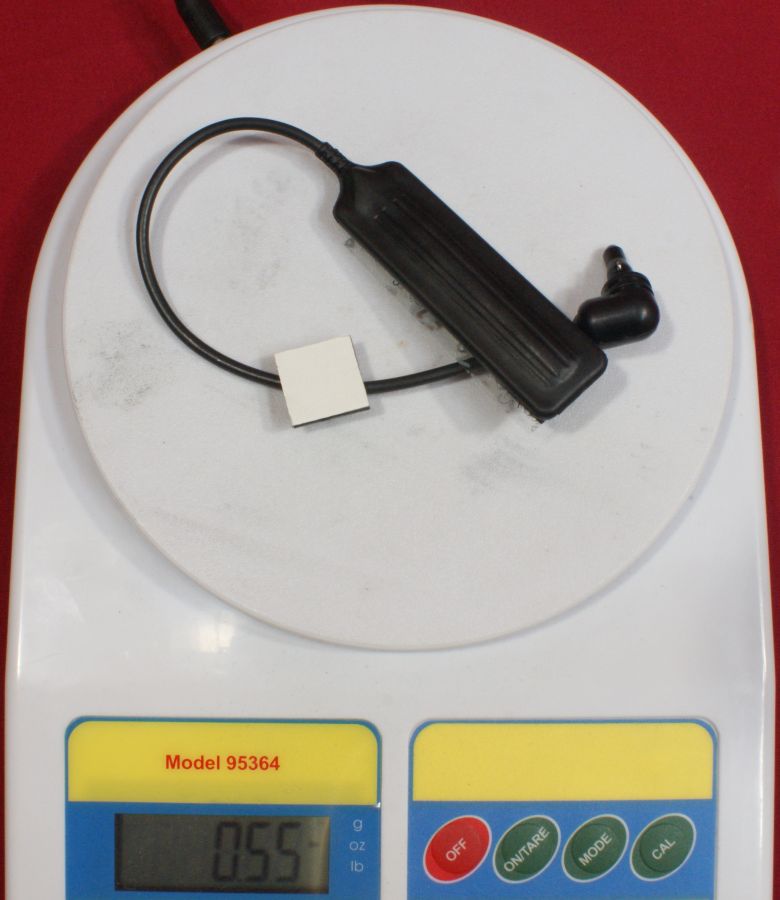
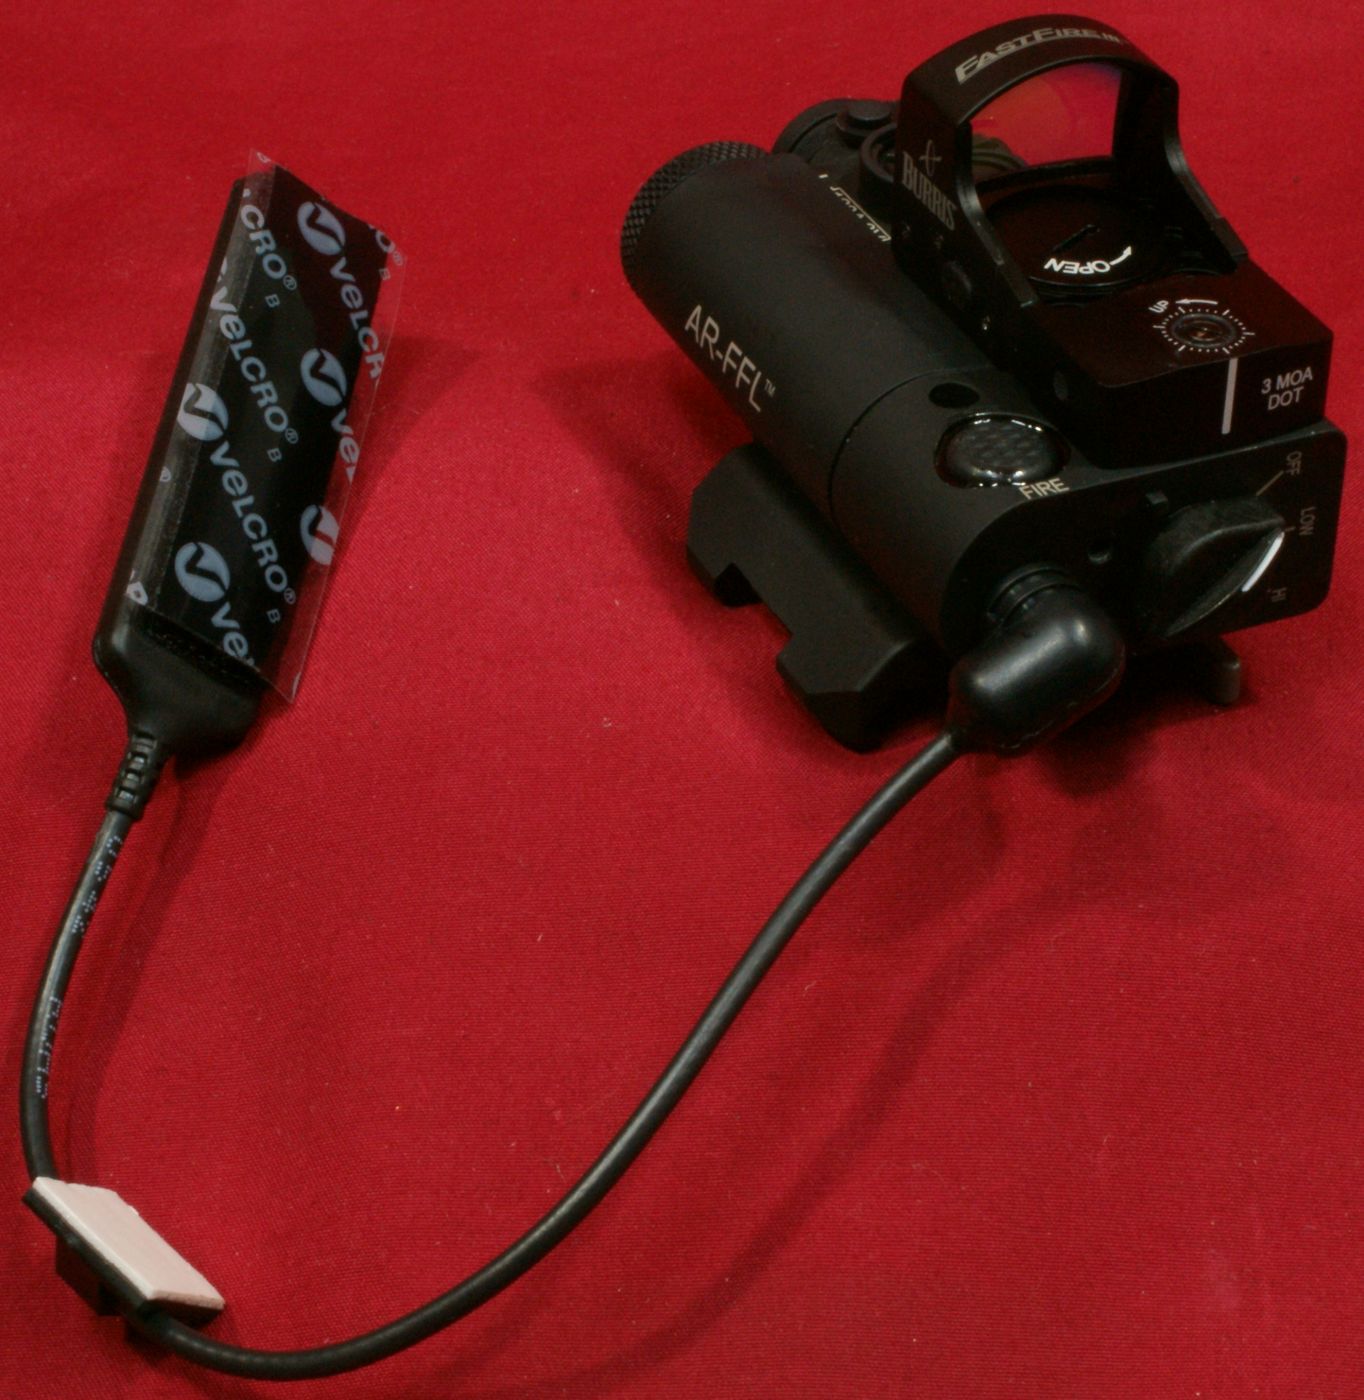
The AR-FFL system comes with a 7" remote cable pressure switch. The 7" measurement is from the 90 degree bend in the plug to where the cable starts to transition into the pressure switch. The pressure sensitive portion of the switch runs about 1.5" in the pad which is about 2.75" long and .75" wide. The same single press and hold for momentary and double press for continuous also works using the pressure cable. Pressing the pad to activate the laser had a positive feel that the switch was being displaced. The pad had some hook and loop (Velcro) installed and is ready for mounting on your rifle. The cable included an adhesive tie down to assist in routing the cable to your liking.
Figure 35
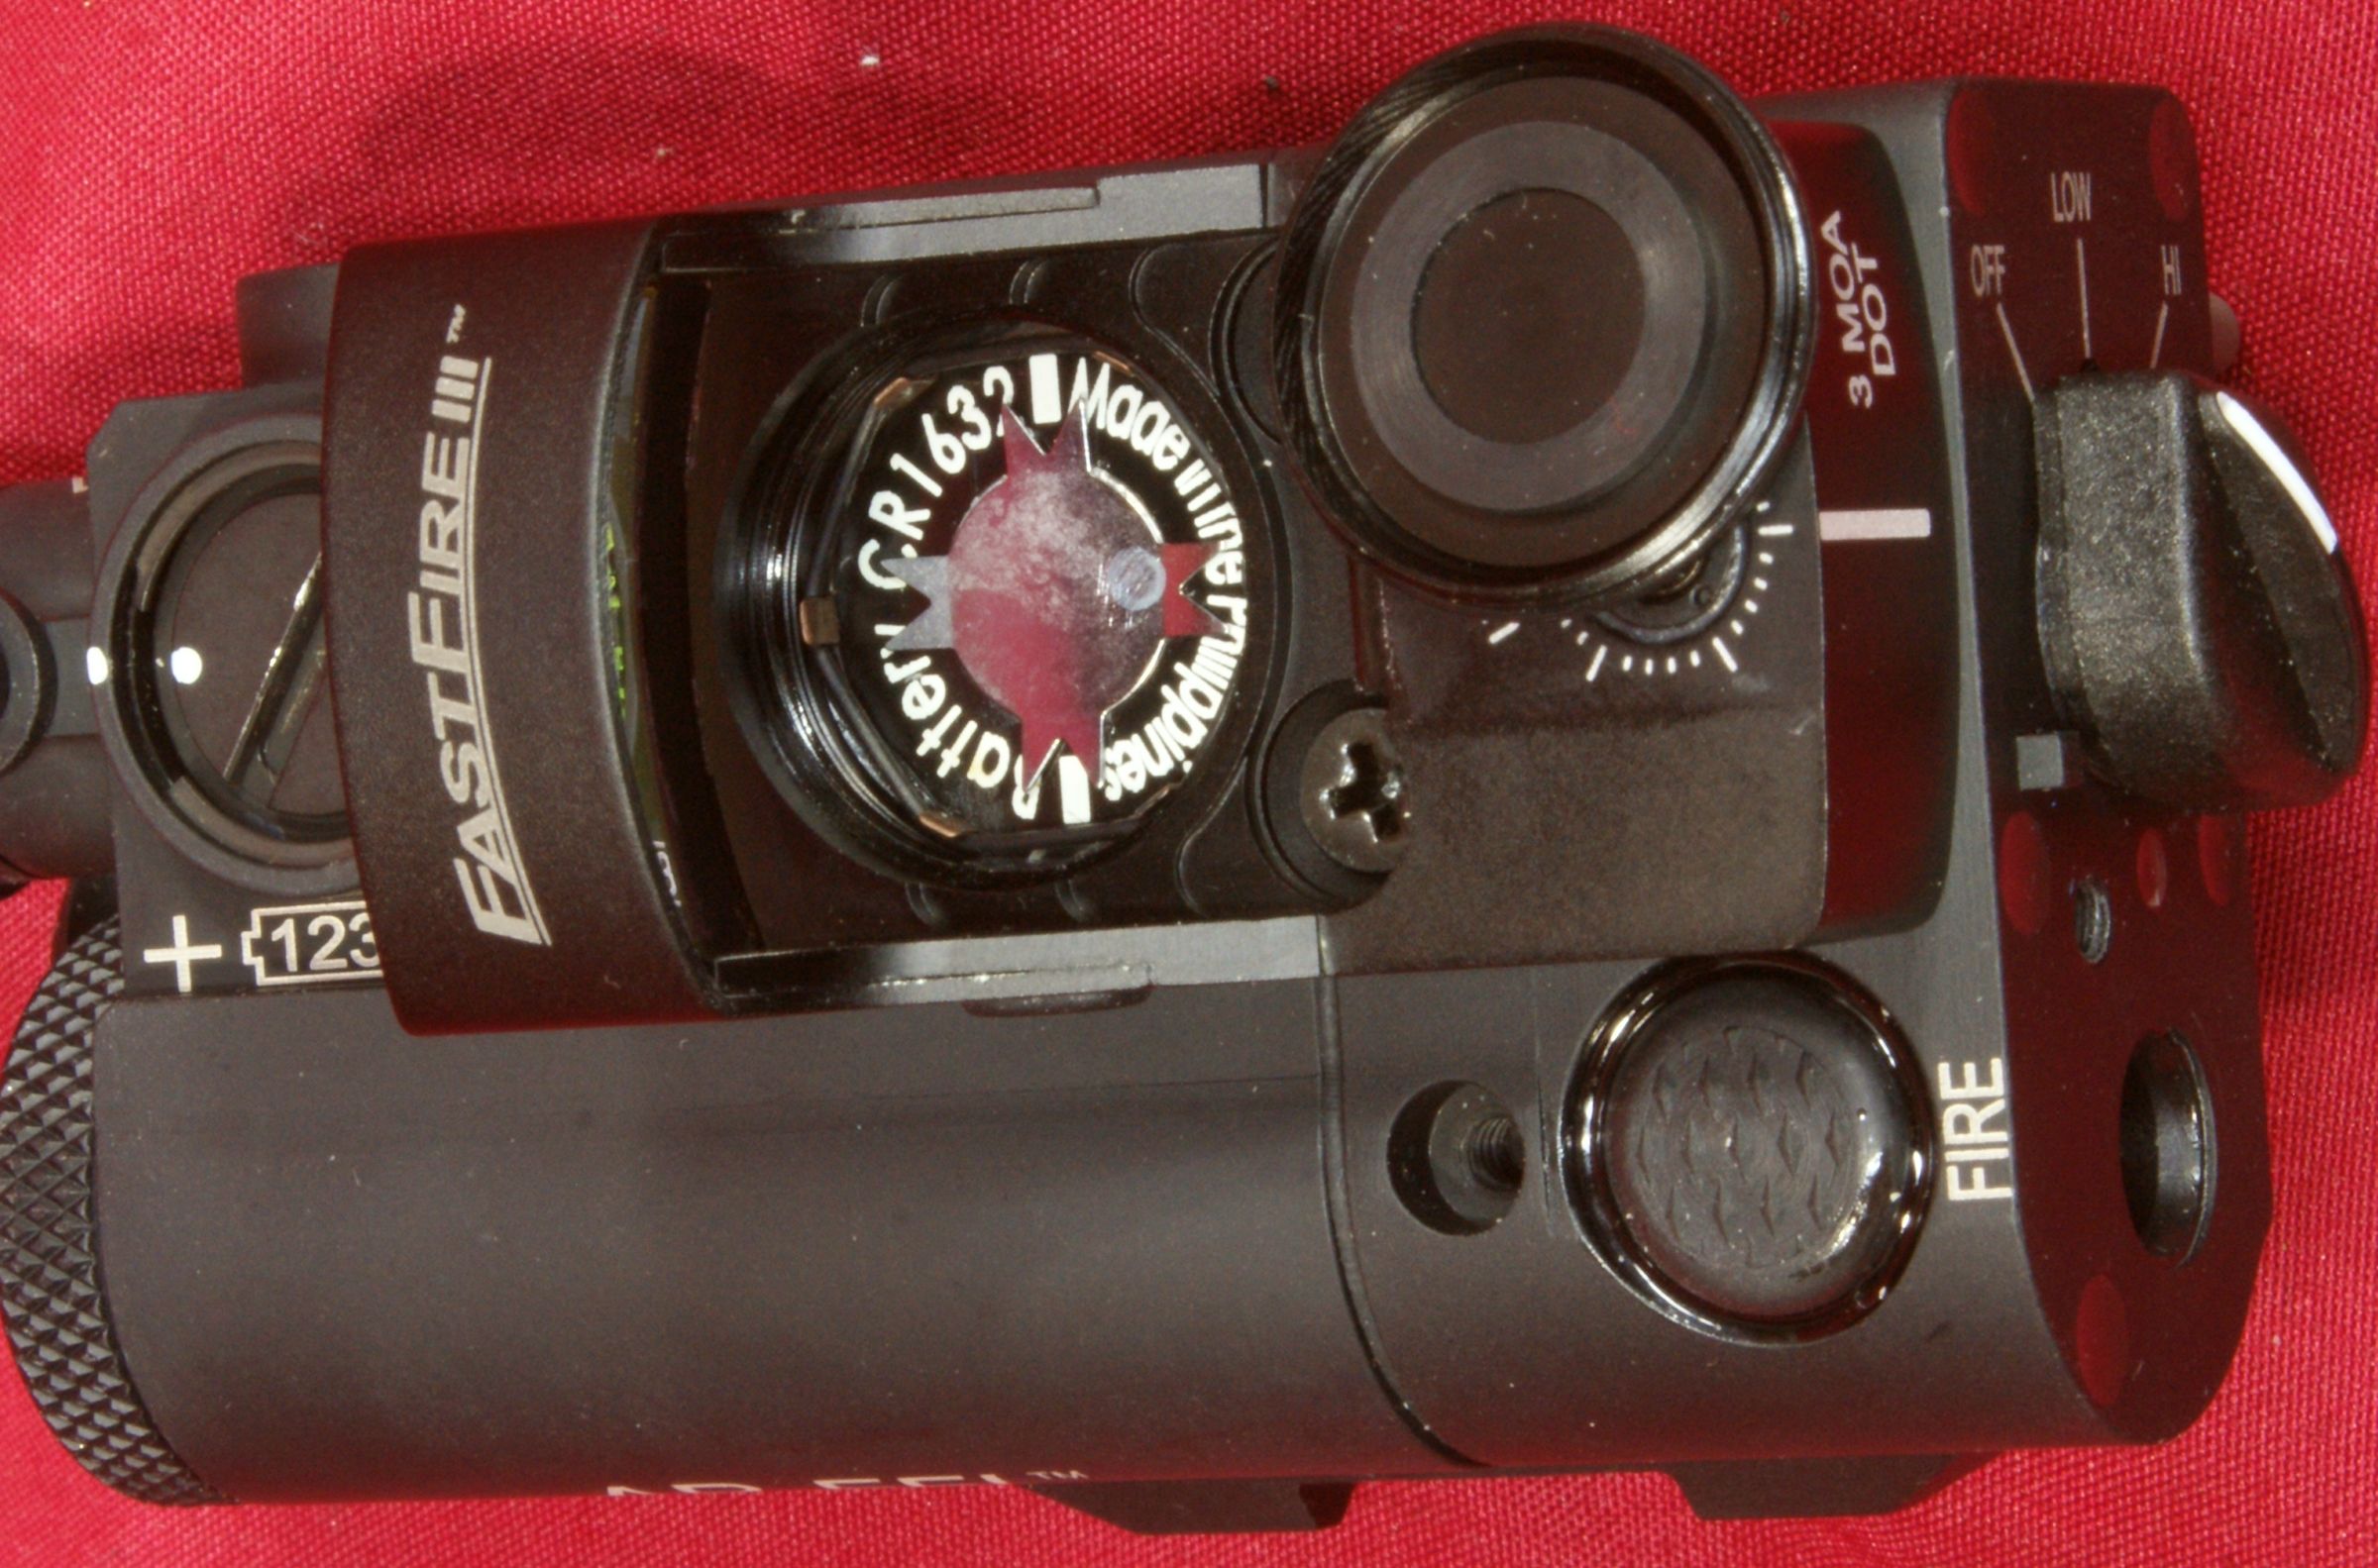
Changing the batteries is a simple task for both the FastFire III and the laser. The laser is clearly marked with the type and orientation of the battery. The laser uses one CR123A battery and one comes in the package.
Figure 36
Changing the laser's battery is just a matter of unscrewing the battery compartment cap and replacing the battery. The cap and bottom of the compartment both have very stiff springs and reinstalling the cap is a little tricky when trying to push down and rotate the cap at the same time. These stiff springs help to ensure that under recoil the battery will always make contact with the springs to ensure the laser stays turned on.
Figure 37
Figure 38
Replacing the battery in the FastFire III is done by removing the cap and installing a new CR1632 battery. Note that with the battery cap removed, you can see that the FastFire III is "Made In The Philippines".
Figure 39
The FastFire III is mounted on the laser with two Phillips head screws shown below. When I loosened these screws I found them to be snug, but I don't believe they were tight enough. There was also no thread locking compound on these screws. If you purchase a Burris AR-FFL, then make sure you verify screw tightness and add thread locker if desired.
Figure 40
The bottom of the FastFire III has a thin mat so that when you clamp the sight to the laser housing, you will get good even contact across the bottom. Also, notice the two recessed holes on the forward end.
Figure 41
These two holes mate with the two protruding integral pins on the body of the laser. These pins, along with the screws, make the FastFire III installation on the laser very sturdy. The laser body also has an extra hole in the event you are mounting some other manufacturer's sight on the laser. These next two photos show the laser without the FastFire III installed and this may be a configuration you choose to use. Remember, you can remove the FastFire III and install it on another firearm as long as you purchase the correct adapter plate for your other firearm. You can see a list of optional FastFire mounts here.
Figure 42
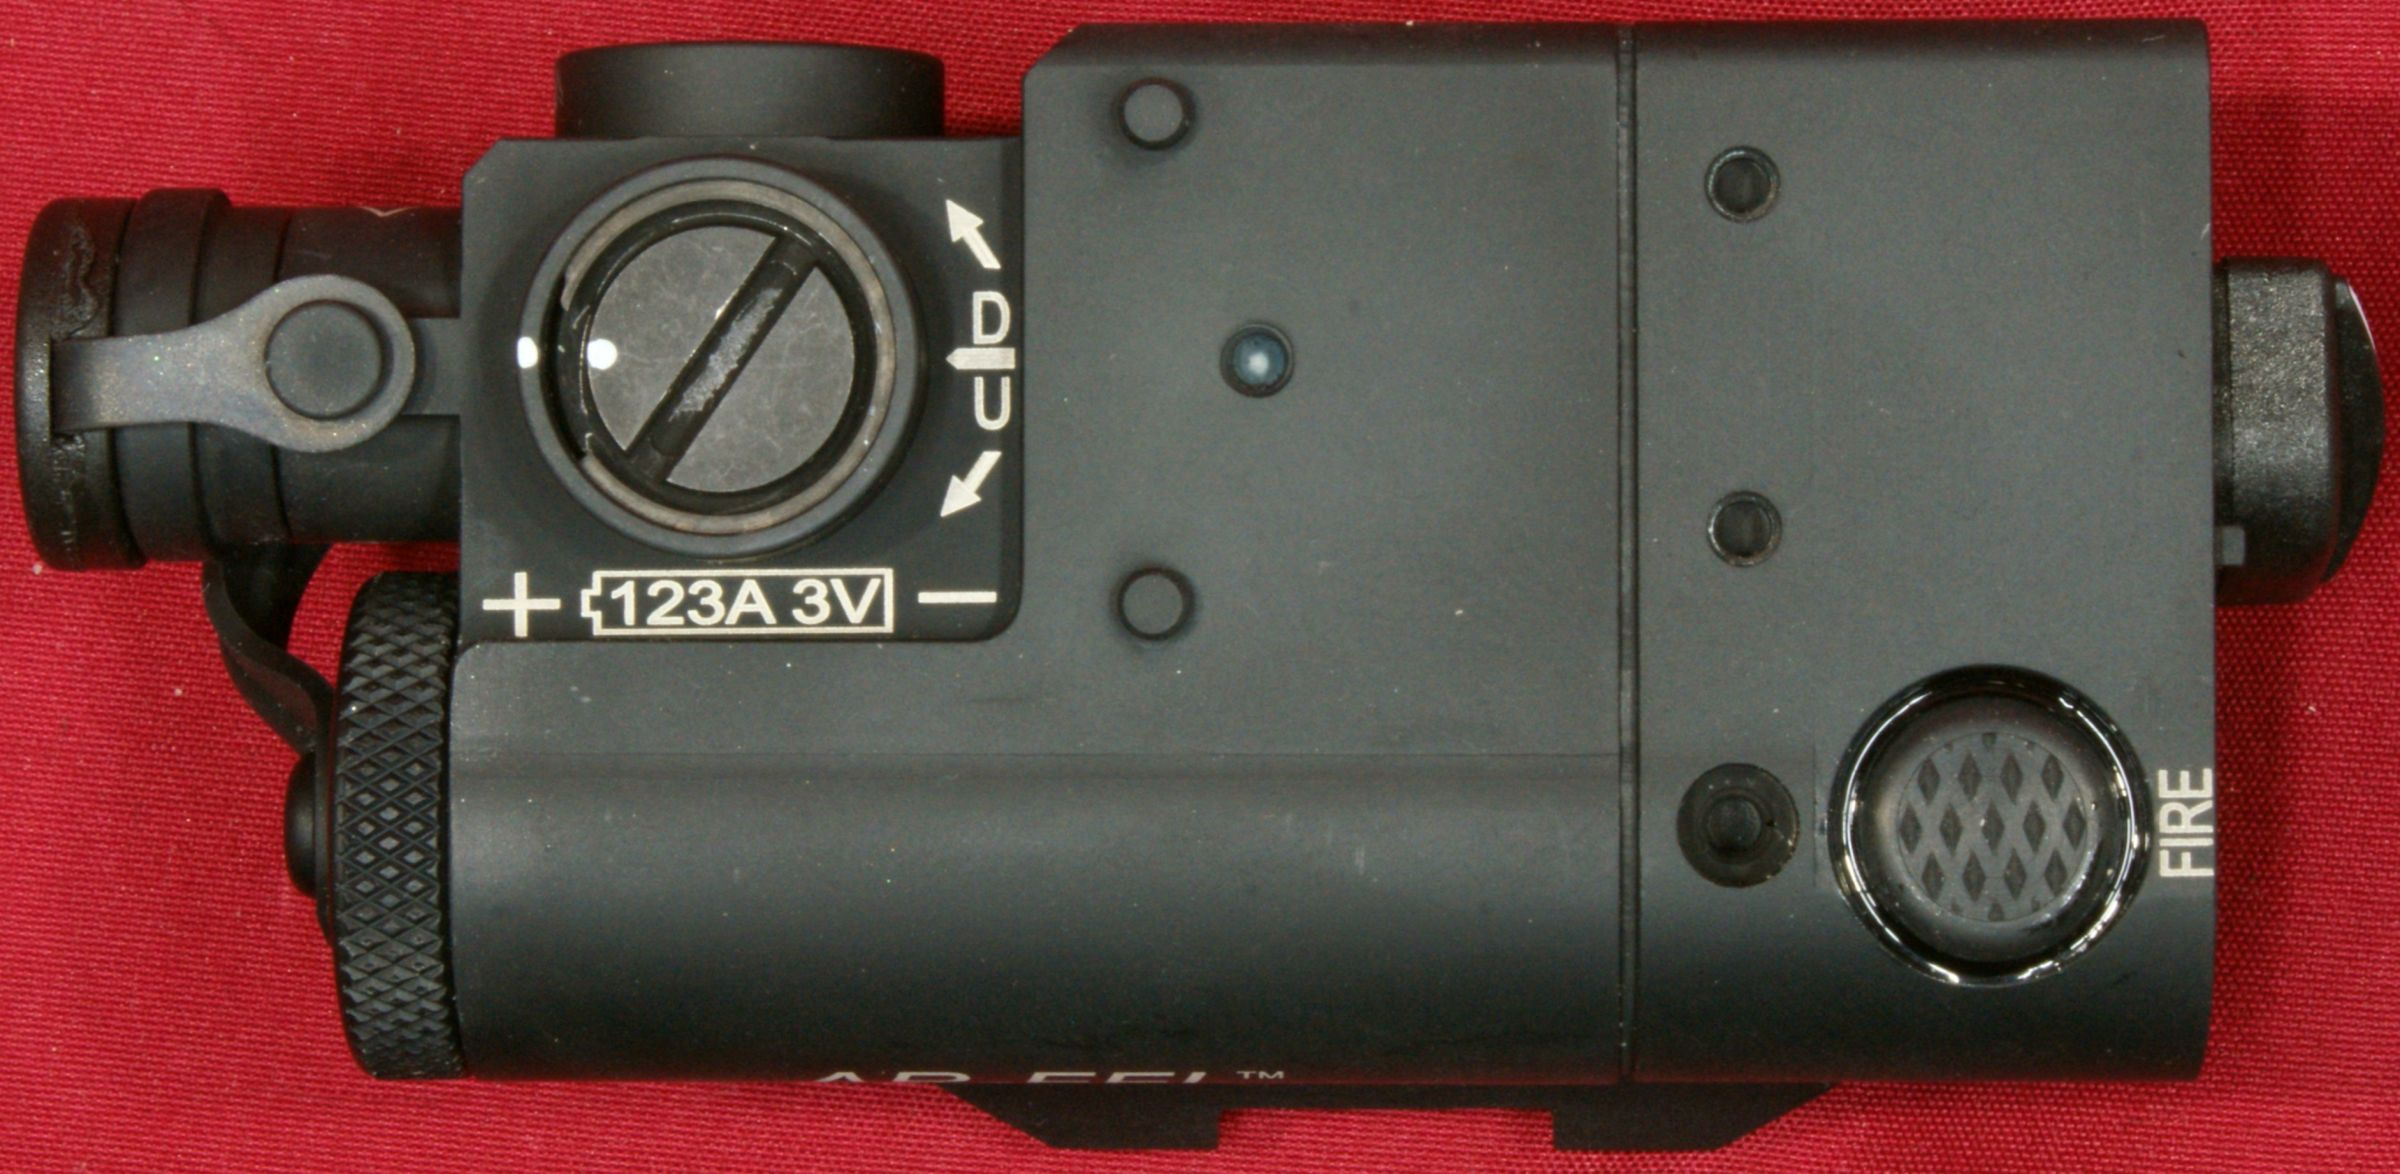
Figure 43
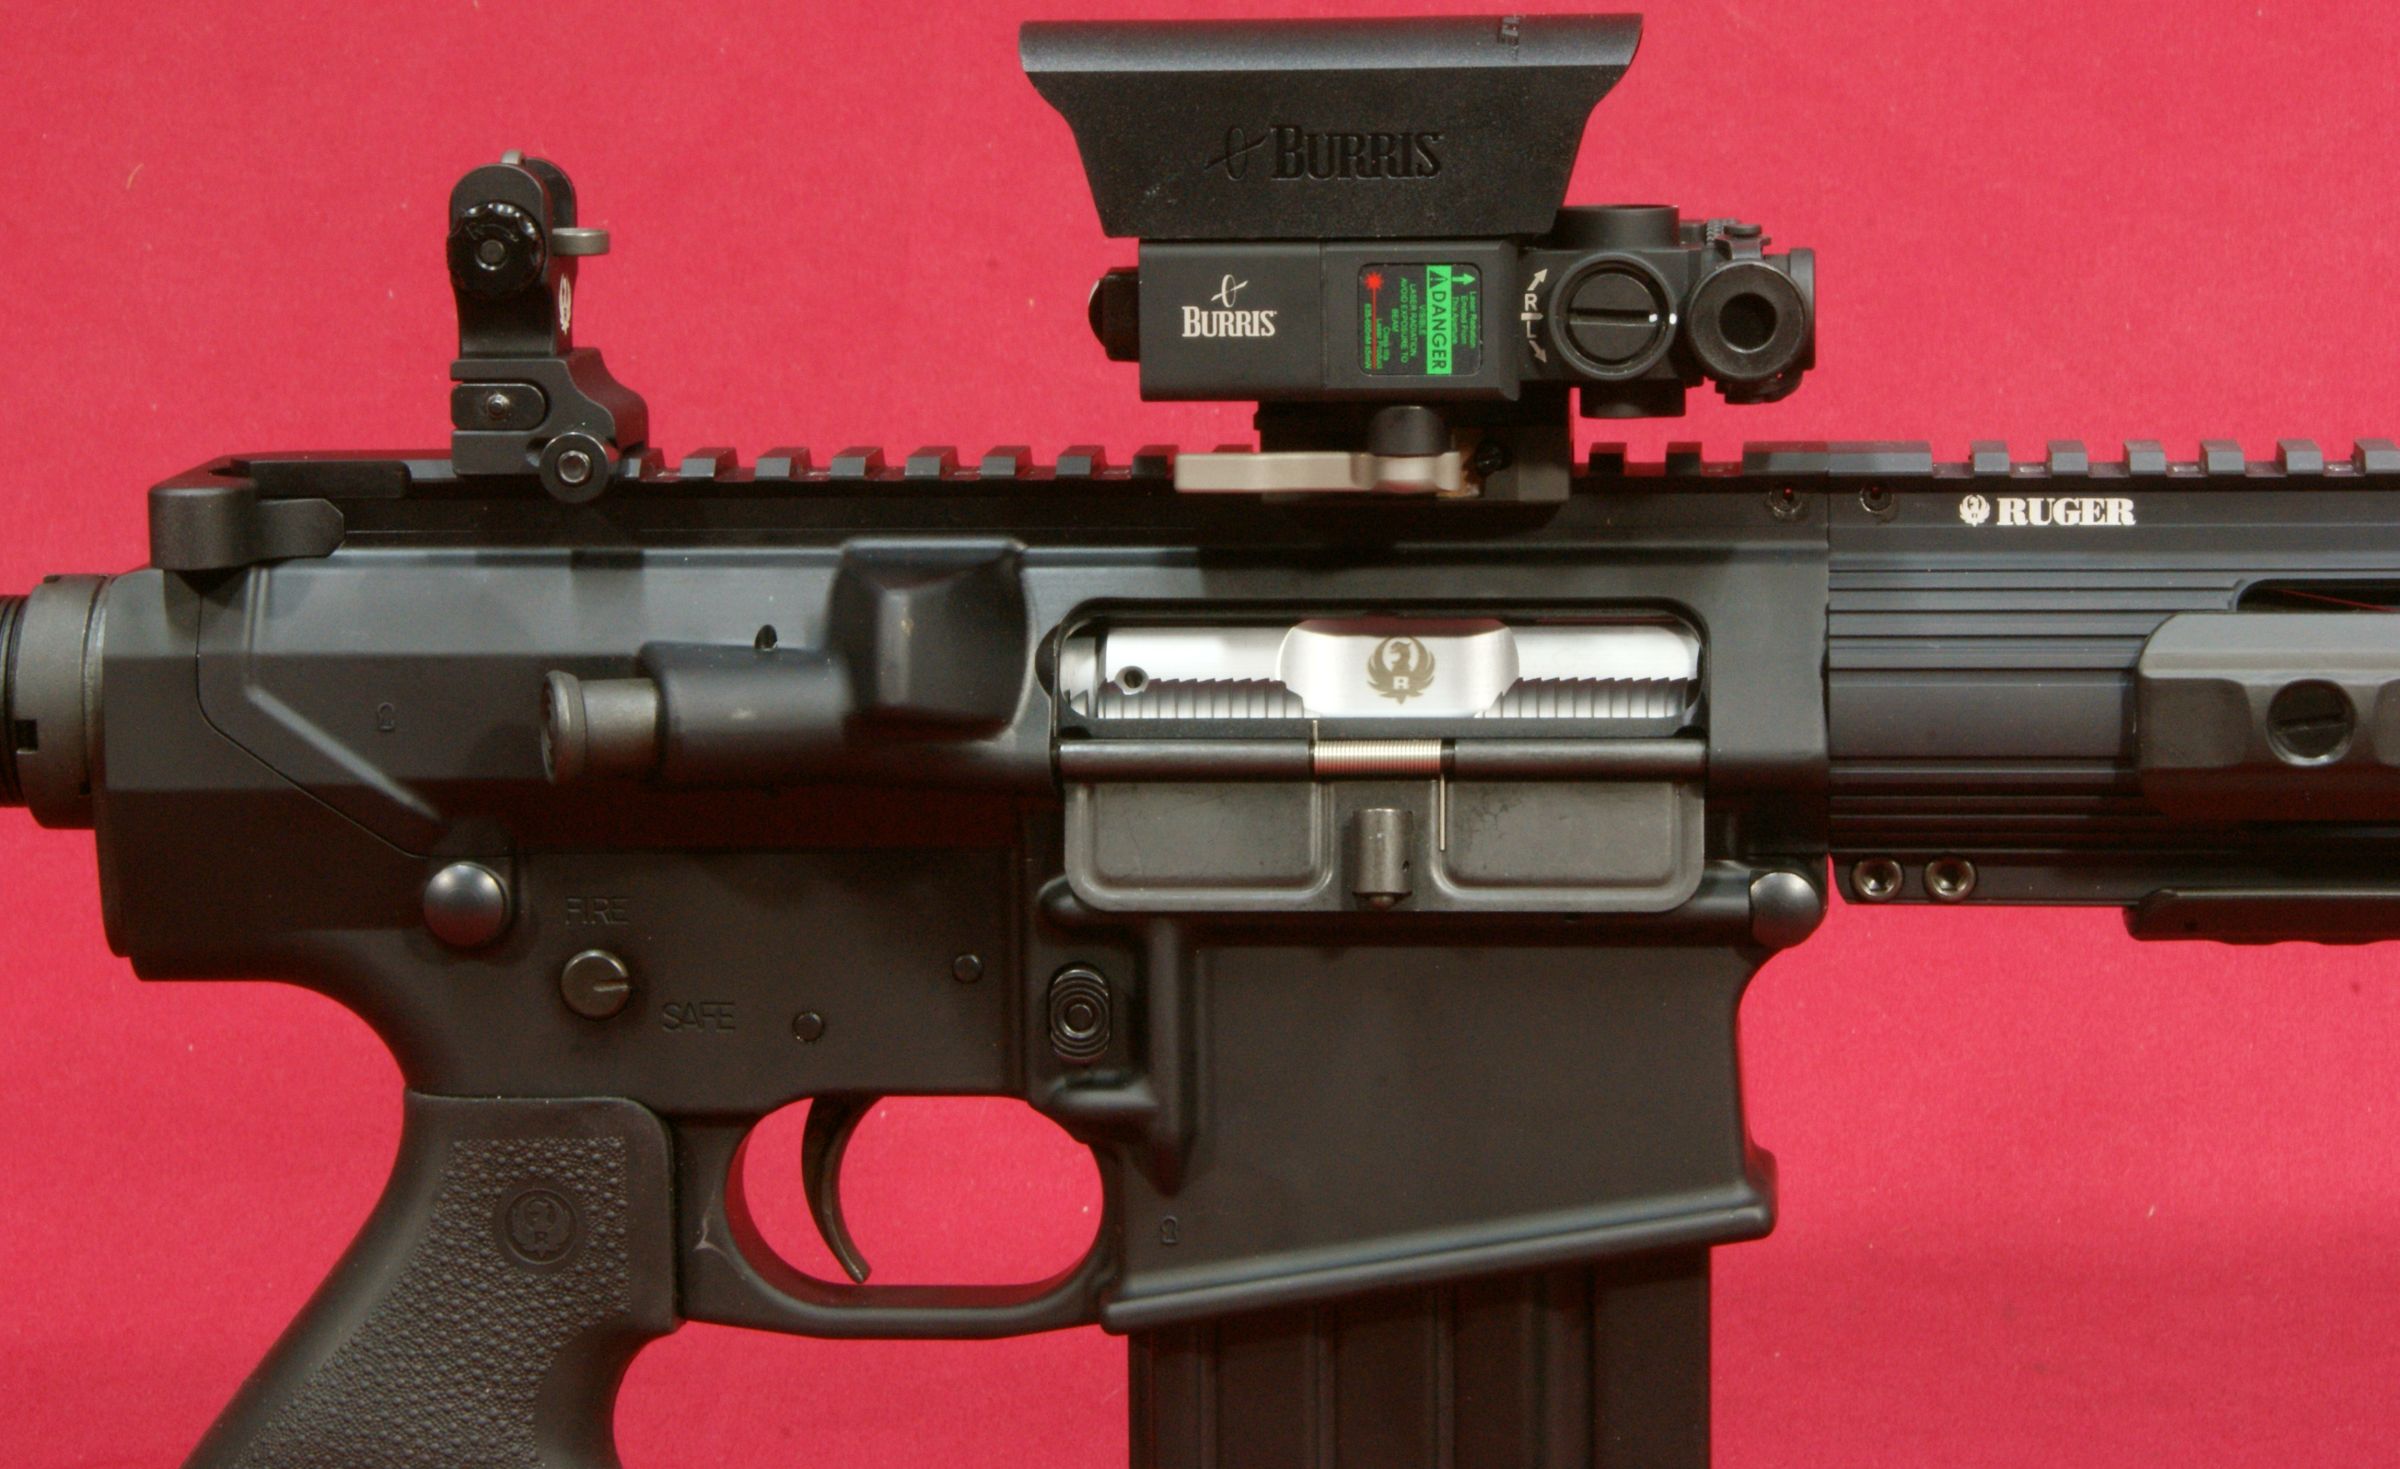
These next photos show the AR-FFL laser system installed on my Ruger SR-762 rifle.
Figure 44
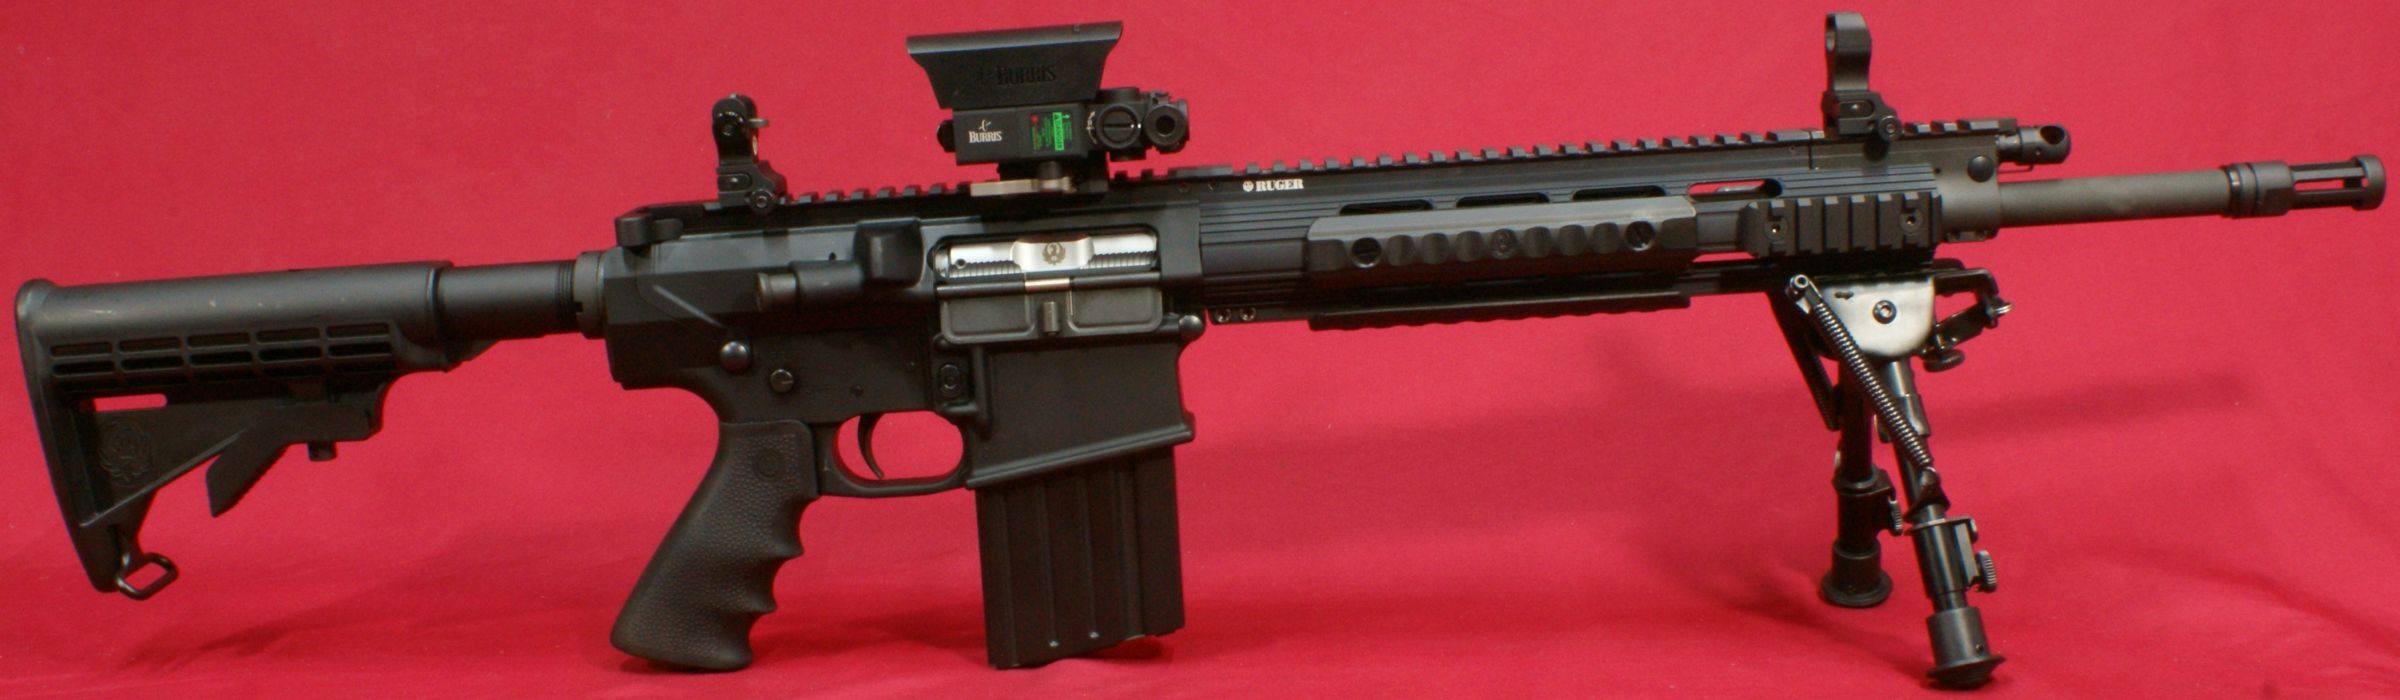
In reality, you can install the AR-FFL anywhere along the length of your upper rail on the receiver or handguard. If this were to be my only additional sight system for this rifle I would install it on the receiver rail in the approximate location shown below.
Figure 45
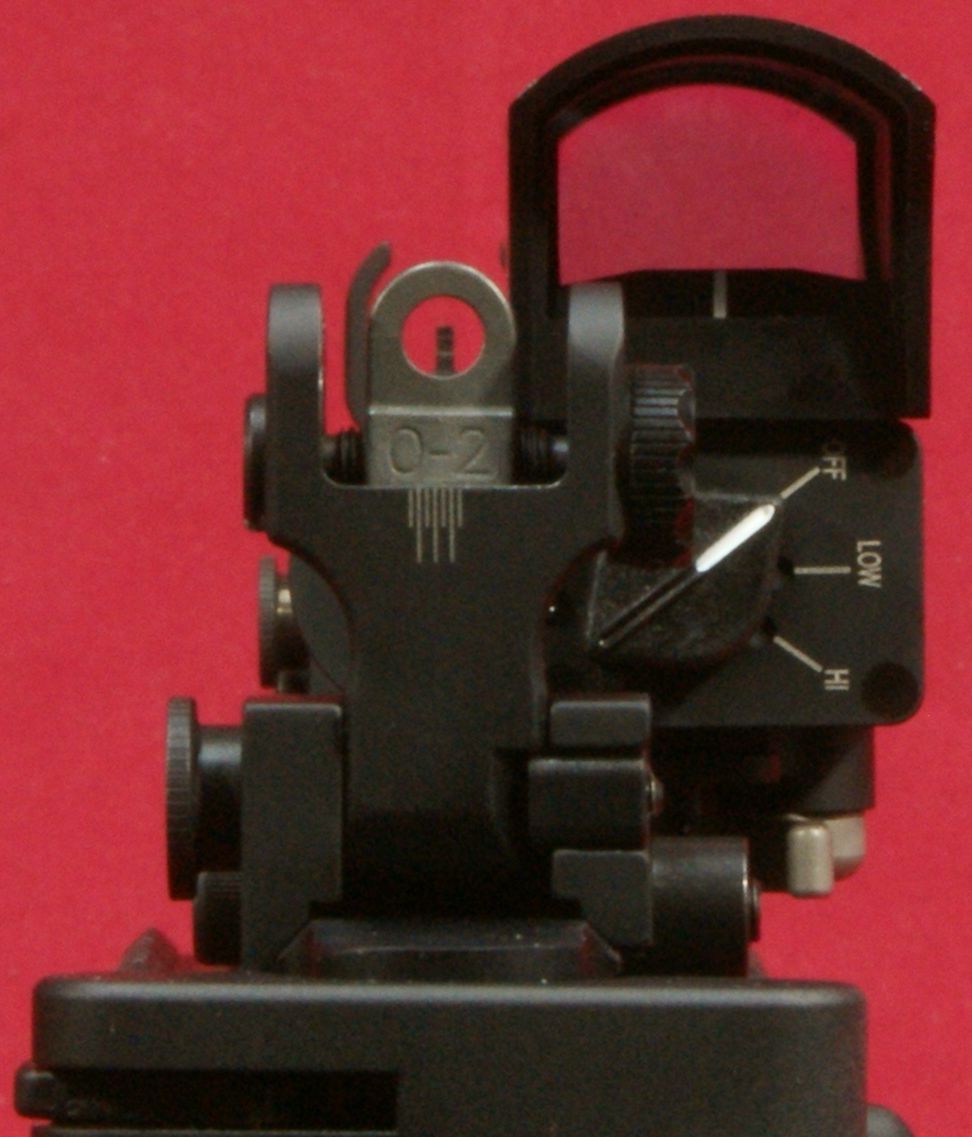
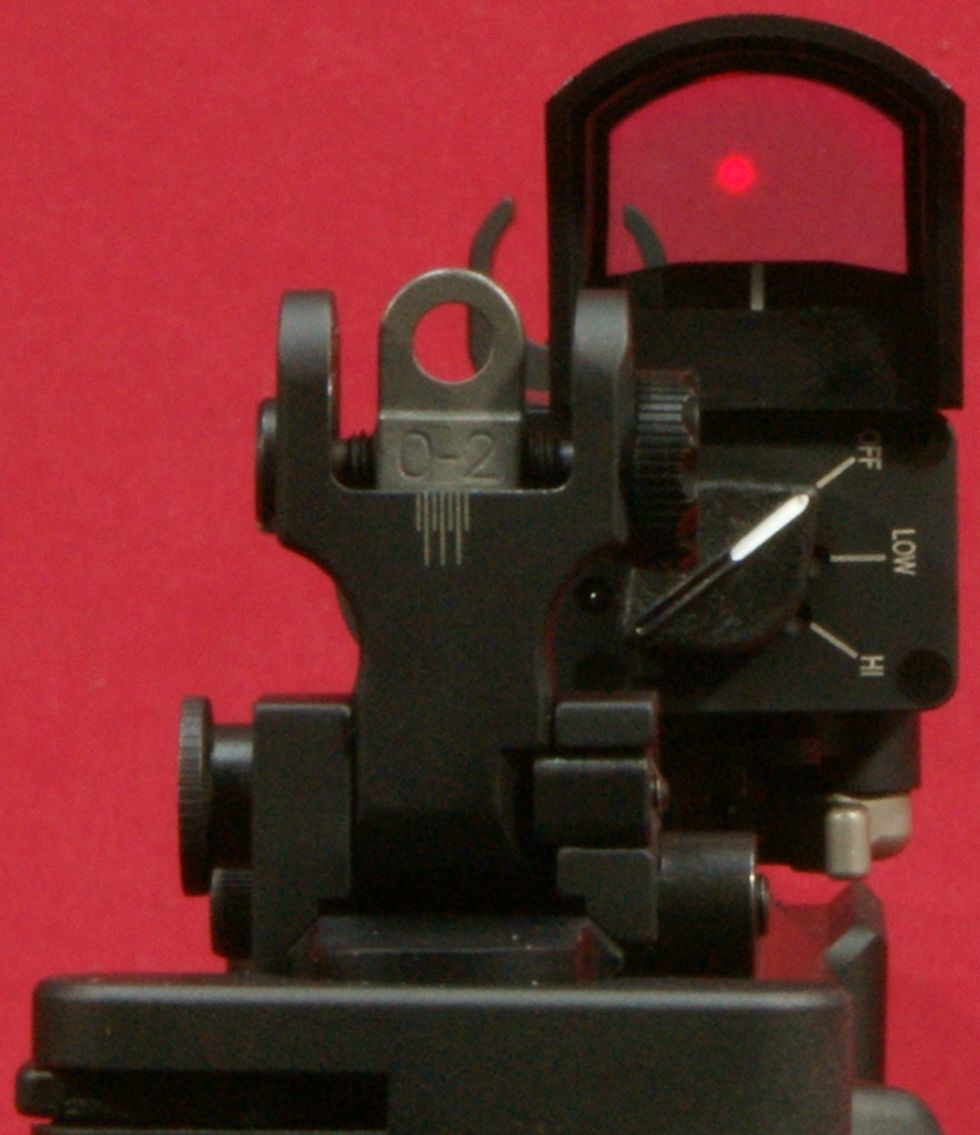
If the "inline" AR-FFL sight height is the same as this "offset" version (most likely it is), the sight height would not allow co-witnessing with the FastFire III based on the flip-up sights that came on my SR-762. The center of the peep on this rear flip-up sight below is about 1.43" above the top of the rail. This is consistent with my other Troy Industries and Magpul flip-up sights. The bottom of the FastFire III sight windows starts at approximately 1.60" above the top of the rail and extends up to approximately 2.15". Clearly you cannot cowitness this "offset" version of the AR-FFL and I don't believe you can cowitness the "inline" version either because of the height of the FastFire III sight.
Figure 46
Figure 47
For this review, one reason I selected to review the offset version of the AR-FFL system so I could get an idea on how the offset feature may impact head position when shooting. The two photos above show the sighting difference between iron sights and the FastFire III and the associated view angles looking through each sight. I found that I was able to transition between sight pictures by either shifting my head, tilting the rifle or a combination of both. During range testing, I found that tilting the rifle seemed to be more natural. I prefer a flattop configuration for my AR style firearms which would lead me towards making the decision to get the "inline" version of the AR-FFL system. But now after taking a close look at this "offset" version, the decision has become a little tougher deciding which one is best for me.
This next video shows some of my range testing of the Burris AR-FFL while installed on my Ruger SR-762. Both the laser and FastFire III zeroed without issue and I was pleased with this combination sight system.
As you would expect, the laser seemed to be very effective on high power even in bright sunlight. The low power setting was sufficient in any low light or indoor settings.
Bottom Line:
Although the Burris AR-FFL Laser System is not an inexpensive sight, I think it has a great amount of value. Purchasing this AR-FFL sight combination which includes the Burris FastFire III installed on top of a Laser Devices offset red laser sights gives you two premium sights at nearly the price of the laser alone. Both the FastFire III and Laser have proven reputations for dependability and reliability. From everything I have seen in my studies of these products, I believe them to be quality pieces of hardware that should provide you many years of use. If you are ready to step up your game and invest in a red dot and laser sight system, then the Burris AR-FFL sight needs to be at the top of your list for consideration.
Check back in the near future to see an update to this review after I have used the Burris AR-FFL on a new AR style pistol that I have in the works.
Or
If you would like to be notified about future Gunsumer Reports reviews via Facebook, make sure "You Like This" by clicking the Facebook "Like" button at the bottom or top of this page. If it already says "You Like This" beside the button, clicking it again will uncheck the "Like" status and you will not be notified.
| Share on Facebook | |
© 2010, 2011, 2012, 2013, 2014, 2015, 2016, 2017, 2018, 2019, 2020, 2021, 2022, 2023 & 2024 Gunsumer Reports™, All rights reserved.
FTC Disclosure