|
|
Gunsumer Reports TM Providing Detailed Objective Reviews for Firearms and Firearm Accessories |
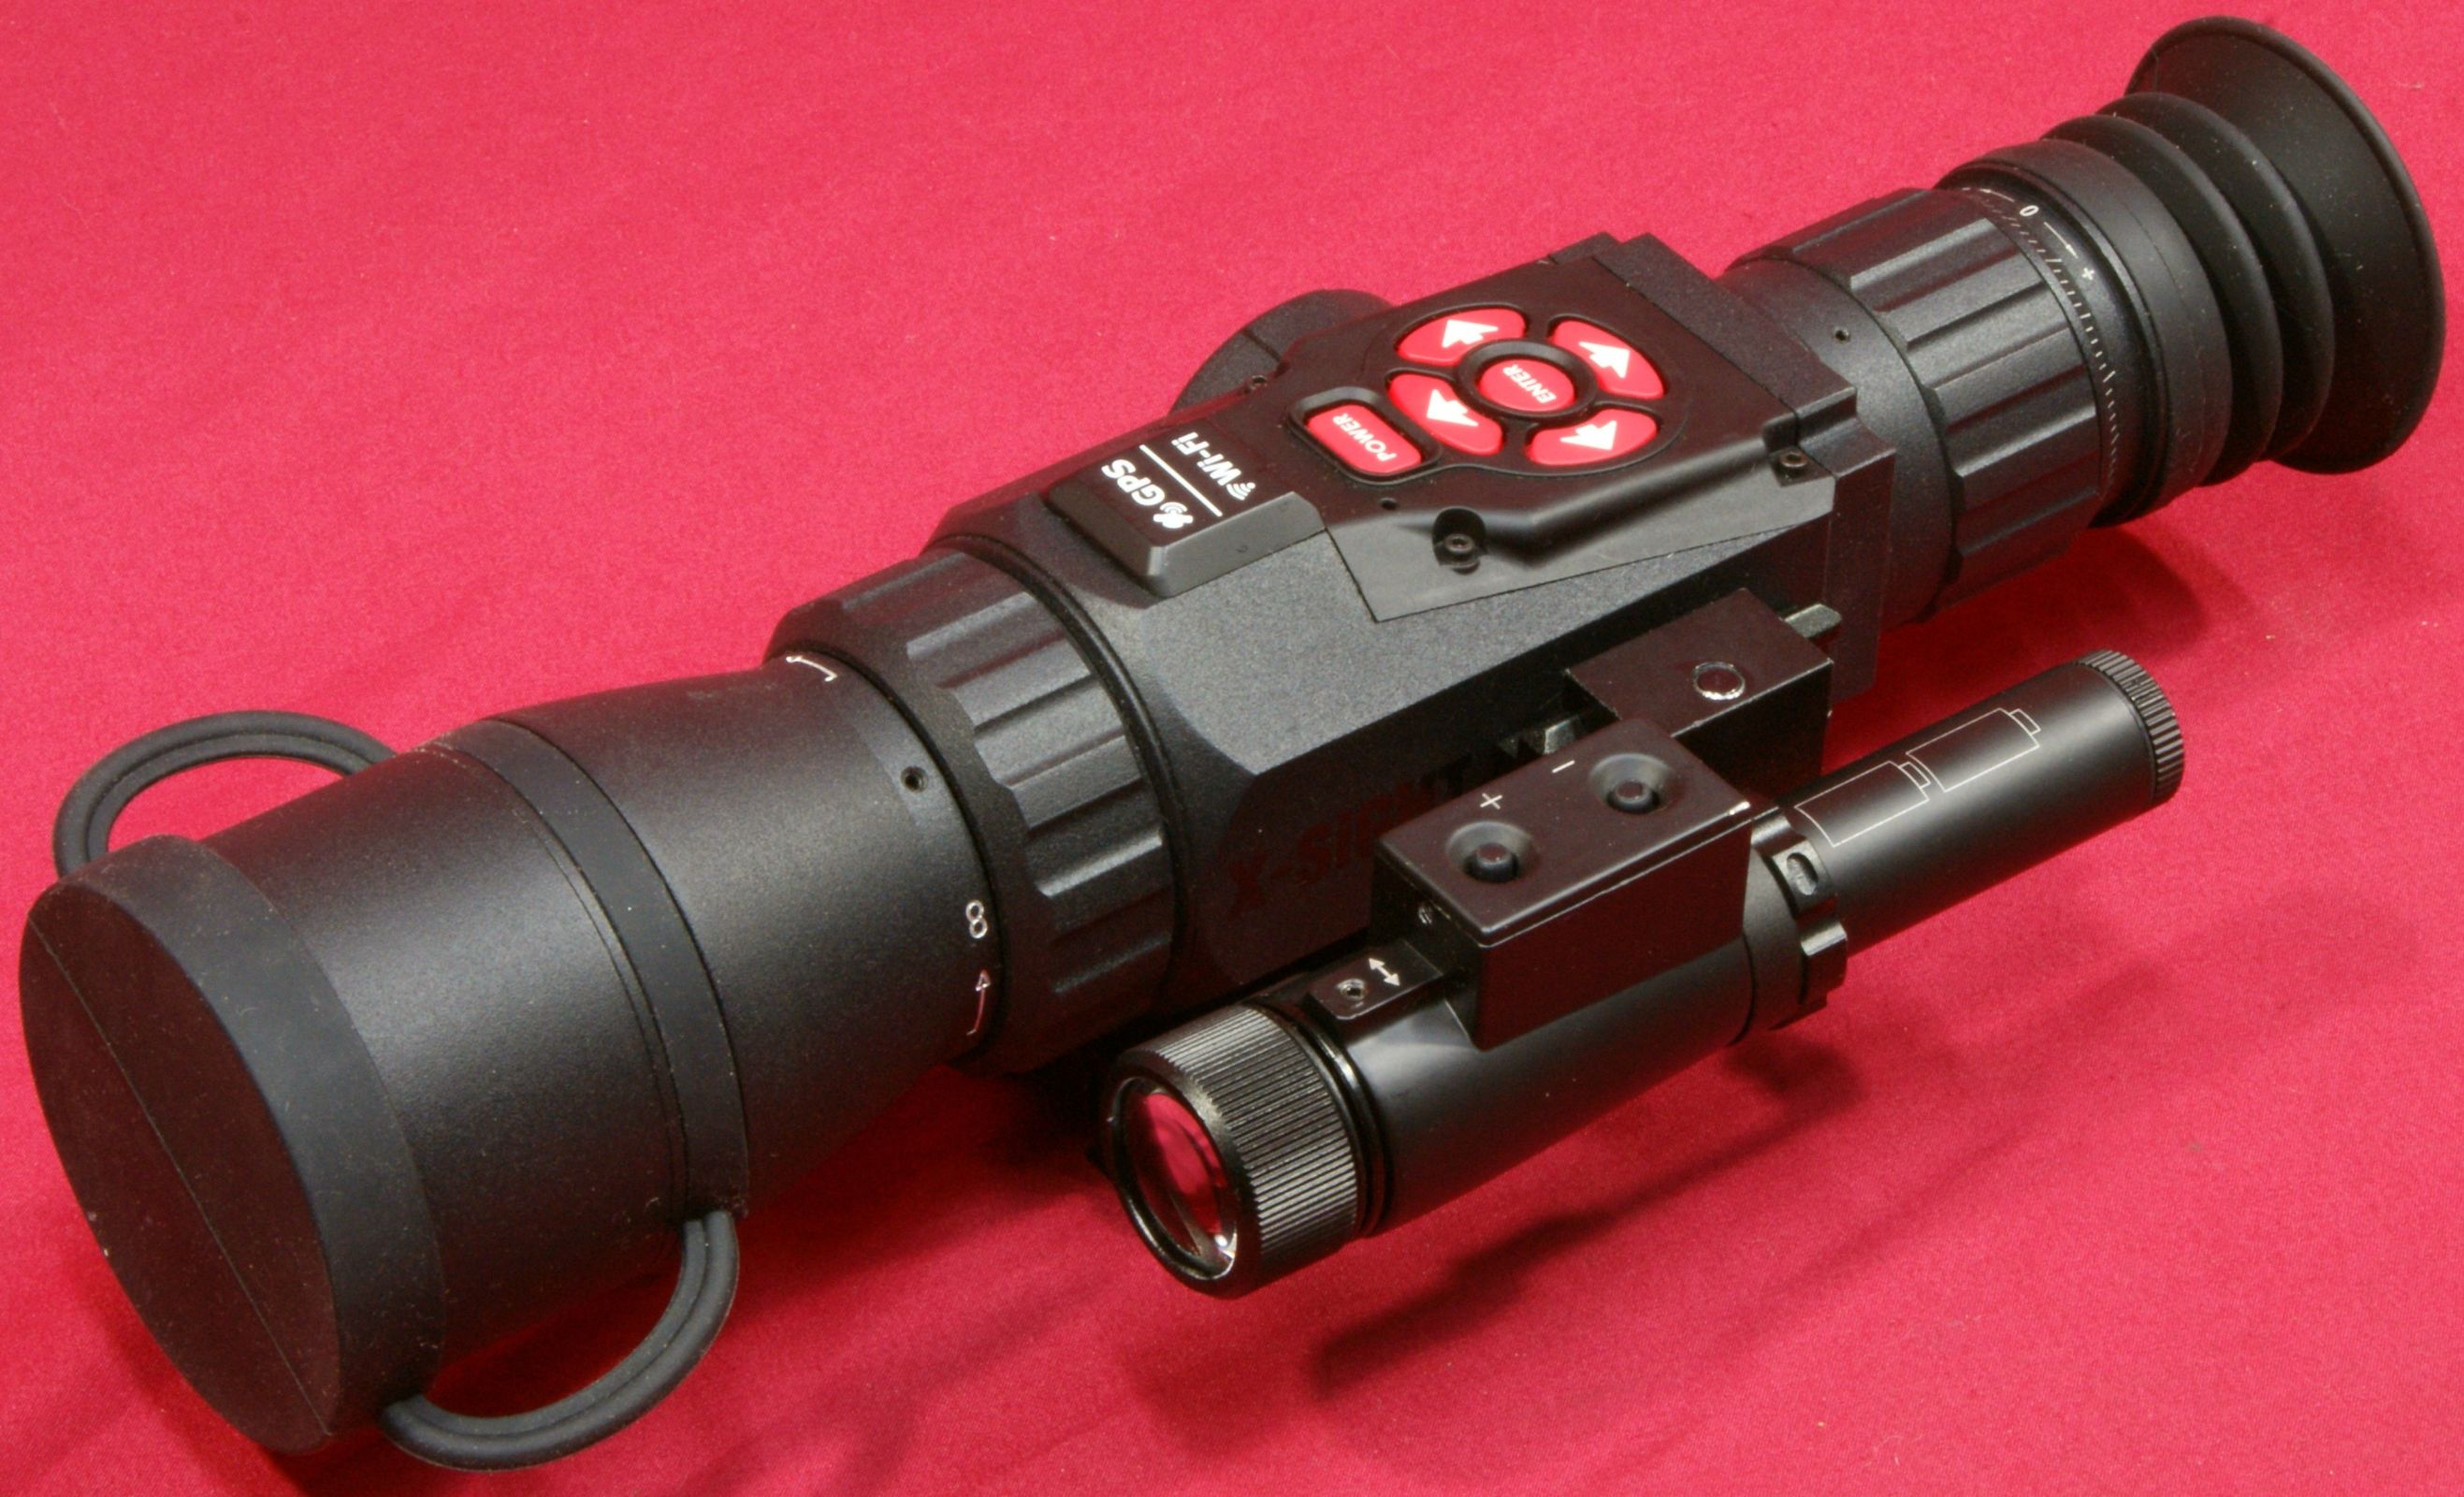
ATN X-Sight HD Day/Night Riflescope Review
Part 3 - Zeroing & Zooming
10/8/15
In this part of my ATN X-Sight review, I'm going to try and cover zeroing the X-Sight and my evaluations of the reticle position when zooming. In an older Firmware version I felt like there were some scaling issues between the screen and reticle which caused slight zero shifts, so I wanted to specifically examine this again to confirm that this problem was fixed (and it looks like it was).
Initial "Checkout" Zeroing
The first order of business for my range tests was doing a quick evaluation of zero repeatability when zooming using a rimfire platform prior to me spending more time shooting higher cost ammunition. I had already done this same test months ago on a very early version of the firmware and proved (at least to myself) that I was seeing some zero shift as I changed the magnification power. Since that initial test, ATN has come out with many firmware updates that changed drastically how the reticle was displayed when zooming so I felt like this issue was probably addressed.
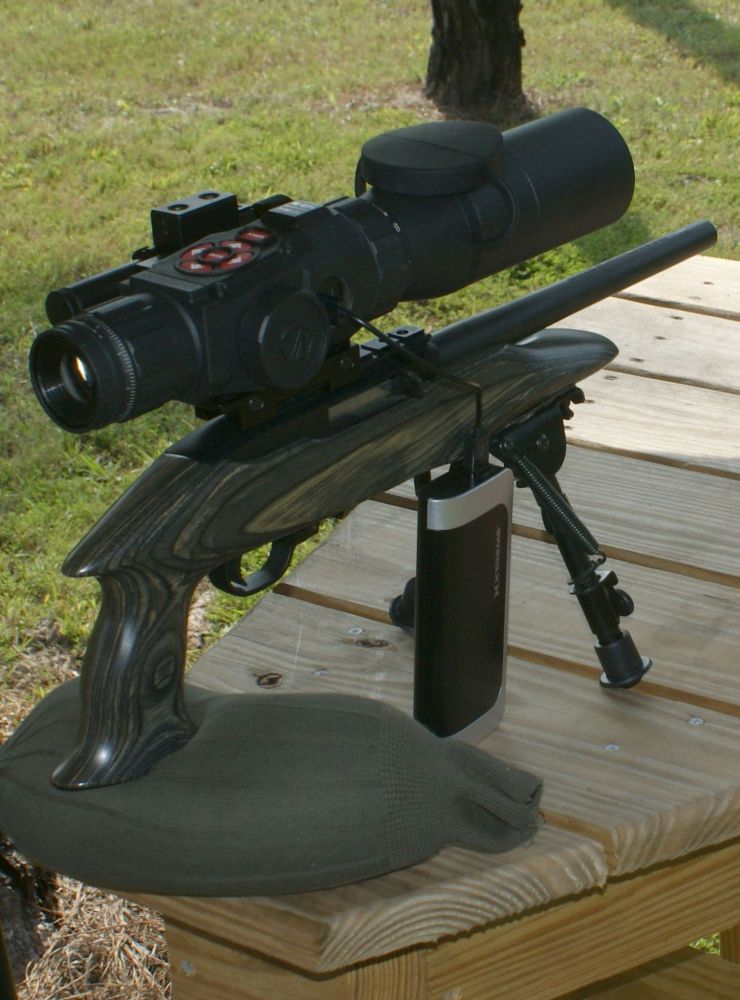
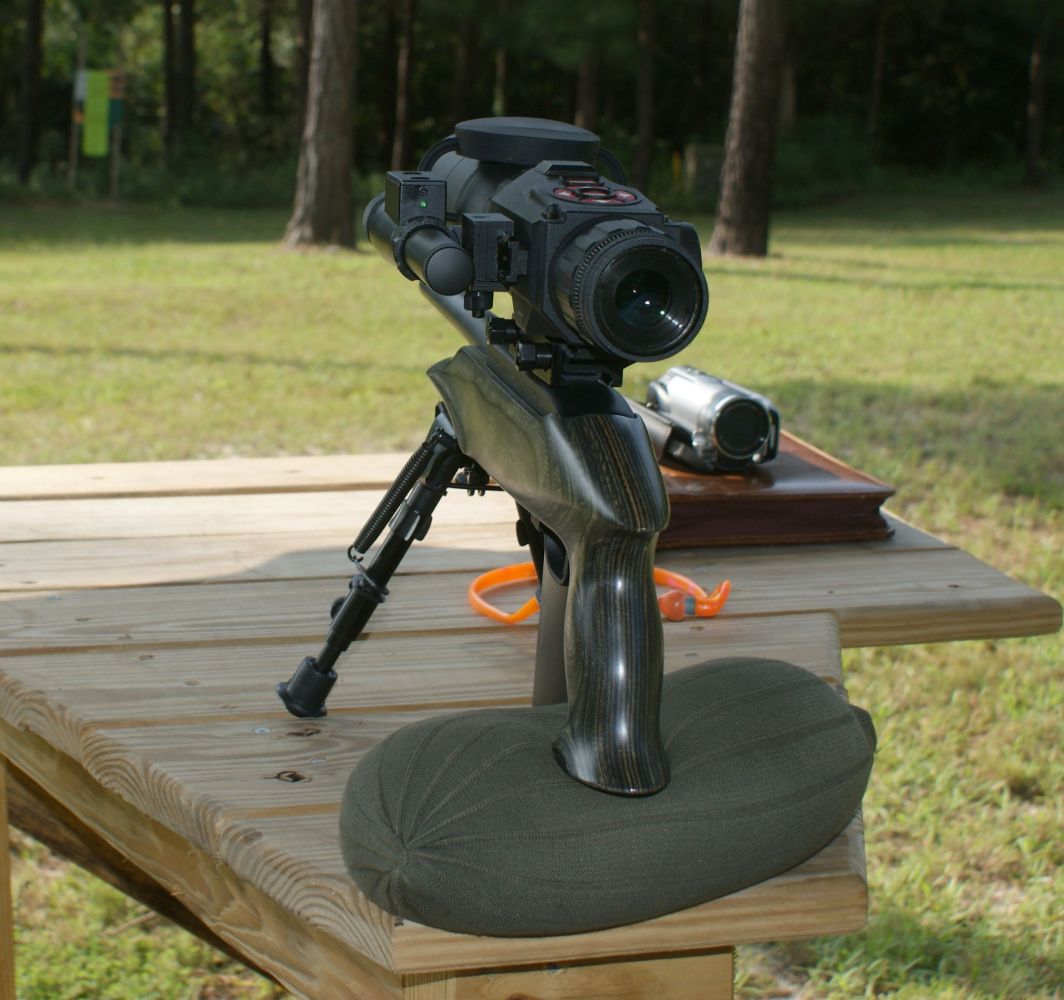
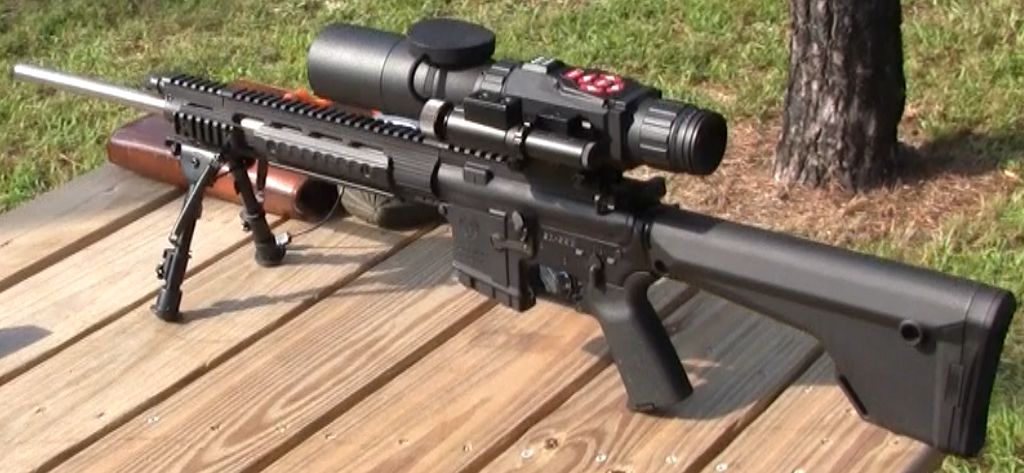
For this effort, I installed the X-Sight on a Ruger 22 Charger pistol as shown below. Clearly the X-Sight is not a pistol scope, but I knew this pistol was very accurate and I could move the pistol to the edge of the bench to deal with the short eye relief on a riflescopes. Also, this pistol configuration is much easier to put a camera up to the lens of the X-Sight because you don't have to deal with a buttstock getting in the way. I set up the targets 25 yards from the bench and used CCI Standard Velocity ammunition through this part of the evaluation.
Figure 1
Figure 2
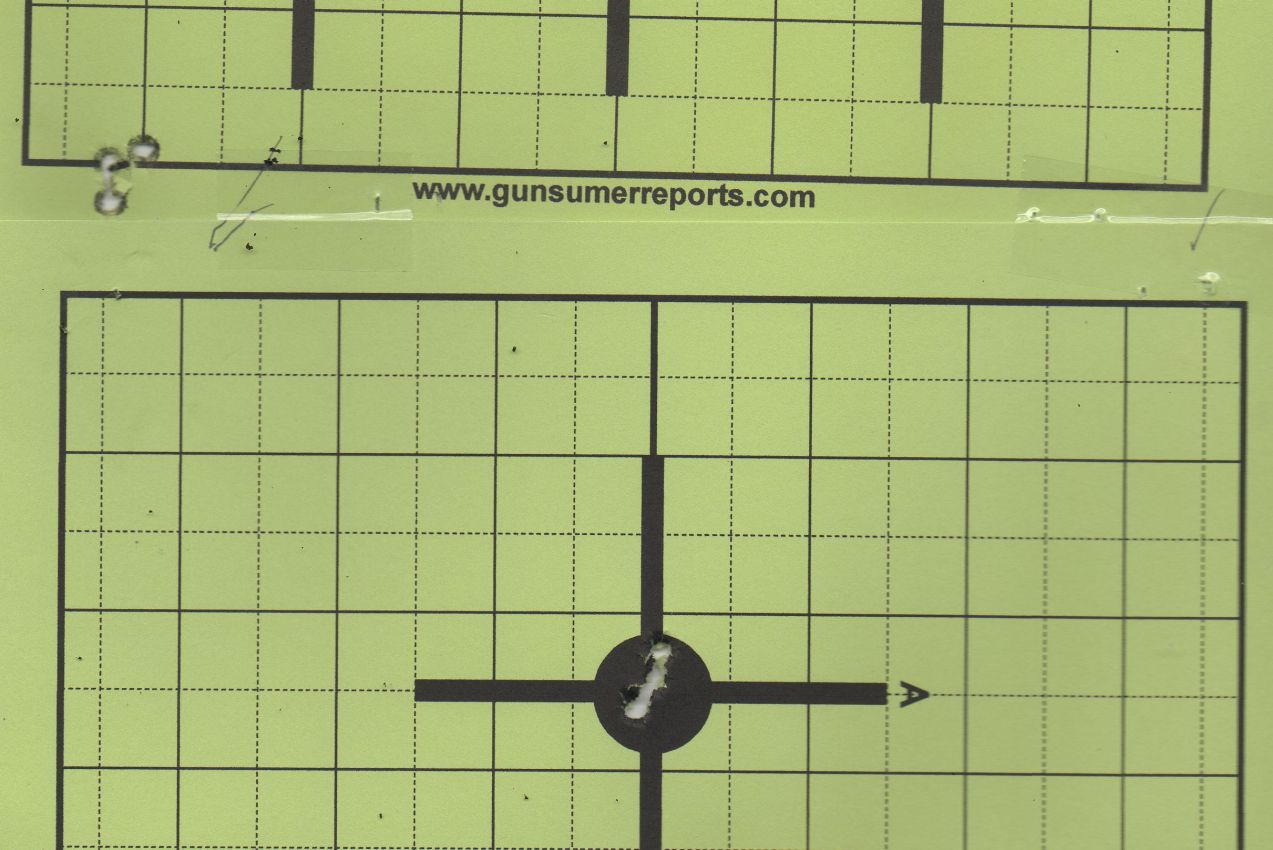
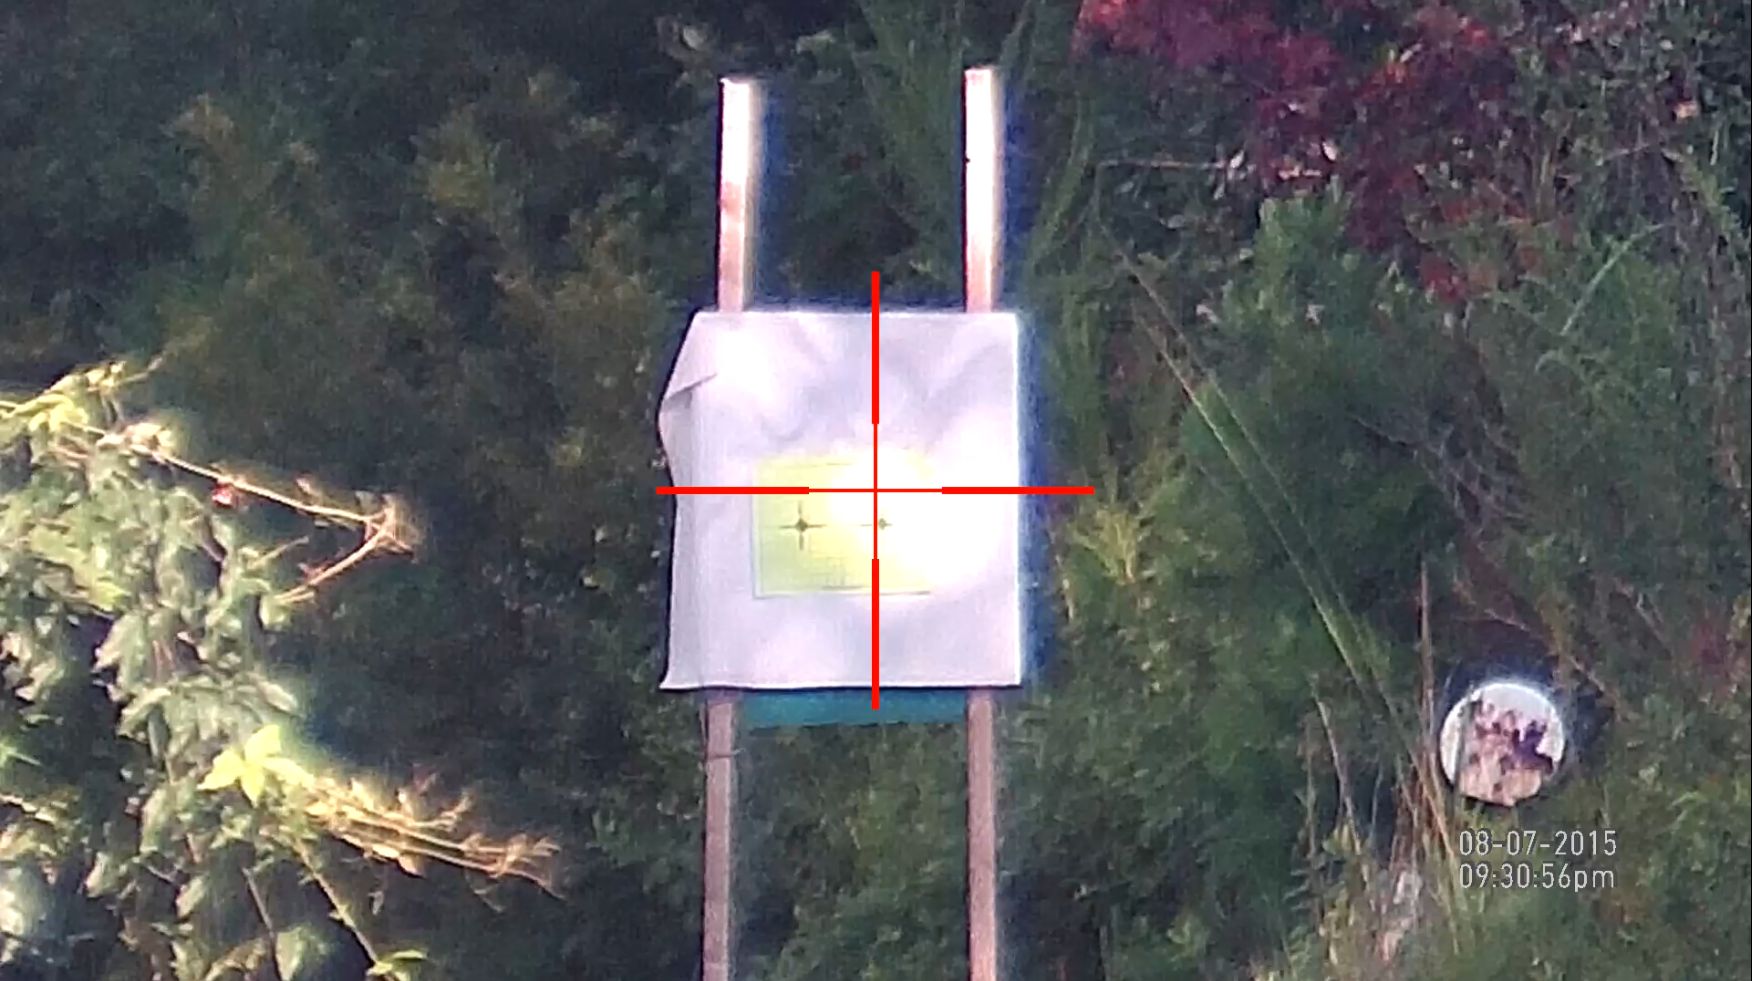
Although the zeroing process on the X-Sight may be considered a "One Shot Zero", I felt better shooting a 3 shot group for my efforts. I initially aimed the device at the center black dot below. My initial three shots fell in the upper left corner of this target. Using their zeroing feature, I held the green reference dot (for an example see Figure 7) in the display screen on top of my initial aim point (the center black dot) and then shifted the reticle using the arrow buttons on top of the unit until the reticle was over the three shot group in the upper left corner. After I saved this new zero (quick press of the Enter button), I aimed again at the black dot and produced the three shots in the black dot as shown below. It was simple and easy.
Figure 3
Zooming And The Ability To Hold The Zero
Now that the X-Sight was zeroed, I wanted to confirm that as I changed the magnification power on the scope that the zero remained true for any magnification power. This next photo shows 3-shot groups at the magnification levels identified (5x through 16x). Except for an occasional stray bullet due to me or the ammo, the zero proved to be consistent throughout this zoom range. I still find it amazing how accurate the Ruger Charger pistols shoot. Many of these groups fall within the one MOA range.
Figure 4
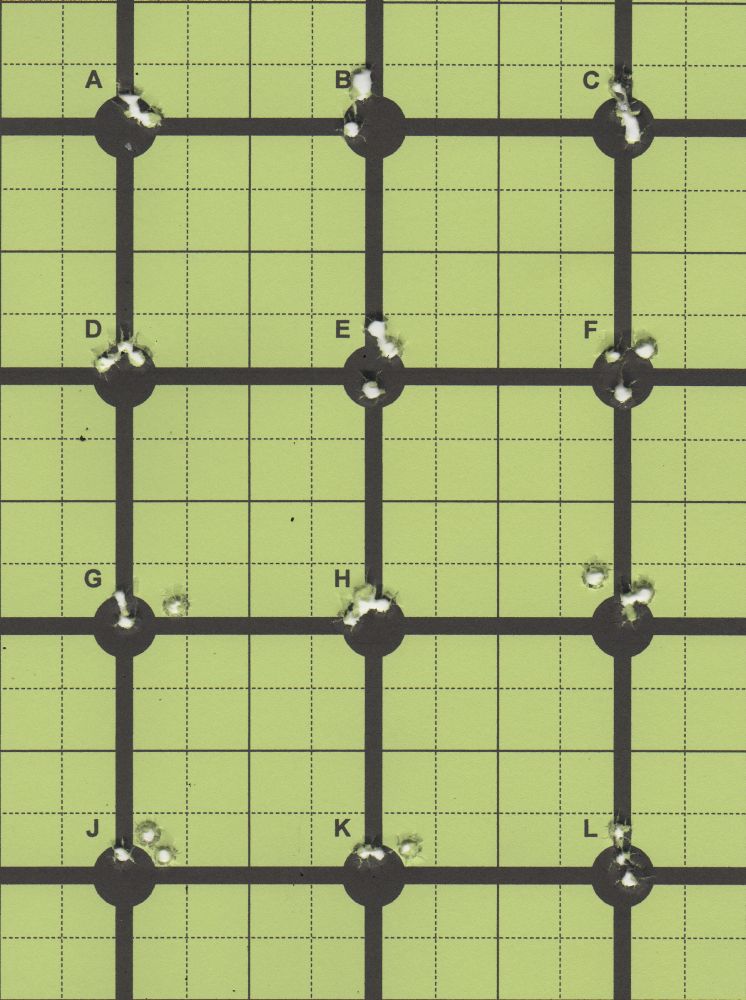
This next photo shows the X-Sight zoomed it at powers of 18x, 20x, 30x, 40x and 50x. In Standard mode, the zoom range is limited to 20x for the 5-18x model, but in Extended mode it is limited to 50x. Also, even though I rounded the power setting off to the nearest 10 power, they were close, but not always exact. I don't feel like this lack of exactness mattered for this evaluation. I also got mixed up on the 50x group when zoomed into that power and put my other two shots on the 20x target. Again, there was no significant, if any, zero shift noticeable when zooming during this evaluation.
Figure 5

Zeroing Again
After being comfortable that there were no issues with the zero shifting while zooming, I installed the ATN 5-18x X-Sight on my Ruger SR-556VT Rifle. With this rifle, I performed an initial zero at 25 yards before shifting to the 100 yard range which is where I like to zero for many of my scopes.
Figure 6
One thing I quickly discovered was that for some reason I didn't have enough elevation adjustment to allow me to zero the scope. I was not able to move the reticle higher than -190 counts. Since I haven't explained counts yet, I guess now is a good time to show the display screen below which is what you see inside the unit when in the Zero Setup Mode. I took this photo in my office, so there was no background image other than the darkened image. At the range, you would see the target just like looking through any scope. The center red dot on the screen represents the absolute zero for the scope. Absolute zero is when X=0 & Y=0 counts which is displayed this way when the reticle is on top of the red dot. The green dot represents your last saved zero position and the reticle cross represents where you have adjusted the reticle for your new zero. In this example, the reticle has been adjusted left X=-312 and up Y=-140 counts.
Figure 7
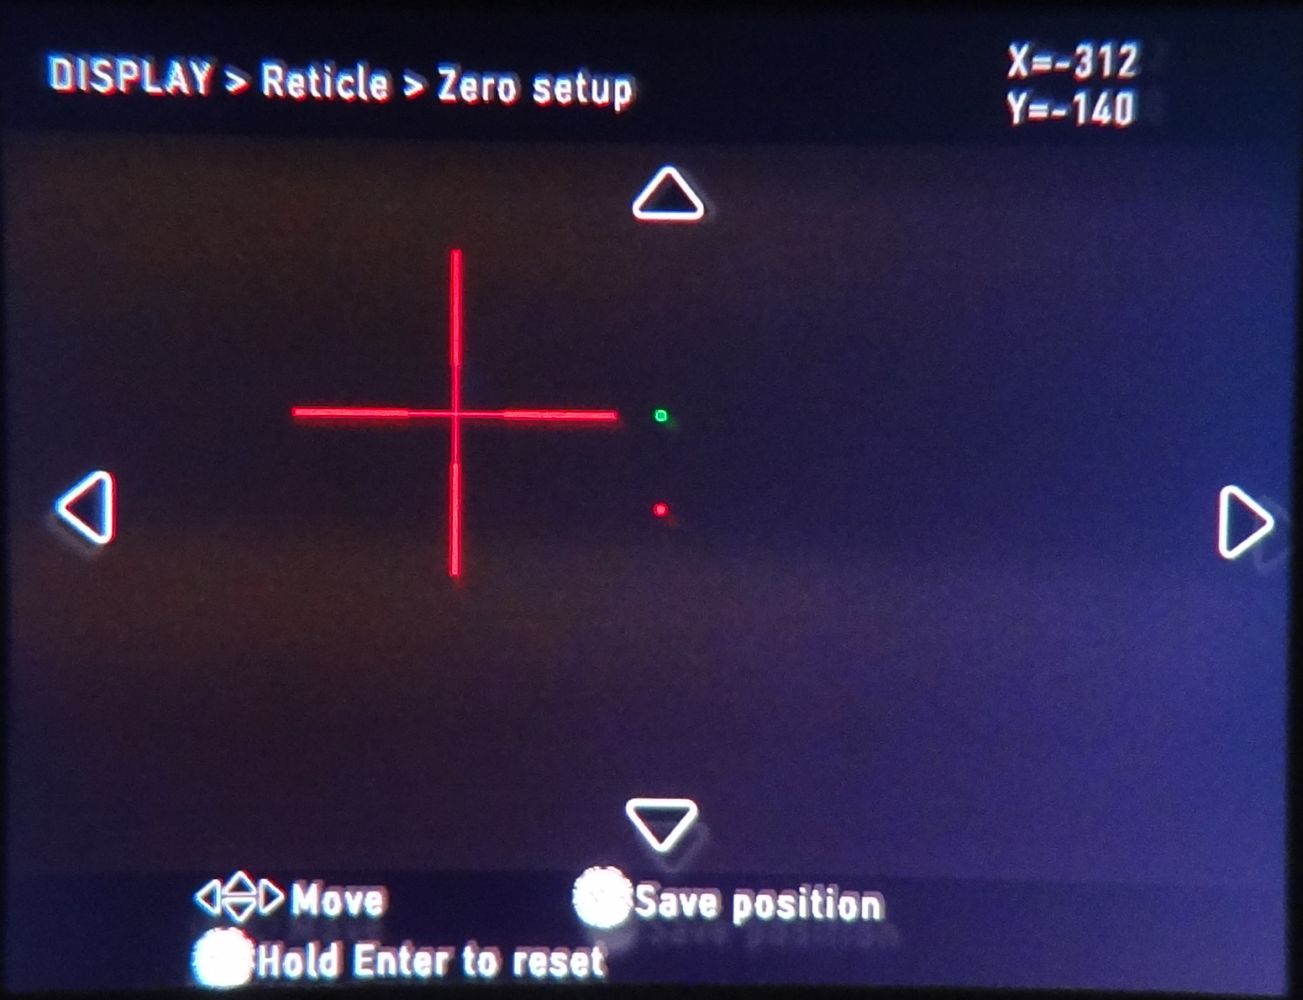
The total adjustment range for the reticle based on counts is X (Windage) = ±470 and Y (Elevation) = ±190. To try and get this into some type of standard windage and elevation value like inches or MOA, I scaled up a zero elevation count which I recorded using the Charger pistol where Y=-140 measured 2.40" shooting from a distance of 40.7 feet. So at 100 yards (300 ft), Y=-140 would be about 17.7". Doing math again, this means a count of Y = ±190 is the same as having ±24 inches of elevation adjustment which is on the low end for elevation adjustment for a typical rifle scope. Using the same scaling factors, windage calculated to be about ±59" which is on the high end for windage adjustment for a rifle scope. Again, with a little more math, each count is about 1/8" at 100 yards.
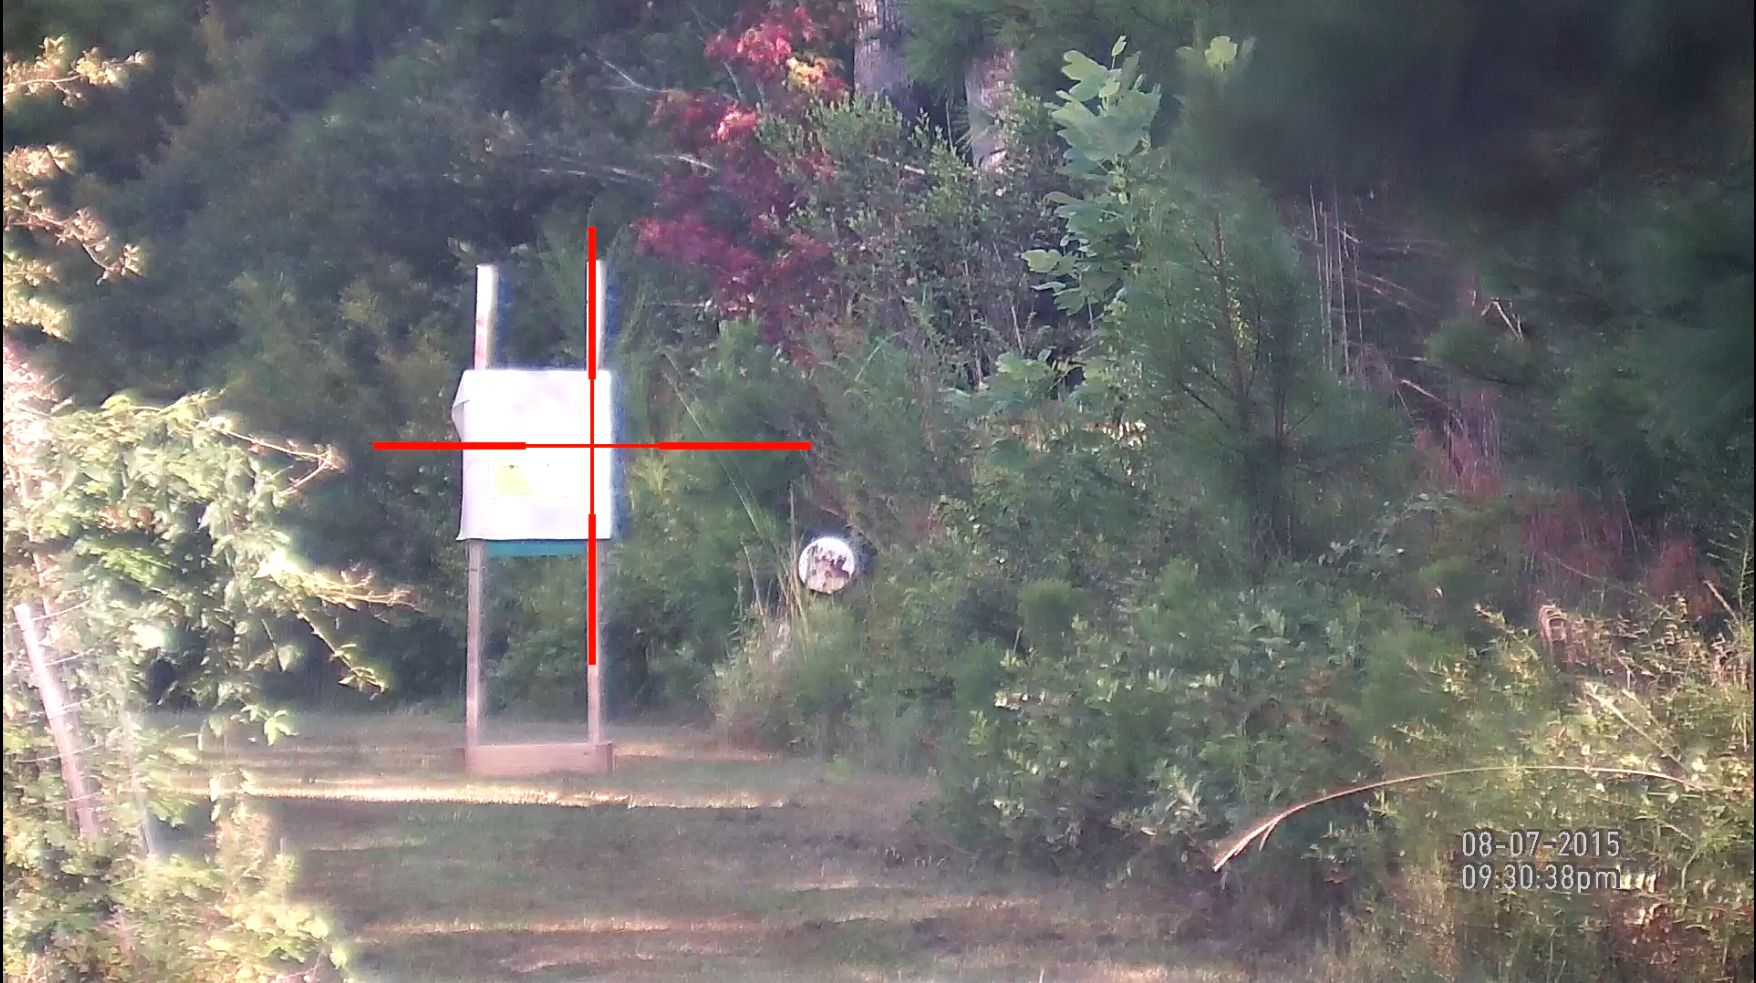
Now back to zeroing the Ruger SR-556VT rifle... I ran out of adjustment range in the up direction so I made some quick shims using aluminum tape and placed the shims (several layers) on the front pad area of the scope mount. I would not recommend this type of shimming on a traditional scope or scope mounts, but I felt this would work on the beefy one piece mount installed on the large body of the X-Sight. Doing this seemed to correct the elevation adjustment issue, but because I did this shimming hastily at the range, some of the shim edges ended up against the side of the clamp which caused me to require a large amount of windage adjustment. The photo below was taken from the video shot by the X-Sight riflescope and shows how far over the zero was to the left. Keep in mind I created this left shift with my shimming error, but I still had to shim to correct for some of the elevation adjustment due to lack of range on the X-Sight. This actually gave me a good talking point.
Figure 8
Fortunately, as you zoom in the X-Sight, the display image and reticle will shift back to the center of the screen and this offset is only seen when at low magnification powers (zoomed out).
Figure 9
I found that in both cases of zeroing the X-Sight on the Ruger Charger pistol and Ruger SR-556VT rifle that I required up and left reticle adjustments which makes me think there could potentially be some type of slight misalignment on this particular scope between the mount attached to the bottom of the X-Sight and body of the X-Sight. This potential misalignment could also exist internally within the X-Sight. I describe this some in the video below. As long as I'm able to zero the sight and the zero holds true when zooming, I don't see this as being a huge issue, but there is a chance that vertical adjustment shimming may be required because of the minimum amount of elevation adjustment built into the scope.
This next video explains some of the details as I went through the zeroing and zooming process, along with me trying to trouble shoot the windage and elevation adjustment issues. The video also gives a brief explanation of the X-Sight along with some other general commentary.
Thoughts:
When I started this part of the review, I was naive enough to think all my range testing would be done in a single part. In an effort to really try to cover the details which I feel need to be covered, this will be the first of several parts of the review covering things I noticed at the range and in the field. As for zeroing and zooming, any firmware related issues that I previously felt existed seem to be corrected. Zeroing is really simple and based on my efforts shown in this review, I feel that the zero will hold true for all your zoom ranges. Since the amount of elevation adjustment within the scope is on the low end, you might run into an issue similar to that I experienced when zeroing on that particular AR style rifle. The amount of elevation adjustment required will vary from rifle to rifle and scope to scope, so potentially the tolerances may have lined up against me. If you experience a similar issue with your rifle/scope, please take time to comment below.
For more detailed photos and commentary, make sure you check out the other parts of this review and feel free to leave comments below. The following links are provided to help you see other parts of this review.
- ATN X-Sight HD Day/Night Riflescope Review: Part 1 - Introduction, Specifications and Hardware
- ATN X-Sight HD Day/Night Riflescope Review: Part 2 - Operational Details
- ATN X-Sight HD Day/Night Riflescope Review: Part 3 - Range & Field Tests
- ATN X-Sight HD Day/Night Riflescope Review: Part 4 - Potential Bugs & Issues Needing Firmware Update
- ATN X-Sight Review HD Day/Night Riflescope Review: Part 5 - Focusing the 5-18x Model
- ATN X-Sight HD Day/Night Riflescope Review: Part 6 - Daytime Videos & Photos
- ATN X-Sight HD Day/Night Riflescope Review: Part 7 - Night Vision Videos & Photos
- ATN X-Sight HD Day/Night Riflescope Review: Part 8 - Connecting a Mobile Device Via WiFi
Or
If you would like to be notified about future Gunsumer Reports reviews via Facebook, make sure "You Like This" by clicking the Facebook "Like" button at the bottom or top of this page. If it already says "You Like This" beside the button, clicking it again will uncheck the "Like" status and you will not be notified.
| Share on Facebook | |
© 2010, 2011, 2012, 2013, 2014, 2015, 2016, 2017, 2018, 2019, 2020, 2021, 2022, 2023 & 2024 Gunsumer Reports™, All rights reserved.
FTC Disclosure