|
|
Gunsumer Reports TM Providing Detailed Objective Reviews for Firearms and Firearm Accessories |
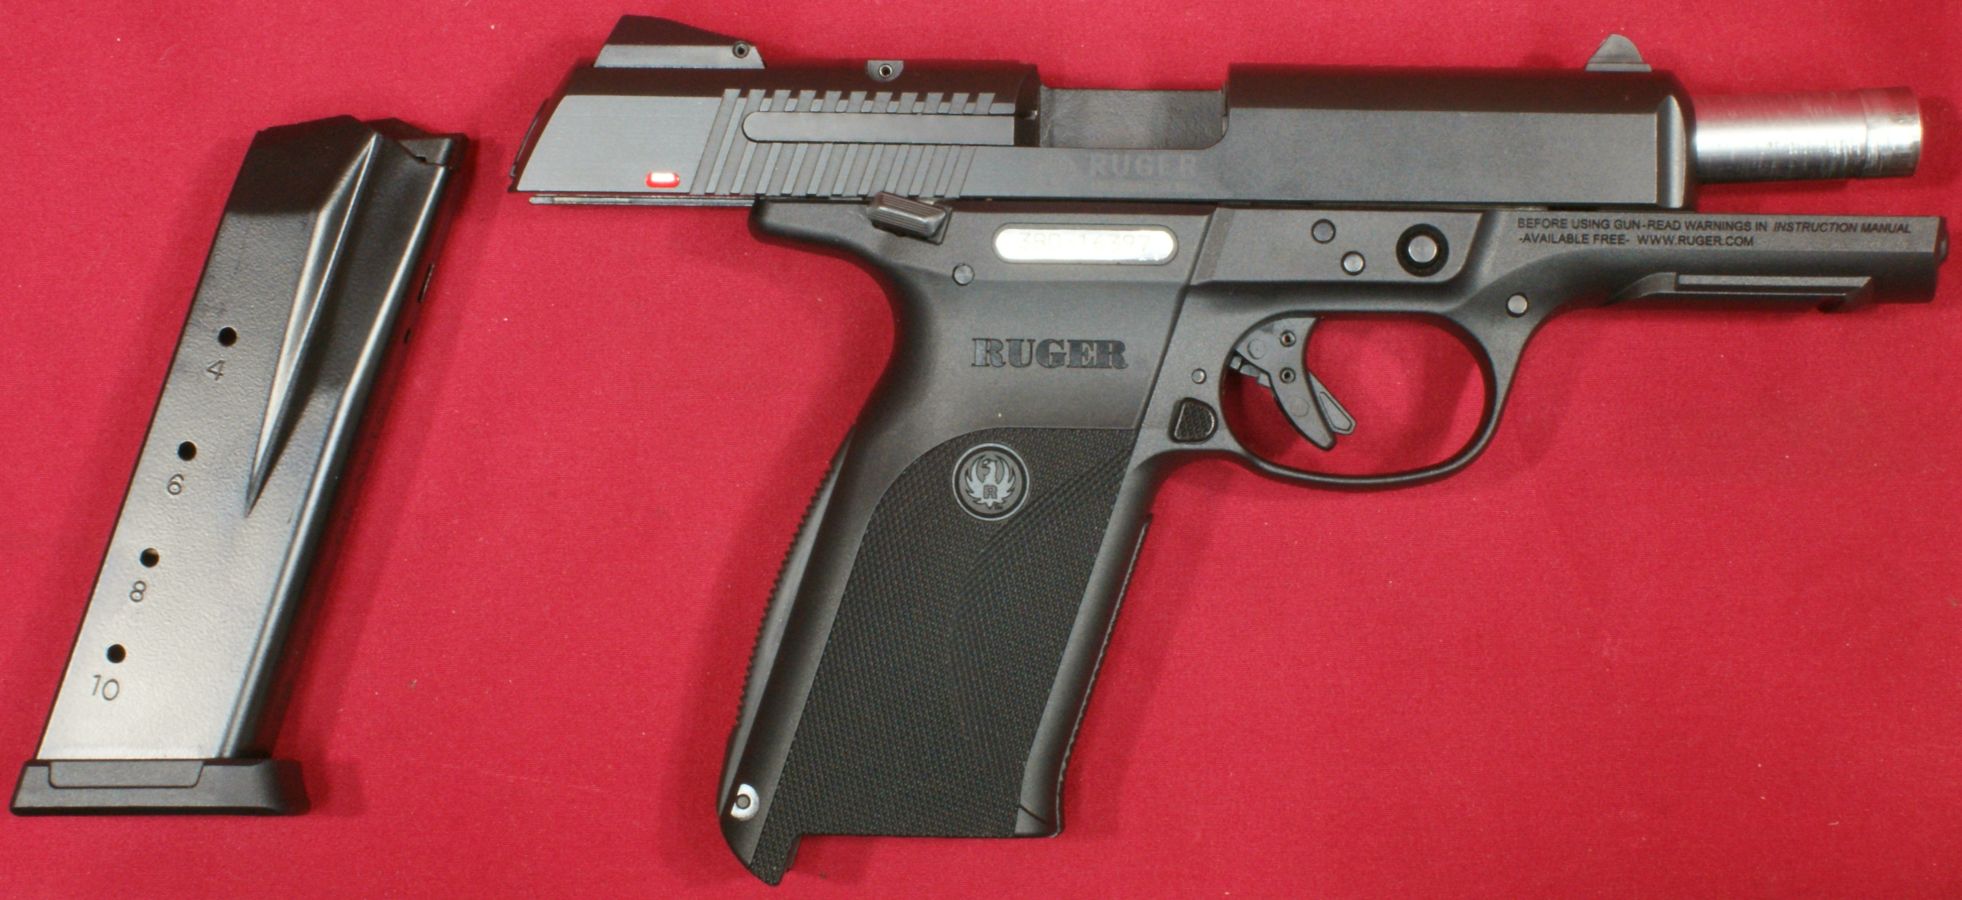
Ruger SR45 Review
Part 4 - Disassembly
September 25, 2013

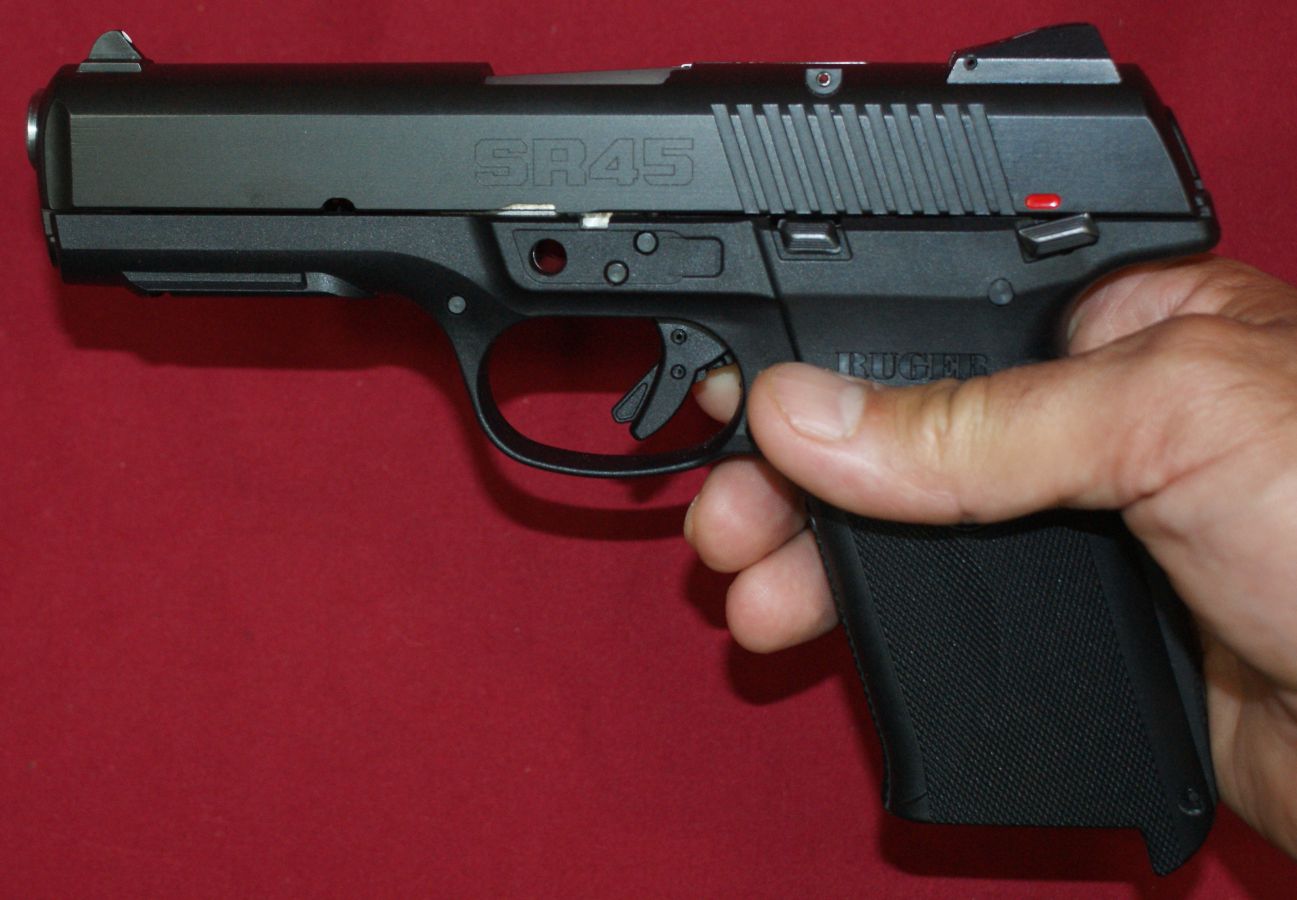
In this part of the review, I'm going to cover disassembly of the Ruger SR45 Pistol. For disassembly, I'm going to stick with the steps outlined in the Instruction Manual (starting page 25). I think Ruger did a nice job explaining disassembly in the manual so make sure you take a look. Also, you should always consider the manufacturer's instruction manual as the official source when disassembling/reassembling your firearms. The instruction manual will cover more safety related comments than those shown in this review. Ruger also has videos at their website that cover disassembly, cleaning and reassembly of the SR9 pistol. Ruger doesn't have any of these videos specifically for the SR45 (yet), but these instructions are the same for the SR45.
Step 1 - Remove Magazine
Press the D shaped magazine latch and remove the magazine.
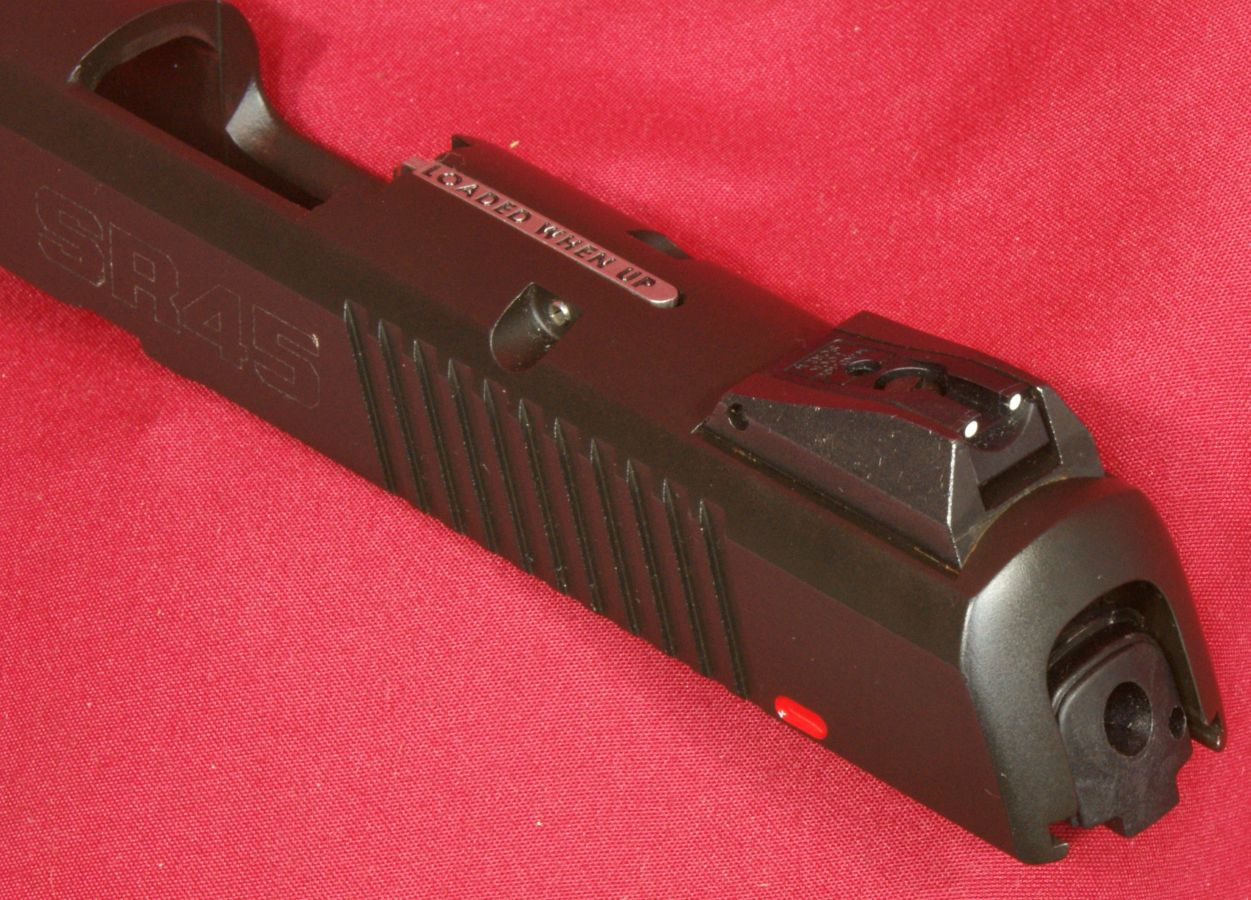
Step 2 - Lock Slide Open & Safety
Pull the slide to the rear and lock the slide open by pressing up on the slide stop. Verify that the pistol is completely unloaded.
Figure 1
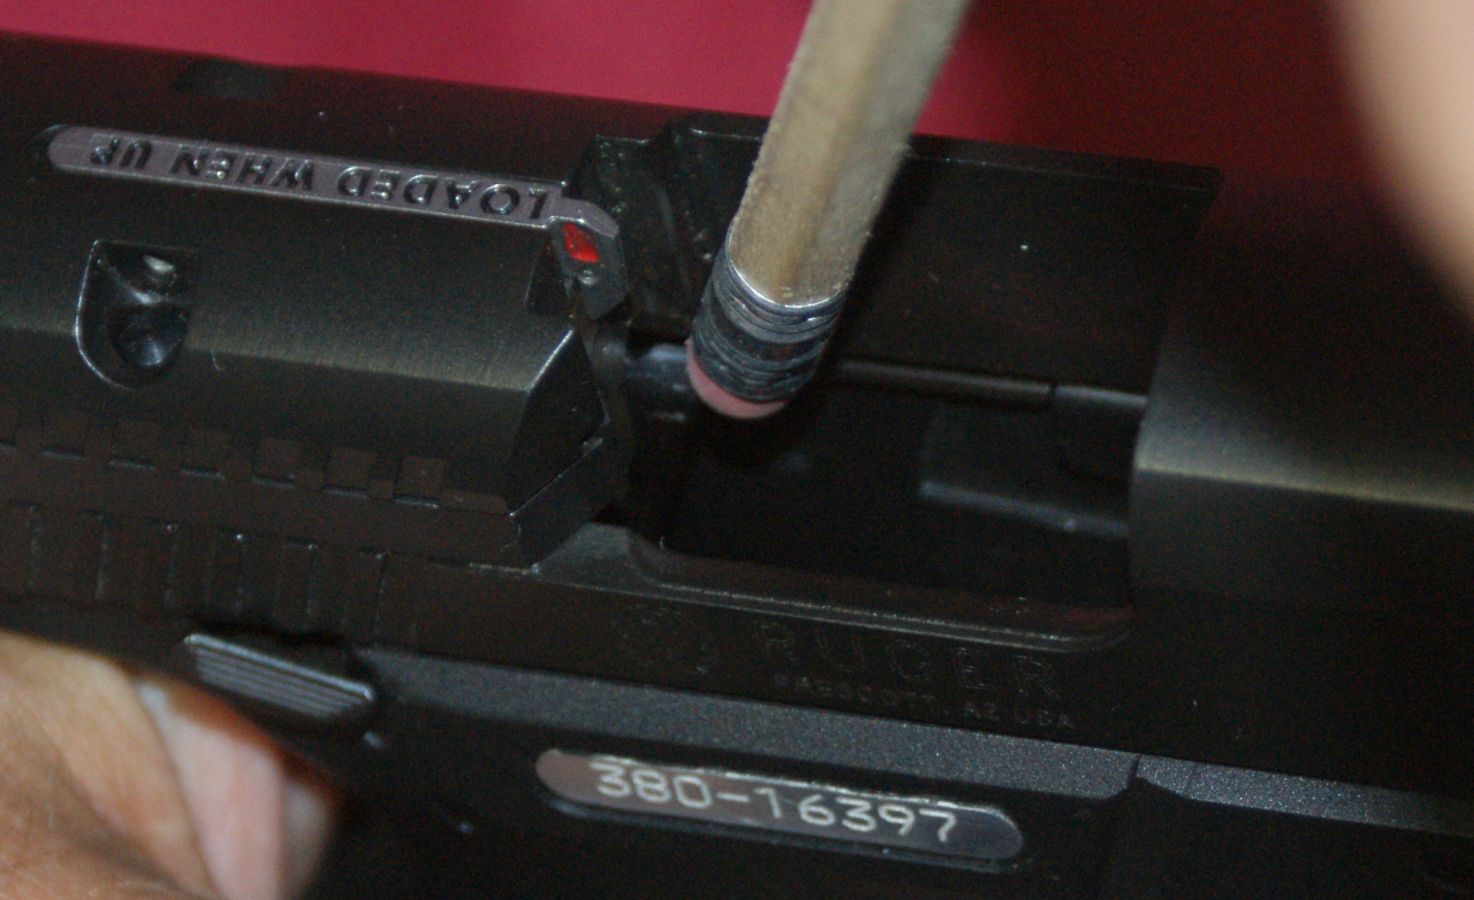
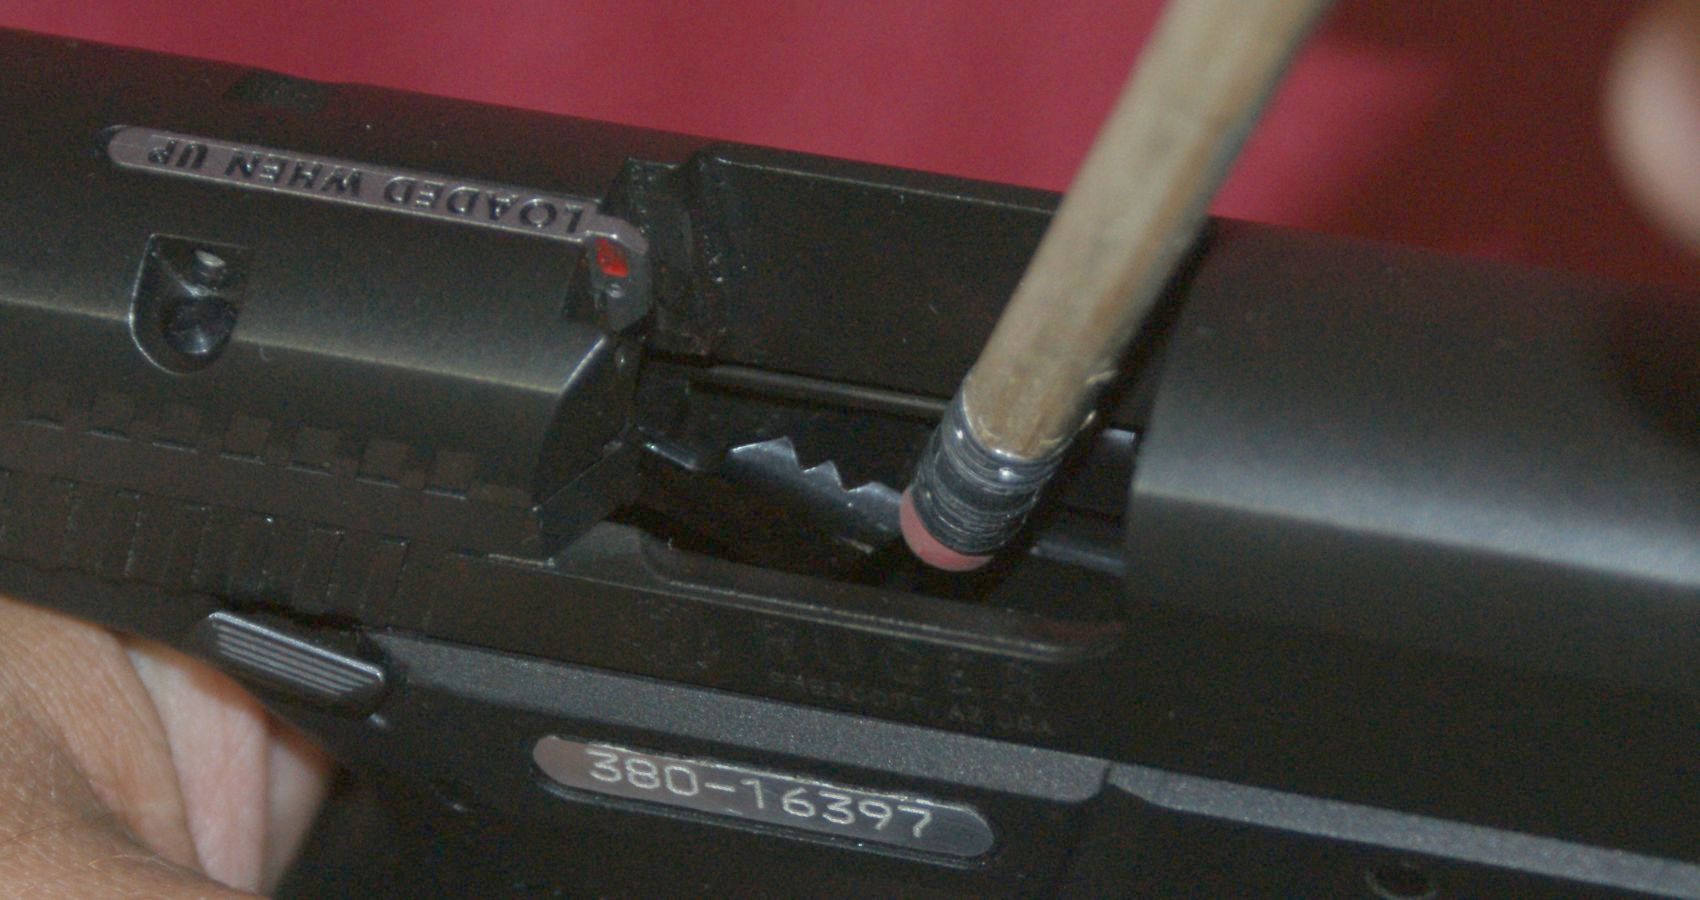
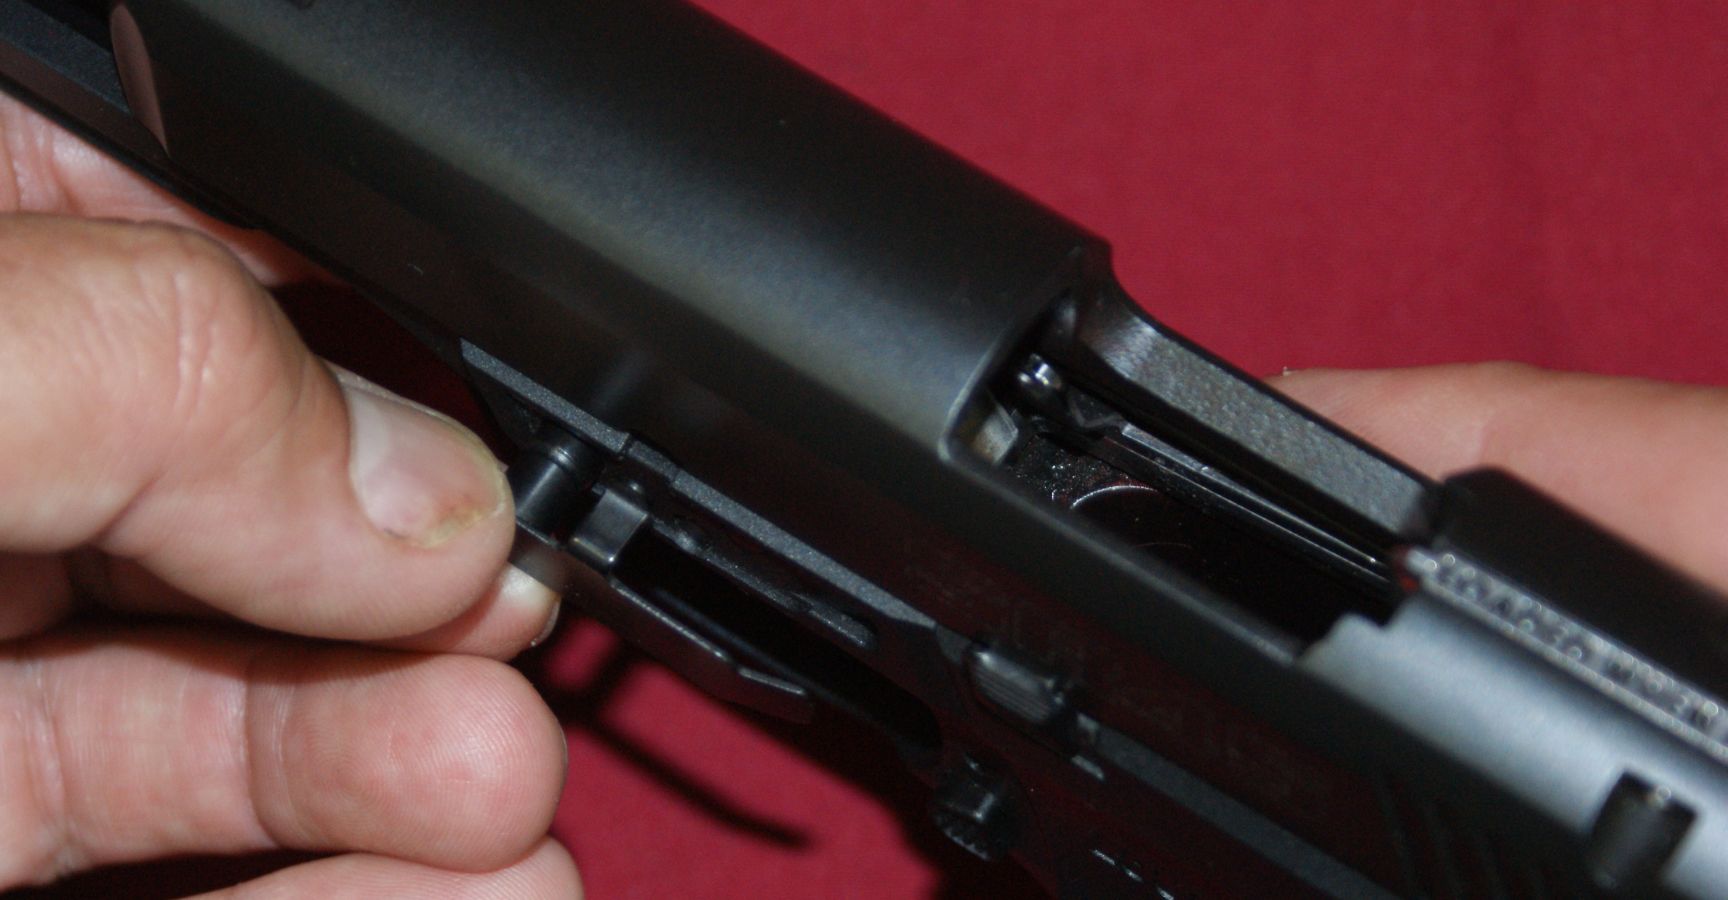
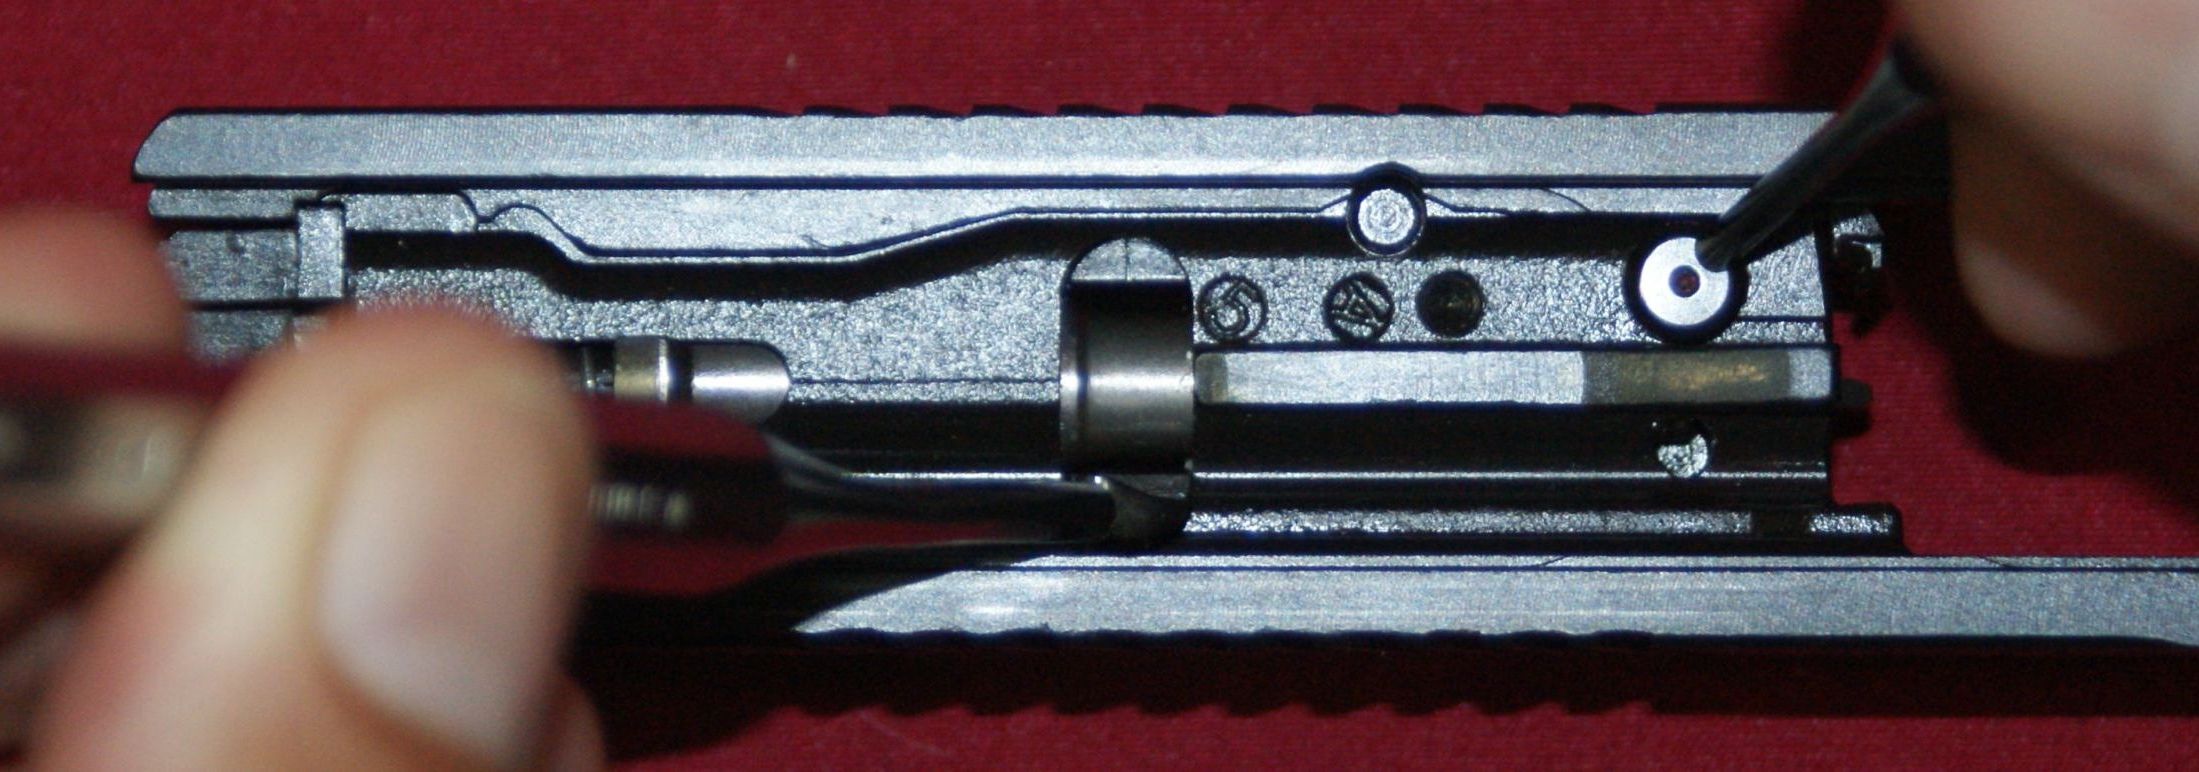
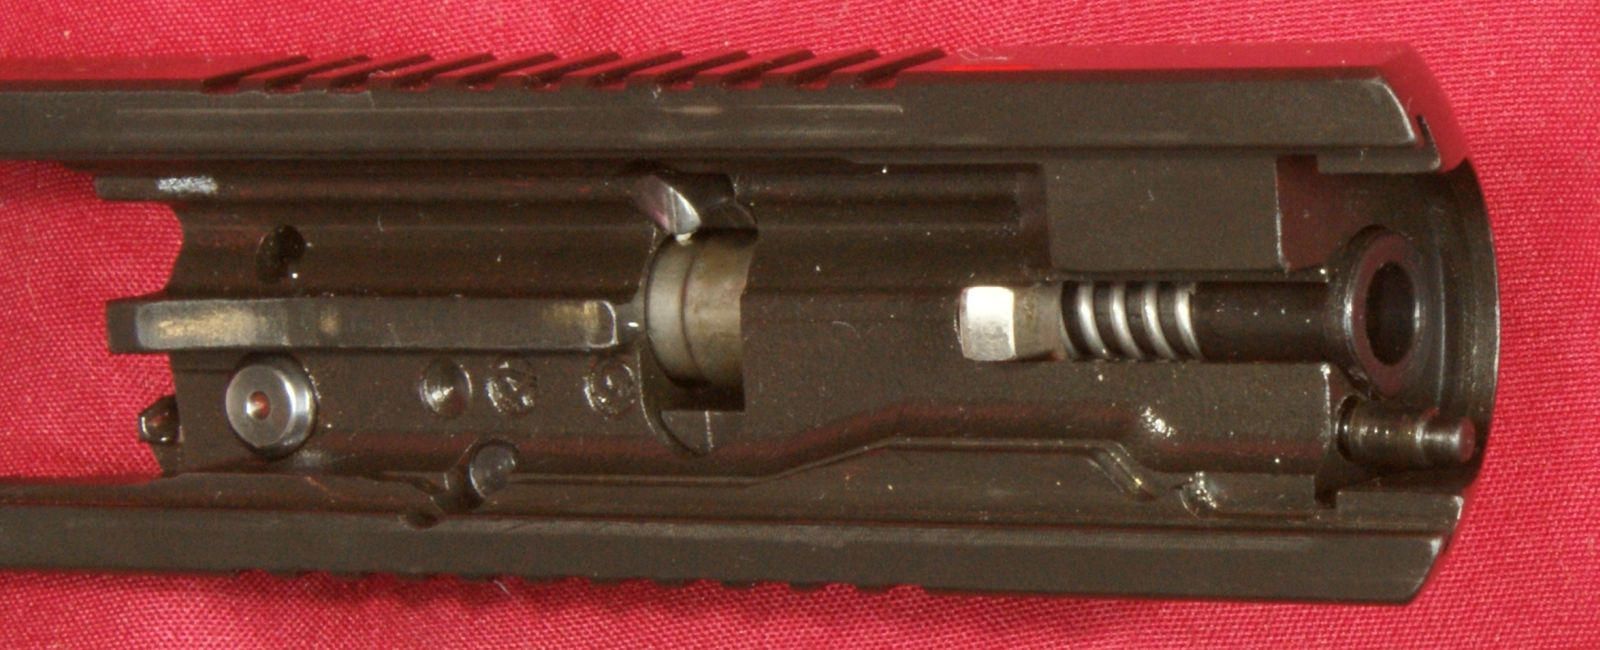
Step 3 - Push Ejector Down
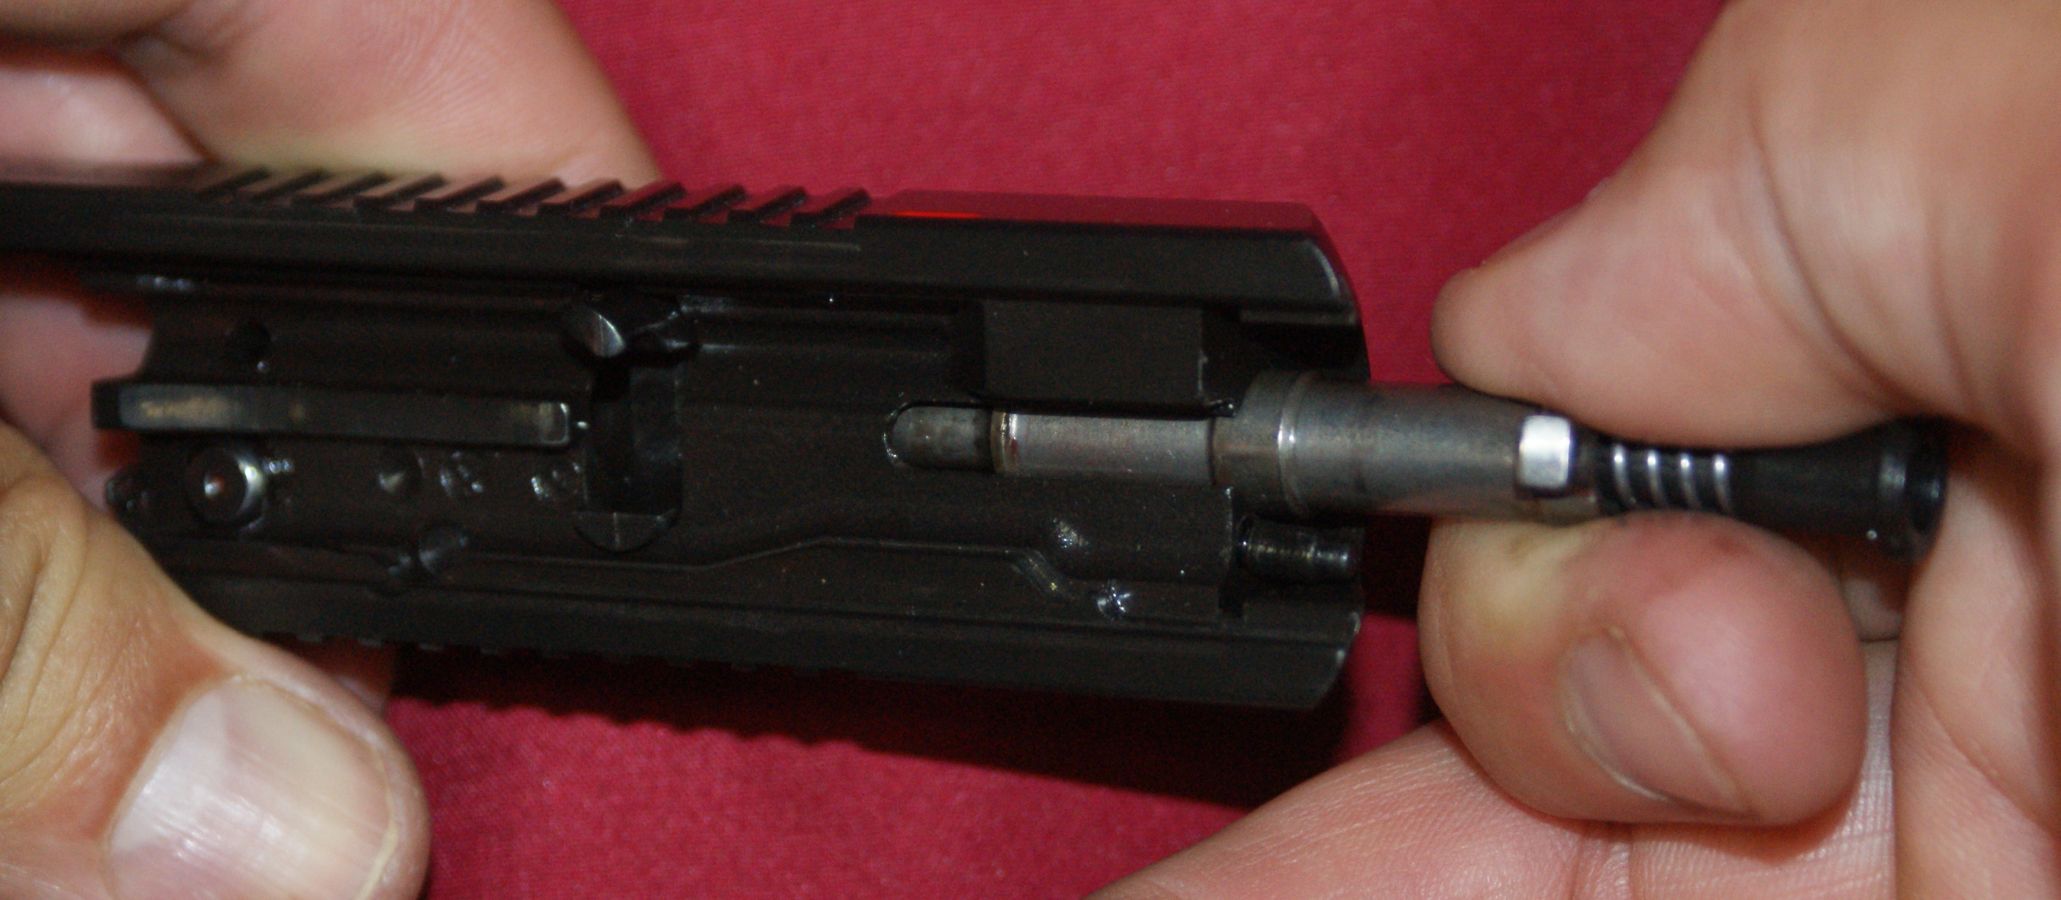
While keeping pressure up on the slide stop to prevent the slide from moving forward, press the ejector down until it stops. The next two photos show the ejector in the up and down positions. I typically use my finger when doing this, but if you don't like the idea of sticking your finger in this area while the slide is back, you can also use some other object like a pencil eraser as shown in the photo.
Figure 2 - Ejector in Up Position
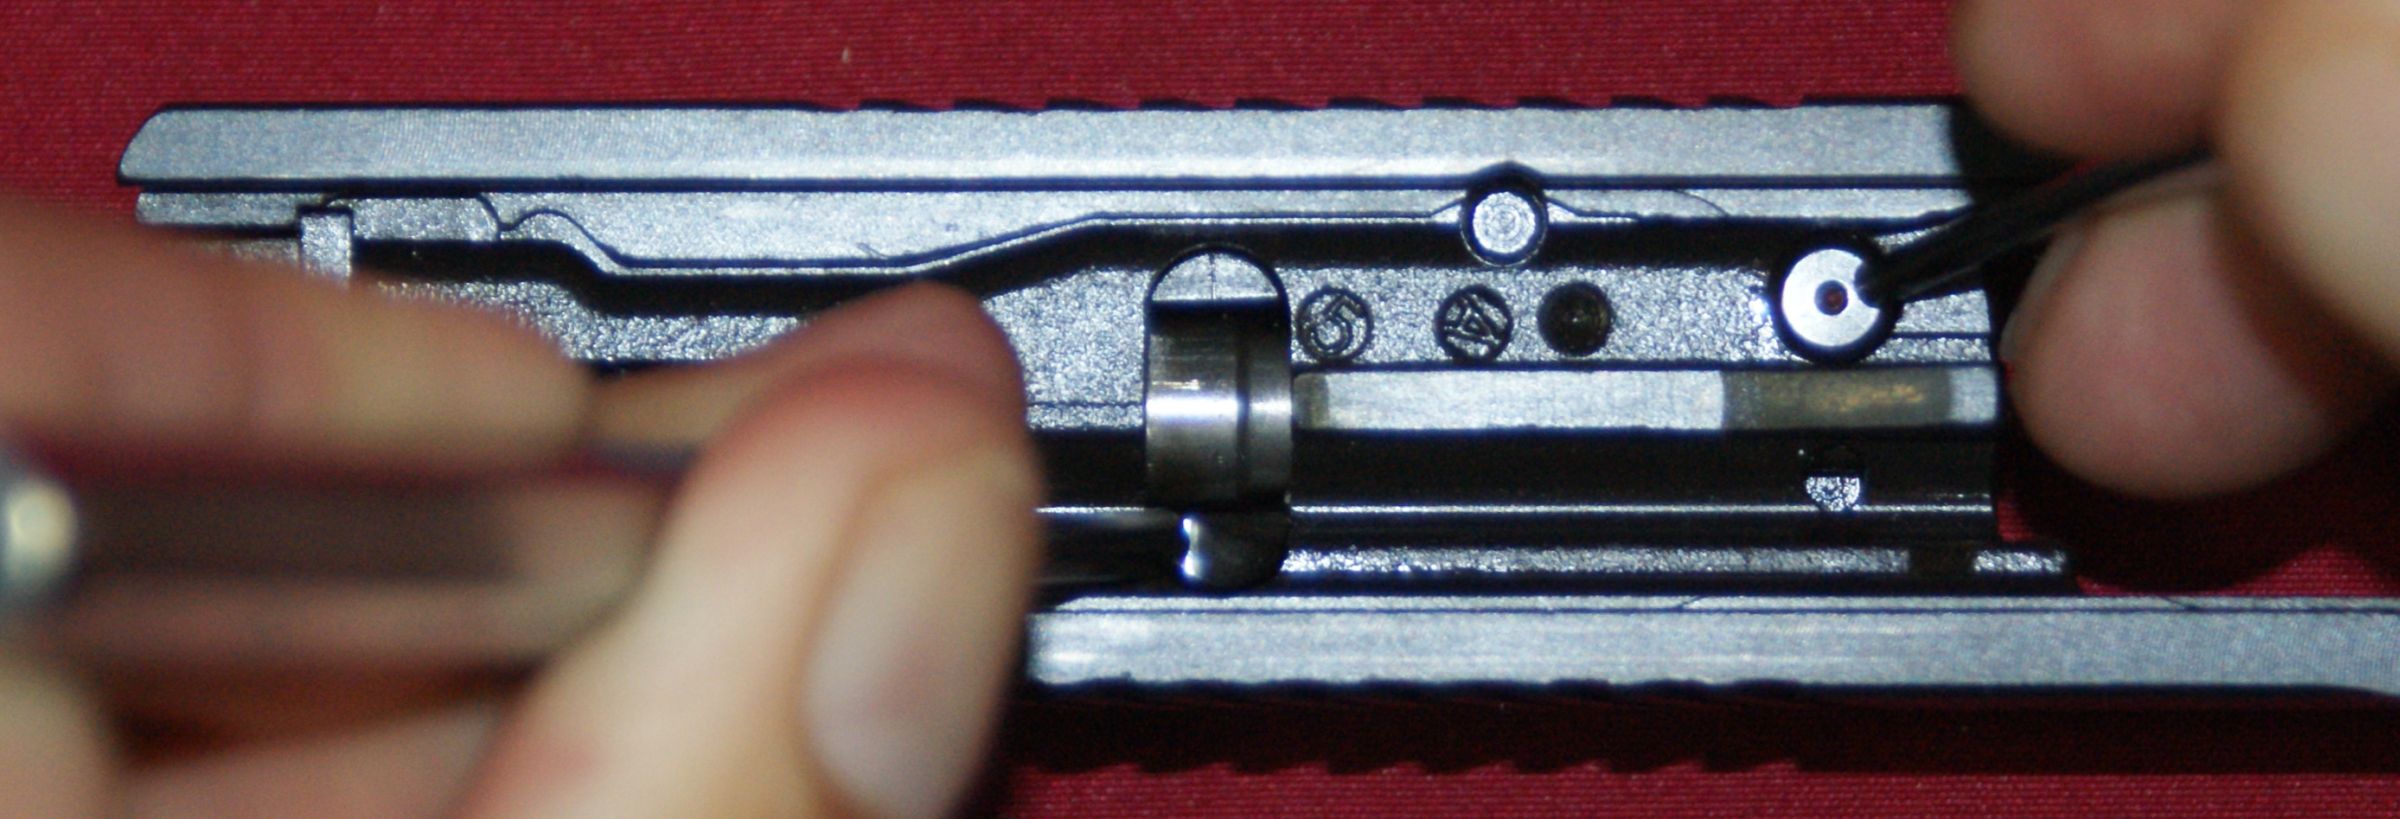
You will hear a slight click when the ejector is fully down and in the position shown below. If for some reason you skip this step, you will not be able to remove the slide. During reassembly, you can either pull the ejector back into place or insert a magazine to push it back into place.
Figure 3 - Ejector in Down Position
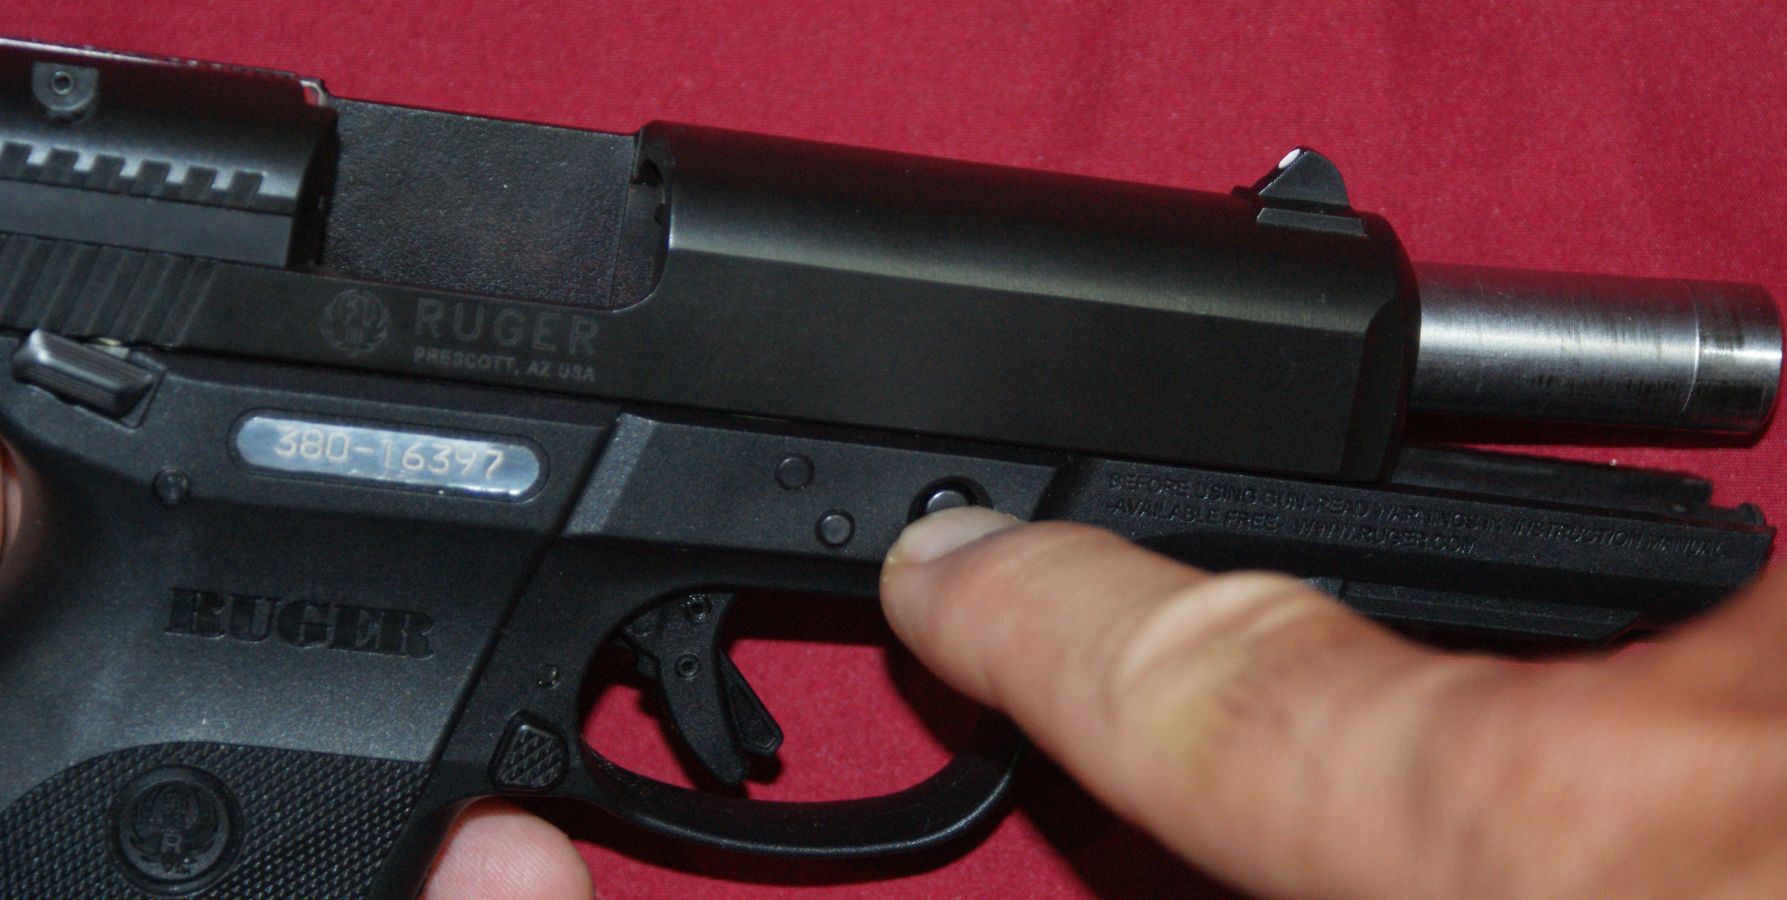
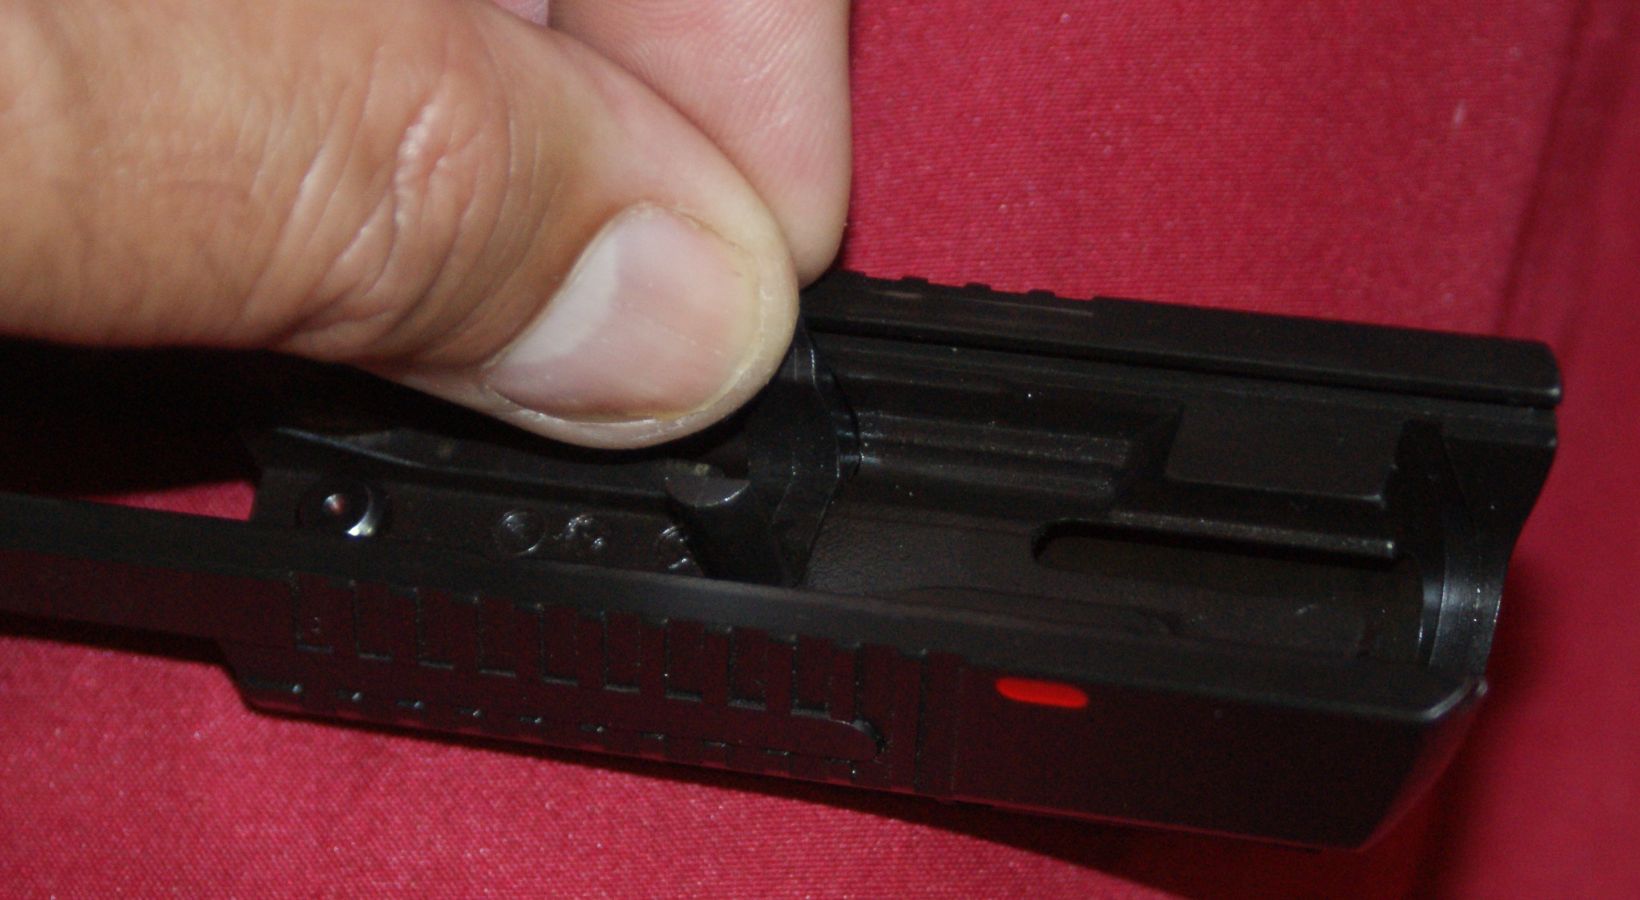
Step 4 - Remove Takedown Pin
While the slide is locked open, on the right side of the pistol you need to press inward on the takedown pin.
Figure 4
Pressing inward on the opposite side pushes the takedown pin out on the left side so that you can grab the pin and remove it from the pistol.
Figure 5
Step 5 - Remove Slide Assembly
While holding the slide to the rear, push down on the slide stop lever and allow the slide to carefully move forward to the position shown below. In this position, the slide is no longer under spring pressure.
Figure 6
You can continue with one motion to push the slide off the frame.
Figure 7
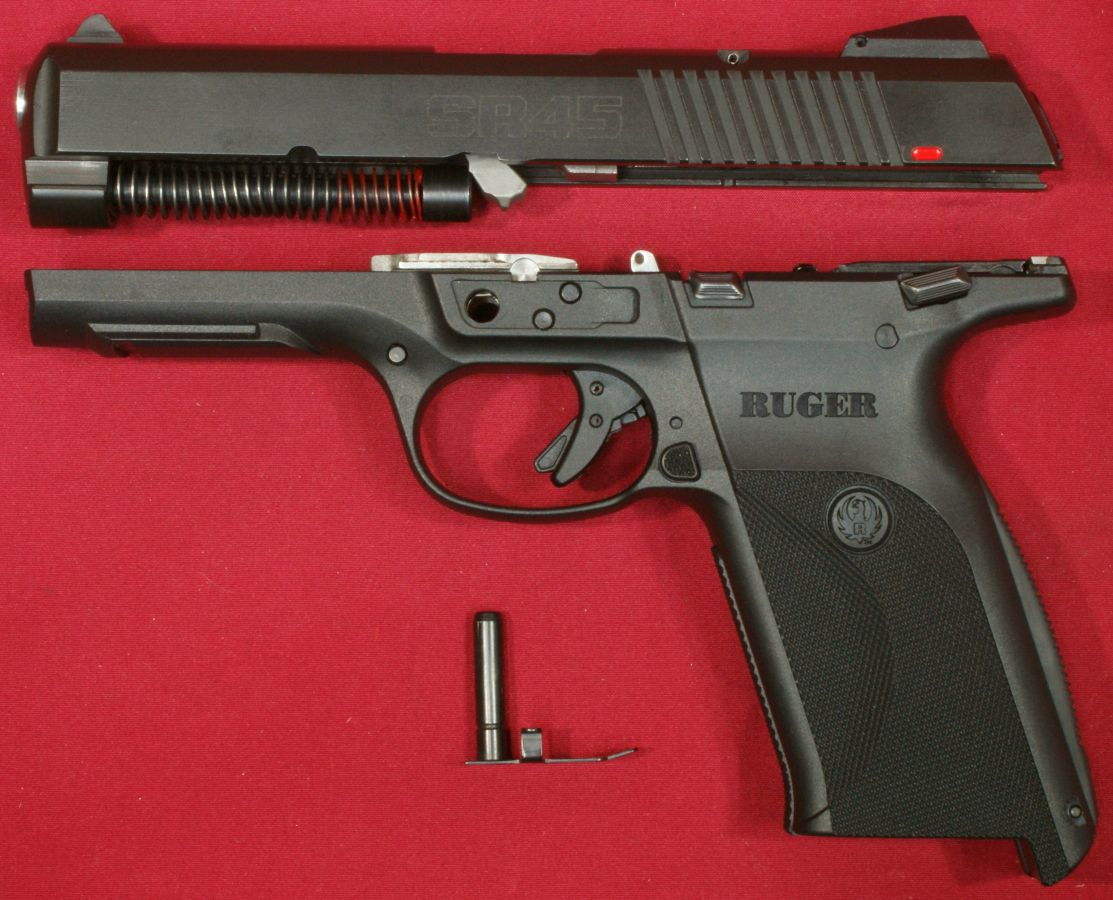
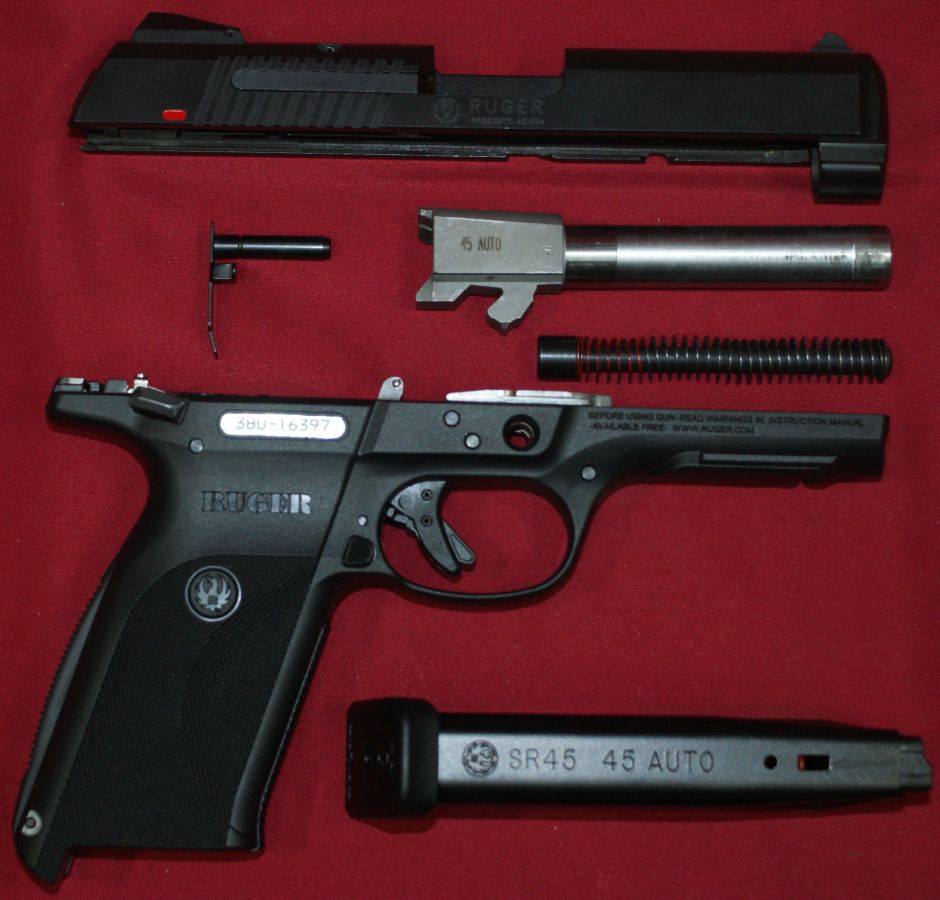
At the end of this step, you will have broken down the pistol into the slide assembly, frame assembly and takedown pin.
Figure 8
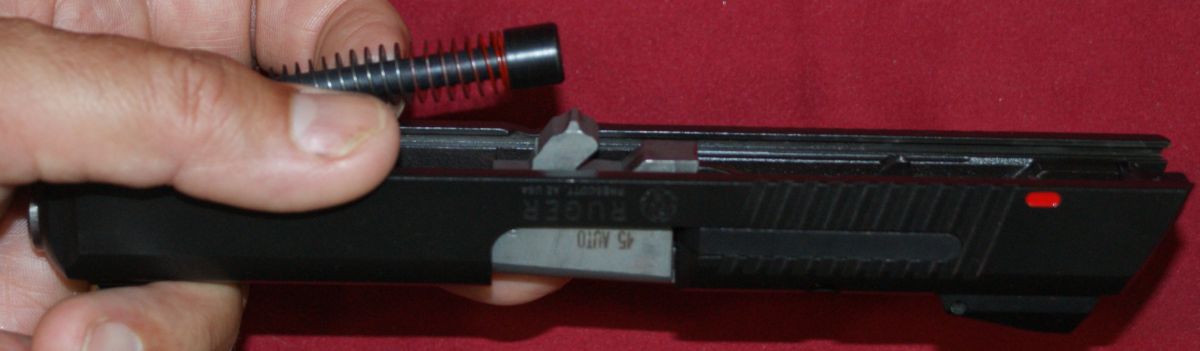
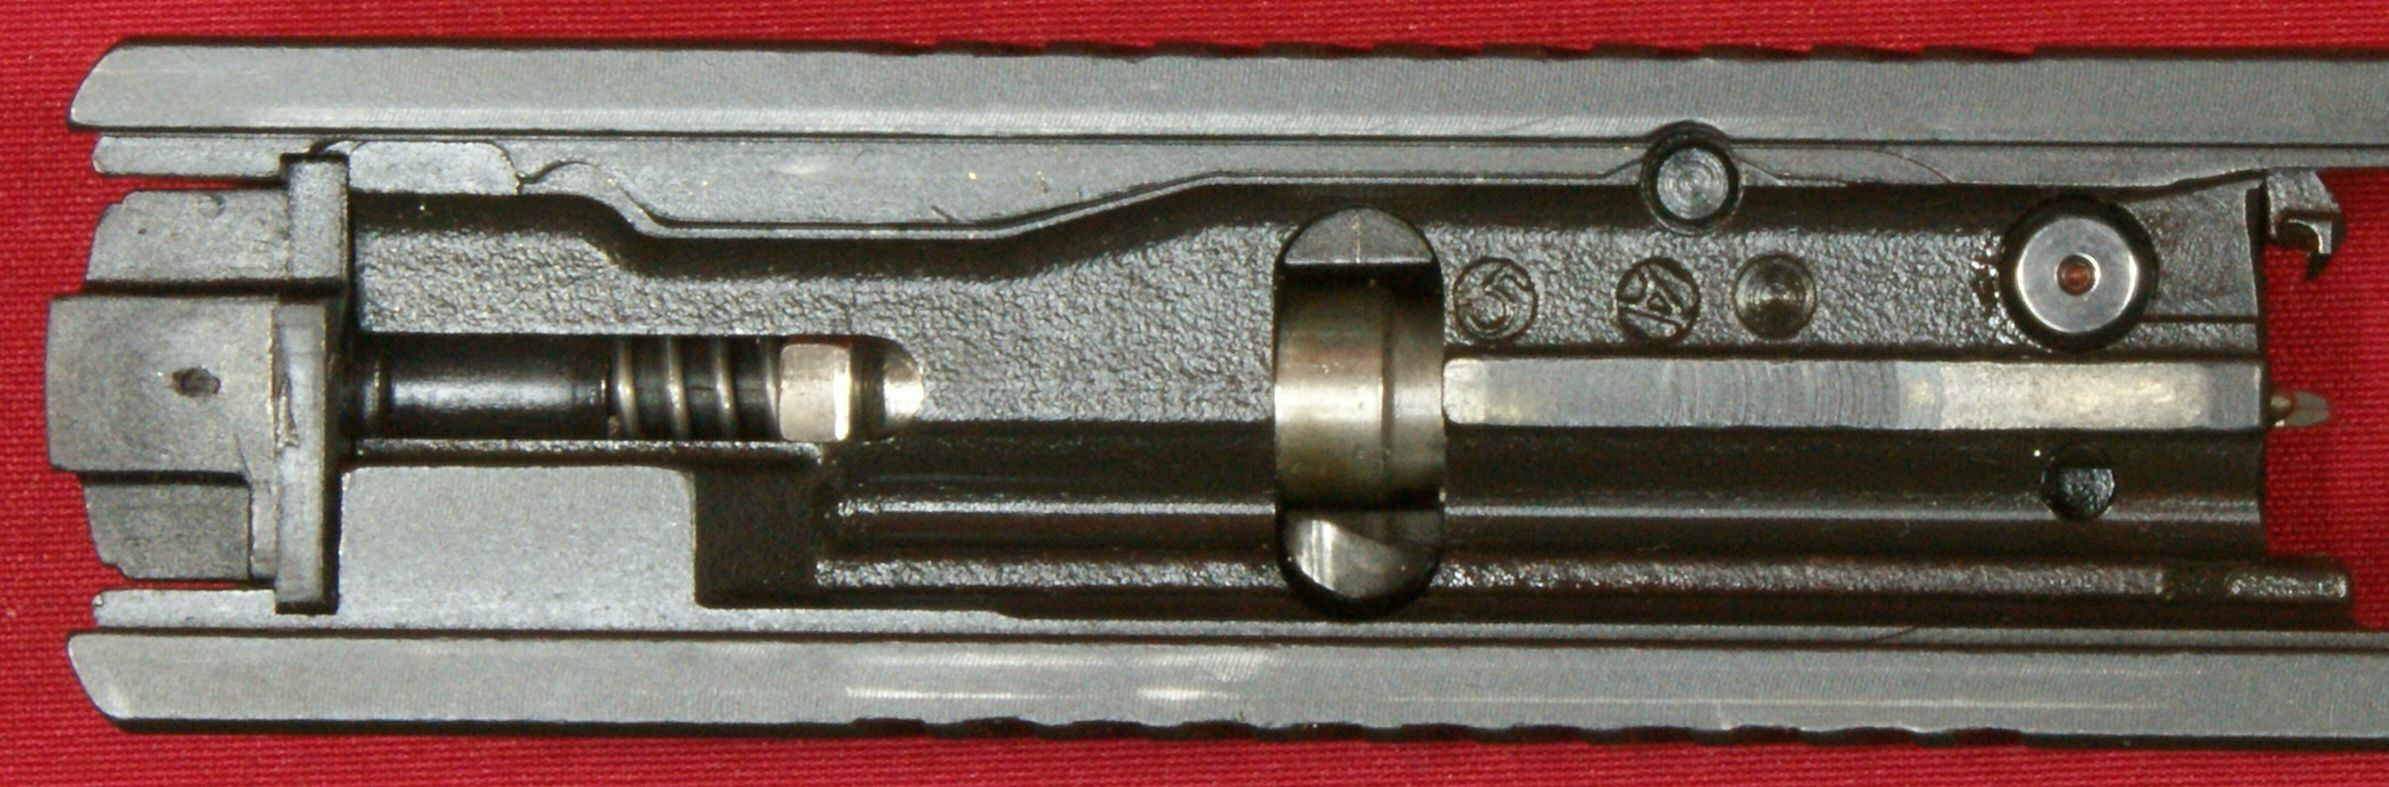
Step 6 - Remove Recoil Spring
With the slide upside down, lift up on the rear of the recoil spring to disengage it from the barrel lug and then pull the spring rearward out of the front of the slide.
Figure 9
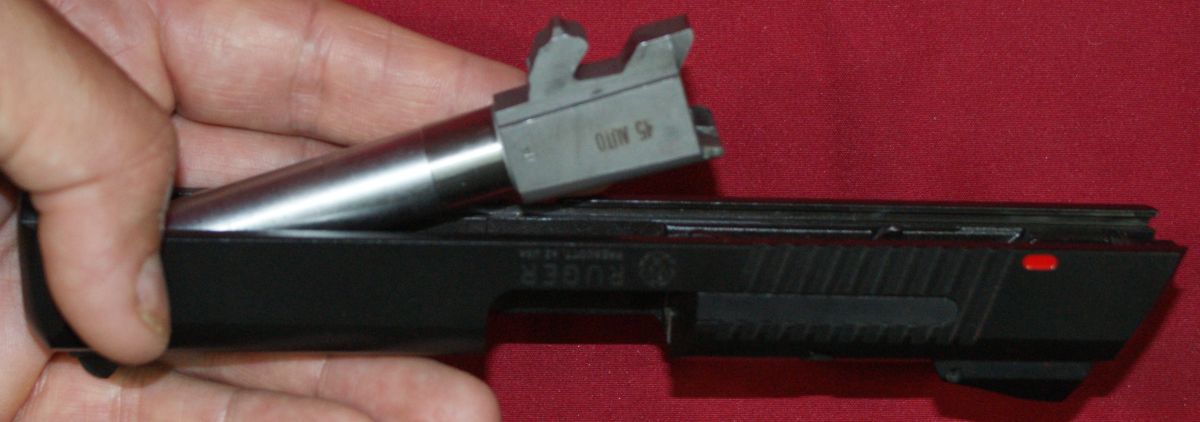
Step 7 - Remove Barrel
To remove the barrel, pull it slightly up and then forward to pivot the barrel up as shown below. From this position, the barrel can be pulled rearward out of the slide.
Figure 10
Normal Disassembly Complete
In most cases, this is as far as you would need to go to clean your SR45 pistol. Also, this is as far as Ruger goes in their instruction manual when talking about disassembly of their SR pistols.
Figure 11
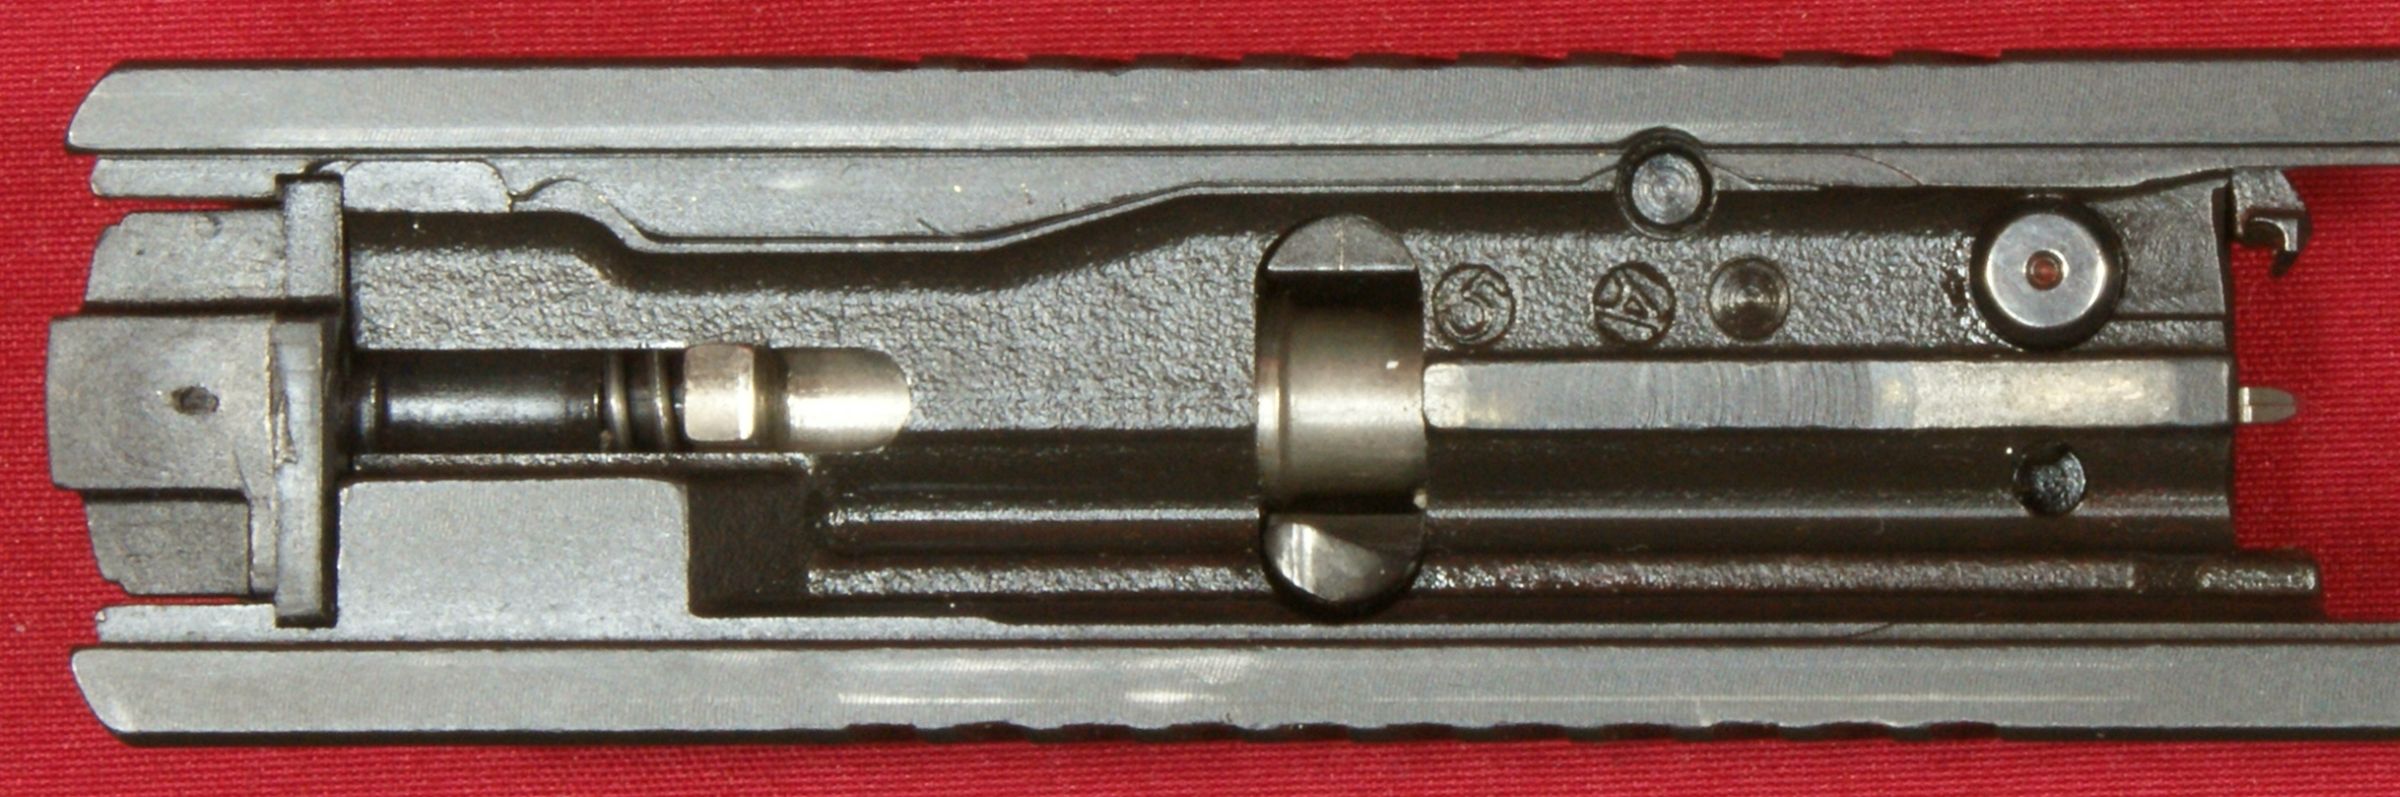
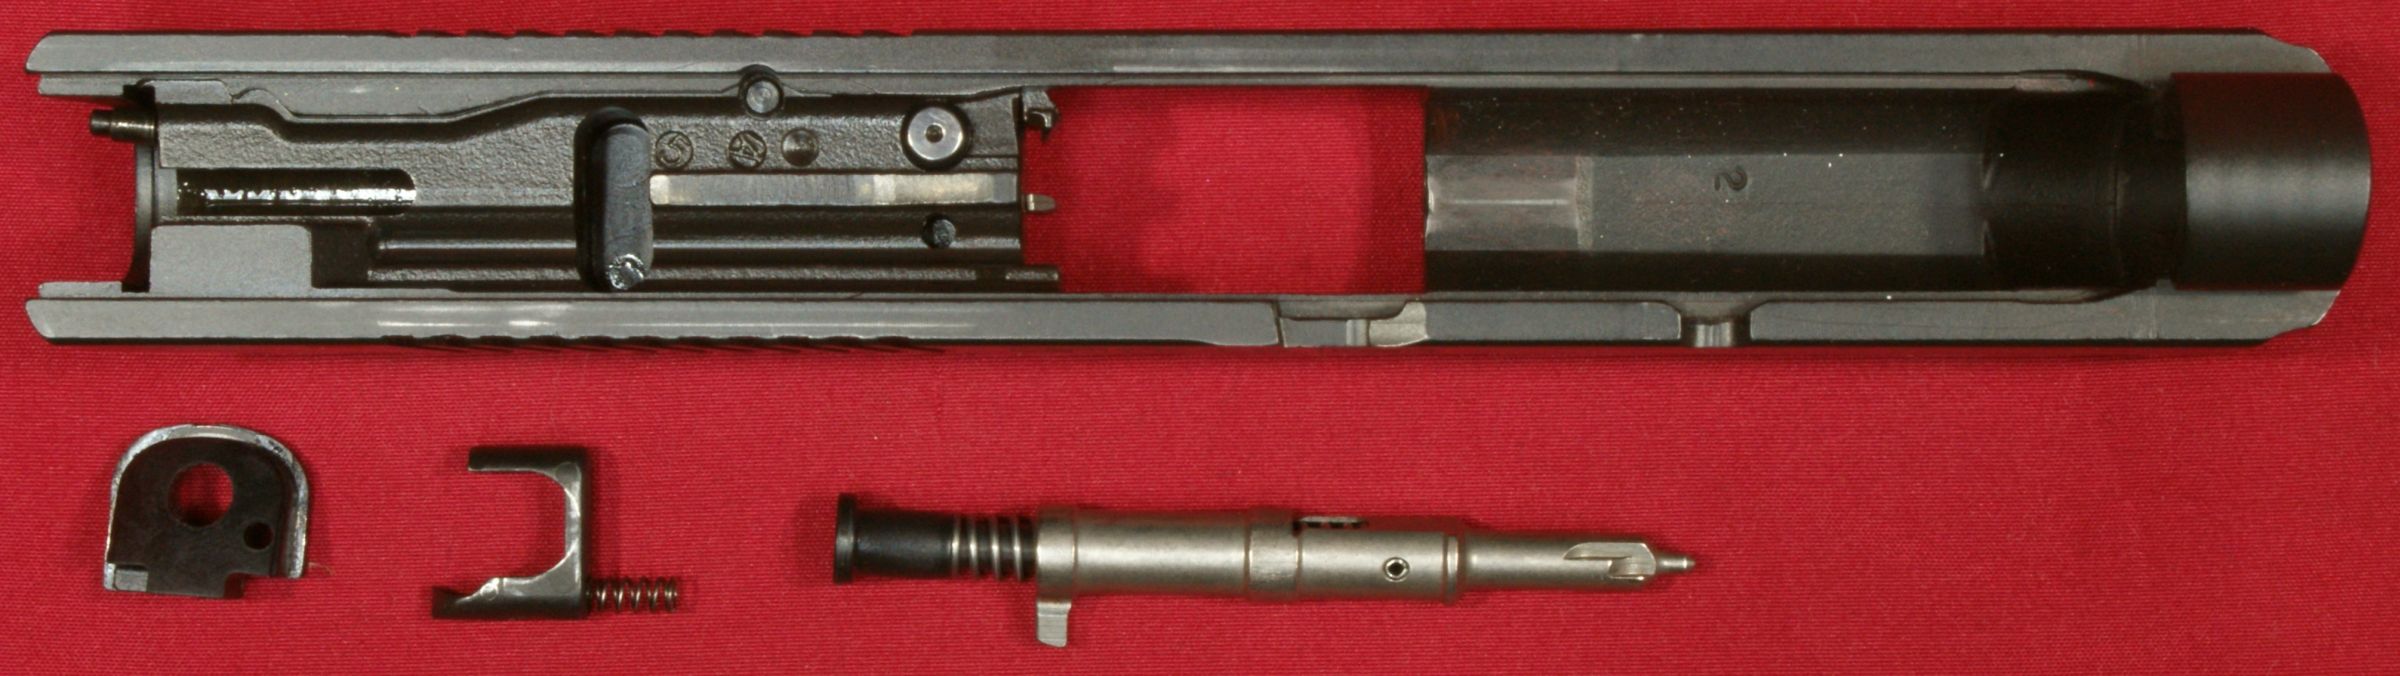
Slide Disassembly
Further reasonable disassembly by the user is possible and Ruger shows this disassembly in their disassembly video. These steps are also outlined below. This next photo helps to get some of the nomenclature correct when describing the following steps. The key components are the (A) Striker, (B) Magazine Disconnect, (C) Striker Blocker and (D) Striker Cover. This photo also shows the striker in its normal partially cocked position.
Figure 12
Using your fingers or a couple of punches, press the Striker Blocker (C) and Magazine Disconnect (B) at the same time to allow the Striker Key (A) to move forward to the position shown below. I used punches in the photos so my fingers don't get in the way of you seeing what is being done, but these items can be easily pressed with your finger tips.
Figure 13
You should be able to see that the striker has moved forward by looking at the striker through the cutout in the slide for the magazine disconnect.
Figure 14
You will also see that the striker cocking lug has moved forward to the position shown below.
Figure 15
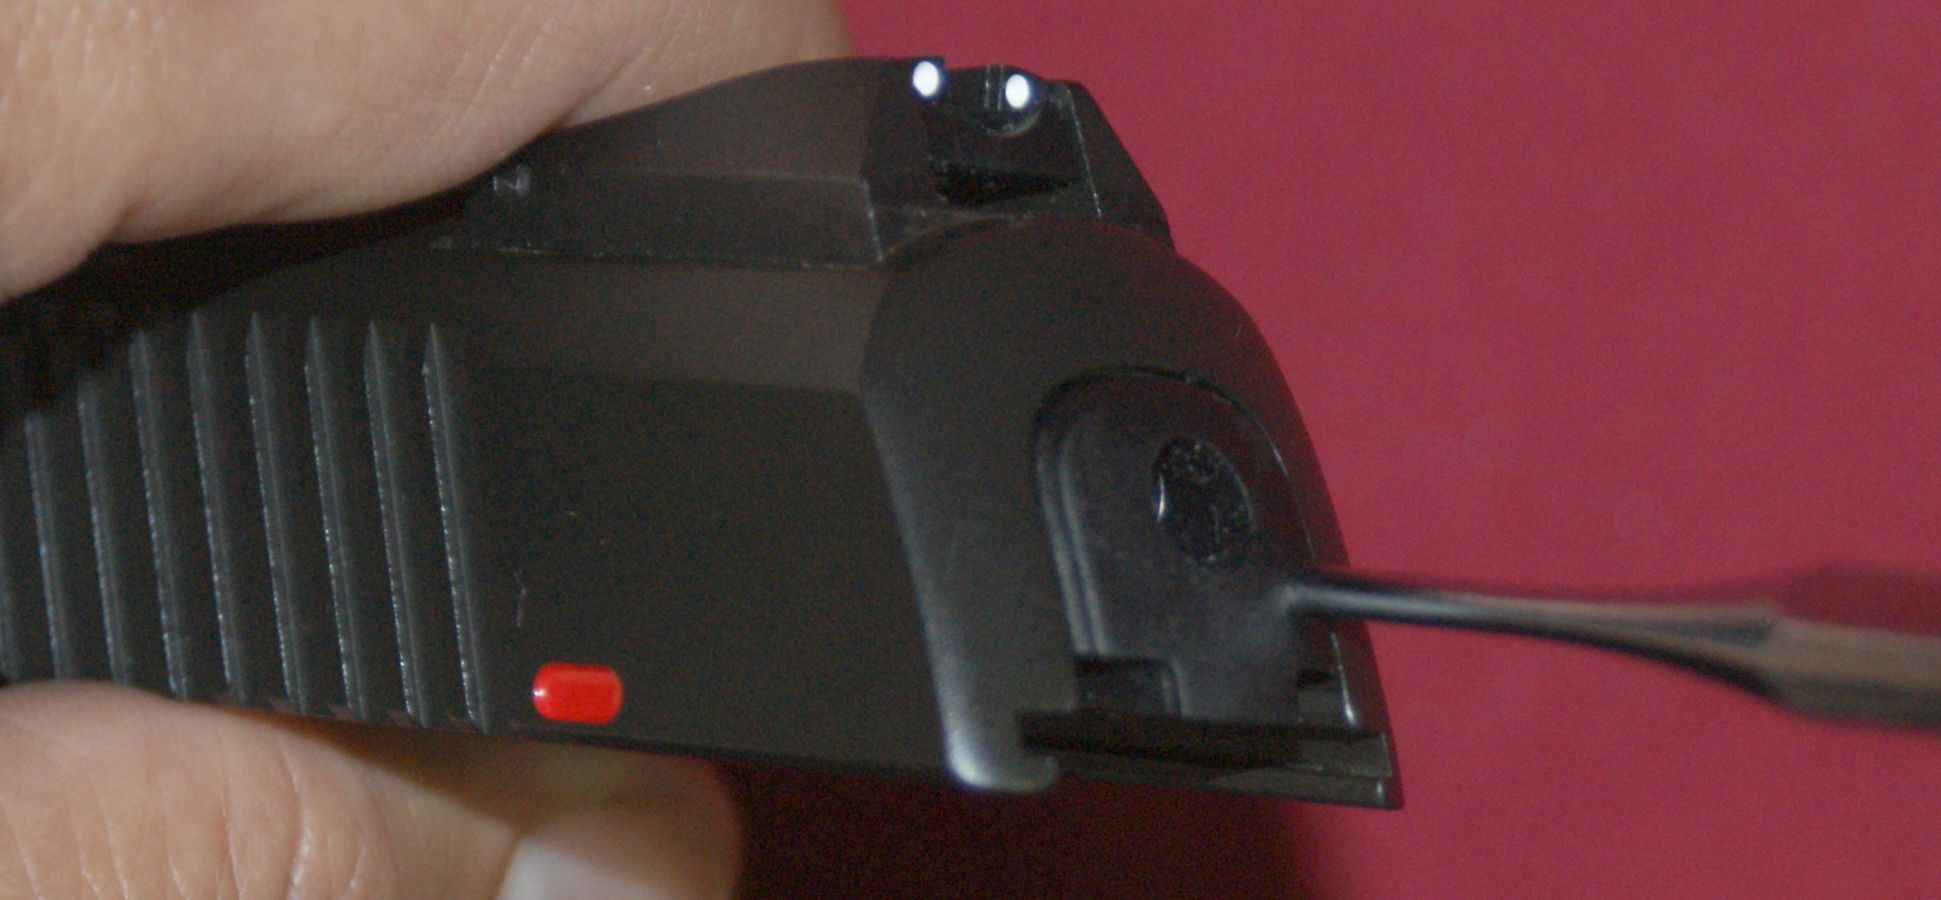
Next you will need to use a small punch to press the striker cover plunger into the slide so that you can push the striker cover down.
Figure 16
This next photo shows the striker cover in a partially down position. Since there is a little spring pressure on the striker and plunger, you will want to keep your thumb over the cover as you slide it out of the grooves in the slide.
Figure 17
This next photo shows the striker cover removed. The striker plunger on all my SR pistols stays held in place by the plunger spring.
Figure 18
To remove the striker, you can press down on the magazine disconnect and striker blocker so that they don't press on the striker and you can then pull the striker out of the slide. Actually, if you press the magazine disconnect and striker blocker, most likely the striker will drop out if you hold the slide with the barrel end pointing up.
Figure 19
In this last step, you can lift the magazine disconnect out of the slide for cleaning.
Figure 20
The photo below shows the slide disassembled to this level which should provide you the ability to thoroughly clean the striker and slide.
Figure 21
Magazine Disassembly
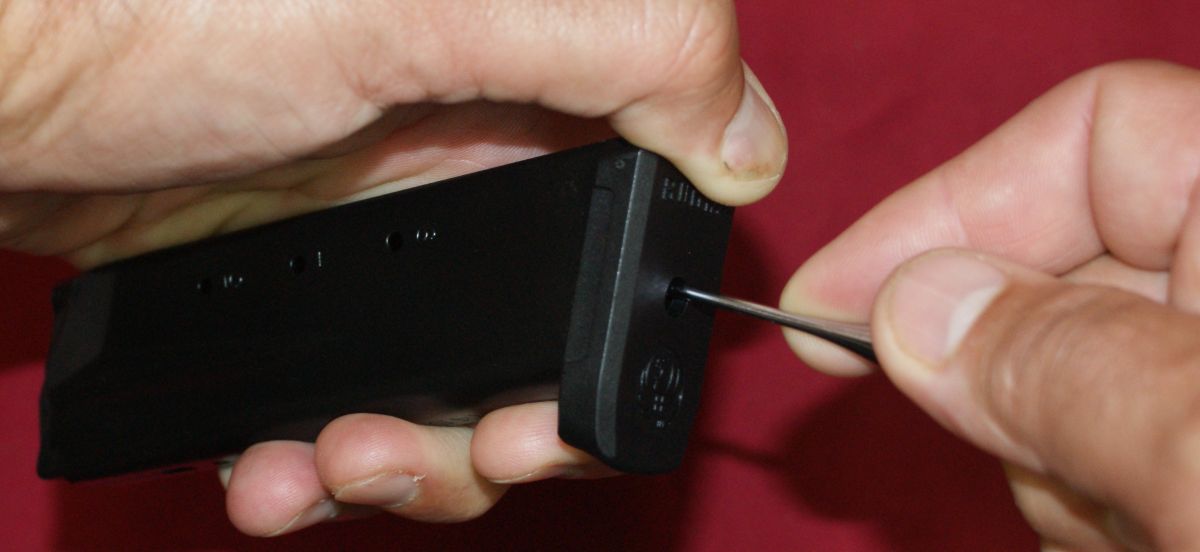
Magazine disassembly is also like most pistol magazines. Use a punch (or something) to press the magazine spring seat into the magazine and then slide the base plate forward slightly.
Figure 22
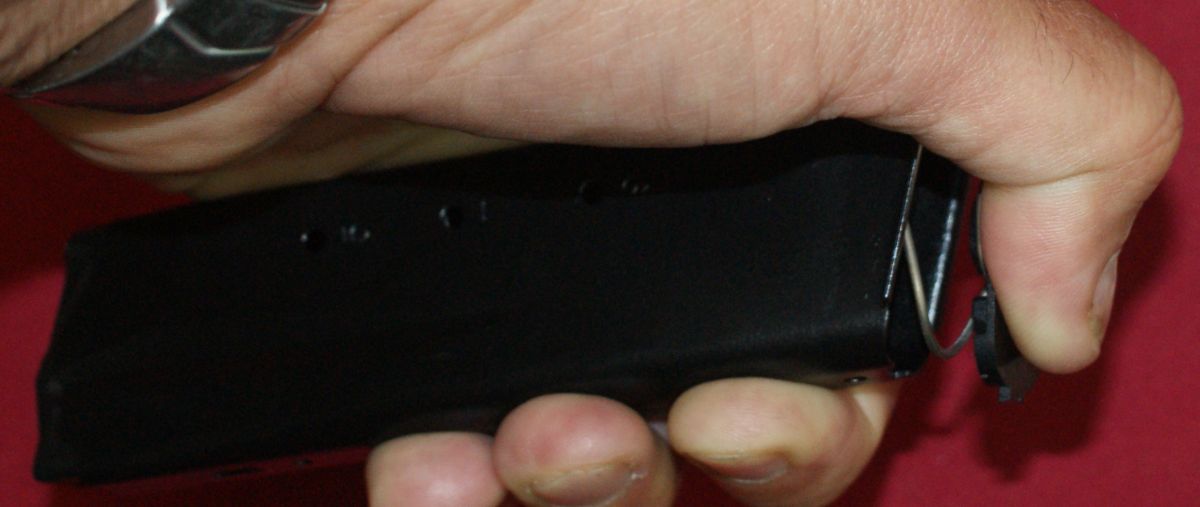
Once the spring seat protrusion is below the base plate, start sliding the base plate off the magazine base while keeping your thumb against the spring seat to prevent it and the spring from flying across the room.
Figure 23
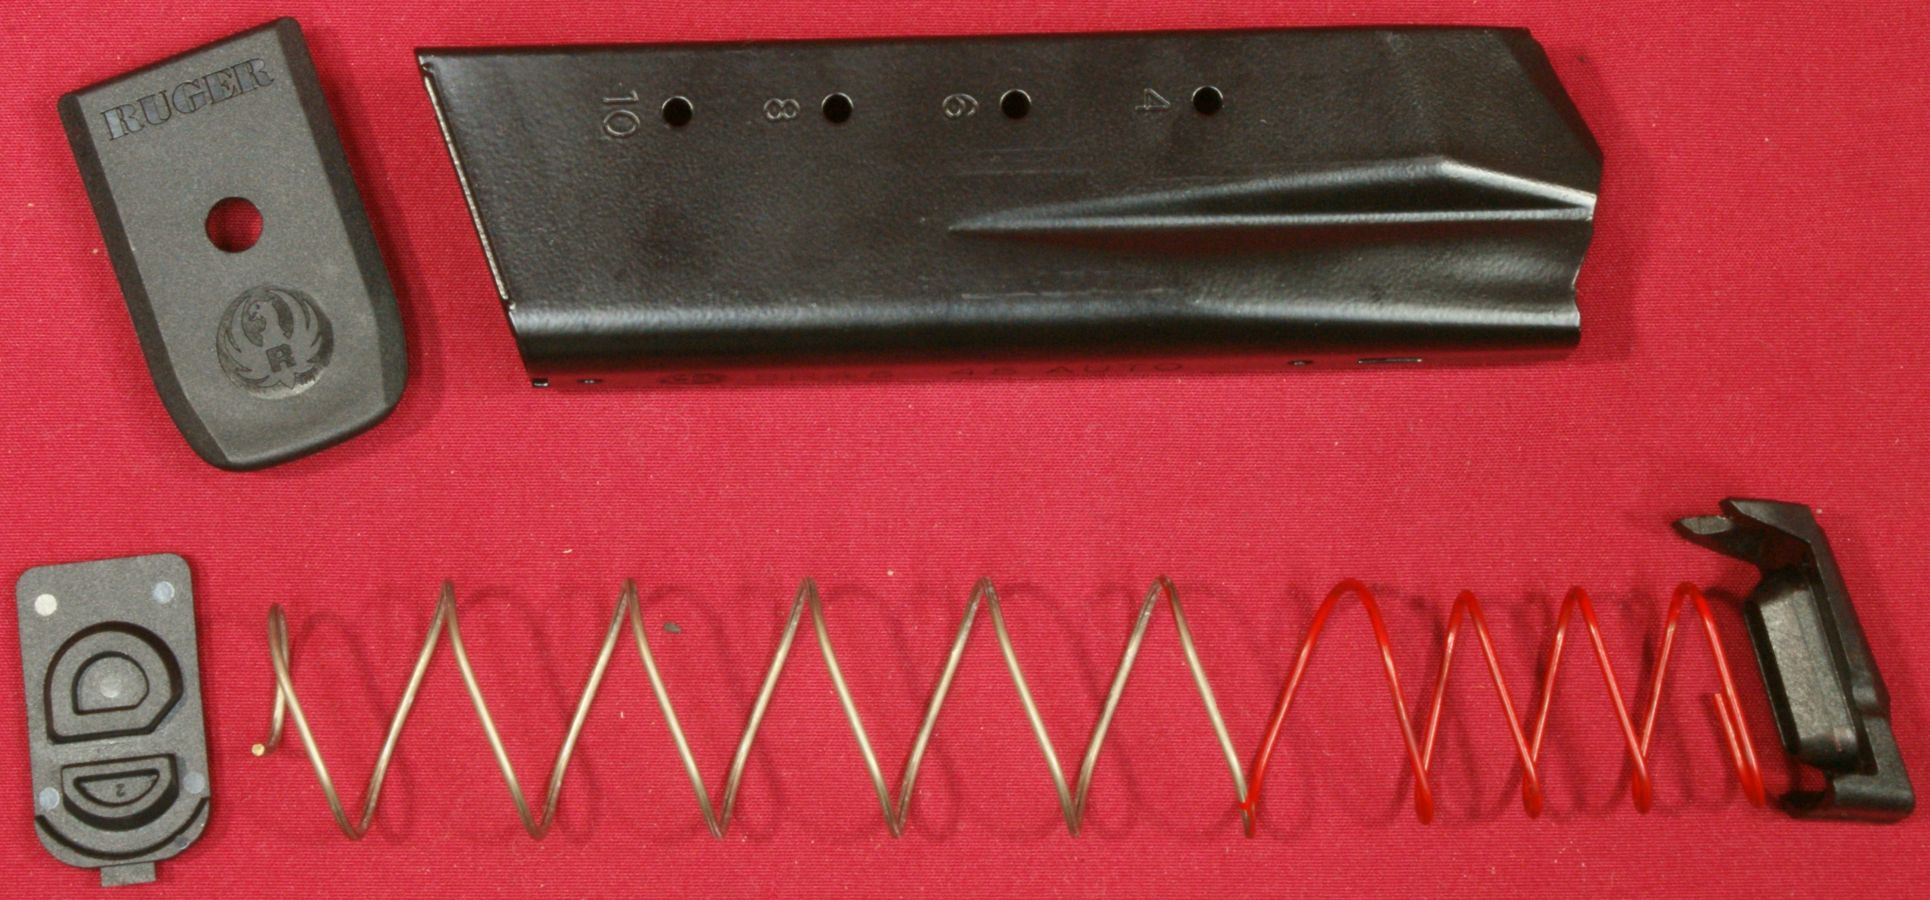
After you relieve all pressure off the spring, you can remove all the components as shown below.
Figure 24
Thoughts
Disassembly and reassembly of the Ruger SR45 is a very quick and simple task so there should be no excuses for not keeping your pistol clean. The process of disassembly is similar to many pistols and the only trick is to remember to push the ejector to its down position.
For more detailed photos and commentary, make sure you check out the other parts of this review and feel free to leave comments on my Reader's Comments page. The following links are provided to help you see other parts of this review.
- Ruger SR45 Pistol Review: Part 1 - Introduction, Specifications and Summary
- Ruger SR45 Pistol Review: Part 2 - What's in the Box
- Ruger SR45 Pistol Review: Part 3 - External and Operational Features
- Ruger SR45 Pistol Review: Part 4 - Disassembly (this page)
- Ruger SR45 Pistol Review: Part 5 - Internal Features
- Ruger SR45 Pistol Review: Part 6 - Range Test
Or
If you would like to be notified about future Gunsumer Reports reviews via Facebook, make sure "You Like This" by clicking the Facebook "Like" button at the bottom or top of this page. If it already says "You Like This" beside the button, clicking it again will uncheck the "Like" status and you will not be notified.
| Share on Facebook | |
© 2010, 2011, 2012, 2013, 2014, 2015, 2016, 2017, 2018, 2019, 2020, 2021, 2022, 2023 & 2024 Gunsumer Reports™, All rights reserved.
FTC Disclosure