|
|
Gunsumer Reports TM Providing Detailed Objective Reviews for Firearms and Firearm Accessories |
Ruger SR22 Pistol Review
Part 4 - Disassembly
February 17, 2012
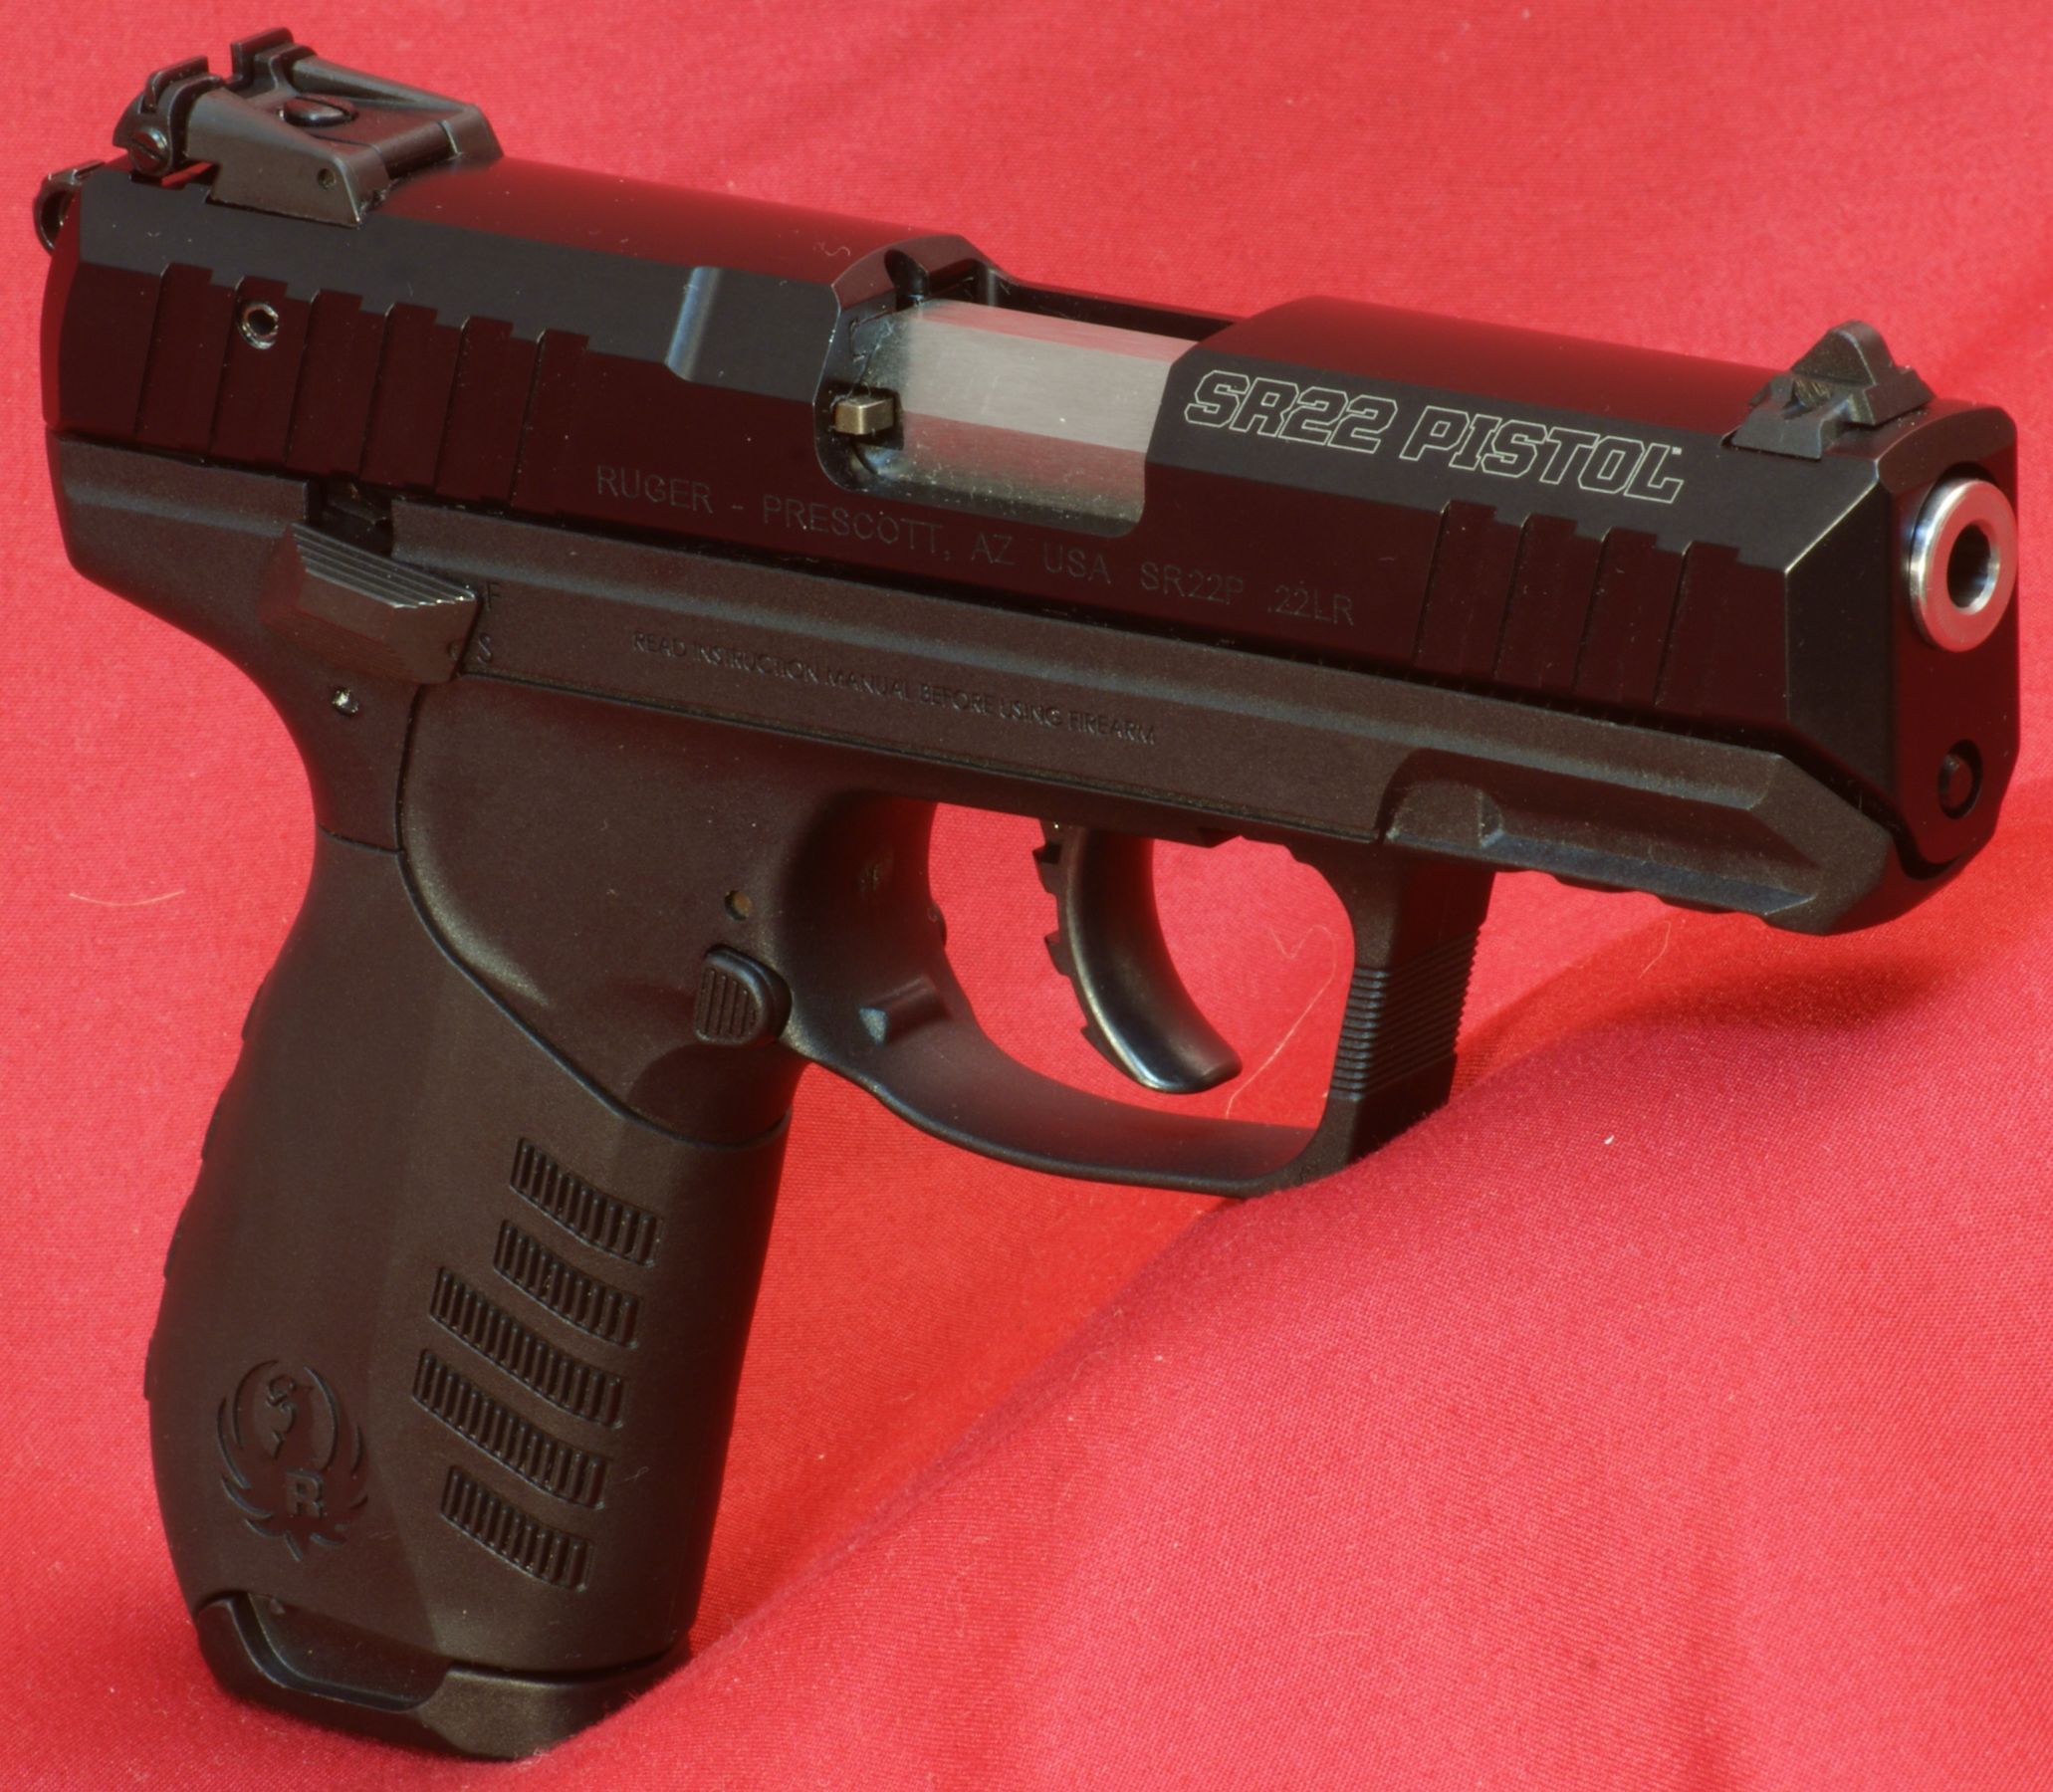
In this part of my Ruger SR22 Pistol review, I'm going to show disassembly of the pistol. Although I'm going to show and follow the steps outlined in the Ruger Instruction Manual, you should always consider the manufacturer's instructions as the official source when disassembling any firearm. The Ruger Instruction Manual contains many comments related to safety that you should read and be aware of before working with your SR22 Pistol.
Disassembly
Step 1 - Safety and Remove Magazine
Before you work with any firearm, you should remove the magazine and check to see that there is no round in the chamber. After you check once, check it again. Also ensure that the manual safety is in the "safe" position.
Step 2 - Open Slide
Pull the slide to the rear and lock it in the open position by pushing up on the slide stop lever. This is also another opportunity to ensure there is no round in the chamber.
Figure 1
Step 3 - Close Slide
Close the slide by gripping the rear of the slide, pulling back and then releasing the slide. Note that the hammer is not cocked if you had the manual safety on "safe" per the instructions because with the safety in the "safe" position the pistol will effectively decock the hammer. I think the Ruger Instructions may be off slightly on the optimum position of the manual safety for disassembly. In one of the figures (9b) in their instruction manual, they clearly show the safety in the "fire" position and the hammer cocked when removing the slide. With the hammer cocked, the hammer doesn't push up on the rear of the slide during disassembly. Actually, you can have the safety and hammer in either position for disassembly, but on assembly, the Ruger instructions clearly state the safety should be disengaged and the hammer cocked.
Step 4 - Rotate Take Down Lever
Rotate the take down lever to it's fully down position as shown below.
Figure 2
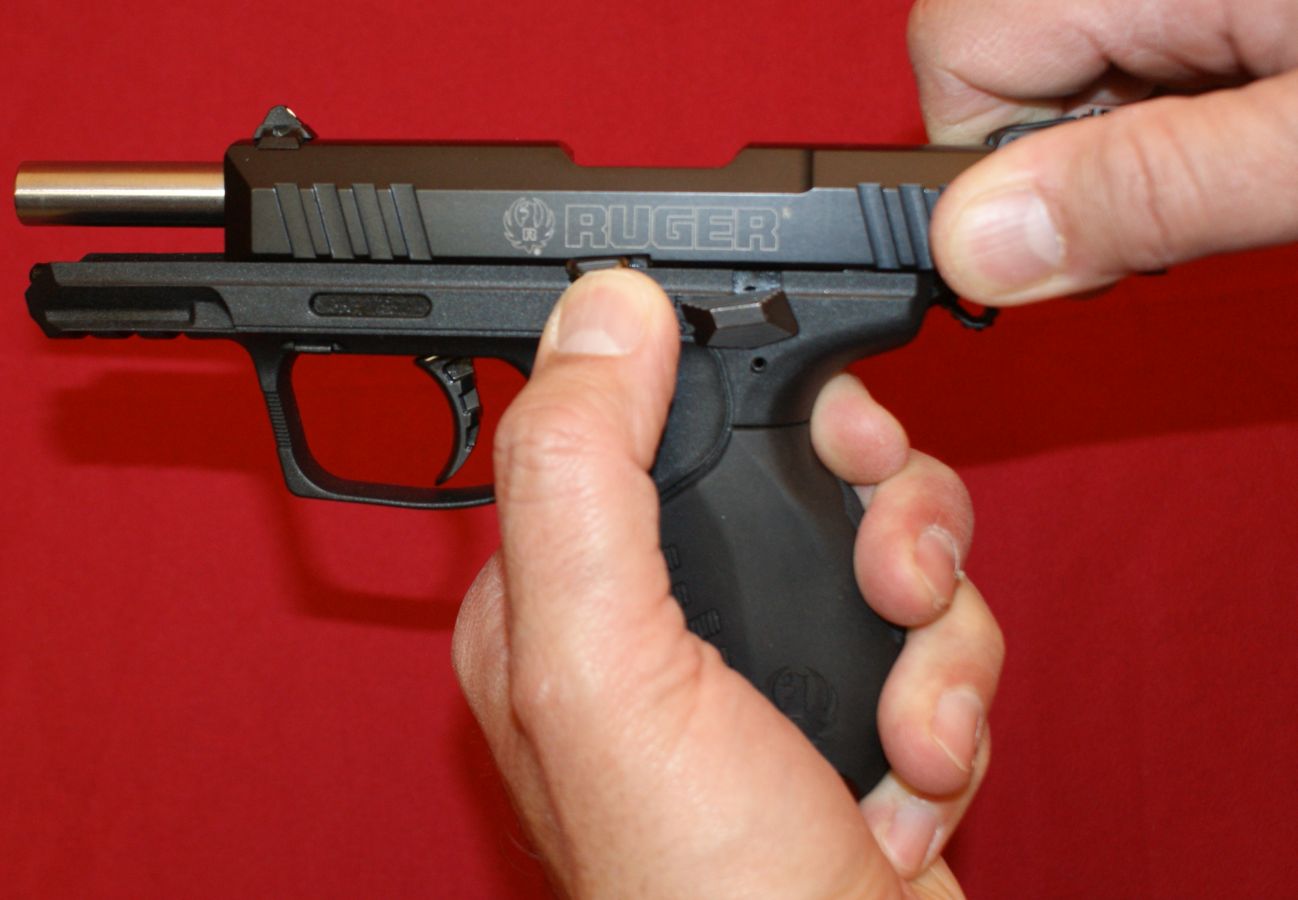
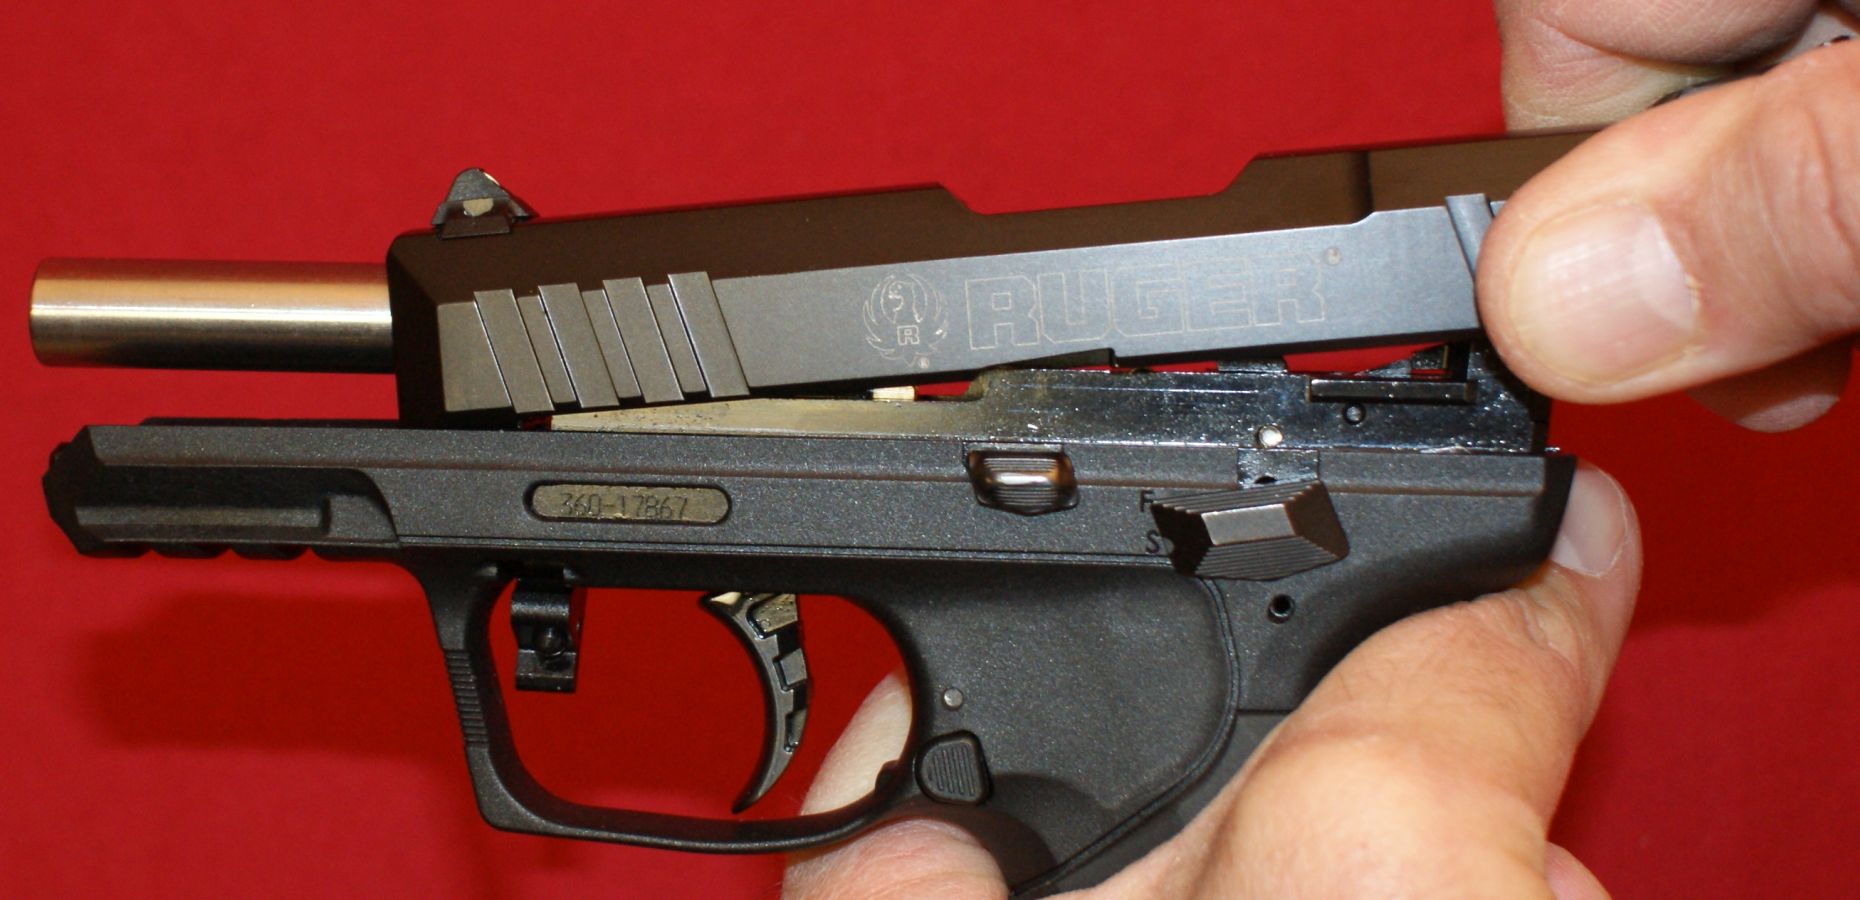
Step 5 - Pull Slide Rear Then Up
Holding the grip firmly in one hand, grab the back of the slide and pull it all the way to the back and then lift up as shown below.
Figure 3
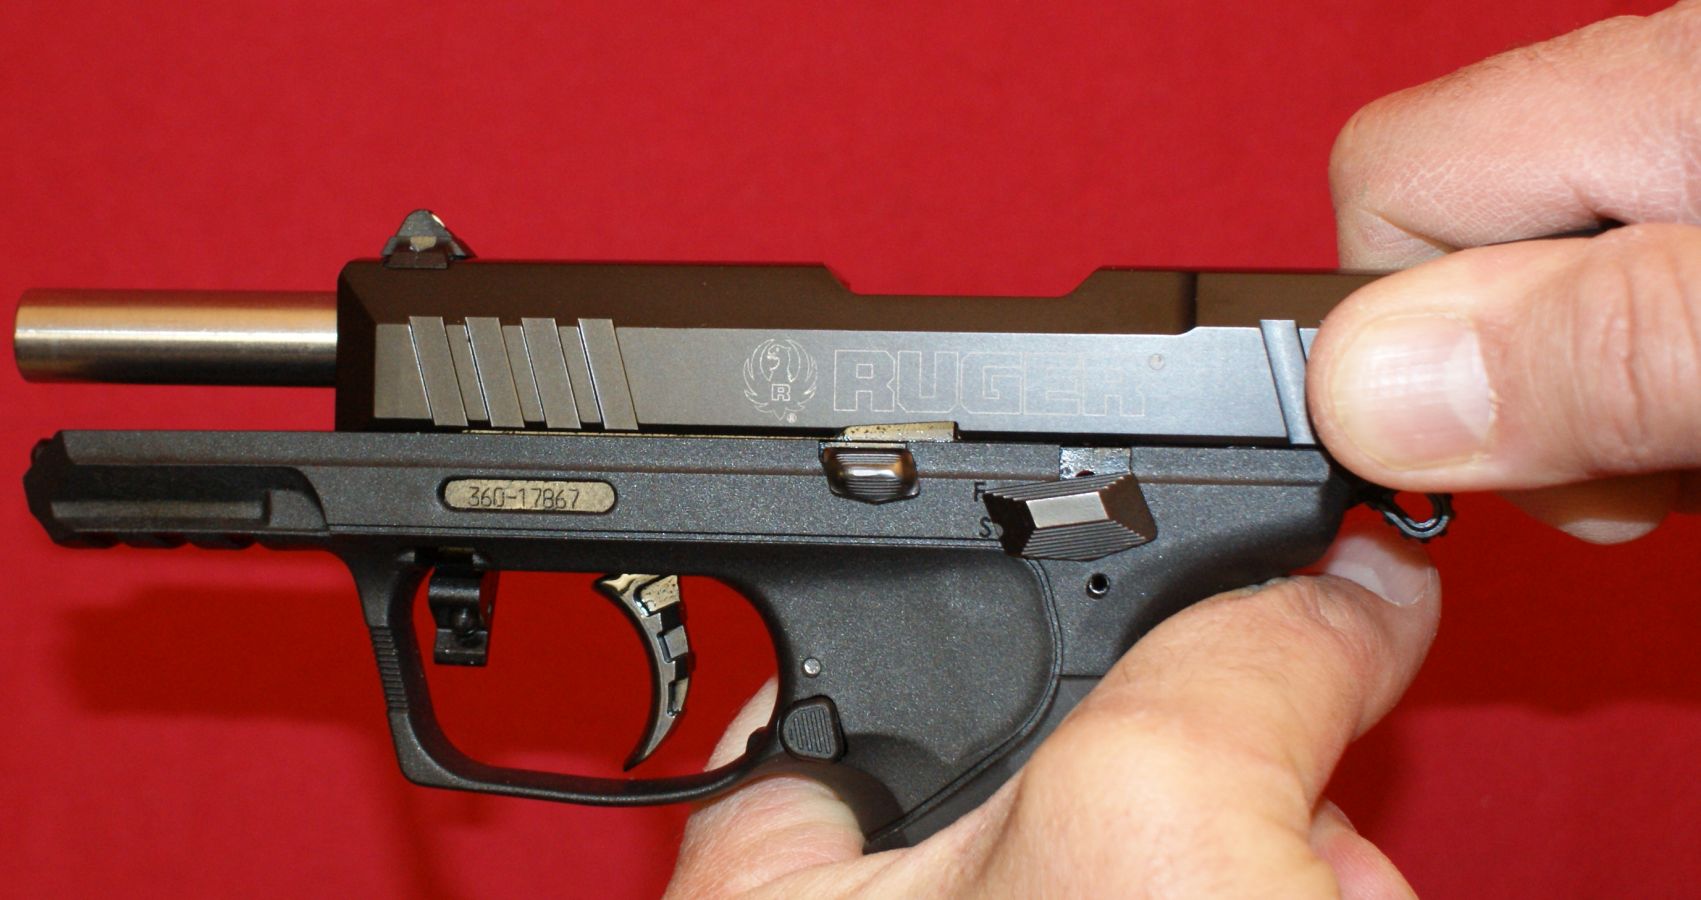
Figure 4
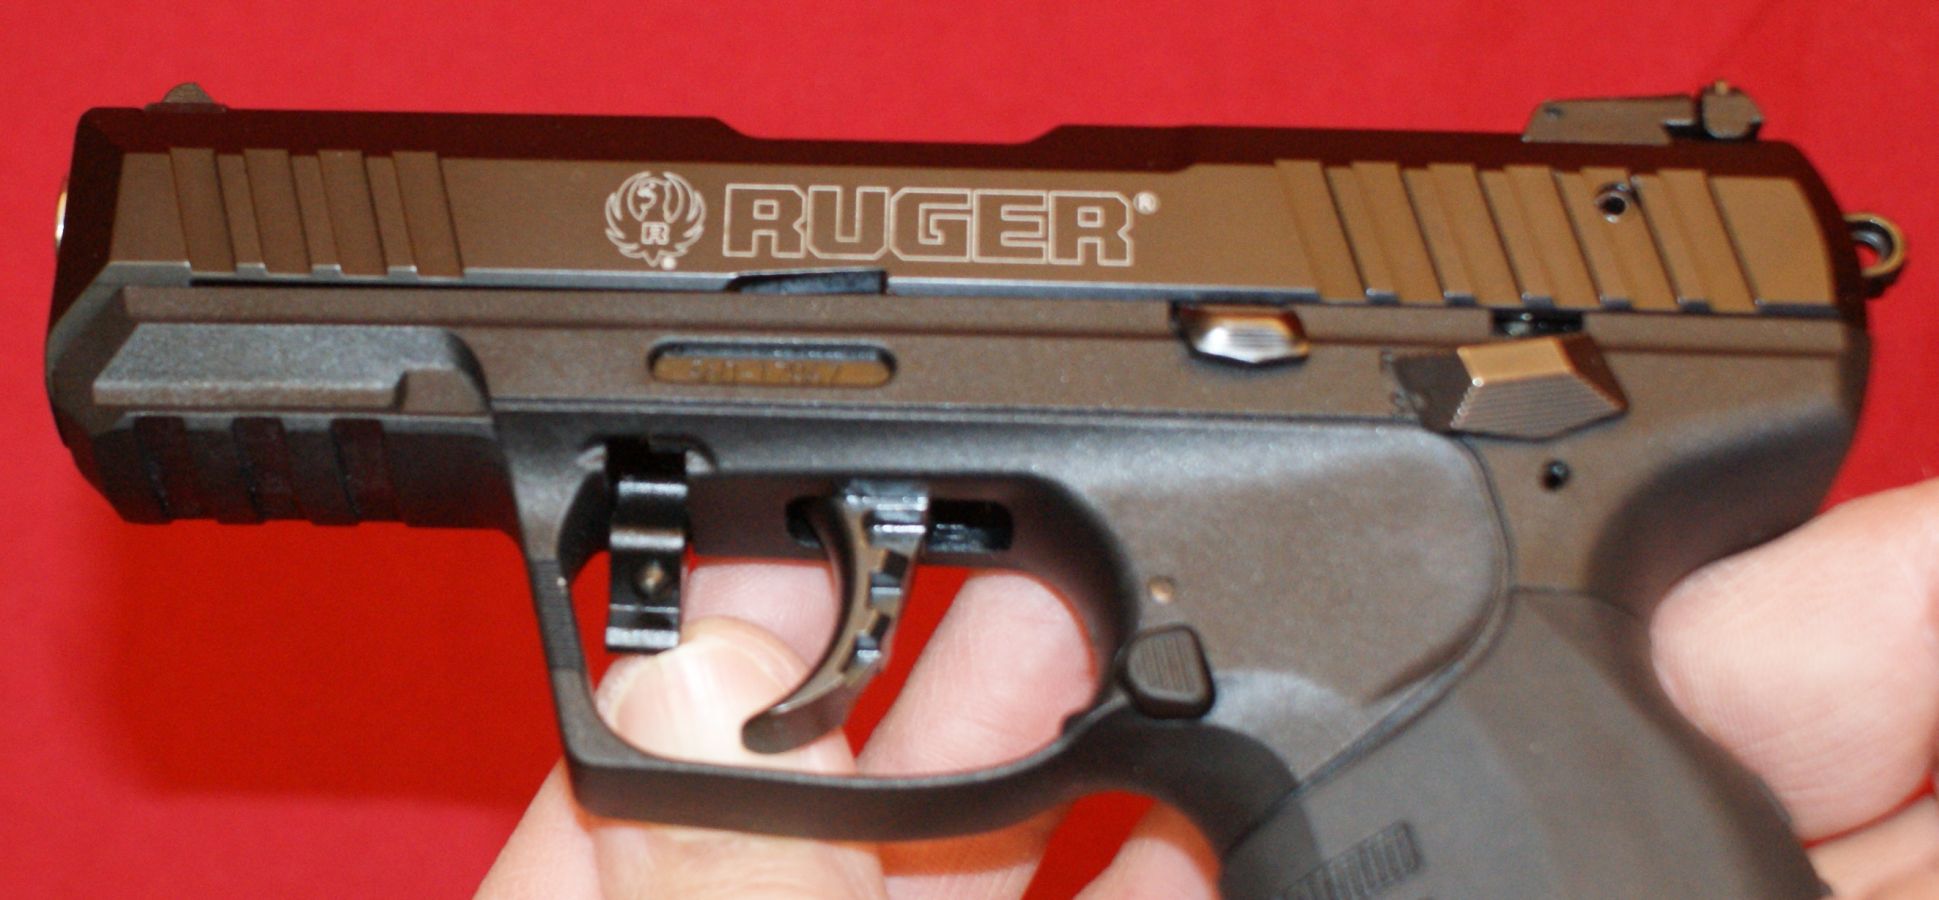
Step 6 - Move Slide Forward and Remove
While holding the slide up to clear the barrel, but not too much to cause binding on the barrel, move the slide forward and then finally off the front of the barrel.
Figure 5
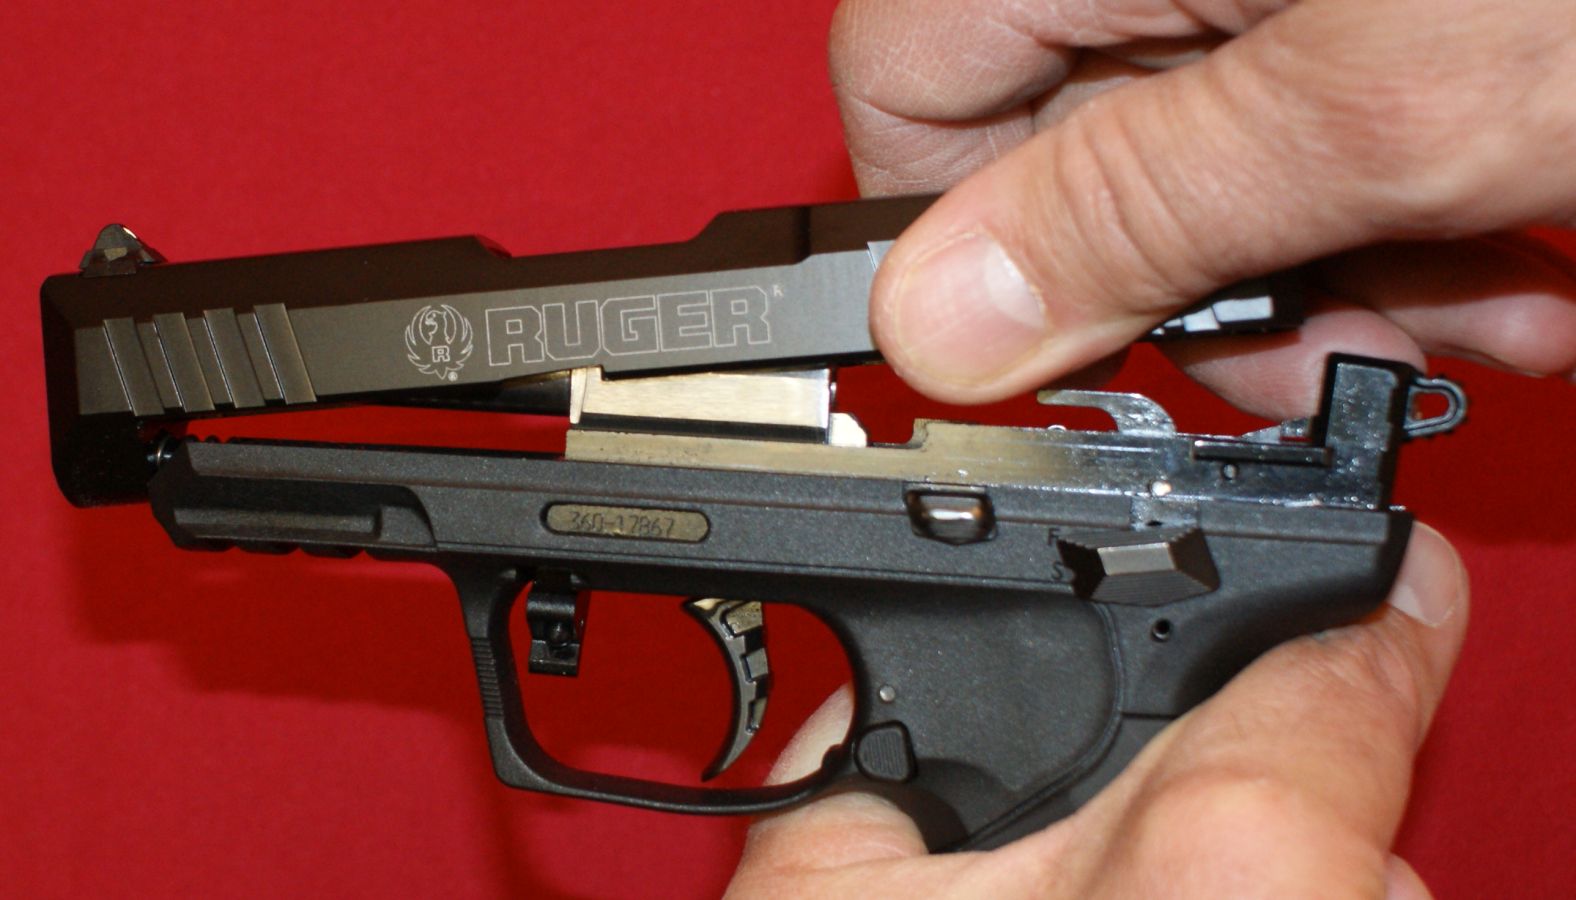
Figure 6
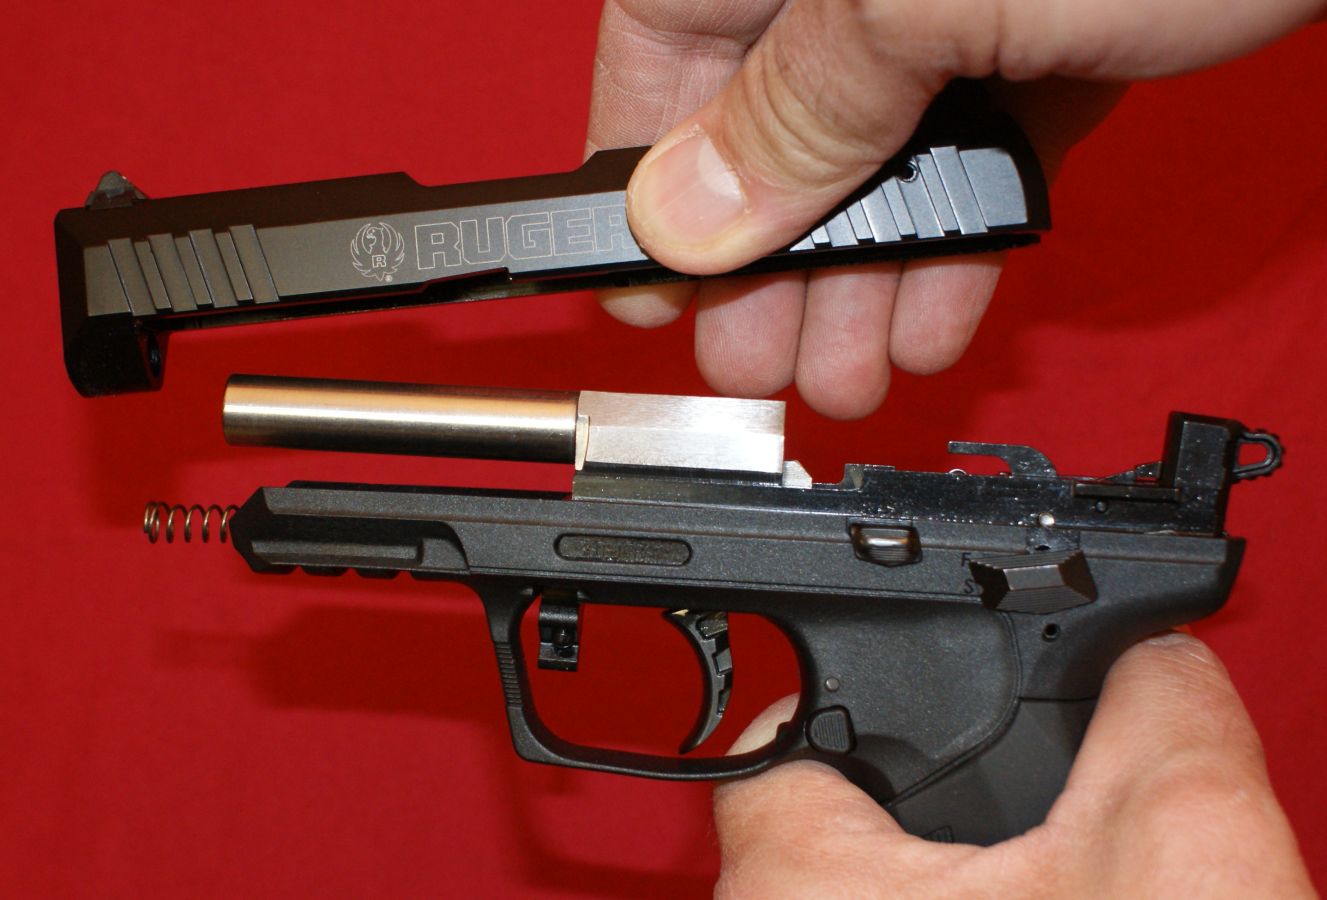
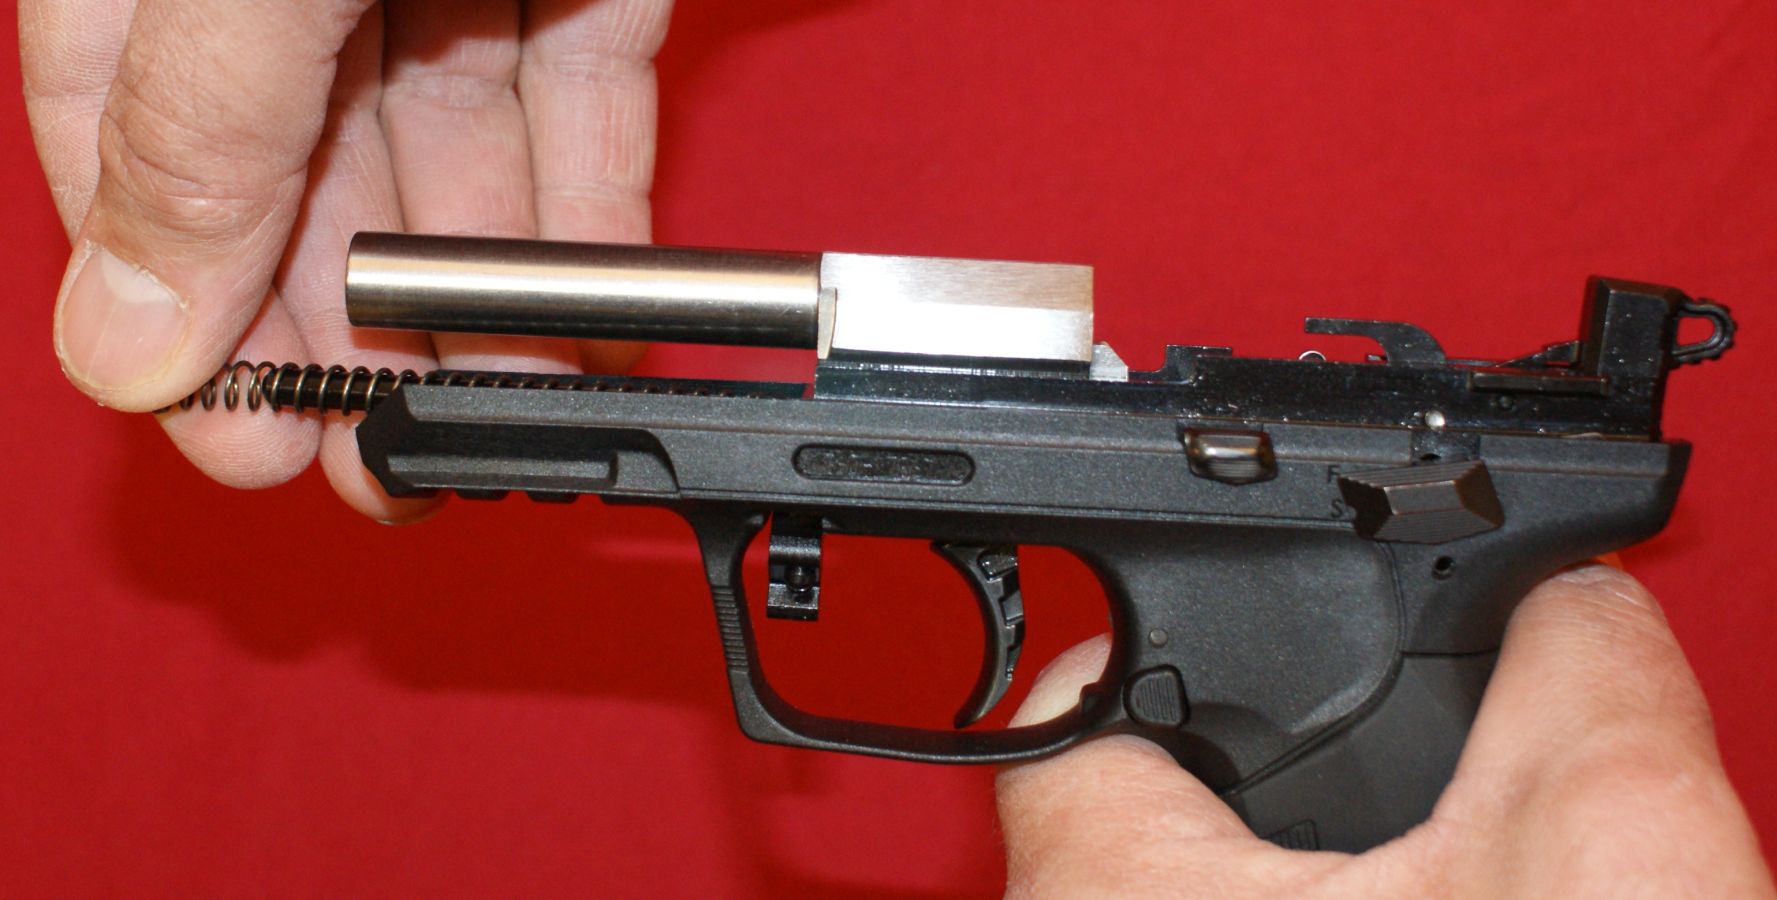
Step 7 - Remove Guide Rod and Recoil Spring
The guide rod and recoil spring can be then be removed from the frame. One thing to note is that the spring coils have different diameters on each end. During assembly, the small diameter end of the spring goes on the guide rod.
Figure 7
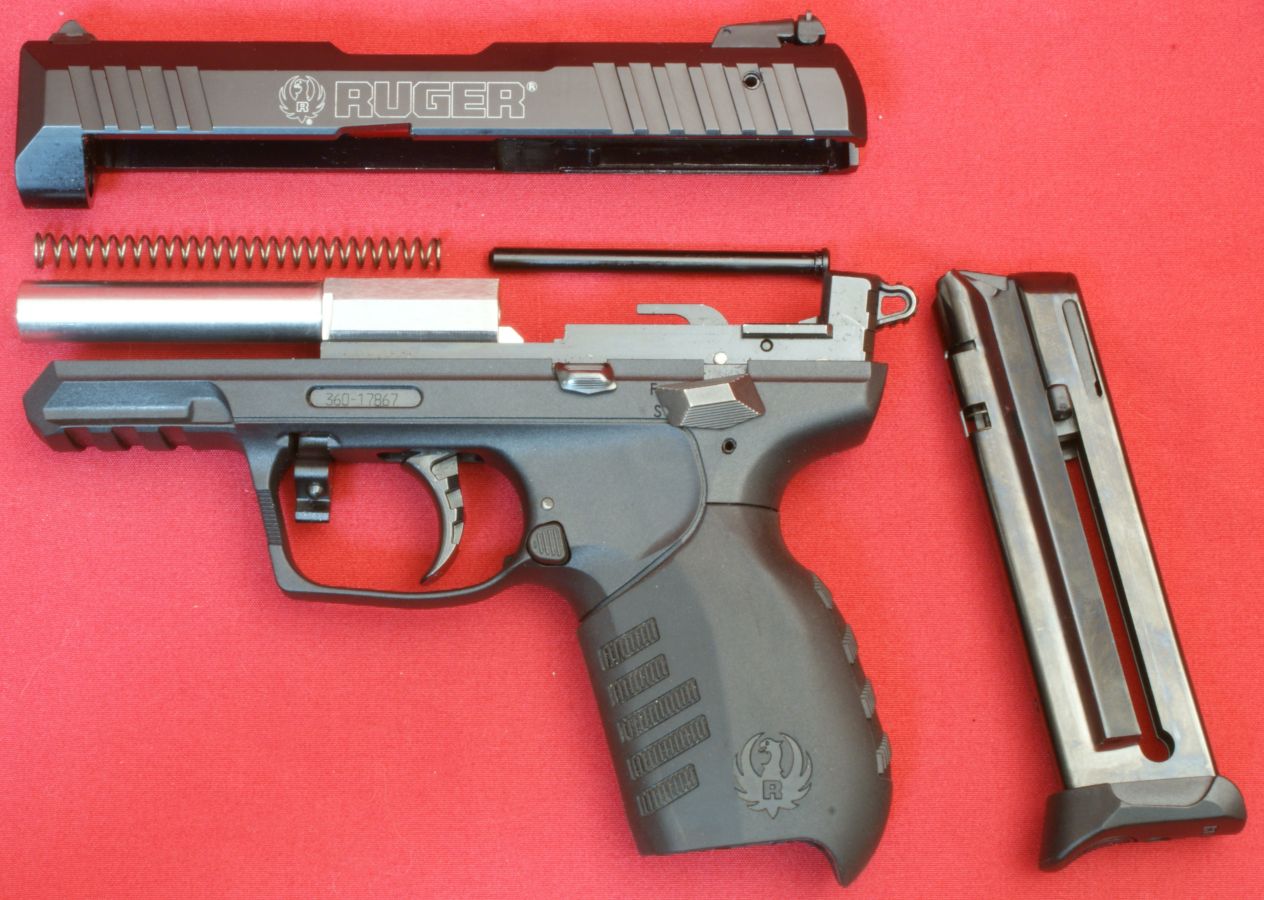
Step 8 - Field Stripping Complete
Ruger states that this is as far as you need to go on disassembly for routine cleaning and lubrication. They also state "Further disassembly of the slide or frame components is not recommended and should only be undertaken by the factory." Except for the removal of the barrel, I would agree that unless you are trained in working on firearms, you would probably be better off cleaning your pistol at this level of disassembly.
Figure 8
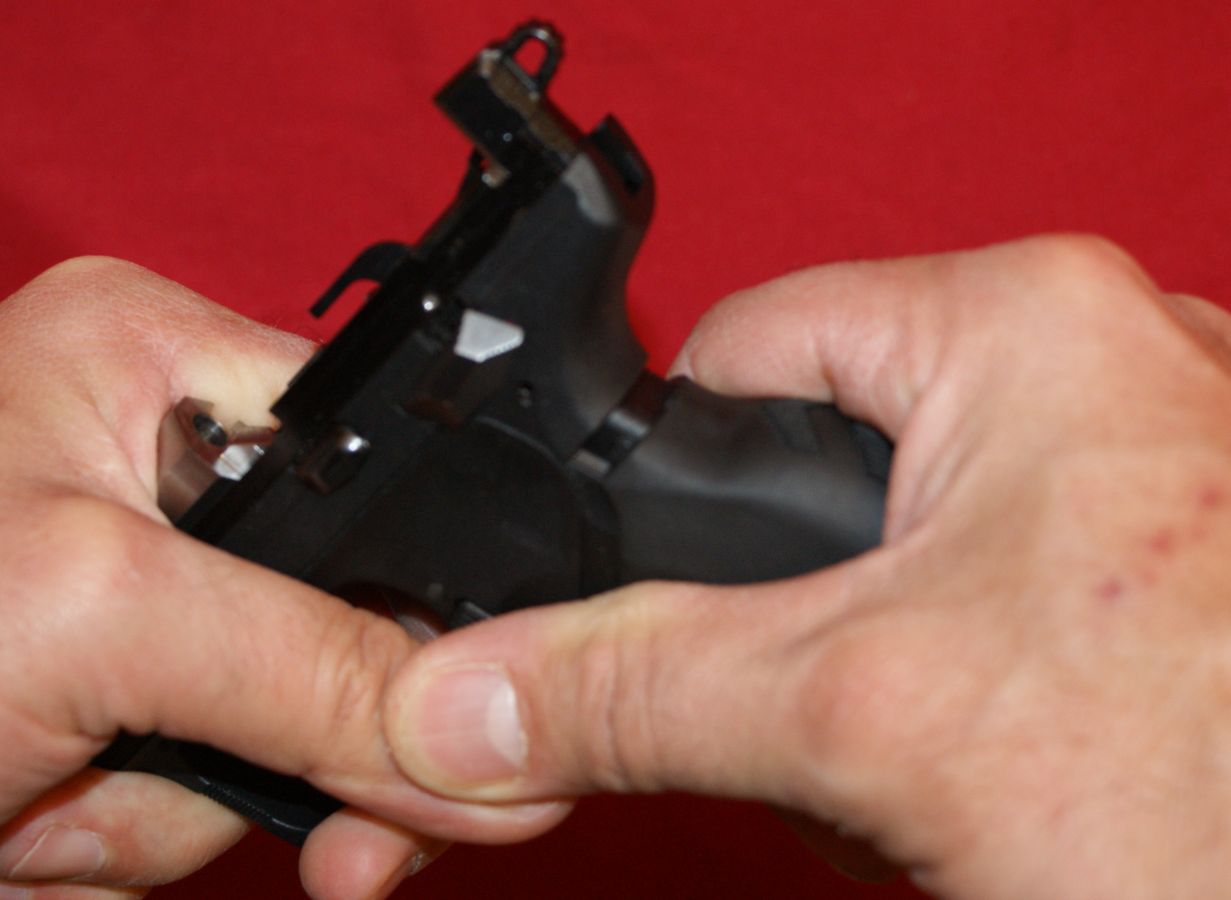
Grip Sleeve Removal
To remove a grip sleeve, first make sure the gun is unloaded, pointed in a safe direction and the magazine removed. Although my photos below show the slide removed after disassembly above, disassembly of the pistol is not required for removal of the sleeve. You are going to need to grip the pistol firmly with each hand. You then pull down on the grip sleeve until it comes off. There are a couple of detents that hold the sleeve in place. Once the sleeve passes out of these detents it slide off much easier.
Figure 9
In the photo below you can see the detent on the grip portion of the frame. The first time you remove the grip sleeve will probably be very difficult. After doing it a couple of times, the sleeve appears to become "broken-in" and removal becomes much easier. Even once "broken-in", the grip sleeve has a very firm fit around the frame handle.
Figure 10

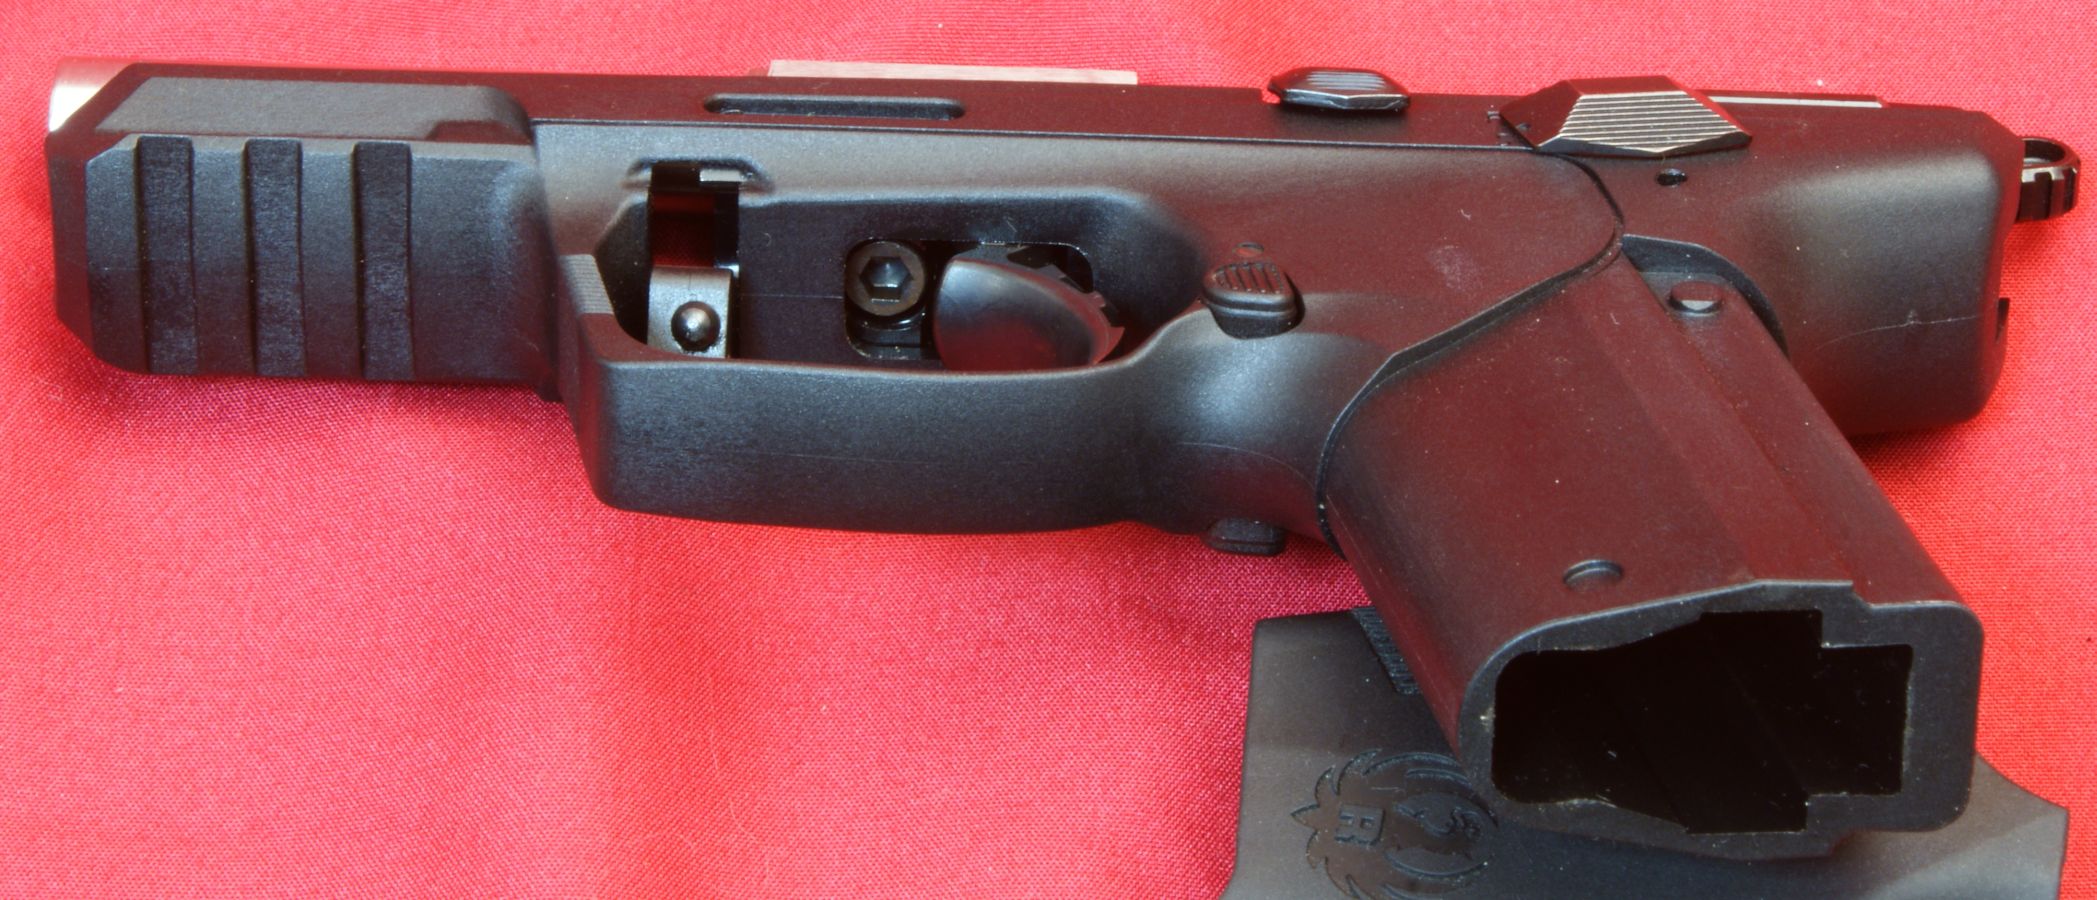
Barrel Removal
Ruger has planned and made barrel removal a simple and easy task with the hopes of selling additional "threaded barrels" in the future. They state "Threaded barrels are available from Ruger", but at the time of this review, I could not find them at their "Shop Now" site.
The first step in barrel removal is to disassemble the pistol as shown above (note that grip sleeve removal is not required). With the safety in the "safe" position, the trigger is disengaged and will stay back when pulled. In the photo below you can see the screw holding the barrel in place just in front of the trigger.
Figure 11
Although the instruction manual states you need a 3/32" Allen Wrench to loosen the screw, the wrench needed on my pistol was a 3.5 mm Allen Wrench which is larger than the 3/232" one indicated. Once you break the torque on the screw, it is easily removed.
Figure 12
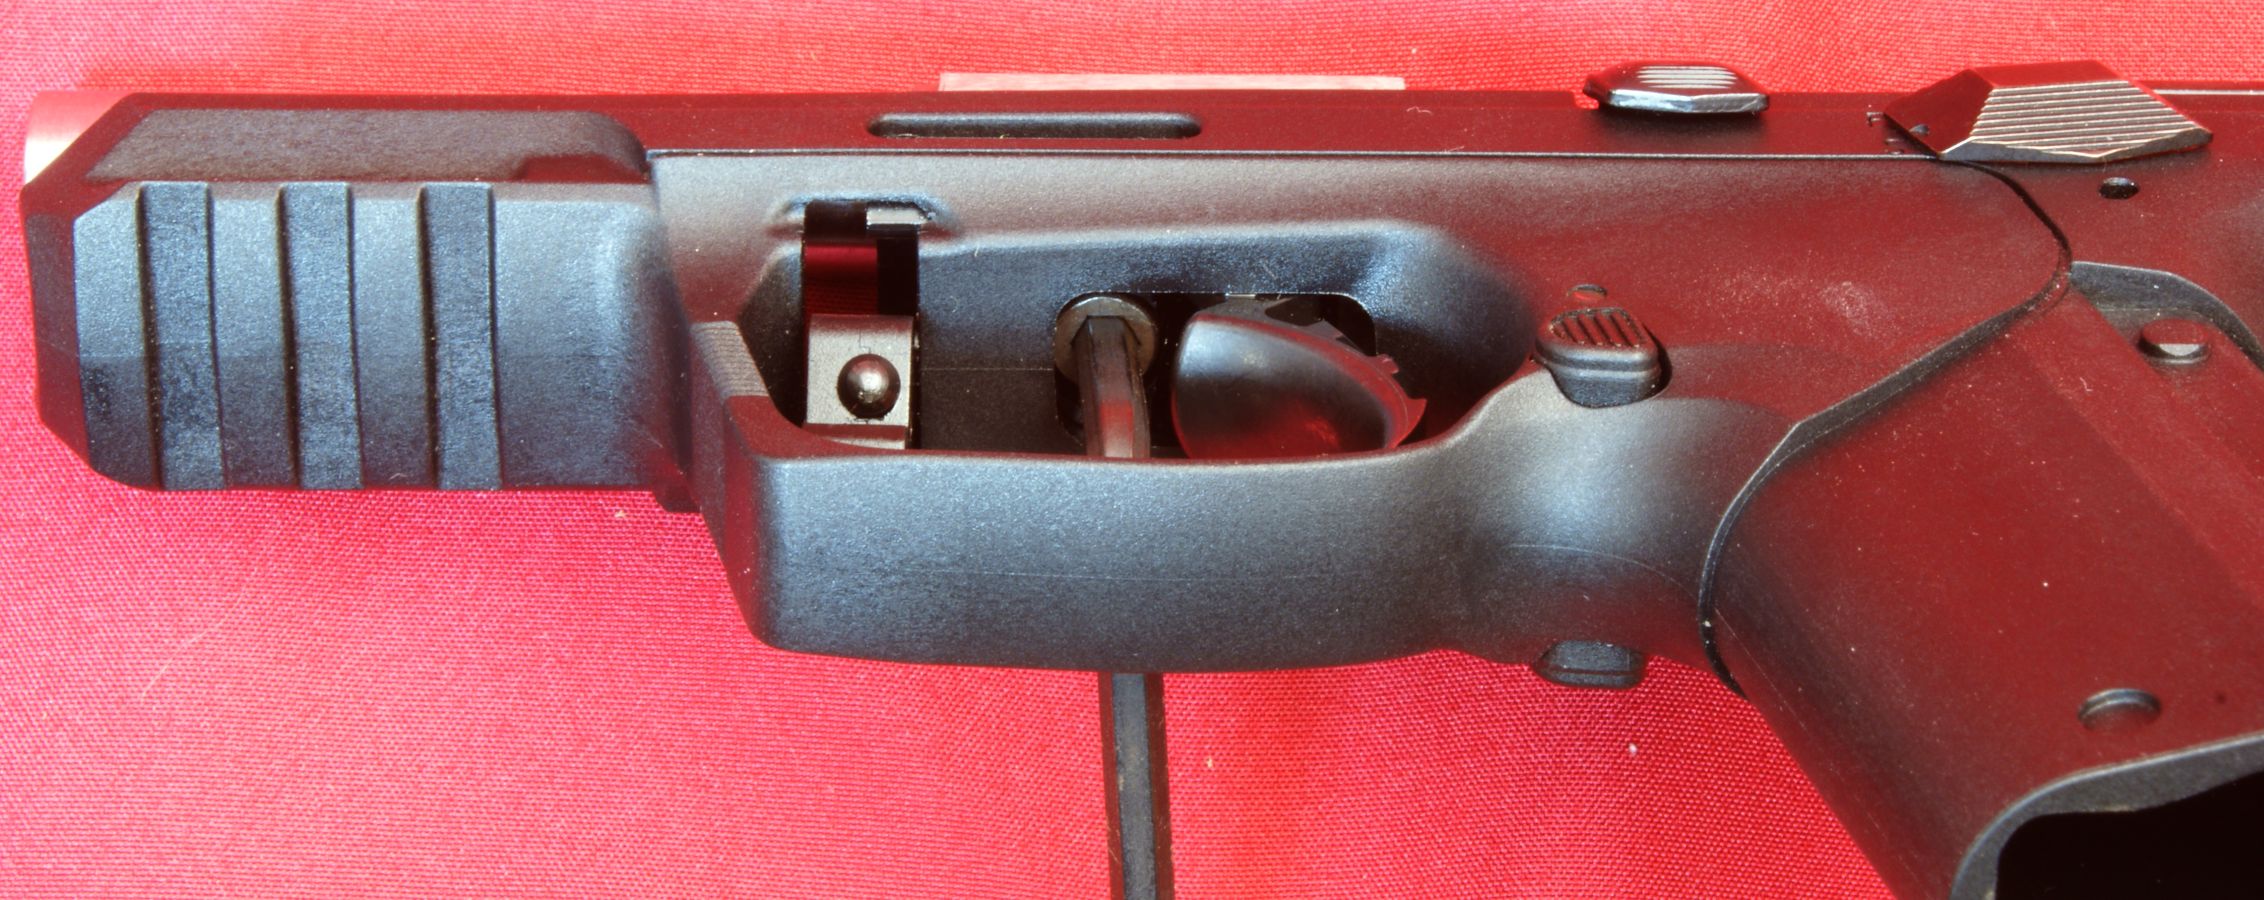
With the screw removed, the barrel can be removed from the frame by lifting upward. The photo below shows this disassembly. On reassembly, since it is not practical to get a torque wrench in the trigger guard, Ruger states that you should tighten the screw an additional 45 to 90 degrees after you make initial contact of the screws with the frame insert.
Figure 13

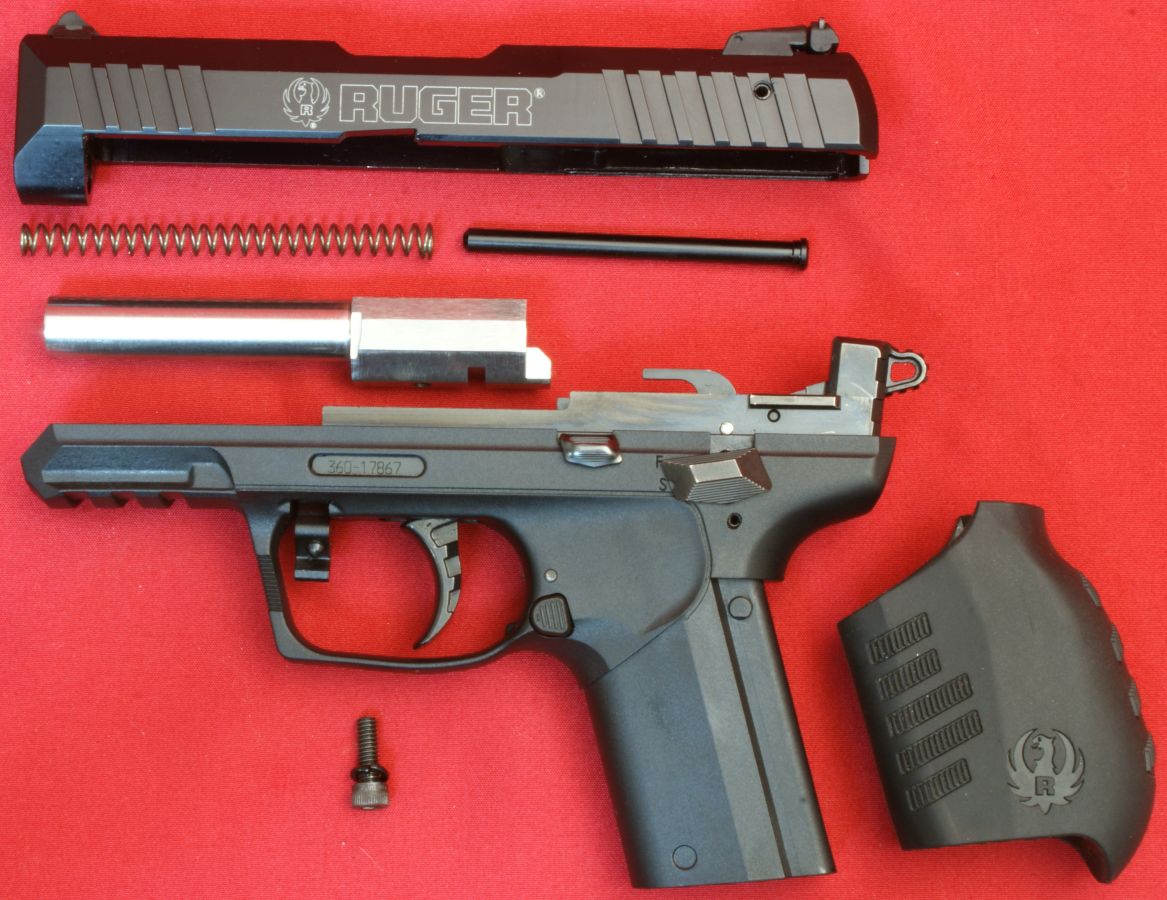
Maximum Recommend Disassembly
This photo shows the maximum recommended level of disassembly based on the instruction manual. Overall I would say that disassembly of the Ruger SR22 Pistol is extremely easy.
Figure 14
Magazine Disassembly
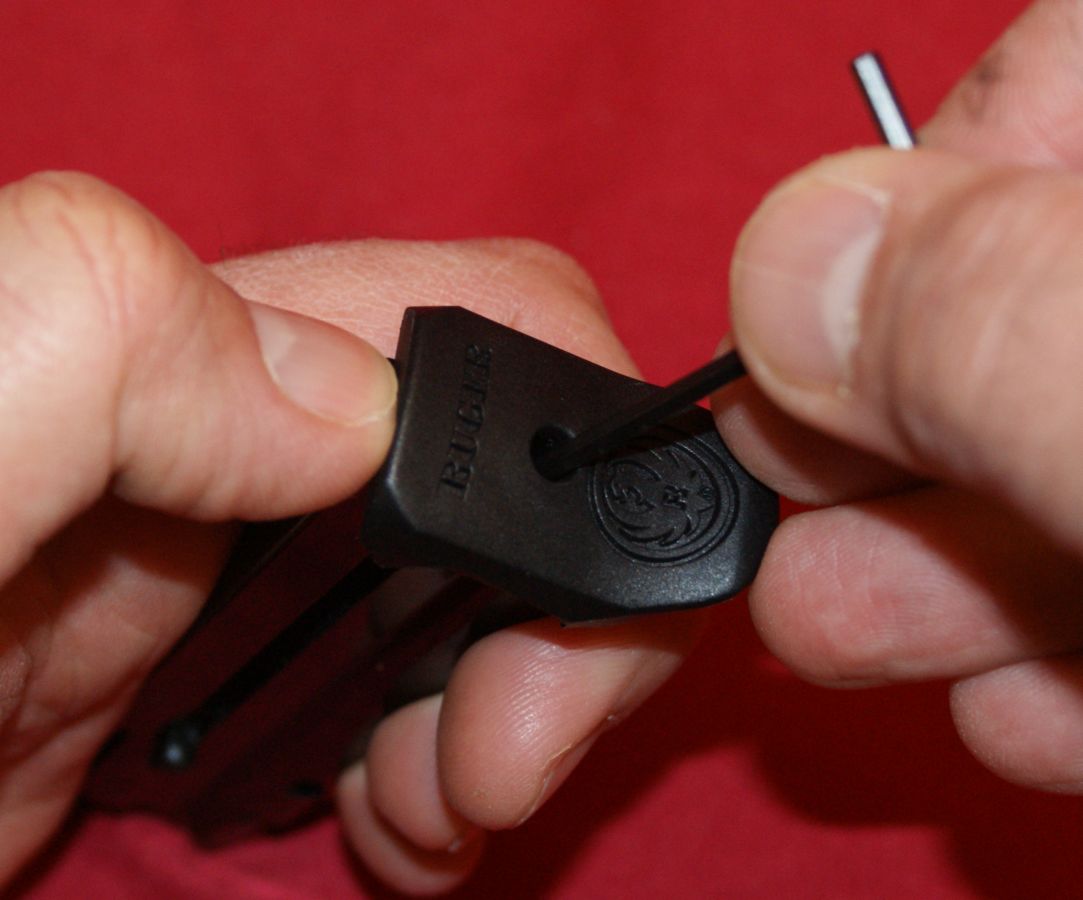
Disassembly of the Ruger SR22 Pistol magazine is typical to most magazines of this type. You first start by pressing on the retainer in the bottom of your magazine with some type of tool (Allen wrench shown) and sliding the floor slightly plate forward so the retainer will stay depressed when you remove the tool. Next you position your thumb to hold the retainer in place with the spring depressed when you remove the floor plate. If you don't do this, your next step will probably be searching for the retainer because it just flew across the room.
Figure 15
Figure 16
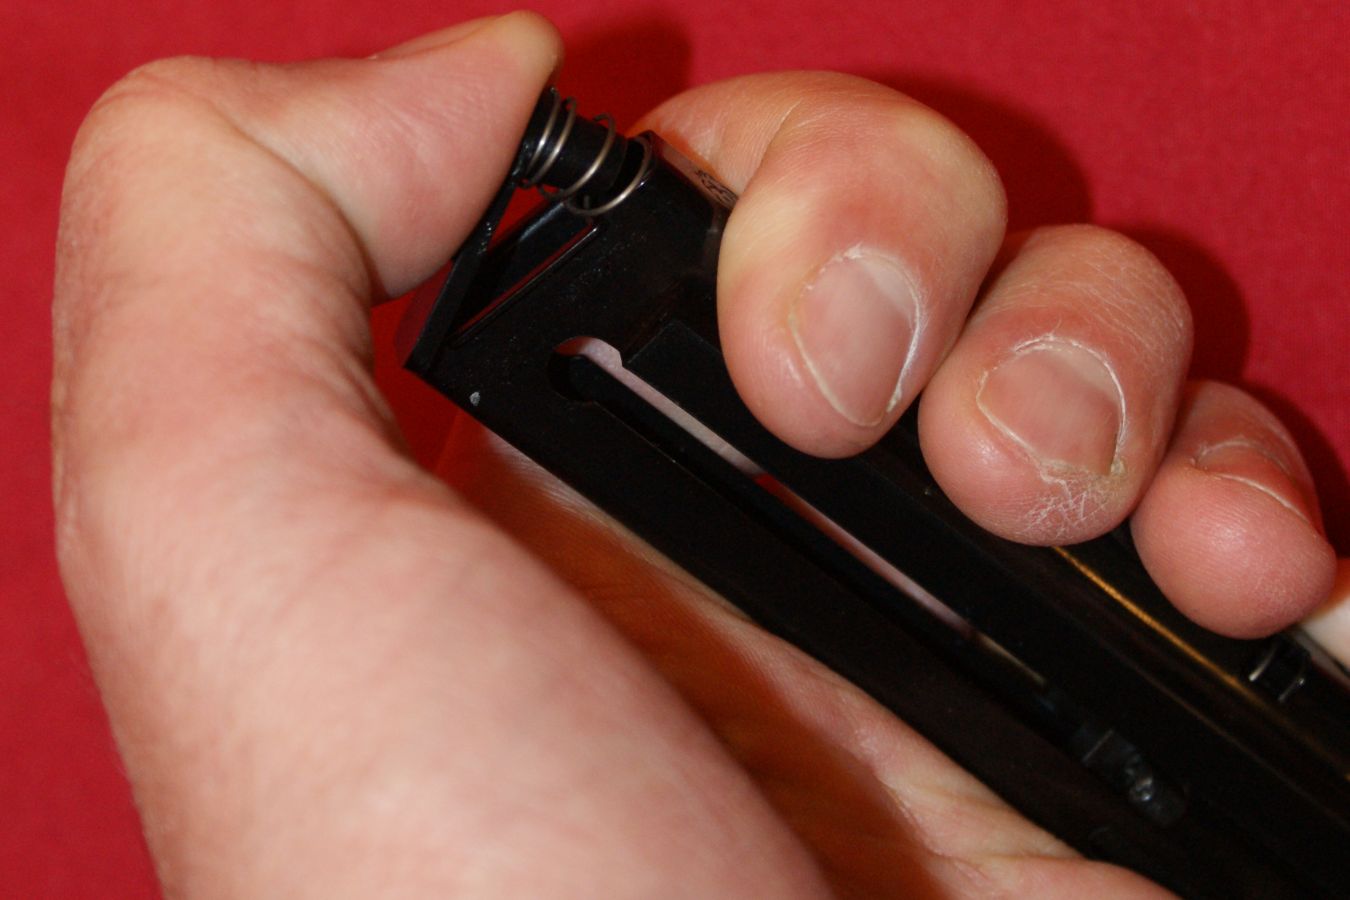
With your thumb as a guide, you can release the compression on the magazine spring. The photo below shows the spring seated fully in the magazine but not compressed.
Figure 17

After you remove the spring and retainer, you then slide the follower to the bottom of the magazine where the side button lines up with the hole at the bottom of the magazine. You can then pull the button out and remove the follower from the the magazine.
Figure 18
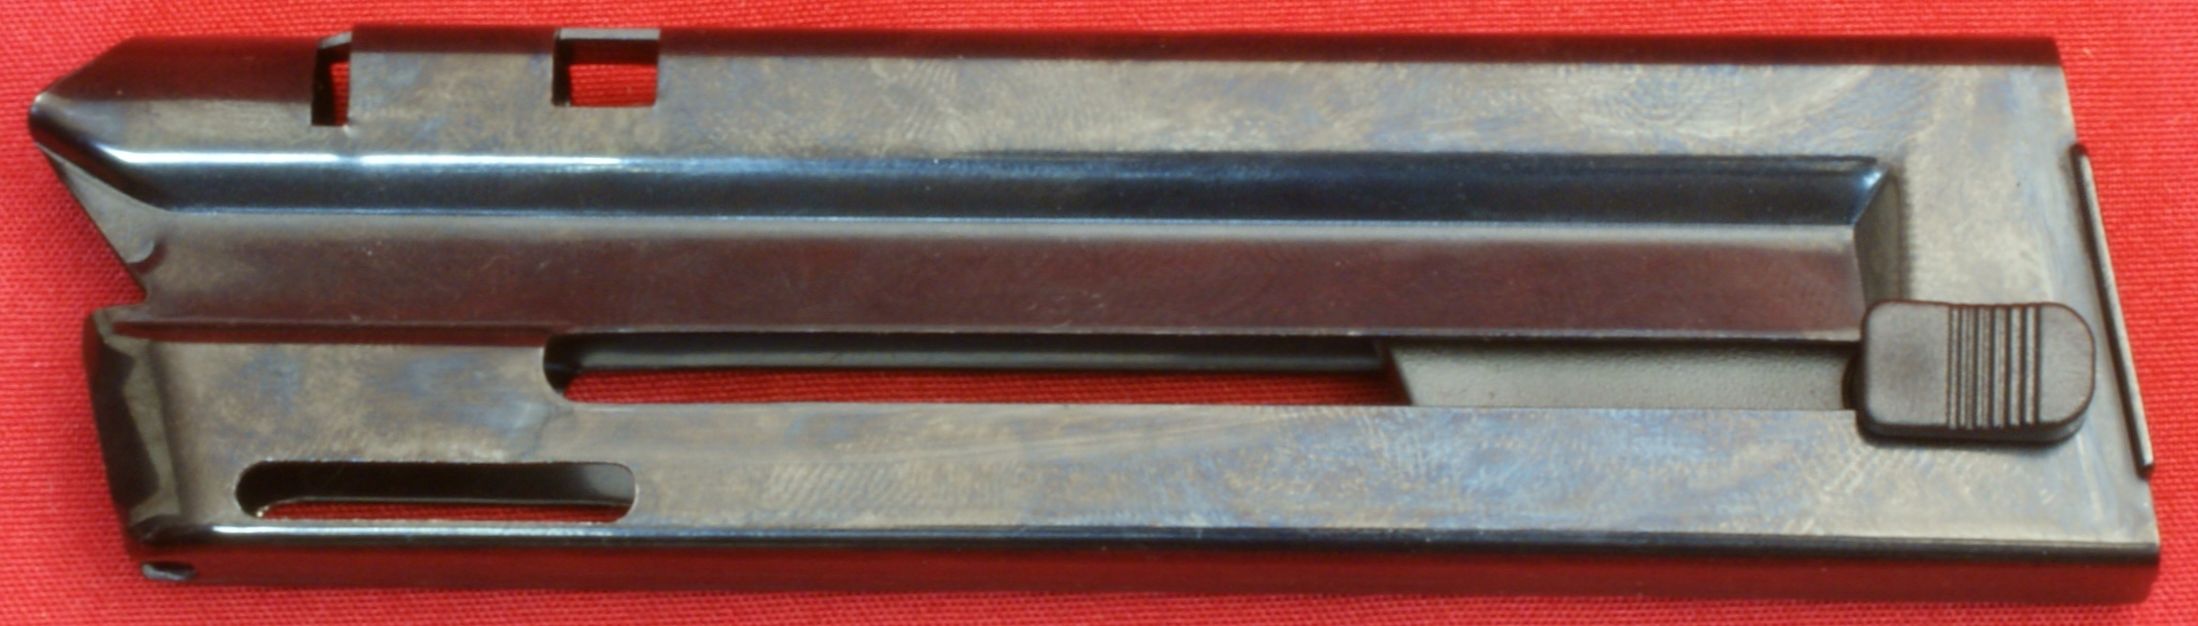
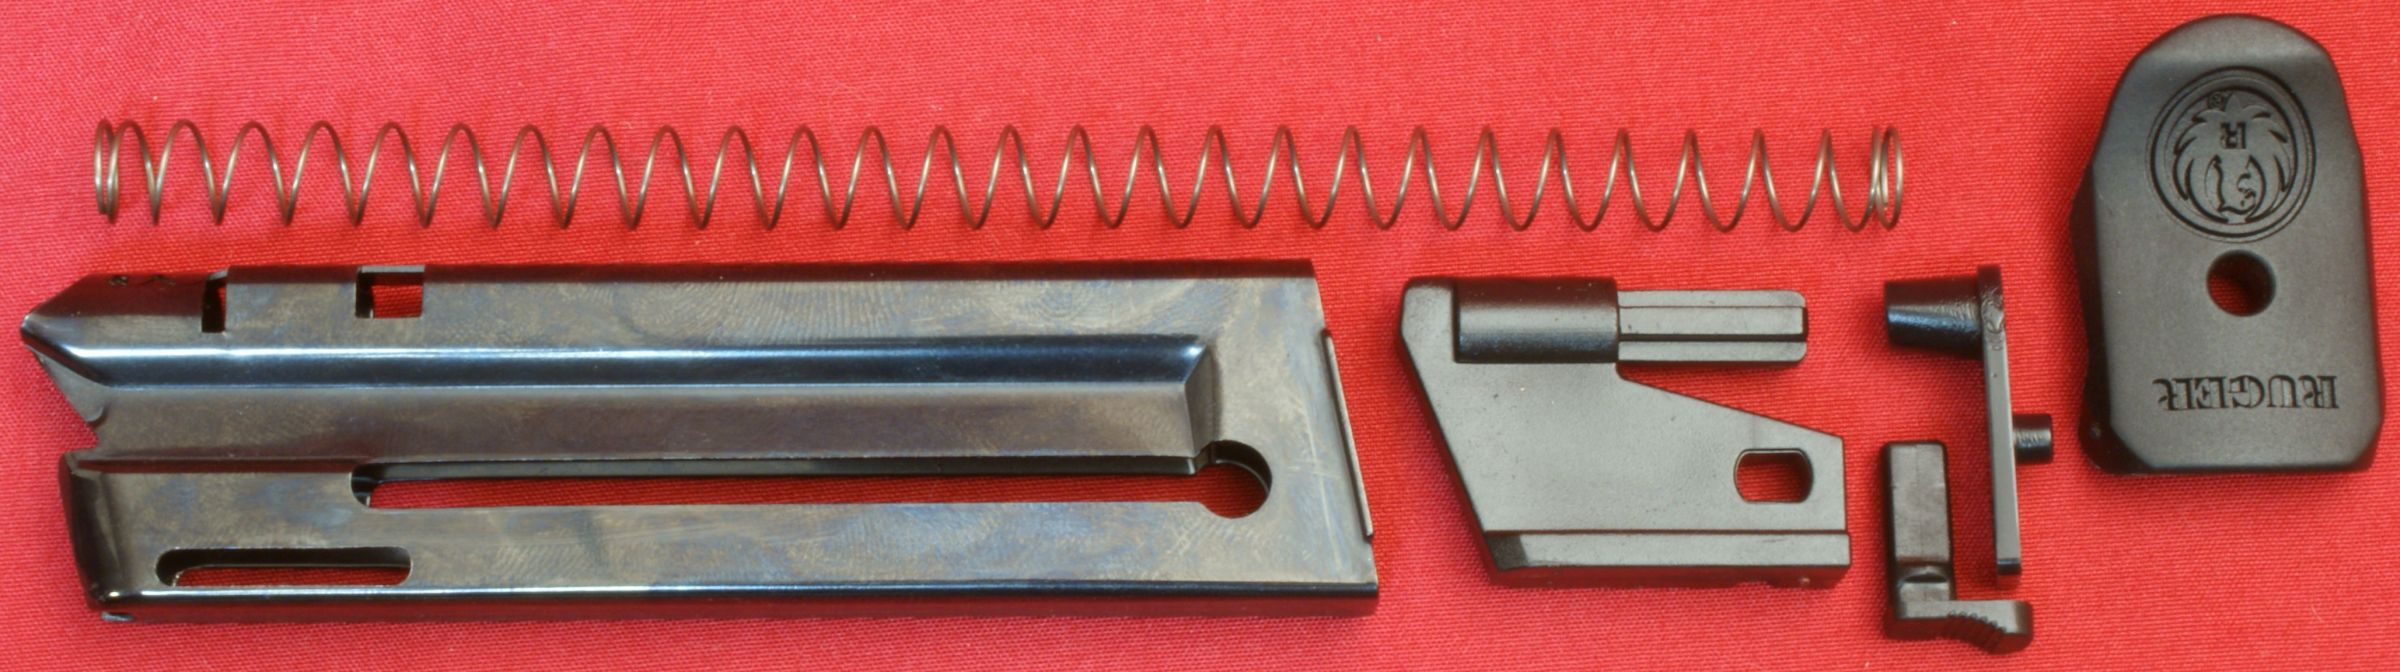
The photo below shows the magazine fully disassembled. Note that you can switch the follower button from either the left or right side depending on your preference.
Figure 19
Thoughts
Disassembly of the Ruger SR22 Pistol and Magazine is simple and easy and the fear of disassembly shouldn't be an issue in cleaning your pistol after use.
For more detailed photos and commentary, make sure you check out the other parts of this review and feel free to leave comments on my Reader's Comments page. The following links are provided to help you see other parts of this review.
- Ruger SR22 Pistol Review: Part 1 - Introduction, Specifications and Summary
- Ruger SR22 Pistol Review: Part 2 - What's in the Box
- Ruger SR22 Pistol Review: Part 3 - External Features
- Ruger SR22 Pistol Review: Part 4 - Disassembly (this page)
- Ruger SR22 Pistol Review: Part 5 - Internal Features
- Ruger SR22 Pistol Review: Part 6 - Range Test
Or
If you would like to be notified about future Gunsumer Reports reviews via Facebook, make sure "You Like This" by clicking the Facebook "Like" button at the bottom or top of this page. If it already says "You Like This" beside the button, clicking it again will uncheck the "Like" status and you will not be notified.
| Share on Facebook | |
© 2010, 2011, 2012, 2013, 2014, 2015, 2016, 2017, 2018, 2019, 2020, 2021, 2022, 2023 & 2024 Gunsumer Reports™, All rights reserved.
FTC Disclosure