|
|
Gunsumer Reports TM Providing Detailed Objective Reviews for Firearms and Firearm Accessories |
Beretta ARX 160 Carbine Review
Part 4 - Disassembly and Internal Features
July 26, 2015

In this part of my Beretta ARX 160 Carbine Review, I take a close look at disassembly of this rifle along with showing some of the internal features. Even though I show disassembly, you should always consider the manufacturer's Instruction Manual as the official source for information when working with your firearms. Their instruction manual will include many more safety related comments that are crucial to safe handling of their firearms.
Disassembly
The Beretta Instruction Manual is pretty brief when it describes disassembly. In fairness to Beretta, disassembly of the ARX 160 Carbine is extremely simple so little instructions are needed.
Step 1 - Safety
As always, the first step when disassembling any firearm is to ensure it is unloaded and safe. Verify the safety selector is in the safe position and the rifle is also pointed in a safe direction. Pull the bolt to the rear using an unloaded magazine to lock the bolt open. Remove the magazine. Ensure there is no round in the chamber, then release the bolt to the forward position.
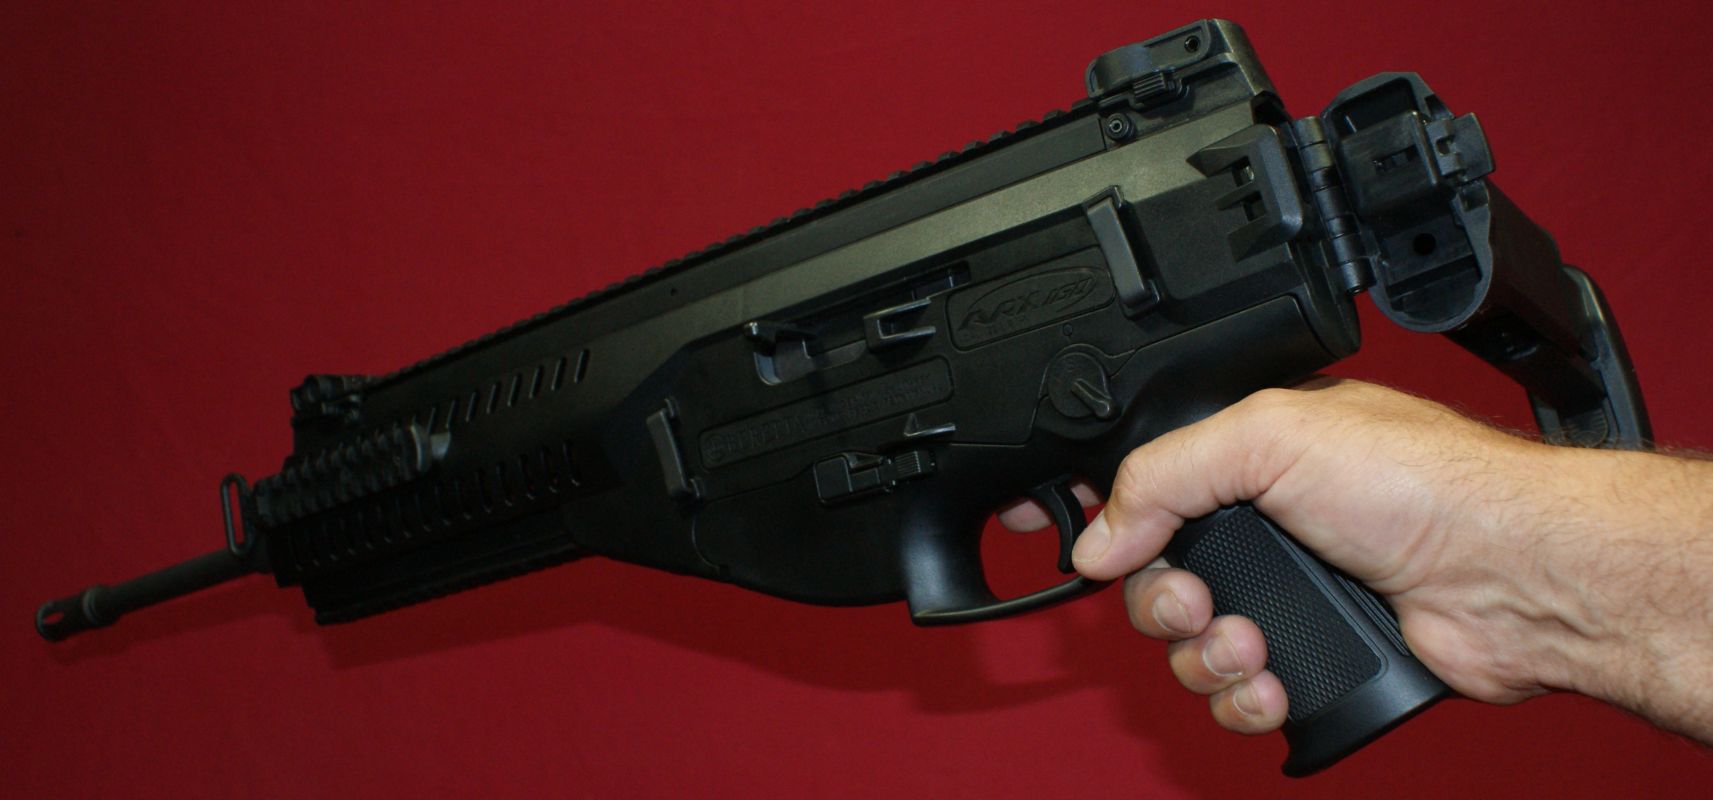
Step 2 - Fold the Stock
You will need to at least partially fold the stock for disassembly to allow you to press on the rear of the guide rod block.
Figure 1
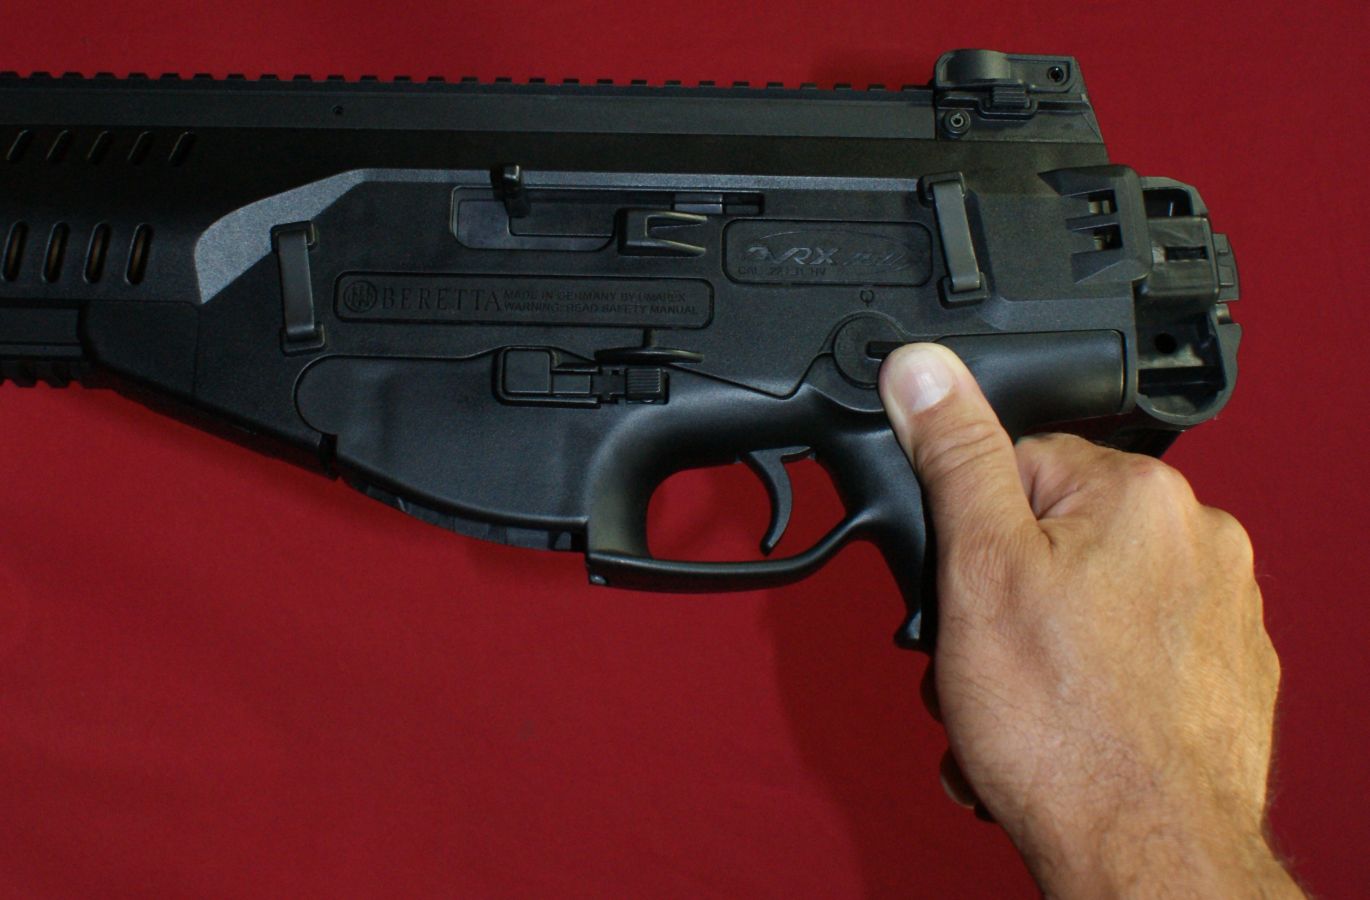
Step 3 - Turn the Safety Selector to the Disassemble Position
Rotate the safety selector in the opposite direction of "F" fire. This direction is spring loaded so you will need to hold the selector in this position.
Figure 2
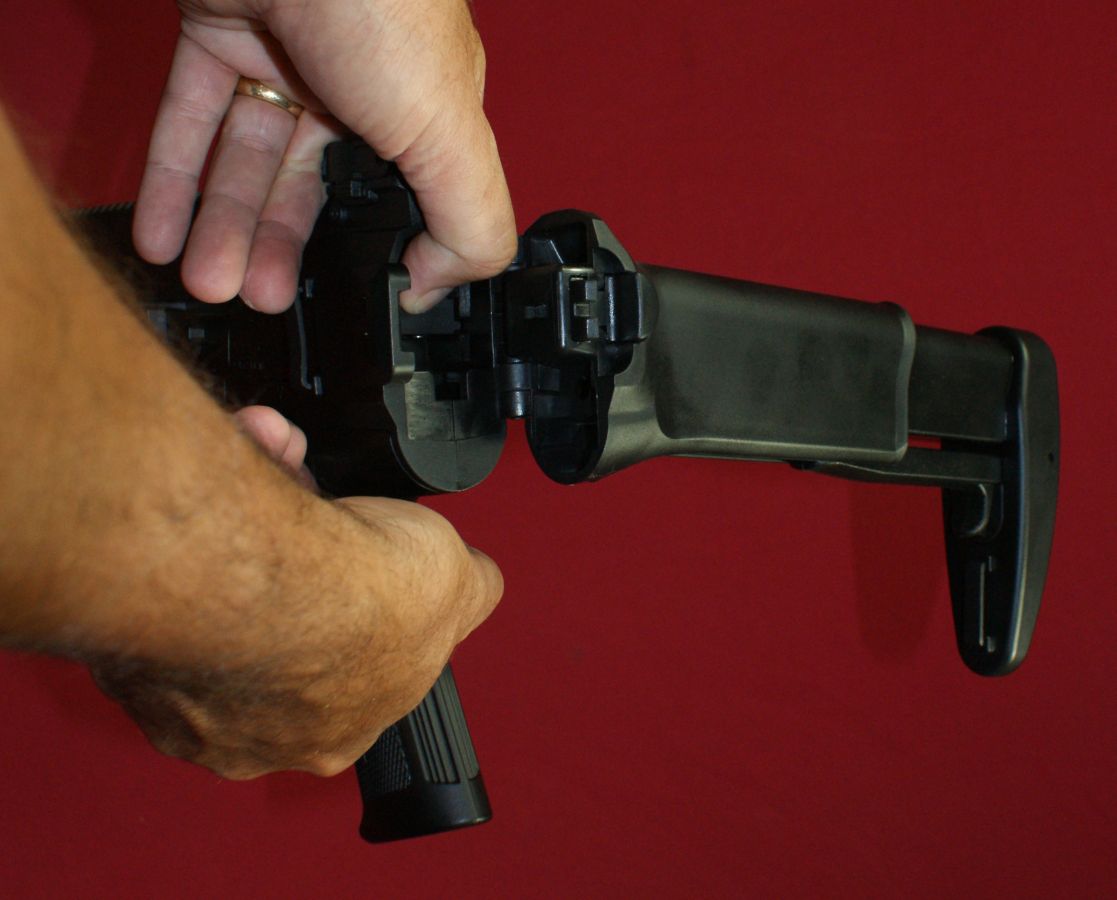
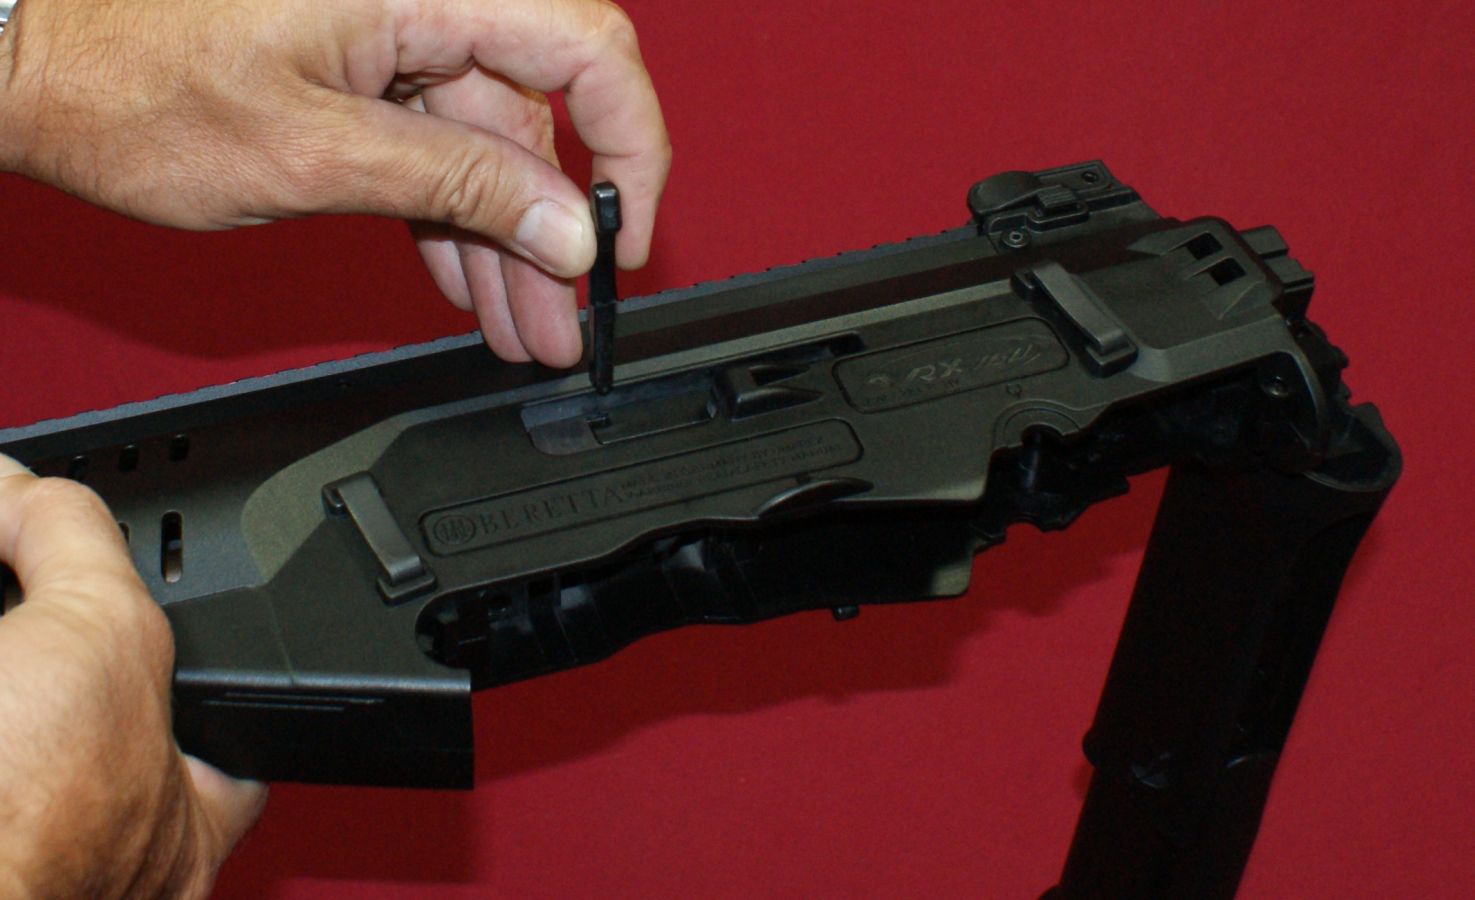
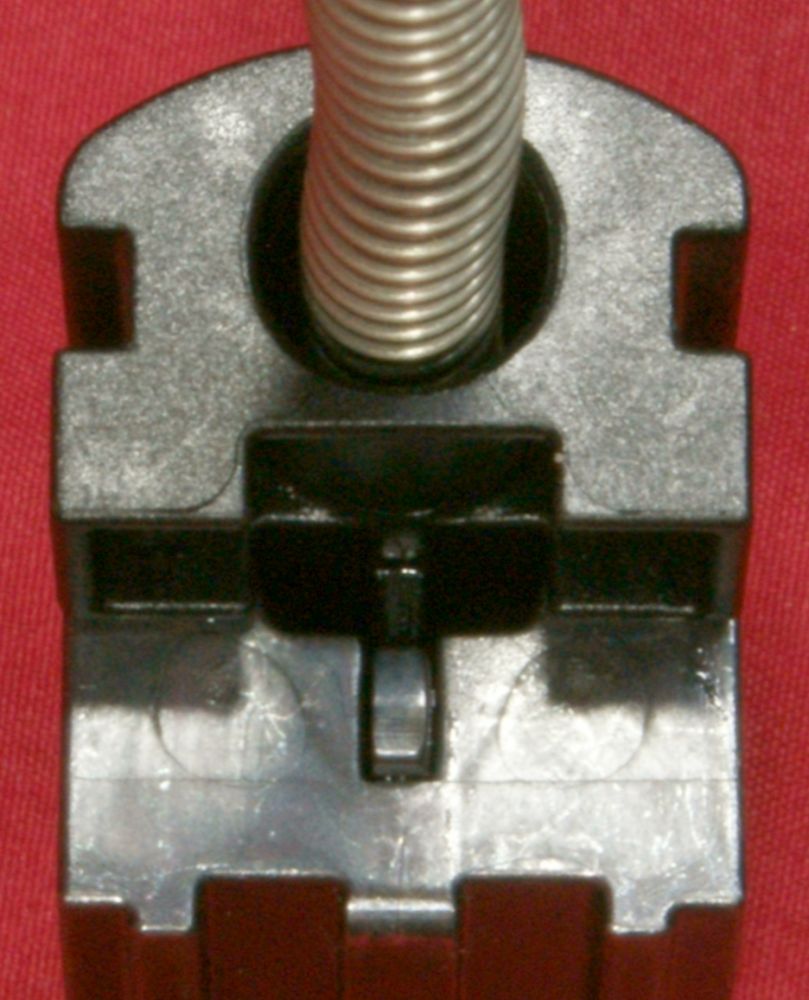
Step 4 - Press the Rear of Guide Rod Block
While holding the safety selector in the disassemble position, press the rear of the guide rod block. You will also want to make sure you are holding the pistol grip so that the grip assembly will not fall out of the stock.
Figure 3
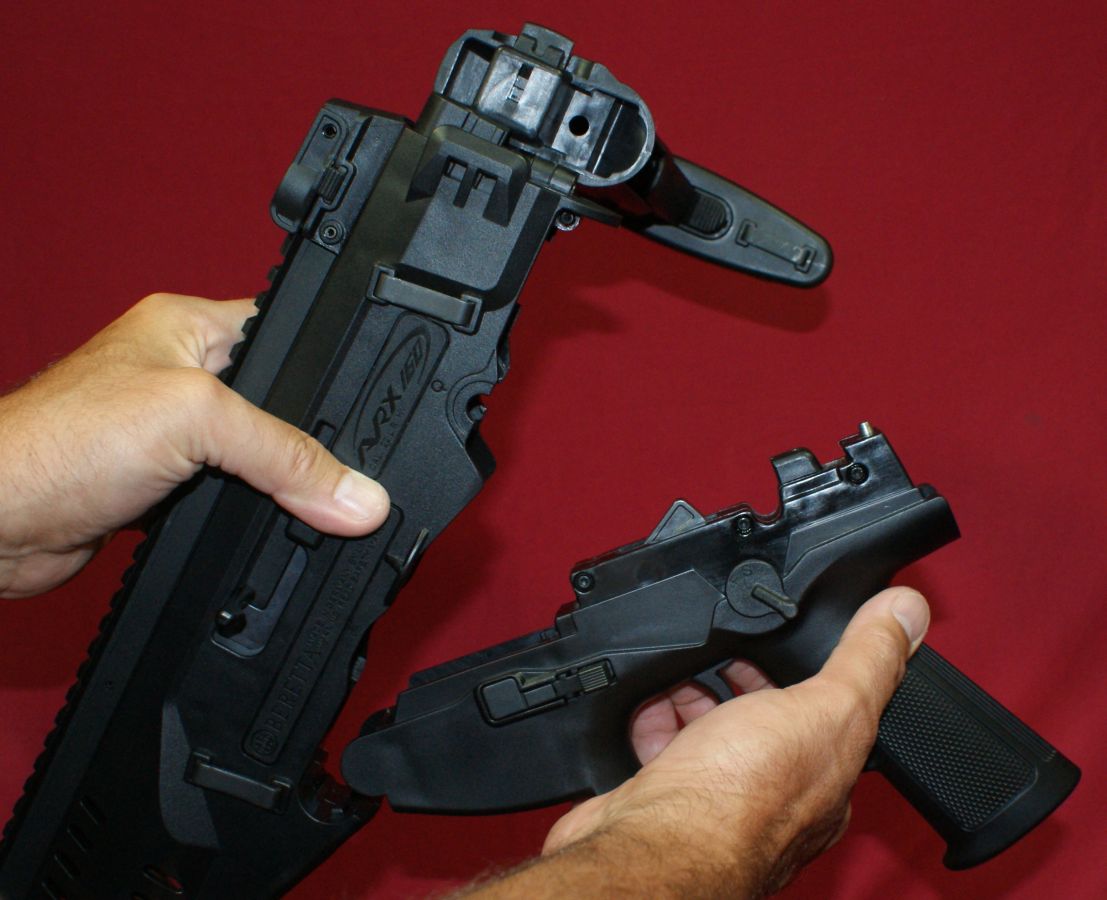
Step 5 - Remove the Pistol Grip Assembly
With the safety selector rotated to the disassemble position and the rear of the guide rod block pressed, the grip assembly can be rotated down at the rear and away from the body of the stock.
Figure 4
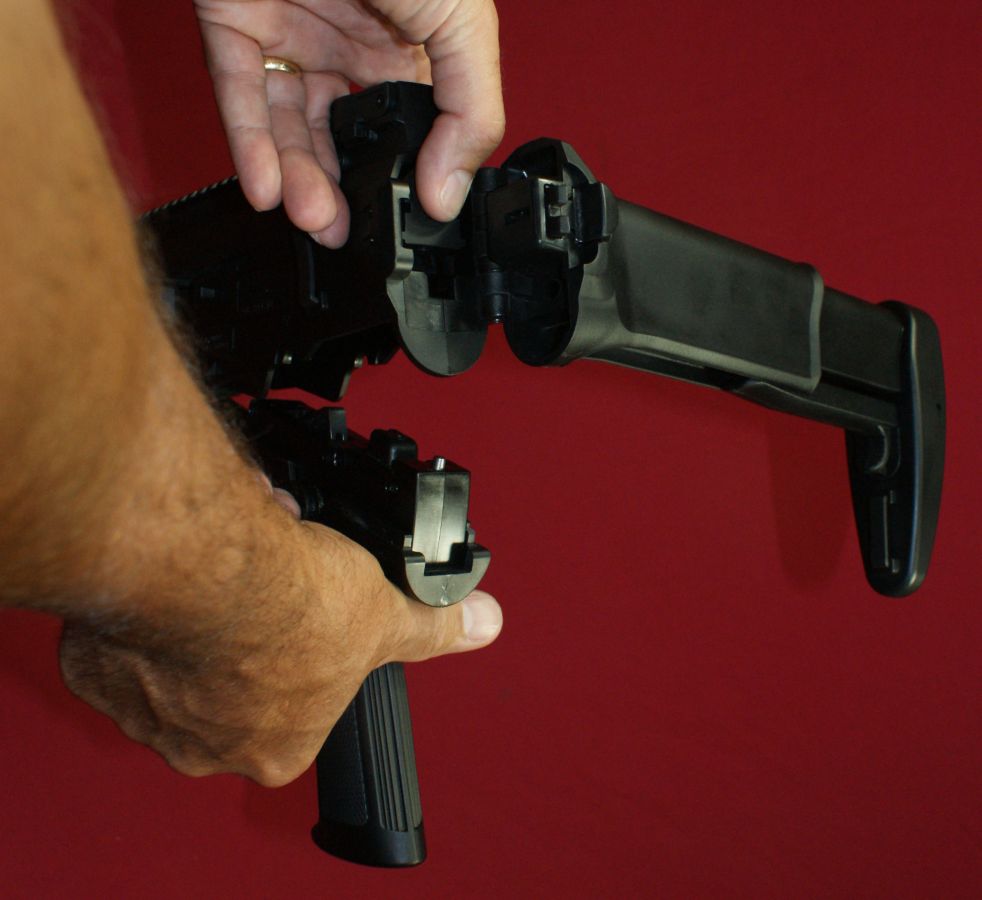
As you rotate the rear of the grip assembly from the stock, you no longer need to press the safety selector or guide rod block. The grip assembly easily rotates away from the stock.
Figure 5
Step 6 - Remove the Bolt Handle
Once the guide rod block extends out of the rear of the stock indicating the tension on the mainspring is removed, the bolt handle can be pulled from the bolt.
Figure 6
Step 7 - Remove the Bolt Group Assembly
With the bolt handle removed, all you need to do is tilt the rear of the stock down and the bolt group assembly will slide out of the stock.
Figure 7

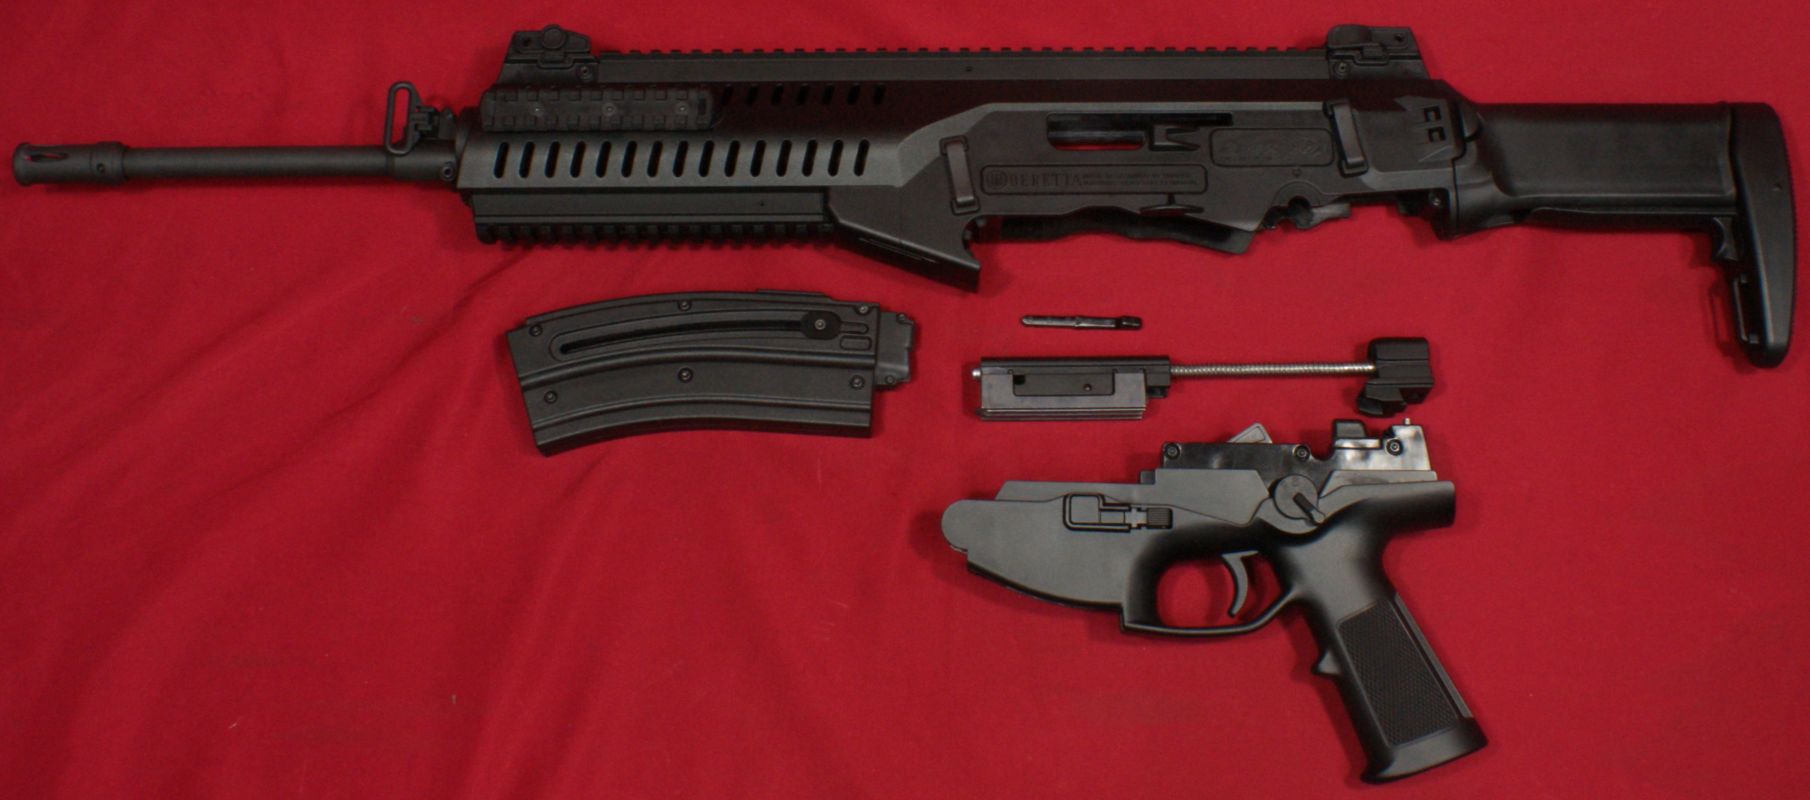
Fully Disassembled for Cleaning
According to the instruction manual, this is the maximum level of disassembly required for cleaning and I would agree. Reassembly is basically the reverse of disassembly.
Figure 8
Bolt Group Disassembly
The Instruction Manual also describes the steps for the bolt group disassembly in the event you need to replace the firing pin or extractor. First you use a punch to push the bolt cover pin from right to left.
Figure 9

The pin is held in position by a small metal spring inside the bolt cover and a leg of the spring rides inside a groove in the pin. You will fully remove the pin.
Figure 10
Next the instructions state to lift the cover off the bolt. I had to take a small screwdriver and pry the cover up. Also, you need to do this over a table or some cloth so that the firing pin return spring doesn't pop out and become lost.
Figure 11

This next photo shows the bolt group cover with the firing pin and return spring removed. Note that the return spring and lug on the firing pin ride inside the slot in the firing pin.
Figure 12
Internal Features
Pistol Grip Assembly
Nearly everything on the pistol grip assembly seems to be made from polymer materials except for the hammer and disassembly pin at the rear. Although, if you look closely inside the trigger group area, there are other metallic parts just like you would expect.
Figure 13
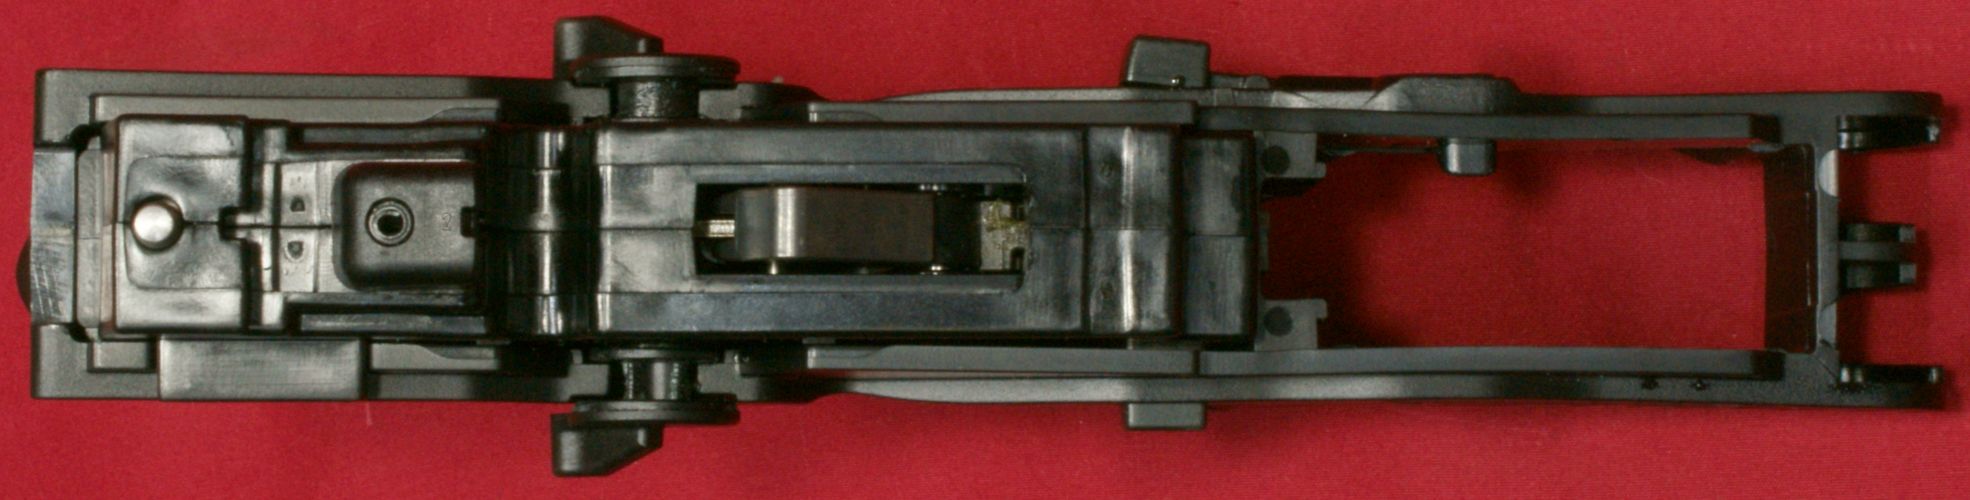
Figure 14
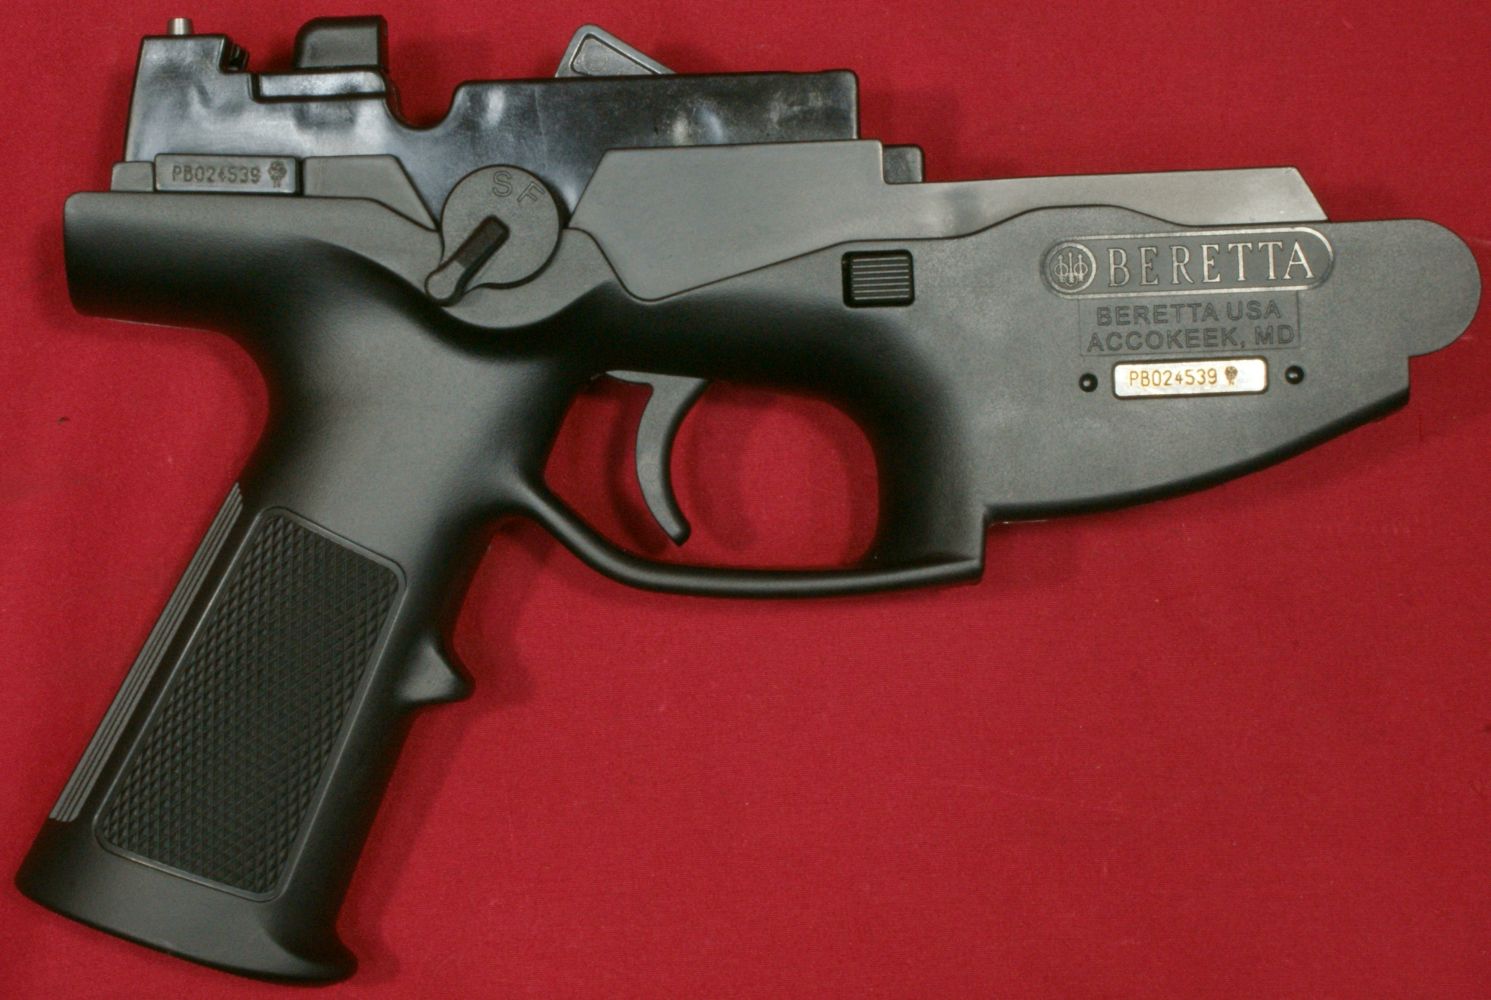
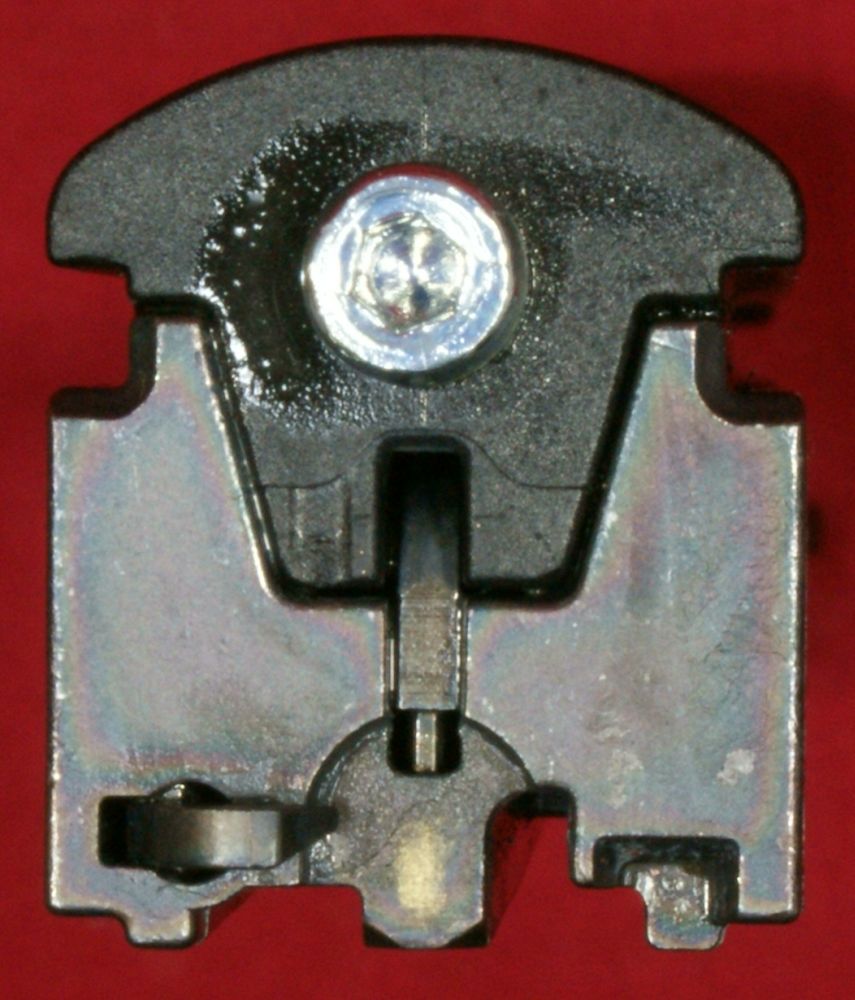
There is a screw inside the grip similar to the screw on an AR which allows you to replace the grip. I believe this screw holds the trigger group in place.
Figure 15
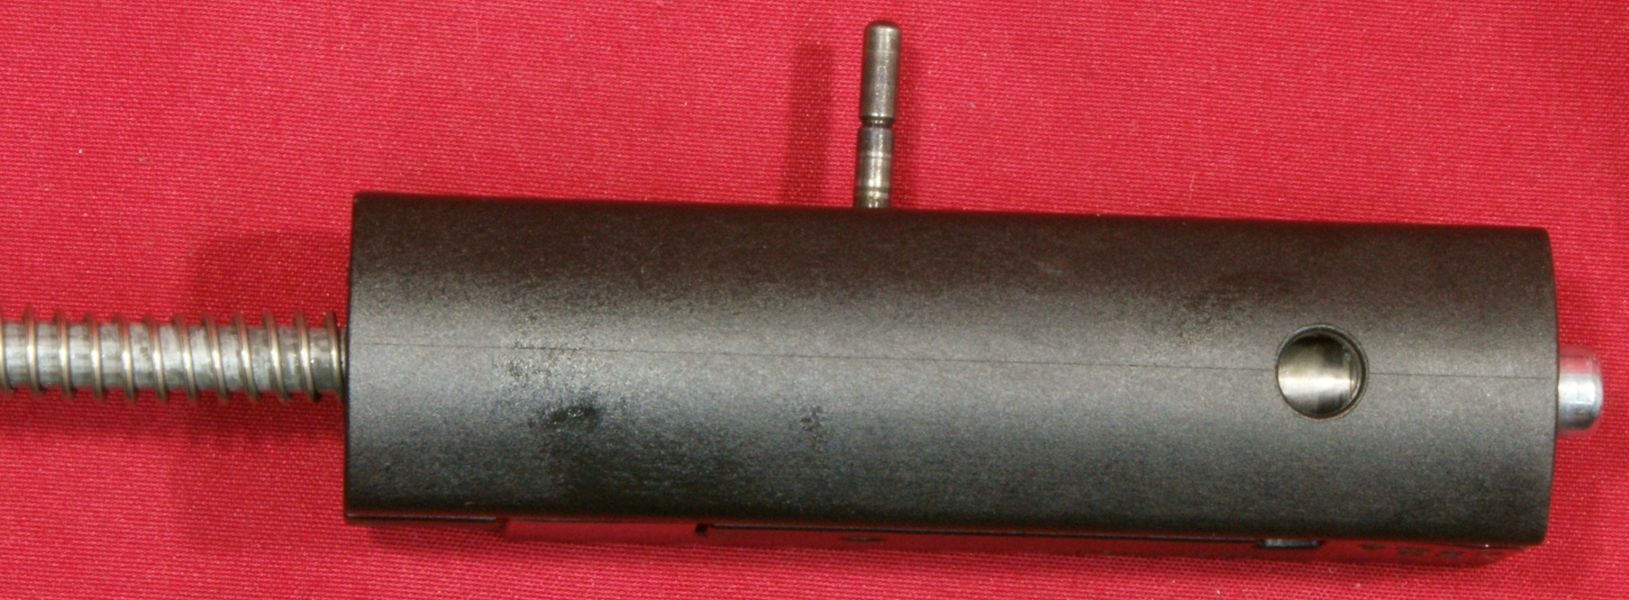
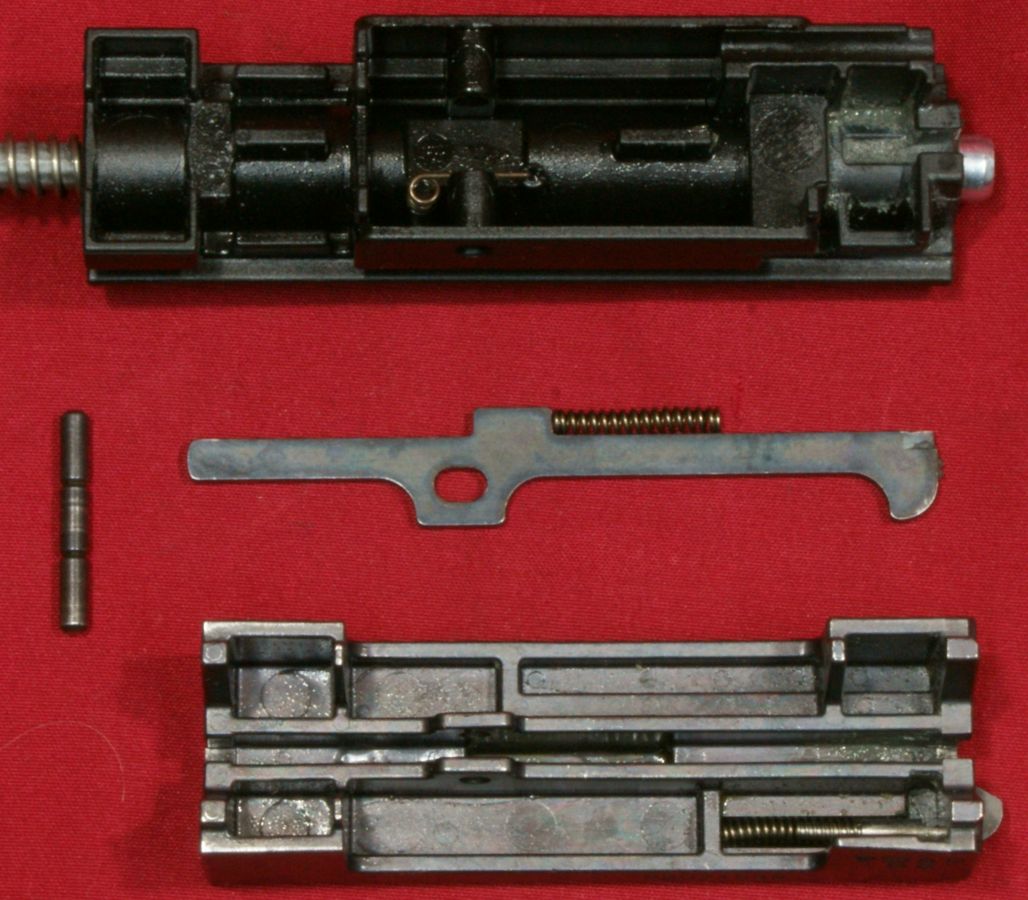
Bolt Group Assembly
The bolt group assembly is a combination of polymer and metallic parts. The polymer guide rod block is at the rear.
Figure 16

The guide rod block is connected to the bolt via the guide rod which is surrounded by the mainspring. At the front, the guide rod passes through the polymer bolt cover which is attached to the metallic bolt.
Figure 17

This is a very simple design which proves to make disassembly of the firearm for cleaning very quick and simple.
Figure 18

Figure 19

These next two photos show the head and tail of the firing pin. The head is designed so that dry firing shouldn't damage the outside of the chamber, but Beretta recommends that if you want to practice by dry firing then you should install the chamber indicator to "cushion the fall of the firing pin and reduce the chance of firing pin breakage."
Figure 20
Figure 21
Bolt Handle
The bold handle is made from steel.
Figure 22

Figure 23

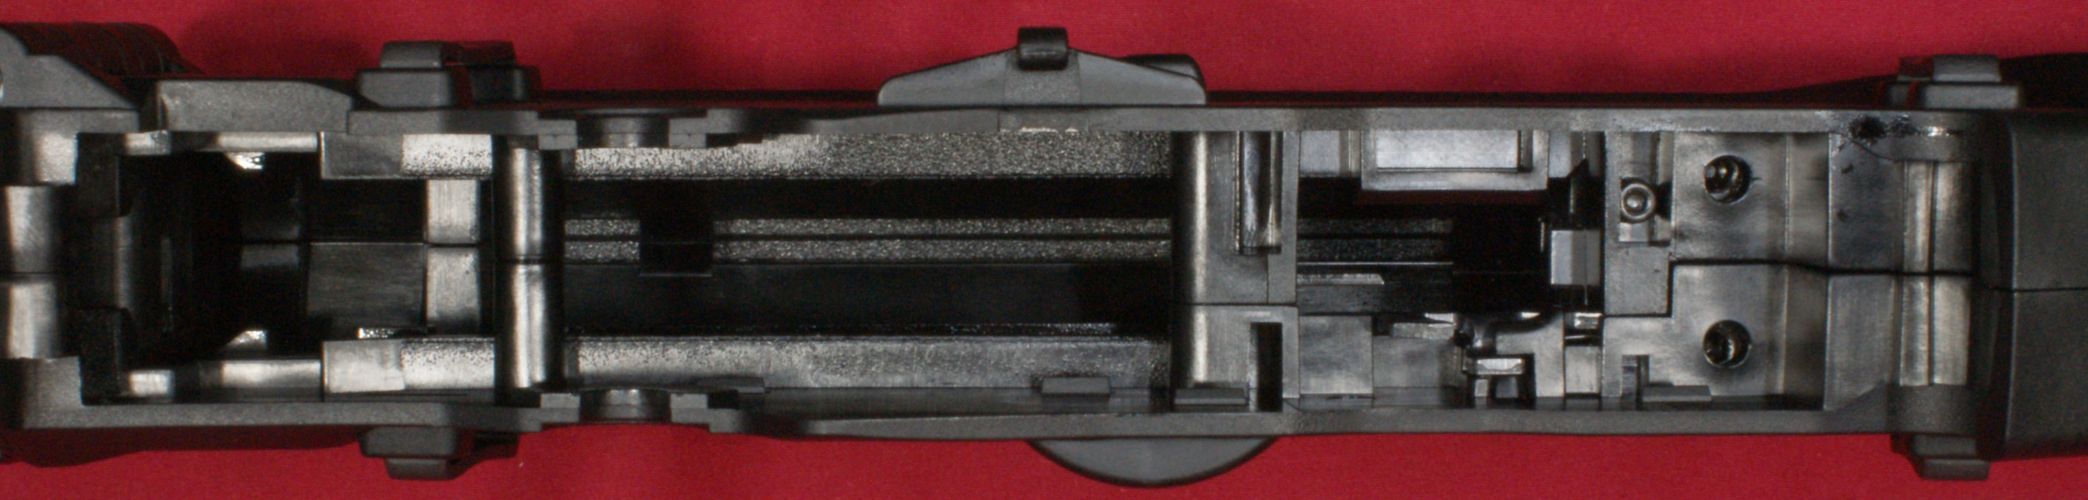
Stock Areas Visible with Grip Assembly Removed
Even with me owning the rifle, I find looking at these next photos and understand what is going on to be a little difficult, but I included them anyway for reference. This next photo shows the area where the pistol grip assembly interfaces with the stock.
Figure 24
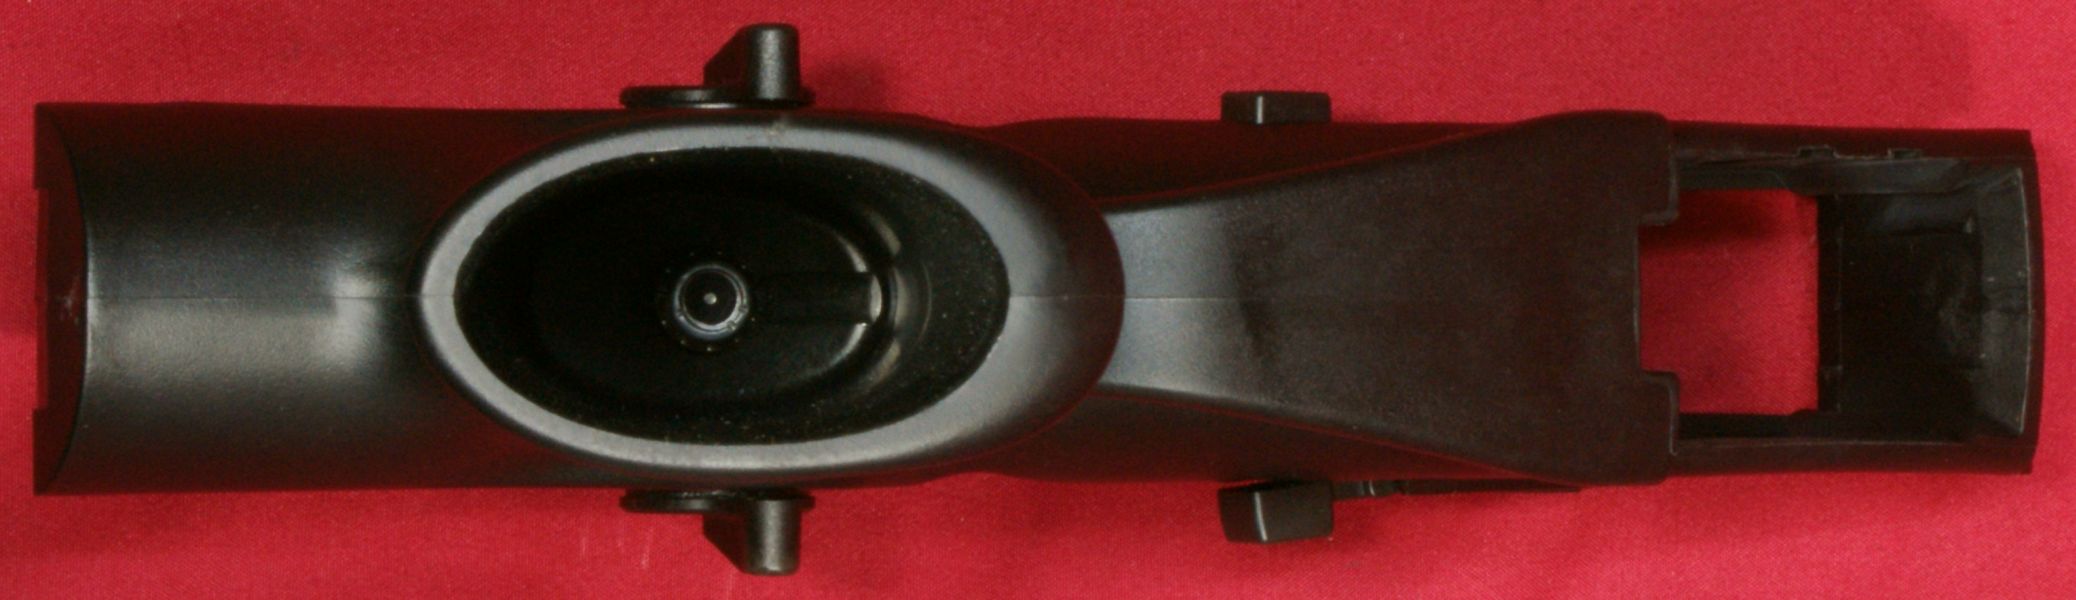
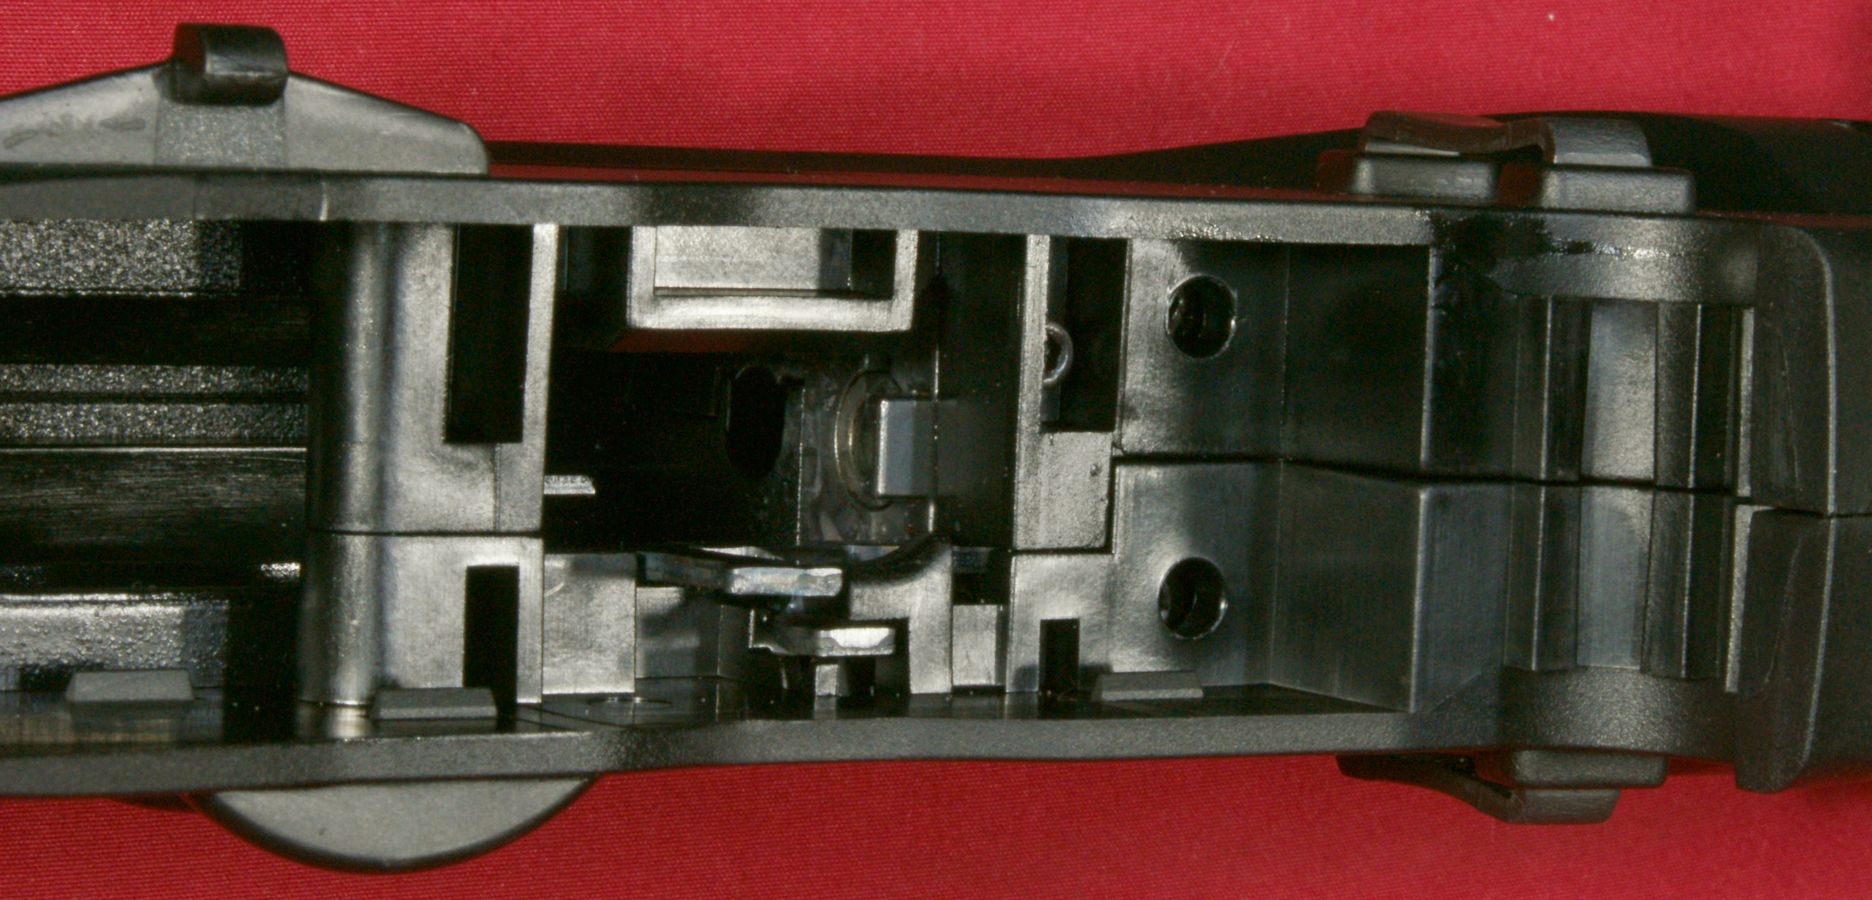
This next photo shows the cradle area where the pistol grip nests at the front and you can also see the fixed ejector (circled in red).
Figure 25
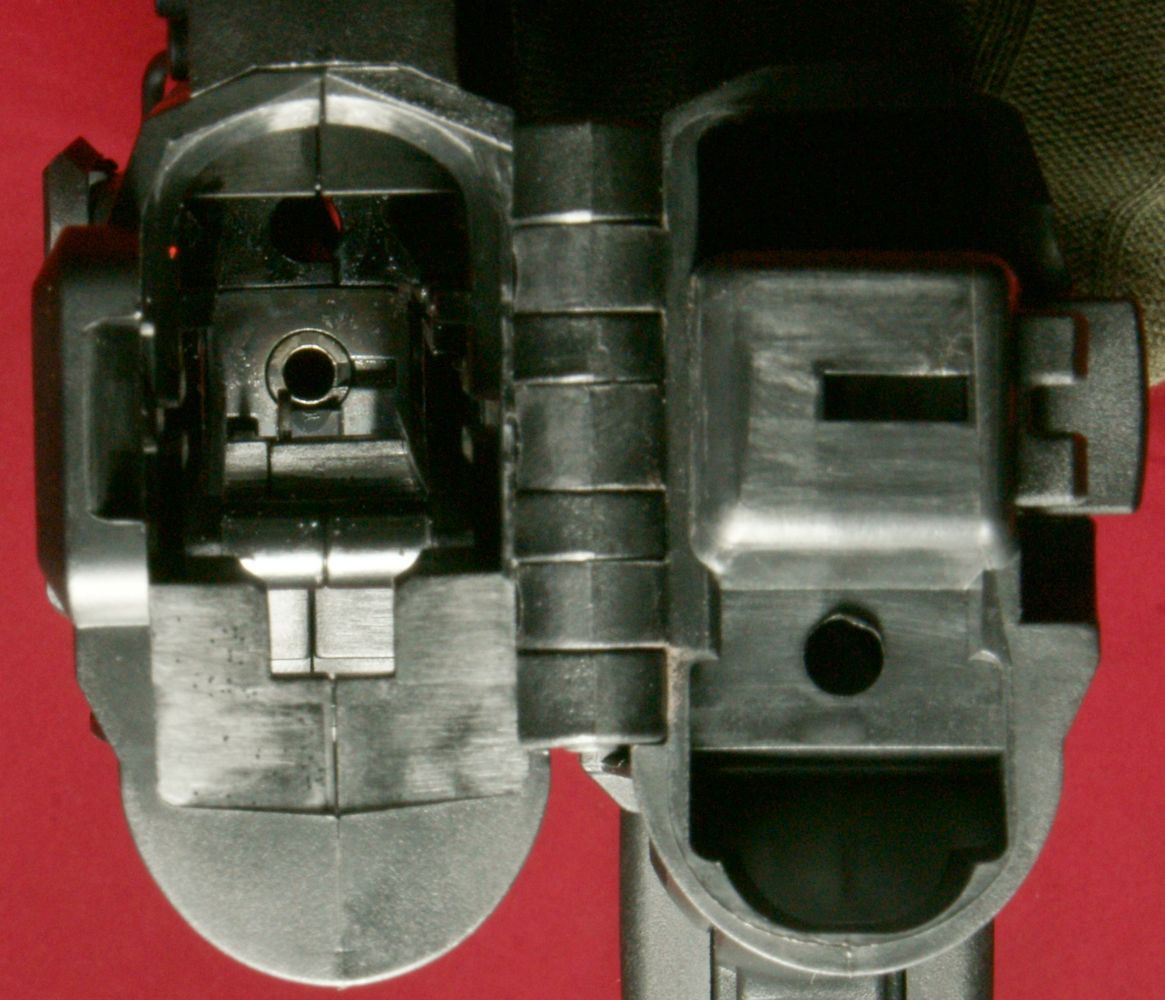
This last photo looks through the stock at the chamber area and you can see the fixed ejector again and the notch in the barrel for the extractor.
Figure 26
Thoughts
Disassembly and reassembly of the Beretta ARX 160 Carbine is very quick and simple. These two tasks can be done together in less than 60 seconds so there shouldn't be any excuses against keeping your rifle clean. There are a significant number of polymer parts inside the action of this rifle and Beretta recommends only a minimum amount of lubrication is needed on the main spring, extractor and each end of the firing pin assembly.
For more detailed photos and commentary, make sure you check out the other parts of this review and feel free to leave comments below. The following links are provided to help you see other parts of this review.
- Beretta ARX 160 Carbine Review: Part 1 - Introduction, Specifications and Summary
- Beretta ARX 160 Carbine Review: Part 2 - What's in the Box
- Beretta ARX 160 Carbine Review: Part 3 - External & Operational Features
- Beretta ARX 160 Carbine Review: Part 4 - Disassembly & Internal Features
- Beretta ARX 160 Carbine Review: Part 5 - Range Test
Or
If you would like to be notified about future Gunsumer Reports reviews via Facebook, make sure "You Like This" by clicking the Facebook "Like" button at the bottom or top of this page. If it already says "You Like This" beside the button, clicking it again will uncheck the "Like" status and you will not be notified.
| Share on Facebook | |
© 2010, 2011, 2012, 2013, 2014, 2015, 2016, 2017, 2018, 2019, 2020, 2021, 2022, 2023 & 2024 Gunsumer Reports™, All rights reserved.
FTC Disclosure